
스플래시 스타크래프트 맵 모음
'스플래시' 태그가 등록된 맵을 모았습니다. 장르 하나로 찾기 어려운 플레이 방식, 난이도와 특징을 중심으로 인기 맵과 최신 맵을 비교해 보세요.
- 등록 맵
- 4개
- 누적 다운로드
- 0
- 누적 조회
- 138
인기 맵
다운로드와 조회 반응이 높은 맵입니다.
터캔히드룬 갓 (TurCanHydGoonGOD!)
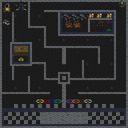
스타크래프트 브루드워 유즈맵 '터캔히드룬 갓'은 터렛, 캐논, 히드라리스크, 드라군, 갓 유닛이 등장하는 6인용 UMS 맵입니다. 내부 설명에 따르면 마린 10+3, 너브 고스트 30+10, 짐 레이너 27+9, 케리건 150+50, 터렛 650, 캐논 650, 헌터 킬러 히드라 99+33, 피닉스 드라군 399+133, 갓 999+333에 스플래시 데미지가 부여된 극단적인 수치의 유닛들이 배치되어 있습니다. 황무지 타일셋의 64×64 타일 크기 맵에서 진행되며, 일반적인 밀리 밸런스와는 완전히 다른 초고속, 초고화력 전투가 특징입니다. 이 맵의 핵심은 '갓(GOD)' 등급 유닛의 압도적인 스탯과 스플래시 공격입니다. 플레이어는 시작부터 막강한 유닛을 조작해 적 진영을 순식간에 쓸어버리는 쾌감을 느낄 수 있습니다. 6인 플레이가 가능하므로 팀전이나 난전 양상으로 흘러가며, 유닛 간의 상성보다는 선제 공격과 집중 포화가 승부를 가르는 경향이 강합니다. 트리거나 별도 미션 없이 유닛 스탯 조정에 집중한 전형적인 '강화형' 유즈맵으로, 복잡한 룰 숙지 없이 즉시 대전 감각을 익히거나 스트레스 해소용으로 즐기기 적합합니다. 다만 극단적인 수치 탓에 게임이 수 분 내로 끝나버릴 수 있고, 밸런스 조정이 없는 만큼 특정 유닛이 압도적으로 유리할 가능성이 있습니다. 경쟁적 승부보다는 가벼운 친선전이나 유즈맵 입문자가 유닛 조작감을 익히는 용도로 추천됩니다. 플레이 전에는 맵 파일명의 느낌표(!)가 배틀넷 로비에서 정렬 순서에 영향을 줄 수 있음을 인지하고, 버전 표기가 없는 점도 참고하시기 바랍니다. Starcraft Brood War UMS map 'TurCanHydGoon GOD' is a 6-player use map setting featuring Turrets, Cannons, Hydralisks, Dragoons, and GOD units. According to the internal description, units have extreme stats: Marine 10+3, Nub Ghost 30+10, Jim Raynor 27+9, Kerrigan 150+50, Turret 650, Cannon 650, Hunter Killer Hydra 99+33, Fenix Dragoon 399+133, and GOD 999+333 with splash damage. Played on a Badlands tileset with 64×64 tiles, it offers ultra-fast, ultra-high-damage combat completely unlike standard melee balance. The core appeal lies in the overwhelming stats and splash attacks of GOD-tier units. Players control devastating units from the start, wiping out enemy bases in seconds. With 6 players, matches become team battles or chaotic free-for-alls where first strike and focus fire matter more than unit counters. As a typical 'enhanced' UMS focused purely on stat modifications without triggers or missions, it requires no complex rule learning — ideal for quick skirmishes or stress relief. However, extreme values can end games in minutes, and the lack of balance tuning means certain units may dominate. It suits casual friendlies or beginners learning unit control more than competitive play. Note that the exclamation mark in the filename affects Battle.net lobby sorting, and no version info is provided.
마이크로 스플래시 디펜스 (Micro Splash Defence)
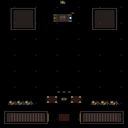
마이크로 스플래시 디펜스(Micro Splash Defence)는 아레나 스타일의 근접 전투와 스플래시 데미지를 활용한 디펜스 요소를 결합한 하이브리드 유즈맵이다. 정글 타일셋 위에 3072x4096 크기로 구성된 전장은 6인 플레이를 기준으로 하며, 파일명에 표기된 1.0 버전이 배포된 것으로 보인다. 맵 설명에 따르면 '마이크로 아레나와 스플래시 디펜스의 혼합'을 표방하는데, 이는 유닛 컨트롤 중심의 아레나 대전과 특정 구역이나 오브젝트를 지키며 몰려오는 적을 처리하는 디펜스 진행이 동시에 요구됨을 의미한다. 플레이어는 제한된 자원과 유닛으로 웨이브 단위 공세를 막아내면서 동시에 타 플레이어와 생존 경쟁을 벌이거나 협력 구도를 형성하게 된다. 스플래시 데미지를 보유한 유닛이나 스킬이 핵심 변수로 작용하므로, 뭉쳐서 이동하는 적 무리를 효율적으로 제압하는 범위 공격 운영과 개별 유닛의 정교한 마이크로 컨트롤이 승부를 가른다. 정글 지형의 시야 제한과 지형지물을 활용한 진형 짜기, 어그로 분산, 집중 포화 타이밍 등이 실시간 판단력으로 이어진다. 6인 기준이라 인원이 모자랄 경우 난이도가 급격히 상승할 수 있으며, 팀 수나 승리 조건이 별도 표기되지 않아 FFA 형태이거나 생존자 1인이 남을 때까지 진행되는 라스트맨 스탠딩 방식일 가능성이 높다. 입문자는 스플래시 범위와 쿨타임, 유닛 상성을 먼저 익히고, 숙련자는 다중 웨이브 동시 처리와 타 플레이어 견제 사이의 밸런스를 조율하는 고단수 운영이 요구된다. 마이크로 컨트롤 연습과 디펜스 감각을 동시에 기르고 싶은 유저, 짧은 호흡 안에 긴장감 있는 판단을 반복하고 싶은 유저에게 적합하다. 플레이 전에는 버전별 밸런스 패치 내역, 트리거 작동 방식, 웨이브 구성표, 유닛 업그레이드 트리 유무를 확인하면 초반 시행착오를 줄일 수 있다. Micro Splash Defence is a hybrid UMS map that blends arena-style close-quarters combat with splash-damage-based defense mechanics. Built on the Jungle tileset at 3072x4096, the map supports six players and appears to have been released as version 1.0 according to the filename. The description calls it a mix of 'Micro Arena and Splash Defence,' meaning players must simultaneously manage precise unit control typical of arena duels and hold positions or objectives against incoming waves characteristic of defense maps. Splash-damage units or abilities become the pivotal variable, so efficient area-of-effect targeting against clustered enemies and fine micro-management of individual units decide the outcome. Jungle terrain limits vision and creates chokepoints, encouraging formation play, aggro distribution, and timed focus fire. With six players expected, missing participants can spike difficulty sharply; team count and victory conditions are not explicitly listed, so a free-for-all or last-man-standing structure is likely. Beginners should first learn splash ranges, cooldowns, and unit matchups, while veterans must balance multi-wave clearing with pressure on other players. The map suits users who want to practice micro control and defense sense together, and who enjoy repeated high-tension decision-making in short sessions. Before playing, checking version-specific balance notes, trigger logic, wave composition tables, and upgrade trees will reduce early trial-and-error.
러커 디펜스 ABC 4 (Lurker Defense ABC 4)
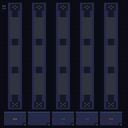
스타크래프트의 유즈맵 장르 중에서도 독보적인 개성을 지닌 ‘러커 디펜스 ABC 4’는 개별 플레이어의 실력을 극한까지 시험하는 디펜스형 맵이다. 6명의 플레이어가 각자 독립된 라인으로 구성된 맵에서 적의 공격을 막아내야 하며, 맵 중앙의 좁은 통로를 통과하는 적들을 러커로 제압하는 것이 핵심 전략이다. 맵은 화산 타일셋으로 이루어져 있으며, 지형이 복잡하고 시야가 제한적인 부분이 많아 플레이어는 항상 예측 불가능한 상황에 대비해야 한다. 각 라인은 서로 연결되어 있지 않지만, 중앙 통로의 길목에서 일어나는 교전이 전체 승패를 좌우하는 경우가 많다. 러커의 특성상 스플래시 데미지가 강력하고, 적의 진형이 밀집되어 있을수록 그 위력이 배가되기 때문에 플레이어는 끊임없이 라인을 관리하고 러커의 위치를 최적화해야 한다. 또한, 맵 곳곳에 배치된 자원이나 업그레이드 포인트는 선택적으로 활용할 수 있어, 개인의 플레이 스타일에 따라 전략이 달라질 수 있다. 초보자는 러커의 스플래시 범위를 제대로 이해하지 못해 쉽게 무너질 수 있으며, 숙련자일수록 중앙 통로의 흐름을 읽고 적절한 타이밍에 러커를 배치하는 플레이가 요구된다. 맵의 난이도는 전체적으로 높은 편으로, 개인의 실력뿐만 아니라 팀원 간의 호흡도 승리를 좌우할 수 있다. 개별 라인에서 혼자 싸워야 한다는 점에서 스트레스가 크지만, 그만큼 성취감을 느낄 수 있는 맵이다. 플레이 전에는 러커의 스킬 사용 방법과 맵의 주요 길목을 숙지하는 것이 필수적이며, 특히 중앙 통로의 넓이와 러커의 사정거리를 정확히 파악하고 있어야 한다. 맵의 구조상 한 라인이 무너지면 전체적인 방어선이 흔들릴 수 있으므로, 각 플레이어는 자신의 라인에만 집중하는 것이 아니라 전장의 흐름을 읽는 안목도 필요하다. 이 맵은 디펜스 매니아뿐만 아니라 개인의 실력을 테스트하고 싶은 유저들에게 강력히 추천할 만하다. 각 라인의 독립성과 중앙 통로의 중요성 때문에, 단순한 디펜스 맵이 아니라 전략과 집중력을 동시에 요구하는 고난이도 맵으로 자리매김하고 있다. 특히 러커의 스플래시 데미지를 효과적으로 활용하는 플레이어는 승리의 열쇠를 쥘 수 있을 것이다. StarCraft's custom map genre boasts a unique identity with *Lurker Defense ABC 4*, a defense-focused map that pushes individual player skill to its limits. Six players must defend separate lanes while suppressing enemies passing through the narrow central corridor with lurkers—a core strategic element. The map features a volcanic tileset with intricate terrain and limited visibility, forcing players to prepare for unpredictable situations. Though the lanes are isolated, battles at the central corridor often determine the outcome of the entire match. Given lurkers' powerful splash damage—especially effective against clustered enemies—players must constantly manage their lanes and optimize lurker positioning. Scattered resources and upgrade points can be selectively used, allowing strategies to vary based on personal playstyle. Beginners may struggle without a proper grasp of lurker splash range, while advanced players must read the central corridor's flow and deploy lurkers at the right moments. The map's overall difficulty demands not just individual skill but also strong team coordination. The stress of solo combat in each lane is high, but the sense of achievement is equally rewarding. Before playing, mastering lurker mechanics and key pathways is essential, particularly understanding the central corridor's width and lurker range. Since one lane's collapse can destabilize the entire defense, players must balance focus on their own lane with awareness of the broader battlefield. This map isn't just for defense enthusiasts—it's a high-level challenge for anyone looking to test their skills. Its blend of lane independence and central corridor importance elevates it beyond a simple defense map, requiring both strategy and concentration. Players who leverage lurker splash damage effectively will hold the key to victory.
스카우트 블러드 잘하세요 (Scout Blood Jalhaseyo)
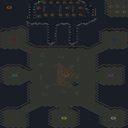
‘스카우트 블러드 잘하세요’는 스타크래프트 브루드워의 유즈맵으로, 커세어 블러드라는 이름의 커스텀 게임입니다. 맵은 설원 테마의 얼음 타일셋으로 꾸며졌으며, 전체 크기 3072x3072의 넓은 공간을 차지하고 있습니다. 내부 설명과 이미지에서 확인되는 바와 같이, 이 맵은 무한한 스플래시 공격을 활용한 공격형 디펜스 게임으로 추정됩니다. 플레이어는 커세어를 조종하여 끊임없이 몰려오는 적 유닛들을 방어하거나 공격해야 하며, 맵 곳곳에 배치된 구조물을 활용해 전략을 세울 수 있습니다. 맵의 특징은 ‘날림’ 작업이라고 언급된 만큼, 빠른 개발과 실험적인 플레이 경험을 제공하는 데 중점을 둔 것으로 보입니다. 내부 설명에서 ‘떠나자! 무한 스플레쉬의 세계로!’라는 문구가 등장하는 점으로 미루어볼 때, 스플래시 공격이 주요 메커니즘일 가능성이 높습니다. 또한, 맵이 wide한 설원 타일셋으로 구성되어 있어 넓은 시야와 넓은 전장 활용이 가능하다는 장점이 있습니다. 플레이어는 7명으로 구성된 팀으로 게임을 진행하며, 각 플레이어의 위치와 역할 분배가 게임의 승패를 좌우할 수 있습니다. 이 맵은 초보자부터 숙련자까지 즐길 수 있도록 설계되었지만, 스플래시 공격을 적극 활용해야 하는 만큼 전략적 사고가 요구됩니다. 특히 넓은 맵에서 적의 진격을 예측하고 방어선을 구축하는 능력이 중요합니다. 또한, 맵 내에 배치된 구조물이나 리소스를 효율적으로 활용하는 것이 관건입니다. ‘무한 스플레쉬’라는 표현이 강조된 만큼, 스플래시 데미지를 극대화할 수 있는 빌드나 조합을 찾는 것이 핵심 전략이 될 것입니다. 플레이어들은 각자의 커세어 유닛을 강화하거나 방어 건물, 보조 유닛 등을 배치해 적의 공세를 막아야 합니다. 이 맵은 실험적이고 재미있는 플레이 경험을 추구하는 유저들에게 특히 추천됩니다. 다만, ‘날림’으로 제작되었다는 점에서 밸런스나 디자인적 완성도는 다소 아쉬울 수 있습니다. 그럼에도 불구하고, 넓은 맵과 스플래시 공격의 조합을 통해 독특한 전투 경험을 제공한다는 점에서 주목할 만한 맵입니다. 초기에는 적응이 필요할 수 있지만, 익숙해지면 다양한 전략을 시도해 볼 수 있는 매력이 있습니다. 플레이 전에는 맵의 구조와 주요 포인트를 미리 숙지하는 것이 좋습니다. 특히, 맵의 중앙 지역이나 주요 길목에 위치한 리소스나 구조물의 위치 파악이 중요합니다. 또한, 팀원과의 실시간 협력이 원활하지 않을 경우, 개인의 전략적 판단이 더욱 중요해질 수 있습니다. 맵의 난이도는 ‘보통’ 정도로 예상되며, 팀워크와 개인의 숙련도가 조화를 이룰 때 최상의 플레이 경험을 얻을 수 있을 것입니다. "Scout Blood Well Done" is a *StarCraft: Brood War* custom map called "Corsair Blood," featuring a snowy ice tileset and spanning a large 3072x3072 space. As seen in its internal description and images, this map appears to be an offensive defense game that leverages infinite splash damage. Players control Corsairs, defending against or attacking relentlessly spawning enemy units while strategizing using structures scattered across the map. Given its mention of being a "rushed" project, the map seems designed to prioritize quick development and experimental gameplay. The internal description’s phrase *"Let’s go! Into the world of infinite splash!"* suggests splash damage is a core mechanic. Additionally, its wide snowy tileset offers expansive visibility and battlefield control. Players compete in teams of seven, with positioning and role distribution playing a crucial role in victory. While accessible to both beginners and veterans, the map demands strategic thinking due to its reliance on splash damage. Success hinges on predicting enemy advances and fortifying defenses across the vast terrain, as well as efficiently utilizing structures and resources. The emphasis on "infinite splash" implies that maximizing splash damage through optimal unit builds or compositions is key. Players must reinforce their Corsairs, deploy defensive buildings, or position auxiliary units to withstand assaults. This map is especially recommended for users seeking experimental and engaging gameplay, though its rushed development may leave some balance or design aspects wanting. Nevertheless, its blend of expansive terrain and splash mechanics delivers a unique combat experience worth noting. While an initial adjustment period may be needed, once mastered, it offers ample room for diverse strategies. Before playing, familiarizing yourself with the map’s layout and key points is advisable. Identifying resource or structure locations—especially around central zones or major pathways—can be critical. If real-time team coordination falters, individual strategic decisions become even more vital. The difficulty is moderate, and optimal enjoyment comes from harmonizing teamwork with personal skill.
최근 등록된 맵
새로 추가된 파일과 버전을 확인하세요.
스카우트 블러드 잘하세요 (Scout Blood Jalhaseyo)
‘스카우트 블러드 잘하세요’는 스타크래프트 브루드워의 유즈맵으로, 커세어 블러드라는 이름의 커스텀 게임입니다. 맵은 설원 테마의 얼음 타일셋으로 꾸며졌으며, 전체 크기 3072x3072의 넓은 공간을 차지하고 있습니다. 내부 설명과 이미지에서 확인되는 바와 같이, 이 맵은 무한한 스플래시 공격을 활용한 공격형 디펜스 게임으로 추정됩니다. 플레이어는 커세어를 조종하여 끊임없이 몰려오는 적 유닛들을 방어하거나 공격해야 하며, 맵 곳곳에 배치된 구조물을 활용해 전략을 세울 수 있습니다. 맵의 특징은 ‘날림’ 작업이라고 언급된 만큼, 빠른 개발과 실험적인 플레이 경험을 제공하는 데 중점을 둔 것으로 보입니다. 내부 설명에서 ‘떠나자! 무한 스플레쉬의 세계로!’라는 문구가 등장하는 점으로 미루어볼 때, 스플래시 공격이 주요 메커니즘일 가능성이 높습니다. 또한, 맵이 wide한 설원 타일셋으로 구성되어 있어 넓은 시야와 넓은 전장 활용이 가능하다는 장점이 있습니다. 플레이어는 7명으로 구성된 팀으로 게임을 진행하며, 각 플레이어의 위치와 역할 분배가 게임의 승패를 좌우할 수 있습니다. 이 맵은 초보자부터 숙련자까지 즐길 수 있도록 설계되었지만, 스플래시 공격을 적극 활용해야 하는 만큼 전략적 사고가 요구됩니다. 특히 넓은 맵에서 적의 진격을 예측하고 방어선을 구축하는 능력이 중요합니다. 또한, 맵 내에 배치된 구조물이나 리소스를 효율적으로 활용하는 것이 관건입니다. ‘무한 스플레쉬’라는 표현이 강조된 만큼, 스플래시 데미지를 극대화할 수 있는 빌드나 조합을 찾는 것이 핵심 전략이 될 것입니다. 플레이어들은 각자의 커세어 유닛을 강화하거나 방어 건물, 보조 유닛 등을 배치해 적의 공세를 막아야 합니다. 이 맵은 실험적이고 재미있는 플레이 경험을 추구하는 유저들에게 특히 추천됩니다. 다만, ‘날림’으로 제작되었다는 점에서 밸런스나 디자인적 완성도는 다소 아쉬울 수 있습니다. 그럼에도 불구하고, 넓은 맵과 스플래시 공격의 조합을 통해 독특한 전투 경험을 제공한다는 점에서 주목할 만한 맵입니다. 초기에는 적응이 필요할 수 있지만, 익숙해지면 다양한 전략을 시도해 볼 수 있는 매력이 있습니다. 플레이 전에는 맵의 구조와 주요 포인트를 미리 숙지하는 것이 좋습니다. 특히, 맵의 중앙 지역이나 주요 길목에 위치한 리소스나 구조물의 위치 파악이 중요합니다. 또한, 팀원과의 실시간 협력이 원활하지 않을 경우, 개인의 전략적 판단이 더욱 중요해질 수 있습니다. 맵의 난이도는 ‘보통’ 정도로 예상되며, 팀워크와 개인의 숙련도가 조화를 이룰 때 최상의 플레이 경험을 얻을 수 있을 것입니다. "Scout Blood Well Done" is a *StarCraft: Brood War* custom map called "Corsair Blood," featuring a snowy ice tileset and spanning a large 3072x3072 space. As seen in its internal description and images, this map appears to be an offensive defense game that leverages infinite splash damage. Players control Corsairs, defending against or attacking relentlessly spawning enemy units while strategizing using structures scattered across the map. Given its mention of being a "rushed" project, the map seems designed to prioritize quick development and experimental gameplay. The internal description’s phrase *"Let’s go! Into the world of infinite splash!"* suggests splash damage is a core mechanic. Additionally, its wide snowy tileset offers expansive visibility and battlefield control. Players compete in teams of seven, with positioning and role distribution playing a crucial role in victory. While accessible to both beginners and veterans, the map demands strategic thinking due to its reliance on splash damage. Success hinges on predicting enemy advances and fortifying defenses across the vast terrain, as well as efficiently utilizing structures and resources. The emphasis on "infinite splash" implies that maximizing splash damage through optimal unit builds or compositions is key. Players must reinforce their Corsairs, deploy defensive buildings, or position auxiliary units to withstand assaults. This map is especially recommended for users seeking experimental and engaging gameplay, though its rushed development may leave some balance or design aspects wanting. Nevertheless, its blend of expansive terrain and splash mechanics delivers a unique combat experience worth noting. While an initial adjustment period may be needed, once mastered, it offers ample room for diverse strategies. Before playing, familiarizing yourself with the map’s layout and key points is advisable. Identifying resource or structure locations—especially around central zones or major pathways—can be critical. If real-time team coordination falters, individual strategic decisions become even more vital. The difficulty is moderate, and optimal enjoyment comes from harmonizing teamwork with personal skill.
터캔히드룬 갓 (TurCanHydGoonGOD!)
스타크래프트 브루드워 유즈맵 '터캔히드룬 갓'은 터렛, 캐논, 히드라리스크, 드라군, 갓 유닛이 등장하는 6인용 UMS 맵입니다. 내부 설명에 따르면 마린 10+3, 너브 고스트 30+10, 짐 레이너 27+9, 케리건 150+50, 터렛 650, 캐논 650, 헌터 킬러 히드라 99+33, 피닉스 드라군 399+133, 갓 999+333에 스플래시 데미지가 부여된 극단적인 수치의 유닛들이 배치되어 있습니다. 황무지 타일셋의 64×64 타일 크기 맵에서 진행되며, 일반적인 밀리 밸런스와는 완전히 다른 초고속, 초고화력 전투가 특징입니다. 이 맵의 핵심은 '갓(GOD)' 등급 유닛의 압도적인 스탯과 스플래시 공격입니다. 플레이어는 시작부터 막강한 유닛을 조작해 적 진영을 순식간에 쓸어버리는 쾌감을 느낄 수 있습니다. 6인 플레이가 가능하므로 팀전이나 난전 양상으로 흘러가며, 유닛 간의 상성보다는 선제 공격과 집중 포화가 승부를 가르는 경향이 강합니다. 트리거나 별도 미션 없이 유닛 스탯 조정에 집중한 전형적인 '강화형' 유즈맵으로, 복잡한 룰 숙지 없이 즉시 대전 감각을 익히거나 스트레스 해소용으로 즐기기 적합합니다. 다만 극단적인 수치 탓에 게임이 수 분 내로 끝나버릴 수 있고, 밸런스 조정이 없는 만큼 특정 유닛이 압도적으로 유리할 가능성이 있습니다. 경쟁적 승부보다는 가벼운 친선전이나 유즈맵 입문자가 유닛 조작감을 익히는 용도로 추천됩니다. 플레이 전에는 맵 파일명의 느낌표(!)가 배틀넷 로비에서 정렬 순서에 영향을 줄 수 있음을 인지하고, 버전 표기가 없는 점도 참고하시기 바랍니다. Starcraft Brood War UMS map 'TurCanHydGoon GOD' is a 6-player use map setting featuring Turrets, Cannons, Hydralisks, Dragoons, and GOD units. According to the internal description, units have extreme stats: Marine 10+3, Nub Ghost 30+10, Jim Raynor 27+9, Kerrigan 150+50, Turret 650, Cannon 650, Hunter Killer Hydra 99+33, Fenix Dragoon 399+133, and GOD 999+333 with splash damage. Played on a Badlands tileset with 64×64 tiles, it offers ultra-fast, ultra-high-damage combat completely unlike standard melee balance. The core appeal lies in the overwhelming stats and splash attacks of GOD-tier units. Players control devastating units from the start, wiping out enemy bases in seconds. With 6 players, matches become team battles or chaotic free-for-alls where first strike and focus fire matter more than unit counters. As a typical 'enhanced' UMS focused purely on stat modifications without triggers or missions, it requires no complex rule learning — ideal for quick skirmishes or stress relief. However, extreme values can end games in minutes, and the lack of balance tuning means certain units may dominate. It suits casual friendlies or beginners learning unit control more than competitive play. Note that the exclamation mark in the filename affects Battle.net lobby sorting, and no version info is provided.
마이크로 스플래시 디펜스 (Micro Splash Defence)
마이크로 스플래시 디펜스(Micro Splash Defence)는 아레나 스타일의 근접 전투와 스플래시 데미지를 활용한 디펜스 요소를 결합한 하이브리드 유즈맵이다. 정글 타일셋 위에 3072x4096 크기로 구성된 전장은 6인 플레이를 기준으로 하며, 파일명에 표기된 1.0 버전이 배포된 것으로 보인다. 맵 설명에 따르면 '마이크로 아레나와 스플래시 디펜스의 혼합'을 표방하는데, 이는 유닛 컨트롤 중심의 아레나 대전과 특정 구역이나 오브젝트를 지키며 몰려오는 적을 처리하는 디펜스 진행이 동시에 요구됨을 의미한다. 플레이어는 제한된 자원과 유닛으로 웨이브 단위 공세를 막아내면서 동시에 타 플레이어와 생존 경쟁을 벌이거나 협력 구도를 형성하게 된다. 스플래시 데미지를 보유한 유닛이나 스킬이 핵심 변수로 작용하므로, 뭉쳐서 이동하는 적 무리를 효율적으로 제압하는 범위 공격 운영과 개별 유닛의 정교한 마이크로 컨트롤이 승부를 가른다. 정글 지형의 시야 제한과 지형지물을 활용한 진형 짜기, 어그로 분산, 집중 포화 타이밍 등이 실시간 판단력으로 이어진다. 6인 기준이라 인원이 모자랄 경우 난이도가 급격히 상승할 수 있으며, 팀 수나 승리 조건이 별도 표기되지 않아 FFA 형태이거나 생존자 1인이 남을 때까지 진행되는 라스트맨 스탠딩 방식일 가능성이 높다. 입문자는 스플래시 범위와 쿨타임, 유닛 상성을 먼저 익히고, 숙련자는 다중 웨이브 동시 처리와 타 플레이어 견제 사이의 밸런스를 조율하는 고단수 운영이 요구된다. 마이크로 컨트롤 연습과 디펜스 감각을 동시에 기르고 싶은 유저, 짧은 호흡 안에 긴장감 있는 판단을 반복하고 싶은 유저에게 적합하다. 플레이 전에는 버전별 밸런스 패치 내역, 트리거 작동 방식, 웨이브 구성표, 유닛 업그레이드 트리 유무를 확인하면 초반 시행착오를 줄일 수 있다. Micro Splash Defence is a hybrid UMS map that blends arena-style close-quarters combat with splash-damage-based defense mechanics. Built on the Jungle tileset at 3072x4096, the map supports six players and appears to have been released as version 1.0 according to the filename. The description calls it a mix of 'Micro Arena and Splash Defence,' meaning players must simultaneously manage precise unit control typical of arena duels and hold positions or objectives against incoming waves characteristic of defense maps. Splash-damage units or abilities become the pivotal variable, so efficient area-of-effect targeting against clustered enemies and fine micro-management of individual units decide the outcome. Jungle terrain limits vision and creates chokepoints, encouraging formation play, aggro distribution, and timed focus fire. With six players expected, missing participants can spike difficulty sharply; team count and victory conditions are not explicitly listed, so a free-for-all or last-man-standing structure is likely. Beginners should first learn splash ranges, cooldowns, and unit matchups, while veterans must balance multi-wave clearing with pressure on other players. The map suits users who want to practice micro control and defense sense together, and who enjoy repeated high-tension decision-making in short sessions. Before playing, checking version-specific balance notes, trigger logic, wave composition tables, and upgrade trees will reduce early trial-and-error.
러커 디펜스 ABC 4 (Lurker Defense ABC 4)
스타크래프트의 유즈맵 장르 중에서도 독보적인 개성을 지닌 ‘러커 디펜스 ABC 4’는 개별 플레이어의 실력을 극한까지 시험하는 디펜스형 맵이다. 6명의 플레이어가 각자 독립된 라인으로 구성된 맵에서 적의 공격을 막아내야 하며, 맵 중앙의 좁은 통로를 통과하는 적들을 러커로 제압하는 것이 핵심 전략이다. 맵은 화산 타일셋으로 이루어져 있으며, 지형이 복잡하고 시야가 제한적인 부분이 많아 플레이어는 항상 예측 불가능한 상황에 대비해야 한다. 각 라인은 서로 연결되어 있지 않지만, 중앙 통로의 길목에서 일어나는 교전이 전체 승패를 좌우하는 경우가 많다. 러커의 특성상 스플래시 데미지가 강력하고, 적의 진형이 밀집되어 있을수록 그 위력이 배가되기 때문에 플레이어는 끊임없이 라인을 관리하고 러커의 위치를 최적화해야 한다. 또한, 맵 곳곳에 배치된 자원이나 업그레이드 포인트는 선택적으로 활용할 수 있어, 개인의 플레이 스타일에 따라 전략이 달라질 수 있다. 초보자는 러커의 스플래시 범위를 제대로 이해하지 못해 쉽게 무너질 수 있으며, 숙련자일수록 중앙 통로의 흐름을 읽고 적절한 타이밍에 러커를 배치하는 플레이가 요구된다. 맵의 난이도는 전체적으로 높은 편으로, 개인의 실력뿐만 아니라 팀원 간의 호흡도 승리를 좌우할 수 있다. 개별 라인에서 혼자 싸워야 한다는 점에서 스트레스가 크지만, 그만큼 성취감을 느낄 수 있는 맵이다. 플레이 전에는 러커의 스킬 사용 방법과 맵의 주요 길목을 숙지하는 것이 필수적이며, 특히 중앙 통로의 넓이와 러커의 사정거리를 정확히 파악하고 있어야 한다. 맵의 구조상 한 라인이 무너지면 전체적인 방어선이 흔들릴 수 있으므로, 각 플레이어는 자신의 라인에만 집중하는 것이 아니라 전장의 흐름을 읽는 안목도 필요하다. 이 맵은 디펜스 매니아뿐만 아니라 개인의 실력을 테스트하고 싶은 유저들에게 강력히 추천할 만하다. 각 라인의 독립성과 중앙 통로의 중요성 때문에, 단순한 디펜스 맵이 아니라 전략과 집중력을 동시에 요구하는 고난이도 맵으로 자리매김하고 있다. 특히 러커의 스플래시 데미지를 효과적으로 활용하는 플레이어는 승리의 열쇠를 쥘 수 있을 것이다. StarCraft's custom map genre boasts a unique identity with *Lurker Defense ABC 4*, a defense-focused map that pushes individual player skill to its limits. Six players must defend separate lanes while suppressing enemies passing through the narrow central corridor with lurkers—a core strategic element. The map features a volcanic tileset with intricate terrain and limited visibility, forcing players to prepare for unpredictable situations. Though the lanes are isolated, battles at the central corridor often determine the outcome of the entire match. Given lurkers' powerful splash damage—especially effective against clustered enemies—players must constantly manage their lanes and optimize lurker positioning. Scattered resources and upgrade points can be selectively used, allowing strategies to vary based on personal playstyle. Beginners may struggle without a proper grasp of lurker splash range, while advanced players must read the central corridor's flow and deploy lurkers at the right moments. The map's overall difficulty demands not just individual skill but also strong team coordination. The stress of solo combat in each lane is high, but the sense of achievement is equally rewarding. Before playing, mastering lurker mechanics and key pathways is essential, particularly understanding the central corridor's width and lurker range. Since one lane's collapse can destabilize the entire defense, players must balance focus on their own lane with awareness of the broader battlefield. This map isn't just for defense enthusiasts—it's a high-level challenge for anyone looking to test their skills. Its blend of lane independence and central corridor importance elevates it beyond a simple defense map, requiring both strategy and concentration. Players who leverage lurker splash damage effectively will hold the key to victory.
맵 선택 가이드
태그는 맵의 핵심 특징을 빠르게 설명하지만 제작 버전마다 규칙이 다를 수 있습니다. 상세 설명에서 권장 인원, 난이도, 플레이 시간과 버전을 함께 확인한 뒤 다운로드하세요.