
스파이더 마인 스타크래프트 맵 모음
'스파이더 마인' 태그가 등록된 맵을 모았습니다. 장르 하나로 찾기 어려운 플레이 방식, 난이도와 특징을 중심으로 인기 맵과 최신 맵을 비교해 보세요.
- 등록 맵
- 2개
- 누적 다운로드
- 0
- 누적 조회
- 107
인기 맵
다운로드와 조회 반응이 높은 맵입니다.
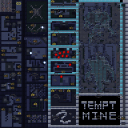
저글링으로 마인유혹하기 2 (Zergling Mine Baiting 2)
저글링으로 마인유혹하기 2는 스타크래프트 브루드워 유즈맵 중에서도 독특한 마이크로 컨트롤 연습에 초점을 맞춘 미니게임 장르의 맵이다. 제목 그대로 저글링을 조작해 벌처가 매설한 스파이더 마인을 유인하고, 이를 안전하게 처리하거나 지정된 장소로 유도하는 것이 핵심 목표로 보인다. 화산 타일셋 기반의 96x96 타일 크기 맵은 비교적 좁은 공간에서 정교한 유닛 움직임을 요구하며, 런처 버전이라는 파일명과 내부 설명에 나타난 'Tempt a mine, Drop the mine' 문구로 미루어 볼 때 마인 유인 후 특정 지점으로 이동시키거나 제거하는 퍼즐형 진행 방식이 예상된다. 최대 7인용으로 표기되어 있으나 실제 플레이는 1인용 마이크로 연습 맵일 가능성이 높으며, 멀티태스킹 없이 단일 부대 컨트롤에 집중할 수 있는 환경을 제공한다. 난이도는 마인 인공지능 반응 속도와 저글링 이동 경로 계산에 따라 체감 난도가 갈릴 수 있으나, 반복 숙달을 통해 클리어 가능한 '보통' 수준으로 추정된다. 마린 컨트롤, 질럿 홀드 등 일반적인 마이크로 연습맵과 달리 저글링의 빠른 이동 속도와 마인의 폭발 범위, 지연 시간을 활용한 심리전 요소가 가미되어 색다른 재미를 준다. 저글링 운영 감각을 익히고 싶은 초보자부터 극한의 컨트롤을 원하는 고수까지 부담 없이 도전하기 좋으며, 짧은 플레이 타임 내에 집중력과 순발력을 기르기에 적합한 맵으로 추천된다. 플레이 전 런처 실행 방식이나 싱글 플레이 모드 지원 여부를 확인하면 보다 원활한 진행이 가능할 것이다. Zergling Mine Baiting 2 is a StarCraft Brood War UMS map that focuses uniquely on micro-control practice within the mini-game genre. As the title suggests, the core objective appears to be controlling Zerglings to lure Spider Mines laid by Vultures and then safely processing or guiding them to a designated location. The map, based on the Volcano tileset with a 96x96 tile size, demands precise unit movement in a relatively confined space. Given the filename 'Launcher' and the internal description 'Tempt a mine, Drop a mine,' a puzzle-style progression is expected where players lure mines and then move or remove them to specific spots. Although listed for up to 7 players, actual gameplay is highly likely a single-player micro practice map, offering an environment to focus solely on single-group control without multitasking. Difficulty may vary depending on the mine AI reaction speed and Zergling path calculation, but it is estimated at a 'Normal' level where clearance is possible through repeated mastery. Unlike standard micro practice maps featuring Marine control or Zealot holds, this map adds a unique psychological warfare element utilizing the Zergling's fast movement speed, the mine's explosion radius, and delay timing. It is recommended for everyone from beginners wanting to learn Zergling management to experts seeking extreme control challenges, serving as a suitable map to build concentration and reflexes within a short playtime. Checking the launcher execution method or single-player mode support before playing will ensure smoother progression.
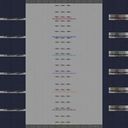
스파이더 마인 디펜스 2.2 (Spider Mine Defense 2.2)
‘스파이더 마인 디펜스 2.2’는 스타크래프트: 브루드워의 디펜스 형식 유즈맵으로, 이름 그대로 스파이더 마인을 중심으로 한 방어 구조와 전략을 펼쳐야 하는 맵이다. 맵의 구성은 좌측에서 끊임없이 몰려오는 적 유닛을 스파이더 마인을 비롯한 방어 건물로 저지하는 방식이며, 특히 마인이라는 독특한 유닛을 활용해 적의 접근을 차단하는 것이 핵심이다. 맵의 길이가 상당히 길고(8192 픽셀) 세로로 긴 구조를 가지고 있어, 방어 지점을 정밀하게 배치하고 유지해야 한다. 다섯 가지 레벨이 추가되어 있는 것으로 확인되며, 각 레벨마다 적의 배치나 공격 패턴이 조금씩 달라져 난이도를 조절할 수 있도록 설계된 것으로 추정된다. 방어 라인은 기본적으로 스파이더 마인으로 구성되어 있으며, 추가로 보조 건물이나 유닛을 배치해 보강할 수 있다. 마인은 적 유닛에게 자동으로 반응해 폭발하는 방식으로, 특히 프로토스와 테란의 조합 공격에 효과적으로 대응할 수 있도록 배치 포인트를 신중히 선택해야 한다. 맵의 특성상 자원 수집이나 확장보다는 방어에 집중해야 하며, 긴 맵 구조 때문에 초반에 잘못된 배치로 인해 적의 침투를 허용하면 복구가 어려울 수 있다. 플레이어는 맵의 중앙이나 후방에 방어타워를 건설하고, 스파이더 마인 필드를 조성해 적의 전진을 막아야 한다. 이 맵은 디펜스 장르의 기본 틀을 따르지만, 스파이더 마인이라는 독특한 유닛을 활용한다는 점에서 일반적인 디펜스 맵과는 차별화된다. 마인을 적재적소에 배치하면 적은 접근조차 불가능해지는 경우가 많기 때문에, 전략적 배치 능력이 중요하다. 또한 다섯 가지 레벨이 존재해 반복 플레이를 유도하며, 각 레벨의 난이도나 적 배치 패턴을 숙지할수록 더 안정적으로 방어할 수 있을 것이다. 추천 대상은 디펜스 맵을 즐기는 플레이어이며, 특히 마인을 활용한 전략적 플레이를 선호하는 유저에게 적합할 것으로 보인다. 플레이 전에는 맵의 길이를 고려해 방어 라인을 충분히 확보할 수 있는지, 마인 배치 포인트를 테스트해보는 것이 중요하다. “Spider Mine Defense 2.2” is a defense-style custom map for *StarCraft: Brood War* where the core focus is on building and executing a defensive strategy centered around spider mines. As the name suggests, players must use spider mines and other defensive structures to stop relentless waves of enemy units approaching from the left side of the map. The key to success lies in leveraging the unique properties of spider mines to block enemy advances. Given the map’s considerable length (8,192 pixels) and its vertically stretched layout, precise placement and maintenance of defensive points are essential. The map includes five additional levels, each featuring slightly different enemy placements and attack patterns, allowing for adjustable difficulty. The primary defensive line consists of spider mines, with options to reinforce it using auxiliary buildings or units. Spider mines detonate automatically upon detecting enemy units, making them particularly effective against mixed Protoss and Terran attacks—though careful selection of placement points is crucial. Since the map emphasizes defense over resource gathering or expansion, and its long structure makes early mistakes in placement hard to recover from, players should focus on constructing defensive towers toward the center or rear of the map and setting up spider mine fields to halt enemy progress. While this map follows the conventions of the defense genre, its use of spider mines sets it apart from typical defense maps. Strategic placement of mines often makes it impossible for enemies to even approach, so tactical positioning plays a major role. With five distinct levels, the map encourages repeated play, and mastering each level’s difficulty and enemy patterns will lead to more stable defenses. It is recommended for players who enjoy defense maps, especially those who prefer strategic use of mines. Before starting, it’s important to ensure sufficient defensive lines can be secured given the map’s length and to test mine placement points in advance.
최근 등록된 맵
새로 추가된 파일과 버전을 확인하세요.
스파이더 마인 디펜스 2.2 (Spider Mine Defense 2.2)
‘스파이더 마인 디펜스 2.2’는 스타크래프트: 브루드워의 디펜스 형식 유즈맵으로, 이름 그대로 스파이더 마인을 중심으로 한 방어 구조와 전략을 펼쳐야 하는 맵이다. 맵의 구성은 좌측에서 끊임없이 몰려오는 적 유닛을 스파이더 마인을 비롯한 방어 건물로 저지하는 방식이며, 특히 마인이라는 독특한 유닛을 활용해 적의 접근을 차단하는 것이 핵심이다. 맵의 길이가 상당히 길고(8192 픽셀) 세로로 긴 구조를 가지고 있어, 방어 지점을 정밀하게 배치하고 유지해야 한다. 다섯 가지 레벨이 추가되어 있는 것으로 확인되며, 각 레벨마다 적의 배치나 공격 패턴이 조금씩 달라져 난이도를 조절할 수 있도록 설계된 것으로 추정된다. 방어 라인은 기본적으로 스파이더 마인으로 구성되어 있으며, 추가로 보조 건물이나 유닛을 배치해 보강할 수 있다. 마인은 적 유닛에게 자동으로 반응해 폭발하는 방식으로, 특히 프로토스와 테란의 조합 공격에 효과적으로 대응할 수 있도록 배치 포인트를 신중히 선택해야 한다. 맵의 특성상 자원 수집이나 확장보다는 방어에 집중해야 하며, 긴 맵 구조 때문에 초반에 잘못된 배치로 인해 적의 침투를 허용하면 복구가 어려울 수 있다. 플레이어는 맵의 중앙이나 후방에 방어타워를 건설하고, 스파이더 마인 필드를 조성해 적의 전진을 막아야 한다. 이 맵은 디펜스 장르의 기본 틀을 따르지만, 스파이더 마인이라는 독특한 유닛을 활용한다는 점에서 일반적인 디펜스 맵과는 차별화된다. 마인을 적재적소에 배치하면 적은 접근조차 불가능해지는 경우가 많기 때문에, 전략적 배치 능력이 중요하다. 또한 다섯 가지 레벨이 존재해 반복 플레이를 유도하며, 각 레벨의 난이도나 적 배치 패턴을 숙지할수록 더 안정적으로 방어할 수 있을 것이다. 추천 대상은 디펜스 맵을 즐기는 플레이어이며, 특히 마인을 활용한 전략적 플레이를 선호하는 유저에게 적합할 것으로 보인다. 플레이 전에는 맵의 길이를 고려해 방어 라인을 충분히 확보할 수 있는지, 마인 배치 포인트를 테스트해보는 것이 중요하다. “Spider Mine Defense 2.2” is a defense-style custom map for *StarCraft: Brood War* where the core focus is on building and executing a defensive strategy centered around spider mines. As the name suggests, players must use spider mines and other defensive structures to stop relentless waves of enemy units approaching from the left side of the map. The key to success lies in leveraging the unique properties of spider mines to block enemy advances. Given the map’s considerable length (8,192 pixels) and its vertically stretched layout, precise placement and maintenance of defensive points are essential. The map includes five additional levels, each featuring slightly different enemy placements and attack patterns, allowing for adjustable difficulty. The primary defensive line consists of spider mines, with options to reinforce it using auxiliary buildings or units. Spider mines detonate automatically upon detecting enemy units, making them particularly effective against mixed Protoss and Terran attacks—though careful selection of placement points is crucial. Since the map emphasizes defense over resource gathering or expansion, and its long structure makes early mistakes in placement hard to recover from, players should focus on constructing defensive towers toward the center or rear of the map and setting up spider mine fields to halt enemy progress. While this map follows the conventions of the defense genre, its use of spider mines sets it apart from typical defense maps. Strategic placement of mines often makes it impossible for enemies to even approach, so tactical positioning plays a major role. With five distinct levels, the map encourages repeated play, and mastering each level’s difficulty and enemy patterns will lead to more stable defenses. It is recommended for players who enjoy defense maps, especially those who prefer strategic use of mines. Before starting, it’s important to ensure sufficient defensive lines can be secured given the map’s length and to test mine placement points in advance.
저글링으로 마인유혹하기 2 (Zergling Mine Baiting 2)
저글링으로 마인유혹하기 2는 스타크래프트 브루드워 유즈맵 중에서도 독특한 마이크로 컨트롤 연습에 초점을 맞춘 미니게임 장르의 맵이다. 제목 그대로 저글링을 조작해 벌처가 매설한 스파이더 마인을 유인하고, 이를 안전하게 처리하거나 지정된 장소로 유도하는 것이 핵심 목표로 보인다. 화산 타일셋 기반의 96x96 타일 크기 맵은 비교적 좁은 공간에서 정교한 유닛 움직임을 요구하며, 런처 버전이라는 파일명과 내부 설명에 나타난 'Tempt a mine, Drop the mine' 문구로 미루어 볼 때 마인 유인 후 특정 지점으로 이동시키거나 제거하는 퍼즐형 진행 방식이 예상된다. 최대 7인용으로 표기되어 있으나 실제 플레이는 1인용 마이크로 연습 맵일 가능성이 높으며, 멀티태스킹 없이 단일 부대 컨트롤에 집중할 수 있는 환경을 제공한다. 난이도는 마인 인공지능 반응 속도와 저글링 이동 경로 계산에 따라 체감 난도가 갈릴 수 있으나, 반복 숙달을 통해 클리어 가능한 '보통' 수준으로 추정된다. 마린 컨트롤, 질럿 홀드 등 일반적인 마이크로 연습맵과 달리 저글링의 빠른 이동 속도와 마인의 폭발 범위, 지연 시간을 활용한 심리전 요소가 가미되어 색다른 재미를 준다. 저글링 운영 감각을 익히고 싶은 초보자부터 극한의 컨트롤을 원하는 고수까지 부담 없이 도전하기 좋으며, 짧은 플레이 타임 내에 집중력과 순발력을 기르기에 적합한 맵으로 추천된다. 플레이 전 런처 실행 방식이나 싱글 플레이 모드 지원 여부를 확인하면 보다 원활한 진행이 가능할 것이다. Zergling Mine Baiting 2 is a StarCraft Brood War UMS map that focuses uniquely on micro-control practice within the mini-game genre. As the title suggests, the core objective appears to be controlling Zerglings to lure Spider Mines laid by Vultures and then safely processing or guiding them to a designated location. The map, based on the Volcano tileset with a 96x96 tile size, demands precise unit movement in a relatively confined space. Given the filename 'Launcher' and the internal description 'Tempt a mine, Drop a mine,' a puzzle-style progression is expected where players lure mines and then move or remove them to specific spots. Although listed for up to 7 players, actual gameplay is highly likely a single-player micro practice map, offering an environment to focus solely on single-group control without multitasking. Difficulty may vary depending on the mine AI reaction speed and Zergling path calculation, but it is estimated at a 'Normal' level where clearance is possible through repeated mastery. Unlike standard micro practice maps featuring Marine control or Zealot holds, this map adds a unique psychological warfare element utilizing the Zergling's fast movement speed, the mine's explosion radius, and delay timing. It is recommended for everyone from beginners wanting to learn Zergling management to experts seeking extreme control challenges, serving as a suitable map to build concentration and reflexes within a short playtime. Checking the launcher execution method or single-player mode support before playing will ensure smoother progression.
맵 선택 가이드
태그는 맵의 핵심 특징을 빠르게 설명하지만 제작 버전마다 규칙이 다를 수 있습니다. 상세 설명에서 권장 인원, 난이도, 플레이 시간과 버전을 함께 확인한 뒤 다운로드하세요.