
스트레스 해소 스타크래프트 맵 모음
'스트레스 해소' 태그가 등록된 맵을 모았습니다. 장르 하나로 찾기 어려운 플레이 방식, 난이도와 특징을 중심으로 인기 맵과 최신 맵을 비교해 보세요.
- 등록 맵
- 2개
- 누적 다운로드
- 0
- 누적 조회
- 34
인기 맵
다운로드와 조회 반응이 높은 맵입니다.
Must Die Mode Control
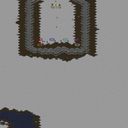
스타크래프트 브루드워의 미니게임으로 유명한 'Must Die Mode Control'은 7명의 플레이어가 동시에 참여하는 경쟁형 맵이다. 맵 중앙에 위치한 거대한 구조물 주변을 빙글빙글 돌며 살아남아야 하는 디자인으로, 플레이어들은 끊임없이 움직이는 구조물의 틈새를 비집고 들어가거나, 떨어지지 않고 버티는 데 집중해야 한다. 구조물은 시계방향으로 천천히 회전하며, 특정 구간에서는 속도가 빨라지거나 좁아지는 구간이 존재해 긴장감을 더한다. 맵의 이름처럼 '죽지 않도록' 버티는 것이 핵심인데, 구조물에서 떨어지거나 다른 플레이어와 충돌하면 즉시 패배 처리된다. 맵의 전체적인 분위기는 밝고 단순한 편이지만, 경쟁심과 순발력을 동시에 요구하는 플레이 스타일이 특징이다. 초보자와 숙련자 모두 즐길 수 있지만, структура물의 움직임에 익숙해지는 데 시간이 걸리기 때문에 처음 플레이 시에는 다소 당황스러울 수 있다. 맵의 디자인상으로는 플레이어 간의 물리적 충돌이 빈번하게 발생할 수 있어, 실력이 부족할 경우 예기치 못한 패배를 당할 수도 있다. 따라서 이 맵을 즐기기 위해서는 구조물의 패턴을 빠르게 파악하고, 자신의 위치를 신중히 조절하는 능력이 중요하다. 또한 맵의 회전 속도가 일정하지 않다는 점도 전략적 요소로 작용하는데, 속도가 빨라지는 구간에서는 급하게 움직여야 하므로 타이밍을 잘 맞춰야 한다. 이 맵은 주로 스트레스 해소와 재미를 목적으로 플레이되며, 소규모 그룹에서 즐기기 좋은 유즈맵으로 평가된다. 다만, 경쟁이 치열해질수록 플레이어 간의 충돌이 잦아져서 실력이 일정 수준 이상이어야 원활한 플레이가 가능하다. 맵을 플레이하기 전에는 구조물의 회전 패턴과 위험 지대를 미리 확인하고, 다른 플레이어와의 거리 유지를 신경 쓰는 것이 좋다. 이 맵은 특히 실시간으로 전략을 세우고 순간적인 판단이 필요한 유저들에게 적합하다. 맵의 디자인상으로는 구조물의 움직임이 규칙적이지 않아서, 숙련자들이 유리한 편이지만, 꾸준한 연습을 통해 적응할 수 있는 가능성도 존재한다. 마지막으로, 이 맵은 다인원이 참여할수록 재미와 긴장감이 배가되므로, 친구들과 함께 플레이하는 것을 추천한다. Must Die Mode Control is a popular mini-game in StarCraft: Brood War, designed for 7 players competing in a survival-style challenge. The map features a massive central structure that rotates continuously, forcing players to navigate its gaps or risk falling off and losing. The structure spins clockwise, with varying speeds and narrowing sections that add tension. The core objective is simple: survive as long as possible by avoiding falls and collisions with other players, as either will result in instant defeat. The map’s bright and straightforward design contrasts with its high-stakes gameplay, which demands quick reflexes and spatial awareness. While accessible to beginners, mastering the structure’s movement patterns takes practice, and new players may feel overwhelmed initially. The map’s design encourages frequent physical collisions between players, making it easier to lose unexpectedly if skills are lacking. Strategic adaptation is key—players must learn the rotation speeds, adjust positioning carefully, and anticipate sudden acceleration zones where rapid movement is necessary. This mini-game is ideal for stress relief and casual fun, particularly in small groups. However, as competition intensifies, collisions become more frequent, favoring players with higher skill levels. Before playing, it’s advisable to study the structure’s rotation patterns and high-risk areas while maintaining distance from opponents. The map suits users who enjoy real-time strategy and split-second decision-making, though its irregular movement patterns give experienced players an edge. With consistent practice, even newcomers can improve. For the best experience, playing with friends amplifies the fun and tension, making it a great choice for group sessions.
놀라지 마라 (Yer Fuckin' Kidding Me)
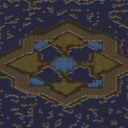
스타크래프트 브루드워의 유즈맵 중에서도 특이하면서도 강렬한 인상을 주는 맵이 바로 'Yer Fuckin' Kidding Me'입니다. 이 맵은 제목부터 시원한 욕설로 시작해 플레이어의 예상을 완전히 빗나가게 만드는 컨셉을 지니고 있습니다. 내부 설명에서도 언급되듯이 'Prepare to be annoyed!'라는 문구는 이 맵의 본질을 정확히 짚어내는데, 말 그대로 플레이어를 짜증나게 만드는 요소가 곳곳에 숨겨져 있습니다. 맵의 구조는 황무지 타일셋을 기반으로 하며, 4096x4096이라는 넓은 공간을 자랑하지만, 실제 플레이 가능한 영역은 소수의 좁디좁은 길과 함정, 혹은 적대적인 유닛들로 가득 차 있습니다. 플레이 방식은 4인용으로 추정되며, 밀리 기반의 맵으로 분류되어 있지만 실제로는 유즈맵의 특성을 강하게 띄고 있습니다. 초반에는 넓은 평지처럼 보이는 지역이지만, progresse를 거듭할수록 좁은 길목이 등장하거나 적 유닛들이 갑자기 튀어나와 길을 막아버립니다. 특히나 맵의 이름에서 연상되는 것처럼, 플레이어는 '이게 뭐야'라는 생각이 절로 들 정도로 비상식적인 배치와 장애물이 기다리고 있습니다. 예를 들어, 길 하나 건너면 갑자기 적 기지가 등장하거나, 좁은 틈을 지나가면 함정으로 가득한 지역이 펼쳐지는 등, 마치 악의적인 설계가 느껴질 정도입니다. 이 맵은 초보 플레이어보다는 오히려 경험 많은 스타크래프트 유저들에게 도전 의식을 자극하는 구조로, 좁은 공간에서의 전투력과 순간적인 판단력이 요구됩니다. 또한, 맵의 이름과 설명에서 느껴지는 유머러스한 느낌이 플레이어의 스트레스를 오히려 재미로 전환시킬 수 있는 요소로 작용할 것입니다. 다만, 이 맵을 즐기기 위해서는 넓은 맵보다는 오히려 좁고 복잡한 맵에 익숙해야 하며, 소수의 병력으로도 승리를 쟁취할 수 있는 전략적 사고가 필요합니다. 이 맵을 추천하는 대상은 스타크래프트의 유즈맵을 즐겨하고, 기존의 평범한 맵보다는 독특한 경험을 원하는 플레이어들입니다. 또한, 친구들과의 친목이나 스트레스 해소를 위해 가볍게 플레이해볼 만한 맵으로도 손색이 없습니다. 다만, 좁은 길목에서의 전투가 잦아지므로, 컨트롤 능력이 부족한 플레이어는 다소 고전할 수 있으니 주의가 필요합니다. 플레이 전에는 맵의 이름과 설명을 유심히 읽어보고, 좁은 길목에서의 전투와 함정에 대비할 준비를 갖추는 것이 좋습니다. 또한, 맵의 넓고 복잡한 구조상 미니맵 활용이 필수적이며, 순간적인 판단과 컨트롤이 승리를 좌우할 수 있으니, 여유를 가지고 플레이하는 것이 중요합니다. This Brood War custom map, titled 'Yer Fuckin' Kidding Me', stands out as one of the most uniquely infuriating yet captivating user-made scenarios in the community. The name itself sets an aggressive tone, immediately signaling that this map won't follow conventional rules. The internal description 'Prepare to be annoyed!' perfectly captures the essence of the experience—players are subjected to an onslaught of traps, tight corridors, and unexpected enemy spawns that seem deliberately designed to frustrate and challenge. The map utilizes the Terran wasteland tileset across a massive 4096x4096 grid, but don't let the open appearance fool you. The playable areas are deceptively narrow, forcing players into claustrophobic skirmishes where every second counts. While classified as a melee map, it operates far outside the boundaries of standard competitive play, leaning heavily into custom map mechanics. Paths that appear safe at first glance often lead to ambushes, dead ends, or sudden enemy base invasions, embodying the map's namesake sentiment of disbelief. The 4-player setup suggests a competitive or co-op experience, though the chaotic design leans more toward chaotic fun than structured strategy. Veteran Brood War players will appreciate the map's twisted logic, where victory hinges on quick reflexes and adaptability in cramped spaces. The humor embedded in both title and description serves as a buffer against the frustration, turning potential rage into entertainment. This map is ideal for players who crave something beyond traditional melee or UMS maps, seeking out experiences that defy expectations. It’s perfect for lighthearted sessions with friends or as a stress-relief outlet, though those unaccustomed to tight-space combat may struggle initially. The reliance on micro-management and split-second decisions means that players should prioritize map awareness and adaptability. Before diving in, reading the map's title and description is crucial to mentally prepare for the chaos ahead. The expansive yet intricate layout demands constant attention to the minimap, as overlooking choke points or enemy movements can quickly turn the tide. While the map's difficulty isn't officially rated, its design inherently favors players with solid control skills and a knack for improvisation.
최근 등록된 맵
새로 추가된 파일과 버전을 확인하세요.
Must Die Mode Control
스타크래프트 브루드워의 미니게임으로 유명한 'Must Die Mode Control'은 7명의 플레이어가 동시에 참여하는 경쟁형 맵이다. 맵 중앙에 위치한 거대한 구조물 주변을 빙글빙글 돌며 살아남아야 하는 디자인으로, 플레이어들은 끊임없이 움직이는 구조물의 틈새를 비집고 들어가거나, 떨어지지 않고 버티는 데 집중해야 한다. 구조물은 시계방향으로 천천히 회전하며, 특정 구간에서는 속도가 빨라지거나 좁아지는 구간이 존재해 긴장감을 더한다. 맵의 이름처럼 '죽지 않도록' 버티는 것이 핵심인데, 구조물에서 떨어지거나 다른 플레이어와 충돌하면 즉시 패배 처리된다. 맵의 전체적인 분위기는 밝고 단순한 편이지만, 경쟁심과 순발력을 동시에 요구하는 플레이 스타일이 특징이다. 초보자와 숙련자 모두 즐길 수 있지만, структура물의 움직임에 익숙해지는 데 시간이 걸리기 때문에 처음 플레이 시에는 다소 당황스러울 수 있다. 맵의 디자인상으로는 플레이어 간의 물리적 충돌이 빈번하게 발생할 수 있어, 실력이 부족할 경우 예기치 못한 패배를 당할 수도 있다. 따라서 이 맵을 즐기기 위해서는 구조물의 패턴을 빠르게 파악하고, 자신의 위치를 신중히 조절하는 능력이 중요하다. 또한 맵의 회전 속도가 일정하지 않다는 점도 전략적 요소로 작용하는데, 속도가 빨라지는 구간에서는 급하게 움직여야 하므로 타이밍을 잘 맞춰야 한다. 이 맵은 주로 스트레스 해소와 재미를 목적으로 플레이되며, 소규모 그룹에서 즐기기 좋은 유즈맵으로 평가된다. 다만, 경쟁이 치열해질수록 플레이어 간의 충돌이 잦아져서 실력이 일정 수준 이상이어야 원활한 플레이가 가능하다. 맵을 플레이하기 전에는 구조물의 회전 패턴과 위험 지대를 미리 확인하고, 다른 플레이어와의 거리 유지를 신경 쓰는 것이 좋다. 이 맵은 특히 실시간으로 전략을 세우고 순간적인 판단이 필요한 유저들에게 적합하다. 맵의 디자인상으로는 구조물의 움직임이 규칙적이지 않아서, 숙련자들이 유리한 편이지만, 꾸준한 연습을 통해 적응할 수 있는 가능성도 존재한다. 마지막으로, 이 맵은 다인원이 참여할수록 재미와 긴장감이 배가되므로, 친구들과 함께 플레이하는 것을 추천한다. Must Die Mode Control is a popular mini-game in StarCraft: Brood War, designed for 7 players competing in a survival-style challenge. The map features a massive central structure that rotates continuously, forcing players to navigate its gaps or risk falling off and losing. The structure spins clockwise, with varying speeds and narrowing sections that add tension. The core objective is simple: survive as long as possible by avoiding falls and collisions with other players, as either will result in instant defeat. The map’s bright and straightforward design contrasts with its high-stakes gameplay, which demands quick reflexes and spatial awareness. While accessible to beginners, mastering the structure’s movement patterns takes practice, and new players may feel overwhelmed initially. The map’s design encourages frequent physical collisions between players, making it easier to lose unexpectedly if skills are lacking. Strategic adaptation is key—players must learn the rotation speeds, adjust positioning carefully, and anticipate sudden acceleration zones where rapid movement is necessary. This mini-game is ideal for stress relief and casual fun, particularly in small groups. However, as competition intensifies, collisions become more frequent, favoring players with higher skill levels. Before playing, it’s advisable to study the structure’s rotation patterns and high-risk areas while maintaining distance from opponents. The map suits users who enjoy real-time strategy and split-second decision-making, though its irregular movement patterns give experienced players an edge. With consistent practice, even newcomers can improve. For the best experience, playing with friends amplifies the fun and tension, making it a great choice for group sessions.
놀라지 마라 (Yer Fuckin' Kidding Me)
스타크래프트 브루드워의 유즈맵 중에서도 특이하면서도 강렬한 인상을 주는 맵이 바로 'Yer Fuckin' Kidding Me'입니다. 이 맵은 제목부터 시원한 욕설로 시작해 플레이어의 예상을 완전히 빗나가게 만드는 컨셉을 지니고 있습니다. 내부 설명에서도 언급되듯이 'Prepare to be annoyed!'라는 문구는 이 맵의 본질을 정확히 짚어내는데, 말 그대로 플레이어를 짜증나게 만드는 요소가 곳곳에 숨겨져 있습니다. 맵의 구조는 황무지 타일셋을 기반으로 하며, 4096x4096이라는 넓은 공간을 자랑하지만, 실제 플레이 가능한 영역은 소수의 좁디좁은 길과 함정, 혹은 적대적인 유닛들로 가득 차 있습니다. 플레이 방식은 4인용으로 추정되며, 밀리 기반의 맵으로 분류되어 있지만 실제로는 유즈맵의 특성을 강하게 띄고 있습니다. 초반에는 넓은 평지처럼 보이는 지역이지만, progresse를 거듭할수록 좁은 길목이 등장하거나 적 유닛들이 갑자기 튀어나와 길을 막아버립니다. 특히나 맵의 이름에서 연상되는 것처럼, 플레이어는 '이게 뭐야'라는 생각이 절로 들 정도로 비상식적인 배치와 장애물이 기다리고 있습니다. 예를 들어, 길 하나 건너면 갑자기 적 기지가 등장하거나, 좁은 틈을 지나가면 함정으로 가득한 지역이 펼쳐지는 등, 마치 악의적인 설계가 느껴질 정도입니다. 이 맵은 초보 플레이어보다는 오히려 경험 많은 스타크래프트 유저들에게 도전 의식을 자극하는 구조로, 좁은 공간에서의 전투력과 순간적인 판단력이 요구됩니다. 또한, 맵의 이름과 설명에서 느껴지는 유머러스한 느낌이 플레이어의 스트레스를 오히려 재미로 전환시킬 수 있는 요소로 작용할 것입니다. 다만, 이 맵을 즐기기 위해서는 넓은 맵보다는 오히려 좁고 복잡한 맵에 익숙해야 하며, 소수의 병력으로도 승리를 쟁취할 수 있는 전략적 사고가 필요합니다. 이 맵을 추천하는 대상은 스타크래프트의 유즈맵을 즐겨하고, 기존의 평범한 맵보다는 독특한 경험을 원하는 플레이어들입니다. 또한, 친구들과의 친목이나 스트레스 해소를 위해 가볍게 플레이해볼 만한 맵으로도 손색이 없습니다. 다만, 좁은 길목에서의 전투가 잦아지므로, 컨트롤 능력이 부족한 플레이어는 다소 고전할 수 있으니 주의가 필요합니다. 플레이 전에는 맵의 이름과 설명을 유심히 읽어보고, 좁은 길목에서의 전투와 함정에 대비할 준비를 갖추는 것이 좋습니다. 또한, 맵의 넓고 복잡한 구조상 미니맵 활용이 필수적이며, 순간적인 판단과 컨트롤이 승리를 좌우할 수 있으니, 여유를 가지고 플레이하는 것이 중요합니다. This Brood War custom map, titled 'Yer Fuckin' Kidding Me', stands out as one of the most uniquely infuriating yet captivating user-made scenarios in the community. The name itself sets an aggressive tone, immediately signaling that this map won't follow conventional rules. The internal description 'Prepare to be annoyed!' perfectly captures the essence of the experience—players are subjected to an onslaught of traps, tight corridors, and unexpected enemy spawns that seem deliberately designed to frustrate and challenge. The map utilizes the Terran wasteland tileset across a massive 4096x4096 grid, but don't let the open appearance fool you. The playable areas are deceptively narrow, forcing players into claustrophobic skirmishes where every second counts. While classified as a melee map, it operates far outside the boundaries of standard competitive play, leaning heavily into custom map mechanics. Paths that appear safe at first glance often lead to ambushes, dead ends, or sudden enemy base invasions, embodying the map's namesake sentiment of disbelief. The 4-player setup suggests a competitive or co-op experience, though the chaotic design leans more toward chaotic fun than structured strategy. Veteran Brood War players will appreciate the map's twisted logic, where victory hinges on quick reflexes and adaptability in cramped spaces. The humor embedded in both title and description serves as a buffer against the frustration, turning potential rage into entertainment. This map is ideal for players who crave something beyond traditional melee or UMS maps, seeking out experiences that defy expectations. It’s perfect for lighthearted sessions with friends or as a stress-relief outlet, though those unaccustomed to tight-space combat may struggle initially. The reliance on micro-management and split-second decisions means that players should prioritize map awareness and adaptability. Before diving in, reading the map's title and description is crucial to mentally prepare for the chaos ahead. The expansive yet intricate layout demands constant attention to the minimap, as overlooking choke points or enemy movements can quickly turn the tide. While the map's difficulty isn't officially rated, its design inherently favors players with solid control skills and a knack for improvisation.
맵 선택 가이드
태그는 맵의 핵심 특징을 빠르게 설명하지만 제작 버전마다 규칙이 다를 수 있습니다. 상세 설명에서 권장 인원, 난이도, 플레이 시간과 버전을 함께 확인한 뒤 다운로드하세요.