
스트레스 테스트 스타크래프트 맵 모음
'스트레스 테스트' 태그가 등록된 맵을 모았습니다. 장르 하나로 찾기 어려운 플레이 방식, 난이도와 특징을 중심으로 인기 맵과 최신 맵을 비교해 보세요.
- 등록 맵
- 7개
- 누적 다운로드
- 2
- 누적 조회
- 328
인기 맵
다운로드와 조회 반응이 높은 맵입니다.
1 Million Zerglings (100만 저글링)
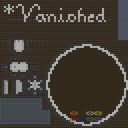
스타크래프트 브루드워의 유즈맵 중에서도 손꼽히는 괴작이자, 플레이어들에게 강한 인상을 남기는 ‘1 Million Zerglings(원 밀리언 저글링)’은 이름 그대로 저글링 100만 마리를 상대로 싸우는 디펜스 형식의 컴까기 맵이다. 맵의 전체적인 배경은 어두운 톤의 우주 공간으로, 중앙에 위치한 플레이어의 본진을 중심으로 거대한 저글링 웨이브가 끊임없이 밀려오는 구조로 구성되어 있다. 플레이어는 초반부터 끊임없이 쏟아지는 저글링 무리를 방어해야 하며, 유닛을 생산하거나 업그레이드를 진행하는 동시에 전략을 세워야만 살아남을 수 있다. 맵의 특징은 단순히 숫자에만 의존하지 않고, 저글링의 스펙과 배치 패턴이 조금씩 변화한다는 점이다. 초반에는 약한 개체들이 무더기로 몰려오지만, 시간이 지날수록 체력이 높아지고 공격력이 증가하는 저글링이 등장하며, 특정 시점부터는 다수의 브루탈리스크나 뮤탈리스크까지 등장하는 등 난이도가 급격히 상승한다. 방어에 실패하면 본진이 순식간에 무너질 수 있기 때문에, 플레이어는 자원을 효율적으로 관리하며 빠른 판단력과 손놀림을 요구받는다. 또한, 맵 곳곳에 배치된 방어 건물이나 특수 아이템(추정됨)을 활용하여 생존 확률을 높일 수 있다. 이 맵은 초보 플레이어에게는 엄청난 난이도를 자랑하지만, 숙련된 유저들에게는 극한의 조작력과 전략을 시험하는 도전 과제로 다가온다. 특히, 저글링의 물량과 스펙 변화에 맞춰 빌드를 유연하게 변경하는 능력이 핵심이며, 지속적인 업그레이드와 건물 관리가 필수적이다. 오랜 시간동안 플레이어들에게 사랑받는 이유 중 하나는 바로 이 ‘도전과 극복’의 재미에 있다. 맵을 처음 접하는 플레이어는 저글링의 물량을 버티지 못하고 순식간에 무너질 수 있지만, 몇 번의 시도 끝에 패턴을 익히고 전략을 세우면 그 쾌感은 이루 말할 수 없다. 또한, 맵의 атмосphere와 긴장감이 조성된 사운드 디자인(추정됨)이 플레이어의 몰입감을 더해준다. 이 맵을 추천하는 대상은 ‘스타크래프트의 기본기를 다지고 싶다’는 생각이 있는 유저들이나, 유즈맵의 새로운 장르를 탐험하고 싶은 이들에게 적합하다. 반대로, 손이 느리거나 전략적인 사고가 약한 플레이어에게는 추천하기 어려운 맵이기도 하다. 플레이 전에는 맵의 구조와 저글링의 패턴 변화 시점을 미리 확인하고, 방어 건물의 배치와 유닛 생산 라인을 미리 세워두는 것이 중요하다. 또한, 맵의 특성상 자원 수급이 제한적이므로, 초반 자원 관리에 특히 신경을 써야 한다. 마지막으로, 맵의 긴장감을 높이기 위해 사운드와 그래픽 설정을 최적화하는 것도 좋은 방법이다. ‘1 Million Zerglings’는 단순히 저글링을 막는 것이 아니라, 자신을 극한으로 몰아세우는 듯한 플레이 경험을 제공하는 맵으로, 스타크래프트 유즈맵의 진수를 느낄 수 있는 작품 중 하나다. 이 맵을 통해 자신의 실력을 시험해보고, 그 짜릿한 승리감을 느껴보길 바란다. 이 맵을 즐기기 위한 필수 조건은 ‘빠른 손놀림’과 ‘유연한 전략’뿐이다. Among Brood War custom maps, *1 Million Zerglings* stands out as one of the most notorious and unforgettable experiences. As the name suggests, it’s a defense-style "comp stomp" map where you fight against a relentless horde of 1 million Zerglings. The map’s atmosphere is set in a dark, cosmic void, with the player’s main base at the center and waves of Zerglings continuously surging toward it. From the start, you must defend against an endless tide of Zerglings while producing units, upgrading, and devising strategies to survive. What makes this map challenging isn’t just the sheer numbers—it’s the evolving specs and patterns of the Zerglings. Early waves consist of weak, swarming units, but as time passes, tougher variants appear with higher HP and attack power. Later stages introduce Brutalisks and Mutalisks, drastically increasing the difficulty. A single mistake can lead to your base collapsing in seconds, forcing you to manage resources efficiently and make quick decisions with precise execution. You can also improve your odds by utilizing defensive structures scattered across the map and special items (likely power-ups). While the map is brutally difficult for beginners, seasoned players see it as the ultimate test of mechanical skill and strategy. The key to success lies in adapting your build dynamically to the changing Zergling waves, constantly upgrading, and meticulously managing your buildings. What keeps players coming back is the thrill of overcoming this brutal challenge. Newcomers may crumble under the initial onslaught, but once they learn the patterns and refine their strategies, the satisfaction is unmatched. The immersive atmosphere and tense sound design (likely) further heighten the experience. This map is ideal for players looking to sharpen their Brood War fundamentals or explore fresh custom map genres. However, it’s not recommended for those with slow reflexes or weak strategic thinking. Before jumping in, study the map layout and the points where Zergling patterns shift, plan your defensive structures and unit production lines, and prioritize resource management—since income is limited. Optimizing sound and graphics settings can also enhance the intense atmosphere. *1 Million Zerglings* isn’t just about surviving waves of Zerglings; it’s an experience that pushes you to your limits, offering a taste of the best that Brood War custom maps have to offer. Give it a try if you’re ready to test your skills and chase that exhilarating sense of victory. The only requirements? Quick reflexes and adaptable strategy.
오브저버:서바이벌 (OBSERVER:survival)
스타크래프트 브루드워의 독특한 서바이벌 유즈맵 'OBSERVER:survival'은 관찰자 시점에서 펼쳐지는 끊임없는 적의 공격을 방어하며 생존을 도모하는 재미를 제공한다. 이 맵은 사막 타일셋을 기반으로 4096x4096의 넓은 공간에 펼쳐지며, 플레이어는 중앙의 안전 구역을 지키며 끊임없이 몰려오는 적 유닛을 상대해야 한다. 맵의 구조는 크게 세 구역으로 나뉘어져 있는데, 안쪽에서부터 바깥쪽으로 갈수록 적의 공격 강도가 높아지는 구조로 되어 있어 난이도 상승을 자연스럽게 느낄 수 있다. 중간 구역에는 보급고가 배치되어 있어 자원 수급이 원활하며, 외부 구역은 넓은 시야를 제공해 적이 접근하는 것을 미리 확인할 수 있도록 설계되어 있다. 플레이어는 테란, 저그, 프로토스 중 하나의 종족을 선택해 플레이할 수 있으며, 각 종족의 특성을 살린 유닛 조합으로 방어전을 펼쳐야 한다. 특히 이 맵의 특징은 관찰자 시점이라는 독특한 관점에서 적의 움직임을 예측하고 전략을 세워야 한다는 점으로, 단순히 공격과 방어를 반복하는 것이 아니라 심리전과 공간 활용 능력이 요구된다. 초보 플레이어는 난이도가 높을 수 있으나, 점차 적의 공격 패턴을 익히고 유닛 관리 능력을 향상시킬수록 긴장감 넘치는 전투를 즐길 수 있다. 추천 대상은 서바이벌 장르를 좋아하는 플레이어, 팀플레이보다는 혼자서 도전하고 싶은 유저, 그리고 전략적 사고와 긴장감을 동시에 즐기고 싶은 플레이어들에게 적합하다. 플레이 전에는 자신의 종족 선택과 유닛 조합을 미리 생각해 두고, 맵의 구조와 적의 공격 루트를 충분히 숙지하는 것이 중요하다. 또한 중간중간 등장하는 보급고를 통해 꾸준히 자원을 확보하며 방어선을 유지하는 것이 성공의 열쇠가 된다. 이 맵은 단순히 적을 무찌르는 것이 아니라 끊임없이 변화하는 상황에 적응하고 최적의 대응책을 찾는 재미가 있는 만큼, 한 번 플레이해 본 후에도 반복해서 도전하고 싶은 매력이 있다. 특히 관찰자라는 컨셉이 주는 독특한 분위기는 다른 서바이벌 맵들과 차별화되는 요소로, 스타크래프트의Classic한 분위기를 느낄 수 있는 매력이 있다. 초보자도 기본적인 유닛 컨트롤과 전략만 익히면 충분히 즐길 수 있지만, 숙련자라면 더욱 복잡한 전술을 구사하며 긴장감 넘치는 전투를 즐길 수 있을 것이다. 이 맵을 통해 플레이어는 서바이벌 장르의 새로운 경험과 함께 스타크래프트의Classic한 재미를 되새길 수 있을 것이다. OBSERVER:survival is a unique survival custom map in StarCraft: Brood War where players defend their safe zone from endless waves of enemy units from an observer's perspective. Set on a 4096x4096 desert tileset map, the gameplay unfolds in three distinct zones: an inner safe area, a midsection with resource depots for supply, and an outer perimeter offering wide visibility to spot approaching enemies. Players choose one of three races—Terran, Zerg, or Protoss—and must leverage their faction's strengths to withstand increasingly intense attacks as they progress outward. The observer perspective adds a layer of strategy, requiring players to anticipate enemy movements and manage space effectively rather than relying solely on brute force. While the difficulty may feel steep for beginners, mastering the attack patterns and honing unit control skills transforms the experience into a thrilling test of adaptability and quick decision-making. This map is ideal for survival genre enthusiasts, solo players seeking a challenge beyond team-based modes, and those who enjoy the blend of strategy and high-stakes action. Before diving in, it's crucial to pre-plan race-specific unit compositions and familiarize yourself with the map's layout and enemy approach routes. Consistent resource management through the midsection depots is key to maintaining a strong defensive line. What sets OBSERVER:survival apart is its focus on adaptation and optimal responses to evolving situations, making it a replayable experience for those who crave strategic depth. The observer concept adds a distinctive atmosphere, blending the classic StarCraft feel with immersive survival mechanics. While accessible to newcomers with basic unit control and strategy knowledge, seasoned players will relish the opportunity to experiment with advanced tactics and savor the tension of each wave. Ultimately, the map offers a fresh take on the survival genre, inviting players to revisit it time and again for both nostalgic and challenging experiences.
마라톤 바운드 2 (Marathon Bound 2)
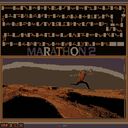
스타크래프트 브루드워의 대표적인 컴까기 장르 유즈맵인 '마라톤 바운드 2(Marathon Bound 2)'는 플레이어에게 끊임없는 도전과 긴장감을 제공하는 디펜스 스타일의 맵이다. 맵 제목에서부터 느껴지는 바와 같이, 이 맵은 일종의 '마라톤'처럼 endless한 스테이지를 돌파해야 하며, 75개의 레벨과 75명의 생명을 가진 채 끊임없이 몰려드는 적군을 상대로 버텨야 한다. 내부 설명에 명시된 '75 Lives + 2 revives'는 플레이어가 실수해도 두 번의 추가 기회를 부여하며, 난이도 1~7까지 단계별로 구성되어 progressively하게 어려움을 높이는 구조로 설계되었다는 점이 특징이다. 맵의 진행 방식은 매우 직관적이다. 중앙에 위치한 플레이어의 시작 지점에서부터 적군 웨이브가 끊임없이 쏟아지며, 각 레벨마다 요구되는 목표는 주로 적군을 일정 수만큼 제거하거나 특정 조건을 달성하는 것이다. 맵의 디자인은 황혼 타일셋을 활용해 어두운 분위기로 조성되어 있으며, 넓은 맵 크기(8192x8192)와 높은 해상도(256x256 타일 단위)는 몰려드는 적군의 웨이브를 시각적으로 압도적으로 표현한다. 맵의 가장 큰 특징은 '생명 시스템'으로, 초반에는 비교적 여유롭게 시작하지만 레벨이 높아질수록 적군의 종류와 수가 기하급수적으로 증가하며, 플레이어의 전략과 컨이 요구된다. 이 맵의 가장 큰 매력은 '지속 가능한 긴장감'이다. endless한 스테이지와 постоян적인 적군 웨이브는 플레이어에게 끊임없는 집중력을 요구하며, 실수 한 번이 치명적인 결과를 초래할 수 있어 긴장감이 지속된다. 또한, 난이도 1~7까지의 단계적 상승은 초보자와 숙련자 모두에게 적절한 도전 거리를 제공하며, '2번의 부활 기회'는 한번의 실수를 만회할 수 있는 기회를 부여한다. 그러나 맵의 난이도가 상당히 높고, 특정 레벨에서는 적군의 물량 공세가 극심해질 수 있어 숙련된 플레이어에게 더 어울리는 맵이라는 점도 유념해야 한다. 이 맵을 추천하는 대상은 주로 스타크래프트의 컴까기 장르를 좋아하는 플레이어이며, endless 디펜스에 도전하고자 하는 유저들에게 적합하다. 또한, 긴장감 있는 플레이와 지속적인 도전을 즐기는 플레이어라면 이 맵에서 큰 재미를 느낄 수 있을 것이다. 다만, 초보자의 경우 난이도가 급격히 상승하는 후반 레벨에서 좌절감을 느낄 수 있어, 난이도 3~4 구간까지는 충분히 연습한 후 도전하는 것이 좋다. 맵의 구조상 적군의 웨이브가 끊임없이 몰려오기 때문에, 초반에는 자원 관리와 유닛 생산 타이밍을 잘 조절하는 것이 중요하다. 플레이 전 반드시 확인해야 할 포인트는 '적군의 종류와 패턴 변화'이다. 레벨이 높아질수록 적군의 종류가 다양해지며, 특정 레벨에서는 특정 유닛이 주를 이루는 경우가 많다. 예를 들어, 후반 레벨에서는 고급 유닛이나 공중 유닛이 다수 등장할 수 있어, 미리 대비할 수 있도록 유닛 조합을 준비하는 것이 중요하다. 또한, 맵의 wide한 공간을 효율적으로 활용하기 위해 '자원 채취 위치'와 '방어 거점'을 미리 파악해 두는 것이 좋다. 마지막으로, 맵의 '부활 시스템'을 최대한 활용하기 위해 실수를 최소화하는 전략을 세우는 것이 핵심이다. "Marathon Bound 2 (Marathon Bound 2)" is a classic defense-style custom map from *StarCraft: Brood War* that challenges players with relentless waves of enemies in an endless marathon-like experience. As the title suggests, players must survive through 75 stages with 75 lives, fighting off waves of enemies that grow progressively harder. The map’s internal description highlights its "75 Lives + 2 revives" system, giving players two chances to recover from mistakes while increasing difficulty from levels 1 to 7 in a structured, escalating manner. The gameplay is straightforward: enemies continuously spawn from the center, and each level typically requires players to defeat a set number of enemies or meet specific conditions. The map’s design uses a twilight tileset to create a dark, immersive atmosphere, while its massive scale (8192x8192) and high-resolution tiles (256x256) visually emphasize the overwhelming scale of enemy waves. The standout feature is its "life system," where early levels feel manageable, but as the stages advance, enemy types and numbers surge exponentially, demanding sharp strategy and precise execution. The map’s greatest strength lies in its "sustained tension." The endless stages and constant enemy waves keep players on edge, as even a single mistake can lead to failure. The difficulty curve from levels 1 to 7 caters to both beginners and veterans, while the two revival chances allow players to recover from errors. However, the high difficulty—especially in later stages with overwhelming enemy numbers—makes it better suited for experienced players. This map is ideal for fans of *StarCraft*’s defense genre and those seeking a challenging endless defense experience. Players who enjoy high-stakes gameplay and continuous challenges will find Marathon Bound 2 particularly engaging. That said, beginners may struggle with the steep difficulty spike in later levels, so it’s wise to practice up to levels 3–4 before attempting higher stages. Early on, managing resources and timing unit production are key, as waves never stop. Before playing, pay close attention to the "enemy type and pattern changes." As levels progress, enemies diversify, with certain stages dominated by specific units—late-game levels, for example, may feature elite or air units in large numbers. Preparing the right unit compositions in advance is crucial. Additionally, familiarize yourself with the map’s layout, including resource locations and defensive strongpoints, to maximize efficiency. Finally, minimizing mistakes is vital to fully utilize the revival system and stay in the game.
블러드 프레셔 레이스* 패스트 (Blood pressure race* fast)
스타크래프트 브루드워 유즈맵 <바람의 나라>나 <리니지> 같은 고전 RPG의 전투 시스템을 모방한 듯한 Blood pressure race* fast는 이름 그대로 혈압을 솟구치게 만드는 스피디한 전투가 핵심인 맵입니다. 화면 가득 펼쳐진 넓은 평원과 곳곳에 배치된 자원 수집 지역, 그리고 중앙에 위치한 강력한 중간 보스가 인상적입니다. 플레이어는 시작 지점에서 출발해 맵 곳곳의 미네랄이나 베스핀 가스를 확보하면서 자원을 모으고, 동시에 적대적인 유닛들이 끊임없이 몰려오는 위협을 극복해야 합니다. 전투는 테란, 저그, 프로토스의 각 종족의 특성을 살린 유닛 구성으로 진행되며, 특히 중간 보스와의 전투는 긴장감을 높이는 하이라이트입니다. 맵의 배경은 황량한 사막 지형으로, 시야가 제한된 곳에서 벌어지는 전투는 플레이어의 전략과 순발력을 동시에 요구합니다. 초반에는 자원 확보가 관건이지만, 중반으로 접어들수록 방어와 공격의 균형을 맞추는 것이 관건이 됩니다. 예상 플레이 시간은 약 20~30분 정도로, 한 판에 몰입감 있게 즐길 수 있는 구조입니다. 초보자도 쉽게 접근할 수 있지만, 후반부로 갈수록 난이도가 급상승하는 만큼 꾸준한 연습이 필요합니다. 특히 중간 보스와의 전투에서는 팀원 간 협력이 무엇보다 중요합니다. 넓은 맵을 활용한 전투와 자원 관리, 그리고 중간 보스 caccia와 같은 강력한 적의 등장은 이 맵의 가장 큰 특징입니다. 플레이 전에는 각 종족의 유닛 구성과 자원 확보 전략을 미리 숙지하는 것이 좋습니다. 또한, 시야가 제한된 사막 지형에서 벌어지는 전투에서는 맵의 주요 자원 지역과 중간 보스 위치, 그리고 적의 침투 경로를 미리 파악해 두는 것이 필수입니다. 이 맵은 좁은 공간에서 벌어지는 전투보다는 넓은 평원과 복잡한 지형을 활용한 전략적 플레이가 요구됩니다. 특히 자원 확보와 방어 라인 구축을 동시에 진행해야 하는 만큼, 멀티태스킹 능력이 중요한 유즈맵입니다. 전투가 치열해질수록 혈압이 오르겠지만, 그 쾌감こそ가 이 맵의 진정한 매력입니다. 팀원 간의 호흡을 맞추는 재미도 쏠쏠하니, 친구들과 함께 플레이해 보세요. 초보자도 충분히 즐길 수 있지만, 숙련자들에게는 더 깊은 전략과 팀플레이의 묘미를 느낄 수 있는 맵입니다. This StarCraft: Brood War custom map, *Blood Pressure Race*, is a fast-paced, adrenaline-fueled battle where heart-pounding combat takes center stage—much like the classic RPG combat systems from games such as *The Land of Winds* or *Lineage*. The map features vast open plains stretching across the screen, scattered resource collection zones, and a powerful mid-boss lurking at the center. Players start at designated points, gathering minerals and vespene gas while fending off relentless waves of hostile units. Combat unfolds with unit compositions tailored to each race—Terran, Zerg, and Protoss—culminating in a high-stakes showdown against the mid-boss that cranks up the tension. Set against a desolate desert backdrop with limited visibility, the battles demand sharp strategy and quick reflexes. Early on, securing resources is key, but as the game progresses, balancing defense and offense becomes critical. A single match lasts about 20 to 30 minutes, offering an immersive experience in a compact format. While accessible to beginners, the difficulty spikes sharply in later stages, making consistent practice essential. Teamwork is especially vital during the mid-boss encounters. The map’s standout features include large-scale combat, resource management, and the appearance of formidable enemies like the mid-boss *Caccia*. Before playing, it’s wise to familiarize yourself with each race’s unit compositions and resource-gathering strategies. In the sand-blinded desert terrain, knowing the key resource zones, mid-boss locations, and enemy approach paths is crucial. Unlike cramped, close-quarters battles, this map rewards strategic play across wide-open plains and intricate terrain. With the need to juggle resource gathering and base defense simultaneously, multitasking skills are a must. As the fight intensifies, so does the thrill—but that’s exactly where the real appeal lies. Syncing up with teammates adds another layer of fun, so gather friends and jump in. While newcomers can enjoy it too, seasoned players will uncover deeper layers of strategy and teamwork.
도트 보지 않기 (Dont Look At The Dot!)
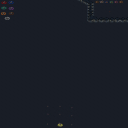
‘Dont Look At The Dot!’은 스타크래프트 브루드워의 유즈맵으로, 시야를 가리고 핵심 요소를 확인하지 못하는 상태에서 진행되는 독특한 디펜스 장르의 유즈맵이다. 맵의 중심에는 시선을 끌어당기는 붉은색 또는 초록색의 깜빡이는 점(‘도트’)이 존재하며, 플레이어는 이 점을 절대로 쳐다보아서는 안 된다. 시선을 돌리거나 화면을 가린 채 맵을 분석하고, 적절한 타이밍에 유닛을 생산하고 배치해야만 살아남을 수 있는 구조로 설계되어 있다. 맵의 배경은 설원 타일셋으로 꾸며져 있으며, 전체적으로 어두운 색조와 조명이 상대적으로 сла한 편이라 시야가 제한되는 환경에서 도트의 유무를 확인하는 것이 핵심 과제가 된다. 플레이 방식은 기본적으로 디펜스 장르의 특징을 따르지만, 시야를 제한하는 특이한 조건이 추가되어 전략적 깊이를 더한다. 플레이어는 도트를 쳐다보지 않으면서도 맵의 상황을 파악해야 하며, 이 과정에서 자연스럽게 맵 리딩 능력이 요구된다. 유닛 생산과 자원 관리도 중요하지만, 도트의 유무를 감지하지 못한 채로 플레이하면 순식간에 패배할 수 있는 위험이 상존한다. 또한, 맵의 타일셋과 조명 설정 때문에 일부 플레이어는 도트의 색상이나 깜빡임 주기를 제대로 인식하지 못할 수 있어, 사전 테스트가 필요하다는 점도 특징이다. 이 맵은 초보자보다는 어느 정도의 전략적 감각과 집중력이 요구되는 유즈맵으로, 특히 디펜스 장르에 익숙한 플레이어에게 추천할 만하다. 또한, 팀 플레이보다는 개인전 또는 팀 디펜스 형태로 구성되어 있으며, 플레이어의 시야를 제한하는 특이한 조건 때문에 기존 디펜스 맵과는 완전히 다른 경험을 제공한다. 맵을 플레이하기 전에는 반드시 도트의 색상과 깜빡임 주기를 숙지하고, 시야를 제한하는 조건하에서도 맵의 구조를 파악할 수 있는 연습을 하는 것이 중요하다. 이 맵의 진정한 재미는 시야를 제한받은 상태에서 어떻게든 승리를 쟁취하는 순간에 있기 때문에, 도전을 즐기는 플레이어에게는 더할 나위 없이 매력적인 경험이 될 것이다. This StarCraft: Brood War custom map, ‘Dont Look At The Dot!’, offers a unique twist on the defense genre by forcing players to navigate the map without looking directly at a blinking dot at the center. The map, set against a snowy tileset with dim lighting, challenges players to rely on peripheral vision and strategic planning, as direct visual contact with the dot—either red or green—leads to failure. Players must produce and position units while avoiding the temptation to glance at the dot, testing both their ability to manage resources and their map awareness under restricted visibility. The gameplay revolves around the core mechanic of avoiding the dot while still reacting to enemy waves, making it a test of reflexes, concentration, and adaptability. Unlike traditional defense maps, the restricted vision forces players to develop alternative methods for tracking enemy movements and base status, adding a layer of unpredictability. The snowy environment and lighting further obscure visibility, which may pose additional challenges for some players, necessitating familiarity with the map’s visual cues before attempting a playthrough. Ideal for players who enjoy strategic depth and unconventional mechanics, ‘Dont Look At The Dot!’ is best suited for those with prior experience in defense-style custom maps. The map can be played solo or in team-based defense modes, emphasizing individual skill and team coordination. Prospective players should practice recognizing the dot’s blinking pattern and map layout without direct visual confirmation to fully appreciate the challenge. The true appeal of this map lies in the thrill of overcoming its unique constraints and achieving victory against the odds, making it a standout experience for fans of creative and demanding custom maps.
도지 더 래피스트 - 인세인 3.6 (Dodge the Rapist - Insane 3.6)
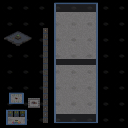
《Dodge the Rapist - Insane 3.6》는 스타크래프트 브루드워의 미니게임 장르 유즈맵으로, 이름에서 느껴지듯 ‘피하기’와 ‘회피’에 특화된 플레이를 제공한다. 맵의 중앙에는 거대한 감옥 모양 구조물이 있으며, 플레이어는 이 내부에서 끊임없이 쏟아지는 적 유닛과 스킬을 피해야 한다. 구조물 내부에는 넓은 통로가 배치되어 있어 회피 루트를 자유롭게 선택할 수 있으며, 일부 구간에서는 좁은 통로로 진입해 적의 공격을 피해야 하는 전략적 요소가 포함되어 있다. 맵의 디자인상 플레이어는 1인용으로 진행되며, 지속적인 적의 공격을 버티며 최대한 오래 살아남는 것이 목표로 보인다. 내부 설명에 따르면 제작자 Firefly(DB)와 Synthlight가 작업을 맡았고, Synthlight가 편집을 담당했다는 정보가 있으며, 개선 사항이나 문의는 제공된 연락처로 가능하다는 점이 특이점이다. 맵의 테마는 다소 자극적인 제목과 상반되게 우주 타일셋을 활용해 중립적인 분위기를 연출하며, 넓은 공간과 복잡한 통로 배치가 회피 게임의 긴장감을 극대화하는 데 기여한다. 특히 ‘Insane’이라는 서브타이틀이 시사하듯 난이도가 상당한 편으로, 초보자는 물론 숙련자도 쉽게 클리어하기 어려운 구조로 설계되어 있다. 플레이 전에는 좁은 통로에서 적 유닛의 집중 공격에 대비해야 하며, 넓은 공간에서 적절한 회피 루트를 미리 예상하는 연습이 필요하다. 또한, 맵의 symmetrical한 구조가 반복되는 구간을 통해 플레이어의 적응력을 테스트한다는 점도 주목할 만하다. 이 맵은 단순히 회피를 넘어서, 순간적인 판단력과 반응 속도를 요구하는 스트레스 테스트와 같은 경험을 제공한다. 추천 대상은 스타크래프트의 빠른 반응과 피지컬을Test하는 유즈맵을 선호하는 플레이어이며, 특히 ‘피하기’ 장르에 익숙한 유저라면 큰 흥미를 느낄 것으로 예상된다. 《Dodge the Rapist - Insane 3.6》 is a mini-game style custom map for *StarCraft: Brood War*, focusing on evasion and dodging mechanics as the name suggests. At the center of the map is a massive prison-like structure, where players must constantly evade enemy units and abilities inside. The interior features wide corridors for flexible route selection, along with strategic sections that require navigating tight passages to avoid attacks. Designed for single-player, the objective appears to be surviving as long as possible against relentless enemy waves. According to the internal description, the map was created by Firefly (DB) and Synthlight, with Synthlight handling the editing, and inquiries or suggestions can be sent via the provided contact details. Despite its provocative title, the map uses a neutral space-themed tileset, creating a detached atmosphere while maximizing tension through expansive spaces and intricate corridors. The "Insane" subtitle hints at its high difficulty, featuring a layout that challenges even experienced players. Before playing, it's essential to prepare for concentrated enemy attacks in narrow passages and practice anticipating evasion routes in open areas. The map’s symmetrical design also tests players' adaptability through repetitive sections. Beyond mere evasion, it serves as a stress test demanding quick decision-making and reflexes. Ideal for players who enjoy *StarCraft* custom maps that challenge speed and physical skill, especially those familiar with evasion-based genres.
컴퓨터 성능 테스트 (Computer Performance Test)
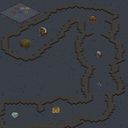
스타크래프트 브루드워 유즈맵 '컴퓨터 성능 테스트'는 일반적인 대전이나 협동 플레이를 목적으로 제작된 맵이 아니라, 사용자 시스템의 연산 처리 능력과 렌더링 한계를 가늠해 볼 수 있는 벤치마크 성격의 맵이다. 우주 타일셋을 배경으로 128x128 타일 크기의 널찍한 전장이 펼쳐지며, 최대 5인까지 입장할 수 있는 구조로 되어 있다. 본격적인 게임플레이보다는 다수의 유닛을 한꺼번에 소환하거나 특수 이펙트를 연출해 프레임 드랍 현상, 렉 발생 시점, CPU 및 GPU 점유율 변화를 관찰하는 데 초점이 맞춰져 있다. 트리거 구성 역시 승리 조건이나 미션 목표보다는 반복적인 유닛 생성, 폭발 이펙트 연출, 화면 전체를 뒤덮는 이벤트 등 하드웨어 부하를 의도적으로 유발하는 방향으로 짜여진 것으로 보인다. 따라서 일반 유저가 재미를 느끼며 즐기기보다는, 맵 제작자나 모더가 트리거 최적화 여부를 검증하거나, 고사양 시스템에서 스타크래프트 구동 안정성을 점검할 때 유용하게 쓰일 수 있다. 플레이 타임은 별도로 정해져 있지 않으나, 테스트 목적에 따라 수 분 내외로 종료하는 것이 일반적이다. 난이도 개념은 없으며, 단순히 맵을 실행해 상황을 지켜보는 것만으로도 충분한 정보를 얻을 수 있다. 만약 본인의 컴퓨터가 스타크래프트 리마스터 혹은 원본 환경에서 어느 정도까지 버텨주는지 궁금하다면 한 번쯤 실행해 볼 만한 특수 목적 맵이다. StarCraft Brood War use map 'Computer Performance Test' is not designed for standard versus or cooperative play, but rather serves as a benchmark map to gauge the user system's computational capacity and rendering limits. Set against a space tileset, a spacious battlefield of 128x128 tiles unfolds, structured to allow up to 5 players. Rather than full gameplay, the focus lies on observing frame drops, lag occurrence points, and CPU/GPU utilization changes by summoning numerous units at once or rendering special effects. The trigger composition also appears to be geared toward intentionally inducing hardware load—repeated unit creation, explosion effects, screen-covering events—instead of victory conditions or mission objectives. Consequently, it is more useful for map creators or modders verifying trigger optimization or checking StarCraft execution stability on high-spec systems, rather than for general users seeking entertainment. Playtime is not fixed but typically ends within a few minutes depending on the test purpose. There is no difficulty concept; simply running the map and observing the situation provides sufficient information. If you are curious how far your computer can handle StarCraft Remastered or the original environment, this is a special-purpose map worth trying once.
최근 등록된 맵
새로 추가된 파일과 버전을 확인하세요.
컴퓨터 성능 테스트 (Computer Performance Test)
스타크래프트 브루드워 유즈맵 '컴퓨터 성능 테스트'는 일반적인 대전이나 협동 플레이를 목적으로 제작된 맵이 아니라, 사용자 시스템의 연산 처리 능력과 렌더링 한계를 가늠해 볼 수 있는 벤치마크 성격의 맵이다. 우주 타일셋을 배경으로 128x128 타일 크기의 널찍한 전장이 펼쳐지며, 최대 5인까지 입장할 수 있는 구조로 되어 있다. 본격적인 게임플레이보다는 다수의 유닛을 한꺼번에 소환하거나 특수 이펙트를 연출해 프레임 드랍 현상, 렉 발생 시점, CPU 및 GPU 점유율 변화를 관찰하는 데 초점이 맞춰져 있다. 트리거 구성 역시 승리 조건이나 미션 목표보다는 반복적인 유닛 생성, 폭발 이펙트 연출, 화면 전체를 뒤덮는 이벤트 등 하드웨어 부하를 의도적으로 유발하는 방향으로 짜여진 것으로 보인다. 따라서 일반 유저가 재미를 느끼며 즐기기보다는, 맵 제작자나 모더가 트리거 최적화 여부를 검증하거나, 고사양 시스템에서 스타크래프트 구동 안정성을 점검할 때 유용하게 쓰일 수 있다. 플레이 타임은 별도로 정해져 있지 않으나, 테스트 목적에 따라 수 분 내외로 종료하는 것이 일반적이다. 난이도 개념은 없으며, 단순히 맵을 실행해 상황을 지켜보는 것만으로도 충분한 정보를 얻을 수 있다. 만약 본인의 컴퓨터가 스타크래프트 리마스터 혹은 원본 환경에서 어느 정도까지 버텨주는지 궁금하다면 한 번쯤 실행해 볼 만한 특수 목적 맵이다. StarCraft Brood War use map 'Computer Performance Test' is not designed for standard versus or cooperative play, but rather serves as a benchmark map to gauge the user system's computational capacity and rendering limits. Set against a space tileset, a spacious battlefield of 128x128 tiles unfolds, structured to allow up to 5 players. Rather than full gameplay, the focus lies on observing frame drops, lag occurrence points, and CPU/GPU utilization changes by summoning numerous units at once or rendering special effects. The trigger composition also appears to be geared toward intentionally inducing hardware load—repeated unit creation, explosion effects, screen-covering events—instead of victory conditions or mission objectives. Consequently, it is more useful for map creators or modders verifying trigger optimization or checking StarCraft execution stability on high-spec systems, rather than for general users seeking entertainment. Playtime is not fixed but typically ends within a few minutes depending on the test purpose. There is no difficulty concept; simply running the map and observing the situation provides sufficient information. If you are curious how far your computer can handle StarCraft Remastered or the original environment, this is a special-purpose map worth trying once.
1 Million Zerglings (100만 저글링)
스타크래프트 브루드워의 유즈맵 중에서도 손꼽히는 괴작이자, 플레이어들에게 강한 인상을 남기는 ‘1 Million Zerglings(원 밀리언 저글링)’은 이름 그대로 저글링 100만 마리를 상대로 싸우는 디펜스 형식의 컴까기 맵이다. 맵의 전체적인 배경은 어두운 톤의 우주 공간으로, 중앙에 위치한 플레이어의 본진을 중심으로 거대한 저글링 웨이브가 끊임없이 밀려오는 구조로 구성되어 있다. 플레이어는 초반부터 끊임없이 쏟아지는 저글링 무리를 방어해야 하며, 유닛을 생산하거나 업그레이드를 진행하는 동시에 전략을 세워야만 살아남을 수 있다. 맵의 특징은 단순히 숫자에만 의존하지 않고, 저글링의 스펙과 배치 패턴이 조금씩 변화한다는 점이다. 초반에는 약한 개체들이 무더기로 몰려오지만, 시간이 지날수록 체력이 높아지고 공격력이 증가하는 저글링이 등장하며, 특정 시점부터는 다수의 브루탈리스크나 뮤탈리스크까지 등장하는 등 난이도가 급격히 상승한다. 방어에 실패하면 본진이 순식간에 무너질 수 있기 때문에, 플레이어는 자원을 효율적으로 관리하며 빠른 판단력과 손놀림을 요구받는다. 또한, 맵 곳곳에 배치된 방어 건물이나 특수 아이템(추정됨)을 활용하여 생존 확률을 높일 수 있다. 이 맵은 초보 플레이어에게는 엄청난 난이도를 자랑하지만, 숙련된 유저들에게는 극한의 조작력과 전략을 시험하는 도전 과제로 다가온다. 특히, 저글링의 물량과 스펙 변화에 맞춰 빌드를 유연하게 변경하는 능력이 핵심이며, 지속적인 업그레이드와 건물 관리가 필수적이다. 오랜 시간동안 플레이어들에게 사랑받는 이유 중 하나는 바로 이 ‘도전과 극복’의 재미에 있다. 맵을 처음 접하는 플레이어는 저글링의 물량을 버티지 못하고 순식간에 무너질 수 있지만, 몇 번의 시도 끝에 패턴을 익히고 전략을 세우면 그 쾌感은 이루 말할 수 없다. 또한, 맵의 атмосphere와 긴장감이 조성된 사운드 디자인(추정됨)이 플레이어의 몰입감을 더해준다. 이 맵을 추천하는 대상은 ‘스타크래프트의 기본기를 다지고 싶다’는 생각이 있는 유저들이나, 유즈맵의 새로운 장르를 탐험하고 싶은 이들에게 적합하다. 반대로, 손이 느리거나 전략적인 사고가 약한 플레이어에게는 추천하기 어려운 맵이기도 하다. 플레이 전에는 맵의 구조와 저글링의 패턴 변화 시점을 미리 확인하고, 방어 건물의 배치와 유닛 생산 라인을 미리 세워두는 것이 중요하다. 또한, 맵의 특성상 자원 수급이 제한적이므로, 초반 자원 관리에 특히 신경을 써야 한다. 마지막으로, 맵의 긴장감을 높이기 위해 사운드와 그래픽 설정을 최적화하는 것도 좋은 방법이다. ‘1 Million Zerglings’는 단순히 저글링을 막는 것이 아니라, 자신을 극한으로 몰아세우는 듯한 플레이 경험을 제공하는 맵으로, 스타크래프트 유즈맵의 진수를 느낄 수 있는 작품 중 하나다. 이 맵을 통해 자신의 실력을 시험해보고, 그 짜릿한 승리감을 느껴보길 바란다. 이 맵을 즐기기 위한 필수 조건은 ‘빠른 손놀림’과 ‘유연한 전략’뿐이다. Among Brood War custom maps, *1 Million Zerglings* stands out as one of the most notorious and unforgettable experiences. As the name suggests, it’s a defense-style "comp stomp" map where you fight against a relentless horde of 1 million Zerglings. The map’s atmosphere is set in a dark, cosmic void, with the player’s main base at the center and waves of Zerglings continuously surging toward it. From the start, you must defend against an endless tide of Zerglings while producing units, upgrading, and devising strategies to survive. What makes this map challenging isn’t just the sheer numbers—it’s the evolving specs and patterns of the Zerglings. Early waves consist of weak, swarming units, but as time passes, tougher variants appear with higher HP and attack power. Later stages introduce Brutalisks and Mutalisks, drastically increasing the difficulty. A single mistake can lead to your base collapsing in seconds, forcing you to manage resources efficiently and make quick decisions with precise execution. You can also improve your odds by utilizing defensive structures scattered across the map and special items (likely power-ups). While the map is brutally difficult for beginners, seasoned players see it as the ultimate test of mechanical skill and strategy. The key to success lies in adapting your build dynamically to the changing Zergling waves, constantly upgrading, and meticulously managing your buildings. What keeps players coming back is the thrill of overcoming this brutal challenge. Newcomers may crumble under the initial onslaught, but once they learn the patterns and refine their strategies, the satisfaction is unmatched. The immersive atmosphere and tense sound design (likely) further heighten the experience. This map is ideal for players looking to sharpen their Brood War fundamentals or explore fresh custom map genres. However, it’s not recommended for those with slow reflexes or weak strategic thinking. Before jumping in, study the map layout and the points where Zergling patterns shift, plan your defensive structures and unit production lines, and prioritize resource management—since income is limited. Optimizing sound and graphics settings can also enhance the intense atmosphere. *1 Million Zerglings* isn’t just about surviving waves of Zerglings; it’s an experience that pushes you to your limits, offering a taste of the best that Brood War custom maps have to offer. Give it a try if you’re ready to test your skills and chase that exhilarating sense of victory. The only requirements? Quick reflexes and adaptable strategy.
마라톤 바운드 2 (Marathon Bound 2)
스타크래프트 브루드워의 대표적인 컴까기 장르 유즈맵인 '마라톤 바운드 2(Marathon Bound 2)'는 플레이어에게 끊임없는 도전과 긴장감을 제공하는 디펜스 스타일의 맵이다. 맵 제목에서부터 느껴지는 바와 같이, 이 맵은 일종의 '마라톤'처럼 endless한 스테이지를 돌파해야 하며, 75개의 레벨과 75명의 생명을 가진 채 끊임없이 몰려드는 적군을 상대로 버텨야 한다. 내부 설명에 명시된 '75 Lives + 2 revives'는 플레이어가 실수해도 두 번의 추가 기회를 부여하며, 난이도 1~7까지 단계별로 구성되어 progressively하게 어려움을 높이는 구조로 설계되었다는 점이 특징이다. 맵의 진행 방식은 매우 직관적이다. 중앙에 위치한 플레이어의 시작 지점에서부터 적군 웨이브가 끊임없이 쏟아지며, 각 레벨마다 요구되는 목표는 주로 적군을 일정 수만큼 제거하거나 특정 조건을 달성하는 것이다. 맵의 디자인은 황혼 타일셋을 활용해 어두운 분위기로 조성되어 있으며, 넓은 맵 크기(8192x8192)와 높은 해상도(256x256 타일 단위)는 몰려드는 적군의 웨이브를 시각적으로 압도적으로 표현한다. 맵의 가장 큰 특징은 '생명 시스템'으로, 초반에는 비교적 여유롭게 시작하지만 레벨이 높아질수록 적군의 종류와 수가 기하급수적으로 증가하며, 플레이어의 전략과 컨이 요구된다. 이 맵의 가장 큰 매력은 '지속 가능한 긴장감'이다. endless한 스테이지와 постоян적인 적군 웨이브는 플레이어에게 끊임없는 집중력을 요구하며, 실수 한 번이 치명적인 결과를 초래할 수 있어 긴장감이 지속된다. 또한, 난이도 1~7까지의 단계적 상승은 초보자와 숙련자 모두에게 적절한 도전 거리를 제공하며, '2번의 부활 기회'는 한번의 실수를 만회할 수 있는 기회를 부여한다. 그러나 맵의 난이도가 상당히 높고, 특정 레벨에서는 적군의 물량 공세가 극심해질 수 있어 숙련된 플레이어에게 더 어울리는 맵이라는 점도 유념해야 한다. 이 맵을 추천하는 대상은 주로 스타크래프트의 컴까기 장르를 좋아하는 플레이어이며, endless 디펜스에 도전하고자 하는 유저들에게 적합하다. 또한, 긴장감 있는 플레이와 지속적인 도전을 즐기는 플레이어라면 이 맵에서 큰 재미를 느낄 수 있을 것이다. 다만, 초보자의 경우 난이도가 급격히 상승하는 후반 레벨에서 좌절감을 느낄 수 있어, 난이도 3~4 구간까지는 충분히 연습한 후 도전하는 것이 좋다. 맵의 구조상 적군의 웨이브가 끊임없이 몰려오기 때문에, 초반에는 자원 관리와 유닛 생산 타이밍을 잘 조절하는 것이 중요하다. 플레이 전 반드시 확인해야 할 포인트는 '적군의 종류와 패턴 변화'이다. 레벨이 높아질수록 적군의 종류가 다양해지며, 특정 레벨에서는 특정 유닛이 주를 이루는 경우가 많다. 예를 들어, 후반 레벨에서는 고급 유닛이나 공중 유닛이 다수 등장할 수 있어, 미리 대비할 수 있도록 유닛 조합을 준비하는 것이 중요하다. 또한, 맵의 wide한 공간을 효율적으로 활용하기 위해 '자원 채취 위치'와 '방어 거점'을 미리 파악해 두는 것이 좋다. 마지막으로, 맵의 '부활 시스템'을 최대한 활용하기 위해 실수를 최소화하는 전략을 세우는 것이 핵심이다. "Marathon Bound 2 (Marathon Bound 2)" is a classic defense-style custom map from *StarCraft: Brood War* that challenges players with relentless waves of enemies in an endless marathon-like experience. As the title suggests, players must survive through 75 stages with 75 lives, fighting off waves of enemies that grow progressively harder. The map’s internal description highlights its "75 Lives + 2 revives" system, giving players two chances to recover from mistakes while increasing difficulty from levels 1 to 7 in a structured, escalating manner. The gameplay is straightforward: enemies continuously spawn from the center, and each level typically requires players to defeat a set number of enemies or meet specific conditions. The map’s design uses a twilight tileset to create a dark, immersive atmosphere, while its massive scale (8192x8192) and high-resolution tiles (256x256) visually emphasize the overwhelming scale of enemy waves. The standout feature is its "life system," where early levels feel manageable, but as the stages advance, enemy types and numbers surge exponentially, demanding sharp strategy and precise execution. The map’s greatest strength lies in its "sustained tension." The endless stages and constant enemy waves keep players on edge, as even a single mistake can lead to failure. The difficulty curve from levels 1 to 7 caters to both beginners and veterans, while the two revival chances allow players to recover from errors. However, the high difficulty—especially in later stages with overwhelming enemy numbers—makes it better suited for experienced players. This map is ideal for fans of *StarCraft*’s defense genre and those seeking a challenging endless defense experience. Players who enjoy high-stakes gameplay and continuous challenges will find Marathon Bound 2 particularly engaging. That said, beginners may struggle with the steep difficulty spike in later levels, so it’s wise to practice up to levels 3–4 before attempting higher stages. Early on, managing resources and timing unit production are key, as waves never stop. Before playing, pay close attention to the "enemy type and pattern changes." As levels progress, enemies diversify, with certain stages dominated by specific units—late-game levels, for example, may feature elite or air units in large numbers. Preparing the right unit compositions in advance is crucial. Additionally, familiarize yourself with the map’s layout, including resource locations and defensive strongpoints, to maximize efficiency. Finally, minimizing mistakes is vital to fully utilize the revival system and stay in the game.
블러드 프레셔 레이스* 패스트 (Blood pressure race* fast)
스타크래프트 브루드워 유즈맵 <바람의 나라>나 <리니지> 같은 고전 RPG의 전투 시스템을 모방한 듯한 Blood pressure race* fast는 이름 그대로 혈압을 솟구치게 만드는 스피디한 전투가 핵심인 맵입니다. 화면 가득 펼쳐진 넓은 평원과 곳곳에 배치된 자원 수집 지역, 그리고 중앙에 위치한 강력한 중간 보스가 인상적입니다. 플레이어는 시작 지점에서 출발해 맵 곳곳의 미네랄이나 베스핀 가스를 확보하면서 자원을 모으고, 동시에 적대적인 유닛들이 끊임없이 몰려오는 위협을 극복해야 합니다. 전투는 테란, 저그, 프로토스의 각 종족의 특성을 살린 유닛 구성으로 진행되며, 특히 중간 보스와의 전투는 긴장감을 높이는 하이라이트입니다. 맵의 배경은 황량한 사막 지형으로, 시야가 제한된 곳에서 벌어지는 전투는 플레이어의 전략과 순발력을 동시에 요구합니다. 초반에는 자원 확보가 관건이지만, 중반으로 접어들수록 방어와 공격의 균형을 맞추는 것이 관건이 됩니다. 예상 플레이 시간은 약 20~30분 정도로, 한 판에 몰입감 있게 즐길 수 있는 구조입니다. 초보자도 쉽게 접근할 수 있지만, 후반부로 갈수록 난이도가 급상승하는 만큼 꾸준한 연습이 필요합니다. 특히 중간 보스와의 전투에서는 팀원 간 협력이 무엇보다 중요합니다. 넓은 맵을 활용한 전투와 자원 관리, 그리고 중간 보스 caccia와 같은 강력한 적의 등장은 이 맵의 가장 큰 특징입니다. 플레이 전에는 각 종족의 유닛 구성과 자원 확보 전략을 미리 숙지하는 것이 좋습니다. 또한, 시야가 제한된 사막 지형에서 벌어지는 전투에서는 맵의 주요 자원 지역과 중간 보스 위치, 그리고 적의 침투 경로를 미리 파악해 두는 것이 필수입니다. 이 맵은 좁은 공간에서 벌어지는 전투보다는 넓은 평원과 복잡한 지형을 활용한 전략적 플레이가 요구됩니다. 특히 자원 확보와 방어 라인 구축을 동시에 진행해야 하는 만큼, 멀티태스킹 능력이 중요한 유즈맵입니다. 전투가 치열해질수록 혈압이 오르겠지만, 그 쾌감こそ가 이 맵의 진정한 매력입니다. 팀원 간의 호흡을 맞추는 재미도 쏠쏠하니, 친구들과 함께 플레이해 보세요. 초보자도 충분히 즐길 수 있지만, 숙련자들에게는 더 깊은 전략과 팀플레이의 묘미를 느낄 수 있는 맵입니다. This StarCraft: Brood War custom map, *Blood Pressure Race*, is a fast-paced, adrenaline-fueled battle where heart-pounding combat takes center stage—much like the classic RPG combat systems from games such as *The Land of Winds* or *Lineage*. The map features vast open plains stretching across the screen, scattered resource collection zones, and a powerful mid-boss lurking at the center. Players start at designated points, gathering minerals and vespene gas while fending off relentless waves of hostile units. Combat unfolds with unit compositions tailored to each race—Terran, Zerg, and Protoss—culminating in a high-stakes showdown against the mid-boss that cranks up the tension. Set against a desolate desert backdrop with limited visibility, the battles demand sharp strategy and quick reflexes. Early on, securing resources is key, but as the game progresses, balancing defense and offense becomes critical. A single match lasts about 20 to 30 minutes, offering an immersive experience in a compact format. While accessible to beginners, the difficulty spikes sharply in later stages, making consistent practice essential. Teamwork is especially vital during the mid-boss encounters. The map’s standout features include large-scale combat, resource management, and the appearance of formidable enemies like the mid-boss *Caccia*. Before playing, it’s wise to familiarize yourself with each race’s unit compositions and resource-gathering strategies. In the sand-blinded desert terrain, knowing the key resource zones, mid-boss locations, and enemy approach paths is crucial. Unlike cramped, close-quarters battles, this map rewards strategic play across wide-open plains and intricate terrain. With the need to juggle resource gathering and base defense simultaneously, multitasking skills are a must. As the fight intensifies, so does the thrill—but that’s exactly where the real appeal lies. Syncing up with teammates adds another layer of fun, so gather friends and jump in. While newcomers can enjoy it too, seasoned players will uncover deeper layers of strategy and teamwork.
도트 보지 않기 (Dont Look At The Dot!)
‘Dont Look At The Dot!’은 스타크래프트 브루드워의 유즈맵으로, 시야를 가리고 핵심 요소를 확인하지 못하는 상태에서 진행되는 독특한 디펜스 장르의 유즈맵이다. 맵의 중심에는 시선을 끌어당기는 붉은색 또는 초록색의 깜빡이는 점(‘도트’)이 존재하며, 플레이어는 이 점을 절대로 쳐다보아서는 안 된다. 시선을 돌리거나 화면을 가린 채 맵을 분석하고, 적절한 타이밍에 유닛을 생산하고 배치해야만 살아남을 수 있는 구조로 설계되어 있다. 맵의 배경은 설원 타일셋으로 꾸며져 있으며, 전체적으로 어두운 색조와 조명이 상대적으로 сла한 편이라 시야가 제한되는 환경에서 도트의 유무를 확인하는 것이 핵심 과제가 된다. 플레이 방식은 기본적으로 디펜스 장르의 특징을 따르지만, 시야를 제한하는 특이한 조건이 추가되어 전략적 깊이를 더한다. 플레이어는 도트를 쳐다보지 않으면서도 맵의 상황을 파악해야 하며, 이 과정에서 자연스럽게 맵 리딩 능력이 요구된다. 유닛 생산과 자원 관리도 중요하지만, 도트의 유무를 감지하지 못한 채로 플레이하면 순식간에 패배할 수 있는 위험이 상존한다. 또한, 맵의 타일셋과 조명 설정 때문에 일부 플레이어는 도트의 색상이나 깜빡임 주기를 제대로 인식하지 못할 수 있어, 사전 테스트가 필요하다는 점도 특징이다. 이 맵은 초보자보다는 어느 정도의 전략적 감각과 집중력이 요구되는 유즈맵으로, 특히 디펜스 장르에 익숙한 플레이어에게 추천할 만하다. 또한, 팀 플레이보다는 개인전 또는 팀 디펜스 형태로 구성되어 있으며, 플레이어의 시야를 제한하는 특이한 조건 때문에 기존 디펜스 맵과는 완전히 다른 경험을 제공한다. 맵을 플레이하기 전에는 반드시 도트의 색상과 깜빡임 주기를 숙지하고, 시야를 제한하는 조건하에서도 맵의 구조를 파악할 수 있는 연습을 하는 것이 중요하다. 이 맵의 진정한 재미는 시야를 제한받은 상태에서 어떻게든 승리를 쟁취하는 순간에 있기 때문에, 도전을 즐기는 플레이어에게는 더할 나위 없이 매력적인 경험이 될 것이다. This StarCraft: Brood War custom map, ‘Dont Look At The Dot!’, offers a unique twist on the defense genre by forcing players to navigate the map without looking directly at a blinking dot at the center. The map, set against a snowy tileset with dim lighting, challenges players to rely on peripheral vision and strategic planning, as direct visual contact with the dot—either red or green—leads to failure. Players must produce and position units while avoiding the temptation to glance at the dot, testing both their ability to manage resources and their map awareness under restricted visibility. The gameplay revolves around the core mechanic of avoiding the dot while still reacting to enemy waves, making it a test of reflexes, concentration, and adaptability. Unlike traditional defense maps, the restricted vision forces players to develop alternative methods for tracking enemy movements and base status, adding a layer of unpredictability. The snowy environment and lighting further obscure visibility, which may pose additional challenges for some players, necessitating familiarity with the map’s visual cues before attempting a playthrough. Ideal for players who enjoy strategic depth and unconventional mechanics, ‘Dont Look At The Dot!’ is best suited for those with prior experience in defense-style custom maps. The map can be played solo or in team-based defense modes, emphasizing individual skill and team coordination. Prospective players should practice recognizing the dot’s blinking pattern and map layout without direct visual confirmation to fully appreciate the challenge. The true appeal of this map lies in the thrill of overcoming its unique constraints and achieving victory against the odds, making it a standout experience for fans of creative and demanding custom maps.
도지 더 래피스트 - 인세인 3.6 (Dodge the Rapist - Insane 3.6)
《Dodge the Rapist - Insane 3.6》는 스타크래프트 브루드워의 미니게임 장르 유즈맵으로, 이름에서 느껴지듯 ‘피하기’와 ‘회피’에 특화된 플레이를 제공한다. 맵의 중앙에는 거대한 감옥 모양 구조물이 있으며, 플레이어는 이 내부에서 끊임없이 쏟아지는 적 유닛과 스킬을 피해야 한다. 구조물 내부에는 넓은 통로가 배치되어 있어 회피 루트를 자유롭게 선택할 수 있으며, 일부 구간에서는 좁은 통로로 진입해 적의 공격을 피해야 하는 전략적 요소가 포함되어 있다. 맵의 디자인상 플레이어는 1인용으로 진행되며, 지속적인 적의 공격을 버티며 최대한 오래 살아남는 것이 목표로 보인다. 내부 설명에 따르면 제작자 Firefly(DB)와 Synthlight가 작업을 맡았고, Synthlight가 편집을 담당했다는 정보가 있으며, 개선 사항이나 문의는 제공된 연락처로 가능하다는 점이 특이점이다. 맵의 테마는 다소 자극적인 제목과 상반되게 우주 타일셋을 활용해 중립적인 분위기를 연출하며, 넓은 공간과 복잡한 통로 배치가 회피 게임의 긴장감을 극대화하는 데 기여한다. 특히 ‘Insane’이라는 서브타이틀이 시사하듯 난이도가 상당한 편으로, 초보자는 물론 숙련자도 쉽게 클리어하기 어려운 구조로 설계되어 있다. 플레이 전에는 좁은 통로에서 적 유닛의 집중 공격에 대비해야 하며, 넓은 공간에서 적절한 회피 루트를 미리 예상하는 연습이 필요하다. 또한, 맵의 symmetrical한 구조가 반복되는 구간을 통해 플레이어의 적응력을 테스트한다는 점도 주목할 만하다. 이 맵은 단순히 회피를 넘어서, 순간적인 판단력과 반응 속도를 요구하는 스트레스 테스트와 같은 경험을 제공한다. 추천 대상은 스타크래프트의 빠른 반응과 피지컬을Test하는 유즈맵을 선호하는 플레이어이며, 특히 ‘피하기’ 장르에 익숙한 유저라면 큰 흥미를 느낄 것으로 예상된다. 《Dodge the Rapist - Insane 3.6》 is a mini-game style custom map for *StarCraft: Brood War*, focusing on evasion and dodging mechanics as the name suggests. At the center of the map is a massive prison-like structure, where players must constantly evade enemy units and abilities inside. The interior features wide corridors for flexible route selection, along with strategic sections that require navigating tight passages to avoid attacks. Designed for single-player, the objective appears to be surviving as long as possible against relentless enemy waves. According to the internal description, the map was created by Firefly (DB) and Synthlight, with Synthlight handling the editing, and inquiries or suggestions can be sent via the provided contact details. Despite its provocative title, the map uses a neutral space-themed tileset, creating a detached atmosphere while maximizing tension through expansive spaces and intricate corridors. The "Insane" subtitle hints at its high difficulty, featuring a layout that challenges even experienced players. Before playing, it's essential to prepare for concentrated enemy attacks in narrow passages and practice anticipating evasion routes in open areas. The map’s symmetrical design also tests players' adaptability through repetitive sections. Beyond mere evasion, it serves as a stress test demanding quick decision-making and reflexes. Ideal for players who enjoy *StarCraft* custom maps that challenge speed and physical skill, especially those familiar with evasion-based genres.
오브저버:서바이벌 (OBSERVER:survival)
스타크래프트 브루드워의 독특한 서바이벌 유즈맵 'OBSERVER:survival'은 관찰자 시점에서 펼쳐지는 끊임없는 적의 공격을 방어하며 생존을 도모하는 재미를 제공한다. 이 맵은 사막 타일셋을 기반으로 4096x4096의 넓은 공간에 펼쳐지며, 플레이어는 중앙의 안전 구역을 지키며 끊임없이 몰려오는 적 유닛을 상대해야 한다. 맵의 구조는 크게 세 구역으로 나뉘어져 있는데, 안쪽에서부터 바깥쪽으로 갈수록 적의 공격 강도가 높아지는 구조로 되어 있어 난이도 상승을 자연스럽게 느낄 수 있다. 중간 구역에는 보급고가 배치되어 있어 자원 수급이 원활하며, 외부 구역은 넓은 시야를 제공해 적이 접근하는 것을 미리 확인할 수 있도록 설계되어 있다. 플레이어는 테란, 저그, 프로토스 중 하나의 종족을 선택해 플레이할 수 있으며, 각 종족의 특성을 살린 유닛 조합으로 방어전을 펼쳐야 한다. 특히 이 맵의 특징은 관찰자 시점이라는 독특한 관점에서 적의 움직임을 예측하고 전략을 세워야 한다는 점으로, 단순히 공격과 방어를 반복하는 것이 아니라 심리전과 공간 활용 능력이 요구된다. 초보 플레이어는 난이도가 높을 수 있으나, 점차 적의 공격 패턴을 익히고 유닛 관리 능력을 향상시킬수록 긴장감 넘치는 전투를 즐길 수 있다. 추천 대상은 서바이벌 장르를 좋아하는 플레이어, 팀플레이보다는 혼자서 도전하고 싶은 유저, 그리고 전략적 사고와 긴장감을 동시에 즐기고 싶은 플레이어들에게 적합하다. 플레이 전에는 자신의 종족 선택과 유닛 조합을 미리 생각해 두고, 맵의 구조와 적의 공격 루트를 충분히 숙지하는 것이 중요하다. 또한 중간중간 등장하는 보급고를 통해 꾸준히 자원을 확보하며 방어선을 유지하는 것이 성공의 열쇠가 된다. 이 맵은 단순히 적을 무찌르는 것이 아니라 끊임없이 변화하는 상황에 적응하고 최적의 대응책을 찾는 재미가 있는 만큼, 한 번 플레이해 본 후에도 반복해서 도전하고 싶은 매력이 있다. 특히 관찰자라는 컨셉이 주는 독특한 분위기는 다른 서바이벌 맵들과 차별화되는 요소로, 스타크래프트의Classic한 분위기를 느낄 수 있는 매력이 있다. 초보자도 기본적인 유닛 컨트롤과 전략만 익히면 충분히 즐길 수 있지만, 숙련자라면 더욱 복잡한 전술을 구사하며 긴장감 넘치는 전투를 즐길 수 있을 것이다. 이 맵을 통해 플레이어는 서바이벌 장르의 새로운 경험과 함께 스타크래프트의Classic한 재미를 되새길 수 있을 것이다. OBSERVER:survival is a unique survival custom map in StarCraft: Brood War where players defend their safe zone from endless waves of enemy units from an observer's perspective. Set on a 4096x4096 desert tileset map, the gameplay unfolds in three distinct zones: an inner safe area, a midsection with resource depots for supply, and an outer perimeter offering wide visibility to spot approaching enemies. Players choose one of three races—Terran, Zerg, or Protoss—and must leverage their faction's strengths to withstand increasingly intense attacks as they progress outward. The observer perspective adds a layer of strategy, requiring players to anticipate enemy movements and manage space effectively rather than relying solely on brute force. While the difficulty may feel steep for beginners, mastering the attack patterns and honing unit control skills transforms the experience into a thrilling test of adaptability and quick decision-making. This map is ideal for survival genre enthusiasts, solo players seeking a challenge beyond team-based modes, and those who enjoy the blend of strategy and high-stakes action. Before diving in, it's crucial to pre-plan race-specific unit compositions and familiarize yourself with the map's layout and enemy approach routes. Consistent resource management through the midsection depots is key to maintaining a strong defensive line. What sets OBSERVER:survival apart is its focus on adaptation and optimal responses to evolving situations, making it a replayable experience for those who crave strategic depth. The observer concept adds a distinctive atmosphere, blending the classic StarCraft feel with immersive survival mechanics. While accessible to newcomers with basic unit control and strategy knowledge, seasoned players will relish the opportunity to experiment with advanced tactics and savor the tension of each wave. Ultimately, the map offers a fresh take on the survival genre, inviting players to revisit it time and again for both nostalgic and challenging experiences.
맵 선택 가이드
태그는 맵의 핵심 특징을 빠르게 설명하지만 제작 버전마다 규칙이 다를 수 있습니다. 상세 설명에서 권장 인원, 난이도, 플레이 시간과 버전을 함께 확인한 뒤 다운로드하세요.