
스트라타 스타크래프트 맵 모음
'스트라타' 태그가 등록된 맵을 모았습니다. 장르 하나로 찾기 어려운 플레이 방식, 난이도와 특징을 중심으로 인기 맵과 최신 맵을 비교해 보세요.
- 등록 맵
- 3개
- 누적 다운로드
- 1
- 누적 조회
- 73
인기 맵
다운로드와 조회 반응이 높은 맵입니다.
![[3] 거절과 복종 (Refusal and Submission) 맵 미리보기](https://cdn-star-data.huzy.net/thumbnail_a2b5f8515fee4a7d85672608fce9ad40.jpg)
[3] 거절과 복종 (Refusal and Submission)
스타크래프트 브루드워 유즈맵 '[3]拒绝与服从'는 통신기를 수리한 플레이어가 UED로부터 받은 메시지를 해석하는 디펜스형 미션입니다. 맵의 중심에는 통신기가 배치되어 있으며, 주변에는 적의 기지나 공격 루트가 이어지는 구조가 보입니다. 플레이어는 제한된 자원을 활용해 통신기를 보호하면서 적의 공격을 방어해야 합니다. 맵은 전체적으로 어두운 분위기의 테마로 구성되어 있으며, 적의 공격 패턴은 랜덤하게 발생하는 것으로 추정됩니다. 플레이 방식은 통신기를 중심으로 한 방어에 중점을 두고 있습니다. 적의 공격 주기가 일정하지 않으며, 때로는 소규모 유닛이 끊임없이 몰려오기도 하고, 때로는 대규모 병력이 한꺼번에 쳐들어오는 패턴이 보입니다. 방어선을 구축할 수 있는 공간이maps입니다. 플레이어는 초반에 자원을 확보해 방어 건물이나 유닛을 배치할 수 있으며, 통신기의 체력이 낮아지면 게임 오버가 됩니다. 맵의 구조상 중앙 통신기 주변에 방어 타워를 건설할 수 있는 위치가 있으며, 이를 활용해 적의 공격을 최대한 효율적으로 막아내야 합니다. 이 맵은 1인 플레이를 염두에 두고 제작된 것으로 보이며, 플레이 시간은 맵의 난이도와 플레이어의 방어 전략에 따라 크게 달라질 수 있습니다. 초보자는 방어 건물의 배치와 자원 관리에서 어려움을 느낄 수 있지만, 경험이 쌓이면 점차 안정적인 방어 루틴을 확보할 수 있습니다. 추천 대상은 스타크래프트의 디펜스 유즈맵을 좋아하는 플레이어이며, 특히 통신기 보호에 중점을 둔 전략적 플레이를 즐기고자 하는 분들에게 적합할 것입니다. 플레이 전 확인해야 할 포인트는 통신기의 위치와 주변의 방어 가능한 공간입니다. 또한, 적의 공격 패턴을 미리 파악해 방어 건물이나 유닛을 배치하는 것이 중요합니다. 자원 관리가 원활하지 않다면 초반 방어가 쉽게 무너질 수 있으므로, 초반 자원 확보에 신경을 써야 합니다. This StarCraft: Brood War custom map '[3]拒绝与服从' presents a defense mission where players repair a communication device and interpret a message received from the UED. The map centers around the communication device, with surrounding areas leading to enemy bases or attack paths. Players must utilize limited resources to protect the device while fending off enemy attacks. The map features a dark-themed atmosphere, and enemy attack patterns appear to be randomized. The gameplay focuses on defending the communication device. Enemy attack cycles are inconsistent, with some waves consisting of small, continuous units while others involve large-scale assaults. There are spaces around the device where defensive buildings can be constructed. Players can secure resources early to place defensive structures or units; if the device's health drops too low, the game ends in defeat. Central to the map's layout is the communication device, surrounded by areas where defensive towers can be strategically placed to counter enemy advances. This map is designed for single-player experiences, though its duration varies based on difficulty and player strategy. Beginners may struggle with tower placement and resource management, but as they gain experience, they can establish more effective defensive routines. It is recommended for players who enjoy StarCraft's defense custom maps, particularly those who prefer strategic gameplay centered on protecting a key objective like the communication device. Before playing, it's crucial to identify the communication device's location and assess the surrounding areas for defensive placements. Understanding enemy attack patterns is equally important for arranging defensive buildings or units effectively. Poor early-game resource management can lead to an early collapse of defenses, so players should prioritize securing initial resources.
히드라리스크 어택 20001 하드 3 (Hydralisk Attack 20001 HARD 3)
히드라리스크 어택 20001 하드 3는 스타크래프트 브루드워의 디펜스 장르 유즈맵으로, 플레이어가 저그의 히드라리스크 다수를 상대로 본진을 방어하는紧凑한 구성이 특징이다. 맵은 수직으로 긴 직사각형 형태로 펼쳐져 있으며, 중앙에 위치한 본진에 적의 공격로가 집중되고 좌우로 넓은 공간이 배치되어 있어 다수의 적 유닛을 효율적으로 상대할 수 있도록 설계되어 보인다. 맵의 가장자리에 위치한 자원 지대와 미네랄 멀미는 플레이어에게 지속적인 자원 공급을 보장하며, 방어선을 구축하기 위해 필요한 건물 배치와 유닛 컨트롤에 대한 전략적 깊이를 더한다. 맵 제목에서 알 수 있듯 난이도는 'HARD'로 설정되어 있어, 초보자는 물론 숙련된 플레이어에게도 긴장감을 제공할 것으로 추정된다. 특히 히드라리스크의 빠른 공격 속도와 다수 출현으로 인해 방어선의 안정화와 자원 관리가 매우 중요하며, 이는 맵을 플레이할 때의 핵심 도전 과제로 작용한다. 이 맵은 디펜스 장르의 기본 틀을 유지하면서도 긴 플레이 시간과 높은 난이도로 인해 반복 플레이를 유도하는 구조를 가지고 있다. 추천 대상은 디펜스 장르에 익숙한 플레이어이며, 특히 긴장감 있는 방어전을 즐기거나 저그 유닛을 상대로 전략을 다듬고 싶은 유저에게 적합할 것으로 보인다. 플레이 전에는 본진 주변의 방어 건물 배치 가능 여부와 자원 라인의 안정성을 미리 점검하는 것이 중요하다. 또한, 히드라리스크의 공격 패턴과 스폰 위치를 숙지하여 방어선을 효과적으로 구축할 수 있도록 준비하는 것이 좋다. 맵의 긴 세로 구조는 시야 확보와 유닛 이동 경로 설정에도 영향을 미치므로, 넓은 시야를 확보할 수 있는 위치 선정을 고려해야 한다. Hydralisk Attack 20001 Hard 3 is a defense-genre custom map in StarCraft: Brood War where players must defend their main base against waves of Zerg Hydralisks. The map features a vertically elongated rectangular layout, with the player’s base positioned centrally where enemy attack paths converge, and wide side areas designed to accommodate large numbers of incoming units. Continuous mineral lines and resource clusters along the map’s edges ensure steady income, adding strategic depth to base building and unit control. As indicated by its title, the map is set to "Hard" difficulty, offering a tense challenge for both beginners and experienced players alike. The rapid attack speed and sheer volume of Hydralisks demand stable defenses and careful resource management, making these the core challenges of the experience. While maintaining the core mechanics of the defense genre, the map’s extended playtime and high difficulty encourage repeated attempts. It is recommended for players familiar with defense maps, particularly those who enjoy high-pressure defensive battles or want to refine their strategies against Zerg units. Before playing, it’s important to check possible defensive building placements around the main base and the stability of your resource lines. Understanding Hydralisk attack patterns and spawn locations will also help in constructing effective defensive lines. The map’s tall vertical structure affects sightlines and unit movement, so positioning for maximum visibility should be a key consideration.
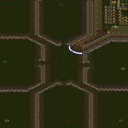
7vs1 HARD PROTOSS
스타크래프트 브루드워의 유즈맵 계의Classic 디펜스 장르로 자리잡은 7vs1 HARD PROTOSS는 7명의 플레이어가 단 한 명의 프로토스 컴퓨터를 상대로 맞서는 혈전이다. 맵은 4096x4096이라는 넓은 사막 지형을 배경으로 펼쳐지며, 중앙에 위치한 프로토스 네트워스(컴퓨터) 기지가 끊임없이 리버, 옵저버, 질럿, 드라군을 비롯한 강력한 유닛들로 공격을 퍼붓는다. 방어에 실패하면 순식간에 본진이 초토화될 수 있으므로, 플레이어들은 제한된 자원으로 신속하게 방어선을 구축해야 한다. 공격 패턴은 무작위가 아닌지라 일정 주기로 강력한 러시가 몰아치며, 이를 예측하고 대비를 해야만 살아남을 수 있다. 특히 프로토스가 리버를 대량 생산한다는 점에서 알 수 있듯, 전투의 핵심은 ‘리버 방어’에 있다. 플레이어들은 테란의 벙커, 프로토스의 실드 배터리, 저그의 스포어 콜로니 등 다양한 방어 건물을 배치해가며, 자원과 유닛 생산을 효율적으로 조율해야 한다. 초보자에게는 매우 어려운 이 맵은 경험 많은 플레이어에게는 치열한 전략 대결의 장으로, 한 판 한 판의 결과가 팀워크와 순발력에 크게 좌우된다. 맵의 특징은 단순히 방어하는 것이 아니라, 끊임없이 몰아치는 적의 공격을 예측하고 대처하는 ‘적응력’이 요구된다는 점이다. 방어선이 무너지면 곧바로 게임이 끝나므로, 모든 플레이어는 각자의 역할을 충실히 수행해야 한다. 추천하는 플레이 방식은 초반에는 최대한의 방어 건물을 배치한 후, 서서히 유닛을 생산해 반격에 나서거나 추가적인 방어선을 구축하는 것이다. 이 맵을 처음 플레이한다면 프로토스 컴퓨터의 공격 패턴을 숙지하는 것이 가장 중요하다. 또한, 자원 관리가 매우 치명적이므로 광물과 베스핀 가스를 신중히 사용해야 한다. 7vs1 HARD PROTOSS는 다인 플레이 디펜스 게임의 정석으로, 팀워크와 전략의 중요성을 뼈저리게 느낄 수 있는 맵이다. 이 맵을 즐기기 위해서는 기본적인 스타크래프트의 유닛 및 건물에 대한 이해가 필수이며, 특히 프로토스의 유닛 조합과 방어 건물의 배치에 익숙해질 필요가 있다. 플레이 전에는 맵의 지형을 충분히 숙지하고, 방어 건물의 효율적인 배치 방법을 연습해두는 것이 좋다. 이 맵은 단 한 번의 실수로도 게임이 끝날 수 있으므로, 긴장감을 유지하며 플레이해야 한다. 7vs1 HARD PROTOSS is a classic defense-style custom map in StarCraft: Brood War where seven players must defend against a single, relentless Protoss AI opponent. The game unfolds on a vast 4096x4096 desert-themed map, with the Protoss AI stationed in the center, launching waves of powerful units including Reavers, Observers, Zealots, and Dragoons. Failure to build a robust defense early on will result in the swift destruction of your base, making quick and strategic placement of defensive structures crucial. The AI’s attack patterns are semi-random but follow a predictable rhythm, with intense rushes at set intervals. The core challenge lies in countering the AI’s Reaver-heavy assaults, which require careful positioning of Terran bunkers, Protoss shield batteries, or Zerg spore colonies. Efficient resource management and unit production are vital, as the AI’s relentless pressure leaves little room for error. For beginners, this map is daunting, but for experienced players, it becomes a thrilling test of adaptability and teamwork. Each player must fulfill their role flawlessly, as the collapse of any defensive line spells immediate defeat. The map demands more than just passive defense—it requires anticipating the AI’s next move and responding with precision. Early game strategy revolves around fortifying your base with defensive structures before gradually shifting to unit production for counterattacks or additional reinforcements. New players should focus on learning the AI’s attack patterns, particularly its reliance on Reavers, and mastering defensive building placements. Resource management is another critical aspect, as every mineral and Vespene gas must be used wisely. 7vs1 HARD PROTOSS stands as a quintessential multiplayer defense game, highlighting the importance of coordination and strategy. To fully enjoy this map, players should have a solid understanding of StarCraft units and buildings, especially Protoss units and defensive structures. Before diving in, it’s advisable to familiarize yourself with the map layout and practice efficient defensive building placements. The game’s tension stems from its unforgiving nature—one mistake can cost you the entire match, so maintaining focus is essential throughout.
최근 등록된 맵
새로 추가된 파일과 버전을 확인하세요.
7vs1 HARD PROTOSS
스타크래프트 브루드워의 유즈맵 계의Classic 디펜스 장르로 자리잡은 7vs1 HARD PROTOSS는 7명의 플레이어가 단 한 명의 프로토스 컴퓨터를 상대로 맞서는 혈전이다. 맵은 4096x4096이라는 넓은 사막 지형을 배경으로 펼쳐지며, 중앙에 위치한 프로토스 네트워스(컴퓨터) 기지가 끊임없이 리버, 옵저버, 질럿, 드라군을 비롯한 강력한 유닛들로 공격을 퍼붓는다. 방어에 실패하면 순식간에 본진이 초토화될 수 있으므로, 플레이어들은 제한된 자원으로 신속하게 방어선을 구축해야 한다. 공격 패턴은 무작위가 아닌지라 일정 주기로 강력한 러시가 몰아치며, 이를 예측하고 대비를 해야만 살아남을 수 있다. 특히 프로토스가 리버를 대량 생산한다는 점에서 알 수 있듯, 전투의 핵심은 ‘리버 방어’에 있다. 플레이어들은 테란의 벙커, 프로토스의 실드 배터리, 저그의 스포어 콜로니 등 다양한 방어 건물을 배치해가며, 자원과 유닛 생산을 효율적으로 조율해야 한다. 초보자에게는 매우 어려운 이 맵은 경험 많은 플레이어에게는 치열한 전략 대결의 장으로, 한 판 한 판의 결과가 팀워크와 순발력에 크게 좌우된다. 맵의 특징은 단순히 방어하는 것이 아니라, 끊임없이 몰아치는 적의 공격을 예측하고 대처하는 ‘적응력’이 요구된다는 점이다. 방어선이 무너지면 곧바로 게임이 끝나므로, 모든 플레이어는 각자의 역할을 충실히 수행해야 한다. 추천하는 플레이 방식은 초반에는 최대한의 방어 건물을 배치한 후, 서서히 유닛을 생산해 반격에 나서거나 추가적인 방어선을 구축하는 것이다. 이 맵을 처음 플레이한다면 프로토스 컴퓨터의 공격 패턴을 숙지하는 것이 가장 중요하다. 또한, 자원 관리가 매우 치명적이므로 광물과 베스핀 가스를 신중히 사용해야 한다. 7vs1 HARD PROTOSS는 다인 플레이 디펜스 게임의 정석으로, 팀워크와 전략의 중요성을 뼈저리게 느낄 수 있는 맵이다. 이 맵을 즐기기 위해서는 기본적인 스타크래프트의 유닛 및 건물에 대한 이해가 필수이며, 특히 프로토스의 유닛 조합과 방어 건물의 배치에 익숙해질 필요가 있다. 플레이 전에는 맵의 지형을 충분히 숙지하고, 방어 건물의 효율적인 배치 방법을 연습해두는 것이 좋다. 이 맵은 단 한 번의 실수로도 게임이 끝날 수 있으므로, 긴장감을 유지하며 플레이해야 한다. 7vs1 HARD PROTOSS is a classic defense-style custom map in StarCraft: Brood War where seven players must defend against a single, relentless Protoss AI opponent. The game unfolds on a vast 4096x4096 desert-themed map, with the Protoss AI stationed in the center, launching waves of powerful units including Reavers, Observers, Zealots, and Dragoons. Failure to build a robust defense early on will result in the swift destruction of your base, making quick and strategic placement of defensive structures crucial. The AI’s attack patterns are semi-random but follow a predictable rhythm, with intense rushes at set intervals. The core challenge lies in countering the AI’s Reaver-heavy assaults, which require careful positioning of Terran bunkers, Protoss shield batteries, or Zerg spore colonies. Efficient resource management and unit production are vital, as the AI’s relentless pressure leaves little room for error. For beginners, this map is daunting, but for experienced players, it becomes a thrilling test of adaptability and teamwork. Each player must fulfill their role flawlessly, as the collapse of any defensive line spells immediate defeat. The map demands more than just passive defense—it requires anticipating the AI’s next move and responding with precision. Early game strategy revolves around fortifying your base with defensive structures before gradually shifting to unit production for counterattacks or additional reinforcements. New players should focus on learning the AI’s attack patterns, particularly its reliance on Reavers, and mastering defensive building placements. Resource management is another critical aspect, as every mineral and Vespene gas must be used wisely. 7vs1 HARD PROTOSS stands as a quintessential multiplayer defense game, highlighting the importance of coordination and strategy. To fully enjoy this map, players should have a solid understanding of StarCraft units and buildings, especially Protoss units and defensive structures. Before diving in, it’s advisable to familiarize yourself with the map layout and practice efficient defensive building placements. The game’s tension stems from its unforgiving nature—one mistake can cost you the entire match, so maintaining focus is essential throughout.
히드라리스크 어택 20001 하드 3 (Hydralisk Attack 20001 HARD 3)
히드라리스크 어택 20001 하드 3는 스타크래프트 브루드워의 디펜스 장르 유즈맵으로, 플레이어가 저그의 히드라리스크 다수를 상대로 본진을 방어하는紧凑한 구성이 특징이다. 맵은 수직으로 긴 직사각형 형태로 펼쳐져 있으며, 중앙에 위치한 본진에 적의 공격로가 집중되고 좌우로 넓은 공간이 배치되어 있어 다수의 적 유닛을 효율적으로 상대할 수 있도록 설계되어 보인다. 맵의 가장자리에 위치한 자원 지대와 미네랄 멀미는 플레이어에게 지속적인 자원 공급을 보장하며, 방어선을 구축하기 위해 필요한 건물 배치와 유닛 컨트롤에 대한 전략적 깊이를 더한다. 맵 제목에서 알 수 있듯 난이도는 'HARD'로 설정되어 있어, 초보자는 물론 숙련된 플레이어에게도 긴장감을 제공할 것으로 추정된다. 특히 히드라리스크의 빠른 공격 속도와 다수 출현으로 인해 방어선의 안정화와 자원 관리가 매우 중요하며, 이는 맵을 플레이할 때의 핵심 도전 과제로 작용한다. 이 맵은 디펜스 장르의 기본 틀을 유지하면서도 긴 플레이 시간과 높은 난이도로 인해 반복 플레이를 유도하는 구조를 가지고 있다. 추천 대상은 디펜스 장르에 익숙한 플레이어이며, 특히 긴장감 있는 방어전을 즐기거나 저그 유닛을 상대로 전략을 다듬고 싶은 유저에게 적합할 것으로 보인다. 플레이 전에는 본진 주변의 방어 건물 배치 가능 여부와 자원 라인의 안정성을 미리 점검하는 것이 중요하다. 또한, 히드라리스크의 공격 패턴과 스폰 위치를 숙지하여 방어선을 효과적으로 구축할 수 있도록 준비하는 것이 좋다. 맵의 긴 세로 구조는 시야 확보와 유닛 이동 경로 설정에도 영향을 미치므로, 넓은 시야를 확보할 수 있는 위치 선정을 고려해야 한다. Hydralisk Attack 20001 Hard 3 is a defense-genre custom map in StarCraft: Brood War where players must defend their main base against waves of Zerg Hydralisks. The map features a vertically elongated rectangular layout, with the player’s base positioned centrally where enemy attack paths converge, and wide side areas designed to accommodate large numbers of incoming units. Continuous mineral lines and resource clusters along the map’s edges ensure steady income, adding strategic depth to base building and unit control. As indicated by its title, the map is set to "Hard" difficulty, offering a tense challenge for both beginners and experienced players alike. The rapid attack speed and sheer volume of Hydralisks demand stable defenses and careful resource management, making these the core challenges of the experience. While maintaining the core mechanics of the defense genre, the map’s extended playtime and high difficulty encourage repeated attempts. It is recommended for players familiar with defense maps, particularly those who enjoy high-pressure defensive battles or want to refine their strategies against Zerg units. Before playing, it’s important to check possible defensive building placements around the main base and the stability of your resource lines. Understanding Hydralisk attack patterns and spawn locations will also help in constructing effective defensive lines. The map’s tall vertical structure affects sightlines and unit movement, so positioning for maximum visibility should be a key consideration.
[3] 거절과 복종 (Refusal and Submission)
스타크래프트 브루드워 유즈맵 '[3]拒绝与服从'는 통신기를 수리한 플레이어가 UED로부터 받은 메시지를 해석하는 디펜스형 미션입니다. 맵의 중심에는 통신기가 배치되어 있으며, 주변에는 적의 기지나 공격 루트가 이어지는 구조가 보입니다. 플레이어는 제한된 자원을 활용해 통신기를 보호하면서 적의 공격을 방어해야 합니다. 맵은 전체적으로 어두운 분위기의 테마로 구성되어 있으며, 적의 공격 패턴은 랜덤하게 발생하는 것으로 추정됩니다. 플레이 방식은 통신기를 중심으로 한 방어에 중점을 두고 있습니다. 적의 공격 주기가 일정하지 않으며, 때로는 소규모 유닛이 끊임없이 몰려오기도 하고, 때로는 대규모 병력이 한꺼번에 쳐들어오는 패턴이 보입니다. 방어선을 구축할 수 있는 공간이maps입니다. 플레이어는 초반에 자원을 확보해 방어 건물이나 유닛을 배치할 수 있으며, 통신기의 체력이 낮아지면 게임 오버가 됩니다. 맵의 구조상 중앙 통신기 주변에 방어 타워를 건설할 수 있는 위치가 있으며, 이를 활용해 적의 공격을 최대한 효율적으로 막아내야 합니다. 이 맵은 1인 플레이를 염두에 두고 제작된 것으로 보이며, 플레이 시간은 맵의 난이도와 플레이어의 방어 전략에 따라 크게 달라질 수 있습니다. 초보자는 방어 건물의 배치와 자원 관리에서 어려움을 느낄 수 있지만, 경험이 쌓이면 점차 안정적인 방어 루틴을 확보할 수 있습니다. 추천 대상은 스타크래프트의 디펜스 유즈맵을 좋아하는 플레이어이며, 특히 통신기 보호에 중점을 둔 전략적 플레이를 즐기고자 하는 분들에게 적합할 것입니다. 플레이 전 확인해야 할 포인트는 통신기의 위치와 주변의 방어 가능한 공간입니다. 또한, 적의 공격 패턴을 미리 파악해 방어 건물이나 유닛을 배치하는 것이 중요합니다. 자원 관리가 원활하지 않다면 초반 방어가 쉽게 무너질 수 있으므로, 초반 자원 확보에 신경을 써야 합니다. This StarCraft: Brood War custom map '[3]拒绝与服从' presents a defense mission where players repair a communication device and interpret a message received from the UED. The map centers around the communication device, with surrounding areas leading to enemy bases or attack paths. Players must utilize limited resources to protect the device while fending off enemy attacks. The map features a dark-themed atmosphere, and enemy attack patterns appear to be randomized. The gameplay focuses on defending the communication device. Enemy attack cycles are inconsistent, with some waves consisting of small, continuous units while others involve large-scale assaults. There are spaces around the device where defensive buildings can be constructed. Players can secure resources early to place defensive structures or units; if the device's health drops too low, the game ends in defeat. Central to the map's layout is the communication device, surrounded by areas where defensive towers can be strategically placed to counter enemy advances. This map is designed for single-player experiences, though its duration varies based on difficulty and player strategy. Beginners may struggle with tower placement and resource management, but as they gain experience, they can establish more effective defensive routines. It is recommended for players who enjoy StarCraft's defense custom maps, particularly those who prefer strategic gameplay centered on protecting a key objective like the communication device. Before playing, it's crucial to identify the communication device's location and assess the surrounding areas for defensive placements. Understanding enemy attack patterns is equally important for arranging defensive buildings or units effectively. Poor early-game resource management can lead to an early collapse of defenses, so players should prioritize securing initial resources.
맵 선택 가이드
태그는 맵의 핵심 특징을 빠르게 설명하지만 제작 버전마다 규칙이 다를 수 있습니다. 상세 설명에서 권장 인원, 난이도, 플레이 시간과 버전을 함께 확인한 뒤 다운로드하세요.