
스트라 스타크래프트 맵 모음
'스트라' 태그가 등록된 맵을 모았습니다. 장르 하나로 찾기 어려운 플레이 방식, 난이도와 특징을 중심으로 인기 맵과 최신 맵을 비교해 보세요.
- 등록 맵
- 7개
- 누적 다운로드
- 0
- 누적 조회
- 320
인기 맵
다운로드와 조회 반응이 높은 맵입니다.
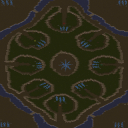
티거 곰바 (tigger-gomba)
스타크래프트 브루드워의 고전 유즈맵으로 잘 알려진 〈tigger-gomba〉는 8인용 밀리 맵으로, 넓은 사막 지형이 펼쳐진 중앙 지역을 중심으로 symmetrical(대칭) 구조의 배치로 구성되어 있다. 맵의 이름은 제작자 'tigger'의 이름을 딴 것으로 보이며, 1999년에 제작된 오래된 맵임에도 불구하고 여전히 많은 유저들에게 사랑받고 있는 저변의 스테디셀러 맵 중 하나다. 맵의 전체적인 분위기는 사막 테마에 걸맞게 황량한 사막 평원과 드문드문 배치된 바위 지형이 특징적이며, 중앙 지역에는 광물과 가스가 균형 있게 배치되어 있어 초반부터 치열한 자원 확보 경쟁이 발생한다. symmetrical 구조 덕분에 양 진영 간의 전략적 균형이 잘 맞춰져 있어, 테란의 경우 벙커링이나Siege Tank를 활용한 방어 라인 구축이, 저그와 프로토스의 경우 멀티 태스크링과 빠른 확장이 중요한 포인트가 된다. 또한 맵의 중앙 지역은 넓은 평지이기 때문에 공중 유닛의 교전이나 대형 전투가 자주 발생하는 장소로, 유닛의 컨트롤과micro management가 승패를 가르는 핵심 요소로 작용한다. 맵의 난이도는 초보자들이 처음 플레이하기에는 다소 어려운 편이지만, symmetrical 구조와 자원 밸런스가 잘 맞춰져 있어 숙련자들에게는 전략적 깊이를 제공하는 매력적인 맵으로 평가된다. 추천 대상은 스타크래프트 밀리 경험이 있는 유저들, symmetrical 맵의 전략적 균형을 즐기는 유저, 그리고 symmetrical 맵에서의 micro management와 멀티 태스크링 능력을 키우고 싶은 유저들에게 적합하다. 플레이 전에는 중앙 지역에서의 전투와 멀티 확보 타이밍을 carefully 고려해야 하며, symmetrical 구조상 양 진영 간의 균형이 깨지지 않도록 자원과 유닛 배치에 신경 써야 한다. 또한, 광물과 가스의 배치가 맵의 symmetrical 구조를 고려한 균형형이기 때문에, 초반 빌드 오더와 자원 확보 전략을 미리 숙지하는 것이 중요하다. 〈tigger-gomba〉 is a classic Brood War custom map well-known among StarCraft players. Designed as an 8-player melee map, it features a wide desert terrain at its center with a symmetrical layout. The map’s name likely comes from its creator, “tigger,” and despite being made in 1999, it remains a beloved steady-seller among many users. The overall atmosphere matches the desert theme, with barren plains and scattered rock formations, while the central area balances mineral and gas deposits to spark intense early-game resource competition. Thanks to its symmetrical design, both sides maintain strategic parity. Terrans excel with bunker rushes or Siege Tank lines, while Zerg and Protoss must prioritize multitasking and rapid expansions. The central expanse invites frequent large-scale clashes and aerial engagements, where unit control and micro-management often decide the outcome. While the map can feel tough for beginners, its balanced resources and symmetrical structure offer deep strategic play for veterans. It’s best suited for experienced StarCraft melee players, fans of symmetrical layouts, and those looking to sharpen their micro and multitasking skills in such settings. Before playing, carefully plan your timing for central battles and multi expansions, and keep resource and unit placements balanced to preserve the map’s symmetry. Since mineral and gas are distributed evenly to support the symmetrical design, mastering early build orders and resource strategies is key.
![후로관 [DW4] (Hu Lao Gate [DW4]) 맵 미리보기](https://cdn-star-data.huzy.net/thumbnail_710b7e97d348484f8419bc4dbc6b9173.jpg)
후로관 [DW4] (Hu Lao Gate [DW4])
스타크래프트 브루드워의 유즈맵 ‘후로관 [DW4]’는 총 7명의 플레이어가 도전할 수 있는 디펜스 장르의 맵으로, 후로관이라는 이름답게 입구를 굳게 지키며 끊임없이 몰려드는 적군을 상대로 teritorry를 사수하는 전략을 요구한다. 맵 중앙에는 거대한 성채 형태의 건물이 있으며, 성벽 주변으로 좁고 복잡한 통로가 이어져 있어 방어 병력을 효율적으로 배치하기 좋은 구조로 설계되어 있다. 성채 내부와 외벽 사이의 공간은 좁아 탱크나 골리앗 같은 중장갑 유닛을 활용해 전선을 형성하기 좋으며, 반대편에서 몰려오는 적의 예봉을 꺾을 수 있도록 입구 양쪽에 방어 타워를 설치할 수 있는 위치가 마련되어 있다. 플레이어는 초기 자원으로 미네랄과 가스를 확보한 뒤, 적절한 타이밍에 병력을 보강하거나 방어 시설을 업그레이드해야 하며, 특히 입구 주변의 좁은 길목은 병력의 전술을 엄밀히 짜야만 적의 물량을 버틸 수 있다. 맵 특유의 입구 구조와 좁은 길목은 유닛의 컨트롤과 조합을 중요시하며, 특히 초보자와 숙련자 간의 실력 격차가 두드러지는 유즈맵으로 꼽힌다. 플레이 난이도는 어려움에 가깝지만, 팀웍과 전략적 사고가 뒷받침된다면 충분히 극복할 수 있는 수준이다. 후로관 [DW4]는 오랜 기간 사랑받아 온 유즈맵답게 맵 곳곳에 숨겨진 기술적 요소와 진행 루트가 존재하며, 이 부분은 반복 플레이를 통해 숙지하는 것이 좋다. 특히 입구와 성채 사이의 거리, 병력 배치의 최적 포인트, 적의 공격 패턴 변화 등은 게임을 유리하게 이끌 수 있는 핵심 요소로, 초반부터 입구를 굳게 지키는 것이 무엇보다 중요하다. 이 맵은 디펜스 유즈맵을 좋아하는 플레이어들에게는 물론, 전략적 사고와 팀워크를 중시하는 유저들에게도 추천할 만한佳作이다. 다만, 좁은 길목과 제한된 공간 탓에 유닛의 컨트롤 미스가 치명적으로 작용할 수 있으니, 게임에 임하기 전에는 맵의 구조와 입구 Verteidiger(방어자)의 역할을 충분히 숙지할 필요가 있다. 또한, 적의 물량이 점점 증가하는 특성상 자원 관리와 업그레이드 타이밍을 놓치지 않도록 주의해야 한다. 이 맵은 순수한 방어전이라는 점에서 전략적 깊이가 깊을 뿐만 아니라, 맵의 디자인 자체가 디펜스 장르의 묘미를 잘 담아내고 있어, 스타크래프트 유즈맵의 정석을 느낄 수 있는 작품으로 평가된다. StarCraft: Brood War's custom map "Huroguan [DW4]" is a defense-style map designed for up to seven players, where participants must fiercely guard the entrance against relentless waves of enemies to secure their territory—aptly reflected in its name. At the map's center stands a massive fortress-like structure, with narrow, intricate pathways weaving around its walls, allowing for efficient defensive unit placement. The tight spaces between the inner sanctum and outer walls are ideal for forming frontlines with heavy units like tanks and goliaths, while the entrances on either side feature strategic spots for defensive towers to blunt the enemy's advance. Players begin with secured mineral and gas resources, then must reinforce their forces or upgrade defenses at the right moments. The map’s signature entrance design and cramped corridors demand precise unit control and tactical composition, making it a map where skill gaps between beginners and veterans are especially pronounced. While the difficulty leans toward the hard side, success becomes achievable with strong teamwork and strategic thinking. As a long-standing beloved custom map, Huroguan [DW4] hides technical nuances and progression routes throughout its layout—elements best mastered through repeated play. Key factors like the distance between the entrance and fortress, optimal troop positioning, and adapting to shifting enemy attack patterns can tilt the game in your favor, with holding the entrance from the start being paramount. This map is a masterpiece worth recommending not only to defense-map enthusiasts but also to players who value strategic depth and teamwork. However, the tight spaces and limited room for maneuver mean that unit control mistakes can be fatal, so familiarizing yourself with the map’s structure and the defender’s role is essential before jumping in. Additionally, since enemy waves grow progressively stronger, careful resource management and timely upgrades are critical. Pure in its focus on defense, the map boasts deep strategic layers while its design perfectly captures the essence of the defense genre, making it a quintessential StarCraft custom map experience.
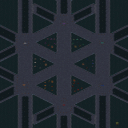
18웨이 러커 디펜스 익스트림 (18 way Lurker Defence X-treme)
스타크래프트 브루드워의 유즈맵 ‘18 way Lurker Defence X-treme(18웨이 러커 디펜스 익스트림)’은 이름 그대로 18방향에서 끊임없이 몰려드는 적들을 상대로 러커를 주력으로 삼아 방어를 펼치는 디펜스 장르의 유즈맵이다. 맵 중앙에 위치한 플레이어 기지 주변으로는 18개의 입구가 radial(방사형)으로 배치되어 있으며, 각 입구마다 일정 주기로 적 유닛이 출현한다. 러커가 주력 유닛이지만, 입구마다 배치된 방어 건물이나 터렛, 그리고 플레이어의 전략적 선택에 따라 스포어 콜로니, 성큰 콜로니, 발키리 등으로 구성된 방어 라인을 구축할 수 있다. 특히 ‘Walling is Gay’이라는 내부 설명의 한마디가 시사하듯, 초반 벽을 치는 전통적인 디펜스 전략보다는 러커를 적극 활용한 능동적인 방어와 업그레이드를 통한 효율적인 대처가 핵심이다. 맵의 특징은 30단계로 나뉜 웨이브가 진행되면서 점점 더 강력한 적 유닛이 등장한다는 점으로, 초반에는 저글링과 히드라리스크가 주를 이루지만 후반으로 갈수록 울트라리스크, 브루탈리스크, 심지어 캐리어까지 등장한다. 플레이어는 각 웨이브를 통과할 때마다 자원을 획득할 수 있으며, 이를 바탕으로 입구마다 러커를 배치하거나 방어 건물의 업그레이드를 우선시해야 한다. 맵의 난이도는 매우 높아 초보자는 빠른 클리어에 어려움을 느낄 수 있지만, 러커의 사정거리와 업그레이드 효율, 그리고 빠른 입구별 대처가 요구되는 만큼 숙련자라면 전략의 깊이를 즐길 수 있다. 추천 대상은 디펜스 장르를 좋아하는 플레이어, 러커를 주력으로 삼는 전략을 선호하는 유저, 그리고 긴장감 넘치는 웨이브 디펜스를 즐기고자 하는 이들에게 적합하다. 플레이 전 반드시 확인해야 할 포인트는 입구별로 러커를 배치할 수 있는 공간이 제한적이라는 점과, 업그레이드와 자원 관리priority를 미리 계획해야 한다는 점이다. 맵의 구조상 6인 플레이가 권장되며, 팀 플레이보다는 각자의 방어 라인을 구축하는 индивидуаль 전략이 중요하다는 특징을 염두에 두고 플레이에 임해야 한다. 30단계의 긴 여정은 플레이어의 집중력과 적응력을 동시에 요구하기 때문에, 부담 없이 즐기기 위해서는 초반 웨이브부터 꾸준한 플레이가 필요하다. StarCraft: Brood War's custom map *18 Way Lurker Defence X-treme* is a defense-style game where players must defend against endless waves of enemies from 18 directions, primarily using Lurkers. The player's base is surrounded by 18 radial entrances, each spawning enemies at regular intervals. While Lurkers are the main unit, players can also build defensive structures like Spore Colonies, Sunken Colonies, and missile turrets at each entrance, or customize their defense with units like Valkyries. The map emphasizes active defense and upgrades over traditional walling strategies, as hinted by the internal description *"Walling is Gay."* The challenge escalates through 30 waves, starting with basic units like Zerglings and Hydralisks but eventually introducing Ultralisks, Brutalisks, and even Carriers in later stages. Players earn resources after each wave, allowing them to place Lurkers or upgrade defenses strategically. The high difficulty may overwhelm beginners, but experienced players will appreciate the depth of Lurker range management, upgrades, and quick entrance-specific responses. This map is ideal for fans of defense games, Lurker-focused strategies, and intense wave-based challenges. Before playing, note that Lurker placement space is limited per entrance and that careful planning of upgrades and resource allocation is crucial. The map is best enjoyed with six players, each building their own defense line rather than relying on teamwork. The 30-wave journey demands focus and adaptability, so consistent play from the early waves is recommended for an enjoyable experience.
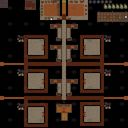
점령 방어전 (Squatting Defenders)
스타크래프트 브루드워의 숨은 보석 중 하나인 'Squatting Defenders'는 디펜스 장르의 유즈맵으로, 플레이어들이 적의 끊임없는 공격을 방어하며 생존을 다투는 긴장감 넘치는 게임입니다. 맵은 중앙에 위치한 본진과 이를 둘러싼 방어 시설, 그리고 끊임없이 쏟아지는 적의 웨이브로 구성되어 있습니다. 플레이어는 본진을 지키기 위해 건물을 건설하고 유닛을 배치해야 하며, 각 웨이브가 끝날 때마다 새로운 적의 공격 패턴을 경험할 수 있습니다. 맵의 특징은 방어 시설의 배치와 업그레이드 시스템으로, 이를 통해 플레이어는 전략적인 선택을 강요받습니다. 예를 들어, 특정 위치에 포격을 집중하거나, 방어 타워의 레벨을 올려 적의 공격을 효과적으로 차단할 수 있습니다. 또한, 맵의 디자인과 색상 구성은 황혼 테마를 사용하여 시각적으로도 매력적입니다. 이 맵은 특히 디펜스 장르를 좋아하는 플레이어들에게 추천되며, 초보자와 숙련자 모두 즐길 수 있도록 난이도 조절이 가능한 구조로 설계되었습니다. 플레이 전에는 방어 시설의 배치와 업그레이드 우선순위를 carefully하게 계획하는 것이 중요합니다. 적의 공격 패턴을 미리 파악하고, 보완할 수 있는 방어 체계를 구축하는 것이 승리의 열쇠가 될 것입니다. 또한, 맵의 중앙 본진을 중심으로 한 공격 루트는 거의 고정되어 있으므로, 이를 바탕으로 방어 전략을 수립하는 것이 좋습니다. 이 맵은 6인 플레이를 지원하며, 각 플레이어는 개별적인 본진을 방어해야 합니다. 팀 플레이를 통해 협동하는 것도 가능하며, 이를 통해 더욱 전략적인 플레이가 가능해집니다. 맵의 긴장감과 연속된 전투는 플레이어에게 끊임없는 긴장감을 제공하며, 한 번 플레이하면 빠져들 수밖에 없는 매력이 있습니다. 이 맵은 디펜스 유즈맵의 정석을 보여주며, 스타크래프트 브루드워의 유즈맵 중에서도 손꼽히는佳作입니다. Squatting Defenders is one of the hidden gems in StarCraft: Brood War's custom maps, offering an intense defensive experience where players must protect their main base from relentless enemy waves. The map features a central base surrounded by defensive structures, with waves of enemies continuously attacking from multiple directions. Players must strategically place buildings and units, upgrading defenses to withstand progressively stronger assaults. The map's design emphasizes strategic placement of defensive towers and resource management, requiring players to make critical decisions at each stage. The twilight-themed aesthetics enhance the visual appeal, creating a moody and immersive atmosphere. This map is highly recommended for fans of the defense genre, catering to both beginners and experienced players with adjustable difficulty. Before playing, it's essential to plan your defense layout and prioritize upgrades to counter specific enemy patterns. The fixed attack routes from the map's center allow for focused defensive strategies, making preparation key to survival. Supporting up to 6 players, the map can be played individually or cooperatively, adding a layer of teamwork and strategy. The constant pressure from enemy waves creates an adrenaline-filled experience that keeps players engaged. Squatting Defenders exemplifies the pinnacle of defense custom maps in StarCraft: Brood War, standing out as a must-play title for genre enthusiasts.
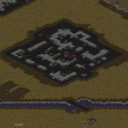
좀비의 공격: 심판의 날 (Zombies Attack: Judgement Day)
Zombies Attack: Judgement Day는 스타크래프트 브루드워의 유즈맵으로, 플레이어들이 좀비 무리를 상대로 방어전을 펼치는 디펜스 장르의 맵이다. 이 맵은 내부 설명에서도 언급된 것처럼 '선한 세력이 악마를 무찌른다'는 스토리 라인에 기반을 두고 있으며, 총 6명의 플레이어가 참여할 수 있는 구조로 설계되었다. 맵 중앙에 위치한 요새를 중심으로 적들이 끊임없이 몰려오며, 이를 저지하기 위해 플레이어는 다양한 유닛과 건물, 방어 시설을 활용해야 한다. 맵의 디자인과 타일셋은 황무지 테마로 구성되어 있어, 초토화된 대지 위에서 전투가 벌어지는 듯한 분위기를 연출한다. 플레이 방식은 크게 두 가지로 나뉜다. 첫 번째는 요새 주변을 순찰하며 적을 사살하는 것과 요새 자체를 보호하는 것이다. 플레이어는 초반에 제한된 자원으로 요새를 건설하고 유닛을 생산해야 하기 때문에 자원 관리가 중요하다. 또한, 적들의 공격 패턴이 시간에 따라 변하기 때문에 타이밍을 맞춰 방어 전략을 수립해야 한다. 맵의 크기는 4096x4096으로 достаточно 넓지만, 요새 주변의 좁은 길목에서 전투가 집중되면서 긴장감이 고조된다. 이 맵의 매력은 끊임없이 밀려오는 적들 속에서 살아남기 위해 협력과 전략을 구사해야 한다는 점이다. 초보 플레이어부터 숙련자까지 모두 즐길 수 있지만, 팀워크와 전략적 사고가 필수적이기 때문에 혼자서는 클리어하기 어려운 구조다. 추천하는 대상은 스타크래프트 유즈맵을 즐기는 플레이어라면 누구나 시도해 볼 만한 맵이다. 특히 디펜스 장르를 좋아하는 유저들에게는 훌륭한 선택지가 될 것이다. 또한, 팀 플레이를 중시하는 플레이어라면 좀비 무리와 맞서기 위해 팀원 간의 소통과 역할 분담을 연습하기에도 좋은 기회가 된다. 다만, 초반 자원 부족으로 인한 어려움을 극복하기 위해 게임 내 팁을 숙지하는 것이 중요하다. 예를 들어, 초반에 빠르게 자원을 확보하고 방어 건물을 적시에 건설하는 것이 승리의 열쇠가 된다. 이 맵은 단순히 적을 무찌르는 것에서 그치지 않고, 어떻게 하면 효율적으로 방어선을 구축하고 자원을 관리할지에 대한 전략적 깊이를 제공한다. 또한, 맵의 분위기가Dark하고 긴장감 넘치는 요소도 플레이어에게 몰입감을 더해준다. Zombies Attack: Judgement Day is a user-made defense map in StarCraft: Brood War where players battle against waves of zombies. Based on the internal description, the story revolves around 'good forces defeating the devil,' and the map supports up to six players in a cooperative defense scenario. The core gameplay involves protecting a central fortress from relentless zombie attacks using various units, buildings, and defensive structures. The map’s terrain and tileset are designed around a desolate wasteland theme, enhancing the post-apocalyptic atmosphere. The gameplay is divided into two main tasks: patrolling the area around the fortress to eliminate enemies and actively defending the fortress itself. Players start with limited resources to construct their base and produce units, making resource management crucial. The zombies’ attack patterns change over time, requiring players to adapt their strategies accordingly. While the map is large at 4096x4096, combat focuses on the narrow passages around the fortress, creating intense and strategic moments. The map’s appeal lies in the need for teamwork and strategic planning to survive the constant waves of enemies. While accessible to both beginners and experienced players, its design makes solo play challenging without strong team coordination. This map is highly recommended for fans of StarCraft user-made maps, especially those who enjoy defense-style gameplay. It also serves as an excellent exercise in teamwork and role assignment for players who prefer cooperative challenges. Beginners may face initial difficulties due to resource constraints, so familiarizing themselves with in-game tips—such as efficient resource gathering and timely base construction—is essential. The map goes beyond simple combat, offering deep strategic elements focused on base defense and resource optimization. Additionally, its dark and tense atmosphere enhances player immersion, making it a standout choice for defense map enthusiasts.
웰컴 투 더 정글 (Welcome To The Jungle)
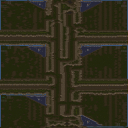
《WELCOME TO THE JUNGLE》는 스타크래프트: 브루드워에서 즐기는 6인용 밀리 맵으로, 적의 모든 건물을 파괴하는 것이 목표인 순수한 전투 맵이다. 맵의 전체적인 분위기는 사막 테마로 꾸며져 있으며, 넓은 평야와 곳곳에 흩어져 있는 잔디 언덕, 바위 지형이 시야를 가리며 전략적 움직임을 요구한다. 지형의 특징으로는 중앙에 위치한 비교적 평탄한 지역과, 양쪽 구석에 방어하기 용이한 언덕 지형이 눈에 띈다. 이 맵은 기본적인 밀리 맵의 틀을 따르지만, 넓은 맵 크기와 사막 배경이 주는 이질감으로 인해 플레이어에게 긴장감을 더한다. 전투는 시작 즉시 본진 인근의 미네랄과 가스 채취를 둘러싼 초반 러시가 중요하며, 중앙 언덕을 차지하는 것이 중반 이후 전투의 관건으로 보인다. 지형이 복잡하지 않지만 넓은 맵 크기 덕분에 컨트롤과 자원 관리가 동시에 요구되며, 특히 даль vison(시야)을 확보하기 위한 센터 점령이 승패를 가를 가능성이 크다. 초보자의 경우 넓은 맵에서 벌어지는 전투에 적응하기 어려울 수 있으나, 익숙해지면 다양한 전략을 구사할 수 있는 매력이 있는 맵이다. 또한, 사막 테마의 맵답게 건물이 흙빛 톤으로 구성되어 있어 시각적인 통일감도 뛰어나다. 이 맵의 가장 큰 특징은 단순하면서도 넓은 전투 공간과 사막이라는 독특한 분위기이며, 이 때문에 플레이어의 전략적 선택지가 넓어진다. 다만, 넓은 맵 특성상 초반 자원 채취와 멀티 테크트리 구축이 다소 느릴 수 있어, 초반부터의 압박이 중요하게 작용할 것으로 추정된다. 맵의 분위기와는 달리 전투는 매우 박진감 넘치며, 특히 중앙 언덕을 두고 벌어지는 전투는 긴장감을 더한다. 이 맵을 즐기기 위해서는 넓은 시야와 빠른 자원 관리가 필수적이며, 멀티 태스킹 능력이 뛰어난 플레이어에게 어울린다. 또한, 팀 플레이보다는 개인 또는 2인 조합이 더 효과적일 수 있어, 팀플레이보다는 자유로운 전투가 가능한 맵으로 느껴진다. 만약 당신이 스타크래프트의 기본 밀리 맵과는 다른 넓은 공간과 전략적인 전투를 즐기고 싶다면, 《WELCOME TO THE JUNGLE》를 시도해 보는 것을 추천한다. 사막의 황량한 분위기와 넓은 맵에서 펼쳐지는 전투의 짜릿함을 동시에 느낄 수 있을 것이다. 특히,Central Vision Control(중앙 시야 싸움)을 중시하는 플레이어에게는 최적의 맵으로 보인다. 플레이 전에는 맵의 지형과 자원 분포를 미리 익혀두면, 초반 러시에서 큰 이점을 얻을 수 있을 것이다. 넓은 맵에서 벌어지는 전투는 결코 만만치 않지만, 그만큼 전략의 깊이가 깊어 재미를 느낄 수 있는 맵이다. 초보자의 경우 맵의 넓이와 전투 intensity에 적응하는 데 시간이 필요할 수 있으니, 우선 연습 모드나 AI 대전으로 맵에 익숙해지는 것이 좋다. 이 맵은 단순한 전투 맵이 아니라, 넓은 공간에서 벌어지는 전략적 대결이라는 점을 기억하자. 사막의 황폐한 아름다움과 전투의 긴장감이 어우러진 이 맵은, 스타크래프트의 밀리 맵 중에서도 독특한 매력을 지닌 작품 중 하나다. 한번 플레이해보면 그 매력에 빠져들게 될 것이다. 또한, 이 맵은 6인용으로 설계되어 있어, 팀플레이보다는 개인 또는 듀오 플레이에 더 적합할 수 있으며, 다양한 전략을 시도해 볼 수 있는 공간이 제공된다. 맵의 넓은 공간은 때로는 지루하게 느껴질 수 있지만, 전투가 벌어질 때에는 그 넓은 공간이 오히려 전략의 다양성을 높이는 장점이 된다. 그러므로, 넓은 맵에서 펼쳐지는 전투의 짜릿함을 즐기고 싶다면, 《WELCOME TO THE JUNGLE》를 반드시 시도해 보길 바란다. 이 맵은 단순히 건물을 파괴하는 것이 아니라, 넓은 공간에서 벌어지는 전략적 대결의 장이라는 점을 잊지 말자. 넓은 맵과 사막 테마가 주는 독특한 분위기는 스타크래프트의 또 다른 매력을 느낄 수 있게 해준다. 한 번 경험해보면, 이 맵이 제공하는 전투의 짜릿함과 전략의 깊이에 빠져들게 될 것이다. 이 맵을 즐기기 위해서는 넓은 시야와 빠른 판단력이 요구되며, 특히 중앙 지역을 차지하는 것이 승리의 관건으로 보인다. 사막의 황량한 분위기와 전투의 긴장감이 어우러진 이 맵은, 스타크래프트의 밀리 맵 중에서도 독특한 경험을 제공하는 작품이다. 초보자와 숙련자 모두에게 매력적인 이 맵에서, 자신의 전략을 마음껏 발휘해 보길 바란다. 넓은 맵에서 펼쳐지는 전투는 결코 쉽지 않지만, 그만큼의 짜릿함과 성취감을 느낄 수 있을 것이다. 이 맵은 단순한 전투 맵이 아니라, 넓은 공간에서 벌어지는 전략적 대결의 장이라는 점을 기억하고, 즐겁게 플레이해 보자. 사막의 황폐한 아름다움과 전투의 긴장감이 어우러진 이 맵은, 스타크래프트의 또 다른 매력을 느낄 수 있는 특별한 작품이다. 한번 플레이해보면, 그 매력에 빠져들게 될 것이다. 넓은 공간과 사막 테마가 주는 독특한 분위기는, 스타크래프트의 밀리 맵 중에서도 손에 꼽히는 매력을 지닌 작품 중 하나다. 이 맵을 즐기기 위해서는 넓은 시야와 빠른 판단력이 필수적이며, 특히 중앙 지역을 차지하는 것이 승리의 관건으로 보인다. 사막의 황량한 분위기와 전투의 긴장감이 어우러진 이 맵은, 플레이어에게 새로운 경험을 제공할 것이다. Welcome to the Jungle is a six-player melee map in StarCraft: Brood War where the sole objective is to destroy all enemy buildings. The map adopts a desert theme, featuring vast plains, scattered grassy hills, and rocky terrain that obstructs vision and demands strategic movement. Key terrain features include a relatively flat central area and elevated high-ground corners that provide defensive advantages. While the map follows the standard melee structure, its expansive size and alien desert atmosphere heighten the tension for players. Combat hinges on early-game pressure around mineral and gas harvesting near spawn points, with control of the central high ground becoming crucial in mid-to-late game engagements. Though the terrain isn’t overly complex, the map’s scale forces players to balance micro-management and resource efficiency. Securing vision in the center often decides matches, and newcomers may struggle to adapt to the open battles, but once familiar, the map offers rich strategic depth. The desert theme is visually cohesive, with structures rendered in earthy tones, and its defining traits—spacious combat zones paired with a distinct atmosphere—expand players’ strategic options. However, the vast layout may slow early resource collection and multi-building progression, making early aggression vital. Despite its serene theme, the battles are intense, especially around the central plateau, where high-stakes fights unfold. To excel, players need wide vision control and rapid resource management, favoring those with strong multitasking skills. The map lends itself more to solo or duo play than full team dynamics, offering a free-for-all experience. If you seek a melee map that diverges from standard designs with its open space and tactical depth, Welcome to the Jungle is worth trying. You’ll experience the thrill of desert combat and the adrenaline of large-scale warfare. Before diving in, study the terrain and resource layout to gain an edge in early rushes. While the battles aren’t easy, the strategic depth and excitement make it rewarding. Beginners may need time to adjust to the scale and intensity, so practicing in AI matches or custom games is wise. This isn’t just a combat map—it’s a strategic battleground where the vast desert landscape amplifies every decision. Once you play, its blend of desolate beauty and high-stakes combat will captivate you. Designed for six players, it thrives in solo or duo settings, encouraging diverse strategies. The open space can feel daunting, but it also fosters creativity in approach. For those craving the rush of wide-scale battles, Welcome to the Jungle delivers an unforgettable experience. Success depends on vision control and quick judgment, with central control often being the key to victory. The map’s unique desert ambiance and tactical challenges set it apart in StarCraft’s melee lineup. Whether you’re a beginner or a veteran, it offers a fresh, engaging challenge—so unleash your strategies and enjoy the ride. The thrill of its vast battles and the satisfaction of outmaneuvering opponents will leave a lasting impression. This is more than a map; it’s a desert warzone where every move counts.
ThaT! BounDThaT! BounD
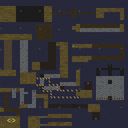
스타크래프트 브루드워 유즈맵 <strong>ThaT! BounD (ThaT! BounDThaT! BounD)</strong>는 플레이어들이 공중 유닛으로만 전투를 펼치며, 끊임없이 움직이는 맵을 기반으로 한 디펜스 장르의 유즈맵으로 추정된다. 맵 이미지를 분석한 결과, 넓은 황무지 타일셋을 배경으로 중앙에 위치한 주요 건물(추정)을 중심으로 다수의 플레이어가 각각의 기지에서 출발하여 일정 주기마다 몰려드는 적을 방어하는 구조로 보인다. 맵 곳곳에 배치된 장애물과 지형적 특징은 공중 유닛의 기동성을 제한하는 요소로 작용할 수 있으며, 플레이어는 이를 고려한 진형 구성과 전략 수립이 필수적이다. 게임의 핵심 메커니즘은 끊임없이 생성되는 적 웨이브를 방어하는 동시에, 제한된 자원으로 아군을 강화하거나 보조를 맞추는 데에 있다. 맵의 디자인상으로는 중앙 지역이 비교적 개방되어 있어 대규모 전투가 벌어질 가능성이 높고, 주변 지역은 플레이어 기지나 보급 거점으로 활용될 수 있는 구조로 추정된다. 또한, 맵의 대칭성 여부는 확인되지 않지만, 각 플레이어의 기지 위치가 균등하게 분배되어 있는 것으로 보아 팀플레이보다는 개인전이 주를 이루는 장르로 판단된다. 이 맵은 초보자와 숙련자 모두에게 적합한 난이도를 제공할 수 있도록 설계되었을 가능성이 있으며, 특히 공중 유닛의 특성을 살린 전략적 플레이가 요구된다. 플레이 전에는 맵의 지형과 주요 길목, 그리고 적 웨이브의 패턴을 사전 숙지하는 것이 중요하다. 또한, 자원 관리와 유닛 조합의 최적화가 승패를 좌우할 수 있으므로, 게임 내에서 제공되는 리소스와 업그레이드 옵션을 면밀히 확인할 필요가 있다. 추천 대상으로는 스타크래프트 유즈맵을 즐기는 모든 플레이어, 특히 디펜스 장르와 공중 유닛 전투를 선호하는 유저들에게 적합할 것으로 보인다. 맵의 구조상으로는 6인 플레이를 고려한 밸런스 조절이 필요하며, 팀전보다는 개인전이 주를 이루는 만큼 1vs1 또는 1vs5의 구도로 플레이하는 것이 이상적일 수 있다. 또한, 공중 유닛의 특성을 살린 전략적 플레이를 즐기고자 하는 유저들에게도 강추할 만하다. 플레이 중에는 끊임없이 변화하는 전장 환경과 적 웨이브의 패턴에 대응하는 유연성이 중요하며, 이를 위해 맵의 주요 길목과 장애물을 활용한 진형 구성이 핵심 전략이 될 것이다. 또한, 맵의 난이도는 플레이어의 실력과 자원 관리 능력에 따라 크게 좌우될 수 있으므로, 초보자의 경우 난이도를 낮춰 연습하는 것을 권장한다. ThaT! BounD (ThaT! BounDThaT! BounD) is a StarCraft: Brood War custom map that appears to be a defense-style UMS game, where players engage in aerial unit combat on a continuously moving battlefield. The map, set against a barren terrain tileset, features a central structure (presumably the main objective) surrounded by player bases. The terrain includes obstacles that may restrict air unit mobility, forcing players to adapt their formations and strategies accordingly. The core gameplay revolves around defending against waves of enemies while managing limited resources to upgrade or support units. The central area of the map seems open for large-scale battles, while the periphery likely serves as player bases or supply points. The symmetry of the map is unclear, but player base placements suggest a more individual-focused mode rather than team play. This map is likely designed to offer a balanced challenge for both beginners and experienced players, emphasizing strategic aerial combat. Players should familiarize themselves with the terrain, key paths, and enemy wave patterns before starting. Effective resource management and optimal unit combinations are crucial for success, so it's essential to review the available upgrades and resources during the game. Ideal for players who enjoy StarCraft custom maps, particularly those who prefer defense genres and aerial unit battles. The map's structure suggests it is balanced for 6 players, though 1vs1 or 1vs5 formats may be more suitable for individual-focused gameplay. It is highly recommended for those who appreciate strategic aerial combat and dynamic battlefield environments. During gameplay, adaptability to the ever-changing battlefield and enemy waves is key. Players should leverage the terrain and obstacles to form effective formations, with core strategies revolving around terrain utilization and resource allocation. Beginners are advised to start on lower difficulties to practice before tackling higher challenges.
최근 등록된 맵
새로 추가된 파일과 버전을 확인하세요.
ThaT! BounDThaT! BounD
스타크래프트 브루드워 유즈맵 <strong>ThaT! BounD (ThaT! BounDThaT! BounD)</strong>는 플레이어들이 공중 유닛으로만 전투를 펼치며, 끊임없이 움직이는 맵을 기반으로 한 디펜스 장르의 유즈맵으로 추정된다. 맵 이미지를 분석한 결과, 넓은 황무지 타일셋을 배경으로 중앙에 위치한 주요 건물(추정)을 중심으로 다수의 플레이어가 각각의 기지에서 출발하여 일정 주기마다 몰려드는 적을 방어하는 구조로 보인다. 맵 곳곳에 배치된 장애물과 지형적 특징은 공중 유닛의 기동성을 제한하는 요소로 작용할 수 있으며, 플레이어는 이를 고려한 진형 구성과 전략 수립이 필수적이다. 게임의 핵심 메커니즘은 끊임없이 생성되는 적 웨이브를 방어하는 동시에, 제한된 자원으로 아군을 강화하거나 보조를 맞추는 데에 있다. 맵의 디자인상으로는 중앙 지역이 비교적 개방되어 있어 대규모 전투가 벌어질 가능성이 높고, 주변 지역은 플레이어 기지나 보급 거점으로 활용될 수 있는 구조로 추정된다. 또한, 맵의 대칭성 여부는 확인되지 않지만, 각 플레이어의 기지 위치가 균등하게 분배되어 있는 것으로 보아 팀플레이보다는 개인전이 주를 이루는 장르로 판단된다. 이 맵은 초보자와 숙련자 모두에게 적합한 난이도를 제공할 수 있도록 설계되었을 가능성이 있으며, 특히 공중 유닛의 특성을 살린 전략적 플레이가 요구된다. 플레이 전에는 맵의 지형과 주요 길목, 그리고 적 웨이브의 패턴을 사전 숙지하는 것이 중요하다. 또한, 자원 관리와 유닛 조합의 최적화가 승패를 좌우할 수 있으므로, 게임 내에서 제공되는 리소스와 업그레이드 옵션을 면밀히 확인할 필요가 있다. 추천 대상으로는 스타크래프트 유즈맵을 즐기는 모든 플레이어, 특히 디펜스 장르와 공중 유닛 전투를 선호하는 유저들에게 적합할 것으로 보인다. 맵의 구조상으로는 6인 플레이를 고려한 밸런스 조절이 필요하며, 팀전보다는 개인전이 주를 이루는 만큼 1vs1 또는 1vs5의 구도로 플레이하는 것이 이상적일 수 있다. 또한, 공중 유닛의 특성을 살린 전략적 플레이를 즐기고자 하는 유저들에게도 강추할 만하다. 플레이 중에는 끊임없이 변화하는 전장 환경과 적 웨이브의 패턴에 대응하는 유연성이 중요하며, 이를 위해 맵의 주요 길목과 장애물을 활용한 진형 구성이 핵심 전략이 될 것이다. 또한, 맵의 난이도는 플레이어의 실력과 자원 관리 능력에 따라 크게 좌우될 수 있으므로, 초보자의 경우 난이도를 낮춰 연습하는 것을 권장한다. ThaT! BounD (ThaT! BounDThaT! BounD) is a StarCraft: Brood War custom map that appears to be a defense-style UMS game, where players engage in aerial unit combat on a continuously moving battlefield. The map, set against a barren terrain tileset, features a central structure (presumably the main objective) surrounded by player bases. The terrain includes obstacles that may restrict air unit mobility, forcing players to adapt their formations and strategies accordingly. The core gameplay revolves around defending against waves of enemies while managing limited resources to upgrade or support units. The central area of the map seems open for large-scale battles, while the periphery likely serves as player bases or supply points. The symmetry of the map is unclear, but player base placements suggest a more individual-focused mode rather than team play. This map is likely designed to offer a balanced challenge for both beginners and experienced players, emphasizing strategic aerial combat. Players should familiarize themselves with the terrain, key paths, and enemy wave patterns before starting. Effective resource management and optimal unit combinations are crucial for success, so it's essential to review the available upgrades and resources during the game. Ideal for players who enjoy StarCraft custom maps, particularly those who prefer defense genres and aerial unit battles. The map's structure suggests it is balanced for 6 players, though 1vs1 or 1vs5 formats may be more suitable for individual-focused gameplay. It is highly recommended for those who appreciate strategic aerial combat and dynamic battlefield environments. During gameplay, adaptability to the ever-changing battlefield and enemy waves is key. Players should leverage the terrain and obstacles to form effective formations, with core strategies revolving around terrain utilization and resource allocation. Beginners are advised to start on lower difficulties to practice before tackling higher challenges.
점령 방어전 (Squatting Defenders)
스타크래프트 브루드워의 숨은 보석 중 하나인 'Squatting Defenders'는 디펜스 장르의 유즈맵으로, 플레이어들이 적의 끊임없는 공격을 방어하며 생존을 다투는 긴장감 넘치는 게임입니다. 맵은 중앙에 위치한 본진과 이를 둘러싼 방어 시설, 그리고 끊임없이 쏟아지는 적의 웨이브로 구성되어 있습니다. 플레이어는 본진을 지키기 위해 건물을 건설하고 유닛을 배치해야 하며, 각 웨이브가 끝날 때마다 새로운 적의 공격 패턴을 경험할 수 있습니다. 맵의 특징은 방어 시설의 배치와 업그레이드 시스템으로, 이를 통해 플레이어는 전략적인 선택을 강요받습니다. 예를 들어, 특정 위치에 포격을 집중하거나, 방어 타워의 레벨을 올려 적의 공격을 효과적으로 차단할 수 있습니다. 또한, 맵의 디자인과 색상 구성은 황혼 테마를 사용하여 시각적으로도 매력적입니다. 이 맵은 특히 디펜스 장르를 좋아하는 플레이어들에게 추천되며, 초보자와 숙련자 모두 즐길 수 있도록 난이도 조절이 가능한 구조로 설계되었습니다. 플레이 전에는 방어 시설의 배치와 업그레이드 우선순위를 carefully하게 계획하는 것이 중요합니다. 적의 공격 패턴을 미리 파악하고, 보완할 수 있는 방어 체계를 구축하는 것이 승리의 열쇠가 될 것입니다. 또한, 맵의 중앙 본진을 중심으로 한 공격 루트는 거의 고정되어 있으므로, 이를 바탕으로 방어 전략을 수립하는 것이 좋습니다. 이 맵은 6인 플레이를 지원하며, 각 플레이어는 개별적인 본진을 방어해야 합니다. 팀 플레이를 통해 협동하는 것도 가능하며, 이를 통해 더욱 전략적인 플레이가 가능해집니다. 맵의 긴장감과 연속된 전투는 플레이어에게 끊임없는 긴장감을 제공하며, 한 번 플레이하면 빠져들 수밖에 없는 매력이 있습니다. 이 맵은 디펜스 유즈맵의 정석을 보여주며, 스타크래프트 브루드워의 유즈맵 중에서도 손꼽히는佳作입니다. Squatting Defenders is one of the hidden gems in StarCraft: Brood War's custom maps, offering an intense defensive experience where players must protect their main base from relentless enemy waves. The map features a central base surrounded by defensive structures, with waves of enemies continuously attacking from multiple directions. Players must strategically place buildings and units, upgrading defenses to withstand progressively stronger assaults. The map's design emphasizes strategic placement of defensive towers and resource management, requiring players to make critical decisions at each stage. The twilight-themed aesthetics enhance the visual appeal, creating a moody and immersive atmosphere. This map is highly recommended for fans of the defense genre, catering to both beginners and experienced players with adjustable difficulty. Before playing, it's essential to plan your defense layout and prioritize upgrades to counter specific enemy patterns. The fixed attack routes from the map's center allow for focused defensive strategies, making preparation key to survival. Supporting up to 6 players, the map can be played individually or cooperatively, adding a layer of teamwork and strategy. The constant pressure from enemy waves creates an adrenaline-filled experience that keeps players engaged. Squatting Defenders exemplifies the pinnacle of defense custom maps in StarCraft: Brood War, standing out as a must-play title for genre enthusiasts.
18웨이 러커 디펜스 익스트림 (18 way Lurker Defence X-treme)
스타크래프트 브루드워의 유즈맵 ‘18 way Lurker Defence X-treme(18웨이 러커 디펜스 익스트림)’은 이름 그대로 18방향에서 끊임없이 몰려드는 적들을 상대로 러커를 주력으로 삼아 방어를 펼치는 디펜스 장르의 유즈맵이다. 맵 중앙에 위치한 플레이어 기지 주변으로는 18개의 입구가 radial(방사형)으로 배치되어 있으며, 각 입구마다 일정 주기로 적 유닛이 출현한다. 러커가 주력 유닛이지만, 입구마다 배치된 방어 건물이나 터렛, 그리고 플레이어의 전략적 선택에 따라 스포어 콜로니, 성큰 콜로니, 발키리 등으로 구성된 방어 라인을 구축할 수 있다. 특히 ‘Walling is Gay’이라는 내부 설명의 한마디가 시사하듯, 초반 벽을 치는 전통적인 디펜스 전략보다는 러커를 적극 활용한 능동적인 방어와 업그레이드를 통한 효율적인 대처가 핵심이다. 맵의 특징은 30단계로 나뉜 웨이브가 진행되면서 점점 더 강력한 적 유닛이 등장한다는 점으로, 초반에는 저글링과 히드라리스크가 주를 이루지만 후반으로 갈수록 울트라리스크, 브루탈리스크, 심지어 캐리어까지 등장한다. 플레이어는 각 웨이브를 통과할 때마다 자원을 획득할 수 있으며, 이를 바탕으로 입구마다 러커를 배치하거나 방어 건물의 업그레이드를 우선시해야 한다. 맵의 난이도는 매우 높아 초보자는 빠른 클리어에 어려움을 느낄 수 있지만, 러커의 사정거리와 업그레이드 효율, 그리고 빠른 입구별 대처가 요구되는 만큼 숙련자라면 전략의 깊이를 즐길 수 있다. 추천 대상은 디펜스 장르를 좋아하는 플레이어, 러커를 주력으로 삼는 전략을 선호하는 유저, 그리고 긴장감 넘치는 웨이브 디펜스를 즐기고자 하는 이들에게 적합하다. 플레이 전 반드시 확인해야 할 포인트는 입구별로 러커를 배치할 수 있는 공간이 제한적이라는 점과, 업그레이드와 자원 관리priority를 미리 계획해야 한다는 점이다. 맵의 구조상 6인 플레이가 권장되며, 팀 플레이보다는 각자의 방어 라인을 구축하는 индивидуаль 전략이 중요하다는 특징을 염두에 두고 플레이에 임해야 한다. 30단계의 긴 여정은 플레이어의 집중력과 적응력을 동시에 요구하기 때문에, 부담 없이 즐기기 위해서는 초반 웨이브부터 꾸준한 플레이가 필요하다. StarCraft: Brood War's custom map *18 Way Lurker Defence X-treme* is a defense-style game where players must defend against endless waves of enemies from 18 directions, primarily using Lurkers. The player's base is surrounded by 18 radial entrances, each spawning enemies at regular intervals. While Lurkers are the main unit, players can also build defensive structures like Spore Colonies, Sunken Colonies, and missile turrets at each entrance, or customize their defense with units like Valkyries. The map emphasizes active defense and upgrades over traditional walling strategies, as hinted by the internal description *"Walling is Gay."* The challenge escalates through 30 waves, starting with basic units like Zerglings and Hydralisks but eventually introducing Ultralisks, Brutalisks, and even Carriers in later stages. Players earn resources after each wave, allowing them to place Lurkers or upgrade defenses strategically. The high difficulty may overwhelm beginners, but experienced players will appreciate the depth of Lurker range management, upgrades, and quick entrance-specific responses. This map is ideal for fans of defense games, Lurker-focused strategies, and intense wave-based challenges. Before playing, note that Lurker placement space is limited per entrance and that careful planning of upgrades and resource allocation is crucial. The map is best enjoyed with six players, each building their own defense line rather than relying on teamwork. The 30-wave journey demands focus and adaptability, so consistent play from the early waves is recommended for an enjoyable experience.
좀비의 공격: 심판의 날 (Zombies Attack: Judgement Day)
Zombies Attack: Judgement Day는 스타크래프트 브루드워의 유즈맵으로, 플레이어들이 좀비 무리를 상대로 방어전을 펼치는 디펜스 장르의 맵이다. 이 맵은 내부 설명에서도 언급된 것처럼 '선한 세력이 악마를 무찌른다'는 스토리 라인에 기반을 두고 있으며, 총 6명의 플레이어가 참여할 수 있는 구조로 설계되었다. 맵 중앙에 위치한 요새를 중심으로 적들이 끊임없이 몰려오며, 이를 저지하기 위해 플레이어는 다양한 유닛과 건물, 방어 시설을 활용해야 한다. 맵의 디자인과 타일셋은 황무지 테마로 구성되어 있어, 초토화된 대지 위에서 전투가 벌어지는 듯한 분위기를 연출한다. 플레이 방식은 크게 두 가지로 나뉜다. 첫 번째는 요새 주변을 순찰하며 적을 사살하는 것과 요새 자체를 보호하는 것이다. 플레이어는 초반에 제한된 자원으로 요새를 건설하고 유닛을 생산해야 하기 때문에 자원 관리가 중요하다. 또한, 적들의 공격 패턴이 시간에 따라 변하기 때문에 타이밍을 맞춰 방어 전략을 수립해야 한다. 맵의 크기는 4096x4096으로 достаточно 넓지만, 요새 주변의 좁은 길목에서 전투가 집중되면서 긴장감이 고조된다. 이 맵의 매력은 끊임없이 밀려오는 적들 속에서 살아남기 위해 협력과 전략을 구사해야 한다는 점이다. 초보 플레이어부터 숙련자까지 모두 즐길 수 있지만, 팀워크와 전략적 사고가 필수적이기 때문에 혼자서는 클리어하기 어려운 구조다. 추천하는 대상은 스타크래프트 유즈맵을 즐기는 플레이어라면 누구나 시도해 볼 만한 맵이다. 특히 디펜스 장르를 좋아하는 유저들에게는 훌륭한 선택지가 될 것이다. 또한, 팀 플레이를 중시하는 플레이어라면 좀비 무리와 맞서기 위해 팀원 간의 소통과 역할 분담을 연습하기에도 좋은 기회가 된다. 다만, 초반 자원 부족으로 인한 어려움을 극복하기 위해 게임 내 팁을 숙지하는 것이 중요하다. 예를 들어, 초반에 빠르게 자원을 확보하고 방어 건물을 적시에 건설하는 것이 승리의 열쇠가 된다. 이 맵은 단순히 적을 무찌르는 것에서 그치지 않고, 어떻게 하면 효율적으로 방어선을 구축하고 자원을 관리할지에 대한 전략적 깊이를 제공한다. 또한, 맵의 분위기가Dark하고 긴장감 넘치는 요소도 플레이어에게 몰입감을 더해준다. Zombies Attack: Judgement Day is a user-made defense map in StarCraft: Brood War where players battle against waves of zombies. Based on the internal description, the story revolves around 'good forces defeating the devil,' and the map supports up to six players in a cooperative defense scenario. The core gameplay involves protecting a central fortress from relentless zombie attacks using various units, buildings, and defensive structures. The map’s terrain and tileset are designed around a desolate wasteland theme, enhancing the post-apocalyptic atmosphere. The gameplay is divided into two main tasks: patrolling the area around the fortress to eliminate enemies and actively defending the fortress itself. Players start with limited resources to construct their base and produce units, making resource management crucial. The zombies’ attack patterns change over time, requiring players to adapt their strategies accordingly. While the map is large at 4096x4096, combat focuses on the narrow passages around the fortress, creating intense and strategic moments. The map’s appeal lies in the need for teamwork and strategic planning to survive the constant waves of enemies. While accessible to both beginners and experienced players, its design makes solo play challenging without strong team coordination. This map is highly recommended for fans of StarCraft user-made maps, especially those who enjoy defense-style gameplay. It also serves as an excellent exercise in teamwork and role assignment for players who prefer cooperative challenges. Beginners may face initial difficulties due to resource constraints, so familiarizing themselves with in-game tips—such as efficient resource gathering and timely base construction—is essential. The map goes beyond simple combat, offering deep strategic elements focused on base defense and resource optimization. Additionally, its dark and tense atmosphere enhances player immersion, making it a standout choice for defense map enthusiasts.
후로관 [DW4] (Hu Lao Gate [DW4])
스타크래프트 브루드워의 유즈맵 ‘후로관 [DW4]’는 총 7명의 플레이어가 도전할 수 있는 디펜스 장르의 맵으로, 후로관이라는 이름답게 입구를 굳게 지키며 끊임없이 몰려드는 적군을 상대로 teritorry를 사수하는 전략을 요구한다. 맵 중앙에는 거대한 성채 형태의 건물이 있으며, 성벽 주변으로 좁고 복잡한 통로가 이어져 있어 방어 병력을 효율적으로 배치하기 좋은 구조로 설계되어 있다. 성채 내부와 외벽 사이의 공간은 좁아 탱크나 골리앗 같은 중장갑 유닛을 활용해 전선을 형성하기 좋으며, 반대편에서 몰려오는 적의 예봉을 꺾을 수 있도록 입구 양쪽에 방어 타워를 설치할 수 있는 위치가 마련되어 있다. 플레이어는 초기 자원으로 미네랄과 가스를 확보한 뒤, 적절한 타이밍에 병력을 보강하거나 방어 시설을 업그레이드해야 하며, 특히 입구 주변의 좁은 길목은 병력의 전술을 엄밀히 짜야만 적의 물량을 버틸 수 있다. 맵 특유의 입구 구조와 좁은 길목은 유닛의 컨트롤과 조합을 중요시하며, 특히 초보자와 숙련자 간의 실력 격차가 두드러지는 유즈맵으로 꼽힌다. 플레이 난이도는 어려움에 가깝지만, 팀웍과 전략적 사고가 뒷받침된다면 충분히 극복할 수 있는 수준이다. 후로관 [DW4]는 오랜 기간 사랑받아 온 유즈맵답게 맵 곳곳에 숨겨진 기술적 요소와 진행 루트가 존재하며, 이 부분은 반복 플레이를 통해 숙지하는 것이 좋다. 특히 입구와 성채 사이의 거리, 병력 배치의 최적 포인트, 적의 공격 패턴 변화 등은 게임을 유리하게 이끌 수 있는 핵심 요소로, 초반부터 입구를 굳게 지키는 것이 무엇보다 중요하다. 이 맵은 디펜스 유즈맵을 좋아하는 플레이어들에게는 물론, 전략적 사고와 팀워크를 중시하는 유저들에게도 추천할 만한佳作이다. 다만, 좁은 길목과 제한된 공간 탓에 유닛의 컨트롤 미스가 치명적으로 작용할 수 있으니, 게임에 임하기 전에는 맵의 구조와 입구 Verteidiger(방어자)의 역할을 충분히 숙지할 필요가 있다. 또한, 적의 물량이 점점 증가하는 특성상 자원 관리와 업그레이드 타이밍을 놓치지 않도록 주의해야 한다. 이 맵은 순수한 방어전이라는 점에서 전략적 깊이가 깊을 뿐만 아니라, 맵의 디자인 자체가 디펜스 장르의 묘미를 잘 담아내고 있어, 스타크래프트 유즈맵의 정석을 느낄 수 있는 작품으로 평가된다. StarCraft: Brood War's custom map "Huroguan [DW4]" is a defense-style map designed for up to seven players, where participants must fiercely guard the entrance against relentless waves of enemies to secure their territory—aptly reflected in its name. At the map's center stands a massive fortress-like structure, with narrow, intricate pathways weaving around its walls, allowing for efficient defensive unit placement. The tight spaces between the inner sanctum and outer walls are ideal for forming frontlines with heavy units like tanks and goliaths, while the entrances on either side feature strategic spots for defensive towers to blunt the enemy's advance. Players begin with secured mineral and gas resources, then must reinforce their forces or upgrade defenses at the right moments. The map’s signature entrance design and cramped corridors demand precise unit control and tactical composition, making it a map where skill gaps between beginners and veterans are especially pronounced. While the difficulty leans toward the hard side, success becomes achievable with strong teamwork and strategic thinking. As a long-standing beloved custom map, Huroguan [DW4] hides technical nuances and progression routes throughout its layout—elements best mastered through repeated play. Key factors like the distance between the entrance and fortress, optimal troop positioning, and adapting to shifting enemy attack patterns can tilt the game in your favor, with holding the entrance from the start being paramount. This map is a masterpiece worth recommending not only to defense-map enthusiasts but also to players who value strategic depth and teamwork. However, the tight spaces and limited room for maneuver mean that unit control mistakes can be fatal, so familiarizing yourself with the map’s structure and the defender’s role is essential before jumping in. Additionally, since enemy waves grow progressively stronger, careful resource management and timely upgrades are critical. Pure in its focus on defense, the map boasts deep strategic layers while its design perfectly captures the essence of the defense genre, making it a quintessential StarCraft custom map experience.
티거 곰바 (tigger-gomba)
스타크래프트 브루드워의 고전 유즈맵으로 잘 알려진 〈tigger-gomba〉는 8인용 밀리 맵으로, 넓은 사막 지형이 펼쳐진 중앙 지역을 중심으로 symmetrical(대칭) 구조의 배치로 구성되어 있다. 맵의 이름은 제작자 'tigger'의 이름을 딴 것으로 보이며, 1999년에 제작된 오래된 맵임에도 불구하고 여전히 많은 유저들에게 사랑받고 있는 저변의 스테디셀러 맵 중 하나다. 맵의 전체적인 분위기는 사막 테마에 걸맞게 황량한 사막 평원과 드문드문 배치된 바위 지형이 특징적이며, 중앙 지역에는 광물과 가스가 균형 있게 배치되어 있어 초반부터 치열한 자원 확보 경쟁이 발생한다. symmetrical 구조 덕분에 양 진영 간의 전략적 균형이 잘 맞춰져 있어, 테란의 경우 벙커링이나Siege Tank를 활용한 방어 라인 구축이, 저그와 프로토스의 경우 멀티 태스크링과 빠른 확장이 중요한 포인트가 된다. 또한 맵의 중앙 지역은 넓은 평지이기 때문에 공중 유닛의 교전이나 대형 전투가 자주 발생하는 장소로, 유닛의 컨트롤과micro management가 승패를 가르는 핵심 요소로 작용한다. 맵의 난이도는 초보자들이 처음 플레이하기에는 다소 어려운 편이지만, symmetrical 구조와 자원 밸런스가 잘 맞춰져 있어 숙련자들에게는 전략적 깊이를 제공하는 매력적인 맵으로 평가된다. 추천 대상은 스타크래프트 밀리 경험이 있는 유저들, symmetrical 맵의 전략적 균형을 즐기는 유저, 그리고 symmetrical 맵에서의 micro management와 멀티 태스크링 능력을 키우고 싶은 유저들에게 적합하다. 플레이 전에는 중앙 지역에서의 전투와 멀티 확보 타이밍을 carefully 고려해야 하며, symmetrical 구조상 양 진영 간의 균형이 깨지지 않도록 자원과 유닛 배치에 신경 써야 한다. 또한, 광물과 가스의 배치가 맵의 symmetrical 구조를 고려한 균형형이기 때문에, 초반 빌드 오더와 자원 확보 전략을 미리 숙지하는 것이 중요하다. 〈tigger-gomba〉 is a classic Brood War custom map well-known among StarCraft players. Designed as an 8-player melee map, it features a wide desert terrain at its center with a symmetrical layout. The map’s name likely comes from its creator, “tigger,” and despite being made in 1999, it remains a beloved steady-seller among many users. The overall atmosphere matches the desert theme, with barren plains and scattered rock formations, while the central area balances mineral and gas deposits to spark intense early-game resource competition. Thanks to its symmetrical design, both sides maintain strategic parity. Terrans excel with bunker rushes or Siege Tank lines, while Zerg and Protoss must prioritize multitasking and rapid expansions. The central expanse invites frequent large-scale clashes and aerial engagements, where unit control and micro-management often decide the outcome. While the map can feel tough for beginners, its balanced resources and symmetrical structure offer deep strategic play for veterans. It’s best suited for experienced StarCraft melee players, fans of symmetrical layouts, and those looking to sharpen their micro and multitasking skills in such settings. Before playing, carefully plan your timing for central battles and multi expansions, and keep resource and unit placements balanced to preserve the map’s symmetry. Since mineral and gas are distributed evenly to support the symmetrical design, mastering early build orders and resource strategies is key.
웰컴 투 더 정글 (Welcome To The Jungle)
《WELCOME TO THE JUNGLE》는 스타크래프트: 브루드워에서 즐기는 6인용 밀리 맵으로, 적의 모든 건물을 파괴하는 것이 목표인 순수한 전투 맵이다. 맵의 전체적인 분위기는 사막 테마로 꾸며져 있으며, 넓은 평야와 곳곳에 흩어져 있는 잔디 언덕, 바위 지형이 시야를 가리며 전략적 움직임을 요구한다. 지형의 특징으로는 중앙에 위치한 비교적 평탄한 지역과, 양쪽 구석에 방어하기 용이한 언덕 지형이 눈에 띈다. 이 맵은 기본적인 밀리 맵의 틀을 따르지만, 넓은 맵 크기와 사막 배경이 주는 이질감으로 인해 플레이어에게 긴장감을 더한다. 전투는 시작 즉시 본진 인근의 미네랄과 가스 채취를 둘러싼 초반 러시가 중요하며, 중앙 언덕을 차지하는 것이 중반 이후 전투의 관건으로 보인다. 지형이 복잡하지 않지만 넓은 맵 크기 덕분에 컨트롤과 자원 관리가 동시에 요구되며, 특히 даль vison(시야)을 확보하기 위한 센터 점령이 승패를 가를 가능성이 크다. 초보자의 경우 넓은 맵에서 벌어지는 전투에 적응하기 어려울 수 있으나, 익숙해지면 다양한 전략을 구사할 수 있는 매력이 있는 맵이다. 또한, 사막 테마의 맵답게 건물이 흙빛 톤으로 구성되어 있어 시각적인 통일감도 뛰어나다. 이 맵의 가장 큰 특징은 단순하면서도 넓은 전투 공간과 사막이라는 독특한 분위기이며, 이 때문에 플레이어의 전략적 선택지가 넓어진다. 다만, 넓은 맵 특성상 초반 자원 채취와 멀티 테크트리 구축이 다소 느릴 수 있어, 초반부터의 압박이 중요하게 작용할 것으로 추정된다. 맵의 분위기와는 달리 전투는 매우 박진감 넘치며, 특히 중앙 언덕을 두고 벌어지는 전투는 긴장감을 더한다. 이 맵을 즐기기 위해서는 넓은 시야와 빠른 자원 관리가 필수적이며, 멀티 태스킹 능력이 뛰어난 플레이어에게 어울린다. 또한, 팀 플레이보다는 개인 또는 2인 조합이 더 효과적일 수 있어, 팀플레이보다는 자유로운 전투가 가능한 맵으로 느껴진다. 만약 당신이 스타크래프트의 기본 밀리 맵과는 다른 넓은 공간과 전략적인 전투를 즐기고 싶다면, 《WELCOME TO THE JUNGLE》를 시도해 보는 것을 추천한다. 사막의 황량한 분위기와 넓은 맵에서 펼쳐지는 전투의 짜릿함을 동시에 느낄 수 있을 것이다. 특히,Central Vision Control(중앙 시야 싸움)을 중시하는 플레이어에게는 최적의 맵으로 보인다. 플레이 전에는 맵의 지형과 자원 분포를 미리 익혀두면, 초반 러시에서 큰 이점을 얻을 수 있을 것이다. 넓은 맵에서 벌어지는 전투는 결코 만만치 않지만, 그만큼 전략의 깊이가 깊어 재미를 느낄 수 있는 맵이다. 초보자의 경우 맵의 넓이와 전투 intensity에 적응하는 데 시간이 필요할 수 있으니, 우선 연습 모드나 AI 대전으로 맵에 익숙해지는 것이 좋다. 이 맵은 단순한 전투 맵이 아니라, 넓은 공간에서 벌어지는 전략적 대결이라는 점을 기억하자. 사막의 황폐한 아름다움과 전투의 긴장감이 어우러진 이 맵은, 스타크래프트의 밀리 맵 중에서도 독특한 매력을 지닌 작품 중 하나다. 한번 플레이해보면 그 매력에 빠져들게 될 것이다. 또한, 이 맵은 6인용으로 설계되어 있어, 팀플레이보다는 개인 또는 듀오 플레이에 더 적합할 수 있으며, 다양한 전략을 시도해 볼 수 있는 공간이 제공된다. 맵의 넓은 공간은 때로는 지루하게 느껴질 수 있지만, 전투가 벌어질 때에는 그 넓은 공간이 오히려 전략의 다양성을 높이는 장점이 된다. 그러므로, 넓은 맵에서 펼쳐지는 전투의 짜릿함을 즐기고 싶다면, 《WELCOME TO THE JUNGLE》를 반드시 시도해 보길 바란다. 이 맵은 단순히 건물을 파괴하는 것이 아니라, 넓은 공간에서 벌어지는 전략적 대결의 장이라는 점을 잊지 말자. 넓은 맵과 사막 테마가 주는 독특한 분위기는 스타크래프트의 또 다른 매력을 느낄 수 있게 해준다. 한 번 경험해보면, 이 맵이 제공하는 전투의 짜릿함과 전략의 깊이에 빠져들게 될 것이다. 이 맵을 즐기기 위해서는 넓은 시야와 빠른 판단력이 요구되며, 특히 중앙 지역을 차지하는 것이 승리의 관건으로 보인다. 사막의 황량한 분위기와 전투의 긴장감이 어우러진 이 맵은, 스타크래프트의 밀리 맵 중에서도 독특한 경험을 제공하는 작품이다. 초보자와 숙련자 모두에게 매력적인 이 맵에서, 자신의 전략을 마음껏 발휘해 보길 바란다. 넓은 맵에서 펼쳐지는 전투는 결코 쉽지 않지만, 그만큼의 짜릿함과 성취감을 느낄 수 있을 것이다. 이 맵은 단순한 전투 맵이 아니라, 넓은 공간에서 벌어지는 전략적 대결의 장이라는 점을 기억하고, 즐겁게 플레이해 보자. 사막의 황폐한 아름다움과 전투의 긴장감이 어우러진 이 맵은, 스타크래프트의 또 다른 매력을 느낄 수 있는 특별한 작품이다. 한번 플레이해보면, 그 매력에 빠져들게 될 것이다. 넓은 공간과 사막 테마가 주는 독특한 분위기는, 스타크래프트의 밀리 맵 중에서도 손에 꼽히는 매력을 지닌 작품 중 하나다. 이 맵을 즐기기 위해서는 넓은 시야와 빠른 판단력이 필수적이며, 특히 중앙 지역을 차지하는 것이 승리의 관건으로 보인다. 사막의 황량한 분위기와 전투의 긴장감이 어우러진 이 맵은, 플레이어에게 새로운 경험을 제공할 것이다. Welcome to the Jungle is a six-player melee map in StarCraft: Brood War where the sole objective is to destroy all enemy buildings. The map adopts a desert theme, featuring vast plains, scattered grassy hills, and rocky terrain that obstructs vision and demands strategic movement. Key terrain features include a relatively flat central area and elevated high-ground corners that provide defensive advantages. While the map follows the standard melee structure, its expansive size and alien desert atmosphere heighten the tension for players. Combat hinges on early-game pressure around mineral and gas harvesting near spawn points, with control of the central high ground becoming crucial in mid-to-late game engagements. Though the terrain isn’t overly complex, the map’s scale forces players to balance micro-management and resource efficiency. Securing vision in the center often decides matches, and newcomers may struggle to adapt to the open battles, but once familiar, the map offers rich strategic depth. The desert theme is visually cohesive, with structures rendered in earthy tones, and its defining traits—spacious combat zones paired with a distinct atmosphere—expand players’ strategic options. However, the vast layout may slow early resource collection and multi-building progression, making early aggression vital. Despite its serene theme, the battles are intense, especially around the central plateau, where high-stakes fights unfold. To excel, players need wide vision control and rapid resource management, favoring those with strong multitasking skills. The map lends itself more to solo or duo play than full team dynamics, offering a free-for-all experience. If you seek a melee map that diverges from standard designs with its open space and tactical depth, Welcome to the Jungle is worth trying. You’ll experience the thrill of desert combat and the adrenaline of large-scale warfare. Before diving in, study the terrain and resource layout to gain an edge in early rushes. While the battles aren’t easy, the strategic depth and excitement make it rewarding. Beginners may need time to adjust to the scale and intensity, so practicing in AI matches or custom games is wise. This isn’t just a combat map—it’s a strategic battleground where the vast desert landscape amplifies every decision. Once you play, its blend of desolate beauty and high-stakes combat will captivate you. Designed for six players, it thrives in solo or duo settings, encouraging diverse strategies. The open space can feel daunting, but it also fosters creativity in approach. For those craving the rush of wide-scale battles, Welcome to the Jungle delivers an unforgettable experience. Success depends on vision control and quick judgment, with central control often being the key to victory. The map’s unique desert ambiance and tactical challenges set it apart in StarCraft’s melee lineup. Whether you’re a beginner or a veteran, it offers a fresh, engaging challenge—so unleash your strategies and enjoy the ride. The thrill of its vast battles and the satisfaction of outmaneuvering opponents will leave a lasting impression. This is more than a map; it’s a desert warzone where every move counts.
맵 선택 가이드
태그는 맵의 핵심 특징을 빠르게 설명하지만 제작 버전마다 규칙이 다를 수 있습니다. 상세 설명에서 권장 인원, 난이도, 플레이 시간과 버전을 함께 확인한 뒤 다운로드하세요.