
성큰 스타크래프트 맵 모음
'성큰' 태그가 등록된 맵을 모았습니다. 장르 하나로 찾기 어려운 플레이 방식, 난이도와 특징을 중심으로 인기 맵과 최신 맵을 비교해 보세요.
- 등록 맵
- 15개
- 누적 다운로드
- 9
- 누적 조회
- 415
인기 맵
다운로드와 조회 반응이 높은 맵입니다.
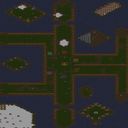
성큰6웨이Hell3버전(곰복권)
스타크래프트 브루드워 유즈맵 '성큰 6웨이 헬 버전 3(곰복권)'은 6인 협동 디펜스 장르에 속하는 맵으로, 플랫폼 타일셋 위에서 여섯 방향에서 몰려드는 적 공세를 성큰 콜로니와 영웅 유닛으로 막아내는 생존형 구조다. 맵 제목이 암시하듯 여섯 개의 진입로(6웨이)가 중앙 기지를 향해 열려 있으며, 각 입구는 좁은 초크 포인트를 형성해 성큰 라인을 구축하기 유리한 지형으로 보인다. 내부 설명에 따르면 영웅 드론이 추가되고 일부 영웅 능력치가 조정되었으며 난이도가 '극악'으로 표기되어 있어, 일반적인 컴까기나 입구막기 맵보다 훨씬 높은 생존 압박과 자원 관리 능력을 요구할 것으로 추정된다. 플레이어는 초반부터 드론 영웅을 활용해 자원 채취와 초기 방어를 병행해야 하며, 웨이브가 거듭될수록 몰려오는 저그·프로토스·테란 혼합 병력의 화력과 체력이 급격히 상승한다. 성큰 콜로니 업그레이드와 영웅 스킬 타이밍, 미네랄·가스 분배가 승패를 가르는 핵심 변수로 작용한다. 6인 전원이 각자 맡은 라인을 지키면서도 중앙 위기 상황에 즉각 합류할 수 있는 유기적인 팀워크가 필수적이며, 한 명이 무너지면 연쇄 붕괴로 이어지는 전형적인 고난이도 디펜스 흐름을 보인다. 추천 대상은 고난이도 협동 생존전을 즐기는 숙련 유저 그룹이며, 입문자는 난이도 체감 차이로 인해 좌절할 가능성이 크다. 플레이 전에는 영웅 드론의 스킬 구성과 성큰 업그레이드 트리, 웨이브 구성표를 숙지하고 팀원 간 라인 분담과 지원 타이밍을 사전에 조율하는 것이 좋다. 파일명에 포함된 '곰복권' 표기는 제작자 또는 배포자 닉네임으로 보이며, 버전 3까지 이어진 업데이트 이력으로 보아 밸런스 패치가 지속되었음을 짐작할 수 있다. StarCraft Brood War UMS map 'Sunken 6 Way Hell Ver 3 (Bear Lottery)' belongs to the 6-player cooperative defense genre, featuring a survival structure where players must fend off enemy assaults from six directions on a platform tileset using Sunken Colonies and hero units. As the title implies, six entrances (6-way) open toward the central base, each forming a narrow choke point that appears favorable for establishing Sunken lines. The internal description notes the addition of a Hero Drone, adjustments to hero stats, and an 'extreme' difficulty rating, suggesting it demands far higher survival pressure and resource management than typical comp-stomp or choke defense maps. Players must utilize the Drone Hero for both resource gathering and early defense from the start. As waves progress, the firepower and durability of incoming mixed Zerg, Protoss, and Terran forces increase sharply. Sunken Colony upgrades, hero skill timing, and mineral/gas allocation act as key variables determining victory or defeat. All six players must hold their assigned lanes while maintaining organic teamwork to reinforce the center during crises; a single player's collapse often triggers a chain reaction, typical of high-difficulty defense flows. Recommended for veteran groups who enjoy high-difficulty cooperative survival; beginners may feel frustrated due to the steep difficulty curve. Before playing, it is advisable to familiarize oneself with the Hero Drone's skill set, Sunken upgrade tree, and wave composition, and to coordinate lane assignments and support timings with teammates. The 'Bear Lottery' in the filename appears to be the creator's or distributor's nickname, and the update history reaching version 3 suggests ongoing balance patches.
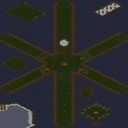
신 성큰 6웨이: 영웅과 복권 (New Sunken 6 Way: Heroes & Lottery)
(신)성큰 6웨이(영웅+복권)는 6명의 플레이어가 협력해 몰려드는 컴퓨터 적군을 막아내는 전형적인 컴까기 스타일의 유즈맵이다. 플랫폼 타일셋 위에서 6방향으로 뻗은 대칭형 지형은 각 진입로가 좁은 초크 포인트를 형성해 성큰 콜로니와 방어 타워를 배치하기 유리한 구조를 보인다. 맵 제목 그대로 성큰을 주력 방어 수단으로 삼으며, 내부 설명에 언급된 러커와 저글링 추가는 적 지상군의 조합을 다양화해 단순 화력전 이상의 대처를 요구한다. 핵심 특징은 영웅 유닛과 복권 시스템이다. 영웅은 강력한 스탯과 스킬로 전선을 주도하며, 복권은 무작위 보상으로 자원이나 유닛, 업그레이드 등을 제공해 운과 전략을 동시에 자극한다. 게임 초반에는 기본 성큰과 영웅으로 버티다가 중반부터 복권 보상과 추가 테크트리를 통해 화력을 극대화하는 흐름이 일반적이다. 6인 전원이 생존해야 클리어에 가까워지므로 팀원 간 자원 지원과 라인 커버가 필수적이다. 플레이 타임은 30분 내외로 짧고 호흡이 빠른 편이며, 난이도는 복권 운에 따라 널뛰기하지만 기본적으로 초보도 영웅 의존으로 입문 가능하다. 성큰 디펜스의 원초적 재미와 랜덤 성장 요소를 동시에 즐기고 싶은 협동 유저에게 추천한다. 플레이 전 버전별 영웅 밸런스와 복권 테이블 차이를 확인하면 더 안정적인 공략이 가능하다. New Sunken 6 Way: Heroes & Lottery is a classic comp-stomp style use-map where six players cooperate to fend off waves of computer-controlled enemies. On the platform tileset, the symmetrical six-way layout creates narrow choke points at each entrance, providing an ideal structure for placing Sunken Colonies and defensive towers. As the title suggests, Sunken Colonies serve as the primary defense, while the addition of Lurkers and Zerglings mentioned in the internal description diversifies enemy ground compositions, demanding responses beyond simple firepower contests. The key features are the Hero units and the Lottery system. Heroes lead the frontline with powerful stats and skills, while the Lottery provides random rewards such as resources, units, or upgrades, stimulating both luck and strategy. The typical flow involves holding the line with basic Sunkens and Heroes in the early game, then maximizing firepower through Lottery rewards and additional tech trees in the mid-to-late game. Since all six players must survive to clear, resource sharing among teammates and covering each other's lines are essential. Playtime is relatively short at around 30 minutes with a fast pace. Difficulty fluctuates depending on Lottery luck, but beginners can enter comfortably by relying on Heroes. It is recommended for cooperative players who want to enjoy the raw fun of Sunken defense alongside random growth elements. Checking Hero balance differences and Lottery tables per version before playing will allow for a more stable strategy.
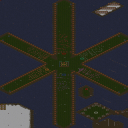
스타 선큰 디펜스 (Star Sunken Defense)
스타크래프트 브루드워 맵을 즐기는 유저들에게 독특한 방어 형식의 플레이 경험을 선사하는 스타 선큰 디펜스(Star Sunken Defense)는 다수의 플레이어가 협력하여 몰려오는 적을 막아내는 재미에 집중한 스타크래프트 유즈맵이다. 전체적인 맵 구조를 살펴보면 중앙의 기지를 기점으로 사방으로 길게 뻗어 나간 여섯 갈래의 길과 지형 배치가 눈에 띄며, 원본 파일명인 성큰 6웨이 및 드론 관련 명칭에서 유추할 수 있듯 다방면에서 동시에 진입하는 적들을 효율적으로 저지하는 것이 핵심인 디펜스 장르의 특징을 강하게 드러내고 있다. 플레이어들은 각자 맡은 구역이나 중앙의 주요 방어 거점을 중심으로 유닛을 배치하고 자원을 활용하여 촘촘한 방어선을 구축해야 한다. 사방으로 나뉜 진입로 구조 덕분에 팀원 간의 소통과 역할 분담이 매우 중요하게 작용하며, 어느 한쪽이 무너질 경우 전체 방어선이 순식간에 위협받을 수 있어 긴장감 넘치는 협동 플레이를 유도한다. 물량 공세를 막아내는 전형적인 디펜스 유즈맵의 문법을 따르면서도, 여섯 갈래라는 독특한 지형적 특색을 통해 차별화된 전술적 재미를 느낄 수 있도록 설계된 점이 가장 큰 매력이다. 친구들과 함께 손발을 맞춰 거세게 밀려오는 적의 공세를 견뎌내는 짜릿한 성취감을 맛보고 싶거나, 전통적인 협동 방어 미션의 긴박함을 선호하는 유저들에게 적합한 맵이다. 플레이를 시작하기 앞서 각 갈래별로 다가오는 적의 동선과 아군의 화력 배치를 미리 확인하고, 초반 자원과 주어진 일꾼 유닛을 활용해 신속하게 방어 건물을 건설하는 것이 승패를 가르는 중요한 포인트가 될 것이다. Star Sunken Defense provides a unique defensive gameplay experience to StarCraft Brood War map enthusiasts, focusing on the fun of multiple players cooperating to fend off incoming waves of enemies. Looking at the overall map structure, six long paths extending outward in all directions from a central base and the distinct terrain layout immediately stand out. As inferred from the original filename mentioning six sunken ways and drones, it strongly embodies the characteristics of the defense genre, where efficiently blocking enemies approaching simultaneously from multiple directions is paramount. Players must deploy units around their assigned zones or the main central defense stronghold, utilizing resources to establish a tight defense line. Due to the multi-directional path structure, communication and role division among team members are crucial; if one side collapses, the entire defense line can be instantly threatened, inducing tense cooperative play. While following the traditional defense custom map grammar of holding off massive offensives, its greatest charm lies in being designed to offer differentiated tactical fun through the unique terrain feature of six branching routes. This map is recommended for users who want to experience the exhilarating sense of accomplishment of withstanding fierce enemy offensives in coordination with friends, or those who prefer the urgency of classic cooperative defense missions. Before starting the game, it is important to check the enemy movement paths and allocate allied firepower for each branch, building defensive structures swiftly using early resources and given worker units as a key point to determine victory or defeat.
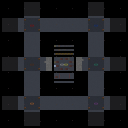
성큰 12웨이 (Sunken 12 Way)
성큰 12웨이 (Sunken 12 Way)는 스타크래프트 브루드워 UMS 유즈맵으로, 여러 방향에서 몰려오는 적의 공세에 맞서 거점을 방어하는 독특한 구조의 디펜스 장르 맵이다. 파일명인 handefensez.scx와 맵 제목에서 알 수 있듯 성큰 콜로니와 같은 고정 방어 건물을 중심으로 다채로운 웨이 방어 요소를 즐길 수 있도록 설계되었다. 제공된 미니맵과 구조를 살펴보면 중앙의 핵심 기지 주변으로 여러 갈래의 길이 교차하며, 사방으로 뻗어 나가는 다중 웨이 형태의 전장이 펼쳐지는 것을 확인할 수 있다. 플레이어는 각각의 위치에서 쏟아지는 적들을 효율적으로 저지해야 하며, 아군과의 유기적인 협동과 빠른 상황 판단이 승패를 가르는 중요한 요소로 작용한다. 특히 다방면에서 적이 압박해 오는 구조 특유의 긴장감이 높아, 평소 협동 디펜스 유즈맵이나 밀집 방어 형태의 플레이를 선호하는 유저들에게 흥미로운 도전이 될 수 있다. 게임이 시작되면 각 위치에 배치된 방어 거점을 점검하고, 적의 진격 경로에 맞춰 유닛과 건물을 신속하게 배치하는 것이 필수적이다. 초반 자원 관리와 빌드업 타이밍을 놓치면 순식간에 방어선이 무너질 수 있으므로, 팀원들과의 역할 분담과 소통이 매우 중요하다. 난이도는 협력의 완성도에 따라 체감 차이가 큰 편이며, 사방으로 트인 구조 속에서 몰려오는 적들을 막아내는 쾌감을 원하는 플레이어들에게 적합하다. 멀티플레이 환경에서 여러 명의 동료와 함께 손발을 맞춰가며 즐길 만한 스타크래프트 맵을 찾는다면 좋은 선택지가 될 수 있으며, 색다른 방어 전략을 시험해보고 싶은 이들에게 추천할 만한 작품이다. 플레이 전 각 플레이어의 담당 구역과 웨이별 특징을 미리 파악하고 진입한다면 훨씬 안정적인 방어가 가능할 것이다. Sunken 12 Way is a StarCraft: Brood War UMS use map featuring a unique defense genre structure where players fend off enemy waves approaching from multiple directions. As indicated by the filename handefensez.scx and the map title, it is designed around fixed defensive structures like Sunken Colonies, allowing players to enjoy diverse wave defense elements. Examining the provided minimap and layout reveals a battlefield with multiple intersecting paths around a central core base, forming a multi-way front extending in all directions. Players must efficiently halt enemies pouring in from various positions, making organic cooperation with allies and quick situational awareness crucial factors that determine victory. In particular, the heightened tension characteristic of structures where enemies press from multiple sides makes it an interesting challenge for users who typically prefer cooperative defense use maps or concentrated defensive gameplay. Once the game begins, inspecting the defensive posts assigned to each position and rapidly placing units and buildings according to the enemy advancement routes is essential. Failing to manage early resources and build-up timings can cause the defense line to collapse instantly, making role division and communication with teammates extremely important. The difficulty varies significantly depending on the level of cooperation, making it suitable for players seeking the thrill of blocking swarming enemies within an open multi-directional layout. If you are looking for a StarCraft map to enjoy by coordinating with multiple companions in a multiplayer environment, it serves as a great option and is recommended for those wanting to test unconventional defensive strategies. Familiarizing oneself with each player's assigned zone and the characteristics of each wave before playing will enable much more stable defenses.
HELL 생존 시험 (Test of Survival - HELL)
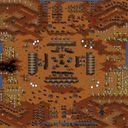
스타크래프트의 ‘Test of Survival - HELL’은 이름에서부터 느껴지듯 극한의 서바이벌 환경을 제공하는 유즈맵이다. 시작과 동시에 벙커로 진입하라는 지시가 있으며, 외부에서는 끊임없이 저글링과 질럿이 무한 스폰되어 플레이어를 압박한다. 맵 중앙의 성큰 콜로니가 방어의 핵심으로, 이를 중심으로 전진배치된 저글링 무리들을 상대하며 건물을 파괴하고 컴퓨터 유닛을 섬멸하는 것이 주요 목표로 보인다. 황혼 타일셋의 어두운 분위기와 붉은 색조가 맵의 긴장감을 한층 더해주며, 특히 성큰 주변의 지형이 복잡하게 배치되어 방어 라인을 구축하기 어렵게 만든다. 벙커와 성큰을 적절히 활용하지 않으면 순식간에 밀려나는 플레이가 예상되며, 끊임없는 적의 물량 공세 속에서Resource management와 위치 선정 능력이 중요할 것으로 추정된다. 초보자에게는 다소 난해할 수 있지만, 숙련된 플레이어라면 이 맵의 치밀한 구조와 전략적 깊이를 즐길 수 있을 것이다. 맵의 난이도는 대체로 높은 수준으로 보이며, 특히 성큰 주변의 좁은 길목에서 벌어지는 전투가 관건일 가능성이 크다. 5인 플레이를 상정하고 제작된 맵으로 보이나, 팀전보다는 개인전 또는 코옵 플레이에 최적화되어 있는 구조다. 플레이 전 반드시 벙커 내부 배치와 성큰의 위치를 숙지하고, 자원 확보 및 방어 전략을 미리 세워두는 것이 중요하다. 이 맵은 순수한 서바이벌 요소와 디펜스 요소가 혼합되어 있으며, 끊임없는 압박 속에서 생존과 공격의 균형을 잡아야 한다. 맵의 분위기와 장르 특성상 긴장감과 몰입도를 중시하는 플레이어에게 강추한다. 맵을 처음 플레이한다면 예상 플레이 시간은 30분 내외로 예상되지만, 난이도에 따라 크게 달라질 수 있으니 주의가 필요하다. StarCraft’s *Test of Survival - HELL* is a custom map that delivers an extreme survival experience, as the name suggests. Right from the start, players are instructed to enter a bunker, while outside, zerglings and zealots spawn endlessly, relentlessly pressuring the player. The core of the defense revolves around the sunkens at the map’s center, where players must fight through waves of zerglings, destroy buildings, and eliminate computer-controlled units. The twilight-themed tileset, with its dark atmosphere and red hues, amplifies the map’s tension, while the complex terrain around the sunkens makes establishing a solid defense line challenging. Without proper use of bunkers and sunkens, players will quickly get overwhelmed by the constant enemy waves. Resource management and strategic positioning are likely key factors in surviving this relentless onslaught. While the map may be difficult for beginners, experienced players will appreciate its intricate design and strategic depth. The difficulty is generally high, with the tight passages around the sunkens likely serving as critical battle points. Though designed with five players in mind, the map is better suited for solo or cooperative play rather than team battles. Before playing, it’s crucial to familiarize yourself with the bunker’s interior layout and the sunkens’ positions, and to plan out resource gathering and defense strategies ahead of time. This map blends pure survival and defense elements, requiring players to balance survival and offense under constant pressure. Given its tense and immersive atmosphere, it’s highly recommended for players who enjoy high-stakes, survival-focused gameplay. If you’re playing for the first time, expect a session to last around 30 minutes, though the difficulty may significantly alter this.
도라에몽 의 Sunken II
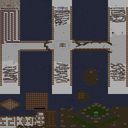
도라에몽 의 Sunken II(도라에몽의 성큰 투)는 스타크래프트 브루드워 UMS(유즈맵) 장르 중에서도 독특한 방어 및 전투 메커니즘을 경험할 수 있도록 제작된 유저 커스텀 맵이다. 이번 작품은 과거 많은 유저들에게 사랑받았던 고전 맵의 계보를 이어받아, 특유의 향수와 함께 몰입감 넘치는 플레이 환경을 제공한다. 게임이 시작되면 플레이어는 주어진 지형과 유닛 배치에 따라 각자의 위치에서 몰려오는 적의 공세를 막아내거나 정해진 목표를 달성하기 위한 전략을 펼쳐야 한다. 특히 내부 설명에 언급된 바와 같이 특정 플레이어 진영인 빨강 유저의 건물이 자동으로 건설되는 등 독특한 트리거 시스템이 포함되어 있어 일반적인 밀리 게임과는 완전히 다른 양상으로 전개된다. 또한 구석 지역에는 개인 럴커 유닛들이 뭉쳐져 배치되어 있어 이를 어떻게 활용하고 방어선 구축에 녹여내느냐가 승패를 가르는 중요한 요인으로 작용한다. 맵의 전반적인 난이도는 하드(HARD) 수준으로 설정되어 있어 초보자부터 숙련된 유저까지 모두 긴장감을 놓을 수 없는 플레이 경험을 선사한다. 사방으로 펼쳐진 플랫폼 타일셋 기반의 독특한 지형 구조는 플레이어가 효율적인 방어 거점을 구축하고 아군과의 협력을 유도하는 핵심 요소로 작용한다. 친구들과 함께 멀티플레이로 즐기기에 적합하며, 색다른 방어전과 유즈맵 특유의 재미를 느끼고 싶은 모든 스타크래프트 브루드워 팬들에게 추천할 만한 작품이다. 플레이를 시작하기 전에 내부 설명에 적힌 자동 건설 요소와 럴커 유닛의 배치 위치를 미리 파악해 두면 더욱 원활하게 게임을 풀어나갈 수 있을 것이다. Doraemon's Sunken II is a user-custom map created within the StarCraft: Brood War UMS (Use Map Settings) genre, designed to let players experience unique defensive and combat mechanisms. This map inherits the legacy of classic maps that have been loved by many players in the past, providing an immersive gameplay environment filled with nostalgia. When the game begins, players must deploy strategies based on the given terrain and unit placements to fend off incoming enemy waves or achieve designated objectives from their respective positions. Notably, as mentioned in the internal description, a unique trigger system is included—such as the buildings of the red player slot being automatically constructed—which unfolds the match in a completely different direction from standard melee games. In addition, personal lurker units are gathered and positioned in the corner areas, making how one utilizes them and integrates them into the defensive line a crucial factor determining victory or defeat. The overall difficulty of the map is set to a hard level, delivering a tense gameplay experience for everyone from beginners to experienced users. The unique terrain structure based on the platform tileset spreading across all directions serves as a core element that encourages players to establish efficient defensive strongholds and cooperate with allies. It is well-suited for multiplayer sessions with friends and is a recommended work for all StarCraft: Brood War fans who want to experience unconventional defense battles and the distinct fun of UMS maps. Before starting the game, grasping the automatic construction features and the placement locations of the lurker units noted in the internal description in advance will help you navigate the match much more smoothly.
스타 성큰 디펜스 업+ (Star Sunken Defense Up+)
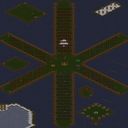
스타크래프트 브루드워 유즈맵 'Star Sunken Defense Up+'는 제목에서 드러나듯 성큰 콜로니를 활용한 디펜스 장르의 맵이다. 원본 파일명 '성큰6웨이(깔려있음)11.scx'를 통해 6인 플레이를 지원하며, 이미 성큰이 일부 배치된 상태로 게임이 시작됨을 추측할 수 있다. 이 맵은 플랫폼 타일셋을 사용한 128x128 크기의 공간에서 펼쳐지며, 플레이어들은 각자의 길목에 성큰과 방어 구조물을 건설해 몰려오는 적 유닛을 막아내는 전형적인 라인 디펜스 방식을 따른다. 게임의 핵심은 제한된 자원과 공간 안에서 효율적인 성큰 배치를 고민하고, 아군과의 협동을 통해 방어 라인을 유지하는 데 있다. 특히 파일명의 '6웨이'라는 용어는 6개 방향에서 적이 공격해오거나 6명의 플레이어가 각자 방어로를 담당하는 구조를 암시한다. 적의 공세는 시간이 지날수록 강력해지므로, 초반 빌드업과 업그레이드 타이밍이 생존을 좌우할 것으로 보인다. 난이도는 디펜스 특성상 초중반을 넘기지 못하면 쉽게 무너질 수 있어 중상급 정도로 추정된다. 이 맵은 성큰 디펜스의 정석적인 재미를 느끼고 싶은 플레이어나, 협동 플레이를 선호하는 유저에게 추천할 만하다. 다만 시작 시 성큰이 이미 배치된 조건이 난이도를 낮추는 요소인지, 아니면 초반 러시를 견디기 위한 장치인지는 실제 플레이를 통해 확인해야 한다. 전반적으로 클래식한 스타크래프트 유즈맵의 감성을 간직한, 직관적이면서도 몰입도 높은 디펜스 경험을 제공할 것이다. StarCraft Brood War map 'Star Sunken Defense Up+' is a defense genre map centered around Sunken Colonies, as the title suggests. The original filename '성큰6웨이(깔려있음)11.scx' indicates support for 6 players and implies that Sunken Colonies are pre-deployed at the start. Set on a Platform tileset with a 128x128 grid, players must build Sunken Colonies and other defensive structures at their respective chokepoints to halt incoming enemy waves, following a classic line-defense format. The core gameplay revolves around optimizing Sunken placement within limited resources and space, while cooperating to reinforce defensive lines. The term '6-way' in the filename hints at a structure where enemies attack from six directions or six players each defend a lane. As enemy assaults intensify over time, early build-up and upgrade timing become critical for survival. The difficulty is estimated to be moderately high, as failing to withstand early waves can lead to a quick collapse. This map is recommended for players seeking the authentic Sunken defense experience or those who enjoy cooperative play. However, whether the pre-placed Sunken units ease the difficulty or serve as a buffer against early rushes needs to be verified through actual gameplay. Overall, it delivers an intuitive and immersive defense map that captures the classic StarCraft UMS spirit.
성큰 디펜스 업+ (Star Sunken Defense Up+)
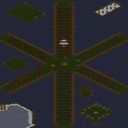
스타크래프트 브루드워의 디펜스 장르 유즈맵인 〈Star Sunken Defense Up+〉는 섬 지형이 조밀하게 배치된 독특한 공간에서 펼쳐지는 방어전을 중심으로 구성되어 있다. 4096x4096의 넓은 맵은 중앙에 위치한 핵심 건물을 중심으로 적의 물량이 끊임없이 몰려오는 구조로, 플레이어는 제한된 자원으로 건물을 짓고 유닛을 생산하여 침략을 저지해야 한다. 섬 지형 간의 이동이 제한적이기 때문에 전략적인 위치 선정이 무엇보다 중요하며, 각 섬에 자원과 건물을 배치하는 타이밍이 승패를 좌우할 가능성이 높다. 맵 상단과 하단에는 각각의 진영이 시작할 수 있는 기지 구역이 마련되어 있으며, 중앙의 좁은 길목을 활용한 방어 체계를 구축하는 것이 핵심 전략이 된다.ografi, the map features dense island terrain formations that force players to carefully plan their expansions and defenses. The 4096x4096 layout centers around a core structure that must be protected from relentless enemy waves, with resource islands scattered across the map. Movement between islands is restricted, making strategic positioning of buildings and resource gathering crucial. Both the top and bottom sections of the map provide starting bases, while the narrow central pathways become critical defensive chokepoints. Players must balance expansion and defense, anticipating enemy attack patterns and adapting their base layouts accordingly. The compact island layout and limited expansion opportunities create a tense, methodical gameplay experience that rewards foresight and adaptability over aggressive tactics.
성큰 9999 웨이 (Sunkend 6 Way)
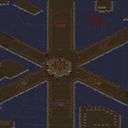
스타크래프트 브루드워 유즈맵 '성큰 9999 웨이'는 6인용 컴까기 디펜스 맵으로, 사막 타일셋 위에서 성큰 콜로니를 활용해 몰려오는 컴퓨터 병력을 막아내는 전형적인 입구막기 플레이를 제공한다. 맵 제목과 내부 파일명에 나타난 '성큰9999웨이'라는 표기는 각 진영마다 다수의 진입로가 존재하며, 플레이어가 성큰 라인을 촘촘히 구축해 9999라는 상징적 수치만큼 압도적인 물량을 버텨내야 함을 암시한다. 128×128 타일 크기의 넓은 전장은 6개 기지가 방사형으로 배치되어 있어, 각자 맡은 입구를 독자적으로 방어하면서도 중앙 지역에서의 지원 병력 교환이나 공동 자원 확보가 자연스럽게 이뤄진다. 진행 방식은 초반 드론으로 미네랄을 확보한 뒤 성큰과 히드라리스크, 러커 등 저그 지상 병력을 조합해 웨이브를 견디는 형태이며, 중후반에는 울트라리스크나 디파일러 같은 고급 유닛으로 화력을 보강한다. 컴퓨터 AI가 끊임없이 병력을 생산해 보내오므로, 성큰 업그레이드 타이밍과 가스 관리, 멀티 기지 확장이 승패를 가른다. 협동이 필수적인 만큼 음성 채팅이나 핑으로 진입로별 병력 분담을 조율하면 안정적으로 클리어할 수 있다. 난이도는 초보부터 중급자까지 무난하게 즐길 수 있는 '보통' 수준으로 추정되며, 한 판당 30~40분 내외로 마무리된다. 성큰 디펜스 특유의 손맛과 6인 협동의 긴장감을 동시에 느끼고 싶은 유저에게 추천한다. Sunken 9999 Way is a six‑player comp‑stomp defense map for StarCraft: Brood War, set on a desert tileset where players mass Sunken Colonies to hold back endless computer waves. The title and the corrupted filename “성큰9999웨이” hint at multiple entrance lanes per base and a symbolic “9999” wave count that players must survive. The 128×128‑tile battlefield spreads six bases radially, letting each player guard an independent choke while still allowing mid‑map reinforcement exchanges and shared resource nodes. Gameplay follows the classic Sunken defense loop: early drones secure minerals, then a mix of Sunken Colonies, Hydralisks, and Lurkers stops the first waves; mid‑to‑late game transitions to Ultralisk and Defiler tech for heavier firepower. Because the AI constantly streams units, upgrade timing, gas management, and timely expansions decide victory. Coordination via voice or pings to assign lanes and share detection makes clears far smoother. Difficulty sits around “normal,” accessible to beginners yet engaging for veterans, with matches lasting roughly 30–40 minutes. Recommended for anyone craving the tactile satisfaction of Sunken line‑holding combined with six‑player cooperative tension.
성큰 6 웨이 Hell 3버전
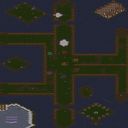
성큰 6 웨이 헬 버전 3은 저그 성큰 콜로니와 영웅 유닛을 활용해 여섯 갈래 진입로를 막아내는 고전적인 입구막기 디펜스 맵이다. 플랫폼 타일셋 위에서 펼쳐지는 128x128 크기의 전장은 여섯 명의 플레이어가 각각 하나의 진입로를 전담하거나 유기적으로 협력해 몰려드는 적 웨이브를 견뎌내도록 설계되었다. 핵심은 '영웅 드론'과 '영웅 성큰'의 추가로, 단순 건물 짓기를 넘어 영웅 육성과 능력치 관리가 생존의 열쇠가 된다는 점이다. 제작자가 '난이도 극악'을 예고했듯 초반부터 강력한 공중·지상 혼합 병력이 끊임없이 밀려오며, 영웅 능력치 조정으로 인한 밸런스 변화가 체감 난이도를 더욱 끌어올린다. 플레이어는 자원 관리, 업그레이드 타이밍, 영웅 컨트롤을 동시에 수행해야 하므로 숙련된 유즈맵 유저라도 긴장을 늦출 수 없다. 6인 협동 플레이 특성상 한 명의 실수가 전선 붕괴로 이어지기 쉬워 팀워크와 역할 분담이 필수적이다. 고난도 디펜스와 영웅 육성 재미를 동시에 원하는 유저, 입구막기 장르의 정수를 맛보고 싶은 팀에게 추천한다. 플레이 전 버전별 영웅 스펙 차이와 웨이브 구성표를 숙지하면 초기 정착에 도움이 된다. Sunken 6 Way Hell Version 3 is a classic choke-point defense map where players utilize Zerg Sunken Colonies and hero units to hold six distinct lanes. The 128x128 platform tileset battlefield is designed for six players to each guard a lane or cooperate organically to survive incoming enemy waves. The key twist lies in the addition of a 'Hero Drone' and 'Hero Sunken,' shifting gameplay beyond simple structure placement toward hero development and stat management as the core of survival. As the creator warns of 'extreme difficulty,' powerful mixed air and ground forces attack relentlessly from the early game, and hero stat adjustments further spike the challenge. Players must juggle resource management, upgrade timing, and hero micro simultaneously, keeping even veteran UMS players on edge. Since a single mistake in this 6-player co-op setting can trigger a total front-line collapse, teamwork and role assignment are essential. Recommended for those seeking high-difficulty defense combined with hero progression, or teams wanting to experience the quintessence of the choke-point defense genre. Checking hero specs per version and wave composition tables before starting will aid early stabilization.
스타 선켄 디펜스 (Star Sunken Defense)
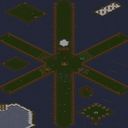
스타크래프트 브루드워 맵 중에서도 오랜 시간 동안 디펜스 장르의 고유한 재미를 선사해 온 스타 선켄 디펜스 (Star Sunken Defense)는 다수의 플레이어가 협력하여 몰려오는 적의 공세를 막아내는 클래식한 유즈맵입니다. 플랫폼 타일셋을 기반으로 펼쳐지는 이 맵은 독특한 방사형 구조와 촘촘하게 배치된 방어 건물의 조화가 인상적인 전장을 제공합니다. 중앙의 거점을 중심으로 여러 갈래로 뻗어 나간 지형은 각 플레이어가 맡은 구역을 충실히 방어하면서도 위기 상황에서는 서로 지원할 수 있는 전략적 공간감을 형성합니다. 특히 맵 전반에 걸쳐 배치된 성큰 콜로니와 다양한 방어 유닛들의 배치는 정형화된 플레이에서 벗어나 유연한 대처 능력을 요구하며, 웨이브가 거듭될수록 치열해지는 전투 속에서 손에 땀을 쥐는 긴장감을 만끽할 수 있습니다. 수많은 적 유닛들이 사방에서 압박해 오는 환경 속에서 자원을 효율적으로 관리하고 최적의 방어 라인을 구축하는 것이 이 유즈맵의 핵심적인 진행 방식입니다. 플레이어들은 각자의 위치에서 몰려오는 적의 공격 성향을 파악하고 이에 맞춘 유닛 배치와 업그레이드 순서를 고민해야 합니다. 혼자서 모든 것을 해결하기보다는 동료들과의 유기적인 소통과 역할 분담이 승패를 가르는 중요한 요인으로 작용하며, 협동 플레이의 묘미를 극대화합니다. 디펜스 장르를 선호하는 유저들이나 친구들과 함께 호흡을 맞추며 몰입도 높은 방어전을 즐기고 싶은 이들에게 더할 나위 없는 선택지가 됩니다. 본격적인 게임을 시작하기 앞서 각 진입로의 지형적 특성과 자원 수급 동선을 미리 파악해 두는 것이 생존 확률을 높이는 지름길입니다. 방어선을 구축할 때 사각지대가 발생하지 않도록 시야를 확보하고, 동료의 구역에 위기가 닥쳤을 때 신속하게 화력을 지원할 수 있는 태세를 갖추는 것이 권장됩니다. 철저한 사전 준비와 긴밀한 협력을 바탕으로 적의 공세를 완벽하게 저지하는 쾌감을 느껴보시기 바랍니다. Star Sunken Defense is a classic custom map that has long delivered the unique fun of the defense genre in StarCraft: Brood War, where multiple players cooperate to fend off incoming enemy waves. Set on a platform tileset, this map offers an impressive battlefield featuring a distinctive radial structure combined with densely arranged defensive buildings. The terrain extending in multiple directions from a central base creates a strategic spatial sense that allows each player to faithfully defend their assigned sector while supporting one another during critical moments. In particular, the placement of Sunken Colonies and various defensive units across the map demands flexible adaptability away from rigid gameplay, allowing players to experience heart-pounding tension amid increasingly fierce battles as waves progress. Managing resources efficiently and establishing optimal defensive lines while numerous enemy units press in from all directions is the core progression method of this use map. Players must analyze the attack tendencies of incoming enemies at their respective positions and deliberate on unit placement and upgrade sequences tailored to them. Organic communication and division of roles with teammates rather than solving everything alone act as crucial factors determining victory or defeat, maximizing the charm of cooperative play. It serves as an unparalleled choice for users who prefer the defense genre or those wanting to enjoy an immersive defensive battle in sync with friends. Before starting the game in earnest, understanding the topographical characteristics of each approach route and resource supply route in advance is the shortcut to increasing survival probability. When establishing defensive lines, it is recommended to secure vision to prevent blind spots and maintain a posture to quickly support firepower when a crisis hits a teammate's sector. Experience the thrill of perfectly repelling enemy offensives based on thorough preliminary preparation and close cooperation.
도라에몽의 성큰 II 보스
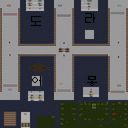
‘도라에몽의 성큰 II 보스’는 스타크래프트 브루드워의 대표적인 유즈맵으로, ‘성큰’ 계열 맵의 후속작이자 보스전 위주의 컨텐츠로 구성되어 있다. 맵은 6인용으로 설계되었으며, 좁은 길목과 요새 구조가 특징적이다. 플레이어는 좁은 통로를 지나가며 끊임없이 몰려오는 적 군단과 맞서는 디펜스 형식의 플레이를 하게 된다. 맵 내부에는 영웅 유닛이 배치되어 있으며, 맵 설명에 따르면 ‘약간의 영웅들이 늘어났다’는 점을 강조하고 있어 기존 성큰 시리즈보다 영웅의 역할이 강화되었음을 짐작할 수 있다. ‘나가지 말고 열심히 하세요’라는 메시지는 플레이어에게 긴장을 놓지 말라는 의미를 담고 있는 것으로 보인다. 이 맵의 핵심은 좁은 길목을 활용한 입구막기 전략과 지속적인 적 웨이브에 대응하는 것이다. 플레이어는 방어선을 구축하고, 영웅의 스킬을 적재적소에 활용하여 보스를 클리어해야 한다. 디펜스 장르 특성상 전략적 배치와 자원 관리가 중요하며, 특히 좁은 공간에서 다수의 적을 상대해야 하므로 컨트롤 능력이 요구된다. 맵의 타일셋은 플랫폼을 사용한 것으로 보아 비교적 오래된 시기의 맵으로 추정된다. 영웅 유닛의 추가와 더불어 맵의 구조적 변화가 있었는지 여부는 플레이를 직접 해보아야 알겠지만, ‘plus+’라는 표현은 개선된 요소가 있음을 시사한다. 이 맵은 초보자보다는 게임에 익숙한 플레이어들에게 더욱 적합하며, 디펜스와 보스전 경험을 동시에 제공한다는 점에서 매력적이다. 또한 6인용으로 설계되어 팀 플레이가 가능하다는 장점도 있다. 다만, 좁은 길목과 높은 난이도의 보스전을 클리어하기 위해서는 사전 연습이 필수적이며, 방어선 구축과 영웅 관리 능력이 중요하다. 맵의 크기는 1024 x 1024로 비교적 큰 편이지만, 좁은 길목이 많기 때문에 실제 플레이 공간은 제한적이다. 맵의 전체 해상도는 4096 x 4096로, 고해상도에서 플레이할 경우 그래픽 품질이 향상될 수 있다. 이 맵을 즐기는 플레이어들은 좁은 길목에서 펼쳐지는 긴장감 넘치는 전투와 보스전 클리어의 성취감을 느낄 수 있을 것이다. 특히 영웅의 스킬 활용과 전략적 방어선 구축은 이 맵의 핵심 포인트로, 반복 플레이를 통해 숙련도를 높일 수 있다. 다만, 난이도가 높기 때문에 초보자나 컨트롤이 부족한 플레이어에게는 다소 어려울 수 있다. 따라서 플레이 전에 맵의 구조와 영웅의 스킬을 충분히 숙지하는 것이 중요하다. ‘Doraemon’s Sunken II Boss’ is a renowned custom map in *StarCraft: Brood War*, serving as a sequel to the *Sunken* series and focusing on boss battles. Designed for six players, the map features narrow pathways and fortress-like structures. Players engage in a defense-style format, navigating tight corridors while fending off relentless waves of enemies. The map includes hero units, with the description highlighting that "a few more heroes have been added," suggesting that their roles are more prominent compared to previous *Sunken* titles. The message "Don’t go out, work hard" seems to urge players to stay focused and vigilant. The core gameplay revolves around blocking enemies at chokepoints and countering continuous enemy waves. Players must establish defensive lines and strategically use hero abilities to defeat the boss. As a defense genre map, strategic placement and resource management are crucial, especially since the confined space requires precise control against large numbers of enemies. Given the tile set uses the *Platform* style, it likely dates back to an earlier era of map creation. While the addition of hero units and structural changes (hinted at by the "plus+" notation) would need hands-on experience to confirm, the term itself implies improvements. This map is better suited for experienced players rather than beginners, offering both defense mechanics and boss battle experiences. Its six-player design also allows for team play. However, clearing the narrow chokepoints and high-difficulty boss fights demands prior practice, with a strong emphasis on building defenses and managing heroes. While the map size is relatively large at 1024x1024, the abundance of narrow passages makes the effective playable space limited. The overall resolution is 4096x4096, so playing at high resolution can enhance visual quality. Players who enjoy this map will experience the thrilling tension of battles in tight corridors and the satisfaction of defeating bosses. The strategic use of hero abilities and defensive setups are key highlights, rewarding repeated play to improve skill. That said, the high difficulty may pose challenges for beginners or players with weaker control. Therefore, it’s important to thoroughly understand the map layout and hero skills before diving in.
최근 등록된 맵
새로 추가된 파일과 버전을 확인하세요.
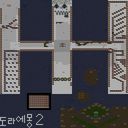
도라에몽 의 Sunken II
도라에몽 의 Sunken II는 플랫폼 타일셋을 활용한 128x128 타일 단위의 거대 맵으로, 전체 크기가 4096x4096에 달하는 광활한 전장을 제공한다. 이 맵은 제목에서 알 수 있듯이 지형이 대거 낮아진 '성큰' 형태를 띠고 있어, 일반 메플 맵과는 전혀 다른 이동 경로와 시야를 만들어낸다. 유즈맵(UMS) 분류에 속하며, 최대 6명이 동시에 참여할 수 있는 자유전투 형태를 기본으로 한다. 팀 구분이 없으므로 각자는 독립적으로 자원을 채취하고 기지를 건드리면서 상대를 압박해야 하며, 성큰 지형 덕분에 일반적인 건물 배치나 유닛 이동이 예상보다 복잡해진다. 특히 낮은 지형에서의 시야 차단과 높은 곳에서의 사격각은 전략적인 요새 건설과 기습을 동시에 고려하게 만든다. 내부에 남은 설명에서 보이는 'H A R D' 표현은 이 맵이 높은 난이도를 목표로 설계되었음을 암시하며, 초보자보다는 스타크래프트 브루드워에 어느 정도 익숙한 플레이어에게 적합하다. 자원 맵의 배치는 표준과 유사하나, 성큰으로 인한 길목의 협소함과 갑작스러운 높이 차이는 전투의 흐름을 자주 바꾸며, 이로 인해 장기전의 긴장감이 유지된다. 추천 대상은 지형 변형을 이용한 독특한 전술을 즐기는 유저와, 친구들과의 비공식 대전에서 색다른 경험을求め하는 그룹이다. 플레이 전에는 성큰 지형으로 인한 유닛 경로 막힘을 확인하고, 초기 건물 배치를 신중히 계획하는 것이 좋다. Doraemon's Sunken II is a massive map built on the Platform tileset with 128x128 tile units, stretching to an impressive 4096x4096 in total size. As the title suggests, the terrain is largely lowered into a "sunken" formation, creating movement paths and sight lines that differ greatly from standard melee maps. Classified as a UMS (User Map Scenario), it allows up to six players to engage in a free-for-all battle by default. With no team divisions, each player must independently gather resources, build structures, and apply pressure on opponents; the sunken terrain makes typical building placement and unit movement more complicated than expected. The vision obstruction from low ground and the advantageous firing angles from higher elevations simultaneously encourage the construction of strategic strongholds and the consideration of ambush tactics. The "H A R D" hint embedded in the internal description implies the map is designed for a high difficulty level, making it more suitable for players already familiar with StarCraft: Brood War rather than complete beginners. Although resource placement follows a standard layout, the sunken terrain’s narrow passages and sudden elevation shifts frequently alter the flow of combat, sustaining tension in prolonged engagements. This map is recommended for users who enjoy unique tactics that exploit terrain variations and for groups seeking a fresh experience in informal matches with friends. Before playing, check for unit path blocking caused by the sunken ground and plan initial building placements carefully.
도라에몽의 성큰 II 보스
‘도라에몽의 성큰 II 보스’는 스타크래프트 브루드워의 대표적인 유즈맵으로, ‘성큰’ 계열 맵의 후속작이자 보스전 위주의 컨텐츠로 구성되어 있다. 맵은 6인용으로 설계되었으며, 좁은 길목과 요새 구조가 특징적이다. 플레이어는 좁은 통로를 지나가며 끊임없이 몰려오는 적 군단과 맞서는 디펜스 형식의 플레이를 하게 된다. 맵 내부에는 영웅 유닛이 배치되어 있으며, 맵 설명에 따르면 ‘약간의 영웅들이 늘어났다’는 점을 강조하고 있어 기존 성큰 시리즈보다 영웅의 역할이 강화되었음을 짐작할 수 있다. ‘나가지 말고 열심히 하세요’라는 메시지는 플레이어에게 긴장을 놓지 말라는 의미를 담고 있는 것으로 보인다. 이 맵의 핵심은 좁은 길목을 활용한 입구막기 전략과 지속적인 적 웨이브에 대응하는 것이다. 플레이어는 방어선을 구축하고, 영웅의 스킬을 적재적소에 활용하여 보스를 클리어해야 한다. 디펜스 장르 특성상 전략적 배치와 자원 관리가 중요하며, 특히 좁은 공간에서 다수의 적을 상대해야 하므로 컨트롤 능력이 요구된다. 맵의 타일셋은 플랫폼을 사용한 것으로 보아 비교적 오래된 시기의 맵으로 추정된다. 영웅 유닛의 추가와 더불어 맵의 구조적 변화가 있었는지 여부는 플레이를 직접 해보아야 알겠지만, ‘plus+’라는 표현은 개선된 요소가 있음을 시사한다. 이 맵은 초보자보다는 게임에 익숙한 플레이어들에게 더욱 적합하며, 디펜스와 보스전 경험을 동시에 제공한다는 점에서 매력적이다. 또한 6인용으로 설계되어 팀 플레이가 가능하다는 장점도 있다. 다만, 좁은 길목과 높은 난이도의 보스전을 클리어하기 위해서는 사전 연습이 필수적이며, 방어선 구축과 영웅 관리 능력이 중요하다. 맵의 크기는 1024 x 1024로 비교적 큰 편이지만, 좁은 길목이 많기 때문에 실제 플레이 공간은 제한적이다. 맵의 전체 해상도는 4096 x 4096로, 고해상도에서 플레이할 경우 그래픽 품질이 향상될 수 있다. 이 맵을 즐기는 플레이어들은 좁은 길목에서 펼쳐지는 긴장감 넘치는 전투와 보스전 클리어의 성취감을 느낄 수 있을 것이다. 특히 영웅의 스킬 활용과 전략적 방어선 구축은 이 맵의 핵심 포인트로, 반복 플레이를 통해 숙련도를 높일 수 있다. 다만, 난이도가 높기 때문에 초보자나 컨트롤이 부족한 플레이어에게는 다소 어려울 수 있다. 따라서 플레이 전에 맵의 구조와 영웅의 스킬을 충분히 숙지하는 것이 중요하다. ‘Doraemon’s Sunken II Boss’ is a renowned custom map in *StarCraft: Brood War*, serving as a sequel to the *Sunken* series and focusing on boss battles. Designed for six players, the map features narrow pathways and fortress-like structures. Players engage in a defense-style format, navigating tight corridors while fending off relentless waves of enemies. The map includes hero units, with the description highlighting that "a few more heroes have been added," suggesting that their roles are more prominent compared to previous *Sunken* titles. The message "Don’t go out, work hard" seems to urge players to stay focused and vigilant. The core gameplay revolves around blocking enemies at chokepoints and countering continuous enemy waves. Players must establish defensive lines and strategically use hero abilities to defeat the boss. As a defense genre map, strategic placement and resource management are crucial, especially since the confined space requires precise control against large numbers of enemies. Given the tile set uses the *Platform* style, it likely dates back to an earlier era of map creation. While the addition of hero units and structural changes (hinted at by the "plus+" notation) would need hands-on experience to confirm, the term itself implies improvements. This map is better suited for experienced players rather than beginners, offering both defense mechanics and boss battle experiences. Its six-player design also allows for team play. However, clearing the narrow chokepoints and high-difficulty boss fights demands prior practice, with a strong emphasis on building defenses and managing heroes. While the map size is relatively large at 1024x1024, the abundance of narrow passages makes the effective playable space limited. The overall resolution is 4096x4096, so playing at high resolution can enhance visual quality. Players who enjoy this map will experience the thrilling tension of battles in tight corridors and the satisfaction of defeating bosses. The strategic use of hero abilities and defensive setups are key highlights, rewarding repeated play to improve skill. That said, the high difficulty may pose challenges for beginners or players with weaker control. Therefore, it’s important to thoroughly understand the map layout and hero skills before diving in.
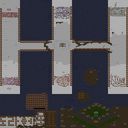
도라에몽의 성큰 II 드론 (Doraemon's Sunken II Drone)
도라에몽의 성큰 II 드론은 스타크래프트 브루드워 플랫폼 타일셋을 활용한 UMS 맵으로, 성큰 유닛과 드론 유닛이 중심이 되는 컴퓨터 상대 맵이다. 맵 크기는 1024×1024 타일로 구성되어 있으며, 전반적인 구조는 넓은 평야 형태에 몇 개의 장애물과 스크립트 트리거가 배치되어 있어 wave 형태의 적 성큰이 주기적으로Spawn된다. 플레이어는 드론 유닛을 조종하여 성큰의 공격을 막고, 일정 시간을 버티거나 특정 수의 성큰을 제거하는 목표를 달성해야 한다. 내부 설명에 HARD 표기가 있어 기본 난이도는 어려움으로 설정되어 있으며, 적의 체력과 공격력이 상향 조정되어 있는 것으로 추정된다. 진행 방식은 처음에는 소수의 성큰이 등장하고, 시간 경과에 따라 숫자와 유닛 종류가 증가하며, 중간중간 보스 형태의 대형 성큰이 출현하는 패턴을 보인다. 이러한 흐름은 플레이어에게 지속적인 압박감을 주며, 유닛 생산과 업그레이드 타이밍이 승패를 좌우한다. 추천 대상은 스타크래프트 유즈맵에 익숙한 중급 이상 플레이어이며, 성큰 유닛의 특성을 이해하고 마이크로 컨트롤에 자신이 있는 유저에게 적합하다. 플레이 전 확인해야 할 점은 맵이 6인용으로 설계되어 있으나 협동 모드보다는 솔로 또는 2인 협동 플레이가 주를 이룬다는 점과, 트리거 오류로 간혹 유닛이 소환되지 않을 수 있으니 저장 기능을 활용하는 것이 좋다. 전체적으로 성큰과 드론이라는 테마를 잘 살린 전략적인 방어 맵으로, 짧은 시간에 강렬한 긴장감을 제공한다. Doraemon's Sunken II Drone is a UMS map that uses the Platform tileset of StarCraft: Brood War, focusing on Sunken and Drone units in a computer‑opponent setting. The map size is 1024×1024 tiles, consisting mainly of an open plain with a few obstacles and script triggers that cause periodic waves of enemy Sunken to spawn. Players control Drone units to fend off the Sunken attacks, aiming to survive for a set time or destroy a certain number of Sunken. The internal description includes the word “HARD”, so the baseline difficulty is set to “어려움” (hard), suggesting that enemy health and damage have been increased. Gameplay begins with a small number of Sunken; as time passes, their count and unit variety increase, and occasional large boss‑type Sunken appear. This progression creates constant pressure, making timing of unit production and upgrades crucial for victory. The map is recommended for intermediate‑to‑advanced players familiar with UMS maps who understand Sunken characteristics and are confident in their micro‑control. Before playing, note that although the map is designed for six players, it is mainly intended for solo or two‑player cooperative play, and occasional trigger glitches may prevent units from spawning, so using the save function is advisable. Overall, the map successfully blends the Sunken and Drone theme into a tense, short‑duration strategic defense experience.
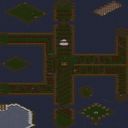
(신)성큰 6웨이(영웅+복권) (New Sunken 6-Way (Hero+Lottery))
(신)성큰 6웨이(영웅+복권)은 플랫폼 타일셋을 기반으로 한 1024x1024 크기의 맵으로, 최대 6명이 동시에 참여할 수 있는 자유전투형 유즈맵이다. 기본 지형은 평탄한 플랫폼에 자원이 균등히 배치되어 있어 일반적인 melee와 비슷한 출발점을 제공하지만, 두 가지 커스텀 요소가 차별점을 만든다. 먼저 저글링과 러커의 생산량을 증가시켜 초반 전투력을 강화하고, 이를 기반으로 빠른 확장이 가능하도록 설계하였다. 두 번째로 복권 시스템을 도입하여 일정 조건을 만족할 때마다 무작위로 자원이나 유닛 보너스를 제공한다. 이 복권은 타이머나 킬 수 등에 연동될 수 있으며, 운에 따라 게임 흐름이 급변할 수 있어 긴장감과 변수를 동시에 제공한다. 플레이는 각 플레이어가 기지를 건설하고 저글링·러커 위주의 군대를 육성하면서 복권 기회를 노리는 형태로 진행된다. 자원 채집은 표준 광물·가스를 따르지만, 복권으로 인한 예상치 못한 자원 증가가 때때로 대규모 타이밍 공격을 가능하게 한다. 영웅 유닛은 별도로 주어지지 않으나, 저글링과 러커의 양적 우위가 전략적 깊이를 만든다. 승리 조건은 상대 세력의 전멸로, 복권이 변수가 되므로 순수 실력 외에도 운의 영향도 고려해야 한다. 추천 대상은 빠른 템포와 운 요소를 즐기는 중급 이상의 플레이어, 특히 저글링·러커 러시를 선호하는 유저와 랜덤 보상을 통해 게임에 변화를 주고 싶은 그룹이다. 플레이 전에는 복권 트리거 조건을 확인하고, 초기 빌드 순서를 저글링·러커 위주로 계획하며, 6인 매치에서의 확산 속도와 자원 소모를 충분히 고려해야 한다. (New) Sunken 6-Way (Hero+Lottery) is a map built on the platform tileset with a size of 1024x1024, allowing up to six players to participate in a free‑for‑all UMS style. The terrain is a flat platform with evenly spaced resources, giving a starting point similar to standard melee, but two custom elements set it apart. First, the production of zerglings and lurkers is increased to boost early‑game combat power and enable rapid expansion. Second, a lottery system grants random resource or unit bonuses whenever certain conditions are met, which can be tied to timers, kill counts, etc., introducing luck‑driven swings that add tension and variability. Gameplay proceeds as each player builds a base, armies centered on zerglings and lurkers, while watching for lottery opportunities. Resource gathering follows the standard mineral and gas model, but occasional unexpected boosts from the lottery can enable large‑scale timing attacks. No dedicated hero units are provided; instead, the numerical advantage of zerglings and lurkers creates strategic depth. The victory condition is the destruction of all opposing forces, but because the lottery can alter the outcome, success depends on both skill and luck. This map is recommended for intermediate‑to‑advanced players who enjoy fast pacing and random elements, especially fans of zergling-lingering rushes and groups that want to shake up the game with random rewards. Before playing, check the lottery trigger conditions, plan an opening build focused on zerglings and lurkers, and consider the expansion speed and resource consumption in a six‑player match.
성큰 9999 웨이 (Sunkend 6 Way)
스타크래프트 브루드워 유즈맵 '성큰 9999 웨이'는 6인용 컴까기 디펜스 맵으로, 사막 타일셋 위에서 성큰 콜로니를 활용해 몰려오는 컴퓨터 병력을 막아내는 전형적인 입구막기 플레이를 제공한다. 맵 제목과 내부 파일명에 나타난 '성큰9999웨이'라는 표기는 각 진영마다 다수의 진입로가 존재하며, 플레이어가 성큰 라인을 촘촘히 구축해 9999라는 상징적 수치만큼 압도적인 물량을 버텨내야 함을 암시한다. 128×128 타일 크기의 넓은 전장은 6개 기지가 방사형으로 배치되어 있어, 각자 맡은 입구를 독자적으로 방어하면서도 중앙 지역에서의 지원 병력 교환이나 공동 자원 확보가 자연스럽게 이뤄진다. 진행 방식은 초반 드론으로 미네랄을 확보한 뒤 성큰과 히드라리스크, 러커 등 저그 지상 병력을 조합해 웨이브를 견디는 형태이며, 중후반에는 울트라리스크나 디파일러 같은 고급 유닛으로 화력을 보강한다. 컴퓨터 AI가 끊임없이 병력을 생산해 보내오므로, 성큰 업그레이드 타이밍과 가스 관리, 멀티 기지 확장이 승패를 가른다. 협동이 필수적인 만큼 음성 채팅이나 핑으로 진입로별 병력 분담을 조율하면 안정적으로 클리어할 수 있다. 난이도는 초보부터 중급자까지 무난하게 즐길 수 있는 '보통' 수준으로 추정되며, 한 판당 30~40분 내외로 마무리된다. 성큰 디펜스 특유의 손맛과 6인 협동의 긴장감을 동시에 느끼고 싶은 유저에게 추천한다. Sunken 9999 Way is a six‑player comp‑stomp defense map for StarCraft: Brood War, set on a desert tileset where players mass Sunken Colonies to hold back endless computer waves. The title and the corrupted filename “성큰9999웨이” hint at multiple entrance lanes per base and a symbolic “9999” wave count that players must survive. The 128×128‑tile battlefield spreads six bases radially, letting each player guard an independent choke while still allowing mid‑map reinforcement exchanges and shared resource nodes. Gameplay follows the classic Sunken defense loop: early drones secure minerals, then a mix of Sunken Colonies, Hydralisks, and Lurkers stops the first waves; mid‑to‑late game transitions to Ultralisk and Defiler tech for heavier firepower. Because the AI constantly streams units, upgrade timing, gas management, and timely expansions decide victory. Coordination via voice or pings to assign lanes and share detection makes clears far smoother. Difficulty sits around “normal,” accessible to beginners yet engaging for veterans, with matches lasting roughly 30–40 minutes. Recommended for anyone craving the tactile satisfaction of Sunken line‑holding combined with six‑player cooperative tension.
신 성큰 6웨이: 영웅과 복권 (New Sunken 6 Way: Heroes & Lottery)
(신)성큰 6웨이(영웅+복권)는 6명의 플레이어가 협력해 몰려드는 컴퓨터 적군을 막아내는 전형적인 컴까기 스타일의 유즈맵이다. 플랫폼 타일셋 위에서 6방향으로 뻗은 대칭형 지형은 각 진입로가 좁은 초크 포인트를 형성해 성큰 콜로니와 방어 타워를 배치하기 유리한 구조를 보인다. 맵 제목 그대로 성큰을 주력 방어 수단으로 삼으며, 내부 설명에 언급된 러커와 저글링 추가는 적 지상군의 조합을 다양화해 단순 화력전 이상의 대처를 요구한다. 핵심 특징은 영웅 유닛과 복권 시스템이다. 영웅은 강력한 스탯과 스킬로 전선을 주도하며, 복권은 무작위 보상으로 자원이나 유닛, 업그레이드 등을 제공해 운과 전략을 동시에 자극한다. 게임 초반에는 기본 성큰과 영웅으로 버티다가 중반부터 복권 보상과 추가 테크트리를 통해 화력을 극대화하는 흐름이 일반적이다. 6인 전원이 생존해야 클리어에 가까워지므로 팀원 간 자원 지원과 라인 커버가 필수적이다. 플레이 타임은 30분 내외로 짧고 호흡이 빠른 편이며, 난이도는 복권 운에 따라 널뛰기하지만 기본적으로 초보도 영웅 의존으로 입문 가능하다. 성큰 디펜스의 원초적 재미와 랜덤 성장 요소를 동시에 즐기고 싶은 협동 유저에게 추천한다. 플레이 전 버전별 영웅 밸런스와 복권 테이블 차이를 확인하면 더 안정적인 공략이 가능하다. New Sunken 6 Way: Heroes & Lottery is a classic comp-stomp style use-map where six players cooperate to fend off waves of computer-controlled enemies. On the platform tileset, the symmetrical six-way layout creates narrow choke points at each entrance, providing an ideal structure for placing Sunken Colonies and defensive towers. As the title suggests, Sunken Colonies serve as the primary defense, while the addition of Lurkers and Zerglings mentioned in the internal description diversifies enemy ground compositions, demanding responses beyond simple firepower contests. The key features are the Hero units and the Lottery system. Heroes lead the frontline with powerful stats and skills, while the Lottery provides random rewards such as resources, units, or upgrades, stimulating both luck and strategy. The typical flow involves holding the line with basic Sunkens and Heroes in the early game, then maximizing firepower through Lottery rewards and additional tech trees in the mid-to-late game. Since all six players must survive to clear, resource sharing among teammates and covering each other's lines are essential. Playtime is relatively short at around 30 minutes with a fast pace. Difficulty fluctuates depending on Lottery luck, but beginners can enter comfortably by relying on Heroes. It is recommended for cooperative players who want to enjoy the raw fun of Sunken defense alongside random growth elements. Checking Hero balance differences and Lottery tables per version before playing will allow for a more stable strategy.
스타 성큰 디펜스 업+ (Star Sunken Defense Up+)
스타크래프트 브루드워 유즈맵 'Star Sunken Defense Up+'는 제목에서 드러나듯 성큰 콜로니를 활용한 디펜스 장르의 맵이다. 원본 파일명 '성큰6웨이(깔려있음)11.scx'를 통해 6인 플레이를 지원하며, 이미 성큰이 일부 배치된 상태로 게임이 시작됨을 추측할 수 있다. 이 맵은 플랫폼 타일셋을 사용한 128x128 크기의 공간에서 펼쳐지며, 플레이어들은 각자의 길목에 성큰과 방어 구조물을 건설해 몰려오는 적 유닛을 막아내는 전형적인 라인 디펜스 방식을 따른다. 게임의 핵심은 제한된 자원과 공간 안에서 효율적인 성큰 배치를 고민하고, 아군과의 협동을 통해 방어 라인을 유지하는 데 있다. 특히 파일명의 '6웨이'라는 용어는 6개 방향에서 적이 공격해오거나 6명의 플레이어가 각자 방어로를 담당하는 구조를 암시한다. 적의 공세는 시간이 지날수록 강력해지므로, 초반 빌드업과 업그레이드 타이밍이 생존을 좌우할 것으로 보인다. 난이도는 디펜스 특성상 초중반을 넘기지 못하면 쉽게 무너질 수 있어 중상급 정도로 추정된다. 이 맵은 성큰 디펜스의 정석적인 재미를 느끼고 싶은 플레이어나, 협동 플레이를 선호하는 유저에게 추천할 만하다. 다만 시작 시 성큰이 이미 배치된 조건이 난이도를 낮추는 요소인지, 아니면 초반 러시를 견디기 위한 장치인지는 실제 플레이를 통해 확인해야 한다. 전반적으로 클래식한 스타크래프트 유즈맵의 감성을 간직한, 직관적이면서도 몰입도 높은 디펜스 경험을 제공할 것이다. StarCraft Brood War map 'Star Sunken Defense Up+' is a defense genre map centered around Sunken Colonies, as the title suggests. The original filename '성큰6웨이(깔려있음)11.scx' indicates support for 6 players and implies that Sunken Colonies are pre-deployed at the start. Set on a Platform tileset with a 128x128 grid, players must build Sunken Colonies and other defensive structures at their respective chokepoints to halt incoming enemy waves, following a classic line-defense format. The core gameplay revolves around optimizing Sunken placement within limited resources and space, while cooperating to reinforce defensive lines. The term '6-way' in the filename hints at a structure where enemies attack from six directions or six players each defend a lane. As enemy assaults intensify over time, early build-up and upgrade timing become critical for survival. The difficulty is estimated to be moderately high, as failing to withstand early waves can lead to a quick collapse. This map is recommended for players seeking the authentic Sunken defense experience or those who enjoy cooperative play. However, whether the pre-placed Sunken units ease the difficulty or serve as a buffer against early rushes needs to be verified through actual gameplay. Overall, it delivers an intuitive and immersive defense map that captures the classic StarCraft UMS spirit.
도라에몽 의 Sunken II
도라에몽 의 Sunken II(도라에몽의 성큰 투)는 스타크래프트 브루드워 UMS(유즈맵) 장르 중에서도 독특한 방어 및 전투 메커니즘을 경험할 수 있도록 제작된 유저 커스텀 맵이다. 이번 작품은 과거 많은 유저들에게 사랑받았던 고전 맵의 계보를 이어받아, 특유의 향수와 함께 몰입감 넘치는 플레이 환경을 제공한다. 게임이 시작되면 플레이어는 주어진 지형과 유닛 배치에 따라 각자의 위치에서 몰려오는 적의 공세를 막아내거나 정해진 목표를 달성하기 위한 전략을 펼쳐야 한다. 특히 내부 설명에 언급된 바와 같이 특정 플레이어 진영인 빨강 유저의 건물이 자동으로 건설되는 등 독특한 트리거 시스템이 포함되어 있어 일반적인 밀리 게임과는 완전히 다른 양상으로 전개된다. 또한 구석 지역에는 개인 럴커 유닛들이 뭉쳐져 배치되어 있어 이를 어떻게 활용하고 방어선 구축에 녹여내느냐가 승패를 가르는 중요한 요인으로 작용한다. 맵의 전반적인 난이도는 하드(HARD) 수준으로 설정되어 있어 초보자부터 숙련된 유저까지 모두 긴장감을 놓을 수 없는 플레이 경험을 선사한다. 사방으로 펼쳐진 플랫폼 타일셋 기반의 독특한 지형 구조는 플레이어가 효율적인 방어 거점을 구축하고 아군과의 협력을 유도하는 핵심 요소로 작용한다. 친구들과 함께 멀티플레이로 즐기기에 적합하며, 색다른 방어전과 유즈맵 특유의 재미를 느끼고 싶은 모든 스타크래프트 브루드워 팬들에게 추천할 만한 작품이다. 플레이를 시작하기 전에 내부 설명에 적힌 자동 건설 요소와 럴커 유닛의 배치 위치를 미리 파악해 두면 더욱 원활하게 게임을 풀어나갈 수 있을 것이다. Doraemon's Sunken II is a user-custom map created within the StarCraft: Brood War UMS (Use Map Settings) genre, designed to let players experience unique defensive and combat mechanisms. This map inherits the legacy of classic maps that have been loved by many players in the past, providing an immersive gameplay environment filled with nostalgia. When the game begins, players must deploy strategies based on the given terrain and unit placements to fend off incoming enemy waves or achieve designated objectives from their respective positions. Notably, as mentioned in the internal description, a unique trigger system is included—such as the buildings of the red player slot being automatically constructed—which unfolds the match in a completely different direction from standard melee games. In addition, personal lurker units are gathered and positioned in the corner areas, making how one utilizes them and integrates them into the defensive line a crucial factor determining victory or defeat. The overall difficulty of the map is set to a hard level, delivering a tense gameplay experience for everyone from beginners to experienced users. The unique terrain structure based on the platform tileset spreading across all directions serves as a core element that encourages players to establish efficient defensive strongholds and cooperate with allies. It is well-suited for multiplayer sessions with friends and is a recommended work for all StarCraft: Brood War fans who want to experience unconventional defense battles and the distinct fun of UMS maps. Before starting the game, grasping the automatic construction features and the placement locations of the lurker units noted in the internal description in advance will help you navigate the match much more smoothly.
맵 선택 가이드
태그는 맵의 핵심 특징을 빠르게 설명하지만 제작 버전마다 규칙이 다를 수 있습니다. 상세 설명에서 권장 인원, 난이도, 플레이 시간과 버전을 함께 확인한 뒤 다운로드하세요.