
성 방어 스타크래프트 맵 모음
'성 방어' 태그가 등록된 맵을 모았습니다. 장르 하나로 찾기 어려운 플레이 방식, 난이도와 특징을 중심으로 인기 맵과 최신 맵을 비교해 보세요.
- 등록 맵
- 4개
- 누적 다운로드
- 0
- 누적 조회
- 66
인기 맵
다운로드와 조회 반응이 높은 맵입니다.
캐슬 디펜드 V2 (Castle Defend V2)
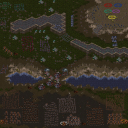
스타크래프트 브루드워의 대표적인 디펜스 장르 유즈맵인 <캐슬 디펜드 V2>는 성을 방어하며 왕의 귀환을 기다리는 중세 판타지 스토리가 인상적인 맵이다. 맵 제목에서부터 드러나듯, 플레이어는 성벽을 지키며 끊임없이 몰려오는 오크 군단의 공격을 막아내야 한다. 맵은 커다란 성을 중심으로 설계되어 있으며, 성문과 성벽, 그리고 내부 요새가 주요 방어 지점으로 보인다. 성벽에는 방어시설이 배치되어 있고, 성 내부에는 보급로를 통해 유닛을 생산하거나 보강할 수 있는 구조물이 배치되어 있는 것으로 추정된다. 오크 군단은 성문과 성벽을 집중 공격하며, 플레이어는 제한된 자원으로 방어선을 구축하고 유지해야 한다. 맵의 특징은 방어 포인트가 명확하다는 점이다. 성문과 성벽이 주요 타격점이며, 이들을 보호하지 못하면 오크 군단이 성내부로 진입해 방어에 치명적인 타격을 입힐 가능성이 크다. 또한, 왕의 귀환 시점이 존재해 오크 군단을 모두 물리치면 승리를 거두는 구조로 보인다. 이는 디펜스 맵이지만 단순한 방어뿐만 아니라 '기다림'과 '최후의 전투'라는 스토리적 요소가 결합된 점이 특징이다. 추천 대상은 디펜스 맵을 선호하는 플레이어이며, 특히 중세 판타지 배경과 스토리텔링이 매력적으로 느껴지는 유저에게 어울린다. 플레이 전에는 성벽과 성문, 보급로의 위치와 오크 군단의 공격 패턴을 미리 숙지하는 것이 중요하다. 또한, 방어에 필요한 자원의 배치와 생산 건물의 위치를 확인해 전략을 세우는 것이 관건이다. 맵의 디자인과 구조는 중세 성곽을 재현한 듯한 디테일이 돋보이지만, 오크 군단의 공격 루트는 다소 예측 가능할 수 있어 방어 전략의 다양성을 고려해야 한다. 이 맵은 디펜스 장르의 기본 틀을 유지하면서도 스토리적 깊이를 더한 점에서 주목할 만하다. 다만, 플레이 시간이 길어질수록 오크 군단의 공격 빈도가 높아질 가능성이 있어 체력과 전략적 집중력이 요구된다. 초보 플레이어는 방어 우선순위를 잘못 설정하거나 자원의 관리에서 실수를 범할 수 있으므로, 난이도를 '보통' 정도로 설정해 가볍게 도전하는 것이 좋다. 맵의 분위기는 중세 판타지풍으로 어두운 색감과 성곽 디자인이 어우러져 atmosferic한 느낌을 준다. 오크 군단의 공격은 성벽을 무너뜨릴 때마다 시야가 넓어지며, 성내부로 침투하는 연출이 있는 것으로 보인다. 이는 플레이어에게 긴장감을 더하는 요소로 작용한다. 전체적으로 <캐슬 디펜드 V2>는 디펜스 유즈맵의 정석을 따르면서도 스토리적 몰입도를 높인 작품으로, 중세 판타지를 좋아하는 유저라면 한 번쯤 도전해볼 만한 가치가 있다. 다만, 반복 플레이 시 오크 군단의 공격 패턴이 익숙해질 수 있어, 난이도나 변형 요소를 추가한 버전을 찾아보는 것도 좋은 방법이다. 이 맵은 디펜스 장르의 입문자에게는 훌륭한 튜토리얼 역할을 할 수 있으며, 숙련자에게는 전략적 깊이를 제공하는 도전 과제가 될 것이다. 성의 구조와 오크 군단의 공격 루트를 분석하며 최적의 방어 전략을 구상하는 재미가 쏠쏠한 작품이다. Castle Defend V2 is one of the most iconic defense genre custom maps in StarCraft: Brood War, featuring a medieval fantasy storyline where players must defend a castle until the king's return. The map is centered around a large castle structure, with defensive walls, gates, and internal fortifications serving as key strategic points. The layout suggests that players can establish supply routes and production buildings to reinforce their defenses. The Orc Legion continuously attacks the gates and walls, and failing to protect these areas allows them to breach the castle, leading to a potential loss. A unique aspect of this map is its narrative-driven structure: players must hold out until the king returns, after which a final battle ensues for victory. This blends classic defense mechanics with an engaging 'waiting' and 'last stand' storyline. The map is ideal for players who enjoy defense games, particularly those drawn to medieval fantasy themes and storytelling. Before playing, it's essential to familiarize yourself with the wall and gate positions, Orc attack patterns, and resource distribution. Strategic planning is crucial, as misplacing defenses or mismanaging resources can lead to failure. While the map excels in recreating a medieval fortress with detailed design, the Orc attack routes may feel predictable over time, limiting strategic variety. The map's atmosphere is enhanced by its dark medieval color palette and fortress architecture, with Orc incursions visually expanding the playable area as walls are breached. The tension builds as the Orcs penetrate deeper into the castle, adding immersion. Castle Defend V2 follows the defense genre's core mechanics while enriching the experience with narrative depth, making it a worthwhile challenge for medieval fantasy fans. Casual players may struggle with prioritizing defenses or resource management, so setting the difficulty to 'Medium' is recommended. Repeated plays might reveal familiar Orc attack patterns, but the map still offers strategic depth for seasoned players. For newcomers to defense maps, it serves as an excellent introduction, while veterans can refine their tactics by analyzing the castle structure and Orc attack routes. The blend of defensive strategy and immersive storytelling makes this a standout custom map worth trying at least once.
반지의 제왕: 미나스 티리스 (Lotr Minas Tirith)
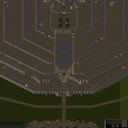
‘반지의 제왕: 미나스 티리스(Lotr Minas Tirith)’는 스타크래프트: 브루드워의 유즈맵으로, 실시간 디펜스와 협동 전략이 조화롭게 펼쳐지는 작품이다. 맵은 가운데 높은 성벽과 성문으로 구성된 미나스 티리스를 중심으로, 사방에서 몰려드는 사우론의 군대를 저지하는 구조로 설계되었다. 사용자는 성벽과 성문, 그리고 성 내부의 보병들을 배치해 적의 공격을 방어해야 하며, 성벽 위는 좁고 긴 통로로 이루어져 있어 좁은 시야와 제한된 이동 공간이 전략적 긴장감을 더한다. 성벽 외곽에는 넓은 평지가 펼쳐져 있으며, 이곳에서 적이 끊임없이 생성되어 성으로 진격해 오는데, 이 평지를 따라 적의 동선과 공격 루트를 예측하며 병력을 배치하는 것이 핵심이다. 성벽 안쪽에는 광장이 있으며, 이곳에서 유닛을 생산하고 보급을 관리할 수 있는 공간이 보인다. 맵의 분위기는 사막 풍의 황량한 지형과 붉은 석조 건물로 조성되어, 반지의 제왕 세계관의 분위기를 충실히 재현한다. 이 맵은 주로 7인 플레이를 전제로 하며, 대부분이 방어 측에 배치되어 사우론의 군대와 맞서 싸운다. 방어 측은 성벽과 성문을 지키며, 성벽을 무너뜨리려는 적의 공세를 저지해야 한다. 공격 측은 끊임없이 생성되는 졸병과 정예 유닛으로 성을 공격하며, 성벽을 무너뜨리거나 성문을 파괴하는 것이 목표로 보인다. 맵의 난이도는 방어 측의 전략과 협동에 따라 크게 달라지며, 특히 성벽의 취약한 부분이나 좁은 통로를 공략하는 공격 측의 전술이 중요하다. 플레이어는 제한된 공간에서 유닛의 효율적인 배치와 자원 관리를 통해 승리를 이끌어내야 하며, 이 과정에서 팀워크와 순간적인 판단력이 요구된다. 이 맵은 ‘반지의 제왕’ 팬이라면无疑喜欢的 작품으로, 원작의 명장면을 느낄 수 있는 동시에 전략적인 재미를 제공한다. 또한 좁은 공간에서의 전투와 협동 플레이가 중시되는 만큼, 스타크래프트의Classic한 전략성을 느낄 수 있는 유즈맵으로 추천할 만하다. 플레이 전에는 성의 구조와 주요 방어 지점을 숙지하고, 팀원과의 역할 분담을 미리 정하는 것이 중요하다. 특히 성벽의 취약한 부분이나 통로의 배치, 그리고 광장의 유닛 생산 공간을 정확히 파악해야만 효율적인 방어가 가능하다. 이 맵은 디펜스 장르의 팬뿐만 아니라, 좁은 공간에서의 전략적 전투를 즐기는 유저들에게도 적합한 선택지가 될 것이다. ‘Lord of the Rings: Minas Tirith (Lotr Minas Tirith)’ is a custom map for *StarCraft: Brood War* that blends real-time defense and cooperative strategy seamlessly. The map centers around Minas Tirith, a towering fortress with high walls and gates, designed to fend off waves of Sauron’s forces converging from all directions. Players must strategically place troops on the walls, gates, and inside the fortress to repel enemy attacks, while the narrow, elongated pathways atop the walls create tight sightlines and restricted movement, heightening the tension. Beyond the outer walls lies a vast plain where enemies continuously spawn and march toward the fortress, forcing players to anticipate their movements and deploy forces along key routes. Inside the walls, a central plaza serves as the hub for unit production and supply management. The map’s atmosphere is evoked through barren, desert-like terrain and crimson stone structures, faithfully capturing the essence of *The Lord of the Rings* universe. Designed primarily for seven players, most take on the defensive role, holding the walls and gates against Sauron’s relentless assaults. The defenders must protect the fortress from collapsing under enemy pressure, while the attackers—composed of waves of minions and elite units—aim to breach the walls or destroy the gates. The difficulty hinges heavily on the defenders’ coordination and strategy, with the attackers often exploiting weak points in the walls or narrow corridors to break through. Players must optimize unit placement and resource management in confined spaces, relying on teamwork and quick decision-making to secure victory. Fans of *The Lord of the Rings* will undoubtedly love this map, as it not only recreates iconic scenes from the original work but also delivers strategic depth. Given its emphasis on confined combat and teamwork, it’s a stellar custom map that showcases classic *StarCraft* strategy. Before playing, it’s crucial to familiarize yourself with the fortress layout, key defensive points, and team roles. Understanding the weak spots in the walls, corridor layouts, and the production area in the plaza is essential for effective defense. Whether you’re a fan of defense games or enjoy strategic battles in tight spaces, this map is a fantastic choice.
최후의 요새 (Final Fortress)
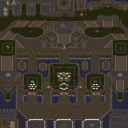
스타크래프트 브루드워의 대표적인 유즈맵 중 하나로 손꼽히는 <Final Fortress v6.6G>는 대규모 디펜스 성격을 띤 전략형 맵입니다. 7명의 플레이어가 각자의 요새를 지키며 적의 공격을 방어하는 방식으로 진행되며, 맵 곳곳에 배치된 방어 시설과 병력을 효율적으로 배치하고 관리하는 능력이 승리의 열쇠가 됩니다. 중앙에 위치한 넓은 평원은 전투가 벌어지는 주요 전장이며, 각 플레이어의 본진은 맵의 가장자리에 배치되어 있어 본진 방어와 전선 지원의 균형을 carefully 고려해야 합니다. 맵의 전체적인 분위기는 사막 테마로 조성되어 있으며, 건물과 지형이 조화롭게 배치되어 있어 시각적으로도 흥미로운 구성을 자랑합니다. 방어 시설로는 터렛, 포톤 캐논, 스포어 콜로니 등 다양한 방어 건물이 제공되며, 이를 활용한 전략적 배치와 업그레이드가 게임의 재미를 한층 더 높입니다. 또한, 맵의 특징 중 하나는 실시간으로 변화하는 전장 상황인데, 적의 공격 패턴이 랜덤하게 정해지기 때문에 플레이어는 매 전투마다 새로운 전략을 짜야 합니다. 이 맵은 단순히 방어만 하는 것이 아니라, 때로는 적극적인 공격이나 기습전을 펼쳐야 하는 순간도 찾아옵니다. 예를 들어, 적의 방어선을 무너뜨리기 위해 본진에서 병력을 이끌고 출격하거나, 상대방의 자원을 빼앗아 오는 등 다양한 전술을 구사할 수 있습니다. 이러한 다채로운 플레이 스타일은 초보자와 숙련자 모두에게 매력적으로 다가오며, 특히 스타크래프트의 기본 전략을 익히기에 좋은 연습용 맵으로도 손색이 없습니다. 플레이 전에는 맵의 구조와 방어 시설의 위치를 숙지하는 것이 중요합니다. 또한, 팀원과의 원활한 소통과 역할 분담이 승패를 좌우할 수 있기 때문에, 팀플레이를 고려한 전략 수립이 필요합니다. 맵의 난이도는 대체로 보통 수준으로 설정되어 있지만, 적의 공격 패턴이 랜덤하게 정해지기 때문에 운적인 요소도 강하다고 볼 수 있습니다. 따라서, 맵의 기본 메커니즘을 익히고자 한다면 먼저 혼자서 플레이해 보는 것도 좋은 방법입니다. 이 맵은 스타크래프트 유즈맵의 classic으로 자리매김하고 있으며, 오랜 시간 동안 많은 플레이어들에게 사랑받아 온 작품입니다. 특히, 대규모 디펜스와 전략적 플레이가 결합된 이 맵은 스타크래프트의 재미를 한층 더 끌어올려 주는 요소로 작용합니다. 만약 당신이 스타크래프트의 전략적 측면을 깊게 즐기고 싶다면, <Final Fortress v6.6G>는 반드시 한번쯤 플레이해 볼 가치가 있는 맵입니다. Final Fortress v6.6G is a classic user-made map in StarCraft: Brood War, renowned for its large-scale defense-focused gameplay. The map accommodates up to 7 players, each defending their own fortress against waves of enemy attacks. The central open area serves as the primary battlefield, while each player's base is strategically positioned at the map's edges, requiring careful balance between defense and offensive support. The map features a desert theme, with terrain and structures designed to create both functional and visually appealing layouts. Defensive buildings such as turrets, photon cannons, and spore colonies are available, and their strategic placement and upgrades play a crucial role in gameplay. One of the map's standout features is its dynamic battle system, where enemy attack patterns are randomized, forcing players to adapt their strategies in real time. Beyond passive defense, players can execute aggressive tactics like leading sorties from their bases or raiding enemy resources to disrupt their economy. This variety in playstyles makes the map appealing to both beginners and experienced players. It also serves as an excellent training ground for mastering StarCraft's core strategic concepts. Before playing, it's essential to familiarize yourself with the map layout and the positions of defensive structures. Effective team communication and role assignment are critical, as teamwork often determines victory. While the difficulty is generally moderate, the randomized enemy attacks introduce an element of unpredictability, making the map engaging for those seeking both strategy and excitement. Final Fortress v6.6G stands as a timeless classic in the StarCraft user-map community, beloved for blending large-scale defense mechanics with deep strategic gameplay. Its combination of challenge and replayability ensures it remains a favorite among fans of StarCraft's tactical depth. If you're looking to experience the strategic side of StarCraft in a fresh and immersive way, this map is a must-play.
버섯 왕국 전쟁 V5.5 (Mushroom Kingdom War V5.5)
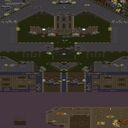
스타크래프트 브루드워의 유즈맵 가운데 ‘Mushroom Kingdom War V5.5’는 이름에서 느껴지듯 마리오 시리즈의 버섯 왕국을 배경으로 한 디펜스 장르의 맵이다. 2048x4096라는 넓은 타일 공간에 펼쳐진 이 맵은 총 7명의 플레이어가 한 팀으로 뭉쳐서 중앙의 성을 지키며 끊임없이 몰려드는 적들을 상대로 버티는 구조로 설계되어 있다. 중앙 성을 중심으로 상단과 하단에 각각의 기지 건물이 배치되어 있으며, 성벽과 포탑으로 무장한 방어 시설을 구축할 수 있다. 적들은 다양한 종류의 잡몹으로 구성되어 끊임없이 공격해 오며, 중간중간 등장하는 보스 몬스터를 물리쳐야만 잠깐의 휴식을 얻을 수 있다. 맵의 전체적인 분위기는 마리오 시리즈의 밝고Colorful한 그래픽이 연상되지만, 실제 게임 플레이에서는 끊임없는 압박과 긴장감이 특징인 디펜스 게임의 묘미를 느낄 수 있다. 특히나 7인이 한 팀으로 협력해야 하기 때문에 팀원 간의 조율과 역할 분배가 무엇보다 중요하다. 방어 시설을 어떻게 배치하느냐에 따라 난이도가 크게 달라질 수 있으므로, 초보자는 방어선을 가급적 좁게 유지하고 포탑의 업그레이드를 신중히 진행하는 것이 좋다. 반면에 숙련자들은 넓은 방어선을 활용하거나 특수한 전략을 구사해 적을 역관광시킬 수 있는 여지가 많다. 이 맵은 단순히 적을 막는 것에서 그치지 않고, 중간중간 등장하는 이벤트성 미션이나 보너스 목표가 포함되어 있어 플레이의 재미를 한층 더 높인다. 또한 넓은 맵의 특성상 시야 확보와 자원 관리, 그리고 팀원 간의 커뮤니케이션이 필수적이기 때문에 단 한 명의 실수로도 전체 게임이 흔들릴 수 있다는 점에서 긴장감을 유지할 수 있다. 전체적으로는 7인 협동 디펜스 게임으로서, 팀워크와 전략이 중요한 장르를 선호하는 유저들에게 강력히 추천할 만한 맵이다. 특히나 마리오 시리즈의 팬이라면 익숙한 배경과 캐릭터 디자인 덕분에 더욱 몰입감 있는 플레이가 가능할 것이다. 다만 넓은 맵의 특성상 렉이나 로딩 시간이 길어질 수 있으니 사양이 낮은 PC에서는 주의가 필요하다. 또한 조작감이 다소 복잡할 수 있으므로, 처음 플레이하는 경우엔 튜토리얼이나 다른 디펜스 맵을 먼저 경험해 보는 것이 좋다. StarCraft: Brood War’s custom map *Mushroom Kingdom War V5.5* is a defense-style game set in the Mushroom Kingdom from the Mario series. Spanning a massive 2048x4096 tile space, this map tasks seven players with defending a central castle against endless waves of enemies. The central castle is surrounded by player bases at the top and bottom, where you can build walls, turrets, and other defensive structures. The enemies consist of various minions that continuously assault your defenses, with only brief respites after defeating boss monsters. While the map’s bright, colorful graphics evoke the cheerful tone of the Mario series, the gameplay is tense and pressure-filled, emphasizing the thrill of a cooperative defense challenge. Since seven players must work together, coordination and role distribution are crucial. The placement of defenses greatly affects difficulty, so beginners should keep their lines tight and upgrade turrets cautiously. Experienced players, however, can leverage wide defensive formations or unconventional strategies to outmaneuver enemies. Beyond basic defense, the map includes event-based missions and bonus objectives that add depth and replayability. The large scale demands strong map awareness, resource management, and constant communication—just one mistake can jeopardize the entire game, keeping tension high throughout. Overall, *Mushroom Kingdom War V5.5* is an excellent seven-player cooperative defense map that rewards teamwork and strategy, making it a great choice for fans of the genre. Mario enthusiasts will especially appreciate the familiar setting and character designs for an immersive experience. However, the vast map size may cause lag or long loading times on lower-end PCs, so players with weaker systems should be cautious. The controls can also feel complex, so newcomers might benefit from trying the tutorial or other defense maps first.
최근 등록된 맵
새로 추가된 파일과 버전을 확인하세요.
버섯 왕국 전쟁 V5.5 (Mushroom Kingdom War V5.5)
스타크래프트 브루드워의 유즈맵 가운데 ‘Mushroom Kingdom War V5.5’는 이름에서 느껴지듯 마리오 시리즈의 버섯 왕국을 배경으로 한 디펜스 장르의 맵이다. 2048x4096라는 넓은 타일 공간에 펼쳐진 이 맵은 총 7명의 플레이어가 한 팀으로 뭉쳐서 중앙의 성을 지키며 끊임없이 몰려드는 적들을 상대로 버티는 구조로 설계되어 있다. 중앙 성을 중심으로 상단과 하단에 각각의 기지 건물이 배치되어 있으며, 성벽과 포탑으로 무장한 방어 시설을 구축할 수 있다. 적들은 다양한 종류의 잡몹으로 구성되어 끊임없이 공격해 오며, 중간중간 등장하는 보스 몬스터를 물리쳐야만 잠깐의 휴식을 얻을 수 있다. 맵의 전체적인 분위기는 마리오 시리즈의 밝고Colorful한 그래픽이 연상되지만, 실제 게임 플레이에서는 끊임없는 압박과 긴장감이 특징인 디펜스 게임의 묘미를 느낄 수 있다. 특히나 7인이 한 팀으로 협력해야 하기 때문에 팀원 간의 조율과 역할 분배가 무엇보다 중요하다. 방어 시설을 어떻게 배치하느냐에 따라 난이도가 크게 달라질 수 있으므로, 초보자는 방어선을 가급적 좁게 유지하고 포탑의 업그레이드를 신중히 진행하는 것이 좋다. 반면에 숙련자들은 넓은 방어선을 활용하거나 특수한 전략을 구사해 적을 역관광시킬 수 있는 여지가 많다. 이 맵은 단순히 적을 막는 것에서 그치지 않고, 중간중간 등장하는 이벤트성 미션이나 보너스 목표가 포함되어 있어 플레이의 재미를 한층 더 높인다. 또한 넓은 맵의 특성상 시야 확보와 자원 관리, 그리고 팀원 간의 커뮤니케이션이 필수적이기 때문에 단 한 명의 실수로도 전체 게임이 흔들릴 수 있다는 점에서 긴장감을 유지할 수 있다. 전체적으로는 7인 협동 디펜스 게임으로서, 팀워크와 전략이 중요한 장르를 선호하는 유저들에게 강력히 추천할 만한 맵이다. 특히나 마리오 시리즈의 팬이라면 익숙한 배경과 캐릭터 디자인 덕분에 더욱 몰입감 있는 플레이가 가능할 것이다. 다만 넓은 맵의 특성상 렉이나 로딩 시간이 길어질 수 있으니 사양이 낮은 PC에서는 주의가 필요하다. 또한 조작감이 다소 복잡할 수 있으므로, 처음 플레이하는 경우엔 튜토리얼이나 다른 디펜스 맵을 먼저 경험해 보는 것이 좋다. StarCraft: Brood War’s custom map *Mushroom Kingdom War V5.5* is a defense-style game set in the Mushroom Kingdom from the Mario series. Spanning a massive 2048x4096 tile space, this map tasks seven players with defending a central castle against endless waves of enemies. The central castle is surrounded by player bases at the top and bottom, where you can build walls, turrets, and other defensive structures. The enemies consist of various minions that continuously assault your defenses, with only brief respites after defeating boss monsters. While the map’s bright, colorful graphics evoke the cheerful tone of the Mario series, the gameplay is tense and pressure-filled, emphasizing the thrill of a cooperative defense challenge. Since seven players must work together, coordination and role distribution are crucial. The placement of defenses greatly affects difficulty, so beginners should keep their lines tight and upgrade turrets cautiously. Experienced players, however, can leverage wide defensive formations or unconventional strategies to outmaneuver enemies. Beyond basic defense, the map includes event-based missions and bonus objectives that add depth and replayability. The large scale demands strong map awareness, resource management, and constant communication—just one mistake can jeopardize the entire game, keeping tension high throughout. Overall, *Mushroom Kingdom War V5.5* is an excellent seven-player cooperative defense map that rewards teamwork and strategy, making it a great choice for fans of the genre. Mario enthusiasts will especially appreciate the familiar setting and character designs for an immersive experience. However, the vast map size may cause lag or long loading times on lower-end PCs, so players with weaker systems should be cautious. The controls can also feel complex, so newcomers might benefit from trying the tutorial or other defense maps first.
반지의 제왕: 미나스 티리스 (Lotr Minas Tirith)
‘반지의 제왕: 미나스 티리스(Lotr Minas Tirith)’는 스타크래프트: 브루드워의 유즈맵으로, 실시간 디펜스와 협동 전략이 조화롭게 펼쳐지는 작품이다. 맵은 가운데 높은 성벽과 성문으로 구성된 미나스 티리스를 중심으로, 사방에서 몰려드는 사우론의 군대를 저지하는 구조로 설계되었다. 사용자는 성벽과 성문, 그리고 성 내부의 보병들을 배치해 적의 공격을 방어해야 하며, 성벽 위는 좁고 긴 통로로 이루어져 있어 좁은 시야와 제한된 이동 공간이 전략적 긴장감을 더한다. 성벽 외곽에는 넓은 평지가 펼쳐져 있으며, 이곳에서 적이 끊임없이 생성되어 성으로 진격해 오는데, 이 평지를 따라 적의 동선과 공격 루트를 예측하며 병력을 배치하는 것이 핵심이다. 성벽 안쪽에는 광장이 있으며, 이곳에서 유닛을 생산하고 보급을 관리할 수 있는 공간이 보인다. 맵의 분위기는 사막 풍의 황량한 지형과 붉은 석조 건물로 조성되어, 반지의 제왕 세계관의 분위기를 충실히 재현한다. 이 맵은 주로 7인 플레이를 전제로 하며, 대부분이 방어 측에 배치되어 사우론의 군대와 맞서 싸운다. 방어 측은 성벽과 성문을 지키며, 성벽을 무너뜨리려는 적의 공세를 저지해야 한다. 공격 측은 끊임없이 생성되는 졸병과 정예 유닛으로 성을 공격하며, 성벽을 무너뜨리거나 성문을 파괴하는 것이 목표로 보인다. 맵의 난이도는 방어 측의 전략과 협동에 따라 크게 달라지며, 특히 성벽의 취약한 부분이나 좁은 통로를 공략하는 공격 측의 전술이 중요하다. 플레이어는 제한된 공간에서 유닛의 효율적인 배치와 자원 관리를 통해 승리를 이끌어내야 하며, 이 과정에서 팀워크와 순간적인 판단력이 요구된다. 이 맵은 ‘반지의 제왕’ 팬이라면无疑喜欢的 작품으로, 원작의 명장면을 느낄 수 있는 동시에 전략적인 재미를 제공한다. 또한 좁은 공간에서의 전투와 협동 플레이가 중시되는 만큼, 스타크래프트의Classic한 전략성을 느낄 수 있는 유즈맵으로 추천할 만하다. 플레이 전에는 성의 구조와 주요 방어 지점을 숙지하고, 팀원과의 역할 분담을 미리 정하는 것이 중요하다. 특히 성벽의 취약한 부분이나 통로의 배치, 그리고 광장의 유닛 생산 공간을 정확히 파악해야만 효율적인 방어가 가능하다. 이 맵은 디펜스 장르의 팬뿐만 아니라, 좁은 공간에서의 전략적 전투를 즐기는 유저들에게도 적합한 선택지가 될 것이다. ‘Lord of the Rings: Minas Tirith (Lotr Minas Tirith)’ is a custom map for *StarCraft: Brood War* that blends real-time defense and cooperative strategy seamlessly. The map centers around Minas Tirith, a towering fortress with high walls and gates, designed to fend off waves of Sauron’s forces converging from all directions. Players must strategically place troops on the walls, gates, and inside the fortress to repel enemy attacks, while the narrow, elongated pathways atop the walls create tight sightlines and restricted movement, heightening the tension. Beyond the outer walls lies a vast plain where enemies continuously spawn and march toward the fortress, forcing players to anticipate their movements and deploy forces along key routes. Inside the walls, a central plaza serves as the hub for unit production and supply management. The map’s atmosphere is evoked through barren, desert-like terrain and crimson stone structures, faithfully capturing the essence of *The Lord of the Rings* universe. Designed primarily for seven players, most take on the defensive role, holding the walls and gates against Sauron’s relentless assaults. The defenders must protect the fortress from collapsing under enemy pressure, while the attackers—composed of waves of minions and elite units—aim to breach the walls or destroy the gates. The difficulty hinges heavily on the defenders’ coordination and strategy, with the attackers often exploiting weak points in the walls or narrow corridors to break through. Players must optimize unit placement and resource management in confined spaces, relying on teamwork and quick decision-making to secure victory. Fans of *The Lord of the Rings* will undoubtedly love this map, as it not only recreates iconic scenes from the original work but also delivers strategic depth. Given its emphasis on confined combat and teamwork, it’s a stellar custom map that showcases classic *StarCraft* strategy. Before playing, it’s crucial to familiarize yourself with the fortress layout, key defensive points, and team roles. Understanding the weak spots in the walls, corridor layouts, and the production area in the plaza is essential for effective defense. Whether you’re a fan of defense games or enjoy strategic battles in tight spaces, this map is a fantastic choice.
최후의 요새 (Final Fortress)
스타크래프트 브루드워의 대표적인 유즈맵 중 하나로 손꼽히는 <Final Fortress v6.6G>는 대규모 디펜스 성격을 띤 전략형 맵입니다. 7명의 플레이어가 각자의 요새를 지키며 적의 공격을 방어하는 방식으로 진행되며, 맵 곳곳에 배치된 방어 시설과 병력을 효율적으로 배치하고 관리하는 능력이 승리의 열쇠가 됩니다. 중앙에 위치한 넓은 평원은 전투가 벌어지는 주요 전장이며, 각 플레이어의 본진은 맵의 가장자리에 배치되어 있어 본진 방어와 전선 지원의 균형을 carefully 고려해야 합니다. 맵의 전체적인 분위기는 사막 테마로 조성되어 있으며, 건물과 지형이 조화롭게 배치되어 있어 시각적으로도 흥미로운 구성을 자랑합니다. 방어 시설로는 터렛, 포톤 캐논, 스포어 콜로니 등 다양한 방어 건물이 제공되며, 이를 활용한 전략적 배치와 업그레이드가 게임의 재미를 한층 더 높입니다. 또한, 맵의 특징 중 하나는 실시간으로 변화하는 전장 상황인데, 적의 공격 패턴이 랜덤하게 정해지기 때문에 플레이어는 매 전투마다 새로운 전략을 짜야 합니다. 이 맵은 단순히 방어만 하는 것이 아니라, 때로는 적극적인 공격이나 기습전을 펼쳐야 하는 순간도 찾아옵니다. 예를 들어, 적의 방어선을 무너뜨리기 위해 본진에서 병력을 이끌고 출격하거나, 상대방의 자원을 빼앗아 오는 등 다양한 전술을 구사할 수 있습니다. 이러한 다채로운 플레이 스타일은 초보자와 숙련자 모두에게 매력적으로 다가오며, 특히 스타크래프트의 기본 전략을 익히기에 좋은 연습용 맵으로도 손색이 없습니다. 플레이 전에는 맵의 구조와 방어 시설의 위치를 숙지하는 것이 중요합니다. 또한, 팀원과의 원활한 소통과 역할 분담이 승패를 좌우할 수 있기 때문에, 팀플레이를 고려한 전략 수립이 필요합니다. 맵의 난이도는 대체로 보통 수준으로 설정되어 있지만, 적의 공격 패턴이 랜덤하게 정해지기 때문에 운적인 요소도 강하다고 볼 수 있습니다. 따라서, 맵의 기본 메커니즘을 익히고자 한다면 먼저 혼자서 플레이해 보는 것도 좋은 방법입니다. 이 맵은 스타크래프트 유즈맵의 classic으로 자리매김하고 있으며, 오랜 시간 동안 많은 플레이어들에게 사랑받아 온 작품입니다. 특히, 대규모 디펜스와 전략적 플레이가 결합된 이 맵은 스타크래프트의 재미를 한층 더 끌어올려 주는 요소로 작용합니다. 만약 당신이 스타크래프트의 전략적 측면을 깊게 즐기고 싶다면, <Final Fortress v6.6G>는 반드시 한번쯤 플레이해 볼 가치가 있는 맵입니다. Final Fortress v6.6G is a classic user-made map in StarCraft: Brood War, renowned for its large-scale defense-focused gameplay. The map accommodates up to 7 players, each defending their own fortress against waves of enemy attacks. The central open area serves as the primary battlefield, while each player's base is strategically positioned at the map's edges, requiring careful balance between defense and offensive support. The map features a desert theme, with terrain and structures designed to create both functional and visually appealing layouts. Defensive buildings such as turrets, photon cannons, and spore colonies are available, and their strategic placement and upgrades play a crucial role in gameplay. One of the map's standout features is its dynamic battle system, where enemy attack patterns are randomized, forcing players to adapt their strategies in real time. Beyond passive defense, players can execute aggressive tactics like leading sorties from their bases or raiding enemy resources to disrupt their economy. This variety in playstyles makes the map appealing to both beginners and experienced players. It also serves as an excellent training ground for mastering StarCraft's core strategic concepts. Before playing, it's essential to familiarize yourself with the map layout and the positions of defensive structures. Effective team communication and role assignment are critical, as teamwork often determines victory. While the difficulty is generally moderate, the randomized enemy attacks introduce an element of unpredictability, making the map engaging for those seeking both strategy and excitement. Final Fortress v6.6G stands as a timeless classic in the StarCraft user-map community, beloved for blending large-scale defense mechanics with deep strategic gameplay. Its combination of challenge and replayability ensures it remains a favorite among fans of StarCraft's tactical depth. If you're looking to experience the strategic side of StarCraft in a fresh and immersive way, this map is a must-play.
캐슬 디펜드 V2 (Castle Defend V2)
스타크래프트 브루드워의 대표적인 디펜스 장르 유즈맵인 <캐슬 디펜드 V2>는 성을 방어하며 왕의 귀환을 기다리는 중세 판타지 스토리가 인상적인 맵이다. 맵 제목에서부터 드러나듯, 플레이어는 성벽을 지키며 끊임없이 몰려오는 오크 군단의 공격을 막아내야 한다. 맵은 커다란 성을 중심으로 설계되어 있으며, 성문과 성벽, 그리고 내부 요새가 주요 방어 지점으로 보인다. 성벽에는 방어시설이 배치되어 있고, 성 내부에는 보급로를 통해 유닛을 생산하거나 보강할 수 있는 구조물이 배치되어 있는 것으로 추정된다. 오크 군단은 성문과 성벽을 집중 공격하며, 플레이어는 제한된 자원으로 방어선을 구축하고 유지해야 한다. 맵의 특징은 방어 포인트가 명확하다는 점이다. 성문과 성벽이 주요 타격점이며, 이들을 보호하지 못하면 오크 군단이 성내부로 진입해 방어에 치명적인 타격을 입힐 가능성이 크다. 또한, 왕의 귀환 시점이 존재해 오크 군단을 모두 물리치면 승리를 거두는 구조로 보인다. 이는 디펜스 맵이지만 단순한 방어뿐만 아니라 '기다림'과 '최후의 전투'라는 스토리적 요소가 결합된 점이 특징이다. 추천 대상은 디펜스 맵을 선호하는 플레이어이며, 특히 중세 판타지 배경과 스토리텔링이 매력적으로 느껴지는 유저에게 어울린다. 플레이 전에는 성벽과 성문, 보급로의 위치와 오크 군단의 공격 패턴을 미리 숙지하는 것이 중요하다. 또한, 방어에 필요한 자원의 배치와 생산 건물의 위치를 확인해 전략을 세우는 것이 관건이다. 맵의 디자인과 구조는 중세 성곽을 재현한 듯한 디테일이 돋보이지만, 오크 군단의 공격 루트는 다소 예측 가능할 수 있어 방어 전략의 다양성을 고려해야 한다. 이 맵은 디펜스 장르의 기본 틀을 유지하면서도 스토리적 깊이를 더한 점에서 주목할 만하다. 다만, 플레이 시간이 길어질수록 오크 군단의 공격 빈도가 높아질 가능성이 있어 체력과 전략적 집중력이 요구된다. 초보 플레이어는 방어 우선순위를 잘못 설정하거나 자원의 관리에서 실수를 범할 수 있으므로, 난이도를 '보통' 정도로 설정해 가볍게 도전하는 것이 좋다. 맵의 분위기는 중세 판타지풍으로 어두운 색감과 성곽 디자인이 어우러져 atmosferic한 느낌을 준다. 오크 군단의 공격은 성벽을 무너뜨릴 때마다 시야가 넓어지며, 성내부로 침투하는 연출이 있는 것으로 보인다. 이는 플레이어에게 긴장감을 더하는 요소로 작용한다. 전체적으로 <캐슬 디펜드 V2>는 디펜스 유즈맵의 정석을 따르면서도 스토리적 몰입도를 높인 작품으로, 중세 판타지를 좋아하는 유저라면 한 번쯤 도전해볼 만한 가치가 있다. 다만, 반복 플레이 시 오크 군단의 공격 패턴이 익숙해질 수 있어, 난이도나 변형 요소를 추가한 버전을 찾아보는 것도 좋은 방법이다. 이 맵은 디펜스 장르의 입문자에게는 훌륭한 튜토리얼 역할을 할 수 있으며, 숙련자에게는 전략적 깊이를 제공하는 도전 과제가 될 것이다. 성의 구조와 오크 군단의 공격 루트를 분석하며 최적의 방어 전략을 구상하는 재미가 쏠쏠한 작품이다. Castle Defend V2 is one of the most iconic defense genre custom maps in StarCraft: Brood War, featuring a medieval fantasy storyline where players must defend a castle until the king's return. The map is centered around a large castle structure, with defensive walls, gates, and internal fortifications serving as key strategic points. The layout suggests that players can establish supply routes and production buildings to reinforce their defenses. The Orc Legion continuously attacks the gates and walls, and failing to protect these areas allows them to breach the castle, leading to a potential loss. A unique aspect of this map is its narrative-driven structure: players must hold out until the king returns, after which a final battle ensues for victory. This blends classic defense mechanics with an engaging 'waiting' and 'last stand' storyline. The map is ideal for players who enjoy defense games, particularly those drawn to medieval fantasy themes and storytelling. Before playing, it's essential to familiarize yourself with the wall and gate positions, Orc attack patterns, and resource distribution. Strategic planning is crucial, as misplacing defenses or mismanaging resources can lead to failure. While the map excels in recreating a medieval fortress with detailed design, the Orc attack routes may feel predictable over time, limiting strategic variety. The map's atmosphere is enhanced by its dark medieval color palette and fortress architecture, with Orc incursions visually expanding the playable area as walls are breached. The tension builds as the Orcs penetrate deeper into the castle, adding immersion. Castle Defend V2 follows the defense genre's core mechanics while enriching the experience with narrative depth, making it a worthwhile challenge for medieval fantasy fans. Casual players may struggle with prioritizing defenses or resource management, so setting the difficulty to 'Medium' is recommended. Repeated plays might reveal familiar Orc attack patterns, but the map still offers strategic depth for seasoned players. For newcomers to defense maps, it serves as an excellent introduction, while veterans can refine their tactics by analyzing the castle structure and Orc attack routes. The blend of defensive strategy and immersive storytelling makes this a standout custom map worth trying at least once.
맵 선택 가이드
태그는 맵의 핵심 특징을 빠르게 설명하지만 제작 버전마다 규칙이 다를 수 있습니다. 상세 설명에서 권장 인원, 난이도, 플레이 시간과 버전을 함께 확인한 뒤 다운로드하세요.