
섬멸전 스타크래프트 맵 모음
'섬멸전' 태그가 등록된 맵을 모았습니다. 장르 하나로 찾기 어려운 플레이 방식, 난이도와 특징을 중심으로 인기 맵과 최신 맵을 비교해 보세요.
- 등록 맵
- 19개
- 누적 다운로드
- 4
- 누적 조회
- 783
인기 맵
다운로드와 조회 반응이 높은 맵입니다.
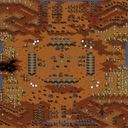
햄버거힐 1.9: 월남전의 지옥 (Test of Survival - Hamburger Hill 1.9)
스타크래프트 브루드워의 대표적인 서바이벌 유즈맵인 <Test of Survival - 햄버거힐1.9>는 이름에서 느껴지듯 치열한 전투가 끊임없이 펼쳐지는 맵이다. 햄버거힐이라는 지명과 월남전의 지옥이라는 설명에서부터 알 수 있듯, 이 맵은 전쟁터의 한복판에서 펼쳐지는 전투를 재현한 것으로 보인다. 맵 중앙에 위치한 넓은 평야와 그 주변을 둘러싼 언덕 지형은 플레이어에게 넓은 시야와 다양한 전략적 선택지를 제공하며, 4차례의 지원부대라는 설명은 끊임없이 몰려오는 적군을 상대로 지속적인 저항을 요구한다는 점을 시사한다. 이 맵은 기본적으로 적군 컴퓨터를 상대로 건물을 파괴하고 유닛을 섬멸하는 Survival(서바이벌) 장르에 속한다. 맵의 구조는 비교적 단순하지만, 넓은 전장과 지속적인 적의 공격은 플레이어에게 전략적 깊이와 긴장감을 동시에 제공한다. 특히 햄버거힐이라는 이름에 걸맞게 맵 곳곳에 흩어져 있는 언덕과 골짜기는 시야 확보와 진형 배치에서 중요한 역할을 한다. 또한, 맵 상단과 하단에 위치한 4차례의 지원부대 지원 지역은 플레이어가 일정 시간마다 추가적인 자원이나 유닛을 확보할 수 있는 기회를 제공하며, 이를 통해 지속적인 전투를 유지할 수 있도록 돕는다. 이 맵을 플레이하기 위해서는 기본적인 스타크래프트 멀티 플레이 전략과 더불어,Earth에서 제공하는 다양한 유닛과 건물의 특성을 숙지하고 있어야 한다. 또한, 넓은 전장과 끊임없는 적의 공격에 대응하기 위한 빠른 판단력과 효율적인 자원 관리 능력이 요구된다. 특히, 초보자의 경우 맵의 구조와 적의 공격 패턴을 충분히 숙지하지 못한 상태에서 플레이할 경우 쉽게 무너질 수 있으므로, 사전 연습이 필수적이다. 이 맵은 주로 혼자서 컴퓨터 상대를 상대로 플레이하는 1인용 맵으로, 난이도는 비교적 높은 편으로 추정된다. 맵의 제목과 설명에서 느껴지는 긴장감과 더불어, 실제 게임 플레이에서도 끊임없는 적의 공격과 제한된 자원으로 인한 압박감이 플레이어에게 지속적인 도전을 안겨준다. 따라서, 이 맵은 기존의 스타크래프트 유저들에게는 새로운 도전 과제로, 초보자에게는 경험을 쌓을 수 있는 좋은 기회로 작용할 수 있을 것이다. StarCraft: Brood War's iconic survival custom map, *Test of Survival - Hamburger Hill 1.9*, lives up to its name with relentless, high-stakes combat unfolding continuously. As the map's name and description—"Hamburger Hill" and "Hell of the Vietnam War"—suggest, it recreates the chaos of a battlefield at its most intense. The wide central plain surrounded by hilly terrain gives players broad visibility and a variety of strategic options, while the mention of four waves of reinforcements implies a constant need to fend off waves of enemy forces. The map primarily falls under the Survival genre, tasking players with destroying enemy buildings and eliminating units against AI-controlled opponents. Though its layout is relatively straightforward, the expansive battlefield and unending enemy assaults deliver both strategic depth and high tension. True to its name, *Hamburger Hill*, scattered hills and valleys across the map play a crucial role in scouting and positioning. Meanwhile, the four reinforcement zones at the top and bottom of the map allow players to secure additional resources or units at regular intervals, helping sustain prolonged combat. To play effectively, players need a solid grasp of StarCraft’s multiplayer mechanics, along with a deep understanding of the unique properties of units and buildings provided by Earth. Fast decision-making and efficient resource management are essential to cope with the vast battlefield and relentless enemy pressure. Beginners, in particular, can easily falter if they don’t first study the map’s layout and enemy attack patterns, making practice sessions a necessity. Designed primarily as a single-player challenge against AI, *Test of Survival - Hamburger Hill 1.9* is considered fairly difficult. The tension suggested by its title and description carries into actual gameplay, where constant enemy attacks and limited resources create sustained pressure. For veteran StarCraft players, it offers a fresh challenge, while for newcomers, it serves as an excellent opportunity to build experience.
지연 벗기기 무조건 벗기는
‘지연 벗기기 무조건 벗기는’는 스타크래프트 브루드워의 유즈맵으로, 이름 그대로 최대한 빠르게 적을 제거하고 승리 목표를 달성하는 데 초점을 맞춘 컴까기 장르의 맵이다. 맵의 전체적인 구조는 중앙이 넓게 뚫린 형태이며, 각 플레이어는 시작 지점에서 출발해 맵 외곽을 따라 배치된 건물을 파괴하거나 적 유닛을 섬멸하는 방식으로 진행된다. 맵의 중앙 공간은 비교적 넓고 개방되어 있어 빠른 이동과 전투가 가능하도록 설계되어 있으며, 외곽의 건물들은 방어선 역할을 하거나 주요 목표물로 기능한다. 맵의 이름에서 알 수 있듯이 ‘무조건 벗기는’라는 컨셉이 강조되며, 플레이어는 최대한 빠른 시간 내에 목표를 달성해야 한다. 맵의 분위기는 밝고 깔끔한 느낌을 주며, 타일셋은 플랫폼을 사용해 안정적인 시야와 이동을 보장한다. 플레이어 간 경쟁이 치열할 것으로 예상되며, 맵의 구조상 소규모 접전보다는 넓은 지역에서 벌어지는 대규모 전투가 주를 이룰 가능성이 높다. 또한, 맵의 크기가 크고 개방적이기 때문에 전략보다는 순간적인 판단과 유닛 컨트롤이 중요하다는 특징이 있다. 초보 플레이어보다는 적응력이 뛰어난 플레이어나 숙련자에게 더욱 적합한 맵으로 보인다. 맵을 플레이하기 전에는 맵의 목표와 구조를 정확히 이해하고, 빠른 판단과 유닛 관리를 연습하는 것이 중요하다. 특히 외곽 건물의 위치와 역할, 중앙의 개방 공간을 얼마나 효율적으로 활용하는지가 승리의 열쇠가 될 것이다. 맵의 난이도는 보통 정도로 예상되며, 적절한 팀워크와 전략이 없으면 목표 달성이 어려울 수 있다. 이 맵은 단순히 적을 제거하는 것뿐만 아니라, 맵의 구조와 특성을 최대한 활용하는 플레이가 요구되는 만큼, 여러 번 플레이해보는 것이 좋다. 또한, 맵의 이름과 설명에서 느껴지는 익살스러운 분위기가 플레이어의 긴장을 풀어주고 재미를 더할 것으로 보인다. 이 맵을 즐기기 위해서는 스타크래프트 브루드워의 기본적인 조작법과 유닛 특성을 숙지하고 있어야 하며, 특히 빠른 판단과 반응 속도가 중요한 만큼 연습이 필수적이다. 마지막으로, 맵의 크기와 구조상 네트워크 상태가 좋지 않다면 플레이 경험이 저하될 수 있으니 주의가 필요하다. ‘Strip and Destroy’ is a *StarCraft: Brood War* custom map where the sole objective is to eliminate the enemy as quickly as possible. The map is a fast-paced *comp stomp* genre, where players rush to destroy buildings along the outer edges or wipe out enemy forces to secure victory. The map features a wide-open central area surrounded by a perimeter of structures. Players start near the outskirts and must navigate the map by either destroying key buildings or engaging in combat across the expansive, open battlefield. The central space is designed for quick movement and large-scale clashes, while the outer buildings serve as defensive strongholds or primary targets. As the name suggests, the core mechanic revolves around stripping away enemy defenses and pushing aggressively toward victory. Visually, the map has a bright and clean aesthetic, using a flat tileset to ensure clear visibility and smooth movement. Due to its open layout, expect intense competition, with most battles unfolding in vast open areas rather than tight chokepoints. The large, open design prioritizes split-second decision-making and precise unit control over long-term strategy. While beginners might struggle, the map is better suited for adaptable or experienced players who can thrive under pressure. Before playing, it’s crucial to fully grasp the map’s objectives and layout. Quick reflexes and efficient unit management are essential, especially when leveraging the outer buildings’ positions or the central open space. While the difficulty is moderate, lacking teamwork or strategy will make victory nearly impossible. This isn’t just about wiping out the enemy—it’s about mastering the map’s mechanics through repeated plays. The map’s quirky name and description also add a playful tone, easing tension and making the experience more enjoyable. To fully enjoy it, players should be familiar with *Brood War*’s basic controls and unit behaviors, as speed and reaction time are key. Given the map’s size and structure, a stable network connection is vital to avoid a frustrating experience.
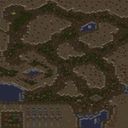
Special Forces God v3.0
「Special Forces God v3.0」은 스타크래프트: 브루드워의 UMS(유즈맵) 장르로, 특수부대를 컨트롤하며 다수의 적을 상대하는 컴까기 스타일의 맵이다. 맵의 배경은 사막 타일셋으로 구성되어 있으며, 넓은 평야와 곳곳의 언덕, 바위가 배치되어 전략적 위치를 제공한다. 플레이어는 6명의 특수부대원으로 구성된 팀을 이끌며, 맵 곳곳에 배치된 적군 기지나 건물을 파괴하거나, 특정 조건을 달성해야 한다. 맵의 구조는 크게 중앙 평야와 좌우 언덕 지역으로 나뉘며, 언덕 지역은 시야 확보와 방어에 유리한 고지대로 활용할 수 있다. 맵의 중앙에는 넓은 평지가 펼쳐져 있어 대규모 전투가 벌어질 가능성이 높으며, 좌우 언덕을 따라 이동하는 루트는 기습이나 후방 공격에 유리한 지형을 제공한다. 맵의 명칭에서 알 수 있듯이 ‘Special Forces’라는 컨셉에 맞게, 플레이어는 개개의 유닛을 조작하여 적을 섬멸하는 스타일을 요구한다. 맵의 난이도는 맵의 규모와 적 배치에 따라 초보자에게는 다소 어려운 편이지만, 익숙해지면 전략적 깊이를 느낄 수 있는 구조로 설계되었다. 특히 넓은 맵에서 벌어지는 전투는 유닛의 컨트롤뿐만 아니라 위치 선정과 자원 관리도 중요하게 작용한다. 추천 대상은 스타크래프트의 컴까기 스타일을 선호하는 유저이며, 넓은 맵에서 벌어지는 대규모 전투를 즐기고자 하는 플레이어에게 적합하다. 플레이 전에는 맵의 구조와 주요 루트를 숙지하여, 적의 배치와 자신의 유닛 배치 전략을 미리 계획하는 것이 중요하다. 또한, 넓은 맵에서 벌어지는 전투는 자원의 관리가 중요하므로, 자원 채취와 유닛 생산 타이밍을 잘 조절해야 한다. 맵의 이름은 ‘Special Forces God’라는 특수부대 컨셉을 강조하며, v3.0 버전은 이전 버전들보다 맵의 밸런스와 디자인 개선이 이루어진 것으로 추정된다. 맵의 플레이 스타일은 컴까기 장르의 특성을 살려, 유닛의 컨트롤과 전략적 위치 선정을 중시하는 구조로 설계되어 있다. 맵의 배경과 구조는 사막 타일셋을 활용하여 현실감 있는 전투 환경과 긴장감을 제공하며, 넓은 평야와 언덕 지형은 다양한 전술적 선택지를 제공한다. 특히, 맵의 중앙 평야는 대규모 전투가 벌어질 가능성이 높으므로, 플레이어는 유닛의 생산과 배치를 신중히 고려해야 한다. 맵의 난이도는 초보자에게는 다소 어려운 편이지만, 익숙해지면 전략적 깊이를 느낄 수 있는 구조로 설계되었다. 또한, 맵의 좌우 언덕은 후방 공격이나 기습에 유리한 지형을 제공하므로, 이를 활용한 전략적 플레이가 가능하다. "Special Forces God v3.0" is a UMS (user-made map) genre map for *StarCraft: Brood War*, where players control a special forces team and engage in a "comp stomp" style battle against numerous enemies. The map features a desert tile set with vast plains, scattered hills, and rocks that provide strategic positions. Players lead a team of six special forces units, tasked with destroying enemy bases or buildings scattered across the map or achieving specific objectives. The map is divided into three main areas: a central plain, left and right hill regions. The hill regions offer elevated ground that enhances visibility and defense. The central plain is wide, making large-scale battles likely, while the paths along the hills provide advantageous terrain for ambushes or rear attacks. As the name suggests, the map emphasizes the "Special Forces" concept, requiring players to control individual units to eliminate enemies. While the map’s scale and enemy placement may pose a challenge for beginners, its design allows experienced players to appreciate its strategic depth. Battles across the expansive map demand not only unit control but also smart positioning and resource management. This map is recommended for players who enjoy *StarCraft*’s comp stomp style and those who prefer large-scale battles on wide maps. Before playing, it’s crucial to familiarize yourself with the map’s layout and key routes, planning your unit placements and counter-strategies against enemy positions. Resource management is also vital in large-scale battles, so timing your resource gathering and unit production is key. The name "Special Forces God" highlights the special forces theme, and v3.0 appears to have improved balance and design over previous versions. The gameplay focuses on unit control and strategic positioning, staying true to the comp stomp genre. The desert tile set and terrain—sprawling plains, hills, and varied landscapes—create an immersive and tense combat environment with diverse tactical options. The central plain, in particular, is prone to large-scale battles, so players must carefully consider unit production and deployment. While the map may be difficult for beginners, its design rewards strategic depth once mastered. The left and right hills also offer advantageous terrain for rear attacks or ambushes, enabling more dynamic strategies.
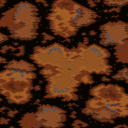
라브레아 (LaBrea)
스타크래프트 브루드워의 오리지널 밀리 맵 ‘라브레아’는 타르 바다 한가운데 떠 있는 섬들이 전투의 무대가 되는 독특한 지형을 자랑한다. 맵 제목 ‘LaBrea’는 미국 로스앤젤레스의 라 브레아 타르 pits에서 이름을 따왔으며, 실제로 맵 곳곳에 검은색 타르 웅덩이가 흩어져 있어 섬과 섬 사이를 이동하는 플레이어에게 전략적 제약을 가한다. 중앙의 넓은 타르 지역은 접근이 어렵지만, 섬들 사이를 연결하는 좁은 통로와 해안가 부근의 좁은 길들이 초반 러시나 테란 바이오닉 견제, 프로토스 질럿 러시 등 다양한 전략적 선택을 강제한다. 맵의 균형은 섬의 크기와 연결 경로에 맞춰져 있어, 테란의 경우 지상 유닛만으로 중앙을 장악하기 어려운 반면, 프로토스의 경우 질럿과 드라군을 활용한 섬멸전이 유리한 구조로 보인다. 저그 역시 뮤탈리스크나 러커를 활용한 섬 공격이 가능하지만, 타르 지역의 접근성이 떨어지는 탓에 초반에는 상대의 움직임을 읽고 섬을 방어하는 데 중점을 두는 플레이가 중요할 것이다. 맵의 난이도는 섬의 크기와 연결 경로의 복잡도에 따라 크게 좌우되며, 섬과 섬 사이를 신속하게 이동할 수 있는 유닛(예: 질럿, 드라군, 시즈 탱크)의 활용이 승패를 가를 가능성이 크다. 특히 테란의 경우, 섬의 좁은 길목을 활용한 벙커링이나 시즈 탱크 견제가 효과적일 수 있으며, 프로토스는 질럿 드랍이나 드라군 포격으로 섬을 장악하는 전략이 유효하다. 저그의 경우, 초반에는 랩터나 히드라리스크로 섬을 방어하다가, 후반에는 뮤탈리스크를 확보해 상대의 섬을 공격하는 플레이가 일반적일 것이다. 추천 대상은 섬과 섬 사이의 이동 전략을 중시하는 플레이어들로, 특히 질럿이나 드라군을 선호하는 프로토스 유저에게 적합하다. 테란과 저그 유저 또한 섬의 지형을 잘 활용할 수 있는 빌드와 유닛 조합을 숙지한다면 충분히 경쟁력 있는 플레이가 가능할 것이다. 플레이 전에는 섬의 연결 경로와 타르 지역의 접근성을 반드시 숙지하고, 상대의 전략에 따라 섬을 방어하거나 공격하는 플레이를 유연하게 전환할 수 있도록 대비해야 한다. 또한, 섬의 좁은 길목에서 벌어지는 전투에서 우위를 점하기 위해 유닛의 이동 속도와 공격 범위를 고려한 빌드 오더를 준비하는 것이 중요하다. 이 맵은 단순히 지형이 아름다운 것뿐만 아니라, 섬멸전과 섬 방어라는 스타크래프트의 핵심 전략을 극대화할 수 있는 구조로 설계되어 있어, 밀리 맵 중에서도 독특한 매력을 자랑한다. 초보자는 섬 사이의 이동이 제한적인 점을 고려해 안정적인 빌드를 우선시하는 것이 좋으며, 숙련자는 섬의 지형을 활용한 다양한 전략을 시도해 볼 수 있을 것이다. StarCraft: Brood War’s original melee map *LaBrea* stands out with its unique terrain of islands floating in the middle of a tar sea. The map’s name comes from the La Brea Tar Pits in Los Angeles, and its scattered black tar pools restrict movement between islands. While the central tar region is hard to access, narrow pathways connecting the islands and the shoreline force players into diverse early strategies like Terran bio rushes, Protoss Zealot rushes, or harassment with Marines. The map’s balance is designed around island sizes and connection routes, making it difficult for Terrans to secure the center with ground units alone, while Protoss benefit from Zealot and Dragoon-based island warfare. Zerg can also strike from the islands with Mutalisks or Lurkers, but the tar’s poor accessibility means early focus should be on scouting and defending islands. Map difficulty hinges on island size and path complexity, with fast-moving units like Zealots, Dragoons, or Siege Tanks often deciding the game. Terrans can exploit narrow chokepoints with bunkers or Siege Tank pressure, Protoss can dominate with Zealot drops or Dragoon sniping, and Zerg typically defend with Zerglings or Hydralisks before transitioning to Mutalisks for late-game island raids. This map suits players who prioritize island mobility, especially Protoss users who favor Zealots or Dragoons, though Terrans and Zerg can remain competitive with the right builds and unit compositions. Before playing, study the island connections and tar accessibility, adapt flexibly between defense and offense, and prepare build orders that account for unit speed and range in tight chokepoints. Beyond its striking visuals, *LaBrea* maximizes core StarCraft strategies like island warfare and defense, offering a distinct appeal among melee maps. Beginners should prioritize stable builds due to limited mobility, while experienced players can experiment with terrain-exploiting tactics.
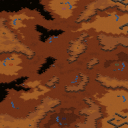
Scorched Earth (불타버린 대지)
스타크래프트 브루드워 유즈맵 〈Scorched Earth〉는 2~4명의 플레이어가 한 팀을 이뤄 모든 적을 전멸시키는 것을 목표로 하는 밀리식 전투 맵이다. 맵의 이름처럼 '불타버린 대지'라는 테마가 느껴지는 황량한 황무지 지형이 특징이며, 넓은 개활지와 굴곡진 지형이 조화를 이룬다. 내부 설명에서도 '플레이어 수: 2~4'로 명시된 만큼 소규모 팀 전투에 최적화되어 있으며, '아무 것도 살아남지 못하게 하라'는 문구는 승리를 위해서는 철저한 섬멸전이 필요하다는 점을 강조한다. 맵의 구조는 중앙의 넓은 평야와 곳곳에 흩어져 있는 언덕, 그리고 기습을 위한 협곡이 조화를 이루며, 플레이어는 이 지형을 활용해 전략적 우위를 점해야 한다. 초보자와 숙련자 모두 즐길 수 있도록 밸런스가 조절된 것으로 보이며, 전장 전체를 아우르는 넓은 시야와 빠른 판단력이 요구된다. 특히 4인 플레이 시에는 팀원 간의 호흡이 승패를 좌우할 수 있어 협동 플레이가 중요하다. 맵의 분위기는 전쟁터의 처절함을 연상시키며, 전투가 벌어질수록 대지가 불타오르는 듯한 시각적 효과가 추가되어 몰입감을 높인다. 맵을 플레이하기 전에는 팀원 간의 역할 분담(탱커, 딜러, 서포터 등)을 미리 정하고, 지형지물 활용 및 기습 루트를 숙지하는 것이 중요하다. 또한, 맵의 넓은 시야를 살려 시야 확보와 정찰을 소홀히 하지 않도록 주의해야 한다. 이 맵은 밀리식 전투의 재미를 느끼고 싶거나, 팀 플레이를 중시하는 유저들에게 추천할 만하다. StarCraft: Brood War custom map *Scorched Earth* is a melee-style battle map where 2 to 4 players team up to wipe out all enemies. As the name suggests, the map features a desolate wasteland theme with barren terrain, blending open fields and rugged landscapes. The in-game description explicitly states “Player Count: 2–4,” confirming it’s optimized for small-scale team combat, and the phrase “Leave nothing alive” underscores the need for total annihilation to secure victory. The layout centers on a broad plain flanked by scattered hills and ravines ideal for ambushes—players must leverage this terrain to gain a strategic edge. The balance appears well-tuned for both beginners and veterans, demanding wide vision control and quick decision-making across the entire battlefield. In 4-player matches, coordination among teammates can decide the outcome, making teamwork essential. The atmosphere evokes the brutality of a warzone, with visual effects that make the land appear to ignite as combat intensifies, deepening immersion. Before playing, it’s crucial to assign roles (tank, damage dealer, support, etc.), study terrain usage, and plan ambush routes. Players should also prioritize vision control and scouting to avoid overlooking key areas. This map is ideal for those seeking the thrill of melee combat or who value strong team play.
![마린메딕 vs 러커[v.Final] 맵 미리보기](https://cdn-star-data.huzy.net/thumbnail_6d80ab6102e24785a0537511bbf18fb2.jpg)
마린메딕 vs 러커[v.Final]
마린메딕 vs 러커[v.Final]는 스타크래프트 브루드워 맵 유즈맵 장르 중에서도 클래식한 대전 및 섬멸 방식을 채택한 독특한 작품입니다. 맵 전반은 설원 타일셋을 배경으로 구성되어 있으며, 화면을 살펴보면 각 플레이어 진영마다 마린과 메딕 부대가 배치되어 있고 맞은편에는 대규모 러커 무리가 포진해 있는 구조를 확인할 수 있습니다. 내부 맵 설명에 적힌 대로 모든 적의 유닛을 처치하는 것이 목표인 난이도 높은 섬멸전 성격을 띠고 있어, 플레이어 간 혹은 주어진 유닛 조합을 활용한 치열한 전투가 전개될 것으로 추정됩니다. 각 진영의 유닛 배치와 지형적 특성을 고려할 때, 마린의 화력 집중과 메딕의 치료 타이밍, 그리고 러커의 스플래시 공격을 어떻게 극복하느냐가 승패를 가르는 핵심 요쇼로 작용합니다. 대규모 유닛들이 격돌하는 빠른 전개와 긴장감 넘치는 전투를 선호하는 유저들에게 적합하며, 특히 컨트롤의 재미를 즐기는 이들에게 추천할 만합니다. 플레이 전 각 진영의 초기 유닛 배치 위치와 중앙 교전 지역의 지형을 미리 파악해 두면 유리한 전투를 이끌어 나갈 수 있습니다. Marine Medic vs Lurker [v.Final] is a unique custom map in StarCraft: Brood War that adopts a classic combat and annihilation style within the UMS genre. The entire map is set against a snow tileset background, and examining the layout reveals that marine and medic squads are positioned in each player's base, while large groups of lurkers are deployed opposite them. As indicated by the internal map description where the goal is to kill every enemy unit, it features a challenging annihilation combat nature, suggesting intense battles utilizing given unit combinations. Considering the unit placement and terrain characteristics of each faction, concentrating marine firepower, timing medic heals, and overcoming lurker splash attacks serve as key elements determining victory or defeat. This map is well-suited for users who prefer fast-paced action and tense combat involving large-scale unit clashes, and it is especially recommended for those who enjoy micro-control gameplay. Understanding the initial unit placement and the terrain of the central engagement area in advance before playing will help lead you to a more advantageous battle.
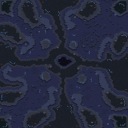
카카루의 복수 (Kakaru's Revenge)
스타크래프트 브루드워의 고전 유즈맵으로 주목받는 <카카루의 복수(Kakaru's Revenge)>는 섬뜩하면서도 신비로운 분위기의 맵으로, Islamic mythology의 한 장면을 모티브로 삼고 있다. 거대한 황소 카카루의 등 위에 자리한 루비 바위가 있으며, 그 위에는 천사가 지구를 지탱하고 있는 형상이 묘사되어 있다. 맵 전체는 화산 지형의 섬들로 구성되어 있으며, 각 섬은 좁은 다리로 연결되어 있어 전략적 이동과 방어가 중요한 포인트가 된다. 8인 플레이어 모두가 개별 섬에 배치되어 시작하며, 맵 중앙에는 중앙 섬이 있어 주요 전투와 자원 관리, 동맹 협의가 벌어질 수 있는 공간으로 활용된다. 이 맵의 특징은 섬 간의 이동성과 방어에 있다. 맵이 넓고 섬들이 흩어져 있어 초반 자원 확보와 건물 배치에 신중을 기해야 한다. 특히 중앙 섬은 여러 플레이어가 접근할 수 있어 초반 동맹 형성과 전투가 일어나기 쉽다. 또한 맵의 지형적 특징상, 섬 사이의 좁은 길목은 적의 공격을 방어하거나 기습을 당하기 쉬운 지점이므로, 방어 건물을 적재적소에 배치하는 것이 중요하다. 맵은 밀리 장르이지만, 섬 간의 격리성과 제한된 자원 때문에 마치 디펜스와 유사한 플레이 감각을 요구한다. 또한, 맵의 아름다움과 신비로운 스토리 콘셉트는 플레이어에게 색다른 경험을 제공하며, 단순히 전투뿐 아니라 전략적 섬멸전으로도 즐길 수 있다. 이 맵을 플레이하기 위해서는 섬 간의 이동성을 충분히 고려한 맵리딩과, 동맹과의 협력이 필수적이다. 특히 중앙 섬을 차지하거나 방어하는 것이 승리의 열쇠가 될 수 있으며, 좁은 길목에서의 전투는 맵의 특성에 맞게 신속하고 치밀한 판단이 요구된다. 또한, 맵의 분위기와 스토리적 요소가 플레이에 몰입감을 더해주므로, 단순히 전투뿐 아니라 맵의 세계관에 빠져드는 재미도 느낄 수 있다. 초보자보다는 어느 정도 전략적 감각과 맵리딩 능력이 있는 플레이어가 즐기기에 적합한 맵으로, 고전 유즈맵의 매력을 느낄 수 있는 작품이다. 이 맵을 플레이하기 전에는 섬 간의 연결 다리가 얼마나 넓은지, 중앙 섬의 위치와 크기, 그리고 각 플레이어의 시작 위치가 어떻게 배치되어 있는지 반드시 확인할 필요가 있다. 또한, 섬 간의 거리와 자원 분포를 고려해 초반 빌드와 건물 배치를 계획해야 한다. 맵의 아름다움과 신비로운 스토리 덕분에 시각적으로도 즐거움을 느낄 수 있지만, 전략적 깊이는 충분히 요구되는 맵이므로, 플레이 전에 맵의 특징을 충분히 숙지하는 것이 중요하다. <Kakaru's Revenge> is a classic *StarCraft: Brood War* custom map that stands out for its eerie yet mystical atmosphere, inspired by a scene from Islamic mythology. The map features a ruby rock atop the back of the giant bull Kakaru, with an angel depicted as supporting the Earth above it. The entire map consists of volcanic islands connected by narrow bridges, making strategic movement and defense key factors. All eight players start on separate islands, with a central island in the middle serving as a hub for major battles, resource management, and alliance negotiations. The map’s defining trait lies in its movement and defense mechanics. With its vast, scattered islands, players must carefully secure early resources and plan their base layouts. The central island, accessible to multiple players, is a hotspot for early alliances and skirmishes. Due to the terrain, narrow passages between islands are vulnerable to attacks or ambushes, so placing defensive structures strategically is crucial. While a melee-style map, its isolated islands and limited resources create a defensive-like gameplay experience. Beyond its strategic depth, the map’s beauty and mysterious lore offer players a unique experience, blending combat with a sense of strategic annihilation. To play effectively, players must account for movement between islands and prioritize cooperation with allies. Controlling or defending the central island can be pivotal to victory, and battles in tight corridors demand quick, precise decision-making. The map’s immersive atmosphere and narrative elements enhance the experience, making it more than just a fight—it’s a journey into its world. This map is best suited for players with some strategic sense and map-reading skills rather than beginners. To prepare, check the widths of connecting bridges, the size and position of the central island, and the starting locations of each player. Consider the distances between islands and resource distribution when planning early builds and base placements. While visually stunning thanks to its lore and aesthetics, the map demands deep strategy, so familiarizing yourself with its mechanics beforehand is essential.
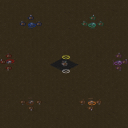
플래그 매드니스 (Flag Madness)
플래그 매드니스(Flag Madness)는 스타크래프트 브루드워 맵 가운데 독특한 구도를 보여주는 유즈맵이다. 전체적인 지형을 살펴보면 황무지 타일셋을 바탕으로 사방에 플레이어들의 기지로 추정되는 거점들이 분산 배치되어 있고, 맵 중앙에는 특정 목표 지점으로 보이는 공간이 자리 잡고 있다. 각 기지 주변에는 자원 채취를 위한 미네랄과 가스 가젯이 배치되어 있어 기본적인 빌드오더를 시작할 수 있는 환경을 갖추고 있다. 내부 맵 설명에 따르면 모든 적 건물을 파괴하는 것이 목표로 제시되어 있어, 단순한 생존이나 특정 오브젝트 방어보다는 전면적인 섬멸전에 초점이 맞춰져 있는 것으로 보인다. 최대 6명이 참여할 수 있는 이 스타크래프트 맵은 각 거점 간의 거리가 비교적 멀고 중앙의 중립 지역을 두고 대립하는 구조를 띠고 있어 플레이어 간의 치열한 교전이 예상된다. 특히 멀티플레이 환경에서 다수의 인원이 모여 난전을 벌이기에 적합한 구도를 보여주며, 아군과의 협력이나 중앙 지역의 통제권을 잡기 위한 전략적인 판단이 중요하게 작용할 것이다. 전체적인 맵 크기는 2048 타일 규격으로 넓은 전장을 제공하므로, 병력의 기동성과 멀티 확장 타이밍을 재는 재미를 느낄 수 있다. 전략적인 유즈맵을 선호하는 유저들이나 친구들과 함께 대규모 난전을 즐기고 싶은 플레이어들에게 추천할 만한 브루드워 전장이다. 본격적인 플레이에 앞서 각 거점의 자원 수급량과 중앙 지형의 방어 배치 상태를 미리 파악해 두는 것이 승리를 위한 중요한 포인트가 될 것이다. Flag Madness is a StarCraft: Brood War use map that showcases a unique layout based on the wasteland tileset. The map features multiple starting bases dispersed across the edges for the players, while a distinct focal point sits right in the center. Each base is equipped with standard resource nodes like minerals and gas, providing the necessary foundation to execute initial build orders and establish an economy. According to the internal map description, the primary objective is to destroy all enemy buildings, shifting the core gameplay focus toward a decisive annihilation battle rather than simple defense or survival mechanics. Accommodating up to six players, this custom map creates an engaging environment where widely spaced starting positions encourage territorial expansion and strategic skirmishes around the contested center. The layout is particularly well-suited for multiplayer matches involving multiple participants, where coordination with allies and control over the central zone will heavily influence the outcome. Spanning a 2048 tile dimension, the battlefield offers ample space for maneuver warfare, rewarding players who master unit mobility and optimal timing for expansion. It is an ideal recommendation for fans of strategic custom maps and those looking to experience large-scale chaotic battles with friends. Before diving into the match, reviewing resource distributions and central terrain characteristics will help players formulate a winning strategy.
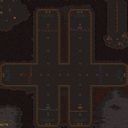
썬크 D 6웨이 (Sunken D 6 Way)
스타크래프트 브루드워의 대표적인 유즈맵 중 하나로 손꼽히는 《썬크 D 6웨이(v10.0)》는 6명의 플레이어가 한 팀을 이뤄 중앙의 해상도를 중심으로 펼쳐지는 섬멸전에 도전하는 디펜스 장르의 유즈맵이다. 맵의 전체적인 구도는 가운데에 위치한 대형 섬을 중심으로 여섯 개의 방향성 있는 통로(웨이)가 뻗어나가며, 각 웨이는 적의 진군을 막는 방어 타워와 유닛 생산 건물이 배치되어 있다. 플레이어는 각자의 웨이를 방어하는 동시에, 중앙 섬에 위치한 공용 자원 채취 건물에서 자원을 얻어 업그레이드와 추가 병력 생산을 진행할 수 있으며, 모든 웨이가 파괴되기 전에 적을 섬멸하거나 방어에 성공해야 한다. 맵의 핵심 전략은 여섯 개의 웨이를 어떻게 효율적으로 방어하냐는 점이다. 각 웨이는 시작 지점에서부터 조금씩 좁아지는 구조로 되어 있어, 초반에는 소수의 병력으로도 방어가 가능하지만, 게임이 진행될수록 적의 공격 규모가 커지면서 방어선이 밀리기 시작한다. 특히 중앙 섬의 자원 채취가 활발해지면 동맹 플레이어와 협력하여 대규모 병력을 동원할 수 있는 반면, 혼자서 방어에만 치중할 경우 자원이 부족해질 위험이 있다. 또한 맵의 각 웨이는 지형이 조금씩 다르며, 일부 웨이는 언덕 지형이나 좁은 협곡이 있어 병력의 배치와 유닛 조합에 따라 방어 난이도가 달라진다. 예를 들어 공중 유닛이 빈약한 플레이어는 언덕이 있는 웨이를 방어하는 데 어려움을 겪을 수 있으며, 반면에 대공 방어가 강한 플레이어는 언덕 지형을 활용하여 공중 공격을 방어하기 용이하다. 이 맵은 초보자와 숙련자 모두 즐길 수 있는 균형 잡힌 난이도를 제공한다. 게임의 진행 방식은 비교적 단순하면서도, 방어와 공격의 밸런스를 맞춰야 하기 때문에 전략적인 사고가 요구된다. 또한, 맵의 디자인 자체가 플레이어 간의 협력과 경쟁을 유도하기 때문에, 팀워크가 중요한 요소로 작용한다. 특히 6명의 플레이어가 한 팀을 이뤄 플레이하는 구조는 스타크래프트의 팀플레이를 극대화할 수 있는 요소로, 밸런스와 재미를 동시에 추구하는 유즈맵으로 평가받고 있다. 이 맵을 플레이하기 전에는 자신의 병력 조합과 방어 전략을 미리 준비하는 것이 중요하다. 또한, 동맹 플레이어와의 원활한 소통과 자원 관리도 게임의 승패를 좌우하는 요소이기 때문에, 팀원과의 협력 플레이가 필수적이다. 《썬크 D 6웨이(v10.0)》는 디펜스 장르의 유즈맵 중에서 손꼽히는 명작으로, 스타크래프트 유즈맵의 역사를 대표하는 작품 중 하나로 손꼽힌다. Sunken D 6 Way (v10.0) stands out as one of the most iconic custom maps in StarCraft: Brood War, offering a team-based defense experience where six players unite to protect a central island from relentless enemy assaults. The map features six distinct pathways (ways) radiating from the core, each equipped with defensive towers and unit production buildings. Players must defend their assigned way while gathering resources from shared central structures to upgrade and reinforce their forces. Victory hinges on either eliminating all enemy forces or successfully defending the island until the game's conclusion. The strategic depth of Sunken D 6 Way lies in its six-way defense system, where each pathway narrows progressively from the starting point. Early-game defense is manageable with minimal forces, but as the match advances, enemy attacks intensify, pushing defensive lines to their limits. Central resource gathering plays a crucial role—allied players who balance defense and resource collection can deploy larger armies, while those focusing solely on defense risk resource depletion. Terrain variations across pathways add another layer of strategy; some ways feature elevated ground or narrow chokepoints, which significantly influence unit positioning and composition. For instance, players lacking strong air defenses may struggle with elevated pathways, while those with robust anti-air capabilities can capitalize on such terrain advantages. Designed for both beginners and veterans, Sunken D 6 Way delivers a well-balanced challenge that rewards strategic planning and teamwork. The map’s simplicity in execution contrasts with its depth in execution, demanding players to balance offense, defense, and resource management. The six-player team structure amplifies the need for coordination, making it a quintessential team-based experience in StarCraft’s custom map scene. Before diving into the game, players should prepare their unit compositions and defensive strategies. Effective communication with teammates and resource management are critical to securing victory. As a cornerstone of the StarCraft custom map genre, Sunken D 6 Way (v10.0) remains a timeless title, celebrated for its balance, replayability, and the thrill of cooperative defense.
스나이퍼 정글 엘리트 (Sniper Jungle Elite)
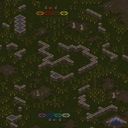
스타크래프트 브루드워의 유즈맵 'Sniper Jungle Elite'는 8명의 플레이어가 참여하는 섬멸전 형식의 맵이다. 맵 제목에서 알 수 있듯이 정글 지형 위에 요새와 방어시설이 배치되어 있으며, 적군을 모두 섬멸하고 깃발을 회수하는 것이 목표로 보인다. 내부 설명에 'Kill all Enemies, Bring Flag back'이라고 명시된 점에서, 단순한 섬멸전 이상의 전략적 요소가 포함된 것으로 추정된다. 맵의 디자인과 배치된 구조물들을 보아 공중 유닛보다는 지상 유닛의 활용이 강조될 가능성이 높으며, 특히 스나이퍼 계열 유닛의 활용을 고려한 디자인으로 보인다. 플레이어들은 각자 개별적인 시작 위치를 확보하며, 맵 중앙과 외곽에 위치한 요새들과 방어시설들을 활용해 적을 제압해야 한다. 맵의 지형은 정글과 오아시스, 바위 지형이 혼합되어 있어 시야 확보와 기동성 확보가 중요할 것으로 예상된다. 또한, 깃발을 회수하기 위한 이동 루트를 보호하거나 차단하는 전략적 선택이 게임의 승패를 좌우할 수 있다. 맵의 크기가 2048x2048로 상당히 넓은 편이므로, 빠른 이동과 효율적인 자원 관리가 필수적일 것이다. 이 맵은 초보자보다는 중급 이상의 플레이어들에게 적합할 것으로 보인다. 복잡한 지형과 전략적 요소들이 요구되기 때문에, 기본적인 스타크래프트 컨트롤과 맵리딩 능력이 충분하지 않다면 상대하기 어려울 수 있다. 또한, 팀플레이보다는 개인전 또는 소규모 팀전으로 진행될 가능성이 높아 보인다. 맵의 디자인과 목표를 고려할 때, 전장 전체를 활용한 기동성과 시야 싸움, 그리고 효율적인 자원 활용이 게임의 핵심 포인트가 될 것이다. 플레이 전에는 맵의 주요 길목과 요새 위치, 깃발의 위치 등을 미리 숙지하는 것이 중요하다. 또한, 스나이퍼 계열 유닛의 활용 가능성과 방어시설의 배치 상태를 확인하여 전략을 세우는 것이 승리의 열쇠가 될 것이다. 맵의 난이도는 보통 수준으로 예상되지만, 적절한 전략과 컨트롤이 뒷받침되지 않는다면 승리를 장담하기 어려울 수 있다. Sniper Jungle Elite is a custom StarCraft: Brood War map designed for 8 players, featuring a jungle-themed terrain with fortresses and defensive structures. The map appears to be a modified elimination mode where the objective is to defeat all enemies and retrieve a flag, as indicated by the internal description 'Kill all Enemies, Bring Flag back'. The layout suggests a focus on ground units rather than air units, with potential emphasis on sniper-type units due to the map's title. Players begin in isolated positions scattered across the map, surrounded by strategically placed fortresses and defensive structures. The terrain includes dense jungles, oases, and rocky areas, which likely require careful consideration of visibility and mobility. The wide-open spaces and mixed terrain mean that controlling key routes to the flag and defending against enemy advances will be crucial for victory. With a map size of 2048x2048, efficient resource management and quick movement are essential. This map seems best suited for intermediate to advanced players. The complex terrain and strategic elements demand solid StarCraft control skills and map-reading abilities; beginners may struggle without sufficient practice. While the map layout suggests a free-for-all or small-team format, the dense jungle areas and defensive structures encourage strategic positioning and tactical combat rather than chaotic rushes. Before playing, it's important to study the map's key paths, fortress locations, and flag positions. Understanding the potential use of sniper units and the layout of defensive structures will help in forming an effective strategy. While the difficulty is estimated to be moderate, success will heavily depend on proper planning and execution, as a lack of strategy or control could easily lead to defeat.
민병대 지원 작전 (Squad Support 3 1.4)
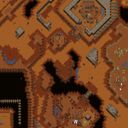
스타크래프트 브루드워의 대표적인 팀 기반 유즈맵인 〈Squad Support 3 1.4〉는 플레이어들이 밀리시아 지역 민병대와 협력하여 적군을 섬멸하는 협동 전투 경험을 제공합니다. 맵의 전체적인 구조는 넓은 평원과 숲, 언덕 지형으로 구성되어 있으며, 중앙의 넓은 도로가 주요 전투 공간으로 기능합니다. 각 플레이어는 개별적으로 병력을 지휘할 수 있지만, 공동 목표를 달성하기 위해 전략적 협력이 필수적입니다. 팀원 간의 실시간 소통과 역할 분담이 승리의 열쇠로, 초보 players도 쉽게 접근할 수 있지만 숙련된 players는 고도의 전술적 대형을 구사할 수 있습니다. 맵의 중간 지점에는 중앙 요충지가 있어, 이곳을 점령하면 일시적인 버프나 자원 보급을 받을 수 있어 공략법에 변수를 제공합니다. 또한, 맵 곳곳에 scattered된 미네랄과 가스는 자원 관리의 중요성을 강조하며, 리소스를 어떻게 활용하느냐에 따라 전투의 흐름이 달라질 수 있습니다. 특히, 적군의 본진은 맵의 상단과 하단에 각각 위치하고 있어, 다방향 공격과 방어가 동시에 요구됩니다. 맵의 디자인상으로는 중앙 도로가 좁아 대형 병력의 이동이 제한적이므로, 소규모 부대 단위의 기동전이 주로 펼쳐집니다. 이 맵은 5인 협동 플레이를 전제로 제작되었지만, 3~4인으로도 충분히 즐길 수 있으며, 특히 팀워크가 중요한 만큼 친목 게임이나 길드 활동에 최적화되어 있습니다. 플레이 전에는 팀원 간의 역할 분담을 미리 정하고, 중앙 요충지 점령 타이밍과 병력 조합을 사전에 논의하는 것이 중요합니다. 또한, 초보 players는 선봉대 역할을 맡아 경험을 쌓고, 숙련된 players는 후방 지원이나 기습 공격 역할을 담당하는 것이 효율적입니다. 맵의 전체적인 밸런스는 대체로 안정적이지만, 특정 조합(예: 바이오닉 중심 vs. 메카닉 중심)에 따라 승리 확률이 달라질 수 있어, 유연한 대처가 필요합니다. Squad Support 3 1.4, a classic team-based custom map in StarCraft: Brood War, immerses players in a cooperative combat experience where they ally with the militia of the Milisia region to eliminate enemy forces. The map features a wide-open terrain of plains, forests, and hills, with a broad central road serving as the primary battleground. While each player commands their own forces, achieving shared objectives demands strategic cooperation. Real-time communication and role distribution among teammates are key to victory, making the map accessible to beginners yet offering depth for skilled players to deploy advanced tactical formations. A central stronghold mid-map provides temporary buffs or resource boosts upon capture, adding strategic variety to the approach. Scattered minerals and vespene gas throughout the map highlight the importance of resource management, as how players utilize these resources can drastically alter the flow of battle. Enemy bases are positioned at the top and bottom of the map, requiring simultaneous multi-directional attacks and defenses. The narrow central road restricts large-scale troop movements, forcing most engagements to revolve around small-unit maneuver warfare. Designed for five-player cooperative play, the map can still be enjoyed with three or four players. Its emphasis on teamwork makes it ideal for casual games or guild activities. Before starting, it’s crucial to pre-assign roles, plan the timing for capturing the central stronghold, and discuss unit compositions. Beginners can take on frontline roles to gain experience, while veterans can focus on rear support or surprise attacks for maximum efficiency. While the map maintains overall balance, the choice of composition—such as bio-focused versus mech-focused strategies—can influence victory odds, so adaptability is essential.
임무 4: 청소 (Invasion 4: Cleanup)
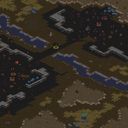
‘임무 4: 청소’는 스타크래프트 브루드워의 유즈맵으로, 단일 플레이어의 정신체 섬멸전을 중심으로 구성된 디펜스 장르 맵이다. 맵의 배경은 황무지 타일셋으로 꾸며졌으며, 중앙에 위치한 옛 기지 안을 따라 저그의 정신체 구조물이 다수 배치되어 있다. 플레이어는 이 구조물들을 제거하는 것이 목표로, 맵 곳곳에 흩어진 저그 유닛과 건물을 공격해 처리해야 한다. 맵의 구조는 비교적 간소한 편이지만, 저그의 공격 패턴과 기지 내의 배치된 방어 시설이 플레이어의 전략을 요구한다. 맵의 크기는 3072x3072로 크지 않지만, 타일셋과 구조물의 밀도로 인해 긴장감을 유지할 수 있다. 플레이어는 초반부터 저그의 공격을 받으며, 이를 방어하면서 정신체 구조물을 파괴하는 것이 핵심이다. 맵의 진행은 비교적 직관적이지만, 저그의 공격 패턴과 방어 시설의 위치에 따라 난이도가 달라질 수 있어 전략적 선택이 중요하다. 특히, 정신체 구조물 주변의 방어 시설은 제거하지 않으면 지속적인 공격을 받기 때문에, 신속한 판단과 공격이 필요하다. 맵의 이름은 ‘청소’라는 다소 가벼운 표현이지만, 실제로는 섬멸전과 디펜스의 조합으로 긴장감을 높이는 요소로 작용한다. 이 맵은 스타크래프트의 유즈맵 특유의 긴장감과 전략적 깊이를 제공하며, 단일 플레이어용으로 설계되어 있어 혼자서도 충분히 즐길 수 있는 구조다. 다만, 맵의 난이도는 플레이어의 실력에 따라 크게 달라질 수 있으며, 초보자의 경우 정신체 구조물 주변의 방어 시설 처리에 어려움을 느낄 수 있다. 또한, 맵의 진행 중 저그의 공격 패턴이 변동될 가능성이 있어, 이를 예측하고 대비하는 것이 중요하다. 맵을 플레이하기 전에는 저그의 공격 패턴과 방어 시설의 위치를 미리 파악하는 것이 좋으며, 빠른 조작과 전략적 사고가 요구된다. 맵의 볼륨은 크지 않지만, 디펜스와 섬멸전의 조합으로 스타크래프트의 유즈맵 특유의 매력을 느낄 수 있는 작품이다. 특히, 단일 플레이어용으로 설계되어 있어 친구가 없어도 혼자서 즐길 수 있다는 점에서 접근성이 높다. 다만, 반복 플레이 시에는 저그의 공격 패턴이 익숙해지면서 난이도가 다소 낮아질 수 있어, 이를 극복하기 위한 변형 플레이가 필요할 수도 있다. Mission 4: Cleanup is a custom StarCraft: Brood War defense map focused on a single-player Zerg Overmind elimination mission. The map features a wasteland tileset, with multiple Overmind structures scattered throughout an old base in the center. The player’s objective is to destroy these structures by attacking the Zerg units and buildings scattered across the map. While the layout is relatively simple, the Zerg’s attack patterns and the defensive structures within the base demand strategic planning from the player. Despite the map’s modest size (3072x3072), the dense tileset and structure placement maintain a high level of tension. Players face early Zerg attacks, requiring them to defend while simultaneously destroying the Overmind structures. The progression is straightforward, but difficulty varies depending on the Zerg’s attack patterns and the placement of defensive buildings, making strategic choices crucial. The name "Cleanup" may sound lighthearted, but the map combines elimination and defense mechanics to heighten tension. Designed for solo play, it offers the unique tension and strategic depth typical of StarCraft custom maps, allowing players to enjoy it even without friends. However, difficulty heavily depends on the player’s skill, and beginners may struggle with clearing the defensive structures around the Overmind. The Zerg’s attack patterns can also shift during the mission, so predicting and adapting to them is essential. Before playing, it’s advisable to familiarize yourself with the Zerg’s attack patterns and defensive structure locations, as quick reflexes and strategic thinking are key. While the map’s scale is small, its blend of defense and elimination captures the charm of StarCraft custom maps. Its solo-friendly design ensures accessibility, though repeated playthroughs may reduce difficulty as patterns become predictable, potentially requiring variations to maintain challenge.
최근 등록된 맵
새로 추가된 파일과 버전을 확인하세요.
임무 4: 청소 (Invasion 4: Cleanup)
‘임무 4: 청소’는 스타크래프트 브루드워의 유즈맵으로, 단일 플레이어의 정신체 섬멸전을 중심으로 구성된 디펜스 장르 맵이다. 맵의 배경은 황무지 타일셋으로 꾸며졌으며, 중앙에 위치한 옛 기지 안을 따라 저그의 정신체 구조물이 다수 배치되어 있다. 플레이어는 이 구조물들을 제거하는 것이 목표로, 맵 곳곳에 흩어진 저그 유닛과 건물을 공격해 처리해야 한다. 맵의 구조는 비교적 간소한 편이지만, 저그의 공격 패턴과 기지 내의 배치된 방어 시설이 플레이어의 전략을 요구한다. 맵의 크기는 3072x3072로 크지 않지만, 타일셋과 구조물의 밀도로 인해 긴장감을 유지할 수 있다. 플레이어는 초반부터 저그의 공격을 받으며, 이를 방어하면서 정신체 구조물을 파괴하는 것이 핵심이다. 맵의 진행은 비교적 직관적이지만, 저그의 공격 패턴과 방어 시설의 위치에 따라 난이도가 달라질 수 있어 전략적 선택이 중요하다. 특히, 정신체 구조물 주변의 방어 시설은 제거하지 않으면 지속적인 공격을 받기 때문에, 신속한 판단과 공격이 필요하다. 맵의 이름은 ‘청소’라는 다소 가벼운 표현이지만, 실제로는 섬멸전과 디펜스의 조합으로 긴장감을 높이는 요소로 작용한다. 이 맵은 스타크래프트의 유즈맵 특유의 긴장감과 전략적 깊이를 제공하며, 단일 플레이어용으로 설계되어 있어 혼자서도 충분히 즐길 수 있는 구조다. 다만, 맵의 난이도는 플레이어의 실력에 따라 크게 달라질 수 있으며, 초보자의 경우 정신체 구조물 주변의 방어 시설 처리에 어려움을 느낄 수 있다. 또한, 맵의 진행 중 저그의 공격 패턴이 변동될 가능성이 있어, 이를 예측하고 대비하는 것이 중요하다. 맵을 플레이하기 전에는 저그의 공격 패턴과 방어 시설의 위치를 미리 파악하는 것이 좋으며, 빠른 조작과 전략적 사고가 요구된다. 맵의 볼륨은 크지 않지만, 디펜스와 섬멸전의 조합으로 스타크래프트의 유즈맵 특유의 매력을 느낄 수 있는 작품이다. 특히, 단일 플레이어용으로 설계되어 있어 친구가 없어도 혼자서 즐길 수 있다는 점에서 접근성이 높다. 다만, 반복 플레이 시에는 저그의 공격 패턴이 익숙해지면서 난이도가 다소 낮아질 수 있어, 이를 극복하기 위한 변형 플레이가 필요할 수도 있다. Mission 4: Cleanup is a custom StarCraft: Brood War defense map focused on a single-player Zerg Overmind elimination mission. The map features a wasteland tileset, with multiple Overmind structures scattered throughout an old base in the center. The player’s objective is to destroy these structures by attacking the Zerg units and buildings scattered across the map. While the layout is relatively simple, the Zerg’s attack patterns and the defensive structures within the base demand strategic planning from the player. Despite the map’s modest size (3072x3072), the dense tileset and structure placement maintain a high level of tension. Players face early Zerg attacks, requiring them to defend while simultaneously destroying the Overmind structures. The progression is straightforward, but difficulty varies depending on the Zerg’s attack patterns and the placement of defensive buildings, making strategic choices crucial. The name "Cleanup" may sound lighthearted, but the map combines elimination and defense mechanics to heighten tension. Designed for solo play, it offers the unique tension and strategic depth typical of StarCraft custom maps, allowing players to enjoy it even without friends. However, difficulty heavily depends on the player’s skill, and beginners may struggle with clearing the defensive structures around the Overmind. The Zerg’s attack patterns can also shift during the mission, so predicting and adapting to them is essential. Before playing, it’s advisable to familiarize yourself with the Zerg’s attack patterns and defensive structure locations, as quick reflexes and strategic thinking are key. While the map’s scale is small, its blend of defense and elimination captures the charm of StarCraft custom maps. Its solo-friendly design ensures accessibility, though repeated playthroughs may reduce difficulty as patterns become predictable, potentially requiring variations to maintain challenge.
정글 탈출 (Welcome to the Jungle)
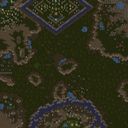
《Welcome to the Jungle》는 스타크래프트: 브루드워의 캠페인 형식 유즈맵으로, 사막 타일셋을 배경으로 펼쳐지는 전략적 전투가 특징이다. 맵 내부 제목과 설명에 따르면 ‘Veteran Level Campaign’이라는 서사가 있으며, ‘Venlindians’라는 집단이 ‘Crystal’을 확보하기 위해 군사 기지를 파괴하는 임무를 수행하는 구조로 보인다. 전체 맵은 6144x4096의 대형 규모로 제작되어 있으며, 사막 지형과 잔해가 scattered되어 있어 전략적 진입로를 확보하고 방어선을 구축하는 플레이가 중요해 보인다. 내부 설명에 ‘USE MAP SETTINGS’이라는 문구가 포함된 점으로 미루어, 맵의 난이도나 승리 조건이 맵 설정에서 조절 가능한 것으로 추정된다. 플레이어는 단독으로 임무를 수행해야 하며, 주변의 방어 시설(‘garrison surrounding the formation’)을 파괴하는 것이 목표로 보인다. 맵의 디자인과 설명을 종합해 보면, 체력 관리와 자원 활용보다는 섬멸전과 목표 파괴에 중점을 둔 플레이 스타일이 요구될 것으로 예상된다. 초보자의 경우 맵의 규모와 방어 시설의 배치에 다소 혼란스러울 수 있으니, 미니맵을 적극 활용하고 주요 길목을 정리하는 데 주의를 기울이는 것이 좋다. 또한, 크리스탈 주변의 안전 지대를 확보하지 않으면 지속적인 공격을 받을 수 있어, 초반 방어와 자원 배치에 신중한 플레이가 필요하다. 이 맵은 캠페인 형식의 유즈맵을 선호하는 플레이어들에게 적합하며, 특히 섬멸전과 목표 파괴에 중점을 둔 전략적 플레이를 즐기는 유저에게 추천할 만하다. 맵을 플레이하기 전에 캠페인 스타일의 임무 수행 방식과 목표 파괴 중심의 플레이가 맞는지 미리 확인하는 것이 좋다. Welcome to the Jungle is a campaign-style custom map for StarCraft: Brood War, set against a desert tile set, offering strategic combat as its core gameplay. According to the internal map title and description, it is labeled as "Veteran Level Campaign," where the Venlindians must destroy a military base to secure a piece of the Crystal for their research. The map is designed on a large scale of 6144x4096, featuring scattered desert terrain and ruins, which suggests that securing strategic entry points and establishing defensive lines are crucial. The phrase "USE MAP SETTINGS" in the description implies that difficulty or victory conditions may be adjustable within the map settings. Players must complete the mission solo, focusing on destroying surrounding defensive facilities ("garrison surrounding the formation"). Based on the map's design and description, the gameplay emphasizes elimination and objective destruction over resource management and unit building. Beginners may find the map’s scale and defensive facility placement overwhelming, so utilizing the minimap and prioritizing clearing key pathways are essential. Additionally, failing to secure a safe zone around the Crystal could lead to continuous attacks, requiring careful attention to early-game defense and unit positioning. This map is ideal for players who enjoy campaign-style custom maps and strategic gameplay centered on elimination and objective destruction. Before playing, it is advisable to verify if the campaign-style mission and objective-focused gameplay align with personal preferences.
햄버거힐 1.9: 월남전의 지옥 (Test of Survival - Hamburger Hill 1.9)
스타크래프트 브루드워의 대표적인 서바이벌 유즈맵인 <Test of Survival - 햄버거힐1.9>는 이름에서 느껴지듯 치열한 전투가 끊임없이 펼쳐지는 맵이다. 햄버거힐이라는 지명과 월남전의 지옥이라는 설명에서부터 알 수 있듯, 이 맵은 전쟁터의 한복판에서 펼쳐지는 전투를 재현한 것으로 보인다. 맵 중앙에 위치한 넓은 평야와 그 주변을 둘러싼 언덕 지형은 플레이어에게 넓은 시야와 다양한 전략적 선택지를 제공하며, 4차례의 지원부대라는 설명은 끊임없이 몰려오는 적군을 상대로 지속적인 저항을 요구한다는 점을 시사한다. 이 맵은 기본적으로 적군 컴퓨터를 상대로 건물을 파괴하고 유닛을 섬멸하는 Survival(서바이벌) 장르에 속한다. 맵의 구조는 비교적 단순하지만, 넓은 전장과 지속적인 적의 공격은 플레이어에게 전략적 깊이와 긴장감을 동시에 제공한다. 특히 햄버거힐이라는 이름에 걸맞게 맵 곳곳에 흩어져 있는 언덕과 골짜기는 시야 확보와 진형 배치에서 중요한 역할을 한다. 또한, 맵 상단과 하단에 위치한 4차례의 지원부대 지원 지역은 플레이어가 일정 시간마다 추가적인 자원이나 유닛을 확보할 수 있는 기회를 제공하며, 이를 통해 지속적인 전투를 유지할 수 있도록 돕는다. 이 맵을 플레이하기 위해서는 기본적인 스타크래프트 멀티 플레이 전략과 더불어,Earth에서 제공하는 다양한 유닛과 건물의 특성을 숙지하고 있어야 한다. 또한, 넓은 전장과 끊임없는 적의 공격에 대응하기 위한 빠른 판단력과 효율적인 자원 관리 능력이 요구된다. 특히, 초보자의 경우 맵의 구조와 적의 공격 패턴을 충분히 숙지하지 못한 상태에서 플레이할 경우 쉽게 무너질 수 있으므로, 사전 연습이 필수적이다. 이 맵은 주로 혼자서 컴퓨터 상대를 상대로 플레이하는 1인용 맵으로, 난이도는 비교적 높은 편으로 추정된다. 맵의 제목과 설명에서 느껴지는 긴장감과 더불어, 실제 게임 플레이에서도 끊임없는 적의 공격과 제한된 자원으로 인한 압박감이 플레이어에게 지속적인 도전을 안겨준다. 따라서, 이 맵은 기존의 스타크래프트 유저들에게는 새로운 도전 과제로, 초보자에게는 경험을 쌓을 수 있는 좋은 기회로 작용할 수 있을 것이다. StarCraft: Brood War's iconic survival custom map, *Test of Survival - Hamburger Hill 1.9*, lives up to its name with relentless, high-stakes combat unfolding continuously. As the map's name and description—"Hamburger Hill" and "Hell of the Vietnam War"—suggest, it recreates the chaos of a battlefield at its most intense. The wide central plain surrounded by hilly terrain gives players broad visibility and a variety of strategic options, while the mention of four waves of reinforcements implies a constant need to fend off waves of enemy forces. The map primarily falls under the Survival genre, tasking players with destroying enemy buildings and eliminating units against AI-controlled opponents. Though its layout is relatively straightforward, the expansive battlefield and unending enemy assaults deliver both strategic depth and high tension. True to its name, *Hamburger Hill*, scattered hills and valleys across the map play a crucial role in scouting and positioning. Meanwhile, the four reinforcement zones at the top and bottom of the map allow players to secure additional resources or units at regular intervals, helping sustain prolonged combat. To play effectively, players need a solid grasp of StarCraft’s multiplayer mechanics, along with a deep understanding of the unique properties of units and buildings provided by Earth. Fast decision-making and efficient resource management are essential to cope with the vast battlefield and relentless enemy pressure. Beginners, in particular, can easily falter if they don’t first study the map’s layout and enemy attack patterns, making practice sessions a necessity. Designed primarily as a single-player challenge against AI, *Test of Survival - Hamburger Hill 1.9* is considered fairly difficult. The tension suggested by its title and description carries into actual gameplay, where constant enemy attacks and limited resources create sustained pressure. For veteran StarCraft players, it offers a fresh challenge, while for newcomers, it serves as an excellent opportunity to build experience.
썬크 D 6웨이 (Sunken D 6 Way)
스타크래프트 브루드워의 대표적인 유즈맵 중 하나로 손꼽히는 《썬크 D 6웨이(v10.0)》는 6명의 플레이어가 한 팀을 이뤄 중앙의 해상도를 중심으로 펼쳐지는 섬멸전에 도전하는 디펜스 장르의 유즈맵이다. 맵의 전체적인 구도는 가운데에 위치한 대형 섬을 중심으로 여섯 개의 방향성 있는 통로(웨이)가 뻗어나가며, 각 웨이는 적의 진군을 막는 방어 타워와 유닛 생산 건물이 배치되어 있다. 플레이어는 각자의 웨이를 방어하는 동시에, 중앙 섬에 위치한 공용 자원 채취 건물에서 자원을 얻어 업그레이드와 추가 병력 생산을 진행할 수 있으며, 모든 웨이가 파괴되기 전에 적을 섬멸하거나 방어에 성공해야 한다. 맵의 핵심 전략은 여섯 개의 웨이를 어떻게 효율적으로 방어하냐는 점이다. 각 웨이는 시작 지점에서부터 조금씩 좁아지는 구조로 되어 있어, 초반에는 소수의 병력으로도 방어가 가능하지만, 게임이 진행될수록 적의 공격 규모가 커지면서 방어선이 밀리기 시작한다. 특히 중앙 섬의 자원 채취가 활발해지면 동맹 플레이어와 협력하여 대규모 병력을 동원할 수 있는 반면, 혼자서 방어에만 치중할 경우 자원이 부족해질 위험이 있다. 또한 맵의 각 웨이는 지형이 조금씩 다르며, 일부 웨이는 언덕 지형이나 좁은 협곡이 있어 병력의 배치와 유닛 조합에 따라 방어 난이도가 달라진다. 예를 들어 공중 유닛이 빈약한 플레이어는 언덕이 있는 웨이를 방어하는 데 어려움을 겪을 수 있으며, 반면에 대공 방어가 강한 플레이어는 언덕 지형을 활용하여 공중 공격을 방어하기 용이하다. 이 맵은 초보자와 숙련자 모두 즐길 수 있는 균형 잡힌 난이도를 제공한다. 게임의 진행 방식은 비교적 단순하면서도, 방어와 공격의 밸런스를 맞춰야 하기 때문에 전략적인 사고가 요구된다. 또한, 맵의 디자인 자체가 플레이어 간의 협력과 경쟁을 유도하기 때문에, 팀워크가 중요한 요소로 작용한다. 특히 6명의 플레이어가 한 팀을 이뤄 플레이하는 구조는 스타크래프트의 팀플레이를 극대화할 수 있는 요소로, 밸런스와 재미를 동시에 추구하는 유즈맵으로 평가받고 있다. 이 맵을 플레이하기 전에는 자신의 병력 조합과 방어 전략을 미리 준비하는 것이 중요하다. 또한, 동맹 플레이어와의 원활한 소통과 자원 관리도 게임의 승패를 좌우하는 요소이기 때문에, 팀원과의 협력 플레이가 필수적이다. 《썬크 D 6웨이(v10.0)》는 디펜스 장르의 유즈맵 중에서 손꼽히는 명작으로, 스타크래프트 유즈맵의 역사를 대표하는 작품 중 하나로 손꼽힌다. Sunken D 6 Way (v10.0) stands out as one of the most iconic custom maps in StarCraft: Brood War, offering a team-based defense experience where six players unite to protect a central island from relentless enemy assaults. The map features six distinct pathways (ways) radiating from the core, each equipped with defensive towers and unit production buildings. Players must defend their assigned way while gathering resources from shared central structures to upgrade and reinforce their forces. Victory hinges on either eliminating all enemy forces or successfully defending the island until the game's conclusion. The strategic depth of Sunken D 6 Way lies in its six-way defense system, where each pathway narrows progressively from the starting point. Early-game defense is manageable with minimal forces, but as the match advances, enemy attacks intensify, pushing defensive lines to their limits. Central resource gathering plays a crucial role—allied players who balance defense and resource collection can deploy larger armies, while those focusing solely on defense risk resource depletion. Terrain variations across pathways add another layer of strategy; some ways feature elevated ground or narrow chokepoints, which significantly influence unit positioning and composition. For instance, players lacking strong air defenses may struggle with elevated pathways, while those with robust anti-air capabilities can capitalize on such terrain advantages. Designed for both beginners and veterans, Sunken D 6 Way delivers a well-balanced challenge that rewards strategic planning and teamwork. The map’s simplicity in execution contrasts with its depth in execution, demanding players to balance offense, defense, and resource management. The six-player team structure amplifies the need for coordination, making it a quintessential team-based experience in StarCraft’s custom map scene. Before diving into the game, players should prepare their unit compositions and defensive strategies. Effective communication with teammates and resource management are critical to securing victory. As a cornerstone of the StarCraft custom map genre, Sunken D 6 Way (v10.0) remains a timeless title, celebrated for its balance, replayability, and the thrill of cooperative defense.
민병대 지원 작전 (Squad Support 3 1.4)
스타크래프트 브루드워의 대표적인 팀 기반 유즈맵인 〈Squad Support 3 1.4〉는 플레이어들이 밀리시아 지역 민병대와 협력하여 적군을 섬멸하는 협동 전투 경험을 제공합니다. 맵의 전체적인 구조는 넓은 평원과 숲, 언덕 지형으로 구성되어 있으며, 중앙의 넓은 도로가 주요 전투 공간으로 기능합니다. 각 플레이어는 개별적으로 병력을 지휘할 수 있지만, 공동 목표를 달성하기 위해 전략적 협력이 필수적입니다. 팀원 간의 실시간 소통과 역할 분담이 승리의 열쇠로, 초보 players도 쉽게 접근할 수 있지만 숙련된 players는 고도의 전술적 대형을 구사할 수 있습니다. 맵의 중간 지점에는 중앙 요충지가 있어, 이곳을 점령하면 일시적인 버프나 자원 보급을 받을 수 있어 공략법에 변수를 제공합니다. 또한, 맵 곳곳에 scattered된 미네랄과 가스는 자원 관리의 중요성을 강조하며, 리소스를 어떻게 활용하느냐에 따라 전투의 흐름이 달라질 수 있습니다. 특히, 적군의 본진은 맵의 상단과 하단에 각각 위치하고 있어, 다방향 공격과 방어가 동시에 요구됩니다. 맵의 디자인상으로는 중앙 도로가 좁아 대형 병력의 이동이 제한적이므로, 소규모 부대 단위의 기동전이 주로 펼쳐집니다. 이 맵은 5인 협동 플레이를 전제로 제작되었지만, 3~4인으로도 충분히 즐길 수 있으며, 특히 팀워크가 중요한 만큼 친목 게임이나 길드 활동에 최적화되어 있습니다. 플레이 전에는 팀원 간의 역할 분담을 미리 정하고, 중앙 요충지 점령 타이밍과 병력 조합을 사전에 논의하는 것이 중요합니다. 또한, 초보 players는 선봉대 역할을 맡아 경험을 쌓고, 숙련된 players는 후방 지원이나 기습 공격 역할을 담당하는 것이 효율적입니다. 맵의 전체적인 밸런스는 대체로 안정적이지만, 특정 조합(예: 바이오닉 중심 vs. 메카닉 중심)에 따라 승리 확률이 달라질 수 있어, 유연한 대처가 필요합니다. Squad Support 3 1.4, a classic team-based custom map in StarCraft: Brood War, immerses players in a cooperative combat experience where they ally with the militia of the Milisia region to eliminate enemy forces. The map features a wide-open terrain of plains, forests, and hills, with a broad central road serving as the primary battleground. While each player commands their own forces, achieving shared objectives demands strategic cooperation. Real-time communication and role distribution among teammates are key to victory, making the map accessible to beginners yet offering depth for skilled players to deploy advanced tactical formations. A central stronghold mid-map provides temporary buffs or resource boosts upon capture, adding strategic variety to the approach. Scattered minerals and vespene gas throughout the map highlight the importance of resource management, as how players utilize these resources can drastically alter the flow of battle. Enemy bases are positioned at the top and bottom of the map, requiring simultaneous multi-directional attacks and defenses. The narrow central road restricts large-scale troop movements, forcing most engagements to revolve around small-unit maneuver warfare. Designed for five-player cooperative play, the map can still be enjoyed with three or four players. Its emphasis on teamwork makes it ideal for casual games or guild activities. Before starting, it’s crucial to pre-assign roles, plan the timing for capturing the central stronghold, and discuss unit compositions. Beginners can take on frontline roles to gain experience, while veterans can focus on rear support or surprise attacks for maximum efficiency. While the map maintains overall balance, the choice of composition—such as bio-focused versus mech-focused strategies—can influence victory odds, so adaptability is essential.
Special Forces God v3.0
「Special Forces God v3.0」은 스타크래프트: 브루드워의 UMS(유즈맵) 장르로, 특수부대를 컨트롤하며 다수의 적을 상대하는 컴까기 스타일의 맵이다. 맵의 배경은 사막 타일셋으로 구성되어 있으며, 넓은 평야와 곳곳의 언덕, 바위가 배치되어 전략적 위치를 제공한다. 플레이어는 6명의 특수부대원으로 구성된 팀을 이끌며, 맵 곳곳에 배치된 적군 기지나 건물을 파괴하거나, 특정 조건을 달성해야 한다. 맵의 구조는 크게 중앙 평야와 좌우 언덕 지역으로 나뉘며, 언덕 지역은 시야 확보와 방어에 유리한 고지대로 활용할 수 있다. 맵의 중앙에는 넓은 평지가 펼쳐져 있어 대규모 전투가 벌어질 가능성이 높으며, 좌우 언덕을 따라 이동하는 루트는 기습이나 후방 공격에 유리한 지형을 제공한다. 맵의 명칭에서 알 수 있듯이 ‘Special Forces’라는 컨셉에 맞게, 플레이어는 개개의 유닛을 조작하여 적을 섬멸하는 스타일을 요구한다. 맵의 난이도는 맵의 규모와 적 배치에 따라 초보자에게는 다소 어려운 편이지만, 익숙해지면 전략적 깊이를 느낄 수 있는 구조로 설계되었다. 특히 넓은 맵에서 벌어지는 전투는 유닛의 컨트롤뿐만 아니라 위치 선정과 자원 관리도 중요하게 작용한다. 추천 대상은 스타크래프트의 컴까기 스타일을 선호하는 유저이며, 넓은 맵에서 벌어지는 대규모 전투를 즐기고자 하는 플레이어에게 적합하다. 플레이 전에는 맵의 구조와 주요 루트를 숙지하여, 적의 배치와 자신의 유닛 배치 전략을 미리 계획하는 것이 중요하다. 또한, 넓은 맵에서 벌어지는 전투는 자원의 관리가 중요하므로, 자원 채취와 유닛 생산 타이밍을 잘 조절해야 한다. 맵의 이름은 ‘Special Forces God’라는 특수부대 컨셉을 강조하며, v3.0 버전은 이전 버전들보다 맵의 밸런스와 디자인 개선이 이루어진 것으로 추정된다. 맵의 플레이 스타일은 컴까기 장르의 특성을 살려, 유닛의 컨트롤과 전략적 위치 선정을 중시하는 구조로 설계되어 있다. 맵의 배경과 구조는 사막 타일셋을 활용하여 현실감 있는 전투 환경과 긴장감을 제공하며, 넓은 평야와 언덕 지형은 다양한 전술적 선택지를 제공한다. 특히, 맵의 중앙 평야는 대규모 전투가 벌어질 가능성이 높으므로, 플레이어는 유닛의 생산과 배치를 신중히 고려해야 한다. 맵의 난이도는 초보자에게는 다소 어려운 편이지만, 익숙해지면 전략적 깊이를 느낄 수 있는 구조로 설계되었다. 또한, 맵의 좌우 언덕은 후방 공격이나 기습에 유리한 지형을 제공하므로, 이를 활용한 전략적 플레이가 가능하다. "Special Forces God v3.0" is a UMS (user-made map) genre map for *StarCraft: Brood War*, where players control a special forces team and engage in a "comp stomp" style battle against numerous enemies. The map features a desert tile set with vast plains, scattered hills, and rocks that provide strategic positions. Players lead a team of six special forces units, tasked with destroying enemy bases or buildings scattered across the map or achieving specific objectives. The map is divided into three main areas: a central plain, left and right hill regions. The hill regions offer elevated ground that enhances visibility and defense. The central plain is wide, making large-scale battles likely, while the paths along the hills provide advantageous terrain for ambushes or rear attacks. As the name suggests, the map emphasizes the "Special Forces" concept, requiring players to control individual units to eliminate enemies. While the map’s scale and enemy placement may pose a challenge for beginners, its design allows experienced players to appreciate its strategic depth. Battles across the expansive map demand not only unit control but also smart positioning and resource management. This map is recommended for players who enjoy *StarCraft*’s comp stomp style and those who prefer large-scale battles on wide maps. Before playing, it’s crucial to familiarize yourself with the map’s layout and key routes, planning your unit placements and counter-strategies against enemy positions. Resource management is also vital in large-scale battles, so timing your resource gathering and unit production is key. The name "Special Forces God" highlights the special forces theme, and v3.0 appears to have improved balance and design over previous versions. The gameplay focuses on unit control and strategic positioning, staying true to the comp stomp genre. The desert tile set and terrain—sprawling plains, hills, and varied landscapes—create an immersive and tense combat environment with diverse tactical options. The central plain, in particular, is prone to large-scale battles, so players must carefully consider unit production and deployment. While the map may be difficult for beginners, its design rewards strategic depth once mastered. The left and right hills also offer advantageous terrain for rear attacks or ambushes, enabling more dynamic strategies.
스나이퍼 정글 엘리트 (Sniper Jungle Elite)
스타크래프트 브루드워의 유즈맵 'Sniper Jungle Elite'는 8명의 플레이어가 참여하는 섬멸전 형식의 맵이다. 맵 제목에서 알 수 있듯이 정글 지형 위에 요새와 방어시설이 배치되어 있으며, 적군을 모두 섬멸하고 깃발을 회수하는 것이 목표로 보인다. 내부 설명에 'Kill all Enemies, Bring Flag back'이라고 명시된 점에서, 단순한 섬멸전 이상의 전략적 요소가 포함된 것으로 추정된다. 맵의 디자인과 배치된 구조물들을 보아 공중 유닛보다는 지상 유닛의 활용이 강조될 가능성이 높으며, 특히 스나이퍼 계열 유닛의 활용을 고려한 디자인으로 보인다. 플레이어들은 각자 개별적인 시작 위치를 확보하며, 맵 중앙과 외곽에 위치한 요새들과 방어시설들을 활용해 적을 제압해야 한다. 맵의 지형은 정글과 오아시스, 바위 지형이 혼합되어 있어 시야 확보와 기동성 확보가 중요할 것으로 예상된다. 또한, 깃발을 회수하기 위한 이동 루트를 보호하거나 차단하는 전략적 선택이 게임의 승패를 좌우할 수 있다. 맵의 크기가 2048x2048로 상당히 넓은 편이므로, 빠른 이동과 효율적인 자원 관리가 필수적일 것이다. 이 맵은 초보자보다는 중급 이상의 플레이어들에게 적합할 것으로 보인다. 복잡한 지형과 전략적 요소들이 요구되기 때문에, 기본적인 스타크래프트 컨트롤과 맵리딩 능력이 충분하지 않다면 상대하기 어려울 수 있다. 또한, 팀플레이보다는 개인전 또는 소규모 팀전으로 진행될 가능성이 높아 보인다. 맵의 디자인과 목표를 고려할 때, 전장 전체를 활용한 기동성과 시야 싸움, 그리고 효율적인 자원 활용이 게임의 핵심 포인트가 될 것이다. 플레이 전에는 맵의 주요 길목과 요새 위치, 깃발의 위치 등을 미리 숙지하는 것이 중요하다. 또한, 스나이퍼 계열 유닛의 활용 가능성과 방어시설의 배치 상태를 확인하여 전략을 세우는 것이 승리의 열쇠가 될 것이다. 맵의 난이도는 보통 수준으로 예상되지만, 적절한 전략과 컨트롤이 뒷받침되지 않는다면 승리를 장담하기 어려울 수 있다. Sniper Jungle Elite is a custom StarCraft: Brood War map designed for 8 players, featuring a jungle-themed terrain with fortresses and defensive structures. The map appears to be a modified elimination mode where the objective is to defeat all enemies and retrieve a flag, as indicated by the internal description 'Kill all Enemies, Bring Flag back'. The layout suggests a focus on ground units rather than air units, with potential emphasis on sniper-type units due to the map's title. Players begin in isolated positions scattered across the map, surrounded by strategically placed fortresses and defensive structures. The terrain includes dense jungles, oases, and rocky areas, which likely require careful consideration of visibility and mobility. The wide-open spaces and mixed terrain mean that controlling key routes to the flag and defending against enemy advances will be crucial for victory. With a map size of 2048x2048, efficient resource management and quick movement are essential. This map seems best suited for intermediate to advanced players. The complex terrain and strategic elements demand solid StarCraft control skills and map-reading abilities; beginners may struggle without sufficient practice. While the map layout suggests a free-for-all or small-team format, the dense jungle areas and defensive structures encourage strategic positioning and tactical combat rather than chaotic rushes. Before playing, it's important to study the map's key paths, fortress locations, and flag positions. Understanding the potential use of sniper units and the layout of defensive structures will help in forming an effective strategy. While the difficulty is estimated to be moderate, success will heavily depend on proper planning and execution, as a lack of strategy or control could easily lead to defeat.
패밀리 가이 매드니스 (Family Guy Madness)
패밀리 가이 매드니스(Family Guy Madness)는 스타크래프트 브루드워 유즈맵 중에서도 다수가 참여하여 치열한 난전과 전투를 즐길 수 있도록 디자인된 독특한 전장이다. 본 맵은 사막 타일셋을 기반으로 넓은 대지가 펼쳐져 있으며, 중앙의 거대한 개방형 교전 지역과 각 진영을 나누는 물길 및 다리 구조가 특징이다. 플레이어들은 각각 독립된 공간에서 시작하여 자원을 확보하고 병력을 조합한 뒤, 중앙 필드로 진출해 상대 진영과 맞붙는 방식으로 게임을 풀어나가게 된다. 내부 설명에 명시된 바와 같이 모든 상대 팀을 섬멸하는 것이 최종 목적이기 때문에, 외딴 곳에 위치한 거점을 방어하면서도 기민하게 공격 타이밍을 잡아야 하는 전략적 판단이 요구된다. 대규모 인원이 함께 즐기기에 적합한 구조를 갖추고 있어, 친구들과 함께 난타전이나 섬멸전 형태의 플레이를 선호하는 유저들에게 안성맞춤인 맵이다. 다수의 플레이어가 동시에 엉켜 싸우는 복잡한 전장 양상 덕분에 매 판마다 색다른 양상의 교전이 벌어지며, 단단한 방어선을 뚫어내는 쾌감과 대규모 병력 충돌의 재미를 동시에 느낄 수 있다. 특히 서로 다른 위치에서 출발해 좁은 다리와 길목을 통과해야 하므로 진입로 통제와 정찰이 승패를 가르는 중요한 요소로 작용한다. 평소 밀리 게임과는 또 다른 매력을 가진 대전형 유즈맵을 찾고 있거나, 여럿이 모여 시끌벅적하게 전투를 벌이는 아레나 스타일의 난전 콘텐츠를 즐기는 이들에게 강력히 추천할 만한 작품이다. 본격적으로 게임을 시작하기 전에 플레이어 배치와 주변 지형의 초소 위치, 그리고 중앙으로 향하는 진격로를 미리 파악해둔다면 훨씬 유리하게 경기를 운영할 수 있을 것이다. Family Guy Madness is a unique StarCraft Brood War custom map designed for multiple players to experience intense skirmishes and chaotic warfare. Based on a desert tileset, the map features a vast expanse of land with a massive open central engagement area and water channels separated by bridges. Players start in independent locations to secure resources and build forces before advancing to the central field to clash with rival factions. As stated in the internal description, the ultimate goal is to eliminate all other teams, requiring strategic judgment to defend isolated outposts while swiftly seizing attack opportunities. With a layout well-suited for large groups, it is an ideal choice for users who prefer all-out brawls or elimination-style matches with friends. The complex battlefield dynamics, where multiple players entangle in combat simultaneously, ensure that every match unfolds with unique skirmishes, offering the thrill of breaking through solid defenses and large-scale troop clashes. Because players must start from different positions and navigate narrow bridges and pathways, controlling choke points and scouting become critical factors for victory. This map is highly recommended for those looking for custom battle-oriented maps distinct from standard melee games or users who enjoy arena-style chaotic combat content with a large group. Before starting the game, thoroughly reviewing player placement, surrounding terrain outposts, and advance routes toward the center will help manage the match much more advantageously.
맵 선택 가이드
태그는 맵의 핵심 특징을 빠르게 설명하지만 제작 버전마다 규칙이 다를 수 있습니다. 상세 설명에서 권장 인원, 난이도, 플레이 시간과 버전을 함께 확인한 뒤 다운로드하세요.