
서바이벌 디펜스 스타크래프트 맵 모음
'서바이벌 디펜스' 태그가 등록된 맵을 모았습니다. 장르 하나로 찾기 어려운 플레이 방식, 난이도와 특징을 중심으로 인기 맵과 최신 맵을 비교해 보세요.
- 등록 맵
- 47개
- 누적 다운로드
- 7
- 누적 조회
- 1,521
인기 맵
다운로드와 조회 반응이 높은 맵입니다.
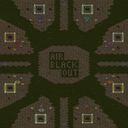
여자가수 블러드 암전 (Blood of Female Singer: Darkness)
‘여자가수블러드암전’은 스타크래프트: 브루드워의 대표적인 유즈맵 장르 중 하나인 ‘블러드’(Blood)로, 공중 유닛과 암전 효과가 조합된 독특한 전투 체험을 제공하는 맵입니다. 맵의 주된 목표는 플레이어가 지정된 유닛으로 무한한 웨이브의 적을 상대로 버텨내는 서바이벌 디펜스 형식으로 추정되며, 내부 맵 제목과 설명에 언급된 ‘무한지속’이라는 특징은 긴 플레이 시간을 기대하게 합니다. 맵의 중앙에는 넓은 전투 공간이 펼쳐져 있으며, 좌우로 배치된 생산 건물을 통해 지속적으로 병력을 보충할 수 있는 구조로 보입니다. 특히 ‘암전’이라는 키워드에서 알 수 있듯이 시야가 제한되는 환경에서 전투를 펼쳐야 하며, 이는 맵의 난이도를 한층 높이는 요소로 작용할 가능성이 큽니다. 또한, 공중 유닛의 비중이 높다는 점은 지상 위주로 전투가 진행되는 기존 블러드 맵들과 차별화되는 포인트입니다. 플레이어는 기본적으로 방어 건물을 건설하거나 유닛을 직접 조종하여 적의 공격을 방어해야 하며, 생산 건물의 위치를 잘 활용해 자원의 소모를 최소화하는 전략이 필요합니다. 맵의 인공지능 시스템은 무한한 웨이브를 지속적으로 보내기 때문에, 플레이어는 꾸준한 자원 관리와 유닛 관리가 필수적입니다. 또한, 암전 효과로 인해 시야가 좁아지는 만큼, 초보 플레이어보다는 어느 정도의 경험과 전략적 사고가 요구되는 맵으로 보입니다. 맵의 난이도는 대체로 ‘보통’ 정도로 설정되어 있지만, 무한 웨이브의 지속성과 암전 효과를 고려하면 초보자가 осво하기는 다소 어려울 수 있습니다. рекомен되는 플레이 방식은 초반에 방어 건물을 집중적으로 건설하고, 유닛 생산을 조절해 자원을 효율적으로 사용하는 것입니다. 특히, 공중 유닛의 비중이 높기 때문에 공중 유닛을 적극적으로 활용하는 전략이 효과적일 수 있습니다. 맵의 분위기는 어둡고 긴장감 있는 스타일로, 블러드 장르 특유의 공포와 긴박감을 느낄 수 있습니다. 마지막으로, 맵의 크기가 3072x3072이라는 점과 사막 타일셋의 사용은 넓은 시야와 건조한 분위기를 연출하며, 이는 맵의 몰입감을 높이는 데 기여합니다. 플레이 전에는 맵의 특성을 충분히 숙지하고, 특히 암전 효과에 대한 대비책을 마련하는 것이 중요합니다. ‘여자가수블러드암전’ is a *Blood* map from *StarCraft: Brood War*, a genre known for its intense survival defense gameplay. This map offers a unique combat experience by combining air units with a darkening effect that limits visibility. The main objective appears to be surviving endless waves of enemies using predefined units, as suggested by the internal map title and description mentioning "infinite duration," promising long play sessions. The central area of the map features a wide combat zone, with production buildings placed on both sides to continuously replenish forces. The keyword "darkening" indicates that visibility is heavily restricted, significantly increasing the difficulty. Additionally, the high proportion of air units sets it apart from traditional *Blood* maps, which typically focus on ground combat. Players must either construct defensive buildings or directly control units to fend off attacks, requiring careful positioning of production structures to minimize resource waste. The AI relentlessly sends endless waves, making constant resource and unit management essential. Due to the darkening effect, the map demands more experience and strategic thinking than casual players might possess. While the difficulty is generally rated as "normal," the combination of endless waves and limited visibility makes it challenging for beginners. Recommended strategies include prioritizing defensive structures early on and balancing unit production to optimize resource use. Leveraging air units effectively is particularly important given their prominence. The map’s dark, tense atmosphere enhances the *Blood* genre’s signature horror and urgency. With a massive 3072x3072 size and a desert tileset, the vast open space and arid setting heighten immersion. Before playing, it’s crucial to fully understand the map’s mechanics, especially preparing countermeasures for the darkening effect.
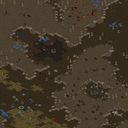
T6) 신년 대첩 (New Year's Day)
스타크래프트 브루드워의 유즈맵 ‘T6) New Year's Day’는 캠페인 스타일의 서바이벌 디펜스 맵으로, 단일 플레이어가 적의 끊임없는 공격을 막아내는 형식의 플레이 경험을 제공한다. 맵의 배경은 황무지로 추정되며, 중앙에 위치한 방어 거점을 중심으로 적의 공세가 끊임없이 이어진다. 플레이어는 듀크라는 유닛을 조종해 적의 공격을 방어해야 하며, 맵 곳곳에 배치된 방어 시설과 유닛 생산 건물을 활용해 전선을 유지하는 것이 핵심 전략이다. 이미지에서 확인되는 다수의 적 유닛과 방어 거점의 배치로 미루어보아, 맵은 난이도가 점차 상승하는 구조로 구성되어 있으며, 후반부로 갈수록 적의 공격 패턴이 복잡해지고 강해지는 특징을 지닌다. 추천 대상은 스타크래프트의 맵 디펜스 장르를 선호하는 플레이어로, 긴장감 있는 서바이벌 플레이를 즐기고자 하는 유저에게 적합하다. 플레이 전에는 맵의 방어 거점 위치와 주요 자원 분포를 미리 확인해, 초반 방어 라인을 어떻게 구축할지를 계획하는 것이 중요하다. 또한, 적의 공격 패턴이 시간에 따라 변화하므로, 맵의 진행 상황에 따라 유닛 생산과 방어 전략을 유연하게 조정해야 한다. 맵의 분위기는campaign-terran-terran06.scm 파일명과 내부 설명에서 유추할 수 있듯 테란 캠페인 스타일을 반영하고 있으며, 듀크와 Mengsk, Raynor, Kerrigan 같은 인물들이 언급되어 스토리성이 일부 포함되어 있음을 짐작할 수 있다. 그러나 맵의 실제 플레이 경험은 서바이벌 디펜스에 중점을 두고 있으므로, 스토리보다는 전투와 방어에 집중하는 것이 좋다. 맵의 난이도는 초보자의 경우 적응이 필요할 수 있으나, 점차적인 패턴 학습을 통해 익숙해질 수 있는 구조로 설계되어 있다. 특히, 후반부로 갈수록 적의 공격이 치열해지므로, 자원 관리와 유닛 업그레이드에 신경을 써야 한다. 맵의 타일셋은 황무지로 구성되어 있으며, 황량한 분위기가 긴장감을 더하는 요소로 작용한다. 마지막으로, 맵의 해상도와 타일 단위가 크고 세밀하게 배치되어 있어, 디펜스 맵으로서의 완성도를 높이는 데 기여하고 있다. The StarCraft: Brood War custom map *T6) New Year's Day* is a campaign-style survival defense map where a single player must fend off endless waves of enemy attacks. Set in a desolate wasteland, the map centers around a key defensive stronghold that faces constant assaults. Players control the unit Duke, using scattered defensive structures and production buildings to hold the line. Enemy units and the stronghold’s layout suggest a progressively increasing difficulty, with attacks growing more complex and intense as the game advances. Ideal for fans of the map defense genre, this map offers tense survival gameplay. Before playing, it’s crucial to study the stronghold’s location and resource distribution to plan your initial defense line. Since enemy attack patterns evolve over time, adapt your unit production and strategy dynamically as the match progresses. The map’s atmosphere, hinted at by filenames like *campaign-terran-terran06.scm* and references to characters such as Duke, Mengsk, Raynor, and Kerrigan, carries a Terran campaign feel with some narrative elements. However, the core experience revolves around survival defense rather than storytelling, so focus on combat and fortification. While the difficulty may require adjustment for beginners, the map is designed to become manageable through pattern recognition. Late-game attacks are brutal, so prioritize resource management and unit upgrades. With its expansive, meticulously detailed wasteland tileset, the map enhances the defensive experience with its stark, immersive setting.
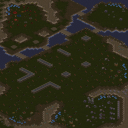
친숙한 적 (Familiar Enemy)
「[2]熟悉的敌人」은 스타크래프트: 브루드워의 유즈맵으로, 한 명의 플레이어가 인간 잔존 세력을 상대하는 디펜스 및 서바이벌 장르의 맵이다. 맵은 사막 타일셋으로 구성되어 있으며, 초반에는 저그의 본진 지역이 보이고, 이어지는 테란/프로토스 잔존 세력이 플레이어의 본진을 향해 끊임없이 공격을 퍼붓는 구조다. 맵의 중앙부는 비교적 평탄한 지형이지만, 곳곳에 바위와 협곡이 배치되어 있으며, 후방으로 갈수록 방어선이 좁아지는 특징을 보인다. 플레이어는 기본적으로 테란과 프로토스의 혼합된 병력을 지휘하게 되며, 각 유닛의 스킬과 조합을 통해 적의 공격을 막아내야 한다. 특히, 적의 공세는 초반에는 약하지만 시간이 지날수록 점점 강해지며, 후반에는 대규모의 고급 유닛들이 등장한다. 맵의 특징 중 하나는 '적응형 공세'로, 플레이어가 특정 유닛을 과도하게 사용하거나 방어선을 무너뜨리면 그 빈틈을 노리고 새로운 전략을 구사하는 적 AI가 등장한다는 점이다. 또한, 맵 곳곳에 숨겨진 보급품과 업그레이드 포인트가 배치되어 있어 장기전을 대비한 전략적 선택이 요구된다. 이 맵의 가장 큰 매력은 단일 플레이어의 긴장감과 전략적 깊이다. 한 명의 플레이어가 모든 것을 통제해야 하며, 실수 하나하나가 치명적으로 이어질 수 있다. 또한, 사막 테마의 시각적 조화와 함께, 적의 공격 패턴이 점차 변해가는 디자인 덕분에 플레이어는 끊임없이 새로운 전략을 고민해야 한다. 추천 대상은 스타크래프트의 디펜스 및 서바이벌 장르를 любить하는 플레이어, 혼자서 긴장감 있는 플레이를 즐기는 유저, 그리고 다양한 유닛 조합과 타이밍을 연습하고 싶은 초중급자들에게 적합하다. 다만, 초보자는 처음엔 공세에 밀려 당황할 수 있으니, 기본적인 테란/프로토스 유닛의 성능과 스킬을 숙지한 후 도전하는 것이 좋다. 플레이 전 반드시 확인해야 할 요소는 다음과 같다. 첫째, 맵의 중앙 지형과 방어선의 좁아지는 부분을 미리 파악하여, 주요據點(거점)을 어디에 둘 것인지 계획해야 한다. 둘째, 적은 초반에는 약하지만 후반으로 갈수록 강력해지므로, 초반 자원과 업그레이드에 충분한 투자를 해야 한다. 셋째, 숨겨진 보급품과 업그레이드 포인트를 찾는 방법을 미리 익혀두면, 후반 전투에서 큰 도움이 된다. 넷째, 적의 공격 패턴이 변한다는 점을 염두에 두고, 유닛 조합을 유동적으로 변경할 준비를 해야 한다. 이 맵은 스타크래프트의 유즈맵 역사에서 자주 언급되는 서바이벌 및 디펜스 장르의 대표작 중 하나로, 그만큼 플레이어의 집중력과 전략적 사고를 요구하는 작품이다. 특히, 한 명의 플레이어가 모든 것을 책임져야 한다는 점에서 '혼자서 모든 것을 해결해야 한다'는 성취감을 느낄 수 있으며, 적의 공격 패턴이 점차 변하는 디자인 덕분에 매번 새로운 도전이 된다. 사막 분위기의 시각적 아름다움과 함께, 긴장감 넘치는 전투가 계속되는 이 맵은 오랫동안 기억에 남는 경험을 선사할 것이다. This StarCraft: Brood War custom map, titled 「[2]熟悉的敌人」, falls under the defense and survival genre, where a single player faces relentless human remnant forces led by the Zerg. Set in a desert-themed tile, the map features a central open area surrounded by rocky terrain and narrow choke points, forcing strategic positioning from the outset. The enemy, composed of Terran and Protoss units, escalates their assaults over time, beginning with basic forces and progressing to high-tier compositions, including adaptive counter-strategies based on the player's weaknesses. The core gameplay revolves around managing limited resources, upgrading units, and exploiting hidden supply caches scattered across the map. Players must balance economy and defense, as early neglect can lead to overwhelming pressure in later stages. The AI's ability to adapt to the player's tactics adds depth, making each playthrough unique. The map's visual design, enhanced by the desert theme, complements the high-stakes tension of holding ground against an ever-increasing onslaught. Recommended for players who enjoy single-player survival challenges, those seeking to refine their Terran and Protoss unit control, and intermediate players looking to test their strategic adaptability. Beginners may find the early waves manageable, but the escalating difficulty demands prior familiarity with unit matchups and micro-management. Key preparation includes scouting the map's choke points, prioritizing early upgrades, and memorizing the locations of hidden upgrades to maximize efficiency in the late game. 「[2]熟悉的敌人」 stands as a testament to the creativity and depth of StarCraft custom maps, offering a tense, immersive experience where every decision counts. Its blend of strategic planning, adaptive enemy AI, and atmospheric desert design ensures replayability, making it a must-try for fans of survival and defense genres.
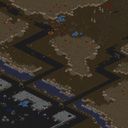
T3) Desperate Alliance (절체절명의 동맹)
스타크래프트 브루드워의 유즈맵 중 하나로 renowned되는 <T3) Desperate Alliance>는 테란 미션을 베이스로 한 서바이벌형 컴까기 맵이다. 맵의 제목에서 느껴지듯 절체절명의 위기 상황에 놓인 테란을 주인공으로 삼아, 저그의 끊임없는 공세를 버티며 생존을 도모하는 것이 핵심 목표로 보인다. 황무지 타일셋으로 구성된 넓은 맵 중앙에는 테란 본진이 배치되어 있으며, 주변으로는 저그 건물과 유닛들이 끊임없이 생산되어 공격해 오는 구조다. 플레이어는 제한된 자원으로 초반부터 끊임없이 밀려오는 저그 웨이브를 방어해야 하며, 방어에 성공할 때마다 보상이 주어지는 방식인 것으로 추정된다. 맵의 구성상 테란 본진을 지키면서도 외부로 진출해 자원 채취를 시도하거나, 방어선을 강화하는 선택지가 있는 듯하다. 초보 플레이어에게는 다소 어려운 난이도를 가질 가능성이 높으며, 경험이 많은 유저라면 효율적인 방어 전략과 자원 관리로 장기전에 대비해야 할 것이다. 특히 저그의 공격 패턴이 일정하지 않고 랜덤 요소도 포함된다면 게임의 재플레이 가치를 높일 수 있을 것으로 보인다. 이 맵을 플레이하기 전에는 테란의 초기 방어 시설 배치와 자원 채취 위치, 그리고 저그의 주요 공격 루트를 미리 숙지하는 것이 중요할 것이다. 또한, 맵의 난이도가 높다면 초반 자원 부족에 대비해 빠른 SCV 생산과 방어 시설 확충을 우선시해야 한다. 이 외에도 지속적인 업그레이드와 유닛 생산이 가능한지 여부도 확인해 두는 것이 좋다. 이 맵은 긴장감 넘치는 서바이벌 경험을 제공하며, 테란의 생존 본능을 자극하는 재미를 느낄 수 있을 것이다. One of the most renowned custom maps in StarCraft: Brood War, *<T3) Desperate Alliance>* is a survival-based Zerg rush map centered around Terran missions. As the title suggests, the core objective is to survive as the Terran protagonist in a desperate situation, enduring endless Zerg assaults while striving to stay alive. The map features a wide, barren tileset with the Terran base placed in the center, surrounded by Zerg structures and units that continuously spawn and attack. Players must defend against relentless Zerg waves with limited resources, likely earning rewards for successful defenses. The layout suggests options to either fortify the base or venture out to gather resources while maintaining defenses. The difficulty may pose a challenge for beginners, while experienced players will need efficient defense strategies and resource management to endure long battles. If the Zerg’s attack patterns are unpredictable and include random elements, the map’s replay value could be significantly enhanced. Before playing, it’s crucial to familiarize yourself with the Terran starting defenses, resource locations, and the Zerg’s primary attack routes. If the difficulty is high, prioritizing rapid SCV production and expanding defenses early to counter initial resource shortages is essential. Additionally, check whether continuous upgrades and unit production are possible. *Desperate Alliance* delivers a thrilling survival experience that taps into the Terran player’s survival instincts for an engaging challenge.
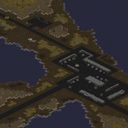
최종 지점 (Final Point)
이 맵은 스타크래프트: 브루드워의 밀리 기반 유즈맵으로, 내부 제목과 파일명에서 확인되는 ‘Ôèíàëüíàÿ òî÷êà’는 러시아어로 ‘최종 지점’을 의미하는 듯하며, 이는 맵의 배경 스토리나 목표를 암시하는 것으로 추정된다. 4096x4096의 넓은 황무지 타일셋을 기반으로 한 맵 구조는 광활한 개방형 필드를 제공하며, 플레이어가 중앙에서 적대적인 유닛들과 교전하거나 거점 방어를 수행하는 방식으로 진행되는 것으로 보인다. 1인 플레이를 전제로 한 디자인이며, 플레이어는 제한된 자원과 유닛을 활용해 목표를 달성해야 하는 서바이벌 또는 디펜스 요소가 포함된 구조로 보이며, 제목과 번역된 설명의 분위기로 보아 진영 간의 전투보다는 단일 플레이어의 생존과 자원 관리, 또는 스킬 활용이 중점인 듯하다. 맵의 진행 방식은 다소 추상적이지만, 내부 설명의 ‘프랭크 반 플리트’와 ‘비누르스트 정부’에 대한 언급은 플레이어의 목표가 특정 세력의 명령을 수행하거나 방해하는 것일 가능성을 시사한다. 맵의 넓은 공간은 전략적 이동과 위치 선정을 강조하며, 유즈맵 특유의 다양한 트리거가 적용된 것으로 보이며, 플레이어는 맵 곳곳에 배치된 자원이나 건물을 확보해 성장하거나 방어전을 펼치는 방식으로 진행된다. 추천 대상은 밀리 기반 유즈맵에 익숙한 플레이어들로, 넓은 맵에서 전략적 사고와 빠른 판단력을 요구하는 맵을 선호하는 경우 즐길 수 있을 것이다. 플레이 전에는 맵의 승리 조건과 트리거 설정을 미리 확인하는 것이 중요하며, 특히 자원 관리와 유닛 배치에 대한 이해가 필요할 것으로 보인다. This map is a StarCraft: Brood War custom map based on the MELEE genre, with its internal title and filename ‘Ôèíàëüíàÿ òî÷êà’ likely translating to ‘Final Point’ in Russian, hinting at its thematic focus. The 4096x4096 vast wasteland tileset provides an open playing field, suggesting a design centered on survival, resource management, or defensive strategies for a single player. The map’s structure implies a progression where players must navigate central conflicts or defend key points against hostile forces. The gameplay appears to incorporate elements of survival and strategy, with the player’s objective potentially tied to completing missions related to the mentioned factions—‘Frank van Fleet’ and the ‘Vinurst government’—though the exact victory conditions remain unclear without further context. The expansive map layout emphasizes strategic movement, positioning, and resource control, typical of custom maps utilizing triggers for dynamic gameplay. Players familiar with MELEE-based custom maps will appreciate the strategic depth required to navigate the terrain, secure resources, and execute defensive or offensive maneuvers. Before playing, reviewing the map’s victory conditions and trigger settings is advisable, as the success heavily relies on efficient resource management and unit positioning. This map is recommended for those who enjoy large-scale custom maps with strategic and survival elements.
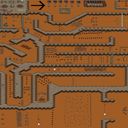
언노운 포시스 (Unknown Forces)
《언노운 포시스》는 스타크래프트 브루드워의 UMS 유즈맵으로, 플레이어가 끝까지 살아남아야 하는 서바이벌 디펜스 장르의 맵이다. 맵 중앙에 위치한 거대 본진을 중심으로 적의 끊임없는 공격을 방어하며, 본진을 보호하는 동시에 자원을 확보하여 방어력을 강화하는 것이 핵심 전략이다. 맵의 넓은 공간은 플레이어에게 넓은 시야와 다양한 진영 배치 옵션을 제공하며, 특히 본진 주변의 좁은 길목은 적의 공격을 효과적으로 차단할 수 있는 요충지 역할을 한다. 맵 곳곳에 배치된 자원 지역은 방어 시설 건설과 유닛 업그레이드에 필수적인 자원을 공급하며, 방어선을 구축할 때 strategic depth를 제공한다. 플레이어는 초반에는 저렴하고 빠른 유닛으로 방어선을 구축하다가, 점차 고급 유닛과 방어 건물을 배치하여 적의 공격을 버텨내야 한다. 맵의 주요 특징은 맵 중앙에 위치한 거대한 본진으로, 이곳을 중심으로 방어 시설과 자원 채집 포인트가 배치되어 있어 전략적 선택이 중요하다. 또한, 맵의 넓은 개활지는 적의 대규모 공격을 받을 경우 대처하기 어려운 상황을 연출할 수 있어, 플레이어는 항상 경계를 늦추지 않고 방어 태세를 유지해야 한다. 이 맵은 초보자는 물론, 숙련자까지도 긴장감을 유지할 수 있도록 설계되어 있으며, 방어력과 자원 관리 간의 밸런스를 맞추는 것이 승리의 관건이다. 《언노운 포시스》는 특히 방어와 자원 관리에 중점을 둔 플레이어들에게 강력히 추천할 만한 맵으로, 스타크래프트의 전략적 깊이를 제대로 느낄 수 있는 작품이다. 맵을 플레이하기 전에는 본진 주변의 지형과 주요 자원 위치, 그리고 적의 공격 패턴을 미리 숙지하는 것이 중요하다. 또한, 방어 건물을 효율적으로 배치하여 자원 낭비를 줄이고, 유닛의 업그레이드를 꾸준히 진행하는 것이 승리의 열쇠가 될 것이다. 《Unknown Fortress》 is a UMS custom map in StarCraft: Brood War, a survival defense genre where players must survive until the end. The core strategy revolves around defending the massive main base located at the center of the map while securing resources to strengthen defenses. The map’s vast open spaces provide wide visibility and diverse base layout options, while the narrow paths around the main base serve as critical choke points to effectively block enemy attacks. Scattered resource areas supply essential minerals and vespene gas for constructing defenses and upgrading units, adding strategic depth to base-building. Players start by establishing early defenses with cheap, fast units before gradually deploying advanced units and defensive structures to withstand enemy assaults. The map’s defining feature is its colossal central main base, where defensive structures and resource gathering points are strategically positioned, making tactical decisions crucial. However, the wide-open terrain can make it difficult to respond to large-scale enemy attacks, so players must remain vigilant and maintain constant defensive readiness. Designed to keep both beginners and veterans on edge, the key to victory lies in balancing defense and resource management. 《Unknown Fortress》 is highly recommended for players who enjoy focusing on defense and resource efficiency, offering a deep strategic experience that truly showcases StarCraft’s tactical complexity. Before playing, it’s essential to familiarize yourself with the terrain around the main base, key resource locations, and enemy attack patterns. Efficiently placing defensive structures to minimize resource waste and consistently upgrading units will be the keys to victory.
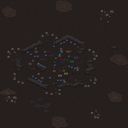
새벽의 저주 (Dawn of the Dead †)
‘새벽의 저주(Dawn of the Dead †)’는 스타크래프트: 브루드워의 유즈맵으로, 좀비 아포칼립스 세계관을 바탕으로 한 서바이벌 디펜스 장르의 맵이다. 플레이어는 총 6인으로 구성되며, 60분의 제한 시간 동안 끊임없이 몰려오는 좀비 무리를 상대로 방어전을 펼치게 된다. 맵은 정글 타일셋을 기반으로 설계되어 있으며, 중앙에 위치한 생존 거점을 중심으로 방어선을 구축하거나 전략적으로 진로를 차단하는 방식으로 진행된다. 맵의 구조상 특정 지점에서 좀비의 물량이 집중되는 패턴이 보이며, 이는 플레이어들에게 즉각적인 대응을 요구한다. 좀비의 공격 패턴은 일정 시간마다 증가하는 것으로 추정되며, 후반부로 갈수록 난이도가 급격히 상승하는 특징을 보인다. 방어 거점 주변에는 자원과 방어 시설 설치가 가능한 공간이 배치되어 있어, 플레이어는 자원을 수집해 방어 시설을 강화하거나 보급로를 확보하는 전략을 세울 수 있다. 맵의 분위기는 어둡고 긴장감 넘치며, 좀비의 출현 효과음과 배경 음악이 몰입감을 증폭시킨다. 이 맵은 특히 팀워크와 빠른 판단력이 요구되는 만큼, 초보자보다는 중간 수준 이상의 플레이어들이 즐기기에 적합하다. 플레이 전에는 팀원 간의 역할 분배와 자원 관리 계획을 사전에 논의하는 것이 중요하며, 방어 거점의 유지와 보급로 확보가 생존의 핵심 요소로 작용할 것이다. 맵의 난이도는 중상 정도로 평가되며, 6인 전원이 협력하지 않으면 완주하기 어려운 구조로 설계되어 있다. 맵의 특징상 좀비의 물량 증가 패턴과 방어 거점의 위치가 반복적으로 등장하므로, 플레이어는 맵을 숙지하고 반복 플레이를 통해 전략을 최적화할 필요가 있다. Dawn of the Dead † is a StarCraft: Brood War user-made map (UMS) that immerses players in a zombie apocalypse survival defense scenario. The map supports up to 6 players, who must defend a central survival point against waves of zombies for 60 minutes. Built on a jungle tileset, the layout features strategic choke points and open areas where players can fortify defenses or cut off zombie advances. The zombie spawns appear to intensify at regular intervals, with later waves becoming significantly more challenging. Players can collect resources to construct defensive structures or secure supply routes around the core base area. The atmosphere is tense, enhanced by eerie sound effects and background music that heighten immersion. The map demands strong teamwork and quick decision-making, making it ideal for intermediate to advanced players rather than beginners. Success hinges on coordinated role distribution, resource management, and maintaining defense positions. The difficulty is classified as moderately high, as solo efforts or poor team coordination will likely result in failure. Familiarity with the map’s zombie spawn patterns and choke points through repeated plays is crucial for optimizing survival strategies.
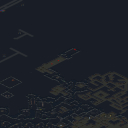
메이슨 오브 호러 5 (Mansion Of Horror 5)
스타크래프트 브루드워의 공포 테마 유즈맵인 〈Mansion Of Horror 5〉는 플레이어가 한밤중의 공포 저택을 탈출하는 서바이벌 디펜스 장르로, 다섯 명의 플레이어가 협력해 다양한 적과 함정을 극복해야 하는 흥미로운 구조로 설계되었다. 맵은 설원 지역을 배경으로 한 어두운 분위기의 저택과 주변 지역을 포함하며, 곳곳에 배치된 몬스터와 위험한 지형 요소들이 플레이어의 도전을 더욱 어렵게 만든다. 게임은 빠른 진행보다는 전략적이고 신중한 움직임이 요구되는 방식으로, 플레이어들은 적의 공격 패턴을 학습하고 자원을 효율적으로 관리하면서 출구를 향해 나아가야 한다. 특히 저택 내부와 외부의 복잡한 길과 좁은 통로들은 플레이어 간의 팀워크와 의사소통을 강조하며, 단일 팀 플레이를 전제로 한 이 맵은 협동이 성공의 핵심 요소로 작용한다. 플레이어는 시작 지점에서 출발해 맵 곳곳에 숨겨진 아이템과 보급로를 확보하며, 몬스터의 습격을 피해가며 전진해야 한다. 저택 내부와 외부의 경계가 모호한 구조는 맵의 긴장감을 높이며, 예상치 못한 곳에서 등장하는 적들이 플레이어의 긴장을 더욱 자극한다. 또한 맵의 디자인상 일부 지역은 지형적 장애물로 인해 접근이 제한되며, 이는 플레이어들이 맵을 꼼꼼히 탐색하고 전략을 세우는 데 도움이 된다. 공포 테마에 걸맞게 어두운 색감과 조명의 대비가 인상적인 이 맵은, 공포와 긴장감을 즐기는 유저들에게 특히 추천할 만하다. 다만, 초보 플레이어의 경우 적의 패턴을 익히지 못해 어려움을 느낄 수 있으므로, 몇 번의 시도와 경험을 통해 적응하는 것이 중요하다. 이 맵을 플레이하기 전에는 최소한의 맵 이해도를 갖추는 것이 좋다. 시작 전 각 플레이어의 초기 위치와 주요 아이템의 위치를 확인하고, 맵의 주요 경로와 위험 지대를 미리 파악해두면 게임 진행이 훨씬 수월해진다. 또한 팀원 간의 역할 분배를 미리 정해두고, 누가 아이템을 수집하고 누가 적을 상대할 것인지 등을 협의해두면 효율적인 플레이가 가능하다. 이 외에도 게임 내의 알림音이나 효과음에도 주의를 기울여, 몬스터의 접근이나 위험 신호를 빠르게 인지할 수 있도록 준비하는 것이 좋다. StarCraft: Brood War’s horror-themed custom map, *Mansion of Horror 5*, is a survival defense game where five players must escape a haunted mansion under the cover of night. Designed as a cooperative challenge, the map tasks players with overcoming waves of enemies and deadly traps through strategic, methodical play rather than speed. Set against a snowy backdrop, the dark, atmospheric mansion and its surrounding grounds are filled with hidden monsters and treacherous terrain that heighten the difficulty. The map’s structure emphasizes teamwork and communication, with winding paths, narrow corridors, and indistinct boundaries between indoor and outdoor areas creating tension and forcing players to stay alert. Progress depends on securing hidden items and supply routes while evading enemy ambushes, and some areas are deliberately inaccessible due to terrain obstacles, rewarding thorough exploration and careful planning. The map’s moody lighting, stark contrasts, and oppressive atmosphere make it ideal for players who enjoy horror and suspense. However, newcomers may struggle at first, as mastering enemy patterns is essential—patience and repeated attempts are key to adapting. Before jumping in, it’s wise to familiarize yourself with the map: check starting positions, locate critical items, and identify safe routes and danger zones. Assigning roles—such as item collection or combat focus—and coordinating with teammates beforehand can streamline gameplay. Paying close attention to in-game sounds and alerts also helps detect approaching threats early, keeping you one step ahead of the horrors lurking in the shadows.
클로킹 바운드 3 (Cloaked Bound ³)
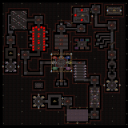
‘클로킹 바운드 3’(Cloaked Bound ³)는 스타크래프트 브루드워의 숨은 보석 같은 유즈맵으로, 플레이어들이 클로킹된 유닛을 조종하며 다양한 장애물을 통과하는 서바이벌 디펜스 장르의 맵이다. 총 6인의 플레이어가 각각 3회의 목숨을 가지고 14개의 장애물이 배치된 맵을 클리어해야 하는데, 각 레벨마다 난이도가 상승하는 구조로 되어 있어 긴장감을 유지할 수 있다. 내부 설명에 따르면 3레벨로 구성되어 있으며, ‘MaThRiX(U)’에 의해 제작되었다고 한다. 맵 제목에서도 알 수 있듯이 클로킹 상태의 유닛을 조종하는 것이 주요 메커니즘으로, 플레이어는 클로킹을 유지하면서 장애물을 피해 나아가야 한다. 장애물의 종류는 정해져 있지 않지만, 맵 이미지를 보면 좁은 통로나 돌출된 지형, 그리고 색상이 다른 타일이 장애물로 사용되었을 가능성이 높다. 맵의 전체적인 분위기는 어둠 속에 밝은 빛을 내는 듯한 어둠/정글 테마로 디자인되어 있으며, 조명 효과나 시각적 디테일이 플레이어의 몰입감을 높이는 요소로 보인다. 이 맵의 가장 큰 특징은 클로킹 상태의 유닛을 얼마나 오랫동안 유지할 수 있느냐에 따라 성공 여부가 좌우된다는 점이다. 또한, 3회의 목숨을 가지고 도전한다는 점에서 실패하더라도 재도전할 기회를 제공하며, 레벨별로 난이도가 상승하는 구조는 플레이어의 숙련도를 자연스럽게 끌어올린다. 초보 플레이어의 경우 클로킹 상태를 유지하는 데 어려움을 느낄 수 있으나, 숙련될수록 전략적인 움직임으로 장애물을 효율적으로 통과할 수 있다. 이 맵은 ‘클로킹’이라는 독특한 메커니즘을 활용한 서바이벌 디펜스 장르의 유즈맵으로, 스타크래프트의 기본 메커니즘을 creative하게 활용한 작품으로 평가할 수 있다. 특히, 클로킹 상태를 유지하면서 장애물을 통과하는 재미와 도전 과제가 플레이어의 흥미를 끈다. 또한, 6인 대전이 가능한 맵 구조는 멀티플레이어와의 경쟁을 즐기는 플레이어들에게도 매력적이다. 플레이 전에는 클로킹 상태를 유지하는 데 필요한 컨트롤과 맵의 장애물 배치 패턴을 숙지하는 것이 중요하며, 특히 좁은 통로나 예기치 못한 돌출 지형을 주의해야 한다. 또한, 각 레벨의 난이도 상승 패턴을 미리 파악해 두면 더 효율적인 플레이가 가능하다. "Cloaked Bound 3" is a hidden gem among StarCraft: Brood War custom maps, a survival defense game where players control cloaked units and navigate through various obstacles. Six players each have three lives to clear a map featuring 14 obstacles, with difficulty increasing at each level to keep tension high. According to the in-game description, the map consists of three levels and was created by MaThRiX(U). As the title suggests, the core mechanic involves controlling cloaked units, requiring players to maintain stealth while avoiding obstacles. While the obstacle types aren't specified, the map's visuals suggest narrow passages, protruding terrain, and differently colored tiles may serve as barriers. The overall atmosphere leans into a dark/jungle theme, with lighting effects and visual details enhancing immersion. The map's defining feature is the reliance on how long players can sustain cloaking, directly impacting success. With three lives per attempt, players get retry opportunities, and the progressive difficulty naturally hones their skills. Beginners may struggle with cloaking control, but mastery allows for strategic navigation through obstacles. This map stands out for its creative use of StarCraft's mechanics, blending survival defense with the unique challenge of cloaked movement. The thrill of passing obstacles while maintaining stealth, along with the competitive 6-player format, makes it appealing to multiplayer enthusiasts. Before playing, it's crucial to practice cloaking control and study the obstacle patterns—especially narrow passages and unexpected protrusions. Understanding the difficulty progression per level also enables more efficient gameplay.
나치 좀비(Zombies) vDEMO (Nazi Zombies vDEMO)
《나치 좀비(Zombies) vDEMO》는 스타크래프트: 브루드워에서 즐기는 서바이벌 디펜스 장르의 유즈맵으로, 플레이어들이 끝없는 좀비 웨이브를 방어하며 30레벨까지 생존하는 것이 목표다. 맵의 전체적인 분위기는 정글 테마로 구성되어 있으며, 곳곳에 배치된 장애물과 좁은 통로들이 플레이어의 전략적 선택을 강제한다. 맵 중앙에는 거대한 구조물이 있어 이를 중심으로 방어선을 구축할 수 있지만, 좀비 웨이브가 밀려올 때마다 빠르게 판단하고 리소스를 배치해야만 한다. 좀비들은 서서히 공격해 오며, 레벨이 올라갈수록 숫자와 공격력이 증가하는 구조로 되어 있어 후반부로 갈수록 어려움이 극심해진다. 방어에 성공하면 포인트를 획득해 추가 병력이나 업그레이드를 구매할 수 있지만, 한 번 실수가 생기면 진영이 순식간에 무너질 위험이 있다. 초중반에는 비교적 평이한 웨이브가 오지만, 15레벨 이후부터는 좀비의 기세가 급격히 강해지므로 빠른 판단력과 효율적인 자원 운용이 필수다. 특히 좁은 길목이나 구석진 장소에서 방어선을 구축할 경우, 좀비의 진격을 늦출 수 있어 전략적 이점이 크다. 전체적인 플레이 스타일은 ‘방어’와 ‘자원 관리’가 주를 이루며, 팀 플레이보다는 개인 또는 소규모 그룹의 협동이 중요한 구조다. 맵의 볼륨이 크고 디자인도 디테일하게 구성되어 있어, 스타크래프트의Classic한 감각을 유지하면서도 새로운 재미를 느낄 수 있다. 다만, 맵의 난이도가 급격히 상승하는 후반부에서는 플레이어 간의 커뮤니케이션이 더욱 중요해지므로, 초보자보다는 어느 정도 경험이 있는 유저들이 즐기기에 적합하다. 맵의 전체적인 난이도는 ‘보통’ 정도로 설정되어 있지만, 20레벨 이후부터는 ‘어려움’에 가깝기 때문에 철저히 준비하고 플레이할 필요가 있다. 또한, 맵의 구조상 특정 위치에서 좀비가 몰려오는 경우가 많으므로, 미리 방어선을 구축해 두는 것이 중요하다. 맵을 플레이하기 전에는 반드시 맵의 구조와 패턴을 숙지한 후, 리소스 관리와 포지셔닝에 신경을 써야 한다. 특히 좁은 길목이나 구석진 장소는 방어에 유리한 위치이므로, 이러한 곳에 포인트를 집중해 방어선을 강화하는 것이 핵심 전략이다. 전체적으로 《나치 좀비(Zombies) vDEMO》는 서바이벌 디펜스 장르의 정석을 잘 구현한 맵으로, 스타크래프트 유즈맵의 새로운 경험을 제공한다. 맵의 볼륨과 디자인, 그리고 플레이어의 전략적 선택이 게임의 재미를 극대화하는 요소로 작용한다. 특히, 좀비 웨이브가 밀려오는 순간은 긴장감이 최고조에 달하며, 생존을 위한 선택이 매 순간 중요해진다. 맵의 전체적인 난이도는 ‘보통’이지만, 후반부로 갈수록 전략의 깊이가 깊어지기 때문에 반복 플레이를 통해 숙련도를 높이는 것이 중요하다. 맵을 플레이하기 전에는 반드시 맵의 구조를 숙지하고, 방어선에 대한 계획을 세운 후 임하는 것이 좋다. 그래야만 좀비의 진격을 효과적으로 저지할 수 있으며, 30레벨까지 생존하는 목표를 달성할 수 있을 것이다. 《Nazi Zombies (Zombies) vDEMO》 is a user-made survival defense map in *StarCraft: Brood War*, where players defend against endless waves of zombies to survive up to level 30. The map features a jungle theme with obstacles and narrow passages that force strategic choices. At the center stands a massive structure, allowing players to build defensive lines around it, but they must quickly assess and deploy resources as waves approach. Zombies attack gradually, with their numbers and strength increasing with each level, making the later stages increasingly challenging. Successful defenses earn points for purchasing reinforcements or upgrades, but a single mistake can lead to a rapid collapse. While early waves are manageable, the difficulty spikes sharply after level 15, requiring quick decision-making and efficient resource management. Building defensive lines in tight spots or corners can slow the zombie advance, providing a strategic advantage. The gameplay revolves around defense and resource control, with an emphasis on individual or small-group coordination rather than team play. The map boasts a large scale and detailed design, offering a fresh yet classic *StarCraft* experience. However, its steep difficulty curve in the late game demands strong communication, making it better suited for experienced players than beginners. While the overall difficulty is rated "medium," it feels closer to "hard" after level 20, so thorough preparation is essential. Given the map’s layout, zombies often swarm specific areas, so preemptive defensive setups are crucial. Before playing, familiarize yourself with the map’s structure and patterns, and prioritize resource management and positioning. Narrow paths and corners are ideal defensive spots, so focusing points there strengthens your lines. Overall, 《Nazi Zombies (Zombies) vDEMO》 exemplifies the survival defense genre, offering *StarCraft* custom maps a fresh experience. Its expansive design, intricate details, and strategic depth maximize gameplay enjoyment. The tense moments when waves surge are exhilarating, with every decision critical to survival. Though rated "medium," the strategy deepens significantly in the late game, rewarding repeated plays to hone skills. Always study the map beforehand, plan your defenses carefully, and you’ll stand a far better chance of surviving the zombie onslaught and reaching level 30.
데스 로드 (Death road)
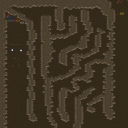
‘데스 로드(Death road)’는 스타크래프트 브루드워의 유즈맵으로, 5명의 플레이어가 함께 좀비와의 전투를 펼치는 서바이벌 디펜스 장르의 맵이다. 내부 맵 설명에서 ‘poos zombies’라는 다소 독특한 표현으로 좀비의 존재를 강조하고 있는데, 이 때문에 단순히 정체 모를 좀비군이 아니라 다소 유머러스하고도 자극적인 분위기의 적이 등장한다는 인상을 준다. 맵은 황무지 타일셋을 기반으로 4096x4096 크기의 넓은 공간을 활용하며, 플레이어는 레벨 업 시스템을 통해 점차 강력해지는 좀비 무리를 상대해야 한다. 내부 설명에 ‘every few kills’라는 표현이 포함되어 있어 킬을 통해 경험치를 획득하고 스킬이나 능력치를 강화할 수 있는 구조로 추정된다. 또한 ‘dont be a team’이라는 문구로 보아 팀 플레이보다는 각자 독립적으로 행동하며 좀비를 처치하는 방식으로 진행되는 것으로 보인다. 맵의 난이도는 제목과 설명에서 느껴지는 ‘HOLY SHIT’이라는 표현, 그리고 ‘they will beat ur ass’라는 문구로 미루어보아 상당히 어려운 편으로 예상된다. 넓은 맵 공간을 활용한 좀비 웨이브와 레벨 업 시스템은 긴장감을 유지하면서도 전략적인 플레이를 요구하므로, 초보 플레이어보다는 적어도 기본적인 스타크래프트 컨트롤과 맵 이해가 있는 중급 이상의 유저에게 적합할 것으로 판단된다. 특히 좀비와의 전투가 지속되면서 맵의 난이도가 점차 상승하는 구조라면, 플레이어는Resource management와 위치 선정에 신경을 써야 할 것이다. 또한 ‘gl hf’라는 마무리 인사로 보아 플레이어 간 소통이나 팀워크보다는 개개인의 실력이 중요한 요소로 작용할 가능성이 크다. 맵을 플레이하기 전에는 맵의 시작 지점과 좀비가 등장하는 경로, 레벨 업 시 선택 가능한 스킬이나 능력치의 종류를 미리 확인하는 것이 좋다. 또한 넓은 맵 공간을 최대한 활용하기 위해 시야 확보와 이동 경로 계획을 사전에 세워두는 것이 추천된다. 다만 현재 제공된 정보만으로는 좀비의 종류나 스킬, 승리 조건 등에 대한 구체적인 설명이 없어, 맵을 플레이하기 전 내부 트리거나 설명을 다시 한 번 확인하는 것이 바람직할 것이다. English review text without any translation heading ‘Death road’ is a StarCraft: Brood War custom map designed for survival defense gameplay, where up to five players face off against waves of zombies. The internal map description uses the phrase ‘poos zombies,’ which gives the enemy a humorous yet menacing twist, suggesting that the zombies here are not your typical undead but perhaps something more chaotic and challenging. The map utilizes a 4096x4096 wilderness tileset, offering a vast open battlefield where players must rely on leveling up through zombie kills to gain stronger abilities. The phrase ‘dont be a team’ implies that this is an individual survival scenario rather than cooperative play, focusing on personal performance and strategic positioning. The tone set by expressions like ‘HOLY SHIT’ and ‘they will beat ur ass’ indicates a high difficulty level, requiring players to manage resources wisely and plan their movements carefully. The leveling system adds depth, encouraging players to adapt their strategies as they progress. While the map’s wide-open spaces provide tactical freedom, they also demand careful attention to enemy spawn points and movement paths. Beginners might find the mechanics overwhelming, so prior experience with StarCraft mechanics and custom maps is advisable. Before playing, reviewing the starting locations, zombie spawn patterns, and available level-up options is highly recommended to optimize survival chances. However, without additional details on zombie types or victory conditions, players should refer back to the map’s internal triggers or additional documentation for a full understanding.
지옥에서 살아남기 Ver 1.145
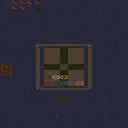
스타크래프트 브루드워의 서바이벌 장르 맵인 '지옥에서 살아남기 Ver 1.145'는 지옥 테마를 배경으로 한 극한의 생존 도전을 담은 유즈맵이다. 맵 곳곳에 배치된 블랙홀과 OX 퀴즈, 그리고 끊임없이 몰려드는 적 유닛들 속에서 살아남아야 하는 구조로, 플레이어들은 끊임없는 압박 속에서 전략을 세워야 한다. 지옥이라는 독특한 컨셉 덕분에 시각적인 몰입감도 뛰어나며, 특히 블랙홀은 맵의 핵심 요소로 자리잡아 유닛을 끌어당기는 역할을 한다. OX 퀴즈는 간간이 등장해 플레이어의 집중력을 분산시키기도 하지만, 이 문제를 해결하면 보상을 제공하기도 하는 등 다양한 요소들이 복합적으로 작용해 긴장감을 높인다. 플레이 방식은 크게 세 가지로 나뉜다. 첫째, 끊임없이 등장하는 적 유닛을 상대하며 생존하는 것이 기본 목표다. 둘째, 맵 곳곳의 블랙홀을 활용해 적을 처리하거나 위험을 피하는 전략이 필요하다. 셋째, OX 퀴즈를 통해 보상을 얻거나 추가적인 리스크를 관리하는 선택지가 주어지는데, 이 부분은 맵의 난이도를 조절하는 중요한 요소로 작용한다. 맵의 구조는 비교적 단순하지만, 블랙홀의 위치와 퀴즈의 배치, 적의 등장 패턴 등이 복합적으로 얽혀 있어 초보자와 숙련자 모두에게 도전적인 경험을 제공한다. 이 맵을 플레이하기에 가장 적합한 대상은 스타크래프트의 기본 조작에 익숙한 플레이어들로, 특히 서바이벌 장르에 대한 이해가 있다면 더욱 재미있게 즐길 수 있을 것이다. 맵의 난이도는 체감상 쉬운 편은 아니지만, 블랙홀과 퀴즈 시스템을 잘 활용하면 비교적 안정적으로 진행할 수 있다. 단, 플레이 전에는 블랙홀의 위치와 퀴즈의 패턴을 미리 숙지하는 것이 중요하며, 팀 플레이보다는 개인 플레이에 초점을 맞춰야 한다. 맵의 볼륨이 크지는 않지만, 끊임없는 긴장감과 전략적인 선택이 요구되는 만큼, 한 번에 몇 차례의 시도를 통해 적응하는 것이 좋다. 지옥이라는 독특한 테마와 블랙홀, 퀴즈 등 다양한 요소들이 어우러져 색다른 서바이벌 경험을 제공하는 이 맵은, 스타크래프트 유즈맵의 장르적 다양성을 증명하는 대표적인 사례 중 하나다. 특히나 지옥이라는 컨셉을 시각적으로 잘 구현해냈기 때문에, 단순히 생존을 넘어 일종의 atmospheric gameplay로도 즐길 수 있는 점이 큰 매력이다. 맵의 난이도는 점점 높아지는 적의 압박과 랜덤한 퀴즈 요소로 인해 예측 불가능한 요소가 많지만, 그만큼 플레이어의 집중력과 순간적인 판단력을 요구하는 재미있는 구조로 구성되어 있다. StarCraft: Brood War's survival-style custom map, *"Surviving Hell Ver 1.145"*, is a user-made game set in a hellish theme where players face extreme survival challenges. The map features black holes scattered throughout, OX quizzes, and relentless waves of enemy units, forcing players to strategize under constant pressure. The unique hell theme immerses players visually, with black holes serving as a core mechanic by pulling units in. OX quizzes occasionally appear, distracting players but also offering rewards when solved, adding layers of tension through these combined elements. The gameplay is divided into three main aspects. First, surviving against the endless waves of enemy units is the primary objective. Second, players must strategically use the black holes to eliminate enemies or evade danger. Third, OX quizzes provide rewards or additional risks, acting as a key factor in adjusting the map's difficulty. While the map's structure is relatively simple, the interplay of black hole placements, quiz locations, and enemy spawn patterns creates a challenging experience for both beginners and veterans alike. This map is best suited for players familiar with basic StarCraft controls, particularly those who enjoy survival genres, as it offers a more engaging experience with prior understanding. While the difficulty isn’t easy, mastering the black hole and quiz systems can help maintain steady progress. However, it’s crucial to study the black hole locations and quiz patterns beforehand, as the map demands individual focus rather than teamwork. Though the content isn’t overly extensive, the constant tension and strategic decisions make it worth multiple attempts to adapt and improve. With its unique hell theme, black holes, and quizzes, this map delivers an unconventional survival experience, showcasing the genre diversity of StarCraft custom maps. The visual execution of the hell concept elevates it beyond mere survival, offering an atmospheric gameplay experience. The rising enemy pressure and random quiz elements create unpredictability, but this unpredictability also makes the map engaging by demanding sharp focus and quick decision-making from players.
최근 등록된 맵
새로 추가된 파일과 버전을 확인하세요.
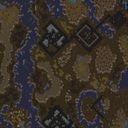
Dawn Of A Martyr 03 - The Game Changer (죽음의 새벽 3: 게임 체인저)
스타크래프트 브루드워의 유즈맵 'Dawn Of A Martyr 03 - The Game Changer'는 유저가 단독으로 진행하는 서바이벌형 디펜스 맵이다. 황무지 타일셋으로 구성된 이 맵은 테란 기지 방어가 무너지면서 unexpected superior(예상치 못한 우수한 존재)가 콘클레이브의 계획을 일시적으로 저지한다는 스토리 배경 속에서, 플레이어는 끊임없이 밀려오는 적군 웨이브를 상대하며 생존을 도모해야 한다. 맵의 구조는 중앙 기지 주변을 에워싼 좁은 길목과 요충지를 중심으로 짜여 있어, 방어선 구축이 필수적이다. 미네랄과 베스핀 가스를 확보할 수 있는Resource Area가 배치되어 있어 자원 관리도 중요하며, 제한된 공간에서 효율적인 방어 건물을 배치해야만 지속적인 공격에 대응할 수 있다. 특히 후반부로 갈수록 점점 강화되는 적의 공격 패턴과 다수의 유닛 조합을 예측하고 대처하는 전략이 요구된다. 초보자는 방어선을 제대로 구축하지 못해 쉽게 무너질 위험이 크며, 숙련자는 자원 효율과 방어 타워의 최적 배치로 최대한의 생존 시간을 확보할 수 있다. 이 맵의 가장 큰 특징은 예상치 못한 적의 변칙적인 공격 루트와 다채로운 유닛 조합으로, 이를 극복하는 과정에서 긴장감과 전략적 깊이를 느낄 수 있다. 또한, 맵 자체가 제공하는Resource Area를 적절히 활용하지 못하면 자원 고갈로 인해 방어에 어려움을 겪을 수 있어,Resource 관리가 승리의 열쇠가 된다. 플레이 전에는 최소한의 방어 건물과Resource 확보를 위한 초기 자원 관리 계획을 세우는 것이 중요하며, 적의 공격 패턴을 숙지하고 방어 타워의 효율적인 배치와 업그레이드 우선순위를 신중히 판단해야 한다. recommendedPlayerCount가 1인 이유는 이 맵이 단독 플레이를 전제로 설계되었기 때문이며, 제공되는Resource Area의 규모와 적의 공격 강도 등을 고려할 때 적정 난이도는 '보통' 정도로 판단된다. 이 맵은 서바이벌 디펜스의 classic한 구조를 지니면서도, unexpected superior라는 스토리 요소가 긴장감을 더해주며, 전략적 깊이를 더하는 요소로 작용한다. 특히 방어 타워의 배치와Resource 활용의 균형이 게임의 승패를 좌우하므로, 이러한 측면을 집중적으로 연습하는 것이 좋다. 또한, 지속적인 공격으로 인해 발생하는Resource 부족 문제를 해결하기 위해Resource Area를 적극적으로 방어하고 확보하는 전략이 요구된다. Dawn Of A Martyr 03 - The Game Changer is a survival defense custom map in StarCraft: Brood War where players defend a single base against relentless enemy waves. Set in a desolate terrain tileset, the map follows a narrative where the Terran lines collapse, and an unexpected superior force temporarily halts the Conclave's plans, forcing the player to survive as long as possible. The layout features narrow pathways and strategic chokepoints around the central base, making defensive tower placement crucial. Players must manage limited resources from nearby mineral and vespene gas areas to build and upgrade defenses effectively. As the game progresses, enemy attacks intensify with varied unit compositions, requiring players to adapt their strategies dynamically. Novices may struggle with maintaining a solid defense line, while experienced players can optimize tower placements and resource allocation for maximum survival time. A key highlight of this map is its unpredictable enemy attack routes and diverse unit combinations, which add tension and depth to the gameplay. Failure to properly utilize the provided resource areas can lead to resource depletion, making efficient resource management essential for prolonged survival. Before playing, it is advisable to plan initial defense structures and resource gathering routes. Understanding enemy attack patterns, prioritizing tower upgrades, and balancing defense and resource collection are critical to success. Given the map's design for solo play and the intensity of enemy waves, the recommended difficulty is 'medium.' The narrative element of an unexpected superior force enhances the survival experience, while the need to balance tower defense and resource management creates a strategic challenge. Players should focus on optimizing tower placements and maintaining resource flow to overcome the map's escalating difficulty.
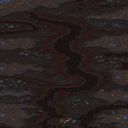
Dawn Of A Martyr 11 - Hunting For Help (암흑의 수호자 11: 구원의 사냥)
스타크래프트 브루드워의 유즈맵 장인들 사이에서 입소문을 타고 있는 《Dawn Of A Martyr 11 - Hunting For Help》는 테란의 영웅 타사다르가 테사니스 탈출 직후, 또다시 베일에 가려진 사이오닉 에너지를 감지하며 시작되는 서바이벌 디펜스 맵입니다. 맵 제목에서 느껴지는 ‘순교’의 기운과 함께, 플레이어는 스스로를 희생하며 적의 공격을 버텨내고 희망을 찾아야 하는 긴장감을 안고 플레이하게 됩니다. 정글 타일셋으로 구현된 이 맵은 어두운 분위기의 숲 속에서 진행되며, 플레이어는 테란의 영웅 유닛을 조종해 점점 밀려오는 적 무리들을 상대로 territoral control을 유지해야 합니다. 맵 구조는 중앙으로 좁아지는 삼각형 형태의 길과, 양옆으로 배치된 수비 거점들로 이루어져 있어, 병력이 집중될수록 방어선이 점점 좁아지는 압박감을 느낄 수 있습니다. 특히, 맵 하단에서 시작하는 타사다르는 초반에 강력한 방어력을 갖추고 있지만,随着时间的推移, 적의 공격 패턴이 점점 강력해지며 전략적 선택이 요구됩니다. 초반에는 비교적 여유로운 수비를 하더라도, 중반부터는 적의 공세를 분산시키거나, 특정 거점을 희생하는 등 유연한 플레이가 필요합니다. 맵의 핵심은 ‘희망’을 잃지 않으면서도 끊임없이 몰아치는 적들을 상대하는 데 있으며, 이는 제목에서도 드러나는 철학적인 메시지와도 연결됩니다. 플레이어는 타사다르의 유닛 능력을 최대한 활용해 적의 공격을 버텨내고, 마지막까지 살아남아 승리를 쟁취해야 합니다. 이 맵은 1인용으로 설계되어 있어, 플레이어 개인의 판단력과 반응 속도가 승패를 좌우합니다. 초보자는 방어를 중심으로 한 기본 전략을 익히며 천천히 적응해나갈 수 있지만, 숙련자라면 보다 공격적인 수비와 리스크 관리로 보다 높은 점수를 노릴 수 있습니다. 맵의 긴장감과 몰입감은 플레이어의 집중력을 요구하며, 특히 마지막까지 살아남아 승리를 쟁취했을 때의 성취감은 이 맵의 주요 매력 중 하나입니다. 또한, 정글 타일셋의 어두운 분위기와 어울리는 맵 디자인은 몰입도를 한층 높여주며, 한 번 플레이하면 다시 플레이하고 싶어지는 중독성을 지니고 있습니다. 다만, 초반 방어 라인을 너무 굳히면 중반 이후 적의 공격 패턴을 따라잡기 어려워질 수 있으니, 전략적 유연성을 늘 염두에 두어야 합니다. 이 맵은 테란 영웅 유닛을 좋아하는 플레이어, 서바이벌 디펜스 장르를 즐기는 플레이어, 그리고 몰입감 있는 스토리텔링이 있는 맵을 선호하는 플레이어에게 특히 추천합니다. 긴장감 있는 플레이를 즐기고 싶다면 《Dawn Of A Martyr 11 - Hunting For Help》를 꼭 시도해보세요. Dawn Of A Martyr 11 - Hunting For Help is a survival defense custom map set in the Brood War universe, where players take on the role of Tassadar, a Terran hero escaping Tarsonis, only to detect another psionic signal. The map blends dark jungle-themed visuals with intense, escalating enemy waves, creating a claustrophobic atmosphere as players must defend shrinking frontlines. The triangular map layout—narrowing toward the center—adds pressure, forcing strategic decisions on where to allocate limited forces. Early gameplay allows for cautious defense, but as enemy aggression intensifies, players must adapt, balancing sustainability with survival. The core challenge lies in maintaining hope against overwhelming odds, a theme echoed in the title. Designed as a single-player experience, the map tests individual reflexes and tactical foresight, rewarding those who can pivot strategies mid-game. Novices can ease into the mechanics, while veterans may push for higher scores through aggressive risk-taking. The jungle tileset enhances immersion, making the survival grind feel both visceral and atmospheric. However, overcommitting to static defenses early on risks leaving players vulnerable to later, more complex enemy compositions. Perfect for fans of hero-based gameplay, survival defense mechanics, or narrative-driven custom maps, this title delivers a punishing yet rewarding experience. If you crave tension, strategic depth, and the thrill of barely holding on, Dawn Of A Martyr 11 - Hunting For Help is a must-try.
대 보이즈 vs MS 앤 프렌즈 (Da Boyz vs MS and Friends)
브루드워의 다채로운 유즈맵 가운데 단연 돋보이는 작품인 <대 보이즈 vs MS 앤 프렌즈(Da Boyz vs MS and friends)는 7인의 플레이어가 팀을 이뤄 강력한 적들과 맞서는 서바이벌 디펜스 장르의 걸작이다. 맵 제목에서부터 느껴지는 중독성 있는 네이밍과 함께, 플레이어들은 ‘맨 스파이더(Man-spider)’와 그녀의 부하들을 상대하며 끊임없이 밀려오는 웨이브를 방어해야 한다. 내부 설명에 ‘survive’라는 단어가 강조된 것처럼, 이 맵은 단순히 적을 섬멸하는 것이 아니라 살아남는 전략이 무엇보다 중요하다는 점이 특징이다. 맵의 구조는 중앙에 위치한 본진과 사방으로 뻗어나가는 입구들을 중심으로 구성되어 있으며, 각 입구마다 병력이 배치되어 끊임없이 공격을 퍼붓는 적들을 상대해야 한다. 특히 ‘맨 스파이더’는 일반 유닛들과는 차원이 다른 강력한 스킬과 체력을 보유하고 있어, 플레이어들은 각자의 유닛 조합과 스킬 타이밍을 carefully 계산해야만 승리를 쟁취할 수 있다. 또한, 맵 곳곳에 숨겨진 리소스와 방어 시설 Upgrade 포인트를 활용해 전세를 역전시킬 수 있는 전략적 요소가 풍부하게 설계되어 있다. 초반에는 비교적 수월하게 느껴지지만, 후반부로 갈수록 적의 공격 패턴이 복잡해지고 강해지기 때문에, 플레이어 간의 협력과 실시간 판단력이 매우 중요하다. 이 맵의 가장 큰 매력은 바로 ‘진화’라는 시스템에 있다. ‘evolve’라는 단어가 파일명에 포함된 것처럼, 플레이어는 게임이 진행됨에 따라 유닛을 진화시키거나 새로운 능력을 얻는 등 성장형 요소를 경험할 수 있다. 이는 단순히 방어에 그치지 않고, 플레이어 스스로가 강해지는 재미를 더해 준다. 또한, 7인의 플레이어가 각자의 역할을 분담해 맡는 팀 플레이가 필수적이기 때문에, 커뮤니케이션과 전략적 협력이 빛을 발하는 순간이 많다. 초보자는 물론이고 숙련자까지도 매번 새로운 전략을 시도해 볼 수 있는 변수가 풍부한 맵으로, 브루드워 유즈맵의 깊이를 느낄 수 있는 작품 중 하나다. 이 맵을 추천하는 대상은 크게 두 가지로 나눌 수 있다. 첫째는 팀 플레이를 즐기며 전략적 깊이를 추구하는 유저들이다. 7명이 한 팀이 되어 협력해야만 승리를 거머쥘 수 있는 구조는, 타 유즈맵과는 차별화되는 매력을 제공한다. 둘째는 유닛의 성장과 진화 시스템에 흥미를 느끼는 플레이어들이다. 단순히 적을 잡는 데 그치지 않고, 유닛을 강화하고 새로운 능력을 얻는 재미는 이 맵만의 독특한 요소다. 플레이 전에는 반드시 팀원 간의 역할 분담을 사전에 협의하고, 각 입구별로 방어 전략을 미리 세워두는 것이 중요하다. 또한, 후반부 웨이브에서는 유닛의 체력과 스킬 사용 타이밍을 면밀히 계산해야 하므로, 기본적인 유닛 컨트롤과 스킬 사용법에 익숙해져 있어야 원활한 플레이가 가능하다. Among the diverse custom maps in Brood War, <Da Boyz vs MS and Friends> stands out as a remarkable work—a survival defense masterpiece where seven players team up to battle against powerful enemies. From the addictive title itself, players face off against "Man-Spider" and her forces, defending against relentless waves of attacks. As the in-game description emphasizes the word "survive," this map prioritizes survival strategy over mere elimination. The map’s structure revolves around a central main base with multiple entrances branching outward, each guarded by forces that continuously launch attacks. Man-Spider, in particular, possesses overwhelming skills and health far beyond standard units, forcing players to carefully calculate unit compositions and skill timing to secure victory. Hidden resources and defensive facility upgrade points scattered across the map add rich strategic depth, allowing players to turn the tide of battle. While the early game feels manageable, the later waves become increasingly complex and intense, making teamwork and real-time decision-making crucial. The map’s greatest appeal lies in its "evolution" system. Just as the filename hints with "evolve," players can evolve their units or gain new abilities as the game progresses, transforming defense into a rewarding growth experience. With seven players each taking on distinct roles, teamwork and strategic coordination shine, offering moments where communication and planning make all the difference. Whether you're a beginner or a veteran, the map’s abundant variables ensure fresh strategies with every playthrough, showcasing the depth of Brood War custom maps. This map is ideal for two types of players. First, those who enjoy team play and strategic depth—its seven-player team structure delivers a unique charm absent in other custom maps. Second, players fascinated by unit growth and evolution—unlike maps where victory hinges solely on defeating enemies, this one rewards strengthening units and unlocking new abilities. Before playing, it’s essential to coordinate roles with teammates and plan defense strategies for each entrance. In the late-game waves, precise unit health management and skill timing become vital, so mastering basic unit control and abilities beforehand ensures smoother gameplay.
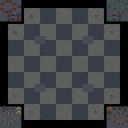
S.W.A.T. Wars Ultra + Snipers
S.W.A.T. Wars Ultra + Snipers는 기존의 S.W.A.T. Wars 맵을 확장하고 강화한 유즈맵으로, 기존 21개의 존에서 무려 45개의 존으로 맵이 대폭 확장된 점이 특징이다. 이 맵은 플레이어들이 좀비, 테란, 저그 등 다양한 적대 세력과 전투를 벌이며 생존을 목표로 진행하는 서바이벌 디펜스 장르에 속한다. 맵의 구조는 중앙에 위치한 안전 지대와 주변의 위험 존들로 나뉘며, 각 존은 난이도에 따라 점차 강화되는 적과 함정으로 구성되어 있다. 플레이어는 맵 곳곳에 배치된 자원과 아이템을 수집해 무기와 방어구를 강화할 수 있으며, 적대 세력의 공격을 방어하면서 마지막까지 살아남아야 한다. 맵의 확장된 존 수는 단순한 스케일 업이 아니라, 각 존의 개성과 난이도 차이를 통해 플레이어의 전략적 선택과 적응력을 요구한다. 특히, 45개의 존은 맵을 여러 구역으로 나누어 각 구역의 특성과 위협 수준을 다르게 설계할 수 있어, 초보자부터 숙련자까지 다양한 플레이어에게 긴장감을 제공한다. 맵의 진행은 비교적 자유로운 편이지만, 각 존의 난이도 상승과 적의 증가를 고려해 신중하게 자원을 관리하고 무기를 업그레이드해야 한다. 이 맵은 팀 플레이보다는 개인이나 소규모 그룹으로 플레이하는 것이 효과적이며, 특히 저격수(Snipers) 모드의 추가로 원거리 전투와 전략적 위치 선정이 중요해진다. 맵의 디자인과 시스템은 기존의 S.W.A.T. Wars 시리즈의 장점을 계승하면서도, 확장된 존 수를 통해 새로운 플레이 경험을 제공한다. 플레이 전에는 맵의 구조와 각 존의 특징을 미리 숙지하고, 팀원과의 역할 분배(예: 탱커, 딜러, 힐러)를 계획하는 것이 중요하다. 또한, 아이템과 무기 업그레이드 시스템을 충분히 이해하고, 적의 공격 패턴을 분석하는 것이 생존의 핵심이다. 이 맵은 장기간 플레이를 통해 점진적으로 난이도를 높이는 방식으로 구성되어 있어, 반복 플레이를 통해 전략과 실력을 발전시킬 수 있는 장점이 있다. S.W.A.T. Wars Ultra + Snipers is an expanded and enhanced version of the classic S.W.A.T. Wars custom map, featuring a massive increase from 21 zones to 45 zones. This map falls under the survival defense genre, where players must fend off waves of hostile forces—including zombies, Terran units, and Zerg—while navigating a perilous environment divided into safe zones and high-risk areas. The expanded map structure introduces a variety of zones, each with unique challenges, enemy types, and traps, escalating in difficulty as players progress. Resource and item collection points are strategically placed, allowing players to upgrade weapons and defenses to improve their chances of survival. The sheer number of zones not only scales the gameplay but also introduces diverse strategic elements, requiring players to adapt their tactics based on zone-specific threats. The addition of the Snipers mode emphasizes long-range combat and positional awareness, making teamwork and individual skill equally important. While the map supports both solo and small-group play, larger teams may find it easier to balance roles such as tanking, damage dealing, and healing. Understanding the map’s layout, enemy patterns, and upgrade systems is crucial for survival, as the difficulty curve is designed to challenge players over extended play sessions. Repeated gameplay allows for skill refinement and strategic mastery, making this map ideal for those seeking a long-term, evolving challenge.
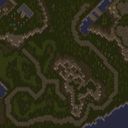
아몬 헨 (Amon Hen)
스타크래프트 브루드워 유즈맵 <아몬 헨(Amon Hen)>은 J.R.R. 톨킨의 반지의 제왕 세계관을 배경으로 한 서바이벌 디펜스 장르의 밀리 기반 맵이다. 맵의 배경은 사막으로 펼쳐져 있으며, Fellowship(반지의 형제단)이 우르크하이(Uruk-Hai) 무리에게 습격을 받는 순간을 재현하고 있다. 플레이어는 프로도 배긴스(Frodo Baggins) 캐릭터를 조종해 탈출을 시도해야 하며, 보로미르(Boromir)를 구출하거나至少 지연시켜야 하는 임무를 수행한다. 맵은 총 3명의 플레이어로 구성되어 있으며, 각 플레이어는 서로 다른 역할을 부여받아 협력하거나 경쟁하며 진행된다. 프로도는 맵 끝까지 도달해야 하고, 다른 플레이어는 우르크하이를 막아내면서 프로도에게 시간을 벌어주어야 한다. 맵의 진행 방식은 끊임없이 몰려오는 적을 상대하는 디펜스와 탈출 성공을 목표로 하는 서바이벌이 조합된 형태다. 맵의 구조는 사막 지형을 활용한 넓은 개활지와 협소한 통로로 나뉘어 있으며, 각 구간마다 적의 진형과 배치 방식이 달라져 전략적 대처가 요구된다. 특히 프로도의 탈출 경로 주변은 엄호가 중요하며, 적의 대규모 침공 시에는 전멸을 피하기 위한 ritirade(후퇴) 및 방어선 구축이 필수적이다. 플레이어는 초반부터 강력한 적과 조우하게 되며, 자원 수집보다는 실시간 전투와 판단력이 핵심인 맵으로, 맵의 긴장감과 몰입감을 극대화하는 디자인이다. 초보자보다는 중수 이상 플레이어에게 적합하며, 팀워크와 순간 판단력이 승리를 좌우할 것이다. 맵의 밸런스는 프로도의 탈출 성공률과 적의 압박 강도 간 균형이 중요하며, 맵의 난이도는 적의 물량과 공격 패턴에 따라 가변적으로 느껴진다. 플레이 전 미리 맵의 주요 길목과 탈출 지점을 숙지하고, 각 역할에 맞는 전략을 준비하는 것이 중요하다. 또한, 우르크하이의 공격 패턴과 스폰 위치를 숙지하면 보다 효과적인 방어가 가능하다. 맵의 분위기는 반지의 제왕의dark fantasy적 요소와 긴박한 전투감을 동시에 살린 디자인으로, 스토리와 연출이 플레이에 몰입을 더해준다. Amon Hen is a survival defense-style custom map for StarCraft: Brood War set in the world of J.R.R. Tolkien's Lord of the Rings universe. The map recreates the tense moment when the Fellowship of the Ring is ambushed by Uruk-Hai in the desert terrain of Amon Hen. Players control Frodo Baggins, who must escape while fulfilling the mission to rescue or at least delay Boromir's defeat. The map features 3 players, each with distinct roles that require either cooperation or competition. Frodo must reach the end of the map, while the others hold off waves of Uruk-Hai to buy time. The gameplay blends real-time defense against endless waves of enemies with survival elements focused on Frodo's escape. The map's structure utilizes the vast desert terrain with open areas and narrow passages, each requiring strategic positioning and adaptability. The escape route for Frodo is particularly vulnerable, demanding constant support from teammates to prevent overwhelming enemy waves. Early encounters are intense, emphasizing real-time combat and split-second decisions over resource management. This makes the map more suitable for intermediate to advanced players who thrive under pressure and require strong teamwork. The balance of the map hinges on the success rate of Frodo's escape and the intensity of enemy pressure, with difficulty varying based on enemy spawn patterns and attack waves. Before playing, it's crucial to familiarize yourself with key paths, escape points, and the roles of each player. Understanding the Uruk-Hai's attack patterns and spawn locations will significantly improve defensive strategies. The map's atmosphere blends the dark fantasy elements of Lord of the Rings with the adrenaline of intense combat, creating an immersive experience through its narrative and visual design.
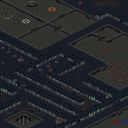
고_HOME! 2 (Go home! 2)
‘Go home!(2).scx’로 알려진 이 스타크래프트 브루드워 유즈맵은 한 플레이어가 홀로 도전하는 서바이벌 디펜스 장르로, 얼음과 설원으로 뒤덮인 맵 위에서 적의 끊임없는 공격을 방어하며 생존을 목표로 한다. 맵의 이름은 파일명과 내부 제목이 모두 ‘Untitled Scenario’로 되어 있지만, ‘Go home!’이라는 명칭이 파일명에 포함되어 있어 일종의 후속작 또는 개조 버전으로 추정된다. 타일셋은 ‘설원/얼음’으로 설정되어 있으며, 차가운 분위기의 배경이 플레이어의 긴장감을 배가시킨다. 맵 크기는 1024x1024 타일로, 해상도 2048x2048에서 플레이할 수 있도록 디자인되어 있으며, 64x64 타일 단위를 사용한다. 내부 설명은 ‘닫쁑杰唐둔렘쉔蓼’으로 표시되어 있어 한글 깨짐 현상이 나타나지만, 제목과 파일명을 통해 디펜스 장르임을 유추할 수 있다. 플레이 방식은 명확히 드러나지는 않지만, 한 플레이어가 맵 중앙 또는 특정 위치에서 적의 공격을 막아내며 생존하는 구조로 보인다. 맵의 배경과 타일셋, 그리고 파일명을 고려했을 때, 적의Wave가 지속적으로 등장하는 서바이벌 디펜스 유즈맵으로 추정된다. 맵의 특성상 난이도는 플레이어의 실력에 따라 크게 달라질 수 있으며, 초보자보다는 적의 패턴을 익히며 점차 난이도를 높이는 데 익숙한 플레이어에게 추천된다. 또한, 디펜스 장르의 특성상 전략적 사고와 자원 관리가 중요한 요소로 작용할 가능성이 높다. 플레이 전에는 맵의 승리 조건과 패배 조건을 명확히 확인하고, 맵 에디터나 설명란을 통해 추가 정보를 얻는 것이 좋다. 맵의 분위기와 장르가 얼음 설원 배경의 디펜스 게임이라는 점에서, 플레이어는 차가운 분위기 속에서 긴장감과 전략을 동시에 요구하는 게임 경험을 기대할 수 있다. This StarCraft: Brood War custom map, known as 'Go home!(2).scx' or internally as 'Untitled Scenario,' falls under the survival defense genre, where a single player must withstand relentless enemy waves in a frozen, snowy terrain. The map's title and internal name suggest it may be a sequel or remastered version, with 'Go home!' hinting at a returning or refined concept. The 'snow/ice' tileset enhances the cold, tense atmosphere, while the 1024x1024 tile size and 2048x2048 resolution imply a compact yet strategic play area. The gameplay revolves around surviving waves of enemies, though specific mechanics remain unclear due to the garbled internal description. Based on the title and tileset, it likely follows a classic 'tower defense' or 'survival defense' structure, where players must defend a key location while managing resources and enemy patterns. The difficulty is expected to scale with enemy intelligence and wave intensity, making it more suitable for players familiar with defense mechanics rather than beginners. Strategic foresight and quick decision-making are crucial, as the icy setting amplifies the pressure of each encounter. Before diving in, players should verify the win/lose conditions and consult any available guides or editor notes to fully grasp the map's objectives.

달빛 사막 (Moonlight Beams)
스타크래프트 브루드워의 유즈맵 〈Moonlight Beams〉는 어두운 사막 지형을 배경으로 진행되는 서바이벌 디펜스 장르의 맵이다. 플레이어는 단독으로 광물과 가스를 확보한 뒤, 강력한 방어 건물과 유닛을 배치하여 끊임없이 몰려오는 적 공세를 막아내야 한다. 맵 중앙의 넓은 평야는 시야를 확보하기 좋지만, 동굴이나 언덕 지형이 곳곳에 흩어져 있어 전략적 요충지를 선점하는 것이 핵심이다. 내부 설명문에 ‘Don't enjoy the views too much, some things are here for you...’라는 문구가 있어 위험한 요소나 숨겨진 함정이 있을 가능성도 시사한다. 초반 자원 확보가 중요하며, 방어선 구축 타이밍을 놓치면 곧장 밀리는 구조로 보인다. 초보 플레이어는 방어 건물의 배치와 유닛 조합에 어려움을 느낄 수 있지만, 익숙해지면 긴장감 넘치는 전투를 즐길 수 있을 것이다. 특히 밤낮이 바뀌는 배경 그래픽이 맵의 분위기를 한층 더 어둡고 긴박하게 연출한다. 다채로운 지형과 시야 차단 요소 덕분에 같은 전략을 반복하기보다는 매 전투마다 새로운 대처가 요구된다. 초반 자원 확보에 실패하거나 방어선을 잘못 배치하면 곧장 게임 오버로 이어질 수 있어, 신중한 플레이가 필수적이다. 이 맵은 디펜스와 서바이벌의 묘미를 동시에 느낄 수 있는 장르로, 단독 플레이를 선호하는 유저들에게 추천할 만한 작품이다. 플레이 전에는 방어 건물의 효율성과 자원 확보 루트를 미리 숙지하고, 초반 러쉬에 대비하는 준비를 갖추는 것이 중요하다. StarCraft: Brood War’s custom map *Moonlight Beams* is a survival defense game set against a dark desert landscape. Players must secure minerals and gas on their own, then arrange powerful defensive structures and units to fend off endless waves of enemy attacks. The wide central plain offers good visibility, but scattered caves and elevated terrain create key strategic spots to claim early. The in-game description hints at hidden dangers with the line *Don’t enjoy the views too much; some things are here for you...*, suggesting potential traps or threats lurking in the shadows. Early resource collection is critical, and missing the window to build a solid defense line can lead to an immediate collapse. Novice players may struggle with unit compositions and tower placement, but once mastered, the intense battles make for an exhilarating experience. The shifting day-night graphics amplify the map’s oppressive, high-stakes atmosphere, while varied terrain and line-of-sight obstructions force players to adapt strategies each wave rather than relying on repetition. A single mistake in early resource gathering or tower placement can spell instant game over, so careful planning is essential. Combining the thrills of defense and survival, *Moonlight Beams* is a standout title for those who enjoy solo play. Before jumping in, study optimal tower efficiency and resource routes, and prepare for early rushes to maximize your chances of survival.
지옥에서 살아남기 Ver 1.145
스타크래프트 브루드워의 서바이벌 장르 맵인 '지옥에서 살아남기 Ver 1.145'는 지옥 테마를 배경으로 한 극한의 생존 도전을 담은 유즈맵이다. 맵 곳곳에 배치된 블랙홀과 OX 퀴즈, 그리고 끊임없이 몰려드는 적 유닛들 속에서 살아남아야 하는 구조로, 플레이어들은 끊임없는 압박 속에서 전략을 세워야 한다. 지옥이라는 독특한 컨셉 덕분에 시각적인 몰입감도 뛰어나며, 특히 블랙홀은 맵의 핵심 요소로 자리잡아 유닛을 끌어당기는 역할을 한다. OX 퀴즈는 간간이 등장해 플레이어의 집중력을 분산시키기도 하지만, 이 문제를 해결하면 보상을 제공하기도 하는 등 다양한 요소들이 복합적으로 작용해 긴장감을 높인다. 플레이 방식은 크게 세 가지로 나뉜다. 첫째, 끊임없이 등장하는 적 유닛을 상대하며 생존하는 것이 기본 목표다. 둘째, 맵 곳곳의 블랙홀을 활용해 적을 처리하거나 위험을 피하는 전략이 필요하다. 셋째, OX 퀴즈를 통해 보상을 얻거나 추가적인 리스크를 관리하는 선택지가 주어지는데, 이 부분은 맵의 난이도를 조절하는 중요한 요소로 작용한다. 맵의 구조는 비교적 단순하지만, 블랙홀의 위치와 퀴즈의 배치, 적의 등장 패턴 등이 복합적으로 얽혀 있어 초보자와 숙련자 모두에게 도전적인 경험을 제공한다. 이 맵을 플레이하기에 가장 적합한 대상은 스타크래프트의 기본 조작에 익숙한 플레이어들로, 특히 서바이벌 장르에 대한 이해가 있다면 더욱 재미있게 즐길 수 있을 것이다. 맵의 난이도는 체감상 쉬운 편은 아니지만, 블랙홀과 퀴즈 시스템을 잘 활용하면 비교적 안정적으로 진행할 수 있다. 단, 플레이 전에는 블랙홀의 위치와 퀴즈의 패턴을 미리 숙지하는 것이 중요하며, 팀 플레이보다는 개인 플레이에 초점을 맞춰야 한다. 맵의 볼륨이 크지는 않지만, 끊임없는 긴장감과 전략적인 선택이 요구되는 만큼, 한 번에 몇 차례의 시도를 통해 적응하는 것이 좋다. 지옥이라는 독특한 테마와 블랙홀, 퀴즈 등 다양한 요소들이 어우러져 색다른 서바이벌 경험을 제공하는 이 맵은, 스타크래프트 유즈맵의 장르적 다양성을 증명하는 대표적인 사례 중 하나다. 특히나 지옥이라는 컨셉을 시각적으로 잘 구현해냈기 때문에, 단순히 생존을 넘어 일종의 atmospheric gameplay로도 즐길 수 있는 점이 큰 매력이다. 맵의 난이도는 점점 높아지는 적의 압박과 랜덤한 퀴즈 요소로 인해 예측 불가능한 요소가 많지만, 그만큼 플레이어의 집중력과 순간적인 판단력을 요구하는 재미있는 구조로 구성되어 있다. StarCraft: Brood War's survival-style custom map, *"Surviving Hell Ver 1.145"*, is a user-made game set in a hellish theme where players face extreme survival challenges. The map features black holes scattered throughout, OX quizzes, and relentless waves of enemy units, forcing players to strategize under constant pressure. The unique hell theme immerses players visually, with black holes serving as a core mechanic by pulling units in. OX quizzes occasionally appear, distracting players but also offering rewards when solved, adding layers of tension through these combined elements. The gameplay is divided into three main aspects. First, surviving against the endless waves of enemy units is the primary objective. Second, players must strategically use the black holes to eliminate enemies or evade danger. Third, OX quizzes provide rewards or additional risks, acting as a key factor in adjusting the map's difficulty. While the map's structure is relatively simple, the interplay of black hole placements, quiz locations, and enemy spawn patterns creates a challenging experience for both beginners and veterans alike. This map is best suited for players familiar with basic StarCraft controls, particularly those who enjoy survival genres, as it offers a more engaging experience with prior understanding. While the difficulty isn’t easy, mastering the black hole and quiz systems can help maintain steady progress. However, it’s crucial to study the black hole locations and quiz patterns beforehand, as the map demands individual focus rather than teamwork. Though the content isn’t overly extensive, the constant tension and strategic decisions make it worth multiple attempts to adapt and improve. With its unique hell theme, black holes, and quizzes, this map delivers an unconventional survival experience, showcasing the genre diversity of StarCraft custom maps. The visual execution of the hell concept elevates it beyond mere survival, offering an atmospheric gameplay experience. The rising enemy pressure and random quiz elements create unpredictability, but this unpredictability also makes the map engaging by demanding sharp focus and quick decision-making from players.
맵 선택 가이드
태그는 맵의 핵심 특징을 빠르게 설명하지만 제작 버전마다 규칙이 다를 수 있습니다. 상세 설명에서 권장 인원, 난이도, 플레이 시간과 버전을 함께 확인한 뒤 다운로드하세요.