
생존 게임 스타크래프트 맵 모음
'생존 게임' 태그가 등록된 맵을 모았습니다. 장르 하나로 찾기 어려운 플레이 방식, 난이도와 특징을 중심으로 인기 맵과 최신 맵을 비교해 보세요.
- 등록 맵
- 4개
- 누적 다운로드
- 0
- 누적 조회
- 218
인기 맵
다운로드와 조회 반응이 높은 맵입니다.
우주에서 살아남기 1.1 (Escape in Space 1.1)
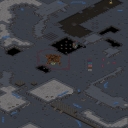
‘우주에서살아남기 1.1ver’이라는 제목의 이 맵은 말 그대로 우주 환경에서 생존을 목표로 하는 서바이벌 형식의 스타크래프트 브루드워 유즈맵이다. 넓은 우주 공간을 배경으로 펼쳐지는 맵의 중앙에는 거대한 행성이 자리 잡고 있으며, 주변에는 소행성 지대와 우주 정거장, 그리고 다수의 자원 지대가 분포되어 있다. 게임은 주로 행성 표면이나 우주 정거장 내에서 진행되며, 플레이어는 제한된 자원과 건물을 활용해 적의 공격과 혹독한 환경으로부터 살아남아야 한다. 맵 곳곳에 배치된 소행성들은 무작위로 이동하거나 파괴되면서 전략적 요소를 추가하며, 플레이어는 이를 피해 건설하거나 자원을 채취해야 한다. 건설 가능한 건물들은 테란 스타일의 커맨드 센터와 서플라이 디팟, 그리고 테크 트리 건물들로 구성되어 있으며, 테란의 유닛 생산 체계를 따르고 있다. 그러나 이 맵의 핵심은 단순히 자원을 모아 유닛을 생산하는 데 있지 않다. 행성 주변을 돌며 시시각각 변하는 소행성의 움직임, 행성 표면의 제한된 공간, 그리고 우주 공간의 특성상 시야 확인이 어려운 점 등이 플레이어를 긴장감으로 몰아넣는다. 특히 행성 표면은 넓지 않지만, 소행성 충돌이나 적의 기습 공격에 노출되기 쉬운 구조로 설계되어 있어 신속한 판단과 방어가 요구된다. 게임의 진행 방식은 크게 세 가지로 나뉠 수 있다. 첫째, 행성 내의 자원을 확보해 건물을 짓고 병력을 양성하는 단계, 둘째, 소행성이나 적의 공격을 방어하며 자원을 보호하는 단계, 셋째, 행성을 벗어나 우주 공간으로 진출해 추가 자원을 확보하거나 적을 제압하는 단계다. 맵의 가장자리에는 우주 공간이 펼쳐져 있으며, 이곳에는 소행성이나 운석이 무작위로 출현해 자원 확보 또는 방해 요인으로 작용한다. 또한, 맵의 일부 구역은 행성 표면과 우주 정거장이 연결되어 있어 기동성을 높이는 데 도움이 된다. 이 맵의 백미는 바로 ‘소행성 시스템’이다. 소행성들은 무작위로 움직이며, 때로는 행성 표면이나 우주 정거장에 충돌해 구조물을 파괴하기도 한다. 플레이어는 이를 예측하고 대비해야 하며, 때로는 소행성을 파괴해 자원을 확보하는 전략도 가능하다. 이러한 시스템은 맵의 긴장감을 극대화하며, 단순하게 자원과 병력만 모아 승리하는 것이 아니라, 실시간으로 변하는 환경을 읽고 대응하는 능력이 요구된다. 또한, 맵 중앙의 거대한 행성은 구조물의 배치와 자원 확보를 제한하는 요소로 작용해, 플레이어 간의 위치 선정이 매우 중요하다. 추천하는 플레이 대상은 실시간 전략 게임을 좋아하고, 긴장감 넘치는 서바이벌 환경을 즐기는 유저들이다. 특히, 스타크래프트의 기본 메커니즘을 알고 있으면서도 새로운 변수를 즐기는 플레이어에게 적합하다. 초보자의 경우, 맵의 복잡한 시스템과 소행성의 움직임에 적응하기 어려울 수 있으니, 먼저 연습 모드나 튜토리얼이 있는 버전을 찾아보는 것이 좋다. 또한, 팀 플레이를 지원한다면, 팀원 간의 역할 분담이 중요해지며, 자원 확보, 방어, 공격의 균형을 맞추는 것이 관건이다. 마지막으로, 이 맵은 꾸준한 업데이트와 밸런스 패치로 개선될 가능성이 있으니, 최신 버전을 다운로드해 플레이하는 것이 좋다. 플레이 전 반드시 확인해야 할 포인트는 다음과 같다. 첫째, 소행성의 움직임과 충돌 패턴을 숙지해야 한다. 둘째, 행성 표면과 우주 정거장의 구조적 특징을 파악해 건설 위치를 신중히 선택해야 한다. 셋째, 자원 확보와 방어의 균형을 맞추는 전략을 세워야 한다. 넷째, 맵의 가장자리로 진출해 추가적인 기회를 노릴 것인지, 아니면 행성 내에 집중할 것인지 결정해야 한다. 마지막으로, 팀 플레이 시에는 팀원 간의 의사소통을 원활히 해야 한다. 이러한 요소들을 염두에 두고 플레이한다면, ‘우주에서살아남기 1.1ver’는 단순한 서바이벌 맵을 넘어, 전략과 긴장감이 조화된 색다른 경험을 제공할 것이다. This map, titled *"Surviving in Space 1.1ver,"* is a survival-style *StarCraft: Brood War* custom map where the goal is to stay alive in a harsh space environment. Set against a vast cosmic backdrop, the map features a massive planet at its center, surrounded by asteroid fields, space stations, and scattered resource zones. Most of the action takes place on the planet’s surface or within space stations, where players must use limited resources and buildings to fend off enemy attacks and survive the unforgiving conditions. Scattered throughout the map are asteroids that move randomly or can be destroyed, adding a strategic layer to the gameplay. Players must navigate around them when constructing buildings or gathering resources. The buildable structures follow the Terran faction’s command center, supply depot, and tech tree system, but the map’s true challenge lies beyond simple resource management and unit production. The ever-shifting asteroid movements, confined space on the planet’s surface, and the difficulty of scouting in open space create constant tension. The planet’s surface, though not overly spacious, is designed to be vulnerable to asteroid collisions or enemy ambushes, demanding quick decision-making and strong defensive play. The gameplay is divided into three main phases. First, securing resources on the planet to construct buildings and train units. Second, defending against asteroid impacts or enemy assaults while protecting gathered materials. Third, venturing beyond the planet into open space to claim additional resources or engage enemies. The map’s edges lead into the void of space, where asteroids and meteors appear randomly, serving as either valuable resources or obstacles. Some areas connect the planet’s surface to space stations, enhancing mobility. The standout feature of this map is its **asteroid system**. These celestial bodies move unpredictably and can crash into the planet’s surface or space stations, destroying structures in their path. Players must anticipate these movements and adapt accordingly—sometimes even destroying asteroids to harvest resources. This dynamic system heightens the map’s tension, shifting the focus from mere resource accumulation to real-time environmental awareness and adaptability. The central planet also acts as a limiting factor, restricting building placement and resource access, making strategic positioning crucial. This map is best suited for players who enjoy real-time strategy games and thrive in high-pressure survival environments. It’s especially appealing to those familiar with *StarCraft*’s core mechanics but eager to tackle new variables. Beginners may struggle with the map’s complex systems and unpredictable asteroid behavior, so practicing in a tutorial or training mode is recommended. If playing in teams, coordination is key—balancing resource gathering, defense, and offense is essential for success. Since the map is likely to receive ongoing updates and balance patches, downloading the latest version is advisable for the best experience. Before playing, keep these key points in mind: First, study the asteroid movement patterns and collision risks. Second, understand the structural differences between the planet’s surface and space stations to choose safe construction spots. Third, balance resource collection with defensive strategies. Fourth, decide whether to focus on the planet’s interior or expand into the outer space for additional opportunities. Lastly, in team play, maintain clear communication with teammates. With these considerations in mind, *"Surviving in Space 1.1ver"* offers more than just a survival challenge—it delivers a unique blend of strategy and tension that elevates it beyond a typical custom map.
랜덤 캣 앤 마우스 정글! (Random Cat n Mouse Jungle!)
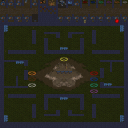
스타크래프트 브루드워의 숨은 재미 중 하나인 ‘고양이와 쥐’는 predator와 prey의 대결 구도를 재미있게 재해석한 유즈맵이다. <Random Cat n Mouse Jungle!>은 이름 그대로 야생의 정글을 배경으로 고양이와 쥐가 무작위 배치된 맵으로, 플레이어는 각각 고양이와 쥐 진영 중 하나를 선택해 전투를 펼친다. 맵 중앙의 넓은 평지에는 무작위로 생성되는 쥐 굴이 위치하며, 고양이 진영은 이 굴을 파괴해 쥐를 모두 제거하는 것이 주요 목표로 보인다. 반면 쥐 진영은 굴을 방어하거나 고양이의 공격을 피하면서 살아남는 데 집중해야 한다. 맵의 특징은 무작위 배치 시스템으로, 각 플레이어의 시작 위치와 쥐 굴의 위치는 매 게임마다 달라진다. 이는 전략의 다양성을 극대화하며, 특히 초보자와 숙련자 간의 체감 난이도 차이가 크다는 점에서 흥미로운 요소로 작용한다. 맵의 디자인 자체는 단순하지만, 무작위 배치와 생존/파괴라는 단순한 목표가 ‘누가 더 잘 숨고, 공격하고, 방어하는가’라는 긴장감을 끊임없이 유지한다. 추천 대상은 전략적 사고와 반사신경을 동시에 요구하는 맵을 좋아하는 플레이어들로, 특히 고양이와 쥐의 생태적 대결을 즐기는 유저들에게 적합할 것으로 보인다. 플레이 전에는 무작위 배치의 영향을 받으므로, 각 진영의 특성과 맵의 주요 지형(굴 위치, 돌출부, 시야)을 미리 확인하는 것이 중요하다. 또한, 쥐 굴의 방어 및 파괴 타이밍을 잘 계산해야만 승리를 이끌어낼 수 있다. 맵의 난이도는 중상으로 평가되며, 팀 플레이보다는 개인전이나 1:1 대결에 더 어울리는 구조다. 다만, 7인의 플레이가 가능한 구조이지만, 실질적인 전략적 깊이는 4~6인 전에서 가장 빛을 발할 것으로 추정된다. 맵의 플레이 시간은 개인전 기준으로 15~30분 내외로 예상되며, 팀전에서는 약간 더 길어질 수 있다. 맵의 밸런스는 무작위 배치의 공정성에 달려 있지만, 대체로 쥐 진영이 조금 더 유리한 것으로 보인다. 그러나 이는 플레이어의 숙련도에 따라 얼마든지 뒤집힐 수 있는 부분이다. 마지막으로, 맵의 제목에 포함된 ‘Random’이라는 단어가 시사하듯, 이 맵의 핵심은 예측 불가능한 요소와 전략적 유연성에 있다. 고정적인 맵이 아니라면 매번 새로운 경험을 제공한다는 점에서 재플레이 가치가 매우 높은 작품이다. "Cat and Mouse" in *StarCraft: Brood War* is one of the hidden gems that reimagines the classic predator-prey dynamic in a fun way. *<Random Cat n Mouse Jungle!>* lives up to its name by placing players in a wild jungle setting where cats and mice are randomly positioned at the start. Each player chooses to be either a cat or a mouse and engages in battle. At the center of the map lies a wide open plain where mouse burrows spawn randomly. The cats' main objective is to destroy these burrows to eliminate all the mice, while the mice must defend their burrows or evade the cats to survive. The map’s standout feature is its random placement system—both players' starting positions and the burrows' locations change every game, maximizing strategic variety. This also creates a noticeable skill gap between beginners and veterans, making it an intriguing challenge. Though the map’s design is simple, the core mechanics of survival and destruction create constant tension over who can hide better, attack more effectively, or defend smarter. It’s ideal for players who enjoy maps requiring both quick reflexes and strategic thinking, especially those who appreciate the ecological showdown between cats and mice. Before playing, keep in mind that random placement plays a big role, so familiarizing yourself with each faction’s strengths and key terrain features (burrow locations, high ground, and sightlines) is crucial. Timing your burrow defenses or attacks is also vital for securing victory. The difficulty is rated as moderate, and the map works best in 1v1 or solo matches rather than team play, though it can support up to seven players. However, the real strategic depth shines in games with four to six players. For solo matches, expect a playtime of 15 to 30 minutes, with team games potentially running a bit longer. Balance depends heavily on the fairness of the random placement, though mice generally have a slight edge—but this can shift entirely based on player skill. As the word "Random" in the title suggests, the map’s core appeal lies in its unpredictability and the need for flexible strategies. Since no two games are the same, it offers high replay value and fresh experiences every time you play.
2003 터렛 디펜스 (2003 Turret Defense)
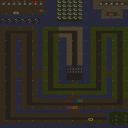
스타크래프트: 브루드워의 고전 디펜스 장르 유즈맵인 <2003 터렛 디펜스>는 오랜 시간 동안 fans 사이에서 사랑받아 온 맵을 현대적으로 재단장한 작품이다. 맵의 중앙에는 거대한 적 웨이브가 밀려오는 구조로, 플레이어는 건설 가능한 터렛을 배치하여 방어선을 구축해야 한다. 이미지 상으로는 사막 지형에 배치된 터렛 자리와 중앙 통로, 그리고 웨이브가 몰려오는 방향을 확인할 수 있다. 맵의 특징은 단순한 방어가 아니라 일정 주기로 밀려오는 적군을 efficiently 처리하며 최대한 오래 버티는 생존 게임이라는 점이다. 초보 플레이어부터 숙련자까지 즐길 수 있도록 난이도 조절이 가능하며, 특히 건설 가능한 터렛의 종류와 배치 전략이 중요하다. 맵의 흐름은 웨이브 사이의 간격을 활용해 자원을 모으고, 강력한 터렛을 배치하는 타이밍을 잡아야 한다. 추천 대상은 디펜스 장르를 좋아하는 유저들로, 특히 타워 디펜스와 유사한 재미를 느끼고 싶은 이들에게 적합하다. 플레이 전에는 맵의 배치 구조와 터렛의 종류, 웨이브의 패턴을 미리 숙지하는 것이 중요하며, 초반에는 방어선을 유지하는 데 집중하고 후반으로 갈수록 공격적인 배치로 전환하는 전략이 필요하다. 맵의 재구성 덕분에 그래픽도 깔끔해졌으며, 사막 테마 덕분에 몰입감도 높은 편이다. 다만, 적의 웨이브가 밀려오는 시점이 제때 파악되지 않으면 방어선이 무너지기 쉽다는 점을 주의해야 한다. StarCraft: Brood War's classic defense genre custom map, *2003 Turret Defense*, is a modernized remake of a long-beloved title among fans. The map features a central structure where massive enemy waves surge forward, and players must strategically place constructible turrets to build their defenses. Visually, you can see turret positions scattered across a desert terrain, a central passage, and the direction from which waves approach. Unlike simple tower defense, this is a survival game where players must efficiently eliminate waves that arrive at set intervals while enduring as long as possible. The map offers adjustable difficulty to cater to both beginners and veterans, with turret variety and placement strategies playing a crucial role. Players should use the intervals between waves to gather resources and time their placement of powerful turrets. It’s ideal for fans of the defense genre, especially those who enjoy the mechanics of tower defense games. Before playing, familiarize yourself with the map layout, available turrets, and wave patterns. Early on, focus on maintaining a solid defense, then shift to more aggressive placements as the game progresses. The remake also boasts cleaner visuals, and the desert theme enhances immersion. However, be cautious—if you fail to recognize when waves are approaching, your defenses may crumble quickly.
썬킨 4웨이 어드밴스드 FIX (Sunken 4 Way Advanced FIX)
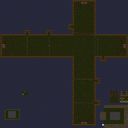
스타크래프트 브루드워의 대표적인 유즈맵 중 하나인 ‘썬킨 4웨이 어드밴스드 FIX’는 4개의 방향에서 몰려오는 적을 방어하며 생존을 도모하는 컴까기 디펜스 장르의 맵이다. 맵 제목에서 알 수 있듯이 ‘썬킨(Sunken)’은 가라앉은 요새나 구조물을 연상시키는 지형 디자인으로, 물웅덩이나 해안선 테마가 전반적으로 느껴진다. 내부 맵 제목과 설명에 따르면 6명의 플레이어가 동시에 도전하는 구조로, 각 플레이어는 4방향에서 끊임없이 밀려드는 적 유닛을 상대로 최대한 오랫동안 버텨야 한다. ‘Dont Let 1 unit make it to the end’라는 설명은 적 유닛이 맵 끝까지 도달하지 못하게 막아야 한다는 핵심 승리 조건을 강조하며, ‘Good Luck’과 ‘Created by: The_[)ark_1’이라는 제작자 멘트는 맵의 도전적 분위기와 커뮤니티적 맥락을 함께 담고 있다. 이 맵의 가장 큰 특징은 4방향으로 나뉜 symmetrical한 구조에 있다. 맵 가운데에 위치한 플레이어 본진은 사방에서 적 유닛이 몰려오는 교차로 역할을 하며, 각 방향의 입구와 통로는 좁고 긴 형태를 띠어 방어 전술을 짜기 쉽도록 설계되어 있다. 사막 타일셋을 사용한 디자인은 건조한 느낌을 주지만, 맵 제목의 ‘썬킨’이 시사하듯 물기운이 느껴지는 디테일(예: 수면 효과나 해안선)이 곳곳에 배치되어 atmospherical한 분위기를 연출한다. 방어에 성공하면 플레이어는 추가 자원을 획득하거나 방어 시설물을 강화할 수 있는 기회가 주어지는 것으로 보이며, 이는 맵의 긴장감을 높이는 요소로 작용한다. 플레이어는 초반부터 끊임없이 몰려드는 저글링, 히드라리스크, 울트라리스크 등 중장거리 유닛과 근접 유닛의 혼합 공격을 상대해야 한다. 방어 라인을 구축하기 위해 mineral을 확보하고, 테란의 경우 벙커와 터렛, 저그의 경우 성큰 콜로니와 스포어 콜로니, 프로토스의 경우 실드 배터리와 포톤 캐논을 적절히 배치하는 전략이 요구된다. 맵의 symmetrical한 구조는 모든 플레이어에게 동일한 방어 난이도를 제공하며, 팀 플레이보다는 각자의 판단력이 승패를 가르는 1인용 경쟁형 디펜스로 분류된다. 특히 ‘4 way’라는 제목에서 알 수 있듯이, 4방향의 공격 루트가 동시에 진행되므로 한 방향에만 집중했다가는 다른 방향에서 적 유닛이 밀고 들어오기 때문에 균형 잡힌 자원 관리와 유닛 배치 타이밍이 무엇보다 중요하다. 이 맵의 가장 큰 매력은 지속적인 긴장감과 도전 정신에 있다. 아무리 강력한 방어라인을 구축했다고 해도 한순간의 실수로 적 유닛이 본진 끝까지 도달할 수 있으며, 이는 플레이어에게 끊임없는 긴장감을 유지하게 만든다. 또한 symmetrical한 구조 덕분에 다양한 전략을 시도해 볼 수 있으며, 반복 플레이를 통해 자신에게 맞는 최적의 방어 전술을 찾을 수 있다는 점도 장점이다. 초보자는 기본적인 방어 라인 구축에 집중해야 하며, 숙련자는 자원 관리와 유닛 스웜 컨트롤을 통해 더 긴 시간 생존하는 것에 도전할 수 있다. 단, 맵 특성상 적 유닛의 난이도가 높아질수록 방어 난이도가 급격히 증가하므로, 초반 자원 수급과 방어 시설물의 밀집도가 승패를 좌우할 가능성이 높다. 이 맵을 플레이하기 전에는 반드시 맵의 symmetrical한 구조와 4방향의 공격 루트를 숙지하고, 각 종족별로 효과적인 방어 전략을 미리 숙지하는 것이 중요하다. 또한, mineral 확보와 유닛 업그레이드 타이밍을 놓치지 않도록 해야 한다. 특히, 프로토스의 경우 실드 배터리의 효율적인 활용과 포톤 캐논의 밀집도가, 테란의 경우 터렛의 설치 위치와 벙커의 효율적인 사용이 승패를 가를 수 있으므로, 종족별 특성을 충분히 이해하고 있어야 한다. 이 맵은 혼자서 또는 소규모 팀으로도 즐길 수 있지만, 각자의 플레이 스타일에 따라 난이도가 크게 달라질 수 있으므로, 자신에게 맞는 전술을 찾는 과정이 게임의 핵심이라고 할 수 있다. This Brood War custom map, 'Sunken 4 Way Advanced FIX,' is a classic UMS defense title where players must survive relentless waves of enemies approaching from four cardinal directions. The map's 'Sunken' title suggests a submerged fortress or coastal theme, reinforced by its desert tileset that incorporates subtle water effects and shoreline details. As indicated in the internal title and description, the game is designed for six players competing simultaneously, each tasked with preventing even a single enemy unit from reaching the end of the map—a clear win condition emphasizing endurance and strategic planning. The map's symmetrical layout is its defining feature, with the central player base serving as a crossroads for attacks coming from all directions. Each of the four pathways narrows into tight corridors, facilitating the creation of choke points and defensive chokeholds. Players must manage resources to construct defensive structures such as Terran bunkers and turrets, Zerg sunken colonies and spore colonies, or Protoss photon cannons and shield batteries. The balanced design ensures no player has an inherent advantage, making it a competitive solo or small-team challenge. The core appeal lies in the map's ability to sustain tension and challenge through its relentless enemy waves. Even with a well-established defense, a single lapse can allow enemies to breach the line, forcing players to maintain constant vigilance. The symmetrical structure encourages experimentation with various defensive strategies, allowing players to refine their tactics through repeated attempts. Beginners should focus on basic structure placement, while advanced players can experiment with resource management and swarm control to extend survival time. However, the difficulty ramps up significantly as enemy waves intensify, making early resource gathering and defense positioning critical to success. Before diving into the game, players should familiarize themselves with the map's symmetrical layout and the four directional attack routes. Understanding race-specific defensive strategies is essential—Protoss players must optimize shield battery placement, Terran players need efficient turret positioning, and Zerg players should focus on sunken and spore colony density. The map is designed for solo or small-team play, though individual playstyles can significantly impact difficulty. Ultimately, the key to mastering 'Sunken 4 Way Advanced FIX' lies in adapting to its high-pressure environment and developing a personalized defensive strategy that balances resource efficiency with structural resilience.
최근 등록된 맵
새로 추가된 파일과 버전을 확인하세요.
썬킨 4웨이 어드밴스드 FIX (Sunken 4 Way Advanced FIX)
스타크래프트 브루드워의 대표적인 유즈맵 중 하나인 ‘썬킨 4웨이 어드밴스드 FIX’는 4개의 방향에서 몰려오는 적을 방어하며 생존을 도모하는 컴까기 디펜스 장르의 맵이다. 맵 제목에서 알 수 있듯이 ‘썬킨(Sunken)’은 가라앉은 요새나 구조물을 연상시키는 지형 디자인으로, 물웅덩이나 해안선 테마가 전반적으로 느껴진다. 내부 맵 제목과 설명에 따르면 6명의 플레이어가 동시에 도전하는 구조로, 각 플레이어는 4방향에서 끊임없이 밀려드는 적 유닛을 상대로 최대한 오랫동안 버텨야 한다. ‘Dont Let 1 unit make it to the end’라는 설명은 적 유닛이 맵 끝까지 도달하지 못하게 막아야 한다는 핵심 승리 조건을 강조하며, ‘Good Luck’과 ‘Created by: The_[)ark_1’이라는 제작자 멘트는 맵의 도전적 분위기와 커뮤니티적 맥락을 함께 담고 있다. 이 맵의 가장 큰 특징은 4방향으로 나뉜 symmetrical한 구조에 있다. 맵 가운데에 위치한 플레이어 본진은 사방에서 적 유닛이 몰려오는 교차로 역할을 하며, 각 방향의 입구와 통로는 좁고 긴 형태를 띠어 방어 전술을 짜기 쉽도록 설계되어 있다. 사막 타일셋을 사용한 디자인은 건조한 느낌을 주지만, 맵 제목의 ‘썬킨’이 시사하듯 물기운이 느껴지는 디테일(예: 수면 효과나 해안선)이 곳곳에 배치되어 atmospherical한 분위기를 연출한다. 방어에 성공하면 플레이어는 추가 자원을 획득하거나 방어 시설물을 강화할 수 있는 기회가 주어지는 것으로 보이며, 이는 맵의 긴장감을 높이는 요소로 작용한다. 플레이어는 초반부터 끊임없이 몰려드는 저글링, 히드라리스크, 울트라리스크 등 중장거리 유닛과 근접 유닛의 혼합 공격을 상대해야 한다. 방어 라인을 구축하기 위해 mineral을 확보하고, 테란의 경우 벙커와 터렛, 저그의 경우 성큰 콜로니와 스포어 콜로니, 프로토스의 경우 실드 배터리와 포톤 캐논을 적절히 배치하는 전략이 요구된다. 맵의 symmetrical한 구조는 모든 플레이어에게 동일한 방어 난이도를 제공하며, 팀 플레이보다는 각자의 판단력이 승패를 가르는 1인용 경쟁형 디펜스로 분류된다. 특히 ‘4 way’라는 제목에서 알 수 있듯이, 4방향의 공격 루트가 동시에 진행되므로 한 방향에만 집중했다가는 다른 방향에서 적 유닛이 밀고 들어오기 때문에 균형 잡힌 자원 관리와 유닛 배치 타이밍이 무엇보다 중요하다. 이 맵의 가장 큰 매력은 지속적인 긴장감과 도전 정신에 있다. 아무리 강력한 방어라인을 구축했다고 해도 한순간의 실수로 적 유닛이 본진 끝까지 도달할 수 있으며, 이는 플레이어에게 끊임없는 긴장감을 유지하게 만든다. 또한 symmetrical한 구조 덕분에 다양한 전략을 시도해 볼 수 있으며, 반복 플레이를 통해 자신에게 맞는 최적의 방어 전술을 찾을 수 있다는 점도 장점이다. 초보자는 기본적인 방어 라인 구축에 집중해야 하며, 숙련자는 자원 관리와 유닛 스웜 컨트롤을 통해 더 긴 시간 생존하는 것에 도전할 수 있다. 단, 맵 특성상 적 유닛의 난이도가 높아질수록 방어 난이도가 급격히 증가하므로, 초반 자원 수급과 방어 시설물의 밀집도가 승패를 좌우할 가능성이 높다. 이 맵을 플레이하기 전에는 반드시 맵의 symmetrical한 구조와 4방향의 공격 루트를 숙지하고, 각 종족별로 효과적인 방어 전략을 미리 숙지하는 것이 중요하다. 또한, mineral 확보와 유닛 업그레이드 타이밍을 놓치지 않도록 해야 한다. 특히, 프로토스의 경우 실드 배터리의 효율적인 활용과 포톤 캐논의 밀집도가, 테란의 경우 터렛의 설치 위치와 벙커의 효율적인 사용이 승패를 가를 수 있으므로, 종족별 특성을 충분히 이해하고 있어야 한다. 이 맵은 혼자서 또는 소규모 팀으로도 즐길 수 있지만, 각자의 플레이 스타일에 따라 난이도가 크게 달라질 수 있으므로, 자신에게 맞는 전술을 찾는 과정이 게임의 핵심이라고 할 수 있다. This Brood War custom map, 'Sunken 4 Way Advanced FIX,' is a classic UMS defense title where players must survive relentless waves of enemies approaching from four cardinal directions. The map's 'Sunken' title suggests a submerged fortress or coastal theme, reinforced by its desert tileset that incorporates subtle water effects and shoreline details. As indicated in the internal title and description, the game is designed for six players competing simultaneously, each tasked with preventing even a single enemy unit from reaching the end of the map—a clear win condition emphasizing endurance and strategic planning. The map's symmetrical layout is its defining feature, with the central player base serving as a crossroads for attacks coming from all directions. Each of the four pathways narrows into tight corridors, facilitating the creation of choke points and defensive chokeholds. Players must manage resources to construct defensive structures such as Terran bunkers and turrets, Zerg sunken colonies and spore colonies, or Protoss photon cannons and shield batteries. The balanced design ensures no player has an inherent advantage, making it a competitive solo or small-team challenge. The core appeal lies in the map's ability to sustain tension and challenge through its relentless enemy waves. Even with a well-established defense, a single lapse can allow enemies to breach the line, forcing players to maintain constant vigilance. The symmetrical structure encourages experimentation with various defensive strategies, allowing players to refine their tactics through repeated attempts. Beginners should focus on basic structure placement, while advanced players can experiment with resource management and swarm control to extend survival time. However, the difficulty ramps up significantly as enemy waves intensify, making early resource gathering and defense positioning critical to success. Before diving into the game, players should familiarize themselves with the map's symmetrical layout and the four directional attack routes. Understanding race-specific defensive strategies is essential—Protoss players must optimize shield battery placement, Terran players need efficient turret positioning, and Zerg players should focus on sunken and spore colony density. The map is designed for solo or small-team play, though individual playstyles can significantly impact difficulty. Ultimately, the key to mastering 'Sunken 4 Way Advanced FIX' lies in adapting to its high-pressure environment and developing a personalized defensive strategy that balances resource efficiency with structural resilience.
랜덤 캣 앤 마우스 정글! (Random Cat n Mouse Jungle!)
스타크래프트 브루드워의 숨은 재미 중 하나인 ‘고양이와 쥐’는 predator와 prey의 대결 구도를 재미있게 재해석한 유즈맵이다. <Random Cat n Mouse Jungle!>은 이름 그대로 야생의 정글을 배경으로 고양이와 쥐가 무작위 배치된 맵으로, 플레이어는 각각 고양이와 쥐 진영 중 하나를 선택해 전투를 펼친다. 맵 중앙의 넓은 평지에는 무작위로 생성되는 쥐 굴이 위치하며, 고양이 진영은 이 굴을 파괴해 쥐를 모두 제거하는 것이 주요 목표로 보인다. 반면 쥐 진영은 굴을 방어하거나 고양이의 공격을 피하면서 살아남는 데 집중해야 한다. 맵의 특징은 무작위 배치 시스템으로, 각 플레이어의 시작 위치와 쥐 굴의 위치는 매 게임마다 달라진다. 이는 전략의 다양성을 극대화하며, 특히 초보자와 숙련자 간의 체감 난이도 차이가 크다는 점에서 흥미로운 요소로 작용한다. 맵의 디자인 자체는 단순하지만, 무작위 배치와 생존/파괴라는 단순한 목표가 ‘누가 더 잘 숨고, 공격하고, 방어하는가’라는 긴장감을 끊임없이 유지한다. 추천 대상은 전략적 사고와 반사신경을 동시에 요구하는 맵을 좋아하는 플레이어들로, 특히 고양이와 쥐의 생태적 대결을 즐기는 유저들에게 적합할 것으로 보인다. 플레이 전에는 무작위 배치의 영향을 받으므로, 각 진영의 특성과 맵의 주요 지형(굴 위치, 돌출부, 시야)을 미리 확인하는 것이 중요하다. 또한, 쥐 굴의 방어 및 파괴 타이밍을 잘 계산해야만 승리를 이끌어낼 수 있다. 맵의 난이도는 중상으로 평가되며, 팀 플레이보다는 개인전이나 1:1 대결에 더 어울리는 구조다. 다만, 7인의 플레이가 가능한 구조이지만, 실질적인 전략적 깊이는 4~6인 전에서 가장 빛을 발할 것으로 추정된다. 맵의 플레이 시간은 개인전 기준으로 15~30분 내외로 예상되며, 팀전에서는 약간 더 길어질 수 있다. 맵의 밸런스는 무작위 배치의 공정성에 달려 있지만, 대체로 쥐 진영이 조금 더 유리한 것으로 보인다. 그러나 이는 플레이어의 숙련도에 따라 얼마든지 뒤집힐 수 있는 부분이다. 마지막으로, 맵의 제목에 포함된 ‘Random’이라는 단어가 시사하듯, 이 맵의 핵심은 예측 불가능한 요소와 전략적 유연성에 있다. 고정적인 맵이 아니라면 매번 새로운 경험을 제공한다는 점에서 재플레이 가치가 매우 높은 작품이다. "Cat and Mouse" in *StarCraft: Brood War* is one of the hidden gems that reimagines the classic predator-prey dynamic in a fun way. *<Random Cat n Mouse Jungle!>* lives up to its name by placing players in a wild jungle setting where cats and mice are randomly positioned at the start. Each player chooses to be either a cat or a mouse and engages in battle. At the center of the map lies a wide open plain where mouse burrows spawn randomly. The cats' main objective is to destroy these burrows to eliminate all the mice, while the mice must defend their burrows or evade the cats to survive. The map’s standout feature is its random placement system—both players' starting positions and the burrows' locations change every game, maximizing strategic variety. This also creates a noticeable skill gap between beginners and veterans, making it an intriguing challenge. Though the map’s design is simple, the core mechanics of survival and destruction create constant tension over who can hide better, attack more effectively, or defend smarter. It’s ideal for players who enjoy maps requiring both quick reflexes and strategic thinking, especially those who appreciate the ecological showdown between cats and mice. Before playing, keep in mind that random placement plays a big role, so familiarizing yourself with each faction’s strengths and key terrain features (burrow locations, high ground, and sightlines) is crucial. Timing your burrow defenses or attacks is also vital for securing victory. The difficulty is rated as moderate, and the map works best in 1v1 or solo matches rather than team play, though it can support up to seven players. However, the real strategic depth shines in games with four to six players. For solo matches, expect a playtime of 15 to 30 minutes, with team games potentially running a bit longer. Balance depends heavily on the fairness of the random placement, though mice generally have a slight edge—but this can shift entirely based on player skill. As the word "Random" in the title suggests, the map’s core appeal lies in its unpredictability and the need for flexible strategies. Since no two games are the same, it offers high replay value and fresh experiences every time you play.
2003 터렛 디펜스 (2003 Turret Defense)
스타크래프트: 브루드워의 고전 디펜스 장르 유즈맵인 <2003 터렛 디펜스>는 오랜 시간 동안 fans 사이에서 사랑받아 온 맵을 현대적으로 재단장한 작품이다. 맵의 중앙에는 거대한 적 웨이브가 밀려오는 구조로, 플레이어는 건설 가능한 터렛을 배치하여 방어선을 구축해야 한다. 이미지 상으로는 사막 지형에 배치된 터렛 자리와 중앙 통로, 그리고 웨이브가 몰려오는 방향을 확인할 수 있다. 맵의 특징은 단순한 방어가 아니라 일정 주기로 밀려오는 적군을 efficiently 처리하며 최대한 오래 버티는 생존 게임이라는 점이다. 초보 플레이어부터 숙련자까지 즐길 수 있도록 난이도 조절이 가능하며, 특히 건설 가능한 터렛의 종류와 배치 전략이 중요하다. 맵의 흐름은 웨이브 사이의 간격을 활용해 자원을 모으고, 강력한 터렛을 배치하는 타이밍을 잡아야 한다. 추천 대상은 디펜스 장르를 좋아하는 유저들로, 특히 타워 디펜스와 유사한 재미를 느끼고 싶은 이들에게 적합하다. 플레이 전에는 맵의 배치 구조와 터렛의 종류, 웨이브의 패턴을 미리 숙지하는 것이 중요하며, 초반에는 방어선을 유지하는 데 집중하고 후반으로 갈수록 공격적인 배치로 전환하는 전략이 필요하다. 맵의 재구성 덕분에 그래픽도 깔끔해졌으며, 사막 테마 덕분에 몰입감도 높은 편이다. 다만, 적의 웨이브가 밀려오는 시점이 제때 파악되지 않으면 방어선이 무너지기 쉽다는 점을 주의해야 한다. StarCraft: Brood War's classic defense genre custom map, *2003 Turret Defense*, is a modernized remake of a long-beloved title among fans. The map features a central structure where massive enemy waves surge forward, and players must strategically place constructible turrets to build their defenses. Visually, you can see turret positions scattered across a desert terrain, a central passage, and the direction from which waves approach. Unlike simple tower defense, this is a survival game where players must efficiently eliminate waves that arrive at set intervals while enduring as long as possible. The map offers adjustable difficulty to cater to both beginners and veterans, with turret variety and placement strategies playing a crucial role. Players should use the intervals between waves to gather resources and time their placement of powerful turrets. It’s ideal for fans of the defense genre, especially those who enjoy the mechanics of tower defense games. Before playing, familiarize yourself with the map layout, available turrets, and wave patterns. Early on, focus on maintaining a solid defense, then shift to more aggressive placements as the game progresses. The remake also boasts cleaner visuals, and the desert theme enhances immersion. However, be cautious—if you fail to recognize when waves are approaching, your defenses may crumble quickly.
우주에서 살아남기 1.1 (Escape in Space 1.1)
‘우주에서살아남기 1.1ver’이라는 제목의 이 맵은 말 그대로 우주 환경에서 생존을 목표로 하는 서바이벌 형식의 스타크래프트 브루드워 유즈맵이다. 넓은 우주 공간을 배경으로 펼쳐지는 맵의 중앙에는 거대한 행성이 자리 잡고 있으며, 주변에는 소행성 지대와 우주 정거장, 그리고 다수의 자원 지대가 분포되어 있다. 게임은 주로 행성 표면이나 우주 정거장 내에서 진행되며, 플레이어는 제한된 자원과 건물을 활용해 적의 공격과 혹독한 환경으로부터 살아남아야 한다. 맵 곳곳에 배치된 소행성들은 무작위로 이동하거나 파괴되면서 전략적 요소를 추가하며, 플레이어는 이를 피해 건설하거나 자원을 채취해야 한다. 건설 가능한 건물들은 테란 스타일의 커맨드 센터와 서플라이 디팟, 그리고 테크 트리 건물들로 구성되어 있으며, 테란의 유닛 생산 체계를 따르고 있다. 그러나 이 맵의 핵심은 단순히 자원을 모아 유닛을 생산하는 데 있지 않다. 행성 주변을 돌며 시시각각 변하는 소행성의 움직임, 행성 표면의 제한된 공간, 그리고 우주 공간의 특성상 시야 확인이 어려운 점 등이 플레이어를 긴장감으로 몰아넣는다. 특히 행성 표면은 넓지 않지만, 소행성 충돌이나 적의 기습 공격에 노출되기 쉬운 구조로 설계되어 있어 신속한 판단과 방어가 요구된다. 게임의 진행 방식은 크게 세 가지로 나뉠 수 있다. 첫째, 행성 내의 자원을 확보해 건물을 짓고 병력을 양성하는 단계, 둘째, 소행성이나 적의 공격을 방어하며 자원을 보호하는 단계, 셋째, 행성을 벗어나 우주 공간으로 진출해 추가 자원을 확보하거나 적을 제압하는 단계다. 맵의 가장자리에는 우주 공간이 펼쳐져 있으며, 이곳에는 소행성이나 운석이 무작위로 출현해 자원 확보 또는 방해 요인으로 작용한다. 또한, 맵의 일부 구역은 행성 표면과 우주 정거장이 연결되어 있어 기동성을 높이는 데 도움이 된다. 이 맵의 백미는 바로 ‘소행성 시스템’이다. 소행성들은 무작위로 움직이며, 때로는 행성 표면이나 우주 정거장에 충돌해 구조물을 파괴하기도 한다. 플레이어는 이를 예측하고 대비해야 하며, 때로는 소행성을 파괴해 자원을 확보하는 전략도 가능하다. 이러한 시스템은 맵의 긴장감을 극대화하며, 단순하게 자원과 병력만 모아 승리하는 것이 아니라, 실시간으로 변하는 환경을 읽고 대응하는 능력이 요구된다. 또한, 맵 중앙의 거대한 행성은 구조물의 배치와 자원 확보를 제한하는 요소로 작용해, 플레이어 간의 위치 선정이 매우 중요하다. 추천하는 플레이 대상은 실시간 전략 게임을 좋아하고, 긴장감 넘치는 서바이벌 환경을 즐기는 유저들이다. 특히, 스타크래프트의 기본 메커니즘을 알고 있으면서도 새로운 변수를 즐기는 플레이어에게 적합하다. 초보자의 경우, 맵의 복잡한 시스템과 소행성의 움직임에 적응하기 어려울 수 있으니, 먼저 연습 모드나 튜토리얼이 있는 버전을 찾아보는 것이 좋다. 또한, 팀 플레이를 지원한다면, 팀원 간의 역할 분담이 중요해지며, 자원 확보, 방어, 공격의 균형을 맞추는 것이 관건이다. 마지막으로, 이 맵은 꾸준한 업데이트와 밸런스 패치로 개선될 가능성이 있으니, 최신 버전을 다운로드해 플레이하는 것이 좋다. 플레이 전 반드시 확인해야 할 포인트는 다음과 같다. 첫째, 소행성의 움직임과 충돌 패턴을 숙지해야 한다. 둘째, 행성 표면과 우주 정거장의 구조적 특징을 파악해 건설 위치를 신중히 선택해야 한다. 셋째, 자원 확보와 방어의 균형을 맞추는 전략을 세워야 한다. 넷째, 맵의 가장자리로 진출해 추가적인 기회를 노릴 것인지, 아니면 행성 내에 집중할 것인지 결정해야 한다. 마지막으로, 팀 플레이 시에는 팀원 간의 의사소통을 원활히 해야 한다. 이러한 요소들을 염두에 두고 플레이한다면, ‘우주에서살아남기 1.1ver’는 단순한 서바이벌 맵을 넘어, 전략과 긴장감이 조화된 색다른 경험을 제공할 것이다. This map, titled *"Surviving in Space 1.1ver,"* is a survival-style *StarCraft: Brood War* custom map where the goal is to stay alive in a harsh space environment. Set against a vast cosmic backdrop, the map features a massive planet at its center, surrounded by asteroid fields, space stations, and scattered resource zones. Most of the action takes place on the planet’s surface or within space stations, where players must use limited resources and buildings to fend off enemy attacks and survive the unforgiving conditions. Scattered throughout the map are asteroids that move randomly or can be destroyed, adding a strategic layer to the gameplay. Players must navigate around them when constructing buildings or gathering resources. The buildable structures follow the Terran faction’s command center, supply depot, and tech tree system, but the map’s true challenge lies beyond simple resource management and unit production. The ever-shifting asteroid movements, confined space on the planet’s surface, and the difficulty of scouting in open space create constant tension. The planet’s surface, though not overly spacious, is designed to be vulnerable to asteroid collisions or enemy ambushes, demanding quick decision-making and strong defensive play. The gameplay is divided into three main phases. First, securing resources on the planet to construct buildings and train units. Second, defending against asteroid impacts or enemy assaults while protecting gathered materials. Third, venturing beyond the planet into open space to claim additional resources or engage enemies. The map’s edges lead into the void of space, where asteroids and meteors appear randomly, serving as either valuable resources or obstacles. Some areas connect the planet’s surface to space stations, enhancing mobility. The standout feature of this map is its **asteroid system**. These celestial bodies move unpredictably and can crash into the planet’s surface or space stations, destroying structures in their path. Players must anticipate these movements and adapt accordingly—sometimes even destroying asteroids to harvest resources. This dynamic system heightens the map’s tension, shifting the focus from mere resource accumulation to real-time environmental awareness and adaptability. The central planet also acts as a limiting factor, restricting building placement and resource access, making strategic positioning crucial. This map is best suited for players who enjoy real-time strategy games and thrive in high-pressure survival environments. It’s especially appealing to those familiar with *StarCraft*’s core mechanics but eager to tackle new variables. Beginners may struggle with the map’s complex systems and unpredictable asteroid behavior, so practicing in a tutorial or training mode is recommended. If playing in teams, coordination is key—balancing resource gathering, defense, and offense is essential for success. Since the map is likely to receive ongoing updates and balance patches, downloading the latest version is advisable for the best experience. Before playing, keep these key points in mind: First, study the asteroid movement patterns and collision risks. Second, understand the structural differences between the planet’s surface and space stations to choose safe construction spots. Third, balance resource collection with defensive strategies. Fourth, decide whether to focus on the planet’s interior or expand into the outer space for additional opportunities. Lastly, in team play, maintain clear communication with teammates. With these considerations in mind, *"Surviving in Space 1.1ver"* offers more than just a survival challenge—it delivers a unique blend of strategy and tension that elevates it beyond a typical custom map.
맵 선택 가이드
태그는 맵의 핵심 특징을 빠르게 설명하지만 제작 버전마다 규칙이 다를 수 있습니다. 상세 설명에서 권장 인원, 난이도, 플레이 시간과 버전을 함께 확인한 뒤 다운로드하세요.