
사막 테마 스타크래프트 맵 모음
'사막 테마' 태그가 등록된 맵을 모았습니다. 장르 하나로 찾기 어려운 플레이 방식, 난이도와 특징을 중심으로 인기 맵과 최신 맵을 비교해 보세요.
- 등록 맵
- 98개
- 누적 다운로드
- 8
- 누적 조회
- 3,798
인기 맵
다운로드와 조회 반응이 높은 맵입니다.
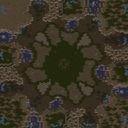
태도 SE 1.91 (Attitude SE 1.91)
스타크래프트 브루드워의 고전 밀리 맵 'Attitude SE 1.91'은 4인용 맵으로, 사막 테마의 넓은 평지 위에서 펼쳐지는 치열한 전투를 즐길 수 있는 명작으로 평가받습니다. 맵의 중앙에는 넓은 개활지가 펼쳐져 있어 빠른 전투가 가능하며, 양 측 진영은 좌우로 대칭을 이루며 배치되어 있습니다. 각 진영에는 미네랄과 베스핀 가스가 풍부하게 배치되어 있어 자원 수급이 원활하고, 건물을 짓기에도 적합한 공간이 확보되어 있습니다. 맵의 가장 큰 특징은 입구와 출구가 상대적으로 넓고 평탄하다는 점으로, 탱크나 벌처 같은 유닛을 활용한 기동전이나 시즈 탱크의 포격전을 펼치기에 최적화되어 있습니다. 또한, 맵의 가장자리로 갈수록 지형이 점점 높아지며 바위가 등장하는데, 이 지역은ucker나 러커 같은 지상 유닛을 배치하기 어려운 구조로 되어 있어 상대방의 러시 방어를 위한 요충지가 될 수 있습니다. 맵의 밸런스는 비교적 안정적이지만, 중앙 개활지에서 벌어지는 전투에서 승리하는 쪽이 게임을 쉽게 이끌어나갈 수 있어 초반 러시나 타이밍 러시를 노리는 플레이가 중요합니다. 또한, 맵의 넓이 때문에 오버로드나 드랍쉽을 활용한 후방 교란이 유용하게 활용될 수 있으며, 상대방의 mineral line을 노리거나 mineral line에 위치한 SCV를 견제하는 플레이가 승리를 좌지우지할 수 있습니다. 초보자부터 숙련자까지 즐길 수 있는 밸런스 좋은 맵으로, 특히 테란과 프로토스의 조합이 강세를 보이는 맵으로 알려져 있습니다. 플레이 전에는 자원 분배와 초반 러시 타이밍을 carefully 계획하는 것이 중요하며, 상대방의 빌드 오더를 읽고 그에 맞게 대응하는 것이 관전 포인트입니다. 이 맵은 스타크래프트의 밀리 대전 문화에서 오랫동안 사랑받아 온 맵으로, 특히 1.91 버전은 여러 번의 밸런스 패치를 거쳐 안정적인 플레이 환경을 제공합니다. Attitude SE 1.91 is a classic 4-player melee map in StarCraft: Brood War, offering intense battles on a wide, desert-themed open field. The map features symmetrical starting positions on both sides, each with abundant mineral and vespene gas resources, making resource management and building placement straightforward. The most notable feature is the wide, flat entrances and exits, which are ideal for tank or vulture-based mobility or siege tank sniping. The terrain gradually rises near the edges, with rocks that make it difficult to deploy ground units like zerglings or hydralisks, serving as strategic choke points for defense. While the map is generally balanced, controlling the central open area can give a significant advantage, making early rushes or timing attacks crucial. The map's size also allows for effective use of overlords or dropships to disrupt the opponent's mineral lines or target SCVs. Suitable for both beginners and advanced players, this map is particularly favored for Terran and Protoss matchups. Before playing, careful planning of resource distribution and rush timing is essential, and adapting to the opponent's build order can be a key factor in victory. Popular in Brood War melee culture, version 1.91 has undergone multiple balance patches to ensure a stable and enjoyable playing experience.
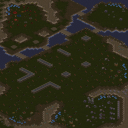
친숙한 적 (Familiar Enemy)
「[2]熟悉的敌人」은 스타크래프트: 브루드워의 유즈맵으로, 한 명의 플레이어가 인간 잔존 세력을 상대하는 디펜스 및 서바이벌 장르의 맵이다. 맵은 사막 타일셋으로 구성되어 있으며, 초반에는 저그의 본진 지역이 보이고, 이어지는 테란/프로토스 잔존 세력이 플레이어의 본진을 향해 끊임없이 공격을 퍼붓는 구조다. 맵의 중앙부는 비교적 평탄한 지형이지만, 곳곳에 바위와 협곡이 배치되어 있으며, 후방으로 갈수록 방어선이 좁아지는 특징을 보인다. 플레이어는 기본적으로 테란과 프로토스의 혼합된 병력을 지휘하게 되며, 각 유닛의 스킬과 조합을 통해 적의 공격을 막아내야 한다. 특히, 적의 공세는 초반에는 약하지만 시간이 지날수록 점점 강해지며, 후반에는 대규모의 고급 유닛들이 등장한다. 맵의 특징 중 하나는 '적응형 공세'로, 플레이어가 특정 유닛을 과도하게 사용하거나 방어선을 무너뜨리면 그 빈틈을 노리고 새로운 전략을 구사하는 적 AI가 등장한다는 점이다. 또한, 맵 곳곳에 숨겨진 보급품과 업그레이드 포인트가 배치되어 있어 장기전을 대비한 전략적 선택이 요구된다. 이 맵의 가장 큰 매력은 단일 플레이어의 긴장감과 전략적 깊이다. 한 명의 플레이어가 모든 것을 통제해야 하며, 실수 하나하나가 치명적으로 이어질 수 있다. 또한, 사막 테마의 시각적 조화와 함께, 적의 공격 패턴이 점차 변해가는 디자인 덕분에 플레이어는 끊임없이 새로운 전략을 고민해야 한다. 추천 대상은 스타크래프트의 디펜스 및 서바이벌 장르를 любить하는 플레이어, 혼자서 긴장감 있는 플레이를 즐기는 유저, 그리고 다양한 유닛 조합과 타이밍을 연습하고 싶은 초중급자들에게 적합하다. 다만, 초보자는 처음엔 공세에 밀려 당황할 수 있으니, 기본적인 테란/프로토스 유닛의 성능과 스킬을 숙지한 후 도전하는 것이 좋다. 플레이 전 반드시 확인해야 할 요소는 다음과 같다. 첫째, 맵의 중앙 지형과 방어선의 좁아지는 부분을 미리 파악하여, 주요據點(거점)을 어디에 둘 것인지 계획해야 한다. 둘째, 적은 초반에는 약하지만 후반으로 갈수록 강력해지므로, 초반 자원과 업그레이드에 충분한 투자를 해야 한다. 셋째, 숨겨진 보급품과 업그레이드 포인트를 찾는 방법을 미리 익혀두면, 후반 전투에서 큰 도움이 된다. 넷째, 적의 공격 패턴이 변한다는 점을 염두에 두고, 유닛 조합을 유동적으로 변경할 준비를 해야 한다. 이 맵은 스타크래프트의 유즈맵 역사에서 자주 언급되는 서바이벌 및 디펜스 장르의 대표작 중 하나로, 그만큼 플레이어의 집중력과 전략적 사고를 요구하는 작품이다. 특히, 한 명의 플레이어가 모든 것을 책임져야 한다는 점에서 '혼자서 모든 것을 해결해야 한다'는 성취감을 느낄 수 있으며, 적의 공격 패턴이 점차 변하는 디자인 덕분에 매번 새로운 도전이 된다. 사막 분위기의 시각적 아름다움과 함께, 긴장감 넘치는 전투가 계속되는 이 맵은 오랫동안 기억에 남는 경험을 선사할 것이다. This StarCraft: Brood War custom map, titled 「[2]熟悉的敌人」, falls under the defense and survival genre, where a single player faces relentless human remnant forces led by the Zerg. Set in a desert-themed tile, the map features a central open area surrounded by rocky terrain and narrow choke points, forcing strategic positioning from the outset. The enemy, composed of Terran and Protoss units, escalates their assaults over time, beginning with basic forces and progressing to high-tier compositions, including adaptive counter-strategies based on the player's weaknesses. The core gameplay revolves around managing limited resources, upgrading units, and exploiting hidden supply caches scattered across the map. Players must balance economy and defense, as early neglect can lead to overwhelming pressure in later stages. The AI's ability to adapt to the player's tactics adds depth, making each playthrough unique. The map's visual design, enhanced by the desert theme, complements the high-stakes tension of holding ground against an ever-increasing onslaught. Recommended for players who enjoy single-player survival challenges, those seeking to refine their Terran and Protoss unit control, and intermediate players looking to test their strategic adaptability. Beginners may find the early waves manageable, but the escalating difficulty demands prior familiarity with unit matchups and micro-management. Key preparation includes scouting the map's choke points, prioritizing early upgrades, and memorizing the locations of hidden upgrades to maximize efficiency in the late game. 「[2]熟悉的敌人」 stands as a testament to the creativity and depth of StarCraft custom maps, offering a tense, immersive experience where every decision counts. Its blend of strategic planning, adaptive enemy AI, and atmospheric desert design ensures replayability, making it a must-try for fans of survival and defense genres.
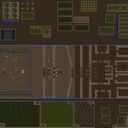
성 지키기 3 War of Epsilion
《성 지키기 3: War of Epsilion》은 스타크래프트 브루드워의 대표적인 디펜스형 유즈맵으로, ‘성 지키기’ 시리즈의 세 번째 작품이다. 이 맵은 사막 테마의 광활한 지형 위에 펼쳐지는 방어전으로, 7명의 플레이어가 각자의 캐릭터와 고유한 콤보, 속성을 활용해 끊임없이 몰려드는 적의 웨이브를 막아내야 한다. 내부 맵 제목과 설명에서 확인되는 ‘월오브 엡실리온(War of Epsilion)’이라는 명칭은, 제작자 Ankalagon이 네이버 닉네임 ‘꿈의낙원’을 통해 공개한 작품으로, 버그 제보 이메일까지 명시되어 있어 비교적 공식성이 있는Fanmade 맵으로 추정된다. 이 맵의 가장 큰 특징은 각 캐릭터별로 부여된 ‘콤보’와 ‘속성’ 시스템이다. 이를 통해 플레이어는 단순히 방어만을 하는 것이 아니라, 전략적으로 스킬을 조합하거나 속성에 따른 특수 효과를 활용해 공격과 방어의 균형을 맞춰야 한다. 예를 들어 특정 속성의 조합이 시너지를 일으켜 적의 공격을 더 효율적으로 방어하거나, 반대로 약점을 찌르는 콤보를 사용해 다수의 적을 한꺼번에 정리할 수 있다. 이러한 시스템은 디펜스 장르에 새로운 전략적 깊이를 더하며, 단순히 ‘버티기’에 그치지 않고 ‘능동적 방어’를 요구한다. 사막 지형의 넓은 맵은 적의 웨이브가 한 방향으로 밀려오는 구조로, 플레이어는 성 주변에 배치된 방어 건물과 유닛을 활용해 진격을 저지해야 한다. 특히 중앙의 성채를 중심으로 한 방어선은 게임의 핵심으로, 성채가 파괴되면 게임 오버가 되므로 신중한 자원 배분과 유닛 관리, 그리고 타이밍 감각이 요구된다. 맵의 광활한 규모는 한눈에 모든 상황을 파악하기 어렵게 만들지만, 반대로 넓은 시야를 활용한 전략적 배치와 시야 차단, 또는 복수의 진입로를 동시에 방어하는 다양한 전술이 가능하다는 장점도 있다. 《성 지키기 3: War of Epsilion》은 초보자에게는 다소 어려운 난이도를 가질 수 있지만, 콤보와 속성 시스템을 익히고 나면 전략적 즐거움이 배가되는 맵이다. 특히 같은 팀원과의 조율과 역할 분담을 통해 시너지를 발휘할 수 있는 팀플레이가 강제되므로, 혼자서는 해결하기 어려운 상황에서도 팀워크로 극복할 수 있는 장점이 있다. 또한, 지속적인 웨이브가 진행되므로 플레이 시간도 길어질 가능성이 높아, 긴장감을 유지하며 몰입할 수 있는 구조를 가지고 있다. 이 맵을 플레이하기 전에는 각 캐릭터의 콤보와 속성을 미리 숙지하고, 사막 지형의 주요 거점(예: 고지대, 좁은 길목)을 활용한 방어 전략을 계획하는 것이 중요하다. 또한, 성채 주변의 방어 건물 배치와 자원 관리(예: 미네랄, 가스)도 신중히 고려해야 한다. 특히 웨이브가 시작되기 전의 준비 단계에서 시간을 허비하지 않고 신속히 대비를 갖춰야 하며, 팀원과의 의사소통을 통해 역할 분담을 명확히 하는 것이 게임의 승패를 좌우할 수 있다. 이 맵은 디펜스 장르를 любить하는 플레이어뿐만 아니라, 전략적 사고와 팀플레이를 즐기는 유저에게 강력히 추천할 만한 작품이다. 《Star Defense 3: War of Epsilion》 is a renowned defense-style custom map in *StarCraft: Brood War*, serving as the third installment in the *Star Defense* series. The map features a vast desert-themed battlefield where seven players must defend against endless enemy waves, utilizing their unique characters, combos, and attributes. The title "War of Epsilion," found in the internal map description, suggests the map was released by the creator Ankalagon under the Naver username "꿈의낙원," with an official-looking bug report email included, indicating it is a relatively well-established fanmade map. The map’s standout feature is its combo and attribute system, which assigns each character distinct skills and elemental properties. Players aren’t just passively defending—they must strategically combine abilities or leverage attribute-based effects to balance offense and defense. For example, certain attribute synergies can enhance defensive efficiency, while well-timed combos can exploit enemy weaknesses to eliminate large groups at once. This system adds strategic depth beyond mere endurance, demanding "active defense" rather than passive resistance. The expansive desert terrain funnels enemy waves toward a single direction, forcing players to rely on defensive structures and units placed around the base to halt their advance. The fortress at the center serves as the game’s linchpin—its destruction triggers a game over, requiring careful resource allocation, unit management, and precise timing. While the map’s vast scale makes it difficult to grasp the full battlefield at a glance, it also enables diverse tactics, such as strategic positioning, vision control, or defending multiple entry points simultaneously. Though 《Star Defense 3: War of Epsilion》 may pose a challenge for beginners, mastering the combo and attribute systems unlocks deep strategic enjoyment. The map enforces teamwork, as players must coordinate roles and synergize to overcome obstacles that would be impossible alone. With continuous waves extending playtime, the structure maintains tension and immersion throughout. Before playing, it’s crucial to familiarize yourself with each character’s combos and attributes and plan defensive strategies around key desert terrain features, such as high ground or narrow chokepoints. Thoughtful placement of defensive buildings around the fortress and efficient resource management (minerals, gas) are also vital. Quick preparation before waves begin and clear role assignments through team communication can determine victory or defeat. This map is highly recommended not only for defense genre enthusiasts but also for players who enjoy strategic thinking and teamwork.
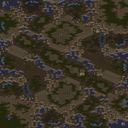
오디세이:RE 1.91 (Odyssey:RE 1.91)
스타크래프트 브루드워의 대형 유즈맵 ‘Odyssey:RE 1.91’은 8인용으로 설계된 대규모 컴까기(컴퓨터 상대) 맵으로, 사막 테마의 광활한 맵에서 펼쳐지는 한층 더 진화된 전투를 경험할 수 있다. 맵의 전체 크기는 3584x4096 타일로, 넓은 개활지와 복잡한 지형이 조화를 이룬 구조가 특징이다. 플레이어는 각자의 기지를 지키며 끊임없이 몰려드는 적군을 상대해야 하며, 맵 곳곳에 배치된 자원과 방어 시설이 전투의 성패를 좌우한다. 특히, 맵의 중앙과 외곽에 위치한 넓은 평야는 대규모 병력 이동을 가능케 하며, 협곡과 절벽은 전략적 우위를 제공하는 동시에 기동력을 제한하는 요소로 작용한다. 이 맵은 기본적인 컴까기 구조를 유지하면서도 맵의 규모와 디자인에서 상당한 발전이 느껴진다. 다양한 고저차와 장애물이 있는 지형은 단순한 공격 루트를 넘어 전략적 깊이를 더하며, 플레이어는 자원의 확보와 방어 시설의 배치, 그리고 적절한 병력 조합을 끊임없이 고민해야 한다. 맵의 난이도는 중간 정도로, 초보자와 숙련자 모두 즐길 수 있도록 설계되었으나, 넓은 맵을 활용한 대규모 전투는 숙련된 플레이어에게 더 큰 재미를 제공할 것으로 보인다. 또한, 맵의 사막 테마는 건조한 분위기와 탁 트인 시야를 제공하여 전투의 몰입감을 높인다. 이 맵을 플레이하기 위해서는 넓은 시야와 빠른 판단력이 요구되며, 특히 자원의 희소성과 병력의 관리 능력이 승패를 가를 수 있다. 맵의 복잡한 지형은 적군의 움직임을 예측하기 어렵게 만들기 때문에, 플레이어는 끊임없이 지형을 분석하고 자신의 전략을 유연하게 변화시켜야 한다. 또한, 맵 곳곳에 숨겨진 자원과 보너스 지역을 발견하는 것도 중요하며, 이를 위해 맵의 전체적인 구조를 숙지하는 것이 필수적이다. 추천 대상으로는 스타크래프트의 컴까기 맵을 즐겨온 플레이어와 넓은 맵에서의 전략적 전투를 선호하는 유저들이며, 특히 8인 대전이 가능한 환경에서 플레이하고자 하는 유저들에게 적합하다. 플레이 전에는 맵의 주요 자원 분포와 주요 루트를 먼저 파악하고, 방어 시설의 배치와 병력 조합을 미리 계획하는 것이 좋다. StarCraft: Brood War’s large-scale custom map *Odyssey:RE 1.91* is an 8-player melee (computer opponent) map where you can experience an evolved battle unfolding across a vast desert-themed landscape. The map spans 3,584 by 4,096 tiles, featuring a harmonious blend of open terrain and intricate geography. Players must defend their bases while fending off relentless waves of enemies, with resources and defensive structures scattered throughout the map determining the outcome of each engagement. The wide plains at the center and periphery facilitate large-scale troop movements, while canyons and cliffs offer strategic advantages while limiting mobility. While maintaining the core structure of a melee map, this title introduces noticeable improvements in scale and design. The varied elevation and obstacles transform the battlefield from a simple attack route into a deep, strategic experience. Players must constantly weigh resource collection, defensive positioning, and troop composition. Designed for intermediate difficulty, the map caters to both beginners and veterans, though its large-scale battles promise greater satisfaction for skilled players. The desert theme further enhances immersion with its dry atmosphere and expansive visibility. Success on this map demands sharp vision and quick decision-making, with resource scarcity and troop management often deciding victory or defeat. The complex terrain obscures enemy movements, forcing players to analyze the landscape and adapt their strategies dynamically. Scouting hidden resources and bonus areas is crucial, making familiarity with the map’s layout essential. Ideal for fans of Brood War’s melee maps and those who enjoy strategic battles on expansive terrain, it’s especially well-suited for players seeking an 8-player experience. Before diving in, study the key resource locations and main routes, and plan your defensive setups and troop compositions in advance.
메이즈 디펜스 6.2.4 (Maze Defense 6.2.4)
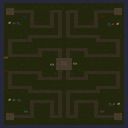
스타크래프트 브루드워의 인기 디펜스 유즈맵 시리즈인 ‘메이즈 디펜스’의 최신 버전인 6.2.4를 리뷰합니다. 이 맵은 사막 테마의 미로를 배경으로 몬스터가 플레이어 기지를 침입하지 못하도록 막아내는 것이 주된 목표입니다. 맵은 거대한 4096x4096 크기의 사막 지형으로 구성되어 있으며, 미로 형태의 길과 복도들이 복잡하게 배치되어 있습니다. 플레이어는 기지 주변에 방어 건물을 건설하고, 몬스터가 미로 내부를 통과하지 못하도록 길을 차단하거나 요격해야 합니다. 몬스터는 맵의 가장자리로부터 일정 주기로 출현하며, 플레이어의 기지까지 도달하지 못하게 해야 승리할 수 있습니다. 맵의 특징은 미로 구조를 활용한 방어 전략과 건물 배치의 중요성입니다. 괴물들이 미로를 통과하는 경로가 제한적이기 때문에, 플레이어는 입구와 복도마다 적절한 방어 건물을 배치해야 합니다. 또한 맵 곳곳에 흩어져 있는 보너스 아이템이나 추가 자원을 획득할 수 있어, 자원 관리와 건물 업그레이드도 전략의 핵심 요소로 작용합니다. 초보자부터 숙련자까지 즐길 수 있도록 난이도가 조절 가능한 구조로 설계되어 있지만, 복잡한 미로와 몬스터의 공격 패턴을 숙지하지 않으면 어려움을 느낄 수 있습니다. 특히 입구와 주요 길목에 방어 건물을 집중 배치하는 플레이가 중요합니다. 추천 대상은 디펜스 맵을 좋아하는 플레이어이며, especially 사막 테마와 미로 디펜스 장르를 선호하는 유저들에게 적합합니다. 사전 준비를 위해서는 맵의 주요 길목을 미리 확인하고, 방어 건물의 배치와 업그레이드 계획을 세워두는 것이 중요합니다. 또한, 몬스터의 공격 패턴을 분석하여 효율적인 방어 라인을 구축하는 것이 관건입니다. 맵을 플레이하기 전에는 건물과 유닛의 특성을 충분히 숙지하고, 맵의 구조를 미리 파악해두는 것이 좋습니다. 복잡한 미로 구조를 이해해야만 몬스터를 효과적으로 저지할 수 있으므로, 초반에는 맵 탐색에 집중하는 것도 좋은 전략입니다. 이 맵은 디펜스 장르의 classic한 재미와 전략적 깊이를 동시에 제공하며, 특히 미로 디펜스 특유의 긴장감과 성취감을 느낄 수 있습니다. StarCraft: Brood War’s popular defense custom map series *Maze Defense* has been updated to version 6.2.4. This map sets players against waves of monsters in a sprawling desert-themed maze, where the goal is to prevent the creatures from reaching your base. The terrain spans a massive 4096x4096 desert landscape filled with winding corridors and dead ends, forcing players to block or intercept the advancing foes before they breach the defenses. The map’s design emphasizes strategic building placement and maze navigation. Since monsters are funneled through predictable paths, players must carefully position defensive structures at choke points and intersections. Scattered throughout the maze are bonus items and resources that reward efficient resource management and allow for critical upgrades, adding another layer of strategy to each run. While the difficulty is adjustable to suit both beginners and veterans, the intricate maze and enemy attack patterns demand careful study—especially when prioritizing key entry points and critical pathways. This makes *Maze Defense 6.2.4* ideal for fans of defense maps, particularly those who enjoy desert themes and maze-based gameplay. To prepare, familiarize yourself with the maze layout, plan your defensive structures and upgrades, and analyze monster behavior to build an effective blockade. Understanding the map’s layout early on is crucial, so spending time exploring the maze before the first wave hits is a smart move. Combining classic defense mechanics with deep strategy, this version delivers the tension and satisfaction unique to maze defense, rewarding players who master its challenges.
Team Micro Legends 5
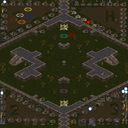
스타크래프트 브루드워의 팀 대전을 기반으로 한 유즈맵, ‘Team Micro Legends 5’는 ‘Team Micro Arena’라는 팀에서 제작한 아레나 스타일의 맵으로, 총 6명의 플레이어가 전투를 펼치는 것이 특징이다. 맵은 사막 타일셋을 기반으로 하며, 중앙에 위치한 넓은 평야와 그 주변을 둘러싼 언덕 지형이 주요 전투 공간으로 보인다. 맵의 구조는 대칭형으로 배치되어 있으며, 각 플레이어의 시작 지점은 맵의 모서리 부근으로 추정된다. 중앙 평야는 넓은 시야와 접근성을 제공하여 빠른 전투가 가능하도록 설계된 것으로 보이며, 언덕 지형은 방어와 시야 확보에 유리한 포지션을 제공하는 듯하다. 맵 이미지에서 확인되는 기지 건물과 건설로봇, serta 마우스 커서가 포인팅하는 지점 등을 종합해 볼 때, 이 맵은 아레나 스타일로 각 플레이어가 중앙 평야에서 교전하거나, 상대 기지를 파괴하는 방식으로 진행되는 것이 예상된다. 맵의 배경에 배치된 작은 건물들과 장식물들은 전투 시점을 방해하지 않으면서도 전투의 분위기를 살리는 역할을 하고 있다. 또한, 맵의 중앙에 위치한 별 모양의 장식은 시각적인 포인트로 기능하며, 전투의 중심을 상기시키는 역할을 한다. 이 맵은 빠른 전투와 전략적 포지셔닝을 중시하는 플레이어들에게 적합할 것으로 보이며, 팀원 간의 조율과 개별 플레이어의micro 컨트롤이 승패를 좌우할 가능성이 높다. 특히, 6인 대전이기 때문에 팀워크와 역할 분담이 중요할 것으로 예상되며, 맵의 대칭 구조는 각 플레이어에게 공정한 기회를 제공하는 듯하다. 플레이 전에는 각 플레이어의 시작 위치와 중앙 평야의 구조, 언덕 지형의 활용 가능성을 미리 숙지하고, 팀원과의 전략적 의사소통을 충분히 준비하는 것이 필요하다. 또한, 맵의 타일셋과 분위기가 사막을 배경으로 하고 있어, 건조한 황무지에서의 전투를 연상시키는 분위기를 제공할 것으로 보인다. 이 맵은 아레나 장르의 특성을 살려, 플레이어 간의 경쟁과 협력을 동시에 경험할 수 있는 구조로 설계된 것으로 판단된다. Team Micro Legends 5 is a custom StarCraft: Brood War map designed for team-based arena battles, developed by the Team Micro Arena clan. The map features a 6-player setup, with combat centered around a large central plain surrounded by hilly terrain. The symmetrical layout ensures balanced starting positions for all players, and the open battlefield allows for fast-paced engagements. The desert-themed tileset adds a distinct visual style, while the scattered structures and decorative elements in the background enhance the arena atmosphere without obstructing gameplay. The central star decoration serves as a focal point, guiding players toward the heart of the action. This map is ideal for players who enjoy strategic positioning, quick micro-management, and team coordination. The 6-player format demands strong teamwork and role specialization, as the symmetrical design ensures fair opportunities for all participants. Before playing, it is advisable to familiarize yourself with the starting positions, the layout of the central plain, and the strategic advantages of the hilly terrain. The desert setting evokes a sense of combat in a barren wasteland, adding an immersive touch to the arena experience. Overall, this map is structured to deliver intense competition and cooperation, embodying the essence of the arena genre in StarCraft: Brood War.
정사각형 전쟁 (cosa rara)
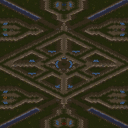
이 맵은 'cosa rara'라는 제목 그대로 네모 반듯한 맵 구조를 자랑하는 특이한 스타크래프트 브루드워 유즈맵이다. 내부 설명이 'una cosa cuadrada e.e'로 간단히 표현된 것처럼, 4096x4096의 거대한 정사각형 맵 중앙에는 넓은 평지가 펼쳐져 있으며, 그 주변으로 사막 타일셋에 걸맞은 잔디와 바위 지형이 배치되어 있다. 6인 플레이를 상정했다는 점에서 대규모 전투가 가능한 공간이지만, 맵의 정중앙을 가로지르는 넓은 가로수림과 구불구불한 도로가 시야를 가리며 전투가 벌어지는 주요 전장임을 암시한다. 맵의 대칭성과 넓은 개활지 덕분에 테란의 지상군이나 프로토스의 공중 유닛이 활약하기 좋은 환경을 제공하며, 특히 초반부터 중앙을 차지하기 위한 치열한 싸움이 예상된다. 사막 타일셋 특유의 건조한 분위기가 전투의 긴장감을 더해주지만, 맵의 네모반듯한 형태가 주는 인공적인 구조감은 플레이어들에게 색다른 경험을 선사할 것이다. 한 가지 주목할 점은 맵의 이름과 설명만으로는 장르를 명확히 유추하기 어렵다는 점이다. 내부 제목과 분류가 MELEE(밀리)로 되어 있지만, 넓은 개활지와 중앙 가로수림 구조는 디펜스나 컴까기와 같은 유즈맵 요소도 포함할 가능성이 있다. 플레이 전 미리 맵의 승리 조건이나 특수 트리거를 확인해 보는 것이 좋다. 이 맵을 처음 플레이하는 유저라면 넓은 시야와 중앙 전장 점령의 중요성을 숙지하고, 테란의 경우 초반 벙커링이나 프로토스의 경우 광전사 돌파 전략을 준비하는 것이 유리할 것으로 보인다. 또한, 6인 플레이를 고려할 때 팀플레이보다는 개별 플레이어가 활약할 수 있는 공간이 많아 보인다. 이 독특한 정사각형 맵에서 펼쳐질 전투가 어떻게 전개될지 궁금증을 자아낸다. This map, titled 'cosa rara', stands out with its strikingly square layout in StarCraft: Brood War custom maps. The internal description 'una cosa cuadrada e.e' translates to 'a square thing e.e', perfectly summarizing its unique 4096x4096 symmetrical design. The map features a vast central plain surrounded by desert-themed tilesets with grassy patches and rocky terrain, ideal for large-scale battles. The wide central road and dense tree lines create natural chokepoints that will likely become key battlegrounds. The symmetrical design and open terrain make it particularly suitable for Terran ground forces or Protoss air units. While classified as MELEE (standard multiplayer), the layout's strategic depth suggests it could easily accommodate UMS (user-made scenario) elements like defense mechanics or special triggers. Players should verify the victory conditions before starting, as the name and description don't clearly indicate the exact gameplay genre. New players might benefit from employing early-game strategies like Terran bunkering or Protoss zealot rushes, given the map's open terrain. The 6-player capacity favors individual performance over team play. The unusual square design promises a fresh tactical experience where controlling the central area will be crucial to victory.
골렘 리벨리션 v12.0 (Golem Revelation v12.0)
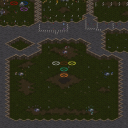
‘골렘 리벨리션 v12.0’은 사막 테마의 유즈맵으로, 거대한 골렘을 조종하며 진행하는 디펜스와 서바이벌 요소가 혼합된 맵이다. 맵 중앙에 위치한 넓은 평야와 그 주변을 에워싼 험준한 산맥, 그리고 곳곳에 흩어져 있는 골렘의 잔해가 인상적인 배경은 플레이어에게 신비로운 분위기를 전달한다. 특히 맵의 가장자리를 따라 배치된 오브젝트와 건물이 방어선을 형성하고 있어, 골렘이 침공해오는 적들을 막아내는 gameplay로 유도된다. 골렘을 제어하는 방식은 마치 RTS의 핵심 유닛을 다루듯 전략적인 움직임을 요구하며, 골렘의 체력과 공격력을 관리하는 것이 주요 포인트다. 또한, 맵 여기저기에 숨겨진 자원 포인트와 보너스 지역을 확보하는 것이 승리의 열쇠로 작용할 가능성이 높아 보인다. 이 맵의 가장 큰 특징은 골렘을 조종하는 플레이 방식에 있다. 골렘은 맵 중앙에 배치된 거대한 구조물을 중심으로 이동하며, 적의 침공을 방어하는 동시에 골렘을 강화하거나 업그레이드하는 시스템이 포함되어 있을 것으로 추정된다. 맵의 지형은 비교적 평탄한 가운데 몇몇 지점을 제어하는 것이 중요하며, 특히 고지대나 좁은 통로가 골렘의 기동성을 제한할 수 있어 전략적 위치 선정이 필수적이다. 또한, 골렘의 움직임과 공격 패턴은 맵의 지형에 큰 영향을 받으므로, 맵을 완벽히 숙지하고 있어야 원활한 플레이가 가능하다. 이 맵은 초보 플레이어보다는 골렘의 조작과 전략적 판단력이 필요한 중급 이상의 플레이어에게 적합할 것으로 보인다. 골렘을 조종하는 재미와 더불어 방어선을 구축하고 자원을 확보하는 재미도 쏠쏠할 것으로 예상되며, 특히 팀플레이가 가능한 맵이라면 협동 플레이의 묘미를 느낄 수 있을 것이다. 플레이 전에는 골렘의 조작법과 맵의 주요 포인트를 미리 숙지하고, 골렘의 체력과 마나 관리, 방어선을 구축하는 법을 숙지하는 것이 중요하다. 또한, 골렘의 공격 패턴과 적의 침공 루트를 미리 예측하여 대비를 하는 것이 승률을 높이는 데 도움이 될 것이다. Golem Revelation v12.0 is a unique UMS custom map set in a desert theme, blending defense and survival elements where players control a massive golem. The map features a vast central plain surrounded by rugged mountains and scattered golem remnants, creating an atmospheric backdrop. The edges of the map are lined with objects and buildings that form defensive lines, guiding players to repel invading enemies with their golem. Controlling the golem feels akin to managing a core RTS unit, requiring strategic movement and focus on health and attack power management. Additionally, hidden resource points and bonus areas scattered throughout the map likely play a crucial role in securing victory. The defining feature of this map is the golem control mechanic. The golem moves around the central structure, defending against enemy invasions while offering opportunities for upgrades and enhancements. The terrain is mostly flat, but controlling key positions, such as high ground or narrow passages, is vital as they can restrict the golem's mobility. The golem's movement and attack patterns are heavily influenced by the map's terrain, so mastering the layout is essential for smooth gameplay. This map is best suited for intermediate to advanced players who enjoy tactical golem control and strategic decision-making. The fun lies in both the golem's control mechanics and the process of building defenses and securing resources. If team play is supported, the cooperative aspect adds an extra layer of enjoyment. Before playing, it's important to familiarize yourself with the golem's control scheme, key map points, health and mana management, and defensive line construction. Predicting enemy invasion routes and preparing accordingly will significantly improve your chances of winning.
Merchants RPG 3: Empires
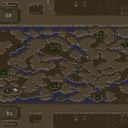
스타크래프트 브루드워의 대표적인 RPG 유즈맵인 ‘Merchants RPG 3: Empires’는 사막 테마의 넓은 맵에서 펼쳐지는 전략적 자원 관리와 전투가 조화롭게 어우러지는 작품이다. 맵은 총 6144x6144 크기의 거대한 사막 지형으로 구성되어 있으며, 플레이어는 각기 다른 세력으로 나뉘어 영토를 확장하고 자원을 확보하며 전투를 벌이는 방식으로 진행된다. 맵의 핵심은 자원 관리와 전략적 위치 선점으로, 초보자부터 숙련자까지 즐길 수 있는 입문용 RPG로 설계되었으나, 맵의 규모와 복잡한 시스템은 플레이어의 지속적인 전략 수립을 요구한다. 맵 곳곳에 scattered된 자원 광산과 보급로, 방어시설은 플레이어가Resource를 확보하고 영토를 확장하는 과정에서 중요한 선택지가 된다. 전투는 실시간으로 진행되며, 각 세력의 특성과 자원 상태에 따라 전투 전략이 달라지므로, 플레이어는 게임 내내 끊임없는 의사결정을 내려야 한다. 맵의 가장 큰 특징은 맵의 중앙부에 위치한 거대한 오아시스와 사막 요새로, 이 지역을 둘러싼 영토 전쟁은 맵의 승패를 좌우하는 핵심 요소로 작용한다. 또한, 맵의 다양한 지형지물(언덕, 협곡, 평원)은 전략적 후퇴와 기습, 방어선 구축에 영향을 미치므로, 플레이어는 지형을 활용한 전투 계획을 세우는 것이 중요하다. ‘Merchants RPG 3: Empires’는 단순히 전투만 있는 것이 아니라, 자원 관리와 영토 확장, 동맹과 적대 관계를 고려한 정치적인 요소까지 포함된 종합적인 전략 RPG로, 스타크래프트의 유즈맵 중에서도 손꼽히는 완성도로 평가받고 있다. 이 맵을 처음 플레이하는 유저는 맵의 자원 분포와 주요 거점을 빠르게 파악하는 것이 중요하며, 특히 초반 자원 확보와 중반 방어선 구축이 게임의 향방을 결정짓는 경우가 많다. 숙련된 플레이어는 맵의 숨겨진 루트와Resource의 재분배를 효율적으로 활용해 상대방의 전략을 무력화시킬 수 있으므로, 반복 플레이를 통해 맵의 시스템을 익히는 것이 필수적이다. 추천 대상은 스타크래프트의 유즈맵을 люби하는 플레이어라면 누구나 즐길 수 있으며, 특히 전략적 사고와 자원 관리 능력이 요구되는 RPG를 선호하는 유저에게 적합하다. 다만, 맵의 규모가 크고 시스템이 복잡한 만큼, 처음 접하는 유저는 충분한 연습을 통해 맵의 흐름을 익히는 것이 중요하다. 플레이 전에는 맵의 주요Resource 위치와 동맹 시스템, 전투 시뮬레이션을 미리 숙지하고, 팀원과의 원활한 커뮤니케이션을 통해 전략을 조율하는 것이 성공의 열쇠가 될 것이다. Merchants RPG 3: Empires is a standout RPG custom map in StarCraft: Brood War, featuring a vast desert-themed map where strategic resource management and combat intertwine seamlessly. With a massive 6144x6144 terrain, players are divided into factions, each expanding territory, securing resources, and engaging in battles. The core gameplay revolves around resource control and strategic positioning, making it accessible to beginners while offering depth for seasoned players. Scattered resource mines, supply routes, and defensive structures force players to make critical decisions throughout the game. Combat is real-time, and each faction's unique characteristics and resource status influence battle strategies, requiring constant decision-making. A key feature is the central oasis and desert fortresses, which become battlegrounds that determine the game's outcome. The diverse terrain—hills, canyons, plains—plays a crucial role in retreat tactics, ambushes, and defense line establishment. Unlike typical battle-focused maps, this map integrates resource management, territorial expansion, and political alliances, offering a comprehensive strategy RPG experience. It is highly regarded among StarCraft custom maps for its polished design. New players should quickly identify resource distribution and key strongholds, as early resource securing and mid-game defense lines often decide the game's direction. Skilled players can neutralize opponents' strategies by efficiently utilizing hidden routes and resource redistribution. Ideal for fans of StarCraft custom maps, especially those who prefer strategic thinking and resource management in an RPG setting, this map demands practice to master its systems. Before playing, familiarize yourself with key resources, alliance systems, and combat simulations, and coordinate strategies with teammates for success.
무비 콘테스트 골드 4.1 (M-O-V-I-E C-O-N-T-E-S-T Gold4.1)
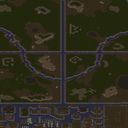
스타크래프트 브루드워 유즈맵 M-O-V-I-E C-O-N-T-E-S-T Gold4.1은 플레이어들이 자신만의 영화를 연출할 수 있는 독특한 콘셉트의 맵이다. 맵 이름은 ' MOVIE CONTEST'로, 영화 제작이라는 창의적인 활동을 배경으로 삼아 다양한 전략과 연출을 요구하는 구조로 설계되었다. 내부 설명에 따르면 Wisdom_Monkey에 의해 제작 및 수정되었고, Death_(Knight)와 extrim에 의해 추가로 업데이트된 버전으로, comunidade 유즈맵 커뮤니티에서 소소한 인기를 끌었던 작품으로 추정된다. 맵은 사막 테마의 넓은 평야와 절벽, 강, 섬으로 구성된 복잡한 지형을 자랑한다. 플레이어는 시작 시점에 따라 각기 다른 자원과 건물을 배치할 수 있는 위치에 배치되며, 맵 중앙에는 대형 건물이 있어 이를 차지하는 전략적 요소가 포함된다. 이 건물은 영화 촬영소 역할을 하며, 점령할 경우 추가적인 보너스나 승리 조건에 영향을 미칠 가능성이 있어 보인다. 맵 곳곳에는 다수의 섬과 물길이 있어, 테란의 건물을 제외하고는 지상 유닛의 이동이 제한되는 구간이 많다. 이로 인해 공중 유닛의 역할이 중요해지며, 다양한 전략적 선택지가 제공된다. 플레이 방식은 크게 세 가지로 나뉘어진다. 첫째, 영화 촬영소를 차지하고 이를 중심으로 방어와 공격을 병행하는 방식, 둘째, 섬이나 고지대에서 농성을 하며 자원을 확보하는 방식, 셋째, 중앙 건물을 차지하지 않고Resource gathering에 집중하는 방식 등이다. 맵의 난이도는 소규모 전투와 자원 관리, 위치 선점의 중요성이 높아 보통 수준으로 평가된다. 특히, 초보자들은 지형 이해와 유닛 컨트롤이 부족해 어려움을 느낄 수 있으며, 숙련된 플레이어는 압도적인 시야와 빠른 판단력이 요구된다. 이 맵은 창의적인 플레이와 전략적 깊이를 동시에 추구하는 유즈맵으로, 멀티 플레이 시 각 플레이어의 개성과 팀워크가 빛을 발할 수 있는 구조다. 영화라는 컨셉에 걸맞게, 단순히 전투를 벌이는 것이 아니라, 각 플레이어가 자신이 맡은 역할을 얼마나 효과적으로 수행하는지가 중요하다. 따라서 팀플레이 시에도 시너지 효과를 내기 쉽고, 개인 플레이 시에도 전략적 다양성을 즐길 수 있는 장점이 있다. 다만, 맵의 복잡한 지형과 전투의 난이도로 인해 초심자에게는 다소 진입 장벽이 있을 수 있으니, 사전 연습이 권장된다. 이 맵은 5인용으로 설계되었으며, 각 플레이어는 독립적인 시작 위치를 확보할 수 있다. 맵의 전체 크기는 8192x8192로 매우 넓지만, 타일셋과 지형 디자인이 사막 분위기를 잘 살려내고 있어 몰입감을 높이는 데 기여한다. 맵의 배경 음악이나 효과음은 없지만, 지형과 디자인만으로도 충분히 분위기를 조성할 수 있는 수준이다. 또한, 맵의 업데이트 이력이 있어, 제작자나 커뮤니티에 의해 지속적인 개선이 이루어졌을 가능성이 높다. 이 맵을 플레이하기 전에는 반드시 맵의 지형과 시작 위치를 숙지하고, 자신의 전략을 미리 계획하는 것이 중요하다. 특히, 섬 지역을 점령할 것인지, 중앙 건물을 차지할 것인지에 따라 플레이 스타일이 완전히 달라질 수 있으니, 이러한 선택지를 잘 활용하는 것이 관건이다. This StarCraft: Brood War custom map, M-O-V-I-E C-O-N-T-E-S-T Gold4.1, offers players a unique opportunity to craft their own cinematic experience through strategy and creativity. The map title 'MOVIE CONTEST' reflects its core concept, where players engage in a battle of wits and resources to produce their own 'film'. Originally developed and refined by Wisdom_Monkey, with subsequent contributions from Death_(Knight) and extrim, this version (Gold4.1) stands as a polished entry in the UMS (Use Map Settings) genre, blending storytelling with competitive gameplay. The map's terrain is a sprawling desert landscape, interspersed with cliffs, rivers, and isolated islands, creating a visually striking and strategically complex environment. Players start in designated positions, each with access to unique resources and building spots. The central area features a large structure that likely serves as a focal point for competition, offering potential bonuses or victory conditions when controlled. The presence of multiple islands and waterways restricts ground movement, emphasizing the importance of air units and strategic positioning. Gameplay revolves around three primary strategies: controlling the central structure to bolster defense and offense, securing high-ground positions for resource gathering, or focusing on resource management while avoiding direct conflict. The map's difficulty is rated as moderate, requiring players to balance unit control, resource allocation, and spatial awareness. Novice players may struggle with the terrain's complexity and the need for quick decision-making, while experienced players will appreciate the depth and variety of tactical options available. M-O-V-I-E C-O-N-T-E-S-T Gold4.1 excels in offering a blend of creative and competitive gameplay, making it ideal for multiplayer sessions where individual roles and teamwork shine. The cinematic theme encourages players to think outside conventional strategies, fostering a dynamic and engaging experience. However, the map's intricate design and combat intensity may present a learning curve for newcomers, suggesting that prior practice or familiarization with the terrain is beneficial. Designed for five players, each with distinct starting positions, the map's vast 8192x8192 size is complemented by a desert tile set that enhances immersion. While the map lacks background music or sound effects, its terrain and layout effectively convey the cinematic atmosphere. The history of updates indicates ongoing improvements by the community, ensuring a refined and enjoyable experience. Players are advised to study the map's geography and starting locations before diving into the game, as strategic choices—such as whether to dominate the central structure or secure island territories—can drastically alter the course of the match.
호스트리지 네고시에이션 2 (Hostage Negotiation 2)
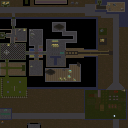
스타크래프트 브루드워의 유즈맵 <호스트리지 네고시에이션 2(Hostage Negotiation 2)>는 이름 그대로 인질극 상황을 배경으로 한 디펜스 및 서바이벌 장르의 맵이다. 맵의 전체적인 분위기는 사막 지형을 배경으로 펼쳐지며, 중앙에 위치한 인질들과 테란 건물을 중심으로 적의 공격을 저지하는 플레이가 주를 이룬다. 플레이어는 인질을 보호하면서 동시에 적의 공격을 방어해야 하며, 인질의 체력이 낮아지면 사망할 수 있어 긴장감을 유지할 수 있다. 맵의 구조는 중앙 광장과 같은 넓은 공간을 중심으로 여러 개의 건물과 요새가 배치되어 있으며, 이 요새들을 활용해 적의 진격을 막아내야 한다. 특히, 맵의 좌측과 우측에 위치한 건물들은 방어선의 주요 거점이 되며, 이곳을 지키느냐에 따라 전체적인 전투의 흐름이 달라진다. 맵의 진행은 인질 보호와 적 방어가 동시에 요구되기 때문에 멀티태스킹 능력이 중요한데, 인질의 위치를 주시하며 동시에 방어선을 보강해야 한다. 또한, 맵의 난이도는 인질의 체력 관리와 적의 공격 패턴에 따라 달라지므로, 초보자보다는 경험이 있는 플레이어에게 더 적합한 맵으로 추정된다. 맵의 후반부로 갈수록 적의 공격이 점점 강해지므로, 초반에 방어선을 잘 구축하는 것이 중요하다. 인질의 위치가 맵의 중앙에 집중되어 있어, 중앙을 중심으로 한 방어 전략이 효과적이며, 적의 공격 루트는 주로 좌우 양측에서 오기 때문에 양측의 방어선을 균형 있게 관리해야 한다. 추천 대상으로는 스타크래프트 유즈맵을 любитель级으로 즐기는 플레이어, 디펜스와 서바이벌 장르를 좋아하는 유저, 그리고 인질 보호와 전략적 방어가 동시에 요구되는 맵을 선호하는 게이머들에게 적합할 것으로 보인다. 플레이 전에는 맵의 주요 방어 거점과 인질의 위치를 미리 숙지하고, 초반에 방어선을 구축하는 데에 집중할 필요가 있다. 또한, 인질의 체력이 낮아질 경우 즉시 치료할 수 있는 준비를 갖추는 것이 좋다. 맵의 구조상 인질의 사망을 방지하는 것이 핵심 목표 중 하나이므로, 인질 보호에 소홀하지 않도록 주의해야 한다. 맵의 분위기는 긴박감 넘치는 사막 인질극을 재현하고 있으며, 적의 공격 패턴과 인질의 체력 변화가 플레이어의 전략을 끊임없이 갱신하도록 유도한다. 이러한 요소들 덕분에 <호스트리지 네고시에이션 2>는 단순히 적을 공격하는 것이 아니라, 인질 보호와 방어라는 두 가지 목표를 동시에 달성해야 하는 전략적 깊이를 지닌 맵으로 평가된다. Hostage Negotiation 2 is a defense and survival-style custom map for StarCraft: Brood War, set in a desert landscape where players must protect hostages while defending against enemy attacks. The map features a central area surrounded by buildings and fortresses that serve as key defensive points. Players must manage both hostage protection and base defense simultaneously, with hostages located in the center and their survival dependent on the player's ability to hold the line. The map's structure emphasizes multi-tasking, as players need to monitor hostage health while reinforcing weak points in their defenses. As the game progresses, enemy attacks intensify, making early fortress construction critical. The recommended strategy involves balancing defense on both left and right flanks, with the central area acting as the primary battlefield. This map is ideal for players who enjoy hybrid defense-survival scenarios and those who appreciate maps requiring strategic planning beyond simple combat. Before playing, it's essential to identify key defensive positions and hostage locations, prioritizing early fortress upgrades to mitigate incoming threats. The map's tension stems from the dual objectives of protecting hostages and fending off waves of enemies, creating a dynamic experience that rewards careful planning and adaptability. The desert-themed setting enhances the immersive atmosphere, reinforcing the high-stakes hostage negotiation scenario central to the gameplay.
Mixed Rancher 1.1
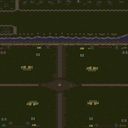
스타크래프트 브루드워의 유즈맵 'Mixed Rancher 1.1'은 재화 관리와 스펠 캐스팅, 미니언 조합을 중심으로 펼쳐지는 흥미로운 디펜스 장르의 맵입니다. 맵의 주 목표는 미네랄을 모아 마법을 시전하고, 매 50킬마다 민간인을 획득해 방어선을 구축하는 것입니다. 사막 테마의 넓은 맵에서 펼쳐지는 전투는 마치 Rancher라는 단어에서 연상되는 목장 관리와도 같은 재미를 선사합니다. 플레이어는 매 턴마다 주어지는 자원으로 다양한 스킬을 사용할 수 있으며, 적의 공격을 효율적으로 방어하기 위해 민간인을 보호하고, 강력한 미니언을 배치해야 합니다. 맵의 특징은 특히 적과의 전투뿐만 아니라 자원 관리와 스킬 사용의 타이밍이 승패를 좌우한다는 점입니다. 또한, 매 50킬마다 주어지는 민간인은 방어력을 강화하는 핵심 요소로, 이를 놓치면 방어선이 쉽게 무너질 수 있습니다. 맵의 진행 방식은 다소 복잡해 보일 수 있지만, 익숙해지면 전략적인 플레이가 가능하며, 특히 팀플레이가 가능한 맵으로도 활용할 수 있습니다. 초보자보다는 중간 이상의 실력을 갖춘 플레이어에게 추천하며, 자원 관리와 스킬의 적절한 사용을 연습할 수 있는 좋은 기회가 될 것입니다. 맵의 난이도는 맵 내부의 설명에 따르면Fixed Version of 1.0'라는 점에서 버전 업데이트를 통해 밸런스가 조정되었을 가능성이 높습니다. 또한, 'Torrasque'라는 제작자에 의해 개발되었다는 점도 흥미로운 포인트입니다. Mixed Rancher 1.1 is a unique defense-style custom map in StarCraft: Brood War, where players manage resources, cast spells, and combine minions to build a stronghold. The goal revolves around accumulating minerals to cast spells and securing civilians every 50 kills to reinforce defenses. Set in a vast desert-themed map, the gameplay blends resource management with strategic combat, offering a fresh twist on the classic defense genre. Players must carefully balance spell usage and minion placement while protecting civilians from relentless enemy attacks. The map’s mechanics emphasize timing and efficiency, as poor resource allocation or missed civilian spawns can lead to a swift defeat. While the mechanics may initially seem complex, mastering them provides a deeply engaging experience, especially for players who enjoy tactical depth. The 'Fixed Version of 1.0' label suggests refinements were made for better balance, and the involvement of a creator named Torrasque adds credibility to its design. This map is best suited for intermediate to advanced players who thrive on strategic planning and resource optimization.
최근 등록된 맵
새로 추가된 파일과 버전을 확인하세요.
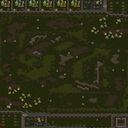
룬니아 프로젝트 V19.2a (Lunia Project V19.2a)
스타크래프트 브루드워의 유즈맵 〈룬니아 프로젝트 V19.2a〉는 영웅 양성을 핵심으로 삼은 컴까기(컴퓨터 상대) 디펜스 장르의 맵으로, 플레이어는 영웅을 성장시켜 적진의 중심부를 파괴하는 것을 목표로 삼게 된다. 맵의 전체적인 분위기는 사막 테마로 이루어져 있으며, 넓은 맵 곳곳에 흩어져 있는 건물과 자원 지대를 활용해 전략을 수립해야 한다. 맵의 중앙부에는 적의 핵심 건물이 위치하고 있어, 이를 파괴하기 위해선 영웅의 레벨 업과 장비 강화가 필수적이다. 적의 공격 패턴은 맵의 주변부에서 시작되어 점차 중앙부로 밀고 들어오는데, 이를 방어하면서 동시에 영웅을 성장시키는 균형 감각이 중요하다. 특히, 맵의 구조상 여러 갈래의 길로 나뉘어져 있어, 영웅의 배치와 자원 수집 루트를 신중히 계획해야 한다. 또한, 맵 곳곳에 숨겨진 보너스 자원과 아이템 상점이 있어, 이를 적극적으로 활용하면 게임의 진행을 크게 앞당길 수 있다. 맵의 난이도는 초보 플레이어부터 숙련자까지 폭넓게 즐길 수 있도록 설계되어 있으며, 적의 공격 패턴과 맵의 지형이 반복적으로 등장하는 특징을 가지고 있다. 추천 대상은 스타크래프트 유즈맵을 любитель 및 중수 플레이어들이며, 영웅 시스템과 전략적 자원 관리에 익숙한 유저들에게 특히 인상적일 것으로 예상된다. 플레이 전에는 맵의 주요 자원 지대와 적의 공격 루트를 미리 확인하고, 영웅의 스킬 트리와 장비 업그레이드 계획을 세워두는 것이 좋다. 이 맵은 〈룬니아 프로젝트〉 시리즈의 일환으로, 과거 다른 버전에서 개선된 요소들이 반영되어 있어, 시리즈 팬들에게도 흥미로운 선택지가 될 것이다. Lunia Project V19.2a is a UMS defense-style user map in StarCraft: Brood War where players focus on hero development to destroy the enemy's core. The map features a desert theme with scattered buildings and resource points, requiring strategic planning to balance defense and hero progression. The central area houses the enemy's key structures, which must be targeted through leveling up heroes and upgrading equipment. Enemies approach from multiple directions, forcing players to defend while managing hero growth. The map's layout includes hidden resource points and item shops, offering opportunities to accelerate progress. Designed for a wide range of players, from beginners to advanced users, the difficulty is balanced, with repetitive enemy patterns and terrain features. Recommended for players familiar with hero systems and strategic resource management, this map suits both casual and intermediate StarCraft UMS enthusiasts. Before playing, it's advisable to scout major resource areas and enemy attack routes, and plan hero skill trees and equipment upgrades. As part of the Lunia Project series, this version incorporates improvements from past iterations, making it appealing to series fans.
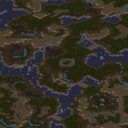
사막의 분노 (Desert Rage)
이 맵은 사막 테마의 유즈맵으로, 플레이어는 적의 공격을 방어하고 주요 목표를 파괴하는 임무를 수행하는 컴까기 스타일의 디펜스 게임으로 추정된다. 맵 중앙에는 커다란 X 모양의 건물이 있으며, 주변은 사막 지형으로 둘러싸여 있어 마치 폐허 속에서의 전투를 연상시킨다. 맵의 이름과 내부 설명을 보면 ‘엔oksi’라는 지역이 적에게 점령당했다는 설정으로, 플레이어는 이 지역을 되찾기 위해 진격을 준비하는 것으로 보인다. 맵의 구조상으로는 일방향으로 진행되는 구조가 아니라면, 대칭형 또는 순환형 루트를 통해 적 기지를 향해 progressing하는 방식일 가능성이 있다. 사막 타일셋 덕분에 건조하고 황량한 분위기가 강조되며, 이는 디펜스나 컴까기 맵에서 흔히 볼 수 있는 어드밴스드한 전투 감각을 자아낸다. 플레이어는 초기에 자원이나 건물을 확보한 후 적의 공격을 막아내면서 점차 전진하는 방식으로 게임이 진행될 것으로 보이며, 맵의 크기가 4096x4096으로 매우 넓기 때문에 전투가 길어질 가능성이 크다. 다만 내부 설명이 러시아어와 영어로 작성되어 있어 정확한 스토리나 승리 조건은 유추하기 어렵지만, ‘적의 공격을 견뎌내고 주요 건물을 파괴하라’는 임무는 명확히 전달된다. 추천 대상은 스타크래프트의 디펜스나 컴까기 맵을 즐기는 플레이어로, 사막 테마의 전략적 전투를 경험하고자 하는 경우에 적합하다. 플레이 전에는 맵의 초기 자원 분배와 적의 배치 위치를 확인하는 것이 중요하며, 사막 지형 특유의 시야 방해 요소(모래폭풍 등)가 있다면 전투 전략을 세우는 데 영향을 줄 수 있다. 또한, 한정된 자원으로 적을 상대해야 한다면 자원 관리와 유닛 생산의 타이밍을 잘 조절하는 것이 관건이 될 것이다. This appears to be a defense-style map in the style of a "compkki" game, where players defend against enemy attacks and destroy key objectives in a desert-themed custom map. At the center of the map is a large X-shaped building, surrounded by desert terrain that evokes a sense of battle in ruins. The map’s name and internal description suggest that the area called "Enoksi" has been occupied by enemies, and players must prepare to reclaim it. Structurally, the map likely progresses toward enemy bases through either a symmetrical or circular route rather than a one-way path. The desert tile set enhances the dry and desolate atmosphere, reinforcing the advanced combat feel typical of defense or compkki maps. Players will likely start by securing resources or buildings, then fend off enemy attacks while advancing gradually. Given the map’s large size (4096x4096), battles may take longer to unfold. While the internal description is written in Russian and English, making it difficult to deduce the exact story or victory conditions, the core mission—"defend against attacks and destroy key buildings"—is clear. This map is recommended for players who enjoy Starcraft’s defense or compkki-style maps and those looking to experience strategic desert combat. Before playing, it’s important to check initial resource distribution and enemy placement. If the desert terrain includes visibility-obstructing elements like sandstorms, they could impact combat strategy. Additionally, with limited resources, managing them effectively and timing unit production will be crucial to success.
태도 SE 1.91 (Attitude SE 1.91)
스타크래프트 브루드워의 고전 밀리 맵 'Attitude SE 1.91'은 4인용 맵으로, 사막 테마의 넓은 평지 위에서 펼쳐지는 치열한 전투를 즐길 수 있는 명작으로 평가받습니다. 맵의 중앙에는 넓은 개활지가 펼쳐져 있어 빠른 전투가 가능하며, 양 측 진영은 좌우로 대칭을 이루며 배치되어 있습니다. 각 진영에는 미네랄과 베스핀 가스가 풍부하게 배치되어 있어 자원 수급이 원활하고, 건물을 짓기에도 적합한 공간이 확보되어 있습니다. 맵의 가장 큰 특징은 입구와 출구가 상대적으로 넓고 평탄하다는 점으로, 탱크나 벌처 같은 유닛을 활용한 기동전이나 시즈 탱크의 포격전을 펼치기에 최적화되어 있습니다. 또한, 맵의 가장자리로 갈수록 지형이 점점 높아지며 바위가 등장하는데, 이 지역은ucker나 러커 같은 지상 유닛을 배치하기 어려운 구조로 되어 있어 상대방의 러시 방어를 위한 요충지가 될 수 있습니다. 맵의 밸런스는 비교적 안정적이지만, 중앙 개활지에서 벌어지는 전투에서 승리하는 쪽이 게임을 쉽게 이끌어나갈 수 있어 초반 러시나 타이밍 러시를 노리는 플레이가 중요합니다. 또한, 맵의 넓이 때문에 오버로드나 드랍쉽을 활용한 후방 교란이 유용하게 활용될 수 있으며, 상대방의 mineral line을 노리거나 mineral line에 위치한 SCV를 견제하는 플레이가 승리를 좌지우지할 수 있습니다. 초보자부터 숙련자까지 즐길 수 있는 밸런스 좋은 맵으로, 특히 테란과 프로토스의 조합이 강세를 보이는 맵으로 알려져 있습니다. 플레이 전에는 자원 분배와 초반 러시 타이밍을 carefully 계획하는 것이 중요하며, 상대방의 빌드 오더를 읽고 그에 맞게 대응하는 것이 관전 포인트입니다. 이 맵은 스타크래프트의 밀리 대전 문화에서 오랫동안 사랑받아 온 맵으로, 특히 1.91 버전은 여러 번의 밸런스 패치를 거쳐 안정적인 플레이 환경을 제공합니다. Attitude SE 1.91 is a classic 4-player melee map in StarCraft: Brood War, offering intense battles on a wide, desert-themed open field. The map features symmetrical starting positions on both sides, each with abundant mineral and vespene gas resources, making resource management and building placement straightforward. The most notable feature is the wide, flat entrances and exits, which are ideal for tank or vulture-based mobility or siege tank sniping. The terrain gradually rises near the edges, with rocks that make it difficult to deploy ground units like zerglings or hydralisks, serving as strategic choke points for defense. While the map is generally balanced, controlling the central open area can give a significant advantage, making early rushes or timing attacks crucial. The map's size also allows for effective use of overlords or dropships to disrupt the opponent's mineral lines or target SCVs. Suitable for both beginners and advanced players, this map is particularly favored for Terran and Protoss matchups. Before playing, careful planning of resource distribution and rush timing is essential, and adapting to the opponent's build order can be a key factor in victory. Popular in Brood War melee culture, version 1.91 has undergone multiple balance patches to ensure a stable and enjoyable playing experience.
오디세이:RE 1.91 (Odyssey:RE 1.91)
스타크래프트 브루드워의 대형 유즈맵 ‘Odyssey:RE 1.91’은 8인용으로 설계된 대규모 컴까기(컴퓨터 상대) 맵으로, 사막 테마의 광활한 맵에서 펼쳐지는 한층 더 진화된 전투를 경험할 수 있다. 맵의 전체 크기는 3584x4096 타일로, 넓은 개활지와 복잡한 지형이 조화를 이룬 구조가 특징이다. 플레이어는 각자의 기지를 지키며 끊임없이 몰려드는 적군을 상대해야 하며, 맵 곳곳에 배치된 자원과 방어 시설이 전투의 성패를 좌우한다. 특히, 맵의 중앙과 외곽에 위치한 넓은 평야는 대규모 병력 이동을 가능케 하며, 협곡과 절벽은 전략적 우위를 제공하는 동시에 기동력을 제한하는 요소로 작용한다. 이 맵은 기본적인 컴까기 구조를 유지하면서도 맵의 규모와 디자인에서 상당한 발전이 느껴진다. 다양한 고저차와 장애물이 있는 지형은 단순한 공격 루트를 넘어 전략적 깊이를 더하며, 플레이어는 자원의 확보와 방어 시설의 배치, 그리고 적절한 병력 조합을 끊임없이 고민해야 한다. 맵의 난이도는 중간 정도로, 초보자와 숙련자 모두 즐길 수 있도록 설계되었으나, 넓은 맵을 활용한 대규모 전투는 숙련된 플레이어에게 더 큰 재미를 제공할 것으로 보인다. 또한, 맵의 사막 테마는 건조한 분위기와 탁 트인 시야를 제공하여 전투의 몰입감을 높인다. 이 맵을 플레이하기 위해서는 넓은 시야와 빠른 판단력이 요구되며, 특히 자원의 희소성과 병력의 관리 능력이 승패를 가를 수 있다. 맵의 복잡한 지형은 적군의 움직임을 예측하기 어렵게 만들기 때문에, 플레이어는 끊임없이 지형을 분석하고 자신의 전략을 유연하게 변화시켜야 한다. 또한, 맵 곳곳에 숨겨진 자원과 보너스 지역을 발견하는 것도 중요하며, 이를 위해 맵의 전체적인 구조를 숙지하는 것이 필수적이다. 추천 대상으로는 스타크래프트의 컴까기 맵을 즐겨온 플레이어와 넓은 맵에서의 전략적 전투를 선호하는 유저들이며, 특히 8인 대전이 가능한 환경에서 플레이하고자 하는 유저들에게 적합하다. 플레이 전에는 맵의 주요 자원 분포와 주요 루트를 먼저 파악하고, 방어 시설의 배치와 병력 조합을 미리 계획하는 것이 좋다. StarCraft: Brood War’s large-scale custom map *Odyssey:RE 1.91* is an 8-player melee (computer opponent) map where you can experience an evolved battle unfolding across a vast desert-themed landscape. The map spans 3,584 by 4,096 tiles, featuring a harmonious blend of open terrain and intricate geography. Players must defend their bases while fending off relentless waves of enemies, with resources and defensive structures scattered throughout the map determining the outcome of each engagement. The wide plains at the center and periphery facilitate large-scale troop movements, while canyons and cliffs offer strategic advantages while limiting mobility. While maintaining the core structure of a melee map, this title introduces noticeable improvements in scale and design. The varied elevation and obstacles transform the battlefield from a simple attack route into a deep, strategic experience. Players must constantly weigh resource collection, defensive positioning, and troop composition. Designed for intermediate difficulty, the map caters to both beginners and veterans, though its large-scale battles promise greater satisfaction for skilled players. The desert theme further enhances immersion with its dry atmosphere and expansive visibility. Success on this map demands sharp vision and quick decision-making, with resource scarcity and troop management often deciding victory or defeat. The complex terrain obscures enemy movements, forcing players to analyze the landscape and adapt their strategies dynamically. Scouting hidden resources and bonus areas is crucial, making familiarity with the map’s layout essential. Ideal for fans of Brood War’s melee maps and those who enjoy strategic battles on expansive terrain, it’s especially well-suited for players seeking an 8-player experience. Before diving in, study the key resource locations and main routes, and plan your defensive setups and troop compositions in advance.
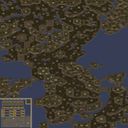
삼한제일 혼란사 (Samhanjeil Hollansa)
이 맵은 ‘삼한제일_혼란사’라는 이름으로 알려진 유즈맵으로, 스타크래프트 브루드워의 유즈맵 장르 중에서도 특이한 ‘혼란’ 요소를 적극적으로 활용한 작품으로 보인다. 맵 크기는 8192x8192로 매우 넓은데, 사막 타일셋을 사용하여 건조한 분위기를 연출하며 플레이어들에게 넓은 시야와 전략적 선택지를 제공한다. 이미지에서 확인되는 다수의 건물과 자원 분포는 이 맵이 단순한 디펜스나 미니게임이 아니라, 복잡한 전략과 자원 관리가 요구되는 대규모 맵임을 시사한다. 특히 ‘혼란’이라는 제목에서 알 수 있듯이, 맵 내에서는 예상치 못한 이벤트나 변수가 발생할 가능성이 높아 보인다. 이는 플레이어들에게 긴장감과Unexpected한 상황 대처 능력을 요구하는 구조로 보이며, 기존의 정형화된 유즈맵과는 차별화된 경험을 제공할 것으로 예상된다. 플레이 인원은 6명으로 설정되어 있으며, 팀 수는 명확히 표시되지 않지만 넓은 맵 크기와 다수의 건물 배치로 보아 각 플레이어는 독립적으로 행동하거나 소규모 팀으로 협력하는 방식으로 진행될 가능성이 있다. 게임의 난이도나 예상 플레이 시간은 명확히 제시되지 않지만, 넓은 맵과 복잡한 구조는 플레이 시간이 길어질 수 있음을 암시하며, 초보자는 물론 숙련자까지 모두 즐길 수 있는 다중 난이도 시스템이 적용되었을 가능성도 있다. 맵의 제작자 Venichez는 한국 커뮤니티에서 활동하는 것으로 보이며, 네이버 블로그와 카페를 통해 관련 정보를 제공하고 있는 것으로 추정된다. 이를 통해 이 맵이 한국 커뮤니티 내에서 일정 수준의 인지도와 피드백을 받았을 가능성이 있다. 이 맵을 플레이하기 위해서는 넓은 시야와 빠른 판단력이 요구되며, 자원 관리와 건물 배치뿐만 아니라 예상치 못한 변수에 대한 대처 능력도 중요할 것으로 보인다. 특히 ‘혼란’이라는 요소는 맵 디자인에 큰 영향을 미쳤을 것이며, 이는 플레이어들에게 긴장감과 재미를 동시에 제공할 수 있는 요소로 작용할 것이다. 또한, 넓은 맵 크기 덕분에 맵 리딩 능력이 뛰어난 플레이어에게는 큰 장점으로 작용할 수 있지만, 반대로 넓은 시야와 빠른 정보 처리가 어려운 플레이어에게는 어려움을 줄 수 있다. 따라서 이 맵은 전략적 사고와 적응력을 동시에 요구하는, 고난이도 유즈맵으로 평가될 수 있다. 추천 대상은 넓은 맵과 복잡한 구조에 익숙한 플레이어, 특히 전략적 사고와 자원 관리에 자신 있는 유저들이나, 혼잡한 상황에서 빠른 판단력을 요구하는 맵을 선호하는 게이머들일 것이다. 또한, 넓은 맵에서 펼쳐지는 예상치 못한 변수와 이벤트를 즐기는 플레이어들에게도 적합할 것으로 보인다. 플레이 전에는 맵의 전체 구조와 주요 건물 위치를 숙지하는 것이 중요하다. 또한, 예상치 못한 이벤트에 대비하기 위해 자원 관리와 건물 배치 계획을 미리 세워두는 것이 좋다. 넓은 맵에서는 자원 수집과 건물 건설 속도가 게임의 승패를 좌우할 수 있으므로, 효율적인 자원 활용이 무엇보다 중요하다. 더불어, 팀 플레이가 필요한 경우 동료와의 원활한 소통과 협력이 필수적일 것이므로, 팀원과의 전략적 공유도 게을리 해서는 안 된다. This StarCraft: Brood War custom map, titled '삼한제일_혼란사' (Samhanjeil_Hollansa), stands out for its unique 'chaos' element integrated into a large-scale UMS format. The map spans an expansive 8192x8192 grid using a desert tileset, creating a visually distinct and strategically challenging environment. The title itself hints at unpredictable events or mechanics that disrupt conventional gameplay, setting it apart from typical defense or mini-game maps. The desert theme not only provides a stark contrast to conventional StarCraft terrains but also emphasizes the need for spatial awareness and efficient resource management. Designed for six players, the map likely encourages either independent play or small-team collaboration due to its vast size and scattered resource nodes. While the exact difficulty level and expected playtime are unspecified, the complexity suggests a longer session, appealing to both casual and hardcore custom map enthusiasts. The map's creator, Venichez, appears to be active in the Korean StarCraft community, with references to a Naver blog and cafe, indicating potential community support or updates. This suggests the map may have undergone refinements based on player feedback. Playing '혼란사' demands strong strategic thinking, adaptability, and quick decision-making, as the 'chaos' element likely introduces dynamic challenges that evolve during gameplay. Players must balance resource gathering, base expansion, and unpredictable events, making it a test of both macro and micro-management skills. The map’s sheer scale rewards players with strong map-reading abilities but may overwhelm those less experienced with large custom maps. It is best suited for players who enjoy high-stakes strategy, resource optimization, and the thrill of navigating unexpected scenarios. Teams should prioritize clear communication to synchronize strategies and react to in-game surprises. Before diving in, players should familiarize themselves with the map layout, key resource locations, and potential choke points. A well-prepared build order and resource allocation plan are essential, as inefficiencies can quickly lead to disadvantageous positions. For team-based play, establishing roles and contingency plans for chaotic scenarios will enhance coordination and overall enjoyment. Whether seeking a fresh challenge or a test of strategic depth, '혼란사' offers a compelling experience for those ready to embrace the chaos.
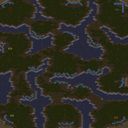
레벨+종족+영웅 완전판!!! (Level + Race + Hero Complete Edition)
‘레벨+종족+영웅 완전판!!!’은 스타크래프트 브루드워의 유즈맵으로, 플레이어가 적을 처치하며 경험치를 얻고 레벨을 올려 유닛과 업그레이드를 해나가는 성장형 디펜스 장르의 맵이다. 게임의 핵심은 끊임없는 적의 공세를 방어하면서 동시에 자신의 유닛을 강화하는 데 있으며, 레벨이 오를수록 사용할 수 있는 유닛과 업그레이드 옵션이 다양해진다. 맵은 사막 테마의 넓은 필드에서 펼쳐지며, 중앙 지역을 중심으로 적의 유닛이 끊임없이 스폰되어 플레이어를 공격해 온다. 플레이 방식은 기본적으로 디펜스에 초점을 맞추지만, 레벨업을 통해 유닛을 직접 조종하거나 업그레이드할 수 있는 시스템이 특징이다. 이를 통해 단순히 방어만 하는 것이 아니라, 능동적으로 적을 상대로 공격할 수 있는 전략적 선택지가 주어진다. 맵의 구조는 중앙Spawn지역과 플레이어 기지 주변의 방어타워 또는 유닛 배치 구역으로 나뉘며, 적의 공격 패턴은 레벨이 올라갈수록 더 강력하고 다양한 유닛으로 변화한다. 따라서 초반에는 비교적 안정적이지만, 후반으로 갈수록防御의 중요성과 유닛 관리 능력이 극대화된다. 이 맵은 특히 스타크래프트의 밸런스와 시스템을 활용한 전략적 플레이를 즐기고 싶은 유저들에게 추천된다. 레벨업과 유닛 성장 시스템은 고전 RPG 게임의 요소를 가져와서 게임에 깊이를 더하며, 디펜스와 공격의 균형을 맞춰야 하는 전략적 사고가 요구된다. 또한, 맵의 넓은 공간과 사막 테마는 시각적으로도 흥미로운 요소로 작용한다. 다만, 레벨이 높아질수록 적의 공격이 치열해지므로, 꾸준한 관리가 필수적이며, 초보자의 경우 적응하는 데 시간이 다소 소요될 수 있다. 맵의 난이도는 레벨에 따라 변동되므로, 자신의 실력에 맞는 난이도 조절이 가능한 장점이 있다. 플레이 전에는 맵의 중앙Spawn지역과 기지 주변의 방어 구조물을 미리 확인해 두는 것이 좋다. 또한, 레벨업을 통해 얻을 수 있는 유닛과 업그레이드 옵션을 숙지하여, 적의 공격 패턴에 대비한 전략을 미리 세워두는 것이 중요하다. 맵의 난이도와 진행 속도는 플레이어의 레벨과 전략에 따라 크게 달라질 수 있으므로, 자신만의 플레이 스타일을 개발하는 것이 이 맵의 재미를 극대화하는 핵심이다. "Level + Race + Hero Complete Edition!!!" is a StarCraft: Brood War custom map where players defeat enemies to earn experience, level up, and gradually strengthen their units and upgrades in a survival defense-style genre. The core gameplay revolves around continuously defending against enemy assaults while simultaneously enhancing your own forces—higher levels unlock more unit options and upgrade choices. The map unfolds across a vast desert-themed field, with enemy units constantly spawning near the center to relentlessly attack the player. While the gameplay primarily focuses on defense, the leveling system allows players to directly control or upgrade units, offering strategic flexibility beyond passive protection. The map is divided into a central spawn area and defensive zones around the player's base, featuring towers or unit deployment spots. Enemy attack patterns grow progressively stronger and more varied as levels increase, making early stages relatively stable but demanding sharper defensive skills and unit management in later stages. This map is especially recommended for players who enjoy leveraging StarCraft’s balance and mechanics for strategic depth. The leveling and unit growth mechanics borrow classic RPG elements, adding layers to the gameplay, while requiring players to balance defense and offense with thoughtful strategy. The expansive desert theme also enhances visual appeal. However, as levels rise, enemy attacks intensify, making consistent management essential—beginners may need time to adapt. One advantage is that difficulty scales with level, allowing players to adjust the challenge to match their skill. Before playing, it’s wise to scout the central spawn area and defensive structures around your base. Familiarizing yourself with the units and upgrades available through leveling—and planning strategies to counter enemy attack patterns—is crucial. Since difficulty and pacing depend heavily on your level and tactics, developing your own playstyle is key to maximizing the fun of this map.
성 지키기 3 War of Epsilion
《성 지키기 3: War of Epsilion》은 스타크래프트 브루드워의 대표적인 디펜스형 유즈맵으로, ‘성 지키기’ 시리즈의 세 번째 작품이다. 이 맵은 사막 테마의 광활한 지형 위에 펼쳐지는 방어전으로, 7명의 플레이어가 각자의 캐릭터와 고유한 콤보, 속성을 활용해 끊임없이 몰려드는 적의 웨이브를 막아내야 한다. 내부 맵 제목과 설명에서 확인되는 ‘월오브 엡실리온(War of Epsilion)’이라는 명칭은, 제작자 Ankalagon이 네이버 닉네임 ‘꿈의낙원’을 통해 공개한 작품으로, 버그 제보 이메일까지 명시되어 있어 비교적 공식성이 있는Fanmade 맵으로 추정된다. 이 맵의 가장 큰 특징은 각 캐릭터별로 부여된 ‘콤보’와 ‘속성’ 시스템이다. 이를 통해 플레이어는 단순히 방어만을 하는 것이 아니라, 전략적으로 스킬을 조합하거나 속성에 따른 특수 효과를 활용해 공격과 방어의 균형을 맞춰야 한다. 예를 들어 특정 속성의 조합이 시너지를 일으켜 적의 공격을 더 효율적으로 방어하거나, 반대로 약점을 찌르는 콤보를 사용해 다수의 적을 한꺼번에 정리할 수 있다. 이러한 시스템은 디펜스 장르에 새로운 전략적 깊이를 더하며, 단순히 ‘버티기’에 그치지 않고 ‘능동적 방어’를 요구한다. 사막 지형의 넓은 맵은 적의 웨이브가 한 방향으로 밀려오는 구조로, 플레이어는 성 주변에 배치된 방어 건물과 유닛을 활용해 진격을 저지해야 한다. 특히 중앙의 성채를 중심으로 한 방어선은 게임의 핵심으로, 성채가 파괴되면 게임 오버가 되므로 신중한 자원 배분과 유닛 관리, 그리고 타이밍 감각이 요구된다. 맵의 광활한 규모는 한눈에 모든 상황을 파악하기 어렵게 만들지만, 반대로 넓은 시야를 활용한 전략적 배치와 시야 차단, 또는 복수의 진입로를 동시에 방어하는 다양한 전술이 가능하다는 장점도 있다. 《성 지키기 3: War of Epsilion》은 초보자에게는 다소 어려운 난이도를 가질 수 있지만, 콤보와 속성 시스템을 익히고 나면 전략적 즐거움이 배가되는 맵이다. 특히 같은 팀원과의 조율과 역할 분담을 통해 시너지를 발휘할 수 있는 팀플레이가 강제되므로, 혼자서는 해결하기 어려운 상황에서도 팀워크로 극복할 수 있는 장점이 있다. 또한, 지속적인 웨이브가 진행되므로 플레이 시간도 길어질 가능성이 높아, 긴장감을 유지하며 몰입할 수 있는 구조를 가지고 있다. 이 맵을 플레이하기 전에는 각 캐릭터의 콤보와 속성을 미리 숙지하고, 사막 지형의 주요 거점(예: 고지대, 좁은 길목)을 활용한 방어 전략을 계획하는 것이 중요하다. 또한, 성채 주변의 방어 건물 배치와 자원 관리(예: 미네랄, 가스)도 신중히 고려해야 한다. 특히 웨이브가 시작되기 전의 준비 단계에서 시간을 허비하지 않고 신속히 대비를 갖춰야 하며, 팀원과의 의사소통을 통해 역할 분담을 명확히 하는 것이 게임의 승패를 좌우할 수 있다. 이 맵은 디펜스 장르를 любить하는 플레이어뿐만 아니라, 전략적 사고와 팀플레이를 즐기는 유저에게 강력히 추천할 만한 작품이다. 《Star Defense 3: War of Epsilion》 is a renowned defense-style custom map in *StarCraft: Brood War*, serving as the third installment in the *Star Defense* series. The map features a vast desert-themed battlefield where seven players must defend against endless enemy waves, utilizing their unique characters, combos, and attributes. The title "War of Epsilion," found in the internal map description, suggests the map was released by the creator Ankalagon under the Naver username "꿈의낙원," with an official-looking bug report email included, indicating it is a relatively well-established fanmade map. The map’s standout feature is its combo and attribute system, which assigns each character distinct skills and elemental properties. Players aren’t just passively defending—they must strategically combine abilities or leverage attribute-based effects to balance offense and defense. For example, certain attribute synergies can enhance defensive efficiency, while well-timed combos can exploit enemy weaknesses to eliminate large groups at once. This system adds strategic depth beyond mere endurance, demanding "active defense" rather than passive resistance. The expansive desert terrain funnels enemy waves toward a single direction, forcing players to rely on defensive structures and units placed around the base to halt their advance. The fortress at the center serves as the game’s linchpin—its destruction triggers a game over, requiring careful resource allocation, unit management, and precise timing. While the map’s vast scale makes it difficult to grasp the full battlefield at a glance, it also enables diverse tactics, such as strategic positioning, vision control, or defending multiple entry points simultaneously. Though 《Star Defense 3: War of Epsilion》 may pose a challenge for beginners, mastering the combo and attribute systems unlocks deep strategic enjoyment. The map enforces teamwork, as players must coordinate roles and synergize to overcome obstacles that would be impossible alone. With continuous waves extending playtime, the structure maintains tension and immersion throughout. Before playing, it’s crucial to familiarize yourself with each character’s combos and attributes and plan defensive strategies around key desert terrain features, such as high ground or narrow chokepoints. Thoughtful placement of defensive buildings around the fortress and efficient resource management (minerals, gas) are also vital. Quick preparation before waves begin and clear role assignments through team communication can determine victory or defeat. This map is highly recommended not only for defense genre enthusiasts but also for players who enjoy strategic thinking and teamwork.
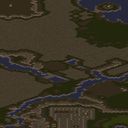
GBB's: Two Tales RPG
스타크래프트 브루드워의 대표적인 RPG 유즈맵 중 하나로, 'GBB's: Two Tales RPG'는 한 맵 안에서 두 개의 완전히 다른 RPG 파티를 경험할 수 있는 독특한 구조를 자랑합니다. 맵 제목에서 나타나듯 'Two Tales'라는 이름처럼 두 가지 이야기가 동시에 진행되며, 각 파티는 서로 다른 스토리와 아이템, 던전, 보스를 마주하게 됩니다. 내부는 사막 타일셋으로 구성되어 있으며, 넓은 맵 곳곳에 숨겨진 비밀 지역과 다중 루트가 존재해 플레이어의 선택에 따라 엔딩이 달라지는 구조로 설계되었습니다. 특히 두 파티의 진행 경로가 교차하거나, 특정 조건에서만 열리는 숨겨진 던전은 반복 플레이를 유도하는 핵심 요소로 작용합니다. 플레이어는 초반 각 파티의 주인공으로 선택할 수 있으며, 각 파티는 고유한 스킬 트리와 장비를 보유하고 있어 전략적 선택이 중요합니다. 맵 곳곳에 배치된 적들은 단순히 처치하는 수준을 넘어, 특정 아이템이나 레벨 조건을 만족해야만 진입할 수 있는 고난이도 구역이 다수 존재합니다. 또한, 두 파티가 동시에 진행되면서 맵의 일부 지역은 한 파티가 통과한 후에야 열리는 구조로 되어 있어, 두 번째 플레이에서는 새로운 비밀을 발견할 수 있습니다. 맵의 크기는 4096x6144로 매우 넓으며, 타일 단위가 128x192로 세밀한 디자인과 넓은 시야를 제공합니다. 다만, 맵이 워낙 넓고 진행 방식이 복잡한 탓에 초보자는 처음 몇 번의 시도에서 좌절감을 느낄 수 있습니다. 숙련된 플레이어라면 두 파티의 스토리를 모두 경험하고, 숨겨진 엔딩까지 도달하는 즐거움을 느낄 수 있을 것입니다. 이 맵의 가장 큰 매력은 '두 가지 이야기에 동시에 참여할 수 있다'는 점입니다. 단순히 한 번의 플레이로 모든 컨텐츠를 즐기기 어려운 구조이지만, 각각의 파티가 서로 다른 분위기와 challenges를 제공하기 때문에 한 번 경험한 후에도 다시 플레이해 볼 만한 가치가 있습니다. 다만, 맵의 난이도가 높고 진행 방식이 복잡한 만큼, 플레이 전 맵의 구조를 미리 숙지하거나, 커뮤니티에서 공유된 공략을 참고하는 것이 좋습니다. 또한, 두 파티의 진행을 모두 즐기려면 최소 2~3회 이상의 플레이가 필요할 수 있습니다. 이 맵은 스타크래프트의 기본 에디터만으로 제작된 만큼, 기술적인 한계가 느껴지기도 하지만, 그 안에 담긴 세심하고 다양한 아이디어는 감탄을 자아냅니다. 특히, 두 파티의 스토리가 서로 연관되어 있어, 모든 엔딩을 보기 전까지는 맵의 전체적인 스토리를 온전히 이해할 수 없다는 점은 이 맵만의 독특한 특징입니다. 만약 여러분이 스타크래프트의 RPG 유즈맵을 즐기면서, 단순히 사냥과 레벨업을 넘어서는 깊은 스토리와 선택의 재미를 원한다면, 이 맵은毫无疑问한 추천 대상입니다. One of the most iconic RPG custom maps in *StarCraft: Brood War*, *GBB's: Two Tales RPG* stands out for its unique structure, allowing players to experience two entirely different RPG parties within a single map. As the title suggests, "Two Tales" unfolds two distinct stories simultaneously, with each party encountering unique narratives, items, dungeons, and bosses. The interior is set in a desert tile theme, featuring hidden secret areas and multiple routes scattered across the vast map, designed so that the player's choices determine the ending. Notably, the overlapping paths of the two parties and hidden dungeons that only open under specific conditions serve as key elements that encourage repeated playthroughs. Players can choose to start as the protagonist of either party at the beginning, each with its own skill tree and equipment, making strategic choices crucial. Enemies placed throughout the map aren’t just for mindless grinding—they gate high-difficulty zones that require meeting certain item or level conditions to access. Additionally, since both parties progress simultaneously, some areas only unlock after one party has passed through, allowing new secrets to be discovered in a second playthrough. The map’s size is massive at 4096x6144, with a tile size of 128x192, offering both intricate design and expansive visibility. However, its sheer scale and complex progression can be overwhelming for beginners, leading to frustration in early attempts. Experienced players, on the other hand, will enjoy uncovering both parties’ stories and unlocking hidden endings. The biggest appeal of this map lies in the ability to "participate in two stories at once." While its structure makes it difficult to experience all content in a single playthrough, each party offers a distinct atmosphere and set of challenges, making it worth revisiting even after the first experience. Given its high difficulty and intricate progression, it’s wise to familiarize yourself with the map’s layout beforehand or consult community guides. To fully enjoy both parties, players may need to complete the map two or three times. Though created solely with *StarCraft*’s default editor—meaning some technical limitations are noticeable—the map’s rich and thoughtful design is truly impressive. What makes it unique is how the two parties’ stories intertwine, requiring multiple playthroughs to fully grasp the overarching narrative. If you’re a fan of *StarCraft* RPG custom maps and seek more than just grinding and leveling up—if you crave deep storytelling and meaningful choices—this map is an absolute must-play.
맵 선택 가이드
태그는 맵의 핵심 특징을 빠르게 설명하지만 제작 버전마다 규칙이 다를 수 있습니다. 상세 설명에서 권장 인원, 난이도, 플레이 시간과 버전을 함께 확인한 뒤 다운로드하세요.