
사막 배경 스타크래프트 맵 모음
'사막 배경' 태그가 등록된 맵을 모았습니다. 장르 하나로 찾기 어려운 플레이 방식, 난이도와 특징을 중심으로 인기 맵과 최신 맵을 비교해 보세요.
- 등록 맵
- 72개
- 누적 다운로드
- 2
- 누적 조회
- 3,043
인기 맵
다운로드와 조회 반응이 높은 맵입니다.
Special Forces God v3.0
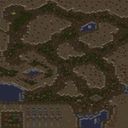
「Special Forces God v3.0」은 스타크래프트: 브루드워의 UMS(유즈맵) 장르로, 특수부대를 컨트롤하며 다수의 적을 상대하는 컴까기 스타일의 맵이다. 맵의 배경은 사막 타일셋으로 구성되어 있으며, 넓은 평야와 곳곳의 언덕, 바위가 배치되어 전략적 위치를 제공한다. 플레이어는 6명의 특수부대원으로 구성된 팀을 이끌며, 맵 곳곳에 배치된 적군 기지나 건물을 파괴하거나, 특정 조건을 달성해야 한다. 맵의 구조는 크게 중앙 평야와 좌우 언덕 지역으로 나뉘며, 언덕 지역은 시야 확보와 방어에 유리한 고지대로 활용할 수 있다. 맵의 중앙에는 넓은 평지가 펼쳐져 있어 대규모 전투가 벌어질 가능성이 높으며, 좌우 언덕을 따라 이동하는 루트는 기습이나 후방 공격에 유리한 지형을 제공한다. 맵의 명칭에서 알 수 있듯이 ‘Special Forces’라는 컨셉에 맞게, 플레이어는 개개의 유닛을 조작하여 적을 섬멸하는 스타일을 요구한다. 맵의 난이도는 맵의 규모와 적 배치에 따라 초보자에게는 다소 어려운 편이지만, 익숙해지면 전략적 깊이를 느낄 수 있는 구조로 설계되었다. 특히 넓은 맵에서 벌어지는 전투는 유닛의 컨트롤뿐만 아니라 위치 선정과 자원 관리도 중요하게 작용한다. 추천 대상은 스타크래프트의 컴까기 스타일을 선호하는 유저이며, 넓은 맵에서 벌어지는 대규모 전투를 즐기고자 하는 플레이어에게 적합하다. 플레이 전에는 맵의 구조와 주요 루트를 숙지하여, 적의 배치와 자신의 유닛 배치 전략을 미리 계획하는 것이 중요하다. 또한, 넓은 맵에서 벌어지는 전투는 자원의 관리가 중요하므로, 자원 채취와 유닛 생산 타이밍을 잘 조절해야 한다. 맵의 이름은 ‘Special Forces God’라는 특수부대 컨셉을 강조하며, v3.0 버전은 이전 버전들보다 맵의 밸런스와 디자인 개선이 이루어진 것으로 추정된다. 맵의 플레이 스타일은 컴까기 장르의 특성을 살려, 유닛의 컨트롤과 전략적 위치 선정을 중시하는 구조로 설계되어 있다. 맵의 배경과 구조는 사막 타일셋을 활용하여 현실감 있는 전투 환경과 긴장감을 제공하며, 넓은 평야와 언덕 지형은 다양한 전술적 선택지를 제공한다. 특히, 맵의 중앙 평야는 대규모 전투가 벌어질 가능성이 높으므로, 플레이어는 유닛의 생산과 배치를 신중히 고려해야 한다. 맵의 난이도는 초보자에게는 다소 어려운 편이지만, 익숙해지면 전략적 깊이를 느낄 수 있는 구조로 설계되었다. 또한, 맵의 좌우 언덕은 후방 공격이나 기습에 유리한 지형을 제공하므로, 이를 활용한 전략적 플레이가 가능하다. "Special Forces God v3.0" is a UMS (user-made map) genre map for *StarCraft: Brood War*, where players control a special forces team and engage in a "comp stomp" style battle against numerous enemies. The map features a desert tile set with vast plains, scattered hills, and rocks that provide strategic positions. Players lead a team of six special forces units, tasked with destroying enemy bases or buildings scattered across the map or achieving specific objectives. The map is divided into three main areas: a central plain, left and right hill regions. The hill regions offer elevated ground that enhances visibility and defense. The central plain is wide, making large-scale battles likely, while the paths along the hills provide advantageous terrain for ambushes or rear attacks. As the name suggests, the map emphasizes the "Special Forces" concept, requiring players to control individual units to eliminate enemies. While the map’s scale and enemy placement may pose a challenge for beginners, its design allows experienced players to appreciate its strategic depth. Battles across the expansive map demand not only unit control but also smart positioning and resource management. This map is recommended for players who enjoy *StarCraft*’s comp stomp style and those who prefer large-scale battles on wide maps. Before playing, it’s crucial to familiarize yourself with the map’s layout and key routes, planning your unit placements and counter-strategies against enemy positions. Resource management is also vital in large-scale battles, so timing your resource gathering and unit production is key. The name "Special Forces God" highlights the special forces theme, and v3.0 appears to have improved balance and design over previous versions. The gameplay focuses on unit control and strategic positioning, staying true to the comp stomp genre. The desert tile set and terrain—sprawling plains, hills, and varied landscapes—create an immersive and tense combat environment with diverse tactical options. The central plain, in particular, is prone to large-scale battles, so players must carefully consider unit production and deployment. While the map may be difficult for beginners, its design rewards strategic depth once mastered. The left and right hills also offer advantageous terrain for rear attacks or ambushes, enabling more dynamic strategies.
모래 베일 (SandVeil)
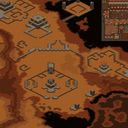
RP - SandVeil은 스타크래프트: 브루드워의 유즈맵으로, 거대한 사막 도시와 외계 동굴을 배경으로 펼쳐지는 디펜스 형식의 맵이다. 맵의 전체적인 분위기는 SF풍으로 조성되어 있으며, 거대한 스케일의 맵답게 플레이어는 광활한 맵 곳곳에서 벌어지는 전투를 경험할 수 있다. 맵 중앙에는 거대한 도시 구조물이 자리 잡고 있으며, 주변으로는 사막 지형과 외계 동굴이 펼쳐져 있다. 맵의 주요 특징은 맵의 규모와 디자인으로, 맵을 가득 메운 사막과 외계의 기운이 느껴지는 구조물이 인상적이다. 플레이어는 맵 곳곳에 배치된 방어 건물이나 유닛을 활용하여 적대적인 유닛이나 건물로부터 자신을 보호해야 한다. 맵의 진행 방식은 주로 방어에 중점을 두고 있으며, 맵의 지형을 활용한 전략적 플레이가 요구된다. 맵의 규모가 크기 때문에 맵을 빠르게 숙지하는 것이 중요하며, 맵의 주요 거점이나 위험한 지역을 미리 파악해두는 것이 좋다. 추천 대상은 디펜스 형식의 맵을 선호하는 플레이어들로, 특히 대규모 맵에서의 전략적 플레이를 즐기는 유저들에게 적합하다. 플레이 전에는 맵의 주요 거점과 위험 지역을 확인하고, 맵의 규모에 맞는 유닛 배치와 방어 전략을 미리 세워두는 것이 중요하다. 또한, 맵의 SF 분위기를 즐기고자 하는 플레이어들에게도 추천할 만한 맵이다. 맵의 디자인과 규모가 크기 때문에, 처음 접하는 플레이어는 맵의 전체적인 구조를 파악하는 데 다소 시간이 걸릴 수 있다. 하지만 맵의 디자인과 전략적 요소는 충분히 매력적이므로, 차분히 맵을 탐험하며 플레이하는 것이 좋다. RP - SandVeil is a user-made map for *StarCraft: Brood War*, set in a massive desert city and alien caverns, featuring a defense-style gameplay experience. The map’s overall atmosphere leans into a sci-fi aesthetic, and true to its grand scale, players engage in battles sprawled across vast terrain. At the center of the map stands a colossal urban structure, surrounded by desert landscapes and alien caves. The map’s standout features are its sheer size and design, with sprawling deserts and structures imbued with an otherworldly presence leaving a strong impression. Players must defend themselves using defensive buildings and units scattered throughout the map against hostile forces. The gameplay focuses primarily on defense, requiring strategic play that leverages the map’s terrain. Given the map’s large scale, quickly familiarizing yourself with it is crucial, and identifying key strongholds or dangerous zones in advance is highly recommended. This map is ideal for players who enjoy defense-style maps, especially those who relish strategic gameplay on a grand scale. Before playing, it’s important to review the map’s key locations and hazardous areas, and to prepare unit placements and defense strategies suited to its scale. The map also comes recommended for those looking to immerse themselves in its sci-fi atmosphere. Due to its expansive design and scale, newcomers may need some time to grasp the map’s overall structure. However, its compelling design and strategic depth make it worth exploring at a relaxed pace.
로키 1.0 (Loki 1.0)
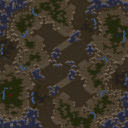
스타크래프트 브루드워의 유즈맵 <b>Loki 1.0</b>은 사막 배경의 넓은 평지에서 펼쳐지는 전략 디펜스 장르의 맵이다. 맵 중앙에 위치한 좁은 통로를 중심으로 적의 공격을 방어하는 구조로, 좁은 길목을 활용한 전략적 플레이가 핵심이다. 맵의 이름은 북유럽 신화의 변신술사 로키(Loki)에서 따왔으며, 변칙적이고 예측 불가능한 적의 움직임이 인상적이다. 맵의 전체적인 분위기는 사막의 황량한 beauty와 대비되는 화려한 색감의 적의 공격으로 가득 차 있어, 시각적으로도 흥미로운 경험을 제공한다. 플레이 방식은 중앙 통로를 지키는 데 초점을 맞추며, 좁은 길목을 통해 끊임없이 몰려드는 적을 상대로 방어전을 펼치게 된다. 맵의 디자인상 적의 공격 루트는 제한적이지만, 그로 인해 발생하는 좁은 통로에서의 집중 방어는 긴장감을 조성한다. 플레이어는 자원의 관리와 병력의 배치, 그리고 적절한 타이밍의 방어선 구축이 중요하며, 이는 초보자에게는 다소 어려운 과제가 될 수 있다. 반면에 디펜스에 익숙한 플레이어들에게는 전략적 깊이를 제공하는 요소로 작용할 것이다. 이 맵은 MBC게임 공식 맵으로 알려져 있으며, ‘MBC게임 공식 맵’이라는 표기에서 알 수 있듯 MBC게임의 공식적인 지원 아래 개발되었을 가능성이 크다. 맵의 제작자 ‘CarlSagan’과 Team M3, 그리고 Dezi가 참여했다는 정보는 맵의 품질과 완성도를 어느 정도 보장하는 요소로 볼 수 있다. 맵의 배경 음악이나 효과음 등은 없지만, 사막 배경의 시각적 요소와 긴박한 방어전이라는 구성 자체가 플레이어에게 몰입감을 높이는 데 충분하다. 추천하는 대상은 디펜스 장르에 익숙한 중급 플레이어 이상이며, 좁은 통로에서의 전략적 방어와 자원 관리를 즐길 수 있는 플레이어라면 충분히 매력을 느낄 수 있을 것이다. 플레이 전 반드시 확인해야 할 부분은 중앙 통로의 너비와 장애물의 배치다. 이 맵의 핵심은 좁은 길목에서의 방어이기 때문에, 통로의 너비가 좁거나 장애물이 많아 전략적 플레이가 제한될 수 있다. 또한, 맵의 맵 에디터 상의 설정이나 트리거가 복잡할 가능성이 있으므로, 미리 게임 내 설정이나 맵 설명을 꼼꼼히 확인하는 것이 좋다. 맵의 전체 크기는 매우 넓지만, 실제 플레이 가능한 구역은 제한적이므로, 맵의 스케일을 오해하지 않도록 주의해야 한다. 마지막으로, 이 맵은 MBC게임 공식 맵답게 한국어 커뮤니티에서 비교적 잘 알려진 편이므로, 관련 커뮤니티나 포럼에서 후기나 팁을 참고하는 것도 좋은 방법이다. This Brood War custom map, <b>Loki 1.0</b>, is a strategic defense game set in a vast desert landscape. The core gameplay revolves around defending a narrow central pathway from relentless enemy waves, utilizing the restricted space for tactical play. The name 'Loki' originates from Norse mythology, and the map's design reflects this theme through its unpredictable and dynamic enemy encounters. The gameplay focuses on protecting the central corridor, where enemy forces continuously attack through a confined route. While the limited attack paths create a sense of constraint, they also generate high tension during concentrated defense moments. Players must manage resources, strategically position units, and time their defenses effectively. This can be challenging for beginners but offers strategic depth for experienced defense map enthusiasts. Labeled as an official MBC Game map, 'Loki 1.0' was likely developed with the support of MBC Game, as indicated by the internal description. The involvement of creators like CarlSagan, Team M3, and Dezi suggests a high-quality production. Though the map lacks background music or sound effects, its desert-themed visuals and intense defense mechanics provide a deeply immersive experience. It is best suited for intermediate to advanced players who enjoy strategic defense gameplay and resource management. Before playing, check the width of the central corridor and the placement of obstacles, as these are critical to the core strategy. The map's large size may be misleading, but the actual playable area is concentrated around the central pathway. Players should also review in-game settings or map descriptions, as the map's editor settings or triggers may be complex. As an officially recognized map, 'Loki 1.0' is relatively well-known in Korean gaming communities, making it easy to find reviews or tips online for additional insights.
신전부수기5-1: 사막의 성 (Castle of De)
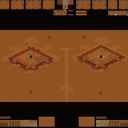
「신전부수기5-1: 사막의 성」은 스타크래프트 브루드워의 유즈맵 중 하나로, 유닛과 건물을 적극 활용해 적의 건물을 파괴하는 ‘신전부수기’ 시리즈의 다섯 번째 작품이다. 맵 제목에서 알 수 있듯이, 사막 지형을 배경으로 한 성곽 형태의 구조물이 특징이며, 플레이어는 이 성에 배치된 건물을 차례대로 파괴해야 한다. 맵 중앙의 넓은 평원과 주변의 성벽, 언덕 지형이 조화를 이루며, 건물이 위치한 성채는 언덕과 협곡으로 둘러싸여 있어 접근 경로가 제한적이다. 적절한 자원 관리와 방어선 구축이 필수적인 이 맵은 주로 컴퓨터를 상대로 진행되는 ‘컴까기’ 장르에 속하며, 일정 규모의 유닛을 동원해 방어塔와 건물을 공격하는 전략적 요소가 강하다. 플레이 방식은 단순하면서도 깊이 있는 전략을 요구한다. 플레이어는 본진에서 자원을 채취해 유닛을 생산하고, 적의 건물이 위치한 성채로 진격해 파괴해야 한다. 성채는 언덕과 협곡으로 보호되어 있어, 적절한 유닛 조합과 공방 업그레이드가 없으면 접근 자체가 어렵다. 특히 중반 이후에는 적의 방어塔와 건물이 밀집된 지역을 돌파해야 하므로, 유닛의 체력 관리와 스킬 사용 타이밍이 중요하다. 맵의 지형적 특징상, 언덕과 협곡을 활용한 방어와 반격이 핵심이며, 플레이어는 이를 바탕으로 적의 공격을 방어하면서도 지속적으로 공격을 감행해야 한다. 이 맵은 초보자와 숙련자 모두 즐길 수 있지만, 난이도 상승에 따라 전략적 깊이가 깊어진다. 초보자라면 방어塔와 건물을 파괴하는 기본적인 공략법부터 숙지해야 하며, 숙련자라면 효율적인 자원 관리와 유닛 조합을 통해 더 빠른 클리어를 노려볼 수 있다. 또한, 맵의 지형과 건물이 배치된 구조상, 팀 플레이가 가능한 구조는 아니지만, 개인전으로도 충분히 재미를 느낄 수 있는 맵이다. 맵 제작자의 언급에 따르면, 지형 디자인에 대한 아쉬움이 있는 만큼, 플레이어는 맵의 구조적 특징을 최대한 활용해 전략을 수립하는 것이 중요하다. 「신전부수기5-1: 사막의 성」은 스타크래프트 브루드워의 유즈맵 중에서도 ‘컴까기’ 장르의 대표작으로 손꼽히며, 특히 건물을 파괴하는 재미와 전략적 깊이가 뛰어나다. 맵의 지형과 건물이 배치된 구조는 플레이어의 전략적 사고를 자극하며, 긴장감 넘치는 전투를 즐길 수 있도록 설계되어 있다. 맵의 난이도는 플레이어의 실력에 따라 조절이 가능하므로, 다양한 전략을 시도해 보며 자신만의 공략법을 찾아보는 것도 좋은 방법이다. 또한, 맵의 배경과 분위기가 사막의 성을 연상케 해, 플레이어의 몰입감을 높이는 데에도 기여한다. 이 맵을 플레이하기 전에는, 맵의 지형과 건물이 배치된 구조를 잘 이해하고, 적절한 자원 관리와 유닛 생산 계획을 세워두는 것이 좋다. 이를 바탕으로, 보다 효율적이고 전략적인 플레이를 즐길 수 있을 것이다. This UMS (User-Made Scenario) map, titled '신전부수기5-1: 사막의 성 (Castle of De)', is a quintessential entry in the 'Temple Destruction' series within StarCraft: Brood War custom maps. The map is set against a desert-themed backdrop, featuring a fortress-like structure where players must systematically destroy enemy buildings. The terrain is strategically designed with central plains, surrounding walls, and elevated hills, creating a challenging environment for unit movement and positioning. The gameplay revolves around resource management and strategic unit deployment. Players start at their base, gathering resources to produce armies, and then advance toward the enemy fortress to destroy its structures. The fortress is protected by elevated terrain and chokepoints, making it difficult to breach without proper unit compositions and upgrades. Mid-game requires players to navigate through densely packed defensive towers and buildings, demanding precise timing for attacks and retreats. The map’s terrain favors defensive play, encouraging players to utilize natural barriers and high ground to their advantage. While accessible to both beginners and experienced players, the map’s depth increases with difficulty. Beginners should focus on basic tactics, such as targeting specific buildings and managing unit health, while advanced players can optimize resource allocation and unit synergies for faster clears. Though designed for single-player against AI, the map’s structure does not support team play. The map’s creator, DraGon[chik], acknowledges limitations in terrain design, urging players to adapt their strategies to the existing layout. '신전부수기5-1: 사막의 성' stands out in the 'competing against AI' genre of StarCraft: Brood War custom maps, offering a blend of strategic depth and immersive desert fortress aesthetics. Its terrain and building placements challenge players to think tactically, balancing offense and defense. The map’s difficulty is scalable, allowing players to refine their strategies over multiple attempts. To maximize enjoyment, players should familiarize themselves with the terrain, plan resource and unit production carefully, and experiment with different approaches to find their optimal playstyle.
헬름즈 딥 대 아나타 13.3 (Helms Deep v. Annatar 13.3)
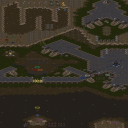
‘헬름즈 딥 대 아나타 13.3’은 스타크래프트: 브루드워의 유즈맵으로, 총 8명의 플레이어가 참여하는 대규모 디펜스 및 전략 게임이다. 맵의 전체적인 구조는 중앙에 위치한 거대한 요새와 주변을 에워싼 방어 시설, 그리고 적의 공격 루트를 차단하는 요충지들로 구성되어 있다. 맵의 배경은 사막 타일셋을 사용해 건조하고 메마른 분위기를 연출하며, 요새와 방어 시설은 마치Middle-earth의 ‘헬름즈 딥 전투’를 연상케 하는 중세 요새 디자인으로 구성되어 있다. 플레이어는 요새를 중심으로 한 방어선을 구축하고, 끊임없이 몰려오는 적의 웨이브를 상대해야 하며, 이 과정에서 자원 관리와 병력 배치, 전략적 판단이 요구된다. 특히 맵의 특징은 맵 곳곳에 배치된 방어 타워와 유닛 생산 건물들로, 플레이어는 초반 자원을 확보해 효율적으로 방어 체계를 구축해야 한다. 적의 공격은 요새 외곽에서부터 시작되며, 공격 루트는 맵의 지형을 따라 여러 갈래로 나뉘어 있어 플레이어는 한정된 병력으로도 다방면의 공격을 방어해야 한다. 또한 맵의 규모가 크고 지형이 복잡해, 전술적인 시야 확보와 통제가 중요한 포인트로 작용한다. 맵의 디자인상으로는 요새 내부와 외곽의 구조가 뚜렷이 구분되어 있어, 방어와 공격의 밸런스를 맞추는 것이 관건이다. 이 맵은 초보 플레이어보다는 중급 이상의 실력을 가진 플레이어에게 더 적합한데, 그 이유는 복잡한 지형과 다채로운 적의 웨이브 패턴 때문이다. 또한 팀 플레이가 강제되는 구조는 아니지만, 협력과 분업이 방어 성공의 열쇠가 되므로, 친구나 팀원과의 원활한 소통이 필요하다. 맵의 난이도는 적의 공격 패턴이 점점 강력해지면서 상승하므로, 초반 자원 확보와 방어 시설 구축을 얼마나 신속히 완료하는지가 승패를 좌우할 수 있다. 맵의 플레이 시간은 약 60분 내외로 예상되며, 이는 맵의 규모와 적의 웨이브 수가 많기 때문이다. 플레이 전 반드시 확인해야 할 요소는 맵의 주요 방어 지점과 적의 공격 루트, 그리고 자원 수집 지역의 위치다. 특히 요새 주변의 mineral field와 gas geyser의 분포는 초반 자원 확보에 큰 영향을 미치므로, 이를 미리 파악해두는 것이 중요하다. 또한 맵의 지형상 여러 길목이 존재해, 한 곳에만 방어 시설을 집중하면 쉽게 뚫릴 수 있으므로, 맵 전체를 아우르는 균형 잡힌 방어 계획을 세우는 것이 필수다. 마지막으로, 적의 웨이브는 일정 시간 간격으로 발생하므로, 이를 예측해 병력을 배치하고 보충하는 타이밍을 잘 조절해야 한다. ‘Helm’s Deep vs. Anath 13.3’ is a *StarCraft: Brood War* custom map designed for a large-scale defense and strategy game with up to eight players. The map features a massive central fortress surrounded by defensive structures and key choke points that block enemy attack routes. Set in a desert tile theme, the dry, barren atmosphere evokes the medieval fortress designs reminiscent of Middle-earth’s Battle of Helm’s Deep. Players must fortify defenses around the fortress while fending off relentless enemy waves, requiring careful resource management, troop positioning, and strategic decision-making. A defining feature of the map is the scattered defensive towers and unit production buildings. Players must secure early resources to efficiently build their defensive framework. Enemy attacks originate from the outer edges of the fortress, with multiple branching routes dictated by the terrain, forcing players to defend against multi-pronged assaults with limited forces. The large scale and complex geography of the map make tactical vision and control critical. The clear distinction between the fortress interior and exterior structures plays a key role in balancing defense and offense. This map is better suited for intermediate to advanced players due to its intricate terrain and varied enemy wave patterns. While not strictly team-based, successful defense hinges on cooperation and division of roles, making clear communication with teammates or friends essential. The difficulty escalates as enemy attacks grow stronger, with early resource collection and rapid defense setup often determining victory or defeat. Matches typically last around 60 minutes, given the map’s size and the number of enemy waves. Before playing, it’s crucial to identify key defensive points, enemy attack routes, and resource locations—especially the distribution of mineral fields and gas geysers around the fortress, which significantly impact early-game resource gathering. The terrain includes multiple pathways, and over-concentrating defenses in one area can lead to easy breaches, so a balanced, map-wide defense plan is vital. Additionally, since enemy waves spawn at regular intervals, predicting their timing and adjusting troop placements and reinforcements accordingly is essential for survival.
정복자들: 보너스 레벨 (Conquistadores: Bonus Level)
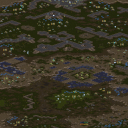
‘정복자들: 보너스 레벨’은 스타크래프트 브루드워의 유즈맵으로, 단일 플레이어용으로 설계된 디펜스 장르의 맵이다. 맵의 배경은 사막 지형으로 펼쳐지며, 중앙에 위치한 본진을 중심으로 적의 끊임없는 웨이브가 밀어닥치는 구조를 갖추고 있다. 플레이어는 프로토스 종족을 선택해, 강력한 방어 건물과 유닛을 배치하고 자원을 관리하면서 적의 공격을 방어해야 한다. 맵 곳곳에는 방어 타워를 설치할 수 있는 공간과 자원 채취 지역이 배치되어 있어, 전략적으로 건물을 배치하고 자원을 확보하는 것이 핵심이다. 이 맵의 가장 큰 특징은 바로 ‘보너스 레벨’이라는 이름에 걸맞게, 플레이어의 선택에 따라 다양한 전략을 펼칠 수 있는 유연성을 제공한다는 점이다. 예를 들어, 초반에 자원을 집중해 강력한 방어 건물을 짓거나, 적의 공격 패턴을 분석해 유닛을 효율적으로 배치할 수 있다. 또한, 맵의 중앙에 위치한 넓은 평원은 방어 건물의 배치와 유닛의 이동 경로를 결정짓는 중요한 요소로 작용한다. 플레이어는 이 평원을 어떻게 활용하느냐에 따라 방어 성공 여부가 갈릴 수 있다. ‘정복자들: 보너스 레벨’의 또 다른 매력은 바로 긴 플레이 시간과 높은 난이도다. 맵의 크기가 크고, 적의 공격이 끊임없이 이어지기 때문에 플레이어는 긴장감을 늦추지 않고 estratégia를 세워야 한다. 또한, 맵 곳곳에 숨겨진 자원과 보너스 아이템을 찾아내어 활용하는 것도 성공의 열쇠가 된다. 이 맵은 단순히 방어하는 것에서 그치지 않고, 자원의 관리와 전략적 계획이 요구되는 고난이도의 디펜스 게임으로, 스타크래프트 유즈맵의 매력을 한껏 느낄 수 있는 작품이다. 이 맵을 추천하는 대상은 바로 디펜스 게임을 즐기며, 전략적 사고와 긴장감을 동시에 경험하고 싶은 플레이어들이다. 특히, 단일 플레이어용 디펜스 맵을 선호하는 유저들에게는 최적의 선택지가 될 것이다. 또한, 프로토스 종족의 특성을 살려 플레이하고 싶은 유저들에게도 적합한 맵으로, 다양한 유닛과 건물의 조합을 통해 자신만의 전략을 펼쳐볼 수 있다. 마지막으로, 긴 플레이 시간을 즐기며 반복 플레이를 통해 실력을 향상시키고 싶은 유저들에게도 추천할 만한 작품이다. 플레이 전 반드시 확인해야 할 사항은 다음과 같다. 먼저, 맵의 크기가 크기 때문에 자원의 분배와 건물의 배치에 신중을 기해야 한다. 또한, 적의 공격 패턴을 미리 분석해 방어 전략을 세우는 것이 중요하다. 마지막으로, 맵 곳곳의 자원과 보너스 아이템을 빠르게 찾아내어 활용하는 연습을 해두면 더 효과적으로 플레이할 수 있다. English review text without any translation heading ‘Conquistadores: Bonus Level’ is a custom map for StarCraft: Brood War, designed as a single-player defense game. The map unfolds across a vast desert terrain, where the player’s base is positioned centrally, surrounded by waves of enemy units that relentlessly assault from all directions. Players control the Protoss faction, tasked with building defenses, gathering resources, and strategically positioning units to withstand continuous enemy pressure. The defining feature of this map is its flexibility, embodied in the ‘Bonus Level’ designation. Players can adapt their strategy based on resource availability and enemy patterns. For instance, early-game tower rushes or defensive setups can be viable, while mid-to-late game requires balancing unit production with base expansion. The central open area plays a crucial role in determining unit movement and building placement, making spatial awareness a key factor in survival. A standout aspect of ‘Conquistadores: Bonus Level’ is its extended playtime and high difficulty. The map’s large scale and persistent enemy waves demand sustained focus and adaptability. Hidden resources and bonus items scattered across the map add depth, rewarding thorough exploration and resource management. This map transcends typical tower defense mechanics by integrating resource scarcity, strategic depth, and real-time decision-making, offering a challenging yet rewarding experience. This map is ideal for players who enjoy defense-focused custom maps and seek a combination of strategic depth and tension. It caters especially to those who prefer single-player scenarios, as well as Protoss enthusiasts looking to leverage the faction’s unique strengths. The extended playtime and replayability make it a great choice for players who enjoy refining their tactics over multiple attempts. Before diving in, players should prioritize careful resource allocation and base layout, as the map’s size amplifies the consequences of poor planning. Analyzing enemy attack patterns and securing bonus resources early will significantly improve long-term survival. Familiarity with Protoss tech trees and defensive structures is also beneficial, as the map rewards disciplined macro-management alongside tactical micro-decisions.
투혼 1.3 (Tohon 1.3)
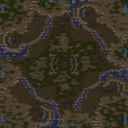
스타크래프트 브루드워의 고전 유즈맵으로 꼽히는 <투혼 1.3>은 혼신의 힘을 끌어내야만 승리를 쟁취할 수 있는 치열한 전투를 제공하는 맵이다. 맵의 이름처럼 물러설 곳이 없다는 것의 의미를 온전히 느끼게 해주는 이 맵은, 플레이어가 전술적 선택과 빠른 판단력을 요구받는 디펜스 장르에 속한다. 맵의 배경은 사막 지형을 바탕으로 하며, 넓은 개활지와 더불어 곳곳에 배치된 방어 시설물을 활용해 적의 공격을 방어해야 한다. 맵의 중앙에는 '은빛 날개'라는 상징적인 구조물이 자리하고 있는데, 이 구조물은 승리 조건과 깊은 연관이 있는 것으로 추정된다. 플레이어는 각자의 기지를 지키며 끊임없이 몰려드는 적의 웨이브를 막아내야 하며, 방어 라인을 구축하고 자원을 확보하는 동시에 적절한 타이밍에 반격을 펼쳐야 한다. 특히 맵의 지형이 복잡한 구조를 띠고 있어, 전략적인 포지셔닝이 승리를 좌우할 확률이 높다. 초보 플레이어는 방어 라인의 중요성을 간과하기 쉬우며, 자원 관리와 병력 구성을 제대로 하지 못해 쉽게 무너질 수 있다. 반면 숙련된 플레이어는 맵의 패턴을 익히고 효율적인 방어 체계를 구축해 적의 공격을 무력화시키는 데 능숙하다. 맵의 분위기는 전쟁의 비장함과 희생을 강조하며, 플레이어에게는 전장의 지휘관으로서의 책임을 부여한다. 전투가 치열해질수록 긴장감은 배가되며, 승리를 향해 나아가기 위해 플레이어는 끊임없이 도전하고 성장해야 한다. 이 맵은 단순히 방어만을 요구하는 것이 아니라, 적재적소에 병력을 투입하고 반격을 펼치는 능동적인 플레이가 요구된다. 때문에 디펜스 장르를 любители지만 전략적 깊이를 원하는 플레이어들에게 strong하게 추천할 만하다. 특히 팀플레이가 가능한 맵 구조를 갖추고 있어, 파트너와의 호흡이 승리를 좌우할 수도 있다. 맵을 플레이하기 전에는 방어 라인의 배치와 주요 자원 지점, 그리고 '은빛 날개'의 위치를 숙지하는 것이 중요하다. 또한, 각 웨이브별로 등장하는 적의 종류와 패턴을 미리 파악해 두면 훨씬 수월하게 방어전을 수행할 수 있을 것이다. 맵의 난이도는 대체로 어려운 편에 속하며, 숙련된 플레이어라도 반복 플레이를 통해 실력을 갈고닦아야만 한다. 투혼 1.3은 단순히 방어만 하는 것이 아니라, 승리를 위한 전략적 사고와 끈기를 요구하는 맵이기 때문이다. 이 맵을 통해 플레이어는 전장의 지휘관으로서의 역량을 발휘하며, 그로 인한 성취감을 느낄 수 있을 것이다. 또한, 맵의 디자인과 분위기가 전쟁의 비장함을 강조하기 때문에, 플레이어는 전투의 무게감을 온전히 느낄 수 있다. 요약하자면, 투혼 1.3은 디펜스 장르의 걸작으로 손꼽히며, 전략적 깊이를 추구하는 플레이어들에게 strong한 추천을 보낸다. 맵의 구조와 디자인이 뛰어나며, 플레이어의 능동적인 참여를 요구한다는 점에서 깊은 인상을 남긴다. 이 맵을 통해 디펜스 장르의 매력을 다시 한 번 느껴보길 바란다. *Touhon 1.3* is a classic *StarCraft: Brood War* custom map renowned for delivering intense battles where victory demands every ounce of a player’s skill. As its name suggests, the map leaves no room for retreat, immersing players in a tense defense genre that tests tactical foresight and split-second decision-making. Set against a desert terrain, the map features vast open spaces alongside strategically placed defensive structures that players must leverage to fend off relentless enemy waves. At its heart lies the iconic "Silver Wing" structure, which appears to be deeply tied to the victory condition. Players must defend their base while simultaneously managing resources, fortifying defensive lines, and launching well-timed counterattacks against waves of enemies. The map’s intricate terrain demands careful positioning, as strategic placement often determines the outcome of battles. Novices may struggle by overlooking the importance of defensive lines, mismanaging resources, or failing to build effective armies, while experienced players excel by recognizing patterns and establishing efficient defensive systems to neutralize threats. The map’s atmosphere is steeped in the gravity of war and sacrifice, placing players in the role of a commander responsible for the fate of their forces. As combat intensifies, the tension escalates, pushing players to constantly adapt and grow to secure victory. *Touhon 1.3* isn’t just about passive defense—it rewards proactive play, requiring players to deploy forces strategically and seize opportunities for counterattacks. This makes it an excellent choice for fans of the defense genre who seek deeper strategic engagement. The map also supports team play, where coordination with a partner can be the key to success. Before diving in, players should familiarize themselves with defensive layouts, critical resource points, and the location of the "Silver Wing." Understanding the types and patterns of enemies that appear in each wave will make defense far more manageable. The difficulty is high, and even seasoned players will need repeated attempts to refine their strategies, as *Touhon 1.3* demands not just defense but a commander’s mindset and unwavering perseverance. Through this map, players take on the role of a battlefield leader, experiencing the satisfaction of overcoming challenges through skill and strategy. Its design and atmosphere amplify the weight of war, allowing players to fully grasp the gravity of their decisions. In short, *Touhon 1.3* stands as a masterpiece of the defense genre, highly recommended for players who crave strategic depth. Its exceptional structure and design demand active participation, leaving a lasting impression. I strongly encourage fans of defense maps to rediscover its appeal.
데저트 스트라이크 3.01 (Desert Strike 3.01)
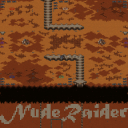
데저트 스트라이크 3.01은 사막 배경의 아케이드 스타일의 컴까기 맵으로,Sand Castle Wars와 유사한 구성을 가지고 있지만 훨씬 단순화된 구조로 제작되었다. 맵 곳곳에 흩어져 있는 적 기지들을 파괴하는 것이 주 목표이며, 맵 중앙에는 거대한 성채가 위치해 있어 이 곳을 차지하는 플레이어가 유리한 고지를 점할 수 있도록 설계되었다. 맵은 6인용으로 제작되어 있으며, 각 플레이어는 독립적인 시작 지역을 확보하고 있다가 점차 확장하는 방식으로 전투를 펼치게 된다. 맵의 특징 중 하나는 이전 버전인 2.1에서 발견된 버그와 밸런스 문제가 모두 수정되었다는 점으로, 안정적인 플레이 경험을 제공한다. 또한, CASTLE FIGHT라는 맵의 리메이크 버전으로도 알려져 있어, 기존 팬들에게는 익숙한 요소들이 포함되어 있다. 맵의 전체적인 분위기는 사막의 황량한 색감과 고대 유적의 흔적이 어우러져 있어 시각적으로도 독특한 감성을 자아낸다. 플레이어는 맵 곳곳에 배치된 자원과 건물을 활용해 전략을 세우며, 성채를 차지하기 위한 공격과 방어가 반복되는 긴장감 있는 전투가 전개된다. 비교적 간단한 규칙에도 불구하고, 맵의 구조와 적의 배치에 따라 전략의 깊이가 달라지므로 반복 플레이를 통해 새로운 전술을 시도해 볼 수 있다. 초보자도 쉽게 접근할 수 있지만, 숙련된 플레이어는 더 효율적인 전략을 구사하며 우위를 점할 수 있는 요소도 포함되어 있다. 또한, 맵의 아케이드 스타일은 빠른 템포의 전투를 즐기려는 플레이어들에게 적합하며, 긴장감 있는 순간들이 throughout the game을 만들어낸다. 맵을 플레이하기 전에는 적 기지의 위치와 성채의 중요성을 숙지하는 것이 중요하며, 자원의 분배와 병력의 이동 경로를 신중히 계획해야 한다. 맵의 단순함은 접근성을 높여주지만, 그만큼 플레이어의 전략적 선택이 승패를 좌우하는 요소가 될 수 있으므로, 신중한 플레이가 요구된다. 데저트 스트라이크 3.01은 사막의 황량한 beauty와 함께 전략적 깊이를 느낄 수 있는 컴까기 맵으로, 스타크래프트 브루드워의 유즈맵 among desert-themed strategy maps의 대표작 중 하나로 손꼽힌다. 이 맵은 특히 아케이드 스타일의 컴까기 맵을 선호하는 플레이어들에게 강력히 추천할 만하다. Desert Strike 3.01 is an arcade-style UMS map set in a desert environment, inspired by Sand Castle Wars but streamlined for accessibility. The primary objective revolves around destroying enemy bases scattered across the map, with a central citadel serving as a strategic stronghold. Designed for six players, each starts in a separate base and expands their territory through combat. A notable feature of this version is the removal of bugs and balance issues present in v2.1, ensuring a smoother gameplay experience. As a remake of the classic CASTLE FIGHT by theleo_ua, it retains familiar elements while introducing refined mechanics. The visual theme blends the barren hues of the desert with ancient ruins, creating a distinct atmosphere. Players leverage resources and structures to formulate strategies, engaging in tense cycles of attack and defense to capture the citadel. While the rules are straightforward, the map's layout and enemy placements offer depth, encouraging repeated plays and tactical experimentation. Beginners will find the map approachable, yet skilled players can exploit strategic nuances for dominance. The arcade-style pacing appeals to those seeking fast-paced battles, with high-tension moments throughout. Before playing, it’s crucial to study enemy base locations and the citadel’s significance, while carefully planning resource allocation and troop movements. Though the map’s simplicity enhances accessibility, strategic decisions remain pivotal to victory. Desert Strike 3.01 stands out among desert-themed strategy maps in Brood War custom maps, offering an engaging blend of simplicity and depth. It is highly recommended for players who enjoy arcade-style UMS maps with a focus on base destruction and strategic expansion.
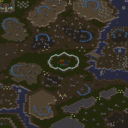
쿠아 테라스 (Qua' Teras) w/o Intro/Lock
이 맵은 스타크래프트 브루드워의 UMS(유즈맵) 장르로, 총 6명의 플레이어가 참여하는 대규모 전투형 디펜스 맵이다. 맵의 배경은 사막 지형으로 이루어져 있으며, 중앙에는 거대한 요새가 자리 잡고 있어 공방전이 활발히 벌어질 것으로 예상된다. 맵의 이름은 'Qua' Teras w/o Intro/Lock'으로, 인트로와 잠금 해제 없이 순수한 전투에 집중할 수 있는 구조로 설계된 것이 특징이다. 내부 맵 설명에 따르면 제작자는 Big-Fat-HomoW이며, 인트로 제거는 SoulStealer-CO에 의해 진행되었다. 플레이어는 각자 독립된 시작 지점에서 출발하며, 중앙 요새를 중심으로 적대 세력과의 전투를 벌이게 된다. 맵의 규모가 크고 타일셋이 사막인 만큼, 넓은 시야와 전략적 이동이 중요한 요소로 작용할 것이다. 다수의 플레이어가 참여하므로 동맹이나 협력이 필요할 수 있으며, 요새 방어와 공격 타이밍을 잘 조율해야만 승리를 거둘 수 있을 것으로 보인다. 또한, 맵의 이름은 다소 독특한 언어로 구성되어 있어 처음 접하는 플레이어는 혼란스러울 수 있지만, 이는 맵의 개성을 나타내는 요소로 받아들일 만하다. 이 맵은 넓은 전장과 다수의 플레이어 수를 고려할 때, 팀플레이가 필수적이거나 아니면 각자 독립적인 전투를 벌이는 구조일 가능성이 크다. 사막 배경의 넓은 맵에서 다양한 전략을 구사하며 전투를 즐길 수 있는 점이 장점으로 작용할 것이다. 다만, 인트로가 없기 때문에 게임의 이해도를 높이기 위해 사전 설명이나 튜토리얼이 포함되어 있지 않다는 점은 주의가 필요하다. 플레이어는 맵의 특성을 직접 체험하며 전략을 세워야 한다. 이 맵은 주로 디펜스와 대규모 전투를 즐기는 플레이어들에게 적합할 것으로 보이며, 특히 6인 이상의 플레이어가 모여서 전략적인 전투를 벌이고자 하는 경우에 추천할 만하다. 맵의 이름이나 배경과는 달리, 전투와 방어에 집중된 구조이기 때문에 스토리나 추가적인 컨텐츠는 없을 것으로 예상된다. 플레이어는 맵의 특성을 잘 이해하고, 각자의 역할을 수행하며 승리를 향해 나아가야 한다. 시작 전에는 맵의 구조와 각자의 시작 위치, 중앙 요새의 위치 등을 미리 확인하는 것이 중요하다. 또한, 동맹이나 적대 세력의 배치, 리소스의 분포 등을 고려하여 전략을 수립하는 것이 좋다. 맵의 이름은 다소 낯설지만, 차근차근 플레이를 진행하며 맵의 특징을 파악하는 것이 중요하다. This StarCraft: Brood War UMS map, titled 'Qua' Teras w/o Intro/Lock', is designed for large-scale defensive warfare across a vast desert battlefield. The map supports up to six players, each starting from isolated positions surrounding a central fortress that serves as the primary battleground. Removing intro sequences allows players to dive straight into the action, emphasizing strategy and coordination over narrative setup. The desert terrain and expansive map layout demand strong spatial awareness and tactical movement, as players must navigate between defensive positions and offensive maneuvers. Centralized fortress structures suggest that controlling key points and resource paths is crucial for survival and victory. While the unique title may initially confuse some players, it reflects the map’s distinct identity rather than its core mechanics. Given the scale and multiplayer nature, teamwork or strategic alliances are likely essential for success, though the exact victory conditions and faction layouts remain undefined without additional documentation. Players are advised to familiarize themselves with the map layout—including starting zones, resource distribution, and potential choke points—before engaging in combat. The absence of an intro sequence means no pre-game tutorial is provided, so understanding the map’s flow through exploration is part of the experience. Recommended for players who enjoy defensive strategy and large-scale PvP battles, this map thrives on coordination, map control, and adaptability. Those seeking narrative depth or single-player challenges may find it less engaging. Prior to starting, scouting the terrain and identifying key defensive or offensive positions will significantly improve performance. The title’s unconventional language may pose minor initial confusion, but the gameplay itself is straightforward once the map’s mechanics are understood.
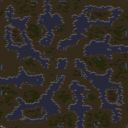
터보 (Turbo)
스타크래프트 브루드워의 유즈맵 〈Turbo〉는 빠른 진행과 박진감 넘치는 전투가 특징인 컴까기 스타일의 맵으로, 최대 8인까지 플레이할 수 있는 멀티플레이어 전용 맵이다. 내부 맵 제목과 파일명에서 확인되는 ‘Turbo’라는 이름은 맵의 속도감과 핑퐁식 전투를 연상시키며, 설명문 ‘Don't blink or you will miss the action.’은 맵의 빠른 템포와 집중력을 요구하는 플레이 스타일을 강조한다. 맵의 배경은 사막 타일셋으로 구성되어 있으며, 넓은 평야와 곡선형 통로, 중앙戰區가 눈에 띈다. 이러한 구조는 플레이어들이 서로를 마주치며 전투를 벌이기 쉽도록 설계된 것으로 추정된다. 플레이 방식은 기본적으로 컴까기 형식으로, 상대방을 재빨리 제압하는 것이 핵심이다. 맵의 넓은 공간과 중앙戰區는 초반부터 교전이 발생하기 쉽도록 유도하며, 좁은 통로나 지형지는 플레이어 간의 추격전이나 기습을 가능케 한다. 특히 설명문에 ‘USE MAP SETTINGS’이 포함된 점으로 보아, 맵 설정에서 인원 수나 게임 모드를 자유롭게 조정할 수 있는 것으로 보인다. 이는 다양한 플레이 스타일을 지원하며, 초보자부터 숙련자까지 폭넓은 사용자를 대상으로 하고 있음을 시사한다. 추천 대상은 스타크래프트의 기본 메커니즘과 빠른 전투를 즐기는 플레이어들이다. 특히 2~8인 멀티플레이어 환경에서 경쟁심을 불태우고 싶거나, 짧은 시간 안에 승부를 가리고 싶은 유저들에게 적합하다. 맵의 빠른 템포는 플레이어의 반응 속도와 전략적 판단력을 요구하므로, 실전 감각을 키우고 싶거나 입문자들에게도 효과적인 훈련이 될 수 있다. 반면, 느린 플레이를 선호하거나 전략적 깊이를 중시하는 유저에게는 다소 간소하게 느껴질 수 있으니, 플레이 전에 맵의 구조와 규칙을 충분히 숙지하는 것이 중요하다. 플레이 전 확인해야 할 포인트는 맵의 지형과 설정이다. 넓은 개활지에서는 초반부터 전투가 발생할 가능성이 높으므로, 빠르게 자원을 확보하고 병력을 생산하는 전략이 필요할 수 있다. 또한, 맵 설정에서 인원 수나 게임 모드를 변경할 경우, 밸런스가 달라질 수 있으므로 참여자 간의 합의를 미리 진행하는 것이 좋다. 마지막으로, 맵의 빠른 진행을 고려해 초반Resource 관리와 병력 생산을 최적화하는 연습을 해두면, 더욱 유리한 고지를 점할 수 있을 것이다. Turbo는 단순한 컴까기 맵을 넘어, 스타크래프트의 기본 전략성을 유지하면서도 속도감과 재미를 극대화한 유즈맵으로 평가된다. 다양한 환경에서 즐길 수 있는 만큼, 플레이어의 수와 전략에 따라 매번 다른 경험을 선사할 수 있을 것이다. 맵의 구조와 설명문을 바탕으로, 사용자 스스로가 최적의 플레이 방법을 모색해 보는 것도 이 맵의 또 다른 재미 요소라 할 수 있다. StarCraft: Brood War’s custom map *Turbo* is a frenetic, action-packed melee-style map designed for fast-paced, high-intensity combat, supporting up to eight players in multiplayer mode. The name “Turbo,” reflected in both the internal map title and filename, evokes the map’s sense of speed and its back-and-forth combat style, while the tagline “Don't blink or you will miss the action.” underscores its rapid tempo and the need for sharp focus. The map features a desert tileset, with wide open plains, winding corridors, and a central battlefield standing out. This layout appears purposefully designed to facilitate early clashes between players. Gameplay follows a classic melee format, where quickly overwhelming opponents is key. The expansive space and central battlefield make early engagements likely, while narrow passages and terrain allow for chases and ambushes. The inclusion of “USE MAP SETTINGS” in the description suggests that player count and game modes can be freely adjusted, catering to a variety of playstyles and appealing to both beginners and veterans alike. Ideal for players who enjoy StarCraft’s core mechanics and fast-paced combat, *Turbo* is especially well-suited for those looking to fuel competitive fire in 2-to-8-player multiplayer or settle matches in a short time. Its rapid pace demands quick reflexes and strategic decision-making, making it a useful training ground for sharpening real-time instincts—even for newcomers. However, those who prefer slower play or deeper strategy may find the experience too streamlined, so familiarizing yourself with the map’s layout and rules beforehand is essential. Before jumping in, check the terrain and settings. Open areas mean early skirmishes are likely, so securing resources and churning out forces quickly can be critical. Since adjusting player count or game modes affects balance, it’s wise to agree on settings with your teammates ahead of time. Finally, given the map’s speed, practicing efficient early resource management and unit production can give you a significant edge. Beyond a mere melee map, *Turbo* stands out for blending StarCraft’s fundamental strategy with exhilarating speed and fun. Its versatility means every match can feel fresh, depending on player count and tactics. By studying the map’s structure and description, players can experiment with different approaches—turning each playthrough into a chance to discover new strategies and enjoy the game’s dynamic challenges.
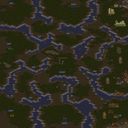
컴퓨터 버전 HELL (Computer Ver.HELL)
스타크래프트 브루드워의 유즈맵 ‘Computer Ver.HELL’은 컴퓨터 상대 디펜스 장르의 맵으로, 이름에서 느껴지듯 일반적인 디펜스와는 차별화된 극한의 방어 플레이를 요구하는 작품이다. 맵의 전체적인 구조는 사막 타일셋을 배경으로 펼쳐지며, 중앙에 위치한 본진을 중심으로 적의 공격을 방어하는 방식으로 진행된다. 맵의 특징은 ‘HELL’이라는 제목답게 초반부터 끊임없는 적의 다중 러시와 강력한 유닛 조합을 상대해야 한다는 점으로, 방어에 실패하면 순식간에 본진이 무너질 수 있는 극한의 긴장감을 제공한다. 특히, 방어선이 복잡하게 배치되어 있으며, 지형적 이점을 살리기 위한 섬세한 배치와 자원 관리, 유닛 생산 전략이 요구된다. 초보 유저보다는 중급 이상의 실력을 갖춘 플레이어에게 적합한 맵으로, 방어 타워의 배치와 유닛 컨트롤, 그리고 자원의 효율적 사용이 승패를 좌우한다. 또한, 맵의 난이도가 높아질수록 적의 공격 패턴이 다양해지고 강해지므로, 반복 플레이를 통해 대처법을 익히는 것이 중요하다. 이 맵은 디펜스 장르의 깊이를 한층 더 끌어올린 작품으로, 방어 플레이의 정석을 경험해 보고 싶은 유저들에게 강력히 추천한다. 다만, 초반 자원의 부족으로 인한 어려움을 극복하기 위한 전략적 준비가 필요하다는 점은 유념해야 한다. This Brood War custom map, ‘Computer Ver.HELL’, falls under the defense genre against AI opponents, offering a uniquely challenging experience distinct from typical defense maps. Set against a desert tileset, the map centers around defending your main base from relentless enemy waves. The ‘HELL’ in its title reflects the extreme difficulty, as players face continuous, multi-pronged assaults with powerful enemy unit compositions from the outset, where even a single mistake can lead to a swift defeat. The defensive lines are intricately designed, demanding strategic tower placements, efficient resource management, and precise unit control. While the map is accessible to intermediate players, mastering its mechanics requires experience and adaptability, especially as enemy patterns grow more complex and intense with higher difficulty levels. Ideal for players seeking to refine their defense strategies, this map rewards patience and practice. However, newcomers should prepare for initial resource scarcity and steep learning curves.
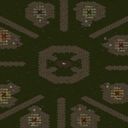
포켓몬블러드 마스터즈3 (7단계) (Pokémon Blood Masters 3 - 7th Stage)
스타크래프트: 브루드워의 유즈맵 장르 중에서도 독특한 ‘블러드’ 스타일을 채택한 ‘포켓몬블러드 마스터즈3 (7단계)’는 플레이어들이 포켓몬-like한 유닛을 조종하며 전투를 펼치는 컴까기 형식의 맵이다. 맵 이미지 상에서 확인되는 중앙의 넓은 평원과 주변의 협소한 입구 구조는 마치 classic 블러드 게임을 연상시키며, 각 플레이어는 고유의 유닛과 스킬을 활용해 적을 섬멸하는 전투를 벌인다. 맵의 7단계라는 표기는 아마도 난이도 progression을 의미하는 것으로 추정되며, 초반에는 간단한 패턴으로 유닛을 컨트롤할 수 있지만 점차 복잡한 스킬 사용과 위치 선정, 팀워크가 요구되는 구조로 변모할 가능성이 높다. 특히 입구 주변의 좁은 길목은 치고 빠지는 전술을 활용할 수 있게 설계되어 있어, 블러드 장르의 특징인 ‘밀고 당기기’ 전투의 묘미를 느낄 수 있다. 이 맵은 8인 대전이 가능한 대규모 전투를 지원하며, 사막 타일셋을 활용한 배경은 마치 사막 한가운데서 벌어지는 대규모 혈투를 연상시킨다. 플레이어는 각자의 포지션을 신중히 선택해야 하며, 특히 입구 부근에서 벌어지는 초반 전투가 전체 승패를 좌우할 수 있어 전략적 플레이가 요구된다. 이 맵은 블러드 장르의 fans뿐만 아니라, 팀 기반의 전략적 전투를 즐기는 유저들에게도 흥미로운 경험을 제공할 것으로 보인다. 또한, 7단계라는 progression은 반복 플레이를 유도할 수 있어, 숙련도를 높이고자 하는 유저들에게 적합할 것이다. 다만, 8인 대전이 가능한 대규모 전투임에도 불구하고 맵의 중앙 공간이 다소 협소한 편이므로, 개방형 맵을 선호하는 유저들은 약간의 불편함을 느낄 수 있다. 맵을 플레이하기 전에는 자신의 유닛의 스킬과 특성을 숙지하는 것이 중요하며, 팀원과의 원활한 소통을 통해 전략을 공유하는 것이 필수적이다. 초보자는 난이도가 있는 편이므로, 먼저 연습 모드나 낮은 단계에서부터 시작해보는 것이 рекомен된다. 이 맵은 특히 블러드 장르에 익숙한 유저들이라면 진가를 발휘할 수 있는 구조로 설계되어 있으며, 전략적 깊이와 재미를 동시에 추구하는 유저들에게 강추할 만한 작품이다. 8인 대전이 가능한 대규모 전투와 더불어, 각 단계가 Progressive하게 구성되어 있어 긴장감과 성취감을 동시에 느낄 수 있는 점이 큰 장점이다. 이 맵을 통해 블러드 장르의 새로운 재미를 발견할 수 있을 것이다. StarCraft: Brood War's custom map genre features a unique "Blood" style, and "Pocketmon Blood Masters 3 (Stage 7)" is a command-style map where players control Pokémon-like units in battle. The central wide plain and surrounding narrow entrances visible in the map image evoke classic Blood games, with each player utilizing their unique units and skills to annihilate their enemies. The "Stage 7" designation likely indicates difficulty progression—while early stages allow simple unit control, later stages demand complex skill usage, positioning, and teamwork. The narrow passages near the entrances enable hit-and-run tactics, capturing the essence of "push-and-pull" combat central to the Blood genre. Supporting up to eight players, the desert-themed background evokes a large-scale battle in the middle of a desert. Players must carefully choose their roles, as early fights near the entrances can determine the outcome of the entire match, requiring strategic play. This map offers an engaging experience not only for Blood genre fans but also for players who enjoy team-based strategic combat. The progressive stages encourage repeated play, making it ideal for users looking to improve their skills. However, despite supporting eight players, the central space is somewhat cramped, which might inconvenience those who prefer open maps. Before playing, it's crucial to understand your units' skills and traits, and smooth communication with teammates is essential. Beginners may find the difficulty high, so starting with practice mode or lower stages is recommended. Designed especially for Blood genre veterans, this map delivers depth and fun, making it highly recommended for those seeking strategic challenge and entertainment. With large-scale eight-player battles and progressive stages, it offers tension and a sense of achievement. This map is a great way to discover new enjoyment in the Blood genre.
최근 등록된 맵
새로 추가된 파일과 버전을 확인하세요.
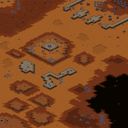
오퍼레이션: 부랴 в пустыне (Operation: Bury v Pustyne)
‘오퍼레이션: 부랴 в пустыне’는 스타크래프트: 브루드워의 유즈맵으로, 한 명의 플레이어가 광활한 사막 지형을 배경으로 펼쳐지는 전투에 도전하는 스타일이 인상적인 작품이다. 맵은 사막 지형과 산악 지대, 그리고 곳곳에 흩어져 있는 잔해와 오아시스가 특징적으로 배치되어 있어, 건물을 짓고 자원을 모으는 동시에 적의 공격을 방어하거나 선제공격을 펼치는 전략적 선택이 강제된다. 내부 설명에 따르면 ‘레이너가 코랄의 사막 지역을 점령하기 위해 특수 부대를 파견한다’는 스토리 설정 하에, 플레이어는 맵 중앙에 위치한 본진을 지키며 주변의 적 건물을 제압하거나, 반대로 적의 핵심 건물을 공격하는 두 가지 방향의 전략을 구사할 수 있는 것으로 보인다. 맵의 구조는 비교적 넓고 개방되어 있어, 유닛의 이동과 시야 확보가 중요해진다. 특히 사막 지형의 경우 시야가 제한되는 경우가 많아, 정찰 유닛이나 센서가 필수적이며, 오아시스 지역은 자원 수집과 방어 거점으로 활용할 수 있는 전략적 요충지다. 맵 곳곳에 배치된 잔해는 자연스러운 장애물 역할을 하면서도, 일부는 건물 배치나 방어선 구축에 활용할 수 있는 유연성을 제공한다. 또한 맵의 중앙과 가장자리에 위치한 고지대는 시야 확보와 포격 유닛의 배치에 유리한 지점으로, 전투의 승패를 좌우할 수 있는 핵심 지역으로 작용한다. 플레이어는 초반 자원 수집과 건물을 건설하는 동시에, 적의 공격 패턴을 분석하여 방어선을 구축하거나, 반대로 빠른 타이밍에 적 본진을 노리는 агре시브한 전략을 펼칠 수 있다. 맵의 난이도는 주로 적의 공격 빈도와 강도에 따라 결정되며, 일부 구간에서는 적의 대규모 병력이 몰려오는 경우 방어가 필요할 수 있다. 또한 맵의 광활한 크기와 개방적인 구조상, 유닛의 컨트롤과 멀티태스킹 능력이 요구되는 경우가 많아, 초보 플레이어보다는 중급 이상의 숙련자를 대상으로 하는 것이 이상적이다. 맵의 진행은 주로 적 건물을 모두 파괴하거나, 모든 적 유닛을 섬멸하는 방식으로 마무리되는 것으로 추정되며, 승리 조건은 내부 설명이나 맵의 구조상 ‘코랄의 사막 지역을 점령’하는 데 성공하는 것으로 보인다. 이 맵을 즐기기 위해서는 사막 지형과 산악 지대의 특성을 충분히 이해하고, 자원 관리와 유닛 컨트롤에 대한 기본적인 숙련이 필요하다. 또한 맵의 광활한 크기상, 빠른 시야 확보와 정찰이 게임의 승패를 가르는 핵심 요소로 작용할 수 있으므로, 초반 정찰을 소홀히 하지 않도록 주의해야 한다. 맵의 분위기는 전쟁과 사막의 황량한 beauty가 어우러져 있어, 전략적인 전투와 함께 몰입감 있는 플레이 경험을 제공한다. 특히 건물을 짓고 방어선을 구축하는 디펜스 요소와, 적 본진을 공격하는 오프ensive 요소가 균형 있게 배치되어 있어, 다양한 전략적 선택을 즐길 수 있는 것이 이 맵의 큰 장점이다. ‘Operation: Burrow in the Desert’ is a custom map for *StarCraft: Brood War* where a single player faces off against a vast desert battlefield, offering a style of play that stands out. The map features a desert terrain interspersed with mountainous regions, scattered debris, and oases, forcing players to balance building structures, gathering resources, and either defending against or launching preemptive strikes. According to its internal lore, the map is set in a scenario where "Raynor dispatches a special forces unit to secure the desert region of Korhal," and players must either protect their central base or push outward to destroy enemy structures—or even assault the enemy’s core buildings. The map’s layout is relatively open and expansive, making unit mobility and vision control critical. The desert terrain often restricts visibility, making scouting units or sensor-based detection essential. Oases serve as key strategic points for resource collection and defensive outposts, while the debris scattered across the map acts as natural obstacles that can also be leveraged for building placement or fortifying defenses. High ground near the center and edges of the map provides superior sightlines and ideal positioning for artillery units, making these areas pivotal to the outcome of battles. Players must gather initial resources and construct buildings while analyzing enemy attack patterns to either fortify their defenses or adopt an aggressive strategy by striking the enemy base early. The difficulty is largely determined by the frequency and intensity of enemy assaults, with some sections requiring preparedness for large-scale enemy advances. Given the map’s vast scale and open design, strong unit control and multitasking skills are essential—making it better suited for intermediate to advanced players rather than beginners. The match concludes when all enemy structures are destroyed or every enemy unit is eliminated, with victory ultimately hinging on "securing the desert region of Korhal," as implied by the map’s lore and structure. To fully enjoy this map, players should grasp the unique characteristics of the desert and mountainous terrain, along with solid resource management and unit control. The map’s sheer size means that early scouting and vision control can decide the game’s outcome, so neglecting reconnaissance in the opening stages is a risk. The atmosphere blends the harsh beauty of war and the desert, delivering an immersive experience where strategic combat and deep engagement go hand in hand. The map strikes a balance between defensive elements—building and fortifying—and offensive pressure, allowing players to experiment with a variety of tactics and enjoy diverse strategic choices.
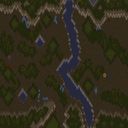
적의 후방 (Behind Enemy Lines)
「Behind Enemy Lines」는 스타크래프트 브루드워의 유즈맵으로, 1인 플레이 중심의 숨바꼭질과 추격전을 조합한 독특한 장르의 맵이다. 맵은 사막 지형을 배경으로 삼아 넓은 평야와 구불구불한 협곡, 절벽 지형이 어우러져 있으며, 플레이어는 지도를 가로지르며 적의 요원을 포착하고 제압하는 임무를 수행한다. 맵 중앙을 가로지르는 긴 도로가 주요 통로로, 양옆으로 펼쳐진 사막과 바위 지형은 시야를 제한하는 요소로 작용해 플레이어는 끊임없이 위치를 이동하며 적의 움직임을 예측해야 한다. 맵 곳곳에 scattered된 붉은 표식들은 presumably 적의 위치나 경로 지시 역할을 하며, 이를 활용해 전략적인 접근이 가능하다. UI는 기본 스타크래프트 인터페이스를 따르지만, 미니맵과 정보 표시가 단순해 플레이어는 맵의 구조와 지형을 암기하는 능력이 요구된다. 진행 방식은 비교적 간단하지만, 넓은 맵과 제한된 시야 때문에 긴장감이 지속되며, 적의 움직임을 예측하는 재미가 주된 포인트다. 초보자의 경우 맵의 넓은 공간과 복잡한 지형에 혼란을 느낄 수 있지만, 익숙해지면 적의 패턴을 읽고 효율적으로 대응할 수 있는 전략적 깊이를 제공한다. 추천 대상은 단독 플레이를 선호하는 유저나, 숨바꼭질과 추격전을 좋아하는 플레이어, 그리고 넓은 맵에서 전략적 사고를 즐기는 게이머에게 적합하다. 플레이 전에는 맵의 주요 길목과 시야가 제한되는 지점을 미리 파악해 두는 것이 좋다. 또한, 적의 움직임이 랜덤에 가까울 수 있어 반복 플레이를 통해 경험을 쌓는 것이 중요하다. 이 맵은 단순히 적을 잡는 것뿐만 아니라, 맵 자체를 활용한 전략적 플레이가 핵심인 만큼, 한 번 익숙해지면 매번 다른 재미를 느낄 수 있다. 특히 사막이라는 배경은 넓은 시야와 개방감을 강조해, 플레이어의 심리적 긴장감을 높이는 데 기여한다. "Behind Enemy Lines" is a custom map from *StarCraft: Brood War* that blends hide-and-seek and pursuit mechanics into a unique single-player experience. Set against a desert landscape, the map features vast plains, winding canyons, and cliffside terrain, forcing players to traverse the map while tracking and eliminating enemy agents. A long central road serves as the main thoroughfare, flanked by desert and rocky formations that restrict visibility, requiring constant movement and prediction of enemy actions. Scattered red markers throughout the map likely indicate enemy positions or paths, offering strategic opportunities for approach. While the UI follows the standard *StarCraft* interface, the minimalist minimap and information display demand strong memorization of the map’s layout and terrain. Though the gameplay is straightforward, the expansive map and limited visibility create sustained tension, with the thrill of anticipating enemy movements as the core appeal. Beginners may feel overwhelmed by the vast space and complex terrain, but once familiar, the map rewards strategic depth—learning enemy patterns and responding efficiently. It’s ideal for players who enjoy solo experiences, hide-and-seek or chase mechanics, and strategic thinking in large-scale environments. Before playing, it’s helpful to memorize key pathways and areas with restricted visibility. Since enemy movements can feel nearly random, repeated play is essential to build experience. What makes this map stand out is its emphasis on strategic play beyond simply defeating enemies—leveraging the map itself as a tool. Once mastered, each session offers fresh excitement. The desert setting enhances the sense of open space and isolation, heightening psychological tension for players.
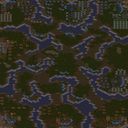
프로게이머대전 신인 VS 신인
스타크래프트 브루드워의 유즈맵 ‘프로게이머대전 신인 VS 신인’은 아레나 장르의 맵으로, 8명의 플레이어가 1:1 대결을 펼치는 전투형 맵이다. 맵의 중앙에는 넓은 전투 공간이 펼쳐져 있으며, 각 플레이어는 자신의 기지 near(네어) 지점에서 시작해 적을 섬멸하거나 승리 조건을 달성해야 한다. 맵의 배경은 사막 타일셋으로 구성되어 있으며, 전투 공간은 비교적 개방되어 있어 빠른 교전과 스킬 활용이 중요하다. 맵의 구조상 대각선으로 배치된 기지들은 서로를 마주보도록 설계되어 있어 초반부터 전투가 발생할 가능성이 높다. 맵의 해상도는 4096x4096으로 크고, 타일 단위는 128x128로 미세한 디테일을 확인할 수 있다. 플레이어들은 각자 강력한 영웅 유닛이나 특수 유닛을 조종할 것으로 추정되며, 전투는 아레나답게 실시간으로 벌어져 전략과 순간 판단력이 요구된다. 맵의 내부 설명은 간소하며, 제작자의 첫 작품임을 고려할 때 밸런스나 디자인 면에서 개선이 필요한 부분이 있을 수 있다. 하지만 기본적인 전투와 대결 구조는 명확히 잡혀 있어, 아레나 장르를 좋아하는 유저들에게는 흥미로운 플레이 경험을 제공할 것이라 기대된다. 아레나 장르에 익숙한 플레이어라면 금방 적응할 수 있지만, 초보자의 경우 전투와 자원 관리에서 어려움을 느낄 수 있으니 사전 연습을 권장한다. 맵의 크기와 개방적인 구조상 대규모 전투가 벌어질 가능성이 높으므로, 팀워크보다는 개인 실력이 더 중요하게 작용할 것이다. StarCraft: Brood War's custom map '프로게이머대전 신인 VS 신인' is an arena-style map designed for 1v1 battles among 8 players. The map features a large central battle arena with each player starting near their respective base. The desert-themed tileset enhances the visual appeal, while the open battlefield layout encourages quick engagements and skill-based combat. The bases are positioned diagonally, ensuring immediate confrontation opportunities. With a resolution of 4096x4096 and a tile size of 128x128, the map offers detailed terrain visibility. Players likely control powerful hero units or special units, making real-time strategy and quick decision-making essential. While the internal description is minimal, this being the creator's first map suggests potential areas for balance or design refinement. However, the core arena battle mechanics are well-structured, promising an engaging experience for fans of the genre. Veteran arena players will adapt quickly, though newcomers may struggle with combat and resource management without prior practice. The map's size and open design suggest large-scale battles, emphasizing individual skill over teamwork.
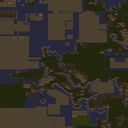
가놀♥ 나짓놀 天과 地와 無 (Ganol Najitnol Heaven Earth Nothingness)
가놀♥ 나짓놀 天과 地와 無는 스타크래프트 브루드워의 유즈맵으로, 독특한 제목과 분위기로 플레이어의 curiosity를 자극하는 맵이다. 맵의 배경은 사막 타일셋으로 구성되어 있으며, 상단과 하단의 넓은 공간이 눈에 띈다. 중앙에는 복잡한 지형이 배치되어 있어 전장 구분이 확실한 구조를 보인다. 맵의 왼쪽 상단과 오른쪽 하단에 각각 플레이어 베이스 지역이 배치되어 있으며, 이 두 지역은 넓은 평원과 협곡으로 연결되어 있어 기동전이 중요할 것으로 추정된다. 맵의 이름에서 느껴지는 '天(하늘)'과 '地(땅)'의 대조가 맵의 지형 배치와도 연관 지어지는데, 상단과 하단의 고저차가 있는 지형이 이를 반영하는 것처럼 보이며, '無(무)'라는 단어는 맵 곳곳의 공허한 공간이나Resource 부족 지역을 암시하는 듯하다. 맵의 제목에 포함된 '랍톨'은 '랩실'의 변형으로 보이며, 플레이어들에게 협동과 전략을 요구하는 플레이 스타일을 강조하는 것으로 보인다. 맵의 구조상으로는 두 플레이어 팀이 중앙의 협곡과 평원을 두고Resources를 확보하며 각자의 기지를 방어하고 공격하는 형태의 유즈맵으로 추정된다. 맵의 크기와 복잡한 지형은 플레이어들에게 전술적 깊이를 제공할 것으로 보이며, 협동 플레이나Resource 관리, 기지 방어와 같은 요소들이 주요 플레이 패턴으로 작용할 것이다. 추천 대상은 스타크래프트 유즈맵을 즐겨 플레이하는 유저들이며, 특히 협동과 전략적 플레이를 선호하는 플레이어들에게 적합할 것으로 보인다. 플레이 전에는 맵의 지형과Resource 분포를 꼼꼼히 확인하여 전략 수립에 참고하는 것이 중요할 것이다. 또한, 맵의 이름에서 느껴지는 독특한 분위기와 '랍톨'이라는 요소가 어떤 플레이 스타일을 요구하는지 미리 예상해 보는 것도 흥미로운 경험이 될 것이다. "Ganol♥ Najitnol" Heaven and Earth and Void is a StarCraft: Brood War custom map that piques players' curiosity with its unique title and atmosphere. The map features a desert tileset, with wide open spaces at the top and bottom standing out. The center is dominated by intricate terrain, creating a clear battlefield structure. Player base areas are placed in the top-left and bottom-right corners, connected by vast plains and canyons, suggesting mobility will play a key role. The contrast between "Heaven" (天) and "Earth" (地) in the title mirrors the map's terrain, with high and low elevations at the top and bottom, while "Void" (無) hints at empty spaces or resource-sparse zones scattered across the map. The word "nol" in the title appears to be a variation of "lab," emphasizing the map's focus on teamwork and strategic play. Structurally, it seems to be a two-team custom map where players compete over central canyons and plains, securing resources while defending and attacking their bases. The map's size and complex terrain likely offer deep tactical gameplay, with cooperative play, resource management, and base defense as key patterns. It’s recommended for players who enjoy StarCraft custom maps, especially those who prefer cooperative and strategic gameplay. Before playing, it’s important to study the terrain and resource distribution to plan your strategy. The map’s unique atmosphere and the "nol" element also hint at a distinct playstyle worth anticipating for an engaging experience.
스타크라 ইন퀴시토러스 3 (Stella Inquisitorus 3)
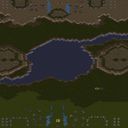
스타크래프트 브루드워의 유즈맵 ‘Stella Inquisitorus 3’는 사막 지형을 배경으로 펼쳐지는 유저 대 컴퓨터 전투형 맵으로, 4인 플레이가 가능한 UMS 장르의 유즈맵이다. 내부 맵 제목과 설명에 따르면 캠페인 형식으로 제작된 이 맵은 ‘3번째 파트를 진행하는’ 구조로 보이며, 플레이어는 각각의 팀으로 나뉘어 컴퓨터 상대와 전투를 펼치게 된다. 맵의 전체적인 분위기는 사막의 황량한 지형과 오브젝트가 어우러져 있으며, 중앙에는 넓은 평야가 펼쳐져 있어 전면전을 펼치기 용이하다. 맵 상단과 하단에는 각각의 시작 지역이 배치되어 있으며, 시작 지역 주변에는 방어 시설이 배치되어 있어 초반 공격을 방어할 수 있는 구조로 보인다. 맵의 왼쪽과 오른쪽에는 넓은 평지가 펼쳐져 있어 병력을 모아 대규모 공격을 펼치기에 적합한 환경으로 추정된다. 이 맵은 디펜스와 공격의 균형을 맞추는 것이 핵심으로 보이며, 컴퓨터의 공격 패턴과 맵의 지형적 특성을 잘 활용해야만 승리를 이끌어낼 수 있을 것이다. 초보 플레이어보다는 경험이 있는 플레이어에게 더 적합한 맵으로 보이며, 팀워크와 전략적인 플레이가 요구되는 장르이기 때문에 협동 플레이를 선호하는 유저에게 추천할 만하다. 또한, 맵의 사막 타일셋과 넓은 개활지는 시야 확보와 기동성에 중점을 둔 플레이를 유도할 것으로 예상된다. 플레이 전에는 맵의 시작 지역과 주요 길목을 미리 확인하여 초기 방어선을 구축하는 것이 중요하다. 또한, 컴퓨터의 공격 루트를 예상하고 주요據點을 방어하는 전략을 세우는 것이 승리의 열쇠가 될 것이다. 맵의 구조상 넓은 개활지가 많기 때문에 스플래시 데미지를 주는 유닛이나 공성 유닛을 활용하는 것이 효과적일 수 있다. 마지막으로, 팀 간의 의사소통을 원활히 하고, 각 플레이어의 역할 분담을 clearly하게 정하는 것이 원활한 플레이에 도움이 될 것이다. 이 맵은 유즈맵 특유의 창의성과 전략성을 모두 즐길 수 있는 매력이 있으며, 특히 사막 배경의 웅장함이 플레이어의 몰입감을 높이는 요소로 작용할 것이다. Stella Inquisitorus 3 is a custom map from StarCraft: Brood War set in a desert terrain, featuring player versus computer combat designed for four players in the UMS genre. According to the internal map title and description, this map appears to be structured as a campaign, progressing through a "third part," where players are divided into teams and engage in battles against the AI. The overall atmosphere blends the barren desert landscape and objects, with a vast plain at the center ideal for large-scale confrontations. The top and bottom of the map feature starting zones, each surrounded by defensive structures to fend off early attacks. Wide plains extend to the left and right, providing an environment conducive to gathering forces for massive assaults. The key to success lies in balancing defense and offense, utilizing the AI's attack patterns and the map's terrain strategically. This map seems better suited for experienced players rather than beginners, requiring teamwork and strategic play—making it a great choice for those who prefer cooperative gameplay. The desert tileset and open areas encourage a playstyle focused on vision control and mobility. Before starting, it's crucial to scout the starting zones and main paths to establish initial defenses, while anticipating the AI's attack routes and strategizing to defend key positions. Due to the map's expansive open areas, units with splash damage or siege capabilities can be particularly effective. Lastly, smooth communication and clearly defined roles among teammates will enhance overall performance. This map offers the unique creativity and strategy typical of custom maps, with the grandeur of the desert setting further immersing players in the experience.
나루토 대모험! (Naruto Daemohum!)
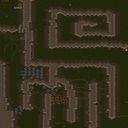
스타크래프트 브루드워의 유즈맵 중 하나인 ‘나루토 대모험!’은 캐릭터 기반 액션과 디펜스가 조화된 재미있는 플레이 경험을 제공하는 맵이다. 맵의 배경은 사막 타일셋으로 구성되어 있으며, 플레이어는 8명의 인원으로 게임에 참여할 수 있다. 맵의 구조는 넓은 평야와 일부 오브젝트가 배치된 지역으로 구성되어 있으며, 중앙에 위치한 주요 진영을 중심으로 방어와 공격을 병행하는 플레이가 가능하다. 이미지에서 확인되는 것처럼 맵의 지형은 비교적 평탄하고, 일부 지역은 오브젝트로 막혀 있어 전략적인 움직임을 요구한다. 맵의 제목과 내부 설명에서 ‘대모험’이라는 표현이 사용된 점을 고려할 때, 단순히 디펜스에 그치지 않고 다양한 미션이나 퍼즐 요소가 포함되었을 가능성이 있다. 또한, ‘wn789632’가 제작자라는 점과 ‘재밌게하세요^^’라는 메시지가 함께 포함되어 있어, 제작자의 의도가 즐겁고 가벼운 분위기의 플레이에 중점을 두고 있음을 유추할 수 있다. 맵의 크기가 4096x4096으로 상당히 넓은 편이므로, 넓은 시야를 활용한 전략과 협력이 중요할 것으로 보인다. 다만, 맵의 내부 설명이 간결하고 승리 조건이나 게임 방식에 대한 구체적인 설명이 없으므로, 플레이 전 미리 맵의 규칙이나 목표를 확인하는 것이 좋다. 이 맵은 스타크래프트의 유즈맵 커뮤니티에서 인기를 끌 만한 요소들을 갖추고 있으며, 특히 나루토라는 인기 있는 캐릭터를 활용한 점이 흥미를 끌 수 있는 포인트다. 플레이어들은 팀워크와 빠른 판단력을 요구하는 이 맵에서 다양한 전략을 구사하며 재미를 느낄 수 있을 것이다. 또한, 맵의 사막 타일셋은 시원한 느낌을 주어 플레이어의 몰입감을 높이는 데 기여할 것으로 보인다. Naruto Daemohum! is a StarCraft: Brood War custom map that blends character-based action with defense mechanics, offering an engaging and entertaining gameplay experience. The map utilizes a desert tileset and allows up to eight players to participate. The terrain features wide open plains interspersed with scattered obstacles, enabling strategic movement and positioning around a central hub. While the visible structure appears relatively flat, some areas are blocked by objects, requiring careful navigation. The title and internal description suggest that the map may incorporate adventure or mission elements beyond simple defense, adding variety to gameplay. The creator's note, 'wn789632' and '재밌게하세요^^' (Have fun!), hints at a lighthearted and enjoyable experience. The map's large 4096x4096 size demands strategic use of vision and teamwork. However, the lack of detailed internal descriptions regarding win conditions or gameplay rules means players should review the map's objectives beforehand. This map likely appeals to the StarCraft custom map community, particularly due to its use of the popular Naruto franchise. Players can expect to enjoy diverse strategies and quick decision-making in this immersive desert-themed adventure.
신전부수기5-1: 사막의 성 (Castle of De)
「신전부수기5-1: 사막의 성」은 스타크래프트 브루드워의 유즈맵 중 하나로, 유닛과 건물을 적극 활용해 적의 건물을 파괴하는 ‘신전부수기’ 시리즈의 다섯 번째 작품이다. 맵 제목에서 알 수 있듯이, 사막 지형을 배경으로 한 성곽 형태의 구조물이 특징이며, 플레이어는 이 성에 배치된 건물을 차례대로 파괴해야 한다. 맵 중앙의 넓은 평원과 주변의 성벽, 언덕 지형이 조화를 이루며, 건물이 위치한 성채는 언덕과 협곡으로 둘러싸여 있어 접근 경로가 제한적이다. 적절한 자원 관리와 방어선 구축이 필수적인 이 맵은 주로 컴퓨터를 상대로 진행되는 ‘컴까기’ 장르에 속하며, 일정 규모의 유닛을 동원해 방어塔와 건물을 공격하는 전략적 요소가 강하다. 플레이 방식은 단순하면서도 깊이 있는 전략을 요구한다. 플레이어는 본진에서 자원을 채취해 유닛을 생산하고, 적의 건물이 위치한 성채로 진격해 파괴해야 한다. 성채는 언덕과 협곡으로 보호되어 있어, 적절한 유닛 조합과 공방 업그레이드가 없으면 접근 자체가 어렵다. 특히 중반 이후에는 적의 방어塔와 건물이 밀집된 지역을 돌파해야 하므로, 유닛의 체력 관리와 스킬 사용 타이밍이 중요하다. 맵의 지형적 특징상, 언덕과 협곡을 활용한 방어와 반격이 핵심이며, 플레이어는 이를 바탕으로 적의 공격을 방어하면서도 지속적으로 공격을 감행해야 한다. 이 맵은 초보자와 숙련자 모두 즐길 수 있지만, 난이도 상승에 따라 전략적 깊이가 깊어진다. 초보자라면 방어塔와 건물을 파괴하는 기본적인 공략법부터 숙지해야 하며, 숙련자라면 효율적인 자원 관리와 유닛 조합을 통해 더 빠른 클리어를 노려볼 수 있다. 또한, 맵의 지형과 건물이 배치된 구조상, 팀 플레이가 가능한 구조는 아니지만, 개인전으로도 충분히 재미를 느낄 수 있는 맵이다. 맵 제작자의 언급에 따르면, 지형 디자인에 대한 아쉬움이 있는 만큼, 플레이어는 맵의 구조적 특징을 최대한 활용해 전략을 수립하는 것이 중요하다. 「신전부수기5-1: 사막의 성」은 스타크래프트 브루드워의 유즈맵 중에서도 ‘컴까기’ 장르의 대표작으로 손꼽히며, 특히 건물을 파괴하는 재미와 전략적 깊이가 뛰어나다. 맵의 지형과 건물이 배치된 구조는 플레이어의 전략적 사고를 자극하며, 긴장감 넘치는 전투를 즐길 수 있도록 설계되어 있다. 맵의 난이도는 플레이어의 실력에 따라 조절이 가능하므로, 다양한 전략을 시도해 보며 자신만의 공략법을 찾아보는 것도 좋은 방법이다. 또한, 맵의 배경과 분위기가 사막의 성을 연상케 해, 플레이어의 몰입감을 높이는 데에도 기여한다. 이 맵을 플레이하기 전에는, 맵의 지형과 건물이 배치된 구조를 잘 이해하고, 적절한 자원 관리와 유닛 생산 계획을 세워두는 것이 좋다. 이를 바탕으로, 보다 효율적이고 전략적인 플레이를 즐길 수 있을 것이다. This UMS (User-Made Scenario) map, titled '신전부수기5-1: 사막의 성 (Castle of De)', is a quintessential entry in the 'Temple Destruction' series within StarCraft: Brood War custom maps. The map is set against a desert-themed backdrop, featuring a fortress-like structure where players must systematically destroy enemy buildings. The terrain is strategically designed with central plains, surrounding walls, and elevated hills, creating a challenging environment for unit movement and positioning. The gameplay revolves around resource management and strategic unit deployment. Players start at their base, gathering resources to produce armies, and then advance toward the enemy fortress to destroy its structures. The fortress is protected by elevated terrain and chokepoints, making it difficult to breach without proper unit compositions and upgrades. Mid-game requires players to navigate through densely packed defensive towers and buildings, demanding precise timing for attacks and retreats. The map’s terrain favors defensive play, encouraging players to utilize natural barriers and high ground to their advantage. While accessible to both beginners and experienced players, the map’s depth increases with difficulty. Beginners should focus on basic tactics, such as targeting specific buildings and managing unit health, while advanced players can optimize resource allocation and unit synergies for faster clears. Though designed for single-player against AI, the map’s structure does not support team play. The map’s creator, DraGon[chik], acknowledges limitations in terrain design, urging players to adapt their strategies to the existing layout. '신전부수기5-1: 사막의 성' stands out in the 'competing against AI' genre of StarCraft: Brood War custom maps, offering a blend of strategic depth and immersive desert fortress aesthetics. Its terrain and building placements challenge players to think tactically, balancing offense and defense. The map’s difficulty is scalable, allowing players to refine their strategies over multiple attempts. To maximize enjoyment, players should familiarize themselves with the terrain, plan resource and unit production carefully, and experiment with different approaches to find their optimal playstyle.
언데드 폴아웃 (The Undead - Fallout V1.11)
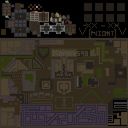
스타크래프트 브루드워의 유즈맵 "The Undead - Fallout V1.11"은 언데드 종족을 중심으로 한 컴까기 스타일의 디펜스 맵입니다. 맵의 주된 목표는 플레이어가 지정된 위치에서 끊임없이 몰려오는 적 유닛들을 방어하는 것이며, 특히 언데드 종족의 특성을 살린 스킬과 유닛 구성이 특징적입니다. 메인 건물 주변으로 배치된 방어 타워와 미네랄 멀티는 초반 자원 확보와 방어력을 동시에 고려해야 하는 플레이 스타일을 요구합니다. 맵 우측 상단에는 추가 자원 멀티가 배치되어 있으며, 이를 확보하는 것이 장기적인 생존에 큰 영향을 미칩니다. 적의 공격 패턴은 랜덤하게 등장하는 미니언과 occasional elite units로 구성되어 있으며, elite units는 특히 주의가 필요합니다. 맵의 배경은 사막 타일셋으로 이루어져 있어 건조한 분위기를 연출하며, 언데드 특유의 어두운 색감과 잘 어울립니다. 이 맵은 7명의 플레이어가 단일 팀으로 협력하여 적을 방어하는 구조로, 팀워크와 전략적 자원 관리가 필수적입니다. 초보자도 쉽게 접근할 수 있지만, elite units의 등장 타이밍을 예측하고 방어 타워를 효율적으로 배치하는 전략적 사고가 필요합니다. 특히, 미네랄 멀티 확보와 방어선 재구축 타이밍을 잘 조율해야 장기 생존이 가능합니다. 맵 플레이 전에는 언데드 유닛의 특성과 스킬 구성을 미리 숙지하고, 방어 타워의 배치 가능 위치를 확인하는 것이 중요합니다. 또한, 추가 자원 멀티 확보 여부가 게임의 승패를 좌우할 수 있으니 이를 우선적으로 고려해야 합니다. 이 맵은 언데드 팬들에게 특히 인기가 있으며, 지속적인 적의 압박 속에서 전략적 결정을 내리는 재미가 있습니다. 다만, elite units의 갑작스러운 등장으로 인해 방어선이 무너질 위험도 있으니 항상 대비가 필요합니다. StarCraft: Brood War's custom map "The Undead - Fallout V1.11" is a defense-style map centered around the Undead race, where players must defend designated positions against waves of enemy units. The map uniquely incorporates the Undead race's special abilities and unit compositions, making it stand out. Players must balance early resource gathering and defense by managing mineral patches and defensive towers around the main building. An additional resource expansion is located in the top-right corner of the map, securing which significantly impacts long-term survival. Enemy waves consist of randomly appearing minions and occasional elite units, with the latter requiring special attention. The map's desert-themed tileset creates a dry, fitting atmosphere that complements the Undead's dark color palette. Seven players cooperate as a single team to defend against waves, making teamwork and strategic resource management essential. While the map is accessible to beginners, predicting the timing of elite unit appearances and efficiently placing defensive towers require strategic thinking. Long-term survival depends on securing mineral expansions and timing the reinforcement of defensive lines. Before playing, it's crucial to familiarize yourself with the Undead units' special abilities and tower placement options. Securing the additional resource expansion can often determine victory or defeat, so prioritizing it early is key. The map is especially popular among Undead fans, offering the thrill of making strategic decisions under constant enemy pressure. However, the sudden appearance of elite units can disrupt defenses, so players must always stay prepared.
맵 선택 가이드
태그는 맵의 핵심 특징을 빠르게 설명하지만 제작 버전마다 규칙이 다를 수 있습니다. 상세 설명에서 권장 인원, 난이도, 플레이 시간과 버전을 함께 확인한 뒤 다운로드하세요.