
빠른 진행 스타크래프트 맵 모음
'빠른 진행' 태그가 등록된 맵을 모았습니다. 장르 하나로 찾기 어려운 플레이 방식, 난이도와 특징을 중심으로 인기 맵과 최신 맵을 비교해 보세요.
- 등록 맵
- 27개
- 누적 다운로드
- 4
- 누적 조회
- 1,056
인기 맵
다운로드와 조회 반응이 높은 맵입니다.
5V3C Kill4Minerals
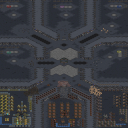
'5V3C Kill4Minerals'는 미네랄과 기본 유닛이 무료로 제공되고 적 처치 시 미네랄을 획득하는 블러드 스타일 유즈맵이다. 128×128 크기의 우주 타일셋 위에서 최대 5인(제목상 5대3 컴까기 구도)이 플레이하며, 시작 시 50 미네랄과 함께 일꾼, 관문/부화장/스포닝풀, 병영이 무료로 주어진다. 마린, 저글링, 질럿 등 1티어 유닛 또한 비용 없이 생산 가능해 초반부터 대규모 난전이 벌어진다. 유일한 자원 채취 대상은 가스이며, 이를 소모해 공격/방어 업그레이드와 테크 업그레이드를 진행하는 것이 핵심 전략이다. 적 유닛을 처치할 때마다 미네랄이 쌓여 추가 병력 생산이나 확장에 재투자되므로, 교전 승리가 곧 경제적 우위로 직결되는 스노우볼 구조다. 맵 크기가 작고 유닛 공급이 자유로워 게임 템포가 매우 빠르며, 업그레이드 타이밍과 병력 조합만 잘 맞추면 초보자도 부담 없이 즐길 수 있다. '5V3C Kill4Minerals3' 같은 후속 버전이 존재하는 것으로 보아 밸런스 조정이나 맵 확장이 지속된 것으로 보인다. 컴퓨터 상대 협동전이나 지인들과의 가벼운 난전용으로 적합하며, 플레이 전 버전 차이와 팀 구성(인간 대 컴퓨터 비율)을 확인하는 것이 좋다. '5V3C Kill4Minerals' is a blood-style UMS map where minerals and basic units are free, and killing enemies grants minerals. On a 128×128 space tileset, up to 5 players (configured as 5 vs 3 computers per the title) start with 50 minerals, free workers, gateways/hatcheries/spawning pools, barracks, and free Tier 1 units (Marines, Zerglings, Zealots). This enables massive battles from the early game. The only resource to mine is vespene gas, which funds attack/defense upgrades and tech research. Each kill adds minerals, creating a snowball economy where combat success directly fuels further production. The small map and free supply accelerate the pace, making upgrade timing and unit composition the decisive factors. It is accessible for beginners who grasp the upgrade cycle. The existence of a '5V3C Kill4Minerals3' version suggests ongoing balance tweaks. Recommended for co-op comp stomps or casual skirmishes with friends; verify the version and human-vs-computer team setup before starting.
지연 벗기기 무조건 벗기는
‘지연 벗기기 무조건 벗기는’는 스타크래프트 브루드워의 유즈맵으로, 이름 그대로 최대한 빠르게 적을 제거하고 승리 목표를 달성하는 데 초점을 맞춘 컴까기 장르의 맵이다. 맵의 전체적인 구조는 중앙이 넓게 뚫린 형태이며, 각 플레이어는 시작 지점에서 출발해 맵 외곽을 따라 배치된 건물을 파괴하거나 적 유닛을 섬멸하는 방식으로 진행된다. 맵의 중앙 공간은 비교적 넓고 개방되어 있어 빠른 이동과 전투가 가능하도록 설계되어 있으며, 외곽의 건물들은 방어선 역할을 하거나 주요 목표물로 기능한다. 맵의 이름에서 알 수 있듯이 ‘무조건 벗기는’라는 컨셉이 강조되며, 플레이어는 최대한 빠른 시간 내에 목표를 달성해야 한다. 맵의 분위기는 밝고 깔끔한 느낌을 주며, 타일셋은 플랫폼을 사용해 안정적인 시야와 이동을 보장한다. 플레이어 간 경쟁이 치열할 것으로 예상되며, 맵의 구조상 소규모 접전보다는 넓은 지역에서 벌어지는 대규모 전투가 주를 이룰 가능성이 높다. 또한, 맵의 크기가 크고 개방적이기 때문에 전략보다는 순간적인 판단과 유닛 컨트롤이 중요하다는 특징이 있다. 초보 플레이어보다는 적응력이 뛰어난 플레이어나 숙련자에게 더욱 적합한 맵으로 보인다. 맵을 플레이하기 전에는 맵의 목표와 구조를 정확히 이해하고, 빠른 판단과 유닛 관리를 연습하는 것이 중요하다. 특히 외곽 건물의 위치와 역할, 중앙의 개방 공간을 얼마나 효율적으로 활용하는지가 승리의 열쇠가 될 것이다. 맵의 난이도는 보통 정도로 예상되며, 적절한 팀워크와 전략이 없으면 목표 달성이 어려울 수 있다. 이 맵은 단순히 적을 제거하는 것뿐만 아니라, 맵의 구조와 특성을 최대한 활용하는 플레이가 요구되는 만큼, 여러 번 플레이해보는 것이 좋다. 또한, 맵의 이름과 설명에서 느껴지는 익살스러운 분위기가 플레이어의 긴장을 풀어주고 재미를 더할 것으로 보인다. 이 맵을 즐기기 위해서는 스타크래프트 브루드워의 기본적인 조작법과 유닛 특성을 숙지하고 있어야 하며, 특히 빠른 판단과 반응 속도가 중요한 만큼 연습이 필수적이다. 마지막으로, 맵의 크기와 구조상 네트워크 상태가 좋지 않다면 플레이 경험이 저하될 수 있으니 주의가 필요하다. ‘Strip and Destroy’ is a *StarCraft: Brood War* custom map where the sole objective is to eliminate the enemy as quickly as possible. The map is a fast-paced *comp stomp* genre, where players rush to destroy buildings along the outer edges or wipe out enemy forces to secure victory. The map features a wide-open central area surrounded by a perimeter of structures. Players start near the outskirts and must navigate the map by either destroying key buildings or engaging in combat across the expansive, open battlefield. The central space is designed for quick movement and large-scale clashes, while the outer buildings serve as defensive strongholds or primary targets. As the name suggests, the core mechanic revolves around stripping away enemy defenses and pushing aggressively toward victory. Visually, the map has a bright and clean aesthetic, using a flat tileset to ensure clear visibility and smooth movement. Due to its open layout, expect intense competition, with most battles unfolding in vast open areas rather than tight chokepoints. The large, open design prioritizes split-second decision-making and precise unit control over long-term strategy. While beginners might struggle, the map is better suited for adaptable or experienced players who can thrive under pressure. Before playing, it’s crucial to fully grasp the map’s objectives and layout. Quick reflexes and efficient unit management are essential, especially when leveraging the outer buildings’ positions or the central open space. While the difficulty is moderate, lacking teamwork or strategy will make victory nearly impossible. This isn’t just about wiping out the enemy—it’s about mastering the map’s mechanics through repeated plays. The map’s quirky name and description also add a playful tone, easing tension and making the experience more enjoyable. To fully enjoy it, players should be familiar with *Brood War*’s basic controls and unit behaviors, as speed and reaction time are key. Given the map’s size and structure, a stable network connection is vital to avoid a frustrating experience.
배틀크래프트 패스트화이트 V2.1 (BattleCraft Fastwhite V2.1)
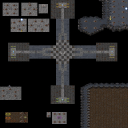
스타크래프트 브루드워의 유즈맵 중 하나로 알려진 〈BattleCraft Fastwhite V2.1〉은 다채로운 전략과 빠른 진행이 특징인 맵이다. 이 맵은 기존의 유즈맵과는 차별화된 독특한 구조와 플레이 방식을 제공하며, 실력 테스트를 위한 다양한 요소들이 조합되어 있다. 맵의 중앙에는 거대한 건물이 위치하고 있으며, 주변으로는 플레이어들이 자원을 확보하고 병력을 생산할 수 있는 공간이 배치되어 있다. 맵 이미지를 통해 확인해보면, 각 플레이어의 시작 지역은 비교적 크고, 중앙 광장과 같은 공유 공간을 통해 상호작용이 활발히 이루어진다. 건물을 짓고 병력을 생산하는 동시에, 적의 공격이나 전략적 요소를 방어해야 하므로 전략의 깊이가 요구된다. 또한, 맵 곳곳에 배치된 특수 지역이나 trigger가 존재하는지 여부에 따라 게임의 흐름이 달라질 수 있어, 플레이어는 맵을 꼼꼼히 분석하고 대응 전략을 세워야 한다. 초보자의 경우 난이도가 다소 높게 느껴질 수 있지만, 숙련자라면 다양한 전략을 구사할 수 있는 기회가 많다. 특히, 빠른 전투와 자원 관리가 중요한 이 맵은 실전 감각을 키우기에도 좋은 선택이다. 플레이 전에는 맵의 구조와 주요 건물을 미리 숙지하고, 자원 획득 지점과 병력 생산 건물의 위치를 정확히 파악하는 것이 중요하다. 또한, 팀 플레이를 고려한다면 팀원 간의 전략적 연계가 성공의 열쇠가 될 수 있다. 이 맵은 단기간 내에 승부를 가르는 빠른 스피드와 전략적 깊이를 동시에 제공하므로, 한 판 한 판이 긴장감 넘치는 경험이 될 것이다. 다양한 전략을 시도해 보며 실력을 키우고 싶다면 반드시 시도해볼 가치가 있다. BattleCraft Fastwhite V2.1 is a well-known custom map from StarCraft: Brood War, distinguished by its diverse strategies and fast-paced gameplay. It offers a unique structure and playstyle that sets it apart from other custom maps, incorporating various elements designed to test a player's skills. At the center of the map stands a massive building, with surrounding areas allocated for players to gather resources and produce units. By examining the map layout, you can see that each player's starting zone is relatively spacious, and shared spaces like the central plaza facilitate active interaction between players. Players must balance constructing buildings, producing units, and defending against enemy attacks or strategic elements, requiring deep tactical thinking. The game's flow can shift depending on whether special zones or triggers are placed throughout the map, so players should carefully analyze the terrain and prepare counter-strategies. While beginners may find the difficulty somewhat high, experienced players have ample opportunities to employ a variety of tactics. With its emphasis on quick battles and resource management, this map is an excellent choice for sharpening real-game instincts. Before playing, it's crucial to familiarize yourself with the map's layout and key buildings, as well as the exact locations of resource points and unit production facilities. If considering team play, coordinated strategies among teammates can be the key to success. Offering both rapid, decisive battles and strategic depth, each match promises a thrilling experience. If you want to hone your skills by experimenting with different strategies, this map is definitely worth trying.
캐나다 vs 미국Fast Build (Canada vs USA Fast Build)
스타크래프트 브루드워의 팀 밀리 유즈맵인 <Canada vs USA Fast Build>는 이름 그대로 빠른 빌드와 전략적 판단이 승부를 가르는 흥미로운 대결을 제공한다. 맵의 중앙에 위치한 넓은 평야와 균등한 자원 분배는 초반부터 치열한 견제를 유도하며, 각 플레이어는 제한된 자원으로 최대한의 효율성을 발휘해야 한다. symmetrical design(대칭형 구조)을 기반으로 한 맵 디자인은 모든 플레이어에게 동일한 opportunities를 제공하며, 특히 빠른 빌드와 자원 관리 능력이 중요하다는 특징이 있다. 맵 곳곳에 배치된 mineral patches와 vespene geysers는 strategic positioning의 중요성을 부각시키며, 초보자와 숙련자 모두에게 공정한 경쟁을 보장하는 구조로 보인다. 맵의 이름에 포함된 'Fast Build'는 단순히 초반 빌드 속도뿐 아니라, 게임 내내 압박과 견제를 통한 빠른 승부 전략을 유도한다는 점에서 전략적 깊이를 더한다. 이 맵은 팀 밀리라는 장르의 특성상 팀워크와 호흡이 매우 중요하며, 개인의 실력뿐 아니라 팀의 전략적 의사소통이 승리를 좌우할 가능성이 크다. 다만, 맵의 복잡한 자원 배치와 빠른 진행 속도는 초보자에게는 진입 장벽이 될 수 있어, 기본적인 빌드와 컨트롤 연습을 충분히 한 후에 플레이하는 것이 좋다. 또한, symmetrical design임에도 불구하고 slight asymmetries(미세한 비대칭성)이 존재하는데, 이 부분은 숙련자 간의 경기에서는 전략적 우위를 제공할 수 있는 요소로 작용할 수 있다. 이 맵은 주로 8인 대전이 주를 이루며, 팀별로 균형 잡힌 자원과 시작 위치를 제공하여 공정한 경쟁을 보장한다. 빠른 빌드와 전략적 판단력이 요구되는 만큼, 플레이어는 게임 내내 집중력을 유지해야 하며, 특히 초반 5분 이내의 빌드와 자원 관리, 그리고 중반부의 진출 타이밍이 승패를 가르는 핵심 포인트가 될 것이다. 추천 대상은 스타크래프트의 팀 밀리 장르를 즐기는 모든 유저이며, 특히 빠른 게임 진행과 전략적 깊이를 추구하는 플레이어에게 적합하다. 또한, 팀플레이 경험이 풍부한 유저들에게는 더욱 흥미로운 경험을 제공할 수 있다. 마지막으로, 이 맵은 symmetrical design과 balanced resource distribution(균형 잡힌 자원 분배)을 기반으로 하므로, 밸런스에 대한 우려보다는 실력과 전략의 대결로 승부가 결정될 가능성이 크다. 플레이 전에는 팀원 간의 전략적 호흡을 맞추고, 빠른 빌드와 자원 관리에 대한 기본기를 점검하는 것이 중요하다. Canada vs USA Fast Build is a team melee custom map from StarCraft: Brood War that delivers an exciting matchup where quick builds and strategic decision-making decide the outcome—just as the name suggests. The map’s wide central plain and evenly distributed resources encourage fierce early harassment, forcing each player to maximize efficiency with limited assets. Its symmetrical design gives every player identical opportunities, emphasizing the importance of fast builds and resource management throughout the game. The mineral patches and vespene geysers scattered across the map highlight the value of strategic positioning, offering a fair competition for both beginners and veterans alike. The “Fast Build” in the title doesn’t just refer to early build speed; it also encourages a fast-paced strategy of constant pressure and harassment throughout the match, adding strategic depth. Given the nature of team melee, teamwork and coordination are crucial—victory often hinges not only on individual skill but also on clear strategic communication among teammates. However, the intricate resource layout and fast pace can be daunting for newcomers, so players should practice basic builds and controls before jumping in. Even though the map is symmetrical, subtle asymmetries exist, which can provide experienced players with strategic advantages in high-level matches. Most games on this map are 8-player free-for-alls, with each team receiving balanced resources and starting positions to ensure fairness. Because fast builds and sharp decision-making are essential, players must stay focused throughout the match. The first five minutes—covering build orders, resource management, and the timing of early aggression—along with mid-game expansion decisions, are critical turning points. This map is ideal for anyone who enjoys StarCraft team melee, especially those seeking fast-paced games with deep strategy. Veteran team players will find it particularly engaging. Thanks to its symmetrical design and balanced resource distribution, the outcome depends more on skill and strategy than on map imbalances, making it a test of pure competitive ability. Before playing, coordinate with your team on strategy, and double-check your fast build and resource management fundamentals.
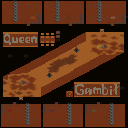
데저트 스트라이크 패스트 퀸 매뉴얼 4.1 (Desert.S Fast vQueenManual 4.1)
데저트 스트라이크 패스트 퀸 매뉴얼 4.1은 고전 유즈맵 장르인 데저트 스트라이크(Desert Strike) 계열의 변형 맵으로, 퀸(Queen) 유닛을 직접 조작해 전장을 누비는 8인용 대전형 맵이다. 원작 데저트 스트라이크가 기지 건설과 병력 생산을 자동화하고 영웅 유닛 하나로 전투를 펼치는 방식이었다면, 이 맵은 'Fast'라는 접두어에서 알 수 있듯 게임 템포를 대폭 끌어올려 초반부터 치열한 교전이 벌어지도록 설계되어 있다. 플레이어는 각자 퀸을 조종하며 적 유닛을 처치해 자원과 경험치를 획득, 공격력·방어력·이동 속도 등 다양한 능력치를 수동으로 강화해 나간다. 맵 크기는 128×128 타일로 비교적 넓게 잡혀 있어 기동전과 포지셔닝 싸움이 중요하며, 황혼(Twilight) 타일셋 특유의 어두운 분위기 속에서 시야 싸움과 스킬 타이밍이 승부를 가른다. 8명 전원이 자유 대결(FFA) 구도로 진행되므로 외교나 임시 동맹이 생길 여지도 있으나, 기본적으로는 실시간 컨트롤과 빌드 오더 최적화가 실력을 가르는 순수 실력전 성격이 강하다. 퀸 매뉴얼(Queen Manual)이라는 부제처럼 퀸의 고유 능력인 인페스테드 테란 투하, 인스네어, 브루들링 등을 상황에 맞춰 수동으로 써야 하므로 유닛 이해도와 마이크로 컨트롤 숙련도가 필수적이다. 초보자에게는 빠른 템포와 복잡한 업그레이드 트리가 진입 장벽으로 느껴질 수 있으나, 데저트 스트라이크 특유의 성장 쾌감과 1대1부터 다대다 난전까지 다양한 구도를 즐기고 싶은 중급 이상 유저에게는 훌륭한 연습장이 된다. 플레이 전에는 업그레이드 메뉴 단축키와 퀸 스킬 쿨타임을 숙지하고, 초반 자원 확보 루트를 미리 시뮬레이션해 두면 초반 생존율을 크게 높일 수 있다. Desert Strike Fast Queen Manual 4.1 is a variant of the classic Desert Strike UMS genre, an eight-player competitive map where each player directly controls a Queen unit across the battlefield. While the original Desert Strike automated base building and unit production to focus on hero combat, this map—as suggested by the 'Fast' prefix—dramatically accelerates the game tempo, forcing intense engagements from the early minutes. Each player pilots a Queen, earning resources and experience by killing enemy units to manually upgrade attack, defense, movement speed, and other stats. The 128×128 tile map provides ample space for maneuvering and positioning battles, and the Twilight tileset's dim atmosphere makes vision control and spell timing decisive. With all eight players in a free-for-all structure, diplomacy or temporary alliances may emerge, but the core experience is a pure skill contest defined by real-time micro and build-order optimization. True to the 'Queen Manual' subtitle, players must manually cast the Queen's signature abilities—Infested Terran drop, Ensnare, Spawn Broodlings—at the right moments, demanding deep unit knowledge and micro proficiency. Newcomers may find the rapid pace and complex upgrade tree a steep barrier, yet for intermediate and advanced users seeking the growth satisfaction unique to Desert Strike and the variety of duels to chaotic multi-way brawls, this map serves as an excellent training ground. Before playing, memorize the upgrade menu hotkeys and Queen spell cooldowns, and simulate early resource routes to significantly improve early-game survival.
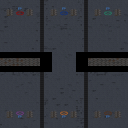
(3v3) Micro Clutter!! V3
(3v3) Micro Clutter!! V3는 클래식한 'Micro Clutter' 컨셉을 3대3 팀전용으로 재구성한 밀리 맵입니다. 우주 타일셋(64x64 타일, 2048x2048 크기) 위에서 양 진영이 대칭 배치되며, 설명에 따라 기존 버전보다 본진 뒷공간이 넓어지고 베스핀 간헐천이 더 가깝게 밀집 배치되어 있습니다. 안티 크립 롤오버(Anti-creep rollover) 기능이 적용되어 저그 크립 확장이 건물 배치에 방해되지 않도록 설계되었습니다. 간헐천이 가까이 붙어 있어 자원 채취 효율이 극대화되고, 초반부터 많은 자원을 확보해 대규모 병력 충돌과 미세 컨트롤(마이크로) 중심으로 게임이 전개됩니다. 6인용 고정 팀(3v3)으로 팀원 간 합류 타이밍과 멀티태스킹 능력이 승부를 가릅니다. 밀리 기본 룰을 유지하면서도 자원 순환이 빨라 일반 밀리보다 템포가 빠르고, 컨트롤 연습이나 빠른 대전용으로 적합합니다. 추천 대상은 팀 밀리 입문자, 마이크로 연습이 필요한 유저, 짧은 시간 내 치열한 교전을 원하는 플레이어입니다. 플레이 전 버전(V3) 확인과 간헐천 밀집도에 따른 빌드 오더 최적화를 점검하세요. (3v3) Micro Clutter!! V3 is a melee map that restructures the classic 'Micro Clutter' concept for 3v3 team play. On the space tileset (64x64 tiles, 2048x2048 size), both teams are symmetrically positioned. As described, the main base rear space is wider than previous versions, and Vespene Geysers are stacked closer together. Anti-creep rollover prevents Zerg creep from obstructing building placement. The clustered geysers maximize mining efficiency, granting massive early resources and leading to large-scale battles centered on micro-control. With fixed 3v3 teams, coordination and multitasking decide the outcome. It retains standard melee rules but accelerates resource cycling, making it faster-paced than regular melee—ideal for control practice or quick matches. Recommended for team melee beginners, players honing micro, and those seeking intense fights in short sessions. Before playing, verify version V3 and optimize build orders for the high-density geyser layout.
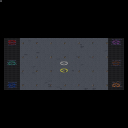
4x SpEeD FoOtBaLl 1.2
'4x 스피드 풋볼 1.2'는 SCV를 조종해 축구를 즐기는 빠른 템포의 미니게임 유즈맵이다. 우주 타일셋 위에서 7인 플레이가 가능하며, 4배속으로 진행되는 덕분에 일반 축구 맵보다 훨씬 박진감 넘치는 공방전이 펼쳐진다. 제작자 MillenniumArmy(Army(U))가 만든 이 맵은 SCV의 이동 속도와 공(드론 등 유닛)의 물리 판정이 빨라져, 순발력과 팀워크가 승부를 가른다. 좁은 필드에서 벌어지는 난전 특성상 개인 기량보다 패스 타이밍과 수비 위치 선정이 중요하며, 골키퍼 역할 분담이 자연스럽게 이뤄진다. 7인 기준 3:3 또는 3:4 구도로 팀을 짜면 밸런스가 잘 맞으며, 한 판당 10~15분 내외로 끝나 부담 없이 즐기기 좋다. 입문자도 쉽게 익힐 수 있으나, 고속 이동에 적응하려면 몇 판 연습이 필요하다. 친구들과 가볍게 내기 게임을 하거나 클랜전 워밍업용으로 추천한다. 플레이 전에는 맵 설명에 나온 '4x the speed' 설정이 적용됐는지 확인하고, 키보드 반응 속도나 마우스 감도를 평소보다 높게 잡아두면 좋다. '4x Speed Football 1.2' is a fast-paced mini-game UMS where players control SCVs to play soccer. Set on a space tileset with 7 players, the 4x speed multiplier creates far more intense offense and defense than standard football maps. Created by MillenniumArmy (Army(U)), the map accelerates SCV movement and ball physics, making reflexes and teamwork decisive. In the tight field, passing timing and defensive positioning matter more than individual mechanics, and a goalkeeper role naturally emerges. A 3v3 or 3v4 split balances well for 7 players, and matches finish in 10–15 minutes, making it ideal for casual fun. Beginners can pick it up quickly, though a few practice rounds help adapt to the high speed. Recommended for friendly wagers or clan warm-ups. Before playing, verify the '4x the speed' setting is active and consider raising keyboard repeat rate or mouse sensitivity.
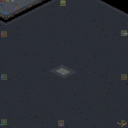
Adult swim v6.0
'어덜트 스윔 v6.0(Adult Swim v6.0)'은 E)Bighunger가 제작하고 dbgt-omegashen이 수정한 8인용 유즈맵으로, 우주 타일셋의 128x128 타일 크기에서 펼쳐지는 빠른 액션 전투가 특징입니다. 맵 제목과 'ASS KICKIN ACTION'이라는 설명에서 알 수 있듯, 복잡한 빌드 오더나 자원 관리보다는 즉각적인 유닛 조작과 화력 대결에 초점을 맞춘 아레나·블러드 계열의 플레이를 지향합니다. 8명의 플레이어가 동시에 진입하는 구조상 초반부터 난전이 벌어지며, 맵 크기가 표준보다 작아 이동 거리가 짧고 교전 템포가 매우 빠릅니다. 트리거로 제공되는 유닛 강화나 특수 능력 아이템을 활용해 순발력 있게 대처하는 재미가 핵심이며, 장시간 밀리 운영에 부담을 느끼는 유저나 가벼운 킬링 타임용 대전 맵을 찾는 이들에게 적합합니다. 플레이 전에는 버전별 밸런스 조정 사항과 시작 자원, 유닛 구성 프리셋을 확인하고, 팀 프리 또는 FFA 룰 여부를 호스트와 맞춰보는 것이 좋습니다. 시리즈의 여섯 번째 버전인 만큼 전작 대비 유닛 밸런스와 맵 지형 수정이 누적되어 있을 것으로 보입니다. 'Adult Swim v6.0' is an 8-player UMS map created by E)Bighunger and modified by dbgt-omegashen, featuring fast-paced action combat on a 128x128 tile space tileset. As the title and the description 'ASS KICKIN ACTION' suggest, it focuses on immediate unit control and firepower duels rather than complex build orders or resource management, leaning towards arena/blood-style gameplay. With eight players entering simultaneously, chaotic skirmishes erupt from the early game, and the map size is smaller than standard, shortening travel distance and accelerating engagement tempo. The core fun lies in reacting swiftly using unit upgrades or special ability items provided via triggers. It suits users who feel burdened by long macro games or seek a light, kill-time battle map. Before playing, it is advisable to check version-specific balance changes, starting resources, unit presets, and confirm whether the host runs Team Free or FFA rules. As the sixth version in the series, cumulative unit balance and terrain revisions from previous iterations are expected.
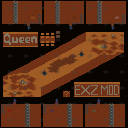
데저트 스트라이크 vSpeed EXZ (Desert Strike vSpeed EXZ)
데저트 스트라이크 vSpeed EXZ는 고전 인기 맵 '데저트 스트라이크'의 변형 버전으로, Queen-Gambit가 수정하고 EXZ가 vSpeed 버전으로 최적화한 유즈맵입니다. 황혼 타일셋의 128x128 타일 맵에서 최대 6인이 참여하며, 전형적인 줄다리기(Arena) 방식으로 중앙 전장을 두고 유닛을 생산해 상대 진영을 밀어내는 구조입니다. vSpeed라는 이름답게 자원 획득 속도와 유닛 생산 주기가 빨라져 초반부터 치열한 교전이 벌어지며, 설명에 명시된 대로 저그 종족의 유닛 비용이 조정되어 종족 간 밸런스가 다르게 다가옵니다. 플레이어는 제한된 자원으로 유닛 조합을 짜고 업그레이드 타이밍을 재며, 아군과의 협력을 통해 전선을 유지해야 합니다. 빠른 템포 덕분에 한 판당 20~30분 내외로 끝나 가볍게 즐기기 좋고, 원작의 전략적 깊이를 유지하면서도 속도감을 높여 입문자와 숙련자 모두 부담 없이 플레이할 수 있습니다. 팀 단위 협동과 실시간 판단이 중요한 맵을 찾는다면 추천합니다. Desert Strike vSpeed EXZ is a variant of the classic popular map 'Desert Strike,' modified by Queen-Gambit and optimized as a vSpeed version by EXZ. On a 128x128 tile map using the Twilight tileset, up to 6 players engage in a classic tug-of-war (Arena) format, producing units to push back the enemy base across a central battlefield. True to its name vSpeed, resource acquisition and unit production cycles are accelerated, leading to intense clashes from the early game. As noted in the description, Zerg unit costs have been adjusted, altering the inter-race balance. Players must compose unit combinations with limited resources, time upgrades, and maintain the frontline through cooperation with allies. The fast pace allows matches to finish in roughly 20–30 minutes, making it easy to enjoy casually while preserving the strategic depth of the original. It is recommended for those seeking a map where team coordination and real-time decision-making are key.
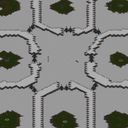
머니99999 스피드255 (Money99999 Speed255)
스타크래프트: 브루드워의 유즈맵 ‘money99999 Speed255’는 빠른 전략과 자원 관리, 그리고 다중 플레이어 간의 경쟁을 중심으로 설계된 흥미로운 맵입니다. 맵의 전체적인 구조는 중앙에 넓은 평지가 펼쳐져 있어 빠른 자원 채취가 가능한 동시에, 주변으로는 미네랄과 가스가 흩어져 있어 전략적인 자원 확보가 필요합니다. 8명의 플레이어가 동시에 참여하는 이 맵은 자원 경쟁이 치열할 수밖에 없으며, 초반 자원 확보가 승패를 좌우할 가능성이 높습니다. 맵의 이름은 ‘Speed255’라는 단어에서 알 수 있듯이, 빠른 진행과 빠른 게임 플레이를 지향하고 있습니다. 플레이어는 제한된 자원을 바탕으로 건물을 짓고 유닛을 생산하여 상대방을 제압하거나, 또는 협력과 경쟁을 통해 자원을 극대화하는 전략을 세워야 합니다. 이 맵의 특징 중 하나는 ‘money’라는 이름에서 유추할 수 있듯이, 자원의 중요성이 극대화되어 있다는 점입니다. 초반에 자원을 얼마나 효율적으로 확보하고 활용할 수 있는지가 게임의 흐름을 결정짓습니다. 또한, 맵의 중앙 평지는 빠른 이동과 전투가 가능하도록 설계되어 있어, 초반 러시나 전략적 기습에 유리한 환경을 제공합니다. 반면, 주변의 자원 지역은 상대방과의 충돌이 빈번할 수 있어, 방어와 공격의 균형을 잘 맞춰야 합니다. 이 맵은 초보자와 숙련자 모두 즐길 수 있지만, 빠른 판단과 전략적 사고가 요구되는 만큼, 초보자의 경우 다소 어려울 수 있습니다. 특히, 자원 관리와 병력 운용의 타이밍을 잘 맞추는 것이 중요합니다. 추천하는 플레이 방법은 초반 자원 확보에 중점을 두고, 빠르게 병력을 생산하여 상대방을 압박하는 것입니다. 또한, 자원의 분배와 건물을 짓는 위치를 신중히 결정하여, 상대방보다 우위에 서는 것이 핵심입니다. 이 맵은 경쟁과 협력의 묘미를 동시에 느낄 수 있어, 스타크래프트 유즈맵의 매력을 제대로 느낄 수 있는 작품 중 하나입니다. 특히, 다중 플레이어와 함께하는 재미가 크기 때문에, 친구들과 함께 플레이한다면 더욱 즐거운 경험을 할 수 있을 것입니다. 이 맵을 플레이하기 전에는 맵의 자원 분포와 중앙 평지의 구조를 미리 숙지하는 것이 좋습니다. 또한, 초반 자원 확보를 위해 빠르게 미네랄과 가스를 확보하는 전략을 준비해야 합니다. 자원 관리와 병력 운용의 균형을 맞추는 것이 이 맵의 핵심 전략이므로, 이러한 점을 염두에 두고 플레이한다면 보다 재미있고 전략적인 게임을 즐길 수 있을 것입니다. StarCraft: Brood War's custom map *Money99999 Speed255* is a dynamic and engaging design centered around fast-paced strategy, resource management, and multiplayer competition. The map features a wide central plain that allows for quick resource gathering while mineral and gas deposits are scattered around the edges, requiring strategic resource control. With eight players competing simultaneously, the battle for resources is intense, and early resource acquisition often determines the outcome of the match. As the name *Speed255* suggests, the map prioritizes rapid progression and fast gameplay. Players must construct buildings and produce units with limited resources to either dominate opponents or maximize gains through cooperation and competition. One of the map’s defining traits, as hinted by its name *Money*, is the heightened importance of resources. The game’s flow hinges on how efficiently players secure and utilize resources in the opening stages. The central plain also facilitates quick movement and combat, making it ideal for early rushes or surprise attacks. However, the surrounding resource zones can lead to frequent clashes, so players must balance defense and offense carefully. While the map caters to both beginners and experienced players, its demand for quick decision-making and strategic thinking can pose a challenge for newcomers. Mastering resource management and troop deployment timing is crucial for success. A recommended strategy is to prioritize early resource collection, rapidly produce forces, and pressure opponents. Careful distribution of resources and placement of buildings can give players a decisive edge. This map excels in blending competition and cooperation, showcasing the charm of StarCraft custom maps. The multiplayer experience is especially rewarding, making it a great choice for playing with friends. Before diving in, familiarize yourself with the resource layout and central plain’s structure. Prepare a strategy to secure minerals and gas quickly in the opening stages. Balancing resource management with troop operations is the key to victory, so keeping these factors in mind will lead to a more strategic and enjoyable game.
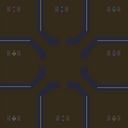
가장 빠른 맵 PHANTOM (Fa§te§t Po§§ible Map PHANTOM)
‘Fa§te§t Po§§ible Map PHANTOM’이라는 제목으로 배포된 이 스타크래프트 브루드워 유즈맵은 ‘가장 빠른 맵’이라는 캐치프레이즈가 말해주듯 플레이어들에게 빠른 진행과 흥미로운 전략적 선택을 강요하는 디펜스 장르의 맵이다. 맵 내부 설명에서도 ‘이제 이 맵보다 빠른 맵은 없다’고 자랑할 만큼, 플레이어는 제한된 시간 내에 끊임없이 밀려오는 적을 방어해야 한다. 맵의 특징 중 하나는 4096×4096의 넓은 타일셋과 사막 테마로 구성된 광활한 필드인데, 이는 넓은 시야와 긴 이동 거리를 요구하며, 방어 구조물의 배치와 자원 관리가 더욱 중요해진다. 특히 맵 중앙에 위치한 10개의 가이저(Geyser)는 자원 수집 경쟁을 유도하며, 빠른 자원 확보와 방어선 구축 사이에서 균형을 잡아야 한다. 맵의 구조는 방어 포인트 간 이동을 최소화하면서도 효율적인 공격로를 제공하는 데 중점을 두고 있으며, 플레이어들은 끊임없이 변화하는 전황에 대응하기 위해 유연한 전략을 구사해야 한다. 빠른 템포와 긴장감 있는 전투가 특징인 이 맵은 주로 방어와 자원 관리 능력을 테스트하는 데 초점을 맞추고 있으며, 초보자는 물론 숙련자까지 다양한 플레이어들에게 도전과 재미를 제공할 것이다. 또한 맵의 난이도는 맵 설명에 ‘업데이트’가 언급된 만큼, 지속적인 개선 과정을 거쳤을 가능성이 높고, 이는 플레이어들에게 안정적이고 완성도 높은 경험을 제공할 것으로 예상된다. 플레이 전 반드시 확인해야 할 사항은 넓은 맵 크기 특성상 미니맵 활용이 필수라는 점과, 자원 경쟁이 치열할 수 있으므로 초반 자원 확보가 승패를 좌우할 수 있다는 점이다. 그리고 방어선 배치 시 적의 공격 패턴을 예측하는 능력이 중요하며, 특히 중앙 가이저 주변의 방어는 신중히 계획해야 한다. This StarCraft: Brood War custom map titled ‘Fa§te§t Po§§ible Map PHANTOM’ delivers a fast-paced, strategy-heavy defense experience under the premise of being ‘the fastest map.’ The internal description boldly claims no map is faster, emphasizing the need for quick decision-making and rapid resource management. The 4096×4096 tile set, featuring a desert theme, provides a vast battlefield where visibility and movement range play critical roles in defensive positioning. Central to the experience are the 10 geysers, which drive resource competition and force players to balance rapid expansion with fortifying defenses. The map’s design prioritizes minimized travel time between key defensive points while offering strategic attack routes. Its fast tempo and tense combat scenarios make it an engaging challenge for both beginners and experienced players. A key highlight is the map’s focus on adaptability, requiring players to respond dynamically to shifting battle conditions. Players should prioritize efficient mini-map usage due to the expansive field and recognize that early resource control can heavily influence the outcome. Careful planning around central geyser defenses is also essential, as predicting enemy attack patterns becomes a deciding factor in survival and success.
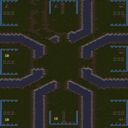
머니 맵 (Money Map)
이 맵은 스타크래프트 브루드워의 유즈맵으로, 플레이어 수가 2명에서 8명까지 지원되는 빠른 진행을 목표로 제작된 맵이다. 내부 맵 설명에서도 언급된 것처럼 '가장 빠른 맵'을 만드는 것이 제작 목표였다는 점에서 흥미로운 접근법을 확인할 수 있다. 맵 제목과 설명에서 느껴지는 성급한 에너지가 맵의 빠른 템포를 반영하고 있으며, 플레이어들은 제한된 자원과 빠른 진행 속도 속에서 전략을 세워야 한다. 맵의 배경은 사막 타일셋으로 설정되어 있으며, 넓은 평야와 드문드문 배치된 오브젝트들이 특징적이다. 맵의 구조는 비교적 평탄한 지형이 많지만, 중앙과 가장자리로 갈수록 고저차가 발생하는 것으로 보인다. 이러한 지형은 빠른 움직임을 요구하는 플레이 스타일에 맞춰져 있으며,Resource management와 빠른 판단력이 중요한 요소로 작용할 것으로 예상된다. 맵이 제공하는 승리 조건이나 추가 규칙은 명확히 확인되지 않지만, 빠른 진행을 중시하는 만큼다면Resources gathering이나 건물 건설, 유닛 생산보다도 순간적인 판단과 이동이 더 중요할 가능성이 높다. 또한, 제작자 클랜 '][ntolerance'의 이름에서 알 수 있듯이, 이 맵은 특정 커뮤니티나 플레이 스타일을 지향하고 있는 것으로 보인다. 플레이어들은 맵을 플레이하기 전, 빠른 진행 속도와 제한된 시간 내에 결정해야 하는 선택지들에 대해 충분히 숙지하는 것이 중요하다. 맵의 난이도는 특별히 명시되지 않았지만, 빠른 템포와 제한된 정보 속에서 전략을 짜야 한다는 점에서 초보자보다는 경험 있는 플레이어들에게 더 적합할 것으로 보인다. 맵의 난이도와 플레이 스타일을 고려할 때, 이 맵은 경쟁적인 플레이 스타일을 선호하는 유저들에게 추천된다. 또한, 짧은 플레이 시간과 빠른 진행을 원하는 플레이어들에게도 적합한 선택지가 될 수 있다. This StarCraft: Brood War custom map is designed as a fast-paced UMS (Use Map Settings) game supporting 2 to 8 players. The creator's goal was to make the 'fastest possible map,' as explicitly stated in the internal description, which is reflected in the map's layout and intended gameplay. The desert-themed tileset provides a vast, open battlefield with subtle elevation changes toward the center and edges, encouraging swift movement and dynamic positioning. While specific victory conditions or additional rules are not detailed, the emphasis on speed suggests that quick decision-making and resource management—rather than prolonged unit production or base-building—will be critical. The map's name and creator's clan, '][ntolerance,' hint at a community-driven design, potentially appealing to players who enjoy competitive or high-tempo scenarios. Players should prepare for a game where split-second choices and adaptability outweigh prolonged strategy. Given the lack of explicit difficulty indicators, the map likely suits experienced players familiar with fast-paced custom maps, though its simplicity and speed could also attract casual players seeking a quick, engaging challenge. Ideal for those who prefer competitive or action-oriented gameplay, this map rewards agility and foresight over meticulous planning.
최근 등록된 맵
새로 추가된 파일과 버전을 확인하세요.
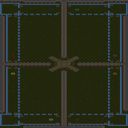
Twizted: Time Attack
스타크래프트 브루드워의 유즈맵 중 하나로, 타임 어택 장르에 특화된 ‘Twizted: Time Attack’는 플레이어들이 제한된 시간 내에 목표를 달성해야 하는 빠른 진행이 특징인 맵입니다. 맵의 전체적인 분위기는 사막 테마로 구성되어 있으며, 초기에 주어지는 인프라와 자원은 플레이어 간의 경쟁을 유도하는 구조로 설계되었습니다. 맵의 중심부에는 중앙 광장이 위치하고 있으며, 이 주변으로 8개의 플레이어 베이스 구역이 배치되어 있습니다. 각 구역은 시작 지점에서부터 확장 가능한 공간이 마련되어 있어, 빠른 자원 확보와 방어 전략을 세울 수 있는 기반을 제공합니다. 이 맵의 핵심은 ‘시간’입니다. 플레이어는 제한된 시간 안에 목표를 달성해야 하며, 이는 맵 곳곳에 배치된 타임 트리거와 연동되어 있습니다. 예를 들어 특정 건물을 건설하거나, 유닛을 생산하거나, 적을 제거하는 등의 과제를 완수해야 다음 단계로 넘어갈 수 있습니다. 맵의 진행 방식은 타임 어택이라는 장르답게, 플레이어의 판단력과 속도감이 가장 중요한 요소로 작용합니다. 또한, 맵의 구조상 중앙 지역을 차지하는 경우가 승리 조건에 가까워지므로, 중앙 지역을 둘러싼 방어와 공격의 균형이 관건입니다. 플레이어는 초반에 주어지는 기본 자원과 유닛으로 시작하며, 빠르게 확장하고 방어 체계를 구축해야 합니다. 맵의 타일셋이 사막으로 구성되어 있어 시각적으로도 건조한 느낌을 주며, 이는 맵의 진행 속도를 반영하는 듯합니다. 또한, 맵의 배치상 중앙 지역이 좁아 대규모 전투보다는 소규모 전투가 빈번하게 발생할 가능성이 높습니다. 이러한 구조는 플레이어 간의 긴장감을 높이며, 빠른 판단을 요구합니다. 이 맵은 초보 플레이어보다는 어느 정도의 전략적 사고와 빠른 판단력이 요구되는 유형입니다. 특히, 시간 제한과 제한된 자원 속에서 효율적인 판단이 중요하므로, 초보자의 경우 연습이 필요할 수 있습니다. 반면, 숙련된 플레이어에게는 매력적인 도전 과제가 될 수 있으며, 빠른 진행과 전략의 조합으로 재미를 느낄 수 있는 맵입니다. 추천하는 플레이 방식은 빠른 자원 확보와 방어선 구축, 그리고 중앙 지역을 둘러싼 경쟁에 중점을 두는 것입니다. 플레이 전에는 맵의 구조와 제공되는 유닛, 건물의 종류를 미리 확인하고, 중앙 지역과 각 플레이어 베이스 간의 거리를 숙지하는 것이 중요합니다. 또한, 시간 제한이 있다는 점을 감안하여, 각 단계별로 얼마나 많은 시간이 소요될지 예상하고 계획을 세우는 것이 좋습니다. 마지막으로, 맵의 타일셋이 사막이므로, 건조한 환경에 맞게 전략을 조정하는 것도 좋은 팁입니다. "Twizted: Time Attack" is a time-attack-style custom map in *StarCraft: Brood War*, where players must complete objectives within a limited time. The map features a desert theme with a central plaza surrounded by eight player bases, each offering expandable space for resource gathering and defense strategies. The core mechanic revolves around time—players must meet triggers like constructing buildings, producing units, or eliminating enemies to advance stages. Central control is crucial for victory, making defense and offense around the middle area key to success. The map’s narrow central region encourages small-scale battles, heightening tension and demanding quick decisions. This map is better suited for players with strategic thinking and fast reflexes, as limited resources and time pressure require efficient decision-making. While beginners may need practice, experienced players will find it a thrilling challenge with its blend of speed and strategy. Recommended approaches include securing resources quickly, establishing defensive lines, and competing for central control. Before playing, familiarize yourself with the map layout, available units, and buildings, and plan your timing based on the expected duration of each stage. Adjusting strategies to fit the arid desert environment is also advisable.
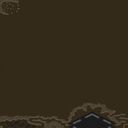
트리거 해피 오펜스 (Trigger Happy Offense)
파일명 'Trigger Happy Offense v0.16'에서 알 수 있듯 이 맵은 트리거 해피(Trigger Happy) 계열의 유즈맵으로 보인다. 사이트 표시 제목과 내부 제목이 모두 'Untitled Scenario'로 되어 있어 실제 콘텐츠는 파일명과 설명에 의존해야 한다. '적 건물 모두 파괴'라는 단순한 승리 조건이 제시되었으나, 장르가 밀리가 아닌 UMS로 분류된 점과 시리즈 명명 규칙상 다수의 유닛과 트리거를 활용한 속도전 형태일 가능성이 높다. 타일셋은 황무지(Badlands)이며 256x256 타일 크기로 표준적인 중형 맵 규모를 갖춘 것으로 보인다. 진행 방식은 일반적인 자원 채취와 병력 생산을 기반으로 하되, 'Trigger Happy'라는 명칭이 암시하듯 트리거를 통해 유닛 스탯 조정, 특수 능력 부여, 웨이브 소환, 이벤트 연출 등이 빈번하게 개입될 것으로 추정된다. 'Offense'라는 부제가 붙은 만큼 방어적 운영보다는 지속적인 공격과 전진을 유도하는 설계가 깔려 있을 수 있다. 4인 플레이를 지원하며 팀 수가 별도로 표기되지 않은 점으로 미루어 자유 대전(FFA) 또는 2대2 팀전 등 다양한 구도가 가능해 보인다. 플레이 경험 측면에서는 트리거 해피 특유의 정신없는 난전과 화려한 이펙트, 빠른 템포의 교전이 주를 이룰 것으로 예상된다. 밀리 실력보다는 트리거 이해도, 유닛 컨트롤, 상황 대처 능력이 승패를 가를 가능성이 크다. 초보자에게는 트리거 효과와 유닛 특성 파악이 선행되어야 하며, 숙련자에게는 최적화된 빌드 오더와 마이크로 컨트롤 경쟁이 재미 요소로 작용할 것이다. 추천 대상은 밀리 방식의 정석 운영에서 벗어나 트리거 기반의 변칙적이고 속도감 있는 전투를 즐기고 싶은 유저다. 플레이 전 확인 포인트는 버전 표시(v0.16)가 개발 초기 또는 테스트 단계를 시사하므로 밸런스 미완성, 버그, 트리거 오류 가능성을 염두에 두어야 한다. 또한 내부 제목이 미설정된 상태이므로 배포 버전과 파일명이 일치하는지, 최신 패치 여부를 확인하고 시작하는 것이 좋다. As indicated by the filename 'Trigger Happy Offense v0.16', this map appears to be a Trigger Happy-style UMS. Since both the site display title and internal title are set to 'Untitled Scenario', the actual content must be inferred from the filename and description. Although the victory condition is simply 'Destroy all enemy buildings', the classification as UMS rather than Melee and the series naming convention suggest a fast-paced format utilizing numerous units and triggers. The tileset is Badlands with a 256x256 tile size, appearing to be a standard medium-sized map. The progression likely follows standard resource gathering and unit production, but as the name 'Trigger Happy' implies, triggers are estimated to frequently intervene with unit stat modifications, special abilities, wave spawns, and event scripting. The subtitle 'Offense' suggests a design that encourages continuous aggression and advancement rather than defensive play. With support for 4 players and no specified team count, various formats such as FFA or 2v2 team play seem possible. In terms of play experience, the chaotic melees, flashy effects, and rapid-tempo engagements characteristic of Trigger Happy maps are expected to dominate. Understanding trigger effects, unit characteristics, and situational adaptation will likely determine victory more than standard Melee mechanics. Beginners will need to grasp trigger mechanics and unit traits first, while veterans will find enjoyment in optimized build orders and micro-control competition. The recommended audience is users seeking unconventional, fast-paced trigger-based combat away from standard Melee play. Pre-play checks should note that the version label (v0.16) indicates an early development or test stage, so balance incompleteness, bugs, and trigger errors are possible. Also, since the internal title is unset, verifying that the distribution version matches the filename and checking for the latest patch is advised.
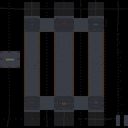
썬크 D XY Fast (Sunken D XY Fast)
스타크래프트 브루드워의 유즈맵으로 유명한 '썬크 D XY Fast'는 빠른 진행과 전략적 대결을 동시에 즐길 수 있는 디펜스 장르의 맵이다. 맵 이미지에서 확인되는 바와 같이, 중앙에 위치한 주요 전투 지역을 중심으로 방어 유닛들이 배치되어 있으며, 좌우로 넓은 공간이 펼쳐져 있어Resource gathering과 유닛 생산이 가능한 구조로 보인다. 특히, 맵의 네 모서리에는Resource가 풍부한 minerals와 vespene gas가 배치되어 있어Resource 확보 경쟁이 치열할 것으로 예상된다. 상단 중앙에는Resource가 밀집된 지역이 있어, 초반Resource 확보가 승패를 좌우할 수 있는 중요한 포인트로 보인다. 플레이어는 6인으로 구성되며, 각 플레이어는 독립적인Resource를 확보할 수 있으며, 중립 미네랄과 가스 지역을 두고 경쟁해야 한다. 맵의 대칭 구조는 모든 플레이어가 동일한Resource 분배를 받을 수 있도록 설계되어 있어, 초반Resource 확보가 공정하게 이루어진다. 또한, 맵 중앙에는 대규모 전투가 벌어질 수 있는 넓은 평지가 있어, 대규모 유닛 조합과 전략적 포지셔닝이 중요한 역할을 할 것으로 보인다. 방어 시설이 없기 때문에, 플레이어는 직접 유닛을 생산하고 전투를 수행해야 하며,Resource 확보와 유닛 생산 속도가 게임의 핵심이다. 이 맵은 빠른 진행과 전략적 대결을 동시에 즐기고자 하는 플레이어에게 적합하다. 특히,Resource 확보와 유닛 생산을 빠르게 처리할 수 있는 전략적 사고와 판단력이 요구된다. 또한, 다른 플레이어와의Resource 경쟁에서 우위를 점하기 위해Resource 확보 지역을 선점하는 것이 중요하다. 초보자도 쉽게 접근할 수 있지만,Resource 확보와 전투 전략을 익히기 위해 몇 차례의 연습이 필요할 수 있다. 숙련된 플레이어는Resource 확보와 전투 전략을 최적화하여 빠른 승리를 노릴 수 있을 것이다. 플레이 전,Resource 확보 지역과Resource 분배를 확인하여Resource 확보 전략을 미리 계획하는 것이 중요하다. 또한,Resource 확보 경쟁에서 우위를 점하기 위해Resource 확보 지역을 선점하는 전략을 세워야 한다. 맵의 대칭 구조를 활용하여Resource 확보와 전투를 균형 있게 진행할 수 있도록 노력해야 한다. This StarCraft: Brood War custom map, 'Sunken D XY Fast,' offers a fast-paced defense experience combined with strategic gameplay. As seen in the map image, the central battle zone is surrounded by defensive structures and resources, with wide open areas on both sides allowing for Resource gathering and unit production. The corners of the map feature dense mineral and vespene gas deposits, making early Resource collection a critical factor in securing an advantage. The map supports up to six players, each starting with their own Resource distribution. Neutral Resource locations in the center create intense competition for early advantages. The symmetrical design ensures fair Resource access for all players, while the expansive central plateau allows for large-scale battles and strategic positioning. Since there are no built-in defenses, players must rely on their own unit production and tactical decisions to secure victory, with Resource management and production speed being key to success. This map is ideal for players who enjoy fast-paced strategic battles and Resource competition. Strong strategic thinking and quick decision-making are essential, particularly in securing early Resource advantages and controlling key Resource locations. While beginners can join easily, mastering Resource management and combat tactics may require practice. Skilled players can optimize their strategies to achieve quick victories. Before playing, it's crucial to scout Resource locations and plan your Resource collection strategy. Securing key Resource areas early will give you a significant advantage. Utilize the map's symmetry to balance Resource gathering and combat, ensuring a strong position throughout the game.
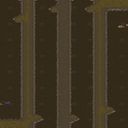
모래성 전쟁: 빠른 버전 (Sand Castle Wars v.Fast)
《Sand Castle Wars v.Fast》는 스타크래프트: 브루드워의 유즈맵으로, 황무지 타일셋을 기반으로 한 대규모 디펜스 장르의 맵입니다. 맵의 이름은 모래성이라는 컨셉을 담고 있으며, 빠른 진행과 전략적 배치, 지속적인 적의 공격을 방어하는 재미가 특징입니다. 4096x4096의 넓은 공간에 펼쳐진 황무지 지형은 맵의 광활함을 강조하며, 중앙에 위치한 요새나 성채를 중심으로 방어선을 구축하는 플레이가 예상됩니다. 내부 맵 제목과 설명에 'Legacy(U)Version L2'가 포함되어 있어, 기존 맵의 후속 버전 또는 레거시 형태로 개발되었을 가능성이 높습니다. 이 맵의 핵심은 방어와 자원 관리에 있습니다. 플레이어는 적의 끊임없는 공격을 효과적으로 막아내며, 제한된 자원을 효율적으로 사용하여 방어 시설을 업그레이드하거나 추가 병력을 생산해야 합니다. 맵의 넓은 공간은 넓은 시야와 넓은 전장 활용을 요구하며, 적의 공격 패턴을 예측하고 방어선을 재구성하는 전략적 깊이가 요구됩니다. 또한, 빠른 진행을 강조하는 'v.Fast'라는 타이틀은 맵의 템포가 빠르고, 공격과 방어가 신속하게 반복되는 플레이 스타일을 지향함을 시사합니다. 이 맵은 특히 방어와 전략적 배치에 interesse가 있는 플레이어들에게 추천됩니다. 넓은 맵과 빠른 진행 템포는 플레이어들에게 긴장감과 도전 의식을 제공하며, 지속적인 적의 공격을 막아내며 승리를 쟁취하는 재미를 느낄 수 있습니다. 또한, 레거시 버전이라는 점에서 기존 팬들에게도 익숙한 요소와 새로운 변화가 결합된 경험을 제공할 것으로 보입니다. 다만, 넓은 맵과 빠른 진행은 초보자에게는 다소 복잡하게 느껴질 수 있으므로, 기본적인 스타크래프트 컨트롤과 전략적 사고가 어느 정도 요구됩니다. 플레이 전에는 맵의 주요 방어 포인트와 자원 위치, 적의 공격 루트를 미리 파악하는 것이 중요합니다. 또한, 빠른 진행을 고려하여 빠른 의사 결정과 효율적인 자원 관리가 필수적입니다. 맵의 넓은 공간을 최대한 활용하여 방어선을 구축하고, 적의 공격 패턴에 따라 유연하게 대응하는 전략이 승리への鍵이 될 것입니다. 《Sand Castle Wars v.Fast》 is a user-made map for *StarCraft: Brood War*, a large-scale defense genre map based on a wasteland tile set. The map’s name reflects its castle-in-the-sand concept, offering fast-paced gameplay, strategic positioning, and the thrill of fending off relentless enemy attacks. Spanning 4096x4096, the vast wasteland terrain emphasizes the map’s scale, with players expected to build defensive lines around the central fortress or stronghold. The internal map title and description include "Legacy(U)Version L2," suggesting it may be a sequel or legacy iteration of a previous map. The core of this map revolves around defense and resource management. Players must effectively block waves of enemy assaults while efficiently using limited resources to upgrade defenses or produce additional forces. The map’s expansive layout demands broad vision and strategic battlefield control, requiring players to anticipate enemy attack patterns and adapt their defenses accordingly. The "v.Fast" in the title signals a rapid tempo, where offensive and defensive actions unfold quickly in repeated cycles. This map is especially recommended for players who enjoy defense and strategic positioning. The combination of a large map and fast-paced gameplay creates tension and challenge, rewarding players with the satisfaction of overcoming persistent enemy waves. As a legacy version, it likely blends familiar elements for existing fans with fresh changes to keep the experience engaging. However, the map’s scale and speed may feel overwhelming for beginners, so basic *StarCraft* mechanics and strategic thinking are prerequisites. Before playing, it’s crucial to study key defensive points, resource locations, and enemy attack routes. Quick decision-making and efficient resource management are essential given the fast pace. Maximizing the map’s open space to construct strong defenses and adapting strategies flexibly to enemy patterns will be the key to victory.
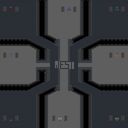
패스트 포서블 맵 (Fastest Possible Map)
스타크래프트 브루드워 유즈맵으로 유명한 ‘•Fa§te§tPo§§ible Map• WesT©’는 밀리 기반 맵이지만, 이름과 달리 순수한 밀리가 아니라 특수한 구조와 룰이 적용된 컴까기 유즈맵으로 추정된다. 내부 맵 설명에 ‘Same Layout as Space but different Look’이 포함된 점과 파일명에 ‘$$Fastest WesT$$’가 명시된 점을 고려할 때, 기존의 스페이스맵 스타일을 재활용한 개선형 맵으로 보인다. 4인용 맵이며, 우주 타일셋을 기반으로 4096x4096의 넓은 공간을 활용한 디자인으로 보이며, minerals 채널이 50개씩 쌓여 있어 초반 자원 확보에 영향을 줄 수 있는 구조로 추정된다. 이 맵의 가장 큰 특징은 ‘Fastest’라는 이름에서 유추할 수 있듯, 빠른 진행과 전략적 선택을 요구하는 플레이 스타일로 보인다. 맵이 넓고 minerals 채널이 체계적으로 배치되어 있어, 플레이어는 초반 자원 확보와 병력의 배치, 그리고 적절한 타이밍에 공격을 감행해야 한다. 또한, ‘WesT©’라는 제작자 명과 ‘oP WesT’ 채널이 언급된 점을 보아, 이러한 빠른 진행과 전략적 깊이를 강조하는 맵으로 설계되었을 가능성이 크다. 맵의 이름과 구조상, 단순히 자원 확보와 테크 업그레이드만을 목표로 하는 것이 아니라, 상대방의 움직임을 예측하고 신속한 대응을 요구하는 플레이 경험을 제공할 것으로 예상된다. 이 맵의 추천 대상은 스타크래프트 브루드워의 밀리 경험이 어느 정도 있는 플레이어들로, 빠른 판단력과 전략적 사고가 요구되는 만큼 초보자보다는 숙련자나 중급 이상 플레이어에게 적합할 것이다. 또한, 넓은 맵과 minerals 채널의 배치가 자원 전쟁과 병력 운용의 중요성을 강조하기 때문에, 자원 관리와 스플릿 컨트롤에 자신 있는 플레이어에게도 추천할 만하다. 다만, 맵의 구조상 특정 위치에 minerals가 집중되어 있어, 자원 확보의 균형을 맞추는 것이 관건일 수 있다. 따라서, 이 맵을 플레이하기 전에는 minerals의 배치와 맵의 주요 길목을 미리 확인하고, 상대방의 전략에 따라 유동적으로 대응할 준비를 해두는 것이 중요하다. This StarCraft: Brood War custom map, famous as a *•Fa§te§tPo§§ible Map• WesT©*, is a mill-based map, but despite its name, it isn’t pure mill—it appears to be a unique custom map with special structures and rules. Given that the internal map description includes "Same Layout as Space but different Look" and the filename explicitly states "$$Fastest WesT$$," it seems to be an improved version of the classic Space map. Designed for four players, it likely utilizes a space-themed tileset and a large 4096x4096 playfield, with minerals arranged in stacks of 50, potentially impacting early resource gathering. The map’s defining feature, as suggested by its name "Fastest," is its emphasis on fast-paced gameplay and strategic decision-making. The spacious design and systematic mineral distribution require players to secure resources early, position their forces effectively, and strike at the right moment. Additionally, references to the creator "WesT©" and the "oP WesT" channel imply that the map is intentionally designed to highlight quick, dynamic play with strategic depth. Rather than focusing solely on resource accumulation and tech upgrades, it encourages predicting opponent movements and making swift responses. This map is best suited for players with some prior Brood War mill experience, as it demands quick judgment and strategic thinking—making it more appropriate for intermediate to advanced players rather than beginners. The wide playfield and mineral distribution also emphasize resource competition and unit control, so it’s highly recommended for players confident in resource management and split control. However, since minerals are concentrated in certain areas, balancing resource acquisition may be a key challenge. Before playing, it’s important to familiarize yourself with mineral layouts and key pathways, and to prepare flexible responses based on your opponent’s strategy.
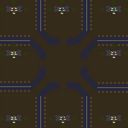
최속 맵 -PERFECTED- (Fa§te§t Map_-PERFECTED-_)
《Fa§te§t Map_-PERFECTED-_》는 스타크래프트 브루드워의 단일 플레이어용 밀리 맵으로, 빠른 진행과 간단한 구조가 특징이다. 맵은 사막 타일셋으로 구성되어 있으며, 중앙에 넓은 평지가 펼쳐져 있고 사방으로 협곡과 언덕이 분포해 지형의 활용을 강제한다. 맵 이름은 Fastest Map -PERFECT-.scm으로 파일명에서도 빠른 플레이를 강조하고 있지만, 이미지 상에서는 적의 배치나 승리 조건을 명확히 확인할 수 없어서 맵의 목적은 추정된다. 사막 지형은 시야를 제한하는 늪이나 언덕으로 이루어져 있어, 초보자가 플레이할 경우 지형의 이점을 활용하지 못해 어려움을 겪을 수 있다. 또한, 맵의 symmetrical한 구조는 양측의 시작 지점 간 거리를 동등하게 유지해 공정한 출발을 보장하는 것으로 보인다. 맵의 전체 크기는 4096x4096으로 크지만, 협소한 길목과 넓은 평지가 균형을 이루어 한정된 공간에서 전략적인 움직임을 요구하는 것으로 판단된다. 이 맵은 특히 Zerg나 Protoss 플레이어에게는 시야 확보와 자원 수집의 중요성이 강조될 것이며, Terran의 경우 방어선의 구축이 핵심일 것으로 추정된다. 추천 대상은 스타크래프트 밀리 초보자부터 중급자까지로, 빠른 진행을 원하는 플레이어에게 적합하며, 맵의 symmetrical한 구조 덕분에 대회용으로도 활용될 가능성이 있다. 플레이 전에는 맵의 지형을 숙지하고, 시작 지점 주변의 자원 분배와 주요 길목의 병력 이동 경로를 미리 확인해야 한다. 맵의 난이도는 맵의 크기에 비해 협소한 길목과 시야 차단 요소로 인해 '보통' 정도로 예상된다. This map, 《Fa§te§t Map_-PERFECTED-_》, is a single-player melee map in StarCraft: Brood War, designed for fast-paced gameplay with a simple yet strategic layout. The map uses a desert tileset, featuring a central open area surrounded by canyons and hills that restrict movement and force players to adapt their strategies based on terrain. The filename, Fastest Map -PERFECT-.scm, hints at the map's emphasis on speed, though the exact victory conditions and enemy placements are not clearly visible in the image, leaving its primary objective to be inferred. The symmetrical design ensures balanced starting positions, making it fair for both players in potential multiplayer scenarios. With a total size of 4096x4096, the map balances open spaces with narrow passages, requiring players to navigate efficiently. Zerg and Protoss players will likely focus on vision control and resource gathering, while Terran players may prioritize defensive structures. Suitable for both beginners and intermediate players, this map appeals to those seeking quick, strategic gameplay. Before playing, it is advisable to study the terrain, resource distribution near starting points, and key pathways for troop movements. The map’s difficulty is estimated as 'Intermediate' due to its narrow chokepoints and limited visibility, which can challenge even experienced players.
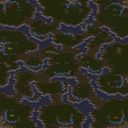
빅 게임 헌터즈 (Big Game Hunters)
스타크래프트 브루드워 유즈맵 역사상 가장 상징적인 머니 맵 중 하나인 빅 게임 헌터즈(Big Game Hunters)는 8인용 팀 밀리 장르로, 128x128 크기의 사막 타일셋 위에서 진행된다. 맵 제목 그대로 '큰 사냥꾼들'이라는 이름에 걸맞게 양 진영이 상하로 나뉘어 4:4 대칭 구도를 이루며, 각 플레이어는 본진 바로 앞에 광물과 베스핀 가스가 무한에 가깝게 배치된 확장 기지를 확보한다. 이로 인해 초반부터 자원 걱정 없이 대량 유닛 생산이 가능하며, 일반적인 밀리 맵보다 훨씬 빠른 타이밍에 200 인구수 병력을 완성해 대규모 교전을 벌이는 것이 핵심 재미다. 진행 방식은 전형적인 팀 밀리와 동일하지만, 자원 고갈 염려가 없어 매크로 운영 부담이 크게 줄어든다. 대신 다수의 병력을 효과적으로 컨트롤하고, 아군과의 타이밍 맞춤 러시나 수비 조율이 승부를 가른다. 맵 중앙은 넓은 평지로 이루어져 있어 지상군 위주의 난전이 빈번하며, 공중 유닛이나 드랍십 플레이도 변수로 작용한다. 트리거나 특수 승리 조건은 별도로 없으며, 적 전원 섬멸 또는 항복 시 승리하는 표준 밀리 규칙을 따른다. 추천 대상은 밀리 빌드 오더 연습이 부담스러운 초보자, 짧은 시간 안에 화려한 대규모 전투를 즐기고 싶은 라이트 유저, 팀원과의 호흡을 맞춰보고 싶은 클랜전 연습용으로 적합하다. 플레이 전 확인할 점은 맵 파일명의 특수 문자(!$$ 등)로 인한 실행 오류 가능성, 그리고 8인 미만으로 시작할 경우 빈 슬롯이 컴퓨터로 채워져 난이도가 달라질 수 있다는 점이다. 20년 넘게 사랑받아온 고전 명작인 만큼, 브루드워 특유의 속도감과 화력을 온전히 체험하고 싶다면 한 번쯤 플레이해보길 권한다. Big Game Hunters is one of the most iconic money maps in StarCraft: Brood War custom map history, an 8-player team melee played on a 128x128 desert tileset. True to its name, the map splits two teams into a top-versus-bottom 4v4 symmetrical layout, with each player securing an expansion base right next to their main that contains near-infinite minerals and vespene gas. This allows massive unit production from the early game without resource concerns, letting players hit 200 supply armies far faster than standard melee and engage in huge battles—the core appeal of the map. The flow follows classic team melee, but macro burden is greatly reduced since resources never run dry. Instead, victory hinges on controlling large armies effectively and coordinating timing attacks or defenses with allies. The wide-open center invites frequent ground skirmishes, while air units and dropship play add strategic variety. There are no special triggers or custom victory conditions; standard melee rules apply—eliminate all opponents or force surrender. Recommended for beginners who find standard melee build orders daunting, casual players wanting quick, spectacular large-scale fights, and clans practicing team coordination. Before playing, note that the map filename contains special characters (!$$) which may cause launch issues, and starting with fewer than 8 players fills empty slots with computers, altering difficulty. As a classic beloved for over two decades, it remains the quintessential way to experience Brood War’s signature speed and firepower in a single match.
가장 빠른 맵 PHANTOM (Fa§te§t Po§§ible Map PHANTOM)
‘Fa§te§t Po§§ible Map PHANTOM’이라는 제목으로 배포된 이 스타크래프트 브루드워 유즈맵은 ‘가장 빠른 맵’이라는 캐치프레이즈가 말해주듯 플레이어들에게 빠른 진행과 흥미로운 전략적 선택을 강요하는 디펜스 장르의 맵이다. 맵 내부 설명에서도 ‘이제 이 맵보다 빠른 맵은 없다’고 자랑할 만큼, 플레이어는 제한된 시간 내에 끊임없이 밀려오는 적을 방어해야 한다. 맵의 특징 중 하나는 4096×4096의 넓은 타일셋과 사막 테마로 구성된 광활한 필드인데, 이는 넓은 시야와 긴 이동 거리를 요구하며, 방어 구조물의 배치와 자원 관리가 더욱 중요해진다. 특히 맵 중앙에 위치한 10개의 가이저(Geyser)는 자원 수집 경쟁을 유도하며, 빠른 자원 확보와 방어선 구축 사이에서 균형을 잡아야 한다. 맵의 구조는 방어 포인트 간 이동을 최소화하면서도 효율적인 공격로를 제공하는 데 중점을 두고 있으며, 플레이어들은 끊임없이 변화하는 전황에 대응하기 위해 유연한 전략을 구사해야 한다. 빠른 템포와 긴장감 있는 전투가 특징인 이 맵은 주로 방어와 자원 관리 능력을 테스트하는 데 초점을 맞추고 있으며, 초보자는 물론 숙련자까지 다양한 플레이어들에게 도전과 재미를 제공할 것이다. 또한 맵의 난이도는 맵 설명에 ‘업데이트’가 언급된 만큼, 지속적인 개선 과정을 거쳤을 가능성이 높고, 이는 플레이어들에게 안정적이고 완성도 높은 경험을 제공할 것으로 예상된다. 플레이 전 반드시 확인해야 할 사항은 넓은 맵 크기 특성상 미니맵 활용이 필수라는 점과, 자원 경쟁이 치열할 수 있으므로 초반 자원 확보가 승패를 좌우할 수 있다는 점이다. 그리고 방어선 배치 시 적의 공격 패턴을 예측하는 능력이 중요하며, 특히 중앙 가이저 주변의 방어는 신중히 계획해야 한다. This StarCraft: Brood War custom map titled ‘Fa§te§t Po§§ible Map PHANTOM’ delivers a fast-paced, strategy-heavy defense experience under the premise of being ‘the fastest map.’ The internal description boldly claims no map is faster, emphasizing the need for quick decision-making and rapid resource management. The 4096×4096 tile set, featuring a desert theme, provides a vast battlefield where visibility and movement range play critical roles in defensive positioning. Central to the experience are the 10 geysers, which drive resource competition and force players to balance rapid expansion with fortifying defenses. The map’s design prioritizes minimized travel time between key defensive points while offering strategic attack routes. Its fast tempo and tense combat scenarios make it an engaging challenge for both beginners and experienced players. A key highlight is the map’s focus on adaptability, requiring players to respond dynamically to shifting battle conditions. Players should prioritize efficient mini-map usage due to the expansive field and recognize that early resource control can heavily influence the outcome. Careful planning around central geyser defenses is also essential, as predicting enemy attack patterns becomes a deciding factor in survival and success.
맵 선택 가이드
태그는 맵의 핵심 특징을 빠르게 설명하지만 제작 버전마다 규칙이 다를 수 있습니다. 상세 설명에서 권장 인원, 난이도, 플레이 시간과 버전을 함께 확인한 뒤 다운로드하세요.