
빠른 빌드 스타크래프트 맵 모음
'빠른 빌드' 태그가 등록된 맵을 모았습니다. 장르 하나로 찾기 어려운 플레이 방식, 난이도와 특징을 중심으로 인기 맵과 최신 맵을 비교해 보세요.
- 등록 맵
- 4개
- 누적 다운로드
- 0
- 누적 조회
- 155
인기 맵
다운로드와 조회 반응이 높은 맵입니다.
초속 2v2 (²v²) SuPeR FaSt Zc
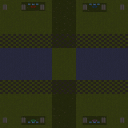
스타크래프트 브루드워의 고전 밀리 맵인 〈(²v²) SuPeR FaSt Zc〉는 2vs2 팀전 구조를 채용한 빠른 속도의 전략맵으로, 시작 지점의 자원 배치가 효율적으로 배치되어 초반 빌드와 전투 흐름을 빠르게 전환할 수 있도록 설계되었다. 맵은 사막 타일셋을 기반으로 하며, 중앙에 위치한 넓은 교전 지역과 양측 진영이 안정된 Mineral Field를 확보할 수 있는 공간을 제공한다. 시작 위치 nearEach는 30개의 미네랄과 2개의 추가 15미네랄 클러스터가 배치되어 있으며, 자원 밀집도가 높아 초반 자원 수급 경쟁이 치열해지는 특징을 보인다. ‘Perfectly Spaced Map’이라는 설명처럼 맵의 균형이 잘 잡혀 있어 양측이 동일한 조건에서 시작할 수 있으며, 빠른 전투와 빌드 전환을 즐기는 플레이어들에게 적합하다. 이 맵은 특히 초반 빌드 오더와 빠른 확장 전략을 선호하는 유저들에게 인기가 있으며, 중앙 교전 지역을 중심으로 한 타이밍 러시나 빠른 멀티 테스킹이 중요한 플레이 스타일을 요구한다. 또한, Mineral Field가 시작 지점 가까이에 밀집되어 있어 초반 자원 확보가 용이하다는 점에서 빌드 속도와 효율성을 중시하는 플레이어들에게 매력적인 요소로 작용한다. 다만, 맵이 비교적 좁고 중앙 교전 지역이 좁아 리스크가 높은 전투가 자주 발생할 수 있어, 유닛 컨트롤과 전략적 판단력이 요구된다. 초보자보다는 밀리 맵에 익숙한 중급 이상의 플레이어들에게 추천되며, 빠른 템포와 전략적 깊이를 동시에 즐길 수 있는 맵으로 평가된다. 플레이 전에는 자원 배치가 시작 지점 nearEach에 집중되어 있어 초반 빌드와 빌드 오더를 신중히 준비해야 하며, Mineral Field가 많지만 위치가 밀집되어 있어 mineral blocking이나 fast expansion 전략을 고려해볼 필요가 있다. 또한, 좁은 중앙 교전 지역을 활용한 카운터 빌드나 타이밍 러시에 대비한 대비책을 마련하는 것이 좋다. 맵의 균형이 잘 잡혀 있어 양측의 실력 차가 크지 않다면 흥미로운 접전으로 이어질 가능성이 높으며, 빠른 전투와 빌드 전환을 즐기는 플레이어들에게는 최고의 선택지 중 하나가 될 수 있다. This classic StarCraft: Brood War melee map, titled 〈(²v²) SuPeR FaSt Zc〉, is a fast-paced 2v2 team-based strategy map designed for quick engagements and efficient resource management. Set on a desert tileset, the map features a wide central battle zone flanked by balanced starting positions, each equipped with 30 minerals and two additional 15-mineral clusters. The ‘Perfectly Spaced Map’ description highlights its symmetrical and balanced design, ensuring both teams begin on equal footing with identical mineral layouts. The map thrives on rapid build orders and early-game aggression, appealing to players who prefer high-tempo strategies and efficient resource exploitation. Central combat zones often lead to intense early skirmishes, rewarding precise unit control and strategic foresight. The clustered mineral fields near starting locations encourage fast expansion and mineral blocking tactics, making early-game resource control critical. While the compact design fosters quick decision-making, it also demands heightened awareness to avoid reckless engagements in confined spaces. Recommended for intermediate to advanced players familiar with Brood War melee mechanics, this map excels in delivering fast-paced, strategic gameplay. Players should prepare for early-game rushes or counter-builds by studying mineral layouts and practicing efficient worker management. The balanced design ensures competitive matches even when skill levels are close, making it a staple for those seeking thrilling and dynamic team-based battles.
팬텀 BGH 패스트빌드 어드밴스 (Phantom BGH Fast Build Adv.)
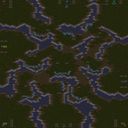
‘팬텀 BGH 패스트빌드 어드밴스(Phantom BGH Fast Build Adv.)’는 스타크래프트 브루드워의 유즈맵으로, 8명의 플레이어가Sand Tileset 기반의 넓은 맵에서 빠른 빌드와 자원 관리를 중심으로 펼쳐지는 전략 대결을 즐길 수 있는 맵입니다. 맵 제목에서 알 수 있듯 BGH(Battle.net Gaming House) 에디션으로 업데이트되었으며, 가스 지대(Gas Geysers)의 위치가 수정되어 자원 분배의 밸런스가 조정되었다고 언급됩니다. 맵의 구조는Sand Tileset의 황량한 지형 위에 펼쳐져 있으며, 중앙과 각 코너에 주요 자원 지대가 배치되어 있습니다. 플레이어들은 빠른 빌드와 효율적인 자원 수집을 통해 상대를 압박하거나 방어선을 구축하는 데 중점을 둡니다. 이 맵의 핵심은 빠른 빌드와 자원 경쟁입니다. 맵 곳곳에 흩어져 있는 미네랄과 가스는 플레이어의 초반 빌드 속도와 자원 확보 전략에 직접적인 영향을 미치며, 이를 통해 상대방보다 앞서 나가거나 방어 체제를 강화할 수 있습니다. 맵의 지형은 비교적 평탄한 편이지만, 일부 elevated 지역이 있어 시야 확보와 치고 빠지는 전략적 플레이가 가능합니다. 특히, 가스 지대의 위치가 수정된 만큼 자원 확보의 중요성이 더욱 커졌으며, 이를 바탕으로 한 빌드 오더와 자원 관리 능력이 승패를 좌우할 수 있습니다. 또한, 맵의 크기가 4096x4096으로 достаточно 넓어, 초반부터 중반까지는 자원 확보와 빌드에 집중해야 하며, 후반에는 상대방의 압박과 방어 체제 구축이 중요해집니다. 이 맵은 초보자와 숙련자 모두에게 적합한 구성으로, 빠른 빌드와 자원 관리 능력을 키우기에 좋은 연습용 맵입니다. 또한, Sand Tileset의 황량한 분위기가 맵의 전략적 깊이를 더해주며, 플레이어 간의 긴장감을 높이는 요소로 작용합니다. 특히, BGH 에디션으로 업데이트되면서 가스 지대의 밸런스가 조정되어, 기존 버전보다 더 공정한 경쟁이 가능해진 점이 눈에 띕니다. 이 맵을 플레이하기 전에, 가스 지대의 위치와 주요 자원 지대를 미리 확인하고, 상대방의 빌드 스타일을 예측하는 연습을 하는 것이 좋습니다. Phantom BGH Fast Build Adv. is a custom map in StarCraft: Brood War that offers an 8-player experience set on aSand Tileset, focusing on rapid build orders and resource management in a strategic battle. As indicated by the title, this is the BGH (Battle.net Gaming House) edition, updated to fix the placement of Gas Geysers for better balance. The map unfolds on a vast desert-like terrain with mineral patches and gas geysers distributed across the field, including corners and central areas, forcing players to prioritize quick resource gathering and efficient build progression. The core gameplay revolves around fast builds and resource competition. The scattered mineral and gas resources directly impact early build speed and strategy, allowing players to either pressure opponents or strengthen their defenses. While the terrain is mostly flat, elevated areas provide opportunities for scouting and hit-and-run tactics. The adjustment of gas geyser positions in this edition enhances the importance of resource control, making build orders and resource management critical factors in determining victory. Given the 4096x4096 map size, players should focus on early resource collection and build progression, shifting to defensive setups and counterattacks as the game progresses. This map is suitable for both beginners and experienced players, offering a balanced environment to practice rapid builds and resource management. The desert atmosphere of the Sand Tileset adds a layer of strategic depth and tension, making the gameplay experience more immersive. The BGH edition’s gas geyser adjustments ensure a fairer competition compared to previous versions. Before playing, it’s advisable to study the gas geyser locations and key resource areas, and to practice predicting opponents’ build orders to gain an edge.
![[5v3] Crazy Comps v1.0 맵 미리보기](https://cdn-star-data.huzy.net/thumbnail_aa2a6d3989654d21b193d7074a762bed.jpg)
[5v3] Crazy Comps v1.0
스타크래프트 브루드워의 유즈맵 계보에서 오랜 사랑을 받은 컴까기 장르의 명작, '[5v3] Crazy Comps'는 빠른 빌드와 치밀한 컴퓨터 AI로 구성된 5대 3의 대결 맵이다. 맵 제목에서 느껴지듯 'Crazy'라는 단어는 단순히 난이도뿐만 아니라, 초반부터 쏟아지는 컴퓨터의 압박과 예측 불허의 전략 변화를 의미한다. 사막 타일셋으로 구성된 넓은 평야는 플레이어와 컴퓨터가 자유롭게 기지를 확장하고 방어선을 구축할 수 있는 공간을 제공하며, 4096x4096의 거대한 맵 크기는 마치 전쟁터처럼 느껴진다. 플레이어는 5명의 동맹군으로 뭉쳐 3대의 강력한 컴퓨터와 맞서야 하는데, 이 컴퓨터는 단순히 방어만 하는 것이 아니라 끊임없이 공격과 견제, 심지어는 예기치 못한 전술을 구사한다. 특히 'Fast Build'라는 특징은 컴퓨터의 초반 자원 확보 속도를 극대화하여, 플레이어에게는 더욱 치열한 초반 대처가 요구된다. 방어선 구축도 중요하지만, 컴퓨터의 공격 타이밍을 읽고 역습을 가하는 전략적 플레이가 이 맵의 핵심이다. 또한, 맵의 중앙과 네 모서리에는 광물이 풍부하게 배치되어 있어, 자원 확보 경쟁도 치열하다. 이 맵을 처음 플레이하는 유저는 컴퓨터의 압박에 당황할 수 있지만, 경험이 쌓일수록 컴퓨터의 패턴을 읽고 대처하는 재미가 쏠쏠하다. 특히 5인 팀 플레이가 필수적이므로, 팀원 간의 호흡과 전략 공유가 승패를 좌우한다. 초보자의 경우 컴퓨터의 빠른 빌드와 공격 패턴에 적응하기 어려울 수 있지만, 꾸준한 플레이를 통해 점차 실력을 키울 수 있는 구조로 설계되어 있다. 이 맵의 가장 큰 특징은 바로 '예측 불가능성'으로, 컴퓨터가 매 게임마다 다른 전략을 구사하기 때문에 매 판이 새로운 도전으로 느껴진다. 이러한 요소들이 결합되어 '[5v3] Crazy Comps'는 컴까기 장르의 고전으로 자리매김하고 있으며, 오랜 시간동안 많은 유저들에게 사랑받고 있다. 이 맵을 플레이한다면, 단순히 방어만 하는 것이 아니라 능동적인 공격과 전략적 사고가 필수임을 깨달을 수 있을 것이다. Fast Build and dense computer AI define the 5v3 asymmetric battle of '[5v3] Crazy Comps', a classic UMS map in the Brood War custom map legacy. The sheer scale of the 4096x4096 desert terrain mirrors a sprawling warzone where five allied players must coordinate defenses against three relentless computer opponents. The 'Crazy' in the title reflects not just difficulty but also the unpredictable strategy shifts—early rushes, surprise attacks, and adaptive counterplay—that the AI deploys thanks to Fast Build mechanics. Rich mineral deposits scattered across central and corner bases fuel intense resource competition, while the map’s vast openness allows for both expansive base-building and daring flanking maneuvers. New players may struggle with the AI’s accelerated expansion and aggressive timing attacks, but as familiarity grows, the real challenge shifts to reading these patterns and executing coordinated team strategies. Each match feels fresh due to the AI’s varied playstyles, making '[5v3] Crazy Comps' a timeless favorite for those seeking dynamic, high-stakes team battles in Brood War’s custom scene. Success hinges on more than passive defense; it demands proactive scouting, adaptive builds, and seamless teamwork across five players.
신의 영토 with Assist/fastbuild (God's Land w/ Assist/fastbuild)
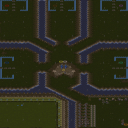
스타크래프트: 브루드워의 유즈맵으로 유명한 《God's Land w/ Assist/fastbuild》는 플레이어들에게 다채로운 전략과 협동을 요구하는 디펜스 장르의 맵입니다. 맵의 핵심은 사막 테마의 넓은 평지에 펼쳐진 중앙 기지 지역과, 이를 둘러싼 적gressive한 외곽 지역으로 구성되어 있습니다. 플레이어는 시작과 동시에 빠른 빌드를 활용해 초반 자원을 안정적으로 확보할 수 있으며, 보조 설정(Assist)으로 인해 AI가 일부 자원 채취를 지원받습니다. 맵의 인상적인 부분은 거대한 스파이더 마인이나 지뢰가 지정된 외부 구역으로, 적의 공격을 방어하는 데 중점을 두고 있습니다. 또한, 맵 상단과 하단에는 각각의 플레이어가 방어선을 구축할 수 있는 넓은 공간이 배치되어 있어, 팀전 스타일로도 즐길 수 있는 구조입니다. 맵의 특징 중 하나는 빠른 빌드(FastBuild) 옵션으로, 초반 자원과 건물을 빠르게 확보할 수 있어 전략적 초반 운영의 중요성이 두드러집니다. 진행 방식은 주로 적의 지속적인 공격을 막아내며 버티는 서바이벌 요소가 강하며, 일부 구간에서는 적이 특정 조건을 달성할 경우 강력한 보너스 유닛을 투입하기도 합니다. 그리고 맵의 상단과 하단에 위치한 방어據點들은 플레이어의 생존을 좌우하는 핵심 지역으로, 이곳을 방어하지 못하면 빠르게 패배로 이어질 수 있습니다. 추천 대상은 스타크래프트의 다양한 빌드와 전략을 경험해 보고 싶은 유저, 팀플레이를 선호하는 게이머, 그리고 디펜스 장르를 즐기는 플레이어에게 적합합니다. 한 가지 주의할 점은, 맵의 외부 지역이 넓고 개방되어 있어 초보자는 자원 관리와 방어 배치에 어려움을 느낄 수 있다는 점입니다. 플레이 전에는 빠른 빌드 옵션과 보조 인공지능의 활용 여부를 미리 설정하고, 팀원과의 협의가 원활할 수 있도록 준비하는 것이 중요합니다. 맵의 난이도는 적의 공격 빈도와 강도에 따라 달라지지만, 대체로 초중반에 집중된 공격을 막아내고 후반으로 갈수록Resources를 확보해 역공을 펼쳐야 하는 구조로 볼 수 있습니다. StarCraft: Brood War's popular custom map, 《God's Land w/ Assist/fastbuild》, is a defense-style map that challenges players with diverse strategies and teamwork. The map features a central base area on a wide desert-themed plain, surrounded by aggressive outer regions. Players can secure early resources quickly using the fast-build option, and the Assist feature allows AI to help gather some resources. The standout elements include large spider mines or designated minefields in the outer zones, which focus on defending against enemy attacks. Additionally, the top and bottom of the map provide wide spaces where players can build defensive lines, making it enjoyable for team play as well. One of the map's key features is the FastBuild option, which emphasizes the importance of early strategic operations by allowing rapid resource and building acquisition. The gameplay revolves around surviving relentless enemy assaults, with certain stages introducing powerful bonus units if enemies meet specific conditions. The defensive strongholds at the top and bottom of the map are critical to a player's survival—failing to defend them can lead to quick defeat. This map is recommended for players who want to explore various StarCraft builds and strategies, those who prefer team play, and fans of defense-style games. One thing to note is that beginners may struggle with resource management and defensive positioning due to the map's open and expansive outer regions. Before playing, it's important to set up the fast-build option and Assist AI usage, and to coordinate with teammates for smooth teamwork. The difficulty varies depending on the frequency and intensity of enemy attacks, but generally, the map requires players to fend off concentrated early and mid-game assaults before securing resources and launching a counterattack in the late game.
최근 등록된 맵
새로 추가된 파일과 버전을 확인하세요.
팬텀 BGH 패스트빌드 어드밴스 (Phantom BGH Fast Build Adv.)
‘팬텀 BGH 패스트빌드 어드밴스(Phantom BGH Fast Build Adv.)’는 스타크래프트 브루드워의 유즈맵으로, 8명의 플레이어가Sand Tileset 기반의 넓은 맵에서 빠른 빌드와 자원 관리를 중심으로 펼쳐지는 전략 대결을 즐길 수 있는 맵입니다. 맵 제목에서 알 수 있듯 BGH(Battle.net Gaming House) 에디션으로 업데이트되었으며, 가스 지대(Gas Geysers)의 위치가 수정되어 자원 분배의 밸런스가 조정되었다고 언급됩니다. 맵의 구조는Sand Tileset의 황량한 지형 위에 펼쳐져 있으며, 중앙과 각 코너에 주요 자원 지대가 배치되어 있습니다. 플레이어들은 빠른 빌드와 효율적인 자원 수집을 통해 상대를 압박하거나 방어선을 구축하는 데 중점을 둡니다. 이 맵의 핵심은 빠른 빌드와 자원 경쟁입니다. 맵 곳곳에 흩어져 있는 미네랄과 가스는 플레이어의 초반 빌드 속도와 자원 확보 전략에 직접적인 영향을 미치며, 이를 통해 상대방보다 앞서 나가거나 방어 체제를 강화할 수 있습니다. 맵의 지형은 비교적 평탄한 편이지만, 일부 elevated 지역이 있어 시야 확보와 치고 빠지는 전략적 플레이가 가능합니다. 특히, 가스 지대의 위치가 수정된 만큼 자원 확보의 중요성이 더욱 커졌으며, 이를 바탕으로 한 빌드 오더와 자원 관리 능력이 승패를 좌우할 수 있습니다. 또한, 맵의 크기가 4096x4096으로 достаточно 넓어, 초반부터 중반까지는 자원 확보와 빌드에 집중해야 하며, 후반에는 상대방의 압박과 방어 체제 구축이 중요해집니다. 이 맵은 초보자와 숙련자 모두에게 적합한 구성으로, 빠른 빌드와 자원 관리 능력을 키우기에 좋은 연습용 맵입니다. 또한, Sand Tileset의 황량한 분위기가 맵의 전략적 깊이를 더해주며, 플레이어 간의 긴장감을 높이는 요소로 작용합니다. 특히, BGH 에디션으로 업데이트되면서 가스 지대의 밸런스가 조정되어, 기존 버전보다 더 공정한 경쟁이 가능해진 점이 눈에 띕니다. 이 맵을 플레이하기 전에, 가스 지대의 위치와 주요 자원 지대를 미리 확인하고, 상대방의 빌드 스타일을 예측하는 연습을 하는 것이 좋습니다. Phantom BGH Fast Build Adv. is a custom map in StarCraft: Brood War that offers an 8-player experience set on aSand Tileset, focusing on rapid build orders and resource management in a strategic battle. As indicated by the title, this is the BGH (Battle.net Gaming House) edition, updated to fix the placement of Gas Geysers for better balance. The map unfolds on a vast desert-like terrain with mineral patches and gas geysers distributed across the field, including corners and central areas, forcing players to prioritize quick resource gathering and efficient build progression. The core gameplay revolves around fast builds and resource competition. The scattered mineral and gas resources directly impact early build speed and strategy, allowing players to either pressure opponents or strengthen their defenses. While the terrain is mostly flat, elevated areas provide opportunities for scouting and hit-and-run tactics. The adjustment of gas geyser positions in this edition enhances the importance of resource control, making build orders and resource management critical factors in determining victory. Given the 4096x4096 map size, players should focus on early resource collection and build progression, shifting to defensive setups and counterattacks as the game progresses. This map is suitable for both beginners and experienced players, offering a balanced environment to practice rapid builds and resource management. The desert atmosphere of the Sand Tileset adds a layer of strategic depth and tension, making the gameplay experience more immersive. The BGH edition’s gas geyser adjustments ensure a fairer competition compared to previous versions. Before playing, it’s advisable to study the gas geyser locations and key resource areas, and to practice predicting opponents’ build orders to gain an edge.
신의 영토 with Assist/fastbuild (God's Land w/ Assist/fastbuild)
스타크래프트: 브루드워의 유즈맵으로 유명한 《God's Land w/ Assist/fastbuild》는 플레이어들에게 다채로운 전략과 협동을 요구하는 디펜스 장르의 맵입니다. 맵의 핵심은 사막 테마의 넓은 평지에 펼쳐진 중앙 기지 지역과, 이를 둘러싼 적gressive한 외곽 지역으로 구성되어 있습니다. 플레이어는 시작과 동시에 빠른 빌드를 활용해 초반 자원을 안정적으로 확보할 수 있으며, 보조 설정(Assist)으로 인해 AI가 일부 자원 채취를 지원받습니다. 맵의 인상적인 부분은 거대한 스파이더 마인이나 지뢰가 지정된 외부 구역으로, 적의 공격을 방어하는 데 중점을 두고 있습니다. 또한, 맵 상단과 하단에는 각각의 플레이어가 방어선을 구축할 수 있는 넓은 공간이 배치되어 있어, 팀전 스타일로도 즐길 수 있는 구조입니다. 맵의 특징 중 하나는 빠른 빌드(FastBuild) 옵션으로, 초반 자원과 건물을 빠르게 확보할 수 있어 전략적 초반 운영의 중요성이 두드러집니다. 진행 방식은 주로 적의 지속적인 공격을 막아내며 버티는 서바이벌 요소가 강하며, 일부 구간에서는 적이 특정 조건을 달성할 경우 강력한 보너스 유닛을 투입하기도 합니다. 그리고 맵의 상단과 하단에 위치한 방어據點들은 플레이어의 생존을 좌우하는 핵심 지역으로, 이곳을 방어하지 못하면 빠르게 패배로 이어질 수 있습니다. 추천 대상은 스타크래프트의 다양한 빌드와 전략을 경험해 보고 싶은 유저, 팀플레이를 선호하는 게이머, 그리고 디펜스 장르를 즐기는 플레이어에게 적합합니다. 한 가지 주의할 점은, 맵의 외부 지역이 넓고 개방되어 있어 초보자는 자원 관리와 방어 배치에 어려움을 느낄 수 있다는 점입니다. 플레이 전에는 빠른 빌드 옵션과 보조 인공지능의 활용 여부를 미리 설정하고, 팀원과의 협의가 원활할 수 있도록 준비하는 것이 중요합니다. 맵의 난이도는 적의 공격 빈도와 강도에 따라 달라지지만, 대체로 초중반에 집중된 공격을 막아내고 후반으로 갈수록Resources를 확보해 역공을 펼쳐야 하는 구조로 볼 수 있습니다. StarCraft: Brood War's popular custom map, 《God's Land w/ Assist/fastbuild》, is a defense-style map that challenges players with diverse strategies and teamwork. The map features a central base area on a wide desert-themed plain, surrounded by aggressive outer regions. Players can secure early resources quickly using the fast-build option, and the Assist feature allows AI to help gather some resources. The standout elements include large spider mines or designated minefields in the outer zones, which focus on defending against enemy attacks. Additionally, the top and bottom of the map provide wide spaces where players can build defensive lines, making it enjoyable for team play as well. One of the map's key features is the FastBuild option, which emphasizes the importance of early strategic operations by allowing rapid resource and building acquisition. The gameplay revolves around surviving relentless enemy assaults, with certain stages introducing powerful bonus units if enemies meet specific conditions. The defensive strongholds at the top and bottom of the map are critical to a player's survival—failing to defend them can lead to quick defeat. This map is recommended for players who want to explore various StarCraft builds and strategies, those who prefer team play, and fans of defense-style games. One thing to note is that beginners may struggle with resource management and defensive positioning due to the map's open and expansive outer regions. Before playing, it's important to set up the fast-build option and Assist AI usage, and to coordinate with teammates for smooth teamwork. The difficulty varies depending on the frequency and intensity of enemy attacks, but generally, the map requires players to fend off concentrated early and mid-game assaults before securing resources and launching a counterattack in the late game.
[5v3] Crazy Comps v1.0
스타크래프트 브루드워의 유즈맵 계보에서 오랜 사랑을 받은 컴까기 장르의 명작, '[5v3] Crazy Comps'는 빠른 빌드와 치밀한 컴퓨터 AI로 구성된 5대 3의 대결 맵이다. 맵 제목에서 느껴지듯 'Crazy'라는 단어는 단순히 난이도뿐만 아니라, 초반부터 쏟아지는 컴퓨터의 압박과 예측 불허의 전략 변화를 의미한다. 사막 타일셋으로 구성된 넓은 평야는 플레이어와 컴퓨터가 자유롭게 기지를 확장하고 방어선을 구축할 수 있는 공간을 제공하며, 4096x4096의 거대한 맵 크기는 마치 전쟁터처럼 느껴진다. 플레이어는 5명의 동맹군으로 뭉쳐 3대의 강력한 컴퓨터와 맞서야 하는데, 이 컴퓨터는 단순히 방어만 하는 것이 아니라 끊임없이 공격과 견제, 심지어는 예기치 못한 전술을 구사한다. 특히 'Fast Build'라는 특징은 컴퓨터의 초반 자원 확보 속도를 극대화하여, 플레이어에게는 더욱 치열한 초반 대처가 요구된다. 방어선 구축도 중요하지만, 컴퓨터의 공격 타이밍을 읽고 역습을 가하는 전략적 플레이가 이 맵의 핵심이다. 또한, 맵의 중앙과 네 모서리에는 광물이 풍부하게 배치되어 있어, 자원 확보 경쟁도 치열하다. 이 맵을 처음 플레이하는 유저는 컴퓨터의 압박에 당황할 수 있지만, 경험이 쌓일수록 컴퓨터의 패턴을 읽고 대처하는 재미가 쏠쏠하다. 특히 5인 팀 플레이가 필수적이므로, 팀원 간의 호흡과 전략 공유가 승패를 좌우한다. 초보자의 경우 컴퓨터의 빠른 빌드와 공격 패턴에 적응하기 어려울 수 있지만, 꾸준한 플레이를 통해 점차 실력을 키울 수 있는 구조로 설계되어 있다. 이 맵의 가장 큰 특징은 바로 '예측 불가능성'으로, 컴퓨터가 매 게임마다 다른 전략을 구사하기 때문에 매 판이 새로운 도전으로 느껴진다. 이러한 요소들이 결합되어 '[5v3] Crazy Comps'는 컴까기 장르의 고전으로 자리매김하고 있으며, 오랜 시간동안 많은 유저들에게 사랑받고 있다. 이 맵을 플레이한다면, 단순히 방어만 하는 것이 아니라 능동적인 공격과 전략적 사고가 필수임을 깨달을 수 있을 것이다. Fast Build and dense computer AI define the 5v3 asymmetric battle of '[5v3] Crazy Comps', a classic UMS map in the Brood War custom map legacy. The sheer scale of the 4096x4096 desert terrain mirrors a sprawling warzone where five allied players must coordinate defenses against three relentless computer opponents. The 'Crazy' in the title reflects not just difficulty but also the unpredictable strategy shifts—early rushes, surprise attacks, and adaptive counterplay—that the AI deploys thanks to Fast Build mechanics. Rich mineral deposits scattered across central and corner bases fuel intense resource competition, while the map’s vast openness allows for both expansive base-building and daring flanking maneuvers. New players may struggle with the AI’s accelerated expansion and aggressive timing attacks, but as familiarity grows, the real challenge shifts to reading these patterns and executing coordinated team strategies. Each match feels fresh due to the AI’s varied playstyles, making '[5v3] Crazy Comps' a timeless favorite for those seeking dynamic, high-stakes team battles in Brood War’s custom scene. Success hinges on more than passive defense; it demands proactive scouting, adaptive builds, and seamless teamwork across five players.
초속 2v2 (²v²) SuPeR FaSt Zc
스타크래프트 브루드워의 고전 밀리 맵인 〈(²v²) SuPeR FaSt Zc〉는 2vs2 팀전 구조를 채용한 빠른 속도의 전략맵으로, 시작 지점의 자원 배치가 효율적으로 배치되어 초반 빌드와 전투 흐름을 빠르게 전환할 수 있도록 설계되었다. 맵은 사막 타일셋을 기반으로 하며, 중앙에 위치한 넓은 교전 지역과 양측 진영이 안정된 Mineral Field를 확보할 수 있는 공간을 제공한다. 시작 위치 nearEach는 30개의 미네랄과 2개의 추가 15미네랄 클러스터가 배치되어 있으며, 자원 밀집도가 높아 초반 자원 수급 경쟁이 치열해지는 특징을 보인다. ‘Perfectly Spaced Map’이라는 설명처럼 맵의 균형이 잘 잡혀 있어 양측이 동일한 조건에서 시작할 수 있으며, 빠른 전투와 빌드 전환을 즐기는 플레이어들에게 적합하다. 이 맵은 특히 초반 빌드 오더와 빠른 확장 전략을 선호하는 유저들에게 인기가 있으며, 중앙 교전 지역을 중심으로 한 타이밍 러시나 빠른 멀티 테스킹이 중요한 플레이 스타일을 요구한다. 또한, Mineral Field가 시작 지점 가까이에 밀집되어 있어 초반 자원 확보가 용이하다는 점에서 빌드 속도와 효율성을 중시하는 플레이어들에게 매력적인 요소로 작용한다. 다만, 맵이 비교적 좁고 중앙 교전 지역이 좁아 리스크가 높은 전투가 자주 발생할 수 있어, 유닛 컨트롤과 전략적 판단력이 요구된다. 초보자보다는 밀리 맵에 익숙한 중급 이상의 플레이어들에게 추천되며, 빠른 템포와 전략적 깊이를 동시에 즐길 수 있는 맵으로 평가된다. 플레이 전에는 자원 배치가 시작 지점 nearEach에 집중되어 있어 초반 빌드와 빌드 오더를 신중히 준비해야 하며, Mineral Field가 많지만 위치가 밀집되어 있어 mineral blocking이나 fast expansion 전략을 고려해볼 필요가 있다. 또한, 좁은 중앙 교전 지역을 활용한 카운터 빌드나 타이밍 러시에 대비한 대비책을 마련하는 것이 좋다. 맵의 균형이 잘 잡혀 있어 양측의 실력 차가 크지 않다면 흥미로운 접전으로 이어질 가능성이 높으며, 빠른 전투와 빌드 전환을 즐기는 플레이어들에게는 최고의 선택지 중 하나가 될 수 있다. This classic StarCraft: Brood War melee map, titled 〈(²v²) SuPeR FaSt Zc〉, is a fast-paced 2v2 team-based strategy map designed for quick engagements and efficient resource management. Set on a desert tileset, the map features a wide central battle zone flanked by balanced starting positions, each equipped with 30 minerals and two additional 15-mineral clusters. The ‘Perfectly Spaced Map’ description highlights its symmetrical and balanced design, ensuring both teams begin on equal footing with identical mineral layouts. The map thrives on rapid build orders and early-game aggression, appealing to players who prefer high-tempo strategies and efficient resource exploitation. Central combat zones often lead to intense early skirmishes, rewarding precise unit control and strategic foresight. The clustered mineral fields near starting locations encourage fast expansion and mineral blocking tactics, making early-game resource control critical. While the compact design fosters quick decision-making, it also demands heightened awareness to avoid reckless engagements in confined spaces. Recommended for intermediate to advanced players familiar with Brood War melee mechanics, this map excels in delivering fast-paced, strategic gameplay. Players should prepare for early-game rushes or counter-builds by studying mineral layouts and practicing efficient worker management. The balanced design ensures competitive matches even when skill levels are close, making it a staple for those seeking thrilling and dynamic team-based battles.
맵 선택 가이드
태그는 맵의 핵심 특징을 빠르게 설명하지만 제작 버전마다 규칙이 다를 수 있습니다. 상세 설명에서 권장 인원, 난이도, 플레이 시간과 버전을 함께 확인한 뒤 다운로드하세요.