
빌드 스타크래프트 맵 모음
'빌드' 태그가 등록된 맵을 모았습니다. 장르 하나로 찾기 어려운 플레이 방식, 난이도와 특징을 중심으로 인기 맵과 최신 맵을 비교해 보세요.
- 등록 맵
- 7개
- 누적 다운로드
- 0
- 누적 조회
- 244
인기 맵
다운로드와 조회 반응이 높은 맵입니다.
AirGolem *SilverStyle*
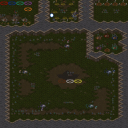
에어 골렘 실버스타일(AirGolem *SilverStyle*)은 제작자 CYTRYN이 만든 5인용 유즈맵으로, 사막 타일셋의 2048x2048 대형 맵에서 골렘을 파괴하고 건설하는 독특한 게임플레이를 제공한다. 내부 설명인 'Destroy and build Golems'에서 알 수 있듯, 핵심 메커니즘은 골렘 유닛을 활용한 전투와 생산에 집중되어 있다. 5명의 플레이어가 참여하는 구조상 프리포올(FFA) 또는 팀 대전 형태가 추정되며, 넓은 맵 크기와 사막 지형이 자원 확보와 기지 확장, 다방향 전투를 유도할 것으로 보인다. 골렘이라는 특정 유닛을 중심으로 한 빌드 앤 파이트(Build & Fight) 방식은 일반적인 밀리나 디펜스와 차별화된 재미를 줄 가능성이 높다. 다만 트리거 상세, 승리 조건, 유닛 밸런스, 자원 시스템 등 세부 규칙은 플레이 전 직접 확인해야 한다. 커스텀 유닛 메커니즘과 자유도 높은 빌드 전략을 즐기는 유저, 색다른 5인 대전 맵을 찾는 파티에게 추천한다. 플레이 전 맵 설명창의 규칙과 단축키, 특수 커맨드 숙지가 필수적이다. AirGolem SilverStyle is a 5-player UMS map created by CYTRYN, offering unique gameplay centered on destroying and building Golems on a large 2048x2048 desert tileset map. As the internal description 'Destroy and build Golems' indicates, the core mechanic focuses on combat and production utilizing Golem units. With five players participating, a free-for-all (FFA) or team battle format is presumed, and the vast map size combined with desert terrain likely encourages resource acquisition, base expansion, and multi-directional combat. The build-and-fight style centered on the specific Golem unit has high potential to deliver differentiated fun compared to standard melee or defense maps. However, detailed triggers, victory conditions, unit balance, and resource systems must be verified directly before play. Recommended for users who enjoy custom unit mechanics and flexible build strategies, as well as parties seeking a fresh 5-player versus map. Checking the map description window for rules, hotkeys, and special commands before starting is essential.
Build TuG-O-WaR FinaL
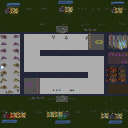
빌드 터그 오브 워 파이널(Build Tug of War Final)은 6인용 팀 대전 방식의 터그 오브 워(Tug of War) 장르 유즈맵이다. 플랫폼 타일셋 기반의 64×64 타일 맵에서 양 진영이 각자의 기지 끝에서 유닛을 생산해 자동으로 전진하는 라인을 따라 충돌한다. 플레이어는 자원 관리와 유닛 조합, 업그레이드 타이밍을 판단해 상대 넥서스를 먼저 파괴하는 것이 목표다. 3대3 고정 팀 구성이 기본으로 보이며, 맵 제목의 'Final' 표기와 다수 파생 버전 존재로 보아 시리즈 완성판에 가깝다. 제작자 Po0pMaStEr를 중심으로 SoftWarewolf, omfg8me가 개량에 참여한 흔적이 설명에 남아 있다. 진행은 초반 빌드 오더 싸움이 치열하고 중반 이후 대규모 병력 교환과 스펠 캐스터 활용, 공중·지상 밸런스 조절이 승부를 가른다. 입문자는 초반 자원 낭비 없이 핵심 유닛을 확보하는 연습이 필요하며, 숙련자는 카운터 유닛 조합과 타이밍 어택으로 스노우볼을 굴리는 재미가 있다. 팀원 간 역할 분담(탱커, 딜러, 지원)과 맵 중앙 시야 장악이 중요한 협동 플레이를 요구한다. 파티 플레이나 클랜 내전용으로 적합하며, 빠른 템포의 전략 대전을 선호하는 유저에게 추천한다. 플레이 전 버전별 밸런스 차이와 허용 유닛 목록, 시작 자원 설정을 확인하면 좋다. Build Tug of War Final is a 6-player team-based Tug of War genre UMS map. On a 64×64 tile map using the Platform tileset, both factions produce units from their base ends that automatically march along lanes to clash. Players manage resources, unit compositions, and upgrade timings to destroy the enemy Nexus first. A fixed 3v3 team setup appears standard, and the 'Final' designation alongside multiple derivative versions suggests this is the series' definitive edition. The description credits Po0pMaStEr as creator with SoftWarewolf and omfg8me contributing enhancements. Gameplay revolves around early build-order contests, transitioning into large-scale army trades, spellcaster usage, and air-ground balance management. Newcomers should practice securing core units without early resource waste, while veterans enjoy snowballing through counter-compositions and timing attacks. Cooperative play demands role division (tank, DPS, support) and central map vision control. Suitable for party play or clan matches, recommended for users who prefer fast-paced strategic battles. Before playing, verify version-specific balance differences, allowed unit lists, and starting resource settings.
팬텀 BGH 패스트빌드 어드밴스 (Phantom BGH Fast Build Adv.)
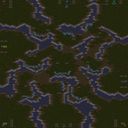
‘팬텀 BGH 패스트빌드 어드밴스(Phantom BGH Fast Build Adv.)’는 스타크래프트 브루드워의 유즈맵으로, 8명의 플레이어가Sand Tileset 기반의 넓은 맵에서 빠른 빌드와 자원 관리를 중심으로 펼쳐지는 전략 대결을 즐길 수 있는 맵입니다. 맵 제목에서 알 수 있듯 BGH(Battle.net Gaming House) 에디션으로 업데이트되었으며, 가스 지대(Gas Geysers)의 위치가 수정되어 자원 분배의 밸런스가 조정되었다고 언급됩니다. 맵의 구조는Sand Tileset의 황량한 지형 위에 펼쳐져 있으며, 중앙과 각 코너에 주요 자원 지대가 배치되어 있습니다. 플레이어들은 빠른 빌드와 효율적인 자원 수집을 통해 상대를 압박하거나 방어선을 구축하는 데 중점을 둡니다. 이 맵의 핵심은 빠른 빌드와 자원 경쟁입니다. 맵 곳곳에 흩어져 있는 미네랄과 가스는 플레이어의 초반 빌드 속도와 자원 확보 전략에 직접적인 영향을 미치며, 이를 통해 상대방보다 앞서 나가거나 방어 체제를 강화할 수 있습니다. 맵의 지형은 비교적 평탄한 편이지만, 일부 elevated 지역이 있어 시야 확보와 치고 빠지는 전략적 플레이가 가능합니다. 특히, 가스 지대의 위치가 수정된 만큼 자원 확보의 중요성이 더욱 커졌으며, 이를 바탕으로 한 빌드 오더와 자원 관리 능력이 승패를 좌우할 수 있습니다. 또한, 맵의 크기가 4096x4096으로 достаточно 넓어, 초반부터 중반까지는 자원 확보와 빌드에 집중해야 하며, 후반에는 상대방의 압박과 방어 체제 구축이 중요해집니다. 이 맵은 초보자와 숙련자 모두에게 적합한 구성으로, 빠른 빌드와 자원 관리 능력을 키우기에 좋은 연습용 맵입니다. 또한, Sand Tileset의 황량한 분위기가 맵의 전략적 깊이를 더해주며, 플레이어 간의 긴장감을 높이는 요소로 작용합니다. 특히, BGH 에디션으로 업데이트되면서 가스 지대의 밸런스가 조정되어, 기존 버전보다 더 공정한 경쟁이 가능해진 점이 눈에 띕니다. 이 맵을 플레이하기 전에, 가스 지대의 위치와 주요 자원 지대를 미리 확인하고, 상대방의 빌드 스타일을 예측하는 연습을 하는 것이 좋습니다. Phantom BGH Fast Build Adv. is a custom map in StarCraft: Brood War that offers an 8-player experience set on aSand Tileset, focusing on rapid build orders and resource management in a strategic battle. As indicated by the title, this is the BGH (Battle.net Gaming House) edition, updated to fix the placement of Gas Geysers for better balance. The map unfolds on a vast desert-like terrain with mineral patches and gas geysers distributed across the field, including corners and central areas, forcing players to prioritize quick resource gathering and efficient build progression. The core gameplay revolves around fast builds and resource competition. The scattered mineral and gas resources directly impact early build speed and strategy, allowing players to either pressure opponents or strengthen their defenses. While the terrain is mostly flat, elevated areas provide opportunities for scouting and hit-and-run tactics. The adjustment of gas geyser positions in this edition enhances the importance of resource control, making build orders and resource management critical factors in determining victory. Given the 4096x4096 map size, players should focus on early resource collection and build progression, shifting to defensive setups and counterattacks as the game progresses. This map is suitable for both beginners and experienced players, offering a balanced environment to practice rapid builds and resource management. The desert atmosphere of the Sand Tileset adds a layer of strategic depth and tension, making the gameplay experience more immersive. The BGH edition’s gas geyser adjustments ensure a fairer competition compared to previous versions. Before playing, it’s advisable to study the gas geyser locations and key resource areas, and to practice predicting opponents’ build orders to gain an edge.
BUILD - HIGH DEFENSE(X-SE)
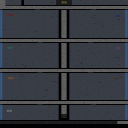
스타크래프트 브루드워 유즈맵 '빌드 - 하이 디펜스 (X-SE)'는 우주 타일셋을 배경으로 최대 7인이 협력해 컴퓨터 상대 방어전을 벌이는 디펜스 장르 맵이다. 내부 설명에 'SKILL COMPUTER 3000 UNIT TO WIN'이라는 문구가 있어, 스킬을 보유한 강력한 컴퓨터 유닛 3,000기를 처치하거나 막아내면 승리하는 방식임이 추정된다. 제목에 'BUILD'가 포함된 만큼 자원 채취와 건물 건설, 유닛 생산을 통한 전력 증강이 핵심 플레이 루프로 보이며, 'HIGH'라는 수식어에서 높은 난이도와 대규모 병력전을 예고한다. 7인 전용으로 설계되어 인원이 모자라면 난이도가 급상승할 수 있으니 정원 충원이 권장된다. 우주 배경 특성상 지형 제약이 적어 자유로운 기지 확장이 가능하지만, 그만큼 다방면에서 몰려드는 적 공세를 막기 위한 입구 막기나 병력 분배가 중요해 보인다. 고난도 협력 디펜스를 즐기는 숙련자 그룹에게 적합하며, 초보자는 초반 빌드 오더와 스킬 유닛 대처법을 숙지한 뒤 도전하는 것이 좋다. 플레이 전 7인 파티 구성 여부와 맵 버전(X-SE) 호환성을 확인해야 한다. StarCraft Brood War UMS 'BUILD - HIGH DEFENSE (X-SE)' is a defense genre map set on the space tileset where up to 7 players cooperate against computer opponents. The internal description mentions 'SKILL COMPUTER 3000 UNIT TO WIN', suggesting the objective is to destroy or withstand 3,000 skilled computer units. With 'BUILD' in the title, resource gathering, building construction, and unit production appear to be the core gameplay loop, while 'HIGH' signals high difficulty and large-scale battles. Designed for 7 players, missing members will spike difficulty, so a full party is recommended. The open space terrain allows free base expansion, but also requires careful chokepoint control and force distribution against multi-directional assaults. Suited for veteran groups seeking high-difficulty cooperative defense; beginners should study early build orders and spellcaster counters first. Before playing, verify 7-player party availability and map version (X-SE) compatibility.
![빌드크래프트[Final] (BuildCraft [Final]) 맵 미리보기](https://cdn-star-data.huzy.net/thumbnail_e9260c40e0a44afbb54c634adb2f2f25.jpg)
빌드크래프트[Final] (BuildCraft [Final])
《빌드크래프트[Final]》는 스타크래프트 브루드워 유즈맵의 한 장르인 아레나 맵으로, 6명의 플레이어가 중앙BattleGround에서 대결을 펼치는 대전형 구조를 갖추고 있다. 맵은 화산 타일셋을 기반으로 하며, 넓은 평지 가운데ে 배치된 일정 규모의 배틀존이 주무대이다. 배틀존 주변으로는 언덕과 협곡이 배치되어 있어 시야 확보와 기습 플레이에 영향을 미친다. 맵 중앙에는 대형 건물이 배치되어 있으며, 이는 맵의 특징점으로 추정된다. 배틀존 주변의 높은 지형과 협곡은 플레이어가 전술을 펼치기에 유리한 환경을 제공하는 한편, 좁은 통로와 언덕은 치고 빠지기를 강요하는 요소로 작용할 수 있다. 맵의 전체적인 분위기는 전투 중심의 아레나 장르에 어울리며, 맵 제목에서 유추해 볼 때 ‘빌드’를 강조하는 진행 방식이 포함될 가능성이 있다. 하지만 내부 설명에 등장하는 ‘Bug’, ‘Op Obs’라는 문구는 맵의 초기 버전이나 테스트 중인 기능이 있음을 시사하며, 완벽하게 polished되지 않은 상태일 수 있음을 고려해야 한다. 플레이어는 중앙 배틀존을 중심으로 전술을 펼치며, 건물을 활용한 방어 혹은 공격 루트를 선택할 수 있을 것으로 보인다. 맵의 규모가 크고 중앙 배틀존이 spacious한 만큼, 빠른 교전과 전략적 움직임이 중요할 것이다. 이 맵은 실력 대 실력의 아레나 대전을 선호하는 유저들에게 적합하며, 특히 중앙BattleGround에서 벌어지는 박진감 넘치는 전투를 즐기고자 하는 플레이어에게 추천된다. 플레이 전에는 맵의 특이한 지형과 건물 배치를 숙지하고, 빠른 반응과 전술적 대처가 필요함을 염두에 두어야 한다. 또한, 맵이 초기 버전일 가능성이 있으므로 버그 발생 시 대처 방법을 마련하는 것이 좋다. 이 맵은 단순한 대전에 그치지 않고, 빌드와 전략을 동시에 요구하는 하이브리드 형식을 지향할 가능성이 높아 보인다. 《BuildCraft [Final]》 is an Arena-style custom map for StarCraft: Brood War, designed for six players to engage in direct combat within a central BattleGround. The map utilizes a volcanic tileset, featuring a large open battlefield surrounded by hills and canyons that influence visibility and ambush tactics. A prominent building is centrally located, likely serving as a key strategic point. The surrounding high ground and narrow passages force players to adapt their strategies, balancing aggressive pushes with defensive positioning. The map's title and structure suggest a focus on 'building' mechanics integrated into the Arena genre, though the internal description hints at potential bugs or unfinished elements with terms like 'Bug' and 'Op Obs.' Players are expected to navigate the central BattleGround, utilizing the terrain and buildings for both offense and defense. Given the map's size and open battlefield, fast-paced engagements and tactical decision-making are critical. This map is ideal for players who enjoy skill-based Arena battles, particularly those seeking intense combat scenarios in a spacious central arena. Prior to playing, it is advisable to study the map's terrain and building placements, as quick reactions and strategic adaptability will be essential. Additionally, since the map may still be in an early version, players should be prepared for potential bugs and their solutions. The map likely blends Arena combat with build mechanics, offering a hybrid experience that rewards both mechanical skill and tactical planning.
고렘 매드니스 매스 어택 (Golem Madness Mass Attack)
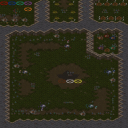
‘고렘 매드니스 매스 어택(Golem Madness Mass Attack)’은 스타크래프트 브루드워의 유즈맵으로, 5명의 플레이어가 고렘(골렘) 조합과 파괴를 기반으로 전투를 펼치는 디펜스 및 빌드 전략 장르의 맵이다. 맵은 사막 타일셋으로 구성되어 있으며, 넓은 평야와 중앙의 요새 구조가 특징적이다. 각 플레이어는 고렘의 부품을 수집하고 조합하여 강력한 유닛을 생산하거나 상대의 고렘을 파괴하는 방식으로 진행된다. 맵의 핵심은 ‘4개의 고렘 파츠 조합’을 완성하는 것이며, 이를 통해 다양한 고렘 유닛을 생성할 수 있다. 특히, 고렘의 파괴와 재조합이 가능한 구조는 전술적 선택을 강제하며, 상대방의 전략을 읽고 대응해야만 승리를 이끌어낼 수 있다. 맵의 디자인은 중앙의 넓은 평야가 확장 공간으로 활용되며, 요새 주변의 언덕과 협곡은 고렘의 이동 경로를 제한하는 역할을 한다. 플레이어는 초반에 자원을 확보하고 고렘 부품을 확보하는 데 집중해야 하며, 중반부터는 고렘 조합을 통한 화력과 방어 전략을 구사해야 한다. 맵의 난이도는 고렘의 조합과 파괴의 균형을 맞추는 데 있으며, 초보자는 고렘의 기본 조합법을 익히는 데 시간이 필요할 수 있다. 추천 대상은 디펜스와 빌드 전략을 즐기는 플레이어, 그리고 고렘의 조합과 파괴를 통한 전술적 플레이를 선호하는 유저들이다. 플레이 전에는 맵의 고렘 파츠 위치와 요새 구조를 숙지하고, 상대방의 고렘 조합을 예측하는 연습을 추천한다. 고렘의 파괴와 재조합이 가능한 맵의 특성상, 지속적인 자원 관리와 전술적 전환이 승리를 좌우할 것이다. This StarCraft: Brood War custom map, titled ‘Golem Madness Mass Attack’, drops players into a 5-player defense and build strategy experience centered around collecting, combining, and destroying golems. The map is set against a desert tileset, featuring expansive plains and central fortress structures that create natural choke points and strategic vantage points. Each player starts with the goal of gathering golem components to assemble powerful units or dismantle opponents’ golems for resources. The core mechanic revolves around completing one of four unique golem part combinations, unlocking specialized units that can turn the tide of battle. The map’s design emphasizes spatial awareness, with central open areas for expansion and elevated terrain around fortresses that restrict unit movement and encourage tactical positioning. Early-game focus should be on securing resources and components, while mid-to-late game demands mastery of golem combinations and defensive play. The challenge lies in balancing golem production with strategic destruction, making it a test of adaptability for players. Newcomers may find the learning curve steep as they familiarize themselves with component locations and fortress layouts, but the depth of golem combinations rewards persistent experimentation. Ideal for players who enjoy defense mechanics paired with build strategies, this map challenges both resource management and tactical foresight. Before diving in, study the golem part spawn points and fortress layouts to anticipate opponent strategies, and be prepared to pivot between offense and defense as the match progresses.
빌드 터그-오-워 파이널 (Build TuG-O-WaR Final)
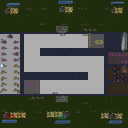
스타크래프트 브루드워의 유즈맵 빌드 터그-오-워 파이널(Build TuG-O-WaR FinaL)은 6명의 플레이어가 참여하는 대규모 빌드 및 전략 대결 맵으로, 각 플레이어가 자원 수집과 건물 건설을 통해 서로의 기지를 파괴하는 경쟁을 펼치는 구조를 갖추고 있다. 맵은 넓은 평야 지형에 각 플레이어의 시작 지점이 배치되어 있으며, 중앙에는 대규모 자원 분포 지역이 위치해 있어 자원 확보 경쟁이 치열할 수밖에 없다. 게임의 핵심은 자원 관리와 방어 건물 건설에 있으며, 상대방의 기지를 직접 공격하거나 방어선을 구축해 공격로를 차단하는 전략이 중요하다. 이미지에서 확인되는 바와 같이, 각 플레이어의 시작 지역은 중앙 자원 지대와 연결된 길목에 위치하고 있어 초반 자원 확보 경쟁이 게임의 판도를 좌우할 수 있다. 또한, 맵의 외곽 지역에는 추가적인 자원과 건물이 배치되어 있어, 후반부로 갈수록 확장과 방어 전략이 더욱 중요해진다. 초보 플레이어의 경우 자원 관리와 건물 배치에 익숙해지기까지 다소 난이도가 있을 수 있지만, 팀플레이와 전략적 협동이 가능한 맵으로 평가된다. 특히, 상대방의 공격을 방어하고 동시에 공격을 퍼부을 수 있는 균형 잡힌 빌드와 업그레이드 전략이 요구된다. 초반에는 자원 확보에 집중하고, 중반부터는 방어 건물과 공격 유닛의 균형을 맞춰야 하며, 후반에는 대규모 병력과 방어선을 구축하는 것이 중요하다. 맵의 난이도는 보통 수준으로, 기본적인 스타크래프트 빌드 오더와 유닛 조합에 익숙한 플레이어라면 즐겁게 플레이할 수 있을 것이다. 추천 대상은 스타크래프트 유즈맵을 즐기며 빌드와 전략 대결을 좋아하는 플레이어들로, 특히 팀플레이와 경쟁을 중시하는 유저들에게 적합하다. 플레이 전에는 맵의 자원 분포와 시작 위치, 주요 길목을 미리 확인하고, 각 플레이어의 빌드 오더와 방어 전략을 숙지하는 것이 중요하다. 또한, 자원 관리와 유닛 업그레이드 타이밍을 잘 맞추는 것이 승리를 좌우할 수 있으므로, 사전 연습을 통해 전략적 감각을 키우는 것이 좋다. StarCraft: Brood War's custom map *Build TuG-O-WaR FinaL* is a large-scale build and strategy battle map where six players compete to destroy each other's bases through resource collection and building construction. The map features wide open terrain with starting positions for each player, and a massive central resource area that makes resource control a fierce contest. The core gameplay revolves around resource management and defensive structure placement, with strategies like direct base assaults or cutting off attack paths through defensive lines playing a crucial role. As seen in the image, each player’s starting area is connected to the central resource zone by pathways, meaning early-game resource competition can heavily influence the match’s outcome. Additional resources and buildings are also scattered along the map’s outer edges, making expansion and defense increasingly vital as the game progresses. While beginners may find the map challenging due to resource management and building placement, it’s praised for supporting team play and strategic coordination. A balanced build and upgrade strategy is essential—defending against attacks while simultaneously launching your own. Players should focus on securing resources early, balancing defensive structures and offensive units mid-game, and establishing large-scale forces and defensive lines late-game. With a moderate difficulty level, the map is enjoyable for players familiar with basic StarCraft build orders and unit compositions. It’s recommended for those who enjoy StarCraft custom maps, especially players who value build and strategy battles and team-based competition. Before playing, it’s important to study the resource distribution, starting positions, and key pathways, as well as familiarize yourself with build orders and defensive strategies. Mastering resource management and timing unit upgrades can be the deciding factor in victory, so practicing beforehand to sharpen strategic instincts is highly advised.
최근 등록된 맵
새로 추가된 파일과 버전을 확인하세요.
팬텀 BGH 패스트빌드 어드밴스 (Phantom BGH Fast Build Adv.)
‘팬텀 BGH 패스트빌드 어드밴스(Phantom BGH Fast Build Adv.)’는 스타크래프트 브루드워의 유즈맵으로, 8명의 플레이어가Sand Tileset 기반의 넓은 맵에서 빠른 빌드와 자원 관리를 중심으로 펼쳐지는 전략 대결을 즐길 수 있는 맵입니다. 맵 제목에서 알 수 있듯 BGH(Battle.net Gaming House) 에디션으로 업데이트되었으며, 가스 지대(Gas Geysers)의 위치가 수정되어 자원 분배의 밸런스가 조정되었다고 언급됩니다. 맵의 구조는Sand Tileset의 황량한 지형 위에 펼쳐져 있으며, 중앙과 각 코너에 주요 자원 지대가 배치되어 있습니다. 플레이어들은 빠른 빌드와 효율적인 자원 수집을 통해 상대를 압박하거나 방어선을 구축하는 데 중점을 둡니다. 이 맵의 핵심은 빠른 빌드와 자원 경쟁입니다. 맵 곳곳에 흩어져 있는 미네랄과 가스는 플레이어의 초반 빌드 속도와 자원 확보 전략에 직접적인 영향을 미치며, 이를 통해 상대방보다 앞서 나가거나 방어 체제를 강화할 수 있습니다. 맵의 지형은 비교적 평탄한 편이지만, 일부 elevated 지역이 있어 시야 확보와 치고 빠지는 전략적 플레이가 가능합니다. 특히, 가스 지대의 위치가 수정된 만큼 자원 확보의 중요성이 더욱 커졌으며, 이를 바탕으로 한 빌드 오더와 자원 관리 능력이 승패를 좌우할 수 있습니다. 또한, 맵의 크기가 4096x4096으로 достаточно 넓어, 초반부터 중반까지는 자원 확보와 빌드에 집중해야 하며, 후반에는 상대방의 압박과 방어 체제 구축이 중요해집니다. 이 맵은 초보자와 숙련자 모두에게 적합한 구성으로, 빠른 빌드와 자원 관리 능력을 키우기에 좋은 연습용 맵입니다. 또한, Sand Tileset의 황량한 분위기가 맵의 전략적 깊이를 더해주며, 플레이어 간의 긴장감을 높이는 요소로 작용합니다. 특히, BGH 에디션으로 업데이트되면서 가스 지대의 밸런스가 조정되어, 기존 버전보다 더 공정한 경쟁이 가능해진 점이 눈에 띕니다. 이 맵을 플레이하기 전에, 가스 지대의 위치와 주요 자원 지대를 미리 확인하고, 상대방의 빌드 스타일을 예측하는 연습을 하는 것이 좋습니다. Phantom BGH Fast Build Adv. is a custom map in StarCraft: Brood War that offers an 8-player experience set on aSand Tileset, focusing on rapid build orders and resource management in a strategic battle. As indicated by the title, this is the BGH (Battle.net Gaming House) edition, updated to fix the placement of Gas Geysers for better balance. The map unfolds on a vast desert-like terrain with mineral patches and gas geysers distributed across the field, including corners and central areas, forcing players to prioritize quick resource gathering and efficient build progression. The core gameplay revolves around fast builds and resource competition. The scattered mineral and gas resources directly impact early build speed and strategy, allowing players to either pressure opponents or strengthen their defenses. While the terrain is mostly flat, elevated areas provide opportunities for scouting and hit-and-run tactics. The adjustment of gas geyser positions in this edition enhances the importance of resource control, making build orders and resource management critical factors in determining victory. Given the 4096x4096 map size, players should focus on early resource collection and build progression, shifting to defensive setups and counterattacks as the game progresses. This map is suitable for both beginners and experienced players, offering a balanced environment to practice rapid builds and resource management. The desert atmosphere of the Sand Tileset adds a layer of strategic depth and tension, making the gameplay experience more immersive. The BGH edition’s gas geyser adjustments ensure a fairer competition compared to previous versions. Before playing, it’s advisable to study the gas geyser locations and key resource areas, and to practice predicting opponents’ build orders to gain an edge.
빌드크래프트[Final] (BuildCraft [Final])
《빌드크래프트[Final]》는 스타크래프트 브루드워 유즈맵의 한 장르인 아레나 맵으로, 6명의 플레이어가 중앙BattleGround에서 대결을 펼치는 대전형 구조를 갖추고 있다. 맵은 화산 타일셋을 기반으로 하며, 넓은 평지 가운데ে 배치된 일정 규모의 배틀존이 주무대이다. 배틀존 주변으로는 언덕과 협곡이 배치되어 있어 시야 확보와 기습 플레이에 영향을 미친다. 맵 중앙에는 대형 건물이 배치되어 있으며, 이는 맵의 특징점으로 추정된다. 배틀존 주변의 높은 지형과 협곡은 플레이어가 전술을 펼치기에 유리한 환경을 제공하는 한편, 좁은 통로와 언덕은 치고 빠지기를 강요하는 요소로 작용할 수 있다. 맵의 전체적인 분위기는 전투 중심의 아레나 장르에 어울리며, 맵 제목에서 유추해 볼 때 ‘빌드’를 강조하는 진행 방식이 포함될 가능성이 있다. 하지만 내부 설명에 등장하는 ‘Bug’, ‘Op Obs’라는 문구는 맵의 초기 버전이나 테스트 중인 기능이 있음을 시사하며, 완벽하게 polished되지 않은 상태일 수 있음을 고려해야 한다. 플레이어는 중앙 배틀존을 중심으로 전술을 펼치며, 건물을 활용한 방어 혹은 공격 루트를 선택할 수 있을 것으로 보인다. 맵의 규모가 크고 중앙 배틀존이 spacious한 만큼, 빠른 교전과 전략적 움직임이 중요할 것이다. 이 맵은 실력 대 실력의 아레나 대전을 선호하는 유저들에게 적합하며, 특히 중앙BattleGround에서 벌어지는 박진감 넘치는 전투를 즐기고자 하는 플레이어에게 추천된다. 플레이 전에는 맵의 특이한 지형과 건물 배치를 숙지하고, 빠른 반응과 전술적 대처가 필요함을 염두에 두어야 한다. 또한, 맵이 초기 버전일 가능성이 있으므로 버그 발생 시 대처 방법을 마련하는 것이 좋다. 이 맵은 단순한 대전에 그치지 않고, 빌드와 전략을 동시에 요구하는 하이브리드 형식을 지향할 가능성이 높아 보인다. 《BuildCraft [Final]》 is an Arena-style custom map for StarCraft: Brood War, designed for six players to engage in direct combat within a central BattleGround. The map utilizes a volcanic tileset, featuring a large open battlefield surrounded by hills and canyons that influence visibility and ambush tactics. A prominent building is centrally located, likely serving as a key strategic point. The surrounding high ground and narrow passages force players to adapt their strategies, balancing aggressive pushes with defensive positioning. The map's title and structure suggest a focus on 'building' mechanics integrated into the Arena genre, though the internal description hints at potential bugs or unfinished elements with terms like 'Bug' and 'Op Obs.' Players are expected to navigate the central BattleGround, utilizing the terrain and buildings for both offense and defense. Given the map's size and open battlefield, fast-paced engagements and tactical decision-making are critical. This map is ideal for players who enjoy skill-based Arena battles, particularly those seeking intense combat scenarios in a spacious central arena. Prior to playing, it is advisable to study the map's terrain and building placements, as quick reactions and strategic adaptability will be essential. Additionally, since the map may still be in an early version, players should be prepared for potential bugs and their solutions. The map likely blends Arena combat with build mechanics, offering a hybrid experience that rewards both mechanical skill and tactical planning.
고렘 매드니스 매스 어택 (Golem Madness Mass Attack)
‘고렘 매드니스 매스 어택(Golem Madness Mass Attack)’은 스타크래프트 브루드워의 유즈맵으로, 5명의 플레이어가 고렘(골렘) 조합과 파괴를 기반으로 전투를 펼치는 디펜스 및 빌드 전략 장르의 맵이다. 맵은 사막 타일셋으로 구성되어 있으며, 넓은 평야와 중앙의 요새 구조가 특징적이다. 각 플레이어는 고렘의 부품을 수집하고 조합하여 강력한 유닛을 생산하거나 상대의 고렘을 파괴하는 방식으로 진행된다. 맵의 핵심은 ‘4개의 고렘 파츠 조합’을 완성하는 것이며, 이를 통해 다양한 고렘 유닛을 생성할 수 있다. 특히, 고렘의 파괴와 재조합이 가능한 구조는 전술적 선택을 강제하며, 상대방의 전략을 읽고 대응해야만 승리를 이끌어낼 수 있다. 맵의 디자인은 중앙의 넓은 평야가 확장 공간으로 활용되며, 요새 주변의 언덕과 협곡은 고렘의 이동 경로를 제한하는 역할을 한다. 플레이어는 초반에 자원을 확보하고 고렘 부품을 확보하는 데 집중해야 하며, 중반부터는 고렘 조합을 통한 화력과 방어 전략을 구사해야 한다. 맵의 난이도는 고렘의 조합과 파괴의 균형을 맞추는 데 있으며, 초보자는 고렘의 기본 조합법을 익히는 데 시간이 필요할 수 있다. 추천 대상은 디펜스와 빌드 전략을 즐기는 플레이어, 그리고 고렘의 조합과 파괴를 통한 전술적 플레이를 선호하는 유저들이다. 플레이 전에는 맵의 고렘 파츠 위치와 요새 구조를 숙지하고, 상대방의 고렘 조합을 예측하는 연습을 추천한다. 고렘의 파괴와 재조합이 가능한 맵의 특성상, 지속적인 자원 관리와 전술적 전환이 승리를 좌우할 것이다. This StarCraft: Brood War custom map, titled ‘Golem Madness Mass Attack’, drops players into a 5-player defense and build strategy experience centered around collecting, combining, and destroying golems. The map is set against a desert tileset, featuring expansive plains and central fortress structures that create natural choke points and strategic vantage points. Each player starts with the goal of gathering golem components to assemble powerful units or dismantle opponents’ golems for resources. The core mechanic revolves around completing one of four unique golem part combinations, unlocking specialized units that can turn the tide of battle. The map’s design emphasizes spatial awareness, with central open areas for expansion and elevated terrain around fortresses that restrict unit movement and encourage tactical positioning. Early-game focus should be on securing resources and components, while mid-to-late game demands mastery of golem combinations and defensive play. The challenge lies in balancing golem production with strategic destruction, making it a test of adaptability for players. Newcomers may find the learning curve steep as they familiarize themselves with component locations and fortress layouts, but the depth of golem combinations rewards persistent experimentation. Ideal for players who enjoy defense mechanics paired with build strategies, this map challenges both resource management and tactical foresight. Before diving in, study the golem part spawn points and fortress layouts to anticipate opponent strategies, and be prepared to pivot between offense and defense as the match progresses.
Build TuG-O-WaR FinaL
빌드 터그 오브 워 파이널(Build Tug of War Final)은 6인용 팀 대전 방식의 터그 오브 워(Tug of War) 장르 유즈맵이다. 플랫폼 타일셋 기반의 64×64 타일 맵에서 양 진영이 각자의 기지 끝에서 유닛을 생산해 자동으로 전진하는 라인을 따라 충돌한다. 플레이어는 자원 관리와 유닛 조합, 업그레이드 타이밍을 판단해 상대 넥서스를 먼저 파괴하는 것이 목표다. 3대3 고정 팀 구성이 기본으로 보이며, 맵 제목의 'Final' 표기와 다수 파생 버전 존재로 보아 시리즈 완성판에 가깝다. 제작자 Po0pMaStEr를 중심으로 SoftWarewolf, omfg8me가 개량에 참여한 흔적이 설명에 남아 있다. 진행은 초반 빌드 오더 싸움이 치열하고 중반 이후 대규모 병력 교환과 스펠 캐스터 활용, 공중·지상 밸런스 조절이 승부를 가른다. 입문자는 초반 자원 낭비 없이 핵심 유닛을 확보하는 연습이 필요하며, 숙련자는 카운터 유닛 조합과 타이밍 어택으로 스노우볼을 굴리는 재미가 있다. 팀원 간 역할 분담(탱커, 딜러, 지원)과 맵 중앙 시야 장악이 중요한 협동 플레이를 요구한다. 파티 플레이나 클랜 내전용으로 적합하며, 빠른 템포의 전략 대전을 선호하는 유저에게 추천한다. 플레이 전 버전별 밸런스 차이와 허용 유닛 목록, 시작 자원 설정을 확인하면 좋다. Build Tug of War Final is a 6-player team-based Tug of War genre UMS map. On a 64×64 tile map using the Platform tileset, both factions produce units from their base ends that automatically march along lanes to clash. Players manage resources, unit compositions, and upgrade timings to destroy the enemy Nexus first. A fixed 3v3 team setup appears standard, and the 'Final' designation alongside multiple derivative versions suggests this is the series' definitive edition. The description credits Po0pMaStEr as creator with SoftWarewolf and omfg8me contributing enhancements. Gameplay revolves around early build-order contests, transitioning into large-scale army trades, spellcaster usage, and air-ground balance management. Newcomers should practice securing core units without early resource waste, while veterans enjoy snowballing through counter-compositions and timing attacks. Cooperative play demands role division (tank, DPS, support) and central map vision control. Suitable for party play or clan matches, recommended for users who prefer fast-paced strategic battles. Before playing, verify version-specific balance differences, allowed unit lists, and starting resource settings.
빌드 터그-오-워 파이널 (Build TuG-O-WaR Final)
스타크래프트 브루드워의 유즈맵 빌드 터그-오-워 파이널(Build TuG-O-WaR FinaL)은 6명의 플레이어가 참여하는 대규모 빌드 및 전략 대결 맵으로, 각 플레이어가 자원 수집과 건물 건설을 통해 서로의 기지를 파괴하는 경쟁을 펼치는 구조를 갖추고 있다. 맵은 넓은 평야 지형에 각 플레이어의 시작 지점이 배치되어 있으며, 중앙에는 대규모 자원 분포 지역이 위치해 있어 자원 확보 경쟁이 치열할 수밖에 없다. 게임의 핵심은 자원 관리와 방어 건물 건설에 있으며, 상대방의 기지를 직접 공격하거나 방어선을 구축해 공격로를 차단하는 전략이 중요하다. 이미지에서 확인되는 바와 같이, 각 플레이어의 시작 지역은 중앙 자원 지대와 연결된 길목에 위치하고 있어 초반 자원 확보 경쟁이 게임의 판도를 좌우할 수 있다. 또한, 맵의 외곽 지역에는 추가적인 자원과 건물이 배치되어 있어, 후반부로 갈수록 확장과 방어 전략이 더욱 중요해진다. 초보 플레이어의 경우 자원 관리와 건물 배치에 익숙해지기까지 다소 난이도가 있을 수 있지만, 팀플레이와 전략적 협동이 가능한 맵으로 평가된다. 특히, 상대방의 공격을 방어하고 동시에 공격을 퍼부을 수 있는 균형 잡힌 빌드와 업그레이드 전략이 요구된다. 초반에는 자원 확보에 집중하고, 중반부터는 방어 건물과 공격 유닛의 균형을 맞춰야 하며, 후반에는 대규모 병력과 방어선을 구축하는 것이 중요하다. 맵의 난이도는 보통 수준으로, 기본적인 스타크래프트 빌드 오더와 유닛 조합에 익숙한 플레이어라면 즐겁게 플레이할 수 있을 것이다. 추천 대상은 스타크래프트 유즈맵을 즐기며 빌드와 전략 대결을 좋아하는 플레이어들로, 특히 팀플레이와 경쟁을 중시하는 유저들에게 적합하다. 플레이 전에는 맵의 자원 분포와 시작 위치, 주요 길목을 미리 확인하고, 각 플레이어의 빌드 오더와 방어 전략을 숙지하는 것이 중요하다. 또한, 자원 관리와 유닛 업그레이드 타이밍을 잘 맞추는 것이 승리를 좌우할 수 있으므로, 사전 연습을 통해 전략적 감각을 키우는 것이 좋다. StarCraft: Brood War's custom map *Build TuG-O-WaR FinaL* is a large-scale build and strategy battle map where six players compete to destroy each other's bases through resource collection and building construction. The map features wide open terrain with starting positions for each player, and a massive central resource area that makes resource control a fierce contest. The core gameplay revolves around resource management and defensive structure placement, with strategies like direct base assaults or cutting off attack paths through defensive lines playing a crucial role. As seen in the image, each player’s starting area is connected to the central resource zone by pathways, meaning early-game resource competition can heavily influence the match’s outcome. Additional resources and buildings are also scattered along the map’s outer edges, making expansion and defense increasingly vital as the game progresses. While beginners may find the map challenging due to resource management and building placement, it’s praised for supporting team play and strategic coordination. A balanced build and upgrade strategy is essential—defending against attacks while simultaneously launching your own. Players should focus on securing resources early, balancing defensive structures and offensive units mid-game, and establishing large-scale forces and defensive lines late-game. With a moderate difficulty level, the map is enjoyable for players familiar with basic StarCraft build orders and unit compositions. It’s recommended for those who enjoy StarCraft custom maps, especially players who value build and strategy battles and team-based competition. Before playing, it’s important to study the resource distribution, starting positions, and key pathways, as well as familiarize yourself with build orders and defensive strategies. Mastering resource management and timing unit upgrades can be the deciding factor in victory, so practicing beforehand to sharpen strategic instincts is highly advised.
BUILD - HIGH DEFENSE(X-SE)
스타크래프트 브루드워 유즈맵 '빌드 - 하이 디펜스 (X-SE)'는 우주 타일셋을 배경으로 최대 7인이 협력해 컴퓨터 상대 방어전을 벌이는 디펜스 장르 맵이다. 내부 설명에 'SKILL COMPUTER 3000 UNIT TO WIN'이라는 문구가 있어, 스킬을 보유한 강력한 컴퓨터 유닛 3,000기를 처치하거나 막아내면 승리하는 방식임이 추정된다. 제목에 'BUILD'가 포함된 만큼 자원 채취와 건물 건설, 유닛 생산을 통한 전력 증강이 핵심 플레이 루프로 보이며, 'HIGH'라는 수식어에서 높은 난이도와 대규모 병력전을 예고한다. 7인 전용으로 설계되어 인원이 모자라면 난이도가 급상승할 수 있으니 정원 충원이 권장된다. 우주 배경 특성상 지형 제약이 적어 자유로운 기지 확장이 가능하지만, 그만큼 다방면에서 몰려드는 적 공세를 막기 위한 입구 막기나 병력 분배가 중요해 보인다. 고난도 협력 디펜스를 즐기는 숙련자 그룹에게 적합하며, 초보자는 초반 빌드 오더와 스킬 유닛 대처법을 숙지한 뒤 도전하는 것이 좋다. 플레이 전 7인 파티 구성 여부와 맵 버전(X-SE) 호환성을 확인해야 한다. StarCraft Brood War UMS 'BUILD - HIGH DEFENSE (X-SE)' is a defense genre map set on the space tileset where up to 7 players cooperate against computer opponents. The internal description mentions 'SKILL COMPUTER 3000 UNIT TO WIN', suggesting the objective is to destroy or withstand 3,000 skilled computer units. With 'BUILD' in the title, resource gathering, building construction, and unit production appear to be the core gameplay loop, while 'HIGH' signals high difficulty and large-scale battles. Designed for 7 players, missing members will spike difficulty, so a full party is recommended. The open space terrain allows free base expansion, but also requires careful chokepoint control and force distribution against multi-directional assaults. Suited for veteran groups seeking high-difficulty cooperative defense; beginners should study early build orders and spellcaster counters first. Before playing, verify 7-player party availability and map version (X-SE) compatibility.
AirGolem *SilverStyle*
에어 골렘 실버스타일(AirGolem *SilverStyle*)은 제작자 CYTRYN이 만든 5인용 유즈맵으로, 사막 타일셋의 2048x2048 대형 맵에서 골렘을 파괴하고 건설하는 독특한 게임플레이를 제공한다. 내부 설명인 'Destroy and build Golems'에서 알 수 있듯, 핵심 메커니즘은 골렘 유닛을 활용한 전투와 생산에 집중되어 있다. 5명의 플레이어가 참여하는 구조상 프리포올(FFA) 또는 팀 대전 형태가 추정되며, 넓은 맵 크기와 사막 지형이 자원 확보와 기지 확장, 다방향 전투를 유도할 것으로 보인다. 골렘이라는 특정 유닛을 중심으로 한 빌드 앤 파이트(Build & Fight) 방식은 일반적인 밀리나 디펜스와 차별화된 재미를 줄 가능성이 높다. 다만 트리거 상세, 승리 조건, 유닛 밸런스, 자원 시스템 등 세부 규칙은 플레이 전 직접 확인해야 한다. 커스텀 유닛 메커니즘과 자유도 높은 빌드 전략을 즐기는 유저, 색다른 5인 대전 맵을 찾는 파티에게 추천한다. 플레이 전 맵 설명창의 규칙과 단축키, 특수 커맨드 숙지가 필수적이다. AirGolem SilverStyle is a 5-player UMS map created by CYTRYN, offering unique gameplay centered on destroying and building Golems on a large 2048x2048 desert tileset map. As the internal description 'Destroy and build Golems' indicates, the core mechanic focuses on combat and production utilizing Golem units. With five players participating, a free-for-all (FFA) or team battle format is presumed, and the vast map size combined with desert terrain likely encourages resource acquisition, base expansion, and multi-directional combat. The build-and-fight style centered on the specific Golem unit has high potential to deliver differentiated fun compared to standard melee or defense maps. However, detailed triggers, victory conditions, unit balance, and resource systems must be verified directly before play. Recommended for users who enjoy custom unit mechanics and flexible build strategies, as well as parties seeking a fresh 5-player versus map. Checking the map description window for rules, hotkeys, and special commands before starting is essential.
맵 선택 가이드
태그는 맵의 핵심 특징을 빠르게 설명하지만 제작 버전마다 규칙이 다를 수 있습니다. 상세 설명에서 권장 인원, 난이도, 플레이 시간과 버전을 함께 확인한 뒤 다운로드하세요.