
브루드워 맵 스타크래프트 맵 모음
'브루드워 맵' 태그가 등록된 맵을 모았습니다. 장르 하나로 찾기 어려운 플레이 방식, 난이도와 특징을 중심으로 인기 맵과 최신 맵을 비교해 보세요.
- 등록 맵
- 6개
- 누적 다운로드
- 0
- 누적 조회
- 156
인기 맵
다운로드와 조회 반응이 높은 맵입니다.
골렘 No Double Perfected (Golem No Double Perfected)
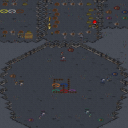
스타크래프트 브루드워의 유즈맵 '골렘 No Double Perfected'는 고전적인 '골렘' 장르의 유즈맵을 한층 더 강화한 버전으로, 원본의 단점을 보완하고 완벽한 밸런스를 추구한 작품이다. 이 맵은 플레이어가 황금색 골렘을 조종해 적의 공격을 방어하며, 일정 조건을 달성하면 승리하는 디펜스형 유즈맵으로, 'No Double'이라는 이름에서 알 수 있듯 골렘의 중복 생성이나 특수 효과 중복 버그를 완벽히 제거했다는 특징이 있다. 맵의 주요 특징은 골렘의 단계별 진화와 강력한 스킬 시스템에 있다. 초반에는 기본 골렘으로 시작해 적의 공격을 방어하며 자원을 모은 뒤, 특정 조건(예: 특정 적 처치, 시간 경과 등)을 만족하면 더 강력한 골렘으로 진화할 수 있으며, 각 골렘은 고유한 스킬을 보유하고 있어 전략적 플레이가 요구된다. 특히, 맵의 오른쪽에 위치한 오렌지색 기지에서 시작하는 플레이어는 버그 없이 안정적으로 골렘을 운용할 수 있도록 설계되어 있으며, 이는 맵의 'Perfected'라는 수식어가 붙은 이유이기도 하다. 맵의 구조는 중앙에 위치한 넓은 길과 양옆의 협소한 길로 나뉘어 있어, 플레이어는 자신의 골렘을 효율적으로 배치하고 적의 공격을 방어해야 한다. 또한, 맵 곳곳에 배치된 자원 상자와 미네랄 멀티는 골렘의 진화를 가속화하는 데 도움을 주며, 이를 활용한 전략적 플레이가 승리의 관건이 된다. 이 맵은 5인용으로 설계되었지만, 팀플레이보다는 개별 플레이어가 골렘을 조종하는 1인용 디펜스 게임에 가깝다. 초보 플레이어의 경우 골렘의 특성이나 맵의 구조를 제대로 이해하지 못해 어려움을 느낄 수 있지만, 골렘의 스킬을 숙지하고 자원을 효율적으로 관리한다면 충분히 도전해 볼 만한 가치가 있다. 특히, 골렘의 진화 조건과 스킬의 조합을 익히는 것이 관전 포인트다. 이 맵을 플레이하기 전에는 골렘의 진화 단계와 각 단계별 스킬을 미리 확인하고, 맵의 주요 자원 위치와 적의 공격 패턴을 숙지하는 것이 중요하다. 또한, 오렌지색 기지에서 시작하는 플레이어는 초반 방어에 좀 더 신경 쓸 필요가 있으며, 중앙 길의 협소한 구간에서는 골렘의 배치 위치를 신중히 결정해야 한다. 이 맵은 디펜스 장르에 익숙한 플레이어에게는 훌륭한 도전 과제가 될 것이며, 골렘의 전략적 운용을 통해 새로운 재미를 느낄 수 있을 것이다. 그뿐만 아니라, 'No Double'이라는 이름처럼 버그가 완벽히 제거된 맵이기 때문에 안정적인 플레이가 가능하다는 점도 큰 장점이다. "Golem No Double Perfected," a classic *Golem*-genre custom map from *StarCraft: Brood War*, is an enhanced version that addresses the flaws of the original while striving for perfect balance. This defense-style map has players controlling a golden golem to fend off enemy attacks, achieving victory upon meeting specific conditions. As the name *No Double* suggests, the map eliminates all duplicate golem spawning and special effect bugs, ensuring a polished experience. The map’s core mechanics revolve around golem evolution and its robust skill system. Players begin with a basic golem, gathering resources while defending against attacks. Once certain conditions are met—such as defeating specific enemies or passing a time threshold—the golem evolves into a stronger form, each with unique abilities that demand strategic play. Notably, the player starting at the orange base on the right can operate their golem without bugs, a key reason for the "Perfected" in the title. The map’s layout features a wide central path flanked by narrow side routes, requiring players to position their golems efficiently and defend against incoming assaults. Scattered resource boxes and mineral patches across the map accelerate golem evolution, making resource management a critical factor in victory. Though designed for five players, the gameplay leans more toward a solo defense experience, where individual players control their golems rather than relying on teamwork. Beginners may struggle initially due to unfamiliarity with golem mechanics or map layout, but mastering the golems’ skills and optimizing resource use makes the challenge rewarding. The real highlight lies in experimenting with different golem evolution paths and skill combinations. Before playing, it’s essential to study the golem’s evolution stages and abilities, identify key resource locations, and learn enemy attack patterns. Orange-base players should prioritize early defense, while those navigating the narrow central paths must carefully plan golem placements. For fans of defense games, this map offers a compelling challenge, delivering fresh strategic depth through golem management. Additionally, its bug-free design—reflected in the *No Double* name—ensures a stable and enjoyable experience.
마법의 숲 탈출 (The Enchanted Forest)
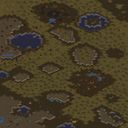
《The Enchanted Forest》는 스타크래프트: 브루드워의 유즈맵으로, 프로토스 종족을 조종해 폐허가 된 숲 속에서 탈출구를 찾는 서바이벌 디펜스 장르의 맵이다. 내부 설명에 따르면 '프로토스가 행성을 탈출해야 한다'는 설정 하에 숲을 통과하는 길을 개척하고 적대적 환경 속에서 살아남는 것이 목표로 추정된다. 중앙의 넓은 평원과 그 주변을 감싸는 짙은 숲 지형이 특징이며, 숲은 어두운 초록색과 파란색으로 표현되어 있으며 곳곳에 붉은 점들이 흩어져 있어 방해 요소나 적의 위치로 추정된다. 맵 전체가 복잡한 지형을 이루고 있어 길찾기 요소가 강하며, 플레이어는 프로토스 유닛을 통제해 지형을 돌파하고 탈출로를 확보해야 한다. 숲의 밀집된 부분은 시야를 제한할 수 있어 전략적 판단이 요구되며, 탈출구가 맵의 가장자리에 위치하는 것으로 보아 목표는 맵 외곽으로의 도피로 보인다. 초보자보다는 경험이 있는 플레이어에게 적합한 구조로, 넓은 시야와 정확한 조작이 요구되는 맵으로 추정된다. 추천 플레이 전에는 맵의 주요 길목과 장애물의 위치를 숙지하는 것이 중요하며, 특히 숲의 밀집 지역을 통과할 때는 주의가 필요하다. 프로토스의 특성을 살려 빠른 기동력과 방어력을 활용하는 것이 핵심 전략이 될 것이다. The map 《The Enchanted Forest》 is a survival defense UMS (Use Map Settings) game in StarCraft: Brood War, where players control the Protoss faction to escape a ruined forest planet. The objective, as suggested by the internal description, involves navigating through the infested forest to find an exit while surviving hostile conditions. The map features a central open area surrounded by dense forest terrain, depicted in dark green and blue hues with scattered red dots likely representing obstacles or enemies. The complex layout demands strong pathfinding skills, as players must guide Protoss units through the forest to secure an escape route leading to the map's edges. The dense forest areas may restrict visibility, adding a layer of strategic depth. This map is more suited for experienced players due to its reliance on quick decision-making and precise unit control. Prior to playing, it is advisable to study key pathways and obstacles, particularly in the dense forest regions. Effective use of Protoss mobility and defensive capabilities will be crucial for success.
네메시스 (Nemesis)
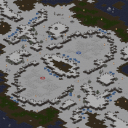
스타크래프트: 브루드워의 네메시스(Nemesis)는 2인용 밀리전 맵으로, 플레이어 각각이 상대방의 넥서스를 파괴하는 것이 승리 조건이다. 평평한 플랫폼맵 형태의 맵은 중앙에 넓은 평지가 펼쳐져 있으며, 양쪽 기지 사이를 가로지르는 좁은 다리가 있다. 양 플레이어의 본진은 맵의 양쪽 끝 모서리에 위치해 있으며, 입구는 좁고 방어하기 쉬운 구조로 되어 있어 초반 러시가 중요해 보인다. 맵 중앙의 넓은 평지는 빠른 이동과 전투가 가능한 공간으로, 초반에 적을 제압하거나, 중반 이후에는 대규모 병력 교전지로 활용될 가능성이 크다. 맵 전체가 균형 잡힌 구조로, 양 플레이어의 시작 위치와 자원 분포가 동일하여 공정한 플레이가 가능하다. 다만, 좁은 입구와 중앙 다리로 인한 병력 이동의 제한이 게임의 긴장감을 높이는 요소로 작용할 수 있다. 초보 플레이어는 좁은 통로를 활용한 방어와 빠른 정찰을 중시해야 하며, 숙련된 플레이어는 중앙 평지에서 우위를 점하기 위한 전략적 움직임이 중요해 보인다. 맵의 간결한 구조는 빠른 게임 진행을 가능하게 하며, 특히 2인 대전이기에 긴장감과 박진감이 뛰어나다.Nemesis는 2인용 밀리전 맵으로, 상대 넥서스 파괴가 목표다. 중앙 넓은 평지와 양쪽 기지를 연결하는 좁은 다리가 특징이며, 입구는 좁고 방어하기 쉬운 구조로 초반 러시가 중요하다. 양 플레이어의 자원과 시작 위치가 동일해 공정성을 유지하며, 좁은 통로와 중앙 평지의 제한된 공간이 긴장감을 높인다. 초보자는 빠른 정찰과 방어에 중점을 두고, 숙련자는 중앙 평지에서 전략적 우위를 점하는 데 집중해야 한다. 맵의 간결한 구조는 빠른 게임 플레이를 지원하며, 2인 대전의 박진감이 뛰어나다. Nemesis from StarCraft: Brood War is a two-player melee map where the objective is to destroy the opponent's Nexus. The map features a flat platform design with a wide central plain and a narrow bridge connecting the two bases. Each player's main base is located at opposite corners of the map, with a narrow, easily defensible entrance that makes early rushes crucial. The central plain allows for quick movement and combat, making it ideal for early harassment or large-scale battles in the mid-to-late game. The balanced layout ensures fair play, as both players start with identical resource distribution and positions. However, the narrow entrances and central bridge can restrict troop movements, adding tension to the game. Beginners should focus on quick scouting and defense through the tight passages, while skilled players need to prioritize strategic positioning on the central plain to gain an advantage. The map's straightforward design enables fast-paced gameplay, and its two-player format delivers intense, thrilling matches.
임파서블 시나리오 (Impossible Scenarios)
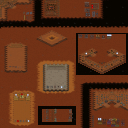
임파서블 시나리오(Impossible Scenarios)는 스타크래프트 브루드워 맵 가운데 독특한 구조와 고난도의 도전 과제를 제공하는 유즈맵이다. 전체적인 맵 구조를 살펴보면, 황혼 타일셋을 바탕으로 여러 개의 독립된 구역과 기지 형태가 사방에 배치되어 있는 것을 확인할 수 있다. 각 구역은 저마다 고유한 유닛 조합과 방어선, 또는 공략해야 할 오브젝트들을 품고 있으며, 플레이어는 제한된 자원과 상황 속에서 주어진 시나리오를 헤쳐 나가야 한다. 제목에서 느껴지듯 난이도가 만만치 않아 보이며, 맵 전반에 배치된 다양한 유닛 군집과 지형 배치는 철저한 전략과 세밀한 컨트롤을 요구하는 플레이 경험을 선사한다. 특히 다인용 플레이어 슬롯을 지원하는 만큼, 아군과의 유기적인 협동 플레이나 역할 분담이 게임의 승패를 가르는 중요한 요인으로 작용할 것으로 보인다. 복잡한 유닛 배치와 고난도 미션을 즐기는 유저들에게 적합하며, 색다른 도전 정신을 자극하는 컴까기나 서바이벌 계열의 유즈맵을 찾는 플레이어라면 한 번쯤 도전해 볼 만한 가치가 있는 맵이다. 플레이를 시작하기 전에 각 구역의 유닛 배치와 주변 지형의 특성을 미리 파악하고, 팀원들과의 협력 전략을 구상하는 것이 공략을 위한 좋은 출발점이 될 것이다. Impossible Scenarios is a custom map for Starcraft Brood War that presents a unique structure and high-difficulty challenges. Looking at the overall map layout based on the Twilight tileset, multiple independent sectors and base-like areas are distributed across the terrain. Each zone contains distinct unit combinations, defensive lines, or objectives that players must tackle under restricted resources and conditions. As the title suggests, the difficulty appears formidable, and the diverse unit clusters and terrain setups across the map offer a gameplay experience that demands careful strategy and precise control. Since it supports multi-player slots, organic cooperative play and role division among allies are likely key factors determining victory or defeat. This map is well-suited for users who enjoy complex unit placement and punishing missions, making it a worthy choice for players looking for a challenging computer-battle or survival-style custom map. Before starting a match, analyzing the unit distribution and surrounding terrain characteristics of each zone, while formulating a cooperative strategy with teammates, serves as a solid starting point for conquering the scenario.
해변 across the Cape (Across the Cape)
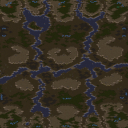
이 맵은 스타크래프트: 브루드워의 해변가 지형을 배경으로 한 멀티 플레이어 전투형 맵으로, 해변을 따라 펼쳐진 넓은 전장 위에서 벌어지는 전투가 특징이다. Across the Cape는 이름 그대로 곶(cape)을 가로지르는 전투를 의미하며, 넓은 개활지와 해안선을 따라 펼쳐진 다양한 지형이 플레이어들에게 전략적인 선택지를 제공한다. 맵의 중앙부는 비교적 평탄한 지형이지만, 해안선을 따라는 바위가 흩어져 있어 진영 방어와 진격로 설계에 영향을 미친다. 특히 해변가 주변의 얕은 물은 시야 방해 요소가 되지 않지만, 병력의 기동성을 제약하는 요소로 작용할 수 있어 유닛 조합과 타이밍을 신중히 고려해야 한다. 이 맵의 핵심은 해변가라는 독특한 지형을 활용한 방어와 공격의 균형이다. 플레이어들은 해안선을 따라 방어선을 구축하거나, 적의 후방을 교란하는 전략을 펼칠 수 있으며, 넓디넓은 전장 덕분에 소규모 병력 간의 교전이 빈번하게 발생한다. 맵의 중앙부는 비교적 개방되어 있어 테란의 벙커링이나 프로토스의 방어탑 전략이 유효할 수 있지만, 해안선 near의 좁은 길목은 치열한 난타전이 벌어질 가능성이 높다. 따라서 초반부터 병력의 양과 질을 균형 있게 유지하는 것이 중요하다. Across the Cape는 2~6명의 플레이어가 참여할 수 있는 멀티 플레이 전용 맵으로, 동맹 플레이 시에는 맵 설정(USE MAP SETTINGS)을 통해 팀별로 협력할 수 있도록 설계되었다. 해변가라는 특성상 테란의 시즈 탱크나 프로토스의 캐리어 같은 공중 유닛이 상대적으로 유리할 수 있지만, 지상 병력의 비중도 결코 낮지 않다. 따라서 유저들은 맵의 특징을 잘 파악하고, 자신의 종족과 전략에 맞는 유닛 조합을 준비해야 한다. 넓은 전장 덕분에 초보자와 숙련자 모두에게 매력적인 맵으로, 특히 해변가 전투의 묘미를 즐기고 싶은 플레이어들에게 추천한다. 플레이 전에는 해안선 near의 좁은 길목과 중앙부의 개활지를 미리 점검해 두는 것이 좋다. This map is a multiplayer combat-focused StarCraft: Brood War map set against a coastal terrain, featuring battles unfolding across a vast battlefield with diverse terrain along the shoreline. Across the Cape, as the name suggests, signifies combat spanning a cape, with a relatively flat central area but scattered rocks along the coastline that influence base defense and advance routes. The shallow waters near the shoreline do not obstruct vision but can limit unit mobility, necessitating careful consideration of unit compositions and timing. The core of this map lies in the balance between defense and offense leveraging the unique coastal terrain. Players can establish defensive lines along the shoreline or disrupt the enemy's rear with strategic maneuvers. The open central area allows for effective strategies like Terran bunker rushes or Protoss photon cannon setups, while the narrow passages near the shoreline are prone to intense close-quarters combat. Maintaining a balanced quantity and quality of units from the early game is crucial. Across the Cape is a multiplayer-exclusive map designed for 2 to 6 players, with team-based cooperation possible via map settings in allied play. The coastal terrain may favor aerial units like Terran siege tanks or Protoss carriers, but ground units remain significant. Players should familiarize themselves with the map's features and prepare unit compositions tailored to their race and strategy. Its vast battlefield appeals to both beginners and veterans, especially those seeking the thrill of coastal combat. Before playing, it’s advisable to scout the narrow shoreline passages and central open areas.
스피넬 밸리 3 OBs (| iCCup | Spinel Valley III OBs)
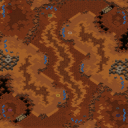
스타크래프트 브루드워 맵인 스피넬 밸리 3 OBs(| iCCup | Spinel Valley III OBs)는 황혼 타일셋을 배경으로 펼쳐지는 독특한 구조의 전장입니다. 본 맵은 오리지널 버전과 컨셉을 바탕으로 iCCup 플랫폼의 수정 과정을 거쳐 탄생한 이력이 있으며, 전형적인 밀리 맵의 형태를 띠면서도 관전(OB) 및 독특한 지형적 특징을 염두에 두고 다듬어진 것으로 보입니다. 전체적인 맵의 크기는 128x96의 넓은 대지를 자랑하며, 최대 8명의 플레이어가 참여할 수 있도록 설계되어 다인전 환경에 적합한 구성을 보여줍니다. 맵의 전반적인 레이아웃은 황혼 타일셋 특유의 붉고 거친 협곡과 언덕 지형이 유기적으로 얽혀 있는 형태입니다. 중앙의 넓은 개활지와 각 플레이어의 시작 지점 주변에 배치된 멀티 자원 지역은 자원 수급과 확장 타이밍의 중요성을 강조합니다. 지형적으로 복잡하게 얽힌 길목과 고저 차이가 존재하여, 병력 이동 경로 설정과 시야 확보가 승패를 가르는 중요한 요인으로 작용할 수 있습니다. 특히 다인전 상황에서 아군과의 협력이나 전략적인 위치 선점이 전투의 양상을 크게 바꿀 수 있는 구조를 취하고 있습니다. 이 맵은 스타크래프트 브루드워 유즈맵 및 밀리 전장의 매력을 동시에 즐기고자 하는 유저들에게 추천할 만합니다. 넓은 맵 크기와 다수의 플레이어 수용 인원을 바탕으로 대규모 교전과 전략적 심리전을 선호하는 플레이어들에게 흥미로운 경험을 선사할 것입니다. 플레이를 시작하기 전, 각 플레이어의 시작 위치와 자원 멀티 주변의 지형적 이점을 미리 파악하고, 협곡을 활용한 방어 및 진격 경로를 고민해 보는 것이 좋습니다. 다인전 전장인 만큼 팀원 간의 소통과 맵 리딩 능력이 중요하게 작용하며, 황혼 타일셋의 시각적 특성에 적응하여 시야 싸움에서 우위를 점하는 것이 승리를 위한 핵심 포인트가 될 것입니다. StarCraft Brood War map | iCCup | Spinel Valley III OBs is a distinct battlefield set against a twilight tileset, featuring a unique structural design. Based on original concepts and versions, this map underwent modifications through the iCCup platform, taking on a traditional melee appearance while being refined with observer elements and specific terrain characteristics in mind. Spanning a spacious 128x96 dimensions, the map accommodates up to eight players, making it well-suited for multiplayer matches. The overall layout organically intertwines the red, rugged canyons and elevated terrain characteristic of the twilight tileset. The expansive central area and the multi-resource locations placed around each player's starting point emphasize the importance of resource gathering and expansion timing. Complex paths and elevation differences can serve as critical factors where troop movement routing and vision control dictate victory or defeat. Especially in multiplayer scenarios, cooperation with allies and strategic positioning can significantly alter the flow of combat. This map is recommended for users who wish to enjoy the charm of both Brood War custom maps and competitive battlefields. Leveraging its large size and high player capacity, it offers an engaging experience for players who prefer large-scale engagements and strategic psychological warfare. Before starting a match, it is advisable to analyze the starting positions and the terrain advantages around resource expansions, while planning defensive and offensive routes through the canyons. As a multiplayer battlefield, communication among team members and map-reading skills play crucial roles, and adapting to the visual characteristics of the twilight tileset to gain an advantage in vision control will be key to achieving victory.
최근 등록된 맵
새로 추가된 파일과 버전을 확인하세요.
마법의 숲 탈출 (The Enchanted Forest)
《The Enchanted Forest》는 스타크래프트: 브루드워의 유즈맵으로, 프로토스 종족을 조종해 폐허가 된 숲 속에서 탈출구를 찾는 서바이벌 디펜스 장르의 맵이다. 내부 설명에 따르면 '프로토스가 행성을 탈출해야 한다'는 설정 하에 숲을 통과하는 길을 개척하고 적대적 환경 속에서 살아남는 것이 목표로 추정된다. 중앙의 넓은 평원과 그 주변을 감싸는 짙은 숲 지형이 특징이며, 숲은 어두운 초록색과 파란색으로 표현되어 있으며 곳곳에 붉은 점들이 흩어져 있어 방해 요소나 적의 위치로 추정된다. 맵 전체가 복잡한 지형을 이루고 있어 길찾기 요소가 강하며, 플레이어는 프로토스 유닛을 통제해 지형을 돌파하고 탈출로를 확보해야 한다. 숲의 밀집된 부분은 시야를 제한할 수 있어 전략적 판단이 요구되며, 탈출구가 맵의 가장자리에 위치하는 것으로 보아 목표는 맵 외곽으로의 도피로 보인다. 초보자보다는 경험이 있는 플레이어에게 적합한 구조로, 넓은 시야와 정확한 조작이 요구되는 맵으로 추정된다. 추천 플레이 전에는 맵의 주요 길목과 장애물의 위치를 숙지하는 것이 중요하며, 특히 숲의 밀집 지역을 통과할 때는 주의가 필요하다. 프로토스의 특성을 살려 빠른 기동력과 방어력을 활용하는 것이 핵심 전략이 될 것이다. The map 《The Enchanted Forest》 is a survival defense UMS (Use Map Settings) game in StarCraft: Brood War, where players control the Protoss faction to escape a ruined forest planet. The objective, as suggested by the internal description, involves navigating through the infested forest to find an exit while surviving hostile conditions. The map features a central open area surrounded by dense forest terrain, depicted in dark green and blue hues with scattered red dots likely representing obstacles or enemies. The complex layout demands strong pathfinding skills, as players must guide Protoss units through the forest to secure an escape route leading to the map's edges. The dense forest areas may restrict visibility, adding a layer of strategic depth. This map is more suited for experienced players due to its reliance on quick decision-making and precise unit control. Prior to playing, it is advisable to study key pathways and obstacles, particularly in the dense forest regions. Effective use of Protoss mobility and defensive capabilities will be crucial for success.
스피넬 밸리 3 OBs (| iCCup | Spinel Valley III OBs)
스타크래프트 브루드워 맵인 스피넬 밸리 3 OBs(| iCCup | Spinel Valley III OBs)는 황혼 타일셋을 배경으로 펼쳐지는 독특한 구조의 전장입니다. 본 맵은 오리지널 버전과 컨셉을 바탕으로 iCCup 플랫폼의 수정 과정을 거쳐 탄생한 이력이 있으며, 전형적인 밀리 맵의 형태를 띠면서도 관전(OB) 및 독특한 지형적 특징을 염두에 두고 다듬어진 것으로 보입니다. 전체적인 맵의 크기는 128x96의 넓은 대지를 자랑하며, 최대 8명의 플레이어가 참여할 수 있도록 설계되어 다인전 환경에 적합한 구성을 보여줍니다. 맵의 전반적인 레이아웃은 황혼 타일셋 특유의 붉고 거친 협곡과 언덕 지형이 유기적으로 얽혀 있는 형태입니다. 중앙의 넓은 개활지와 각 플레이어의 시작 지점 주변에 배치된 멀티 자원 지역은 자원 수급과 확장 타이밍의 중요성을 강조합니다. 지형적으로 복잡하게 얽힌 길목과 고저 차이가 존재하여, 병력 이동 경로 설정과 시야 확보가 승패를 가르는 중요한 요인으로 작용할 수 있습니다. 특히 다인전 상황에서 아군과의 협력이나 전략적인 위치 선점이 전투의 양상을 크게 바꿀 수 있는 구조를 취하고 있습니다. 이 맵은 스타크래프트 브루드워 유즈맵 및 밀리 전장의 매력을 동시에 즐기고자 하는 유저들에게 추천할 만합니다. 넓은 맵 크기와 다수의 플레이어 수용 인원을 바탕으로 대규모 교전과 전략적 심리전을 선호하는 플레이어들에게 흥미로운 경험을 선사할 것입니다. 플레이를 시작하기 전, 각 플레이어의 시작 위치와 자원 멀티 주변의 지형적 이점을 미리 파악하고, 협곡을 활용한 방어 및 진격 경로를 고민해 보는 것이 좋습니다. 다인전 전장인 만큼 팀원 간의 소통과 맵 리딩 능력이 중요하게 작용하며, 황혼 타일셋의 시각적 특성에 적응하여 시야 싸움에서 우위를 점하는 것이 승리를 위한 핵심 포인트가 될 것입니다. StarCraft Brood War map | iCCup | Spinel Valley III OBs is a distinct battlefield set against a twilight tileset, featuring a unique structural design. Based on original concepts and versions, this map underwent modifications through the iCCup platform, taking on a traditional melee appearance while being refined with observer elements and specific terrain characteristics in mind. Spanning a spacious 128x96 dimensions, the map accommodates up to eight players, making it well-suited for multiplayer matches. The overall layout organically intertwines the red, rugged canyons and elevated terrain characteristic of the twilight tileset. The expansive central area and the multi-resource locations placed around each player's starting point emphasize the importance of resource gathering and expansion timing. Complex paths and elevation differences can serve as critical factors where troop movement routing and vision control dictate victory or defeat. Especially in multiplayer scenarios, cooperation with allies and strategic positioning can significantly alter the flow of combat. This map is recommended for users who wish to enjoy the charm of both Brood War custom maps and competitive battlefields. Leveraging its large size and high player capacity, it offers an engaging experience for players who prefer large-scale engagements and strategic psychological warfare. Before starting a match, it is advisable to analyze the starting positions and the terrain advantages around resource expansions, while planning defensive and offensive routes through the canyons. As a multiplayer battlefield, communication among team members and map-reading skills play crucial roles, and adapting to the visual characteristics of the twilight tileset to gain an advantage in vision control will be key to achieving victory.
임파서블 시나리오 (Impossible Scenarios)
임파서블 시나리오(Impossible Scenarios)는 스타크래프트 브루드워 맵 가운데 독특한 구조와 고난도의 도전 과제를 제공하는 유즈맵이다. 전체적인 맵 구조를 살펴보면, 황혼 타일셋을 바탕으로 여러 개의 독립된 구역과 기지 형태가 사방에 배치되어 있는 것을 확인할 수 있다. 각 구역은 저마다 고유한 유닛 조합과 방어선, 또는 공략해야 할 오브젝트들을 품고 있으며, 플레이어는 제한된 자원과 상황 속에서 주어진 시나리오를 헤쳐 나가야 한다. 제목에서 느껴지듯 난이도가 만만치 않아 보이며, 맵 전반에 배치된 다양한 유닛 군집과 지형 배치는 철저한 전략과 세밀한 컨트롤을 요구하는 플레이 경험을 선사한다. 특히 다인용 플레이어 슬롯을 지원하는 만큼, 아군과의 유기적인 협동 플레이나 역할 분담이 게임의 승패를 가르는 중요한 요인으로 작용할 것으로 보인다. 복잡한 유닛 배치와 고난도 미션을 즐기는 유저들에게 적합하며, 색다른 도전 정신을 자극하는 컴까기나 서바이벌 계열의 유즈맵을 찾는 플레이어라면 한 번쯤 도전해 볼 만한 가치가 있는 맵이다. 플레이를 시작하기 전에 각 구역의 유닛 배치와 주변 지형의 특성을 미리 파악하고, 팀원들과의 협력 전략을 구상하는 것이 공략을 위한 좋은 출발점이 될 것이다. Impossible Scenarios is a custom map for Starcraft Brood War that presents a unique structure and high-difficulty challenges. Looking at the overall map layout based on the Twilight tileset, multiple independent sectors and base-like areas are distributed across the terrain. Each zone contains distinct unit combinations, defensive lines, or objectives that players must tackle under restricted resources and conditions. As the title suggests, the difficulty appears formidable, and the diverse unit clusters and terrain setups across the map offer a gameplay experience that demands careful strategy and precise control. Since it supports multi-player slots, organic cooperative play and role division among allies are likely key factors determining victory or defeat. This map is well-suited for users who enjoy complex unit placement and punishing missions, making it a worthy choice for players looking for a challenging computer-battle or survival-style custom map. Before starting a match, analyzing the unit distribution and surrounding terrain characteristics of each zone, while formulating a cooperative strategy with teammates, serves as a solid starting point for conquering the scenario.
골렘 No Double Perfected (Golem No Double Perfected)
스타크래프트 브루드워의 유즈맵 '골렘 No Double Perfected'는 고전적인 '골렘' 장르의 유즈맵을 한층 더 강화한 버전으로, 원본의 단점을 보완하고 완벽한 밸런스를 추구한 작품이다. 이 맵은 플레이어가 황금색 골렘을 조종해 적의 공격을 방어하며, 일정 조건을 달성하면 승리하는 디펜스형 유즈맵으로, 'No Double'이라는 이름에서 알 수 있듯 골렘의 중복 생성이나 특수 효과 중복 버그를 완벽히 제거했다는 특징이 있다. 맵의 주요 특징은 골렘의 단계별 진화와 강력한 스킬 시스템에 있다. 초반에는 기본 골렘으로 시작해 적의 공격을 방어하며 자원을 모은 뒤, 특정 조건(예: 특정 적 처치, 시간 경과 등)을 만족하면 더 강력한 골렘으로 진화할 수 있으며, 각 골렘은 고유한 스킬을 보유하고 있어 전략적 플레이가 요구된다. 특히, 맵의 오른쪽에 위치한 오렌지색 기지에서 시작하는 플레이어는 버그 없이 안정적으로 골렘을 운용할 수 있도록 설계되어 있으며, 이는 맵의 'Perfected'라는 수식어가 붙은 이유이기도 하다. 맵의 구조는 중앙에 위치한 넓은 길과 양옆의 협소한 길로 나뉘어 있어, 플레이어는 자신의 골렘을 효율적으로 배치하고 적의 공격을 방어해야 한다. 또한, 맵 곳곳에 배치된 자원 상자와 미네랄 멀티는 골렘의 진화를 가속화하는 데 도움을 주며, 이를 활용한 전략적 플레이가 승리의 관건이 된다. 이 맵은 5인용으로 설계되었지만, 팀플레이보다는 개별 플레이어가 골렘을 조종하는 1인용 디펜스 게임에 가깝다. 초보 플레이어의 경우 골렘의 특성이나 맵의 구조를 제대로 이해하지 못해 어려움을 느낄 수 있지만, 골렘의 스킬을 숙지하고 자원을 효율적으로 관리한다면 충분히 도전해 볼 만한 가치가 있다. 특히, 골렘의 진화 조건과 스킬의 조합을 익히는 것이 관전 포인트다. 이 맵을 플레이하기 전에는 골렘의 진화 단계와 각 단계별 스킬을 미리 확인하고, 맵의 주요 자원 위치와 적의 공격 패턴을 숙지하는 것이 중요하다. 또한, 오렌지색 기지에서 시작하는 플레이어는 초반 방어에 좀 더 신경 쓸 필요가 있으며, 중앙 길의 협소한 구간에서는 골렘의 배치 위치를 신중히 결정해야 한다. 이 맵은 디펜스 장르에 익숙한 플레이어에게는 훌륭한 도전 과제가 될 것이며, 골렘의 전략적 운용을 통해 새로운 재미를 느낄 수 있을 것이다. 그뿐만 아니라, 'No Double'이라는 이름처럼 버그가 완벽히 제거된 맵이기 때문에 안정적인 플레이가 가능하다는 점도 큰 장점이다. "Golem No Double Perfected," a classic *Golem*-genre custom map from *StarCraft: Brood War*, is an enhanced version that addresses the flaws of the original while striving for perfect balance. This defense-style map has players controlling a golden golem to fend off enemy attacks, achieving victory upon meeting specific conditions. As the name *No Double* suggests, the map eliminates all duplicate golem spawning and special effect bugs, ensuring a polished experience. The map’s core mechanics revolve around golem evolution and its robust skill system. Players begin with a basic golem, gathering resources while defending against attacks. Once certain conditions are met—such as defeating specific enemies or passing a time threshold—the golem evolves into a stronger form, each with unique abilities that demand strategic play. Notably, the player starting at the orange base on the right can operate their golem without bugs, a key reason for the "Perfected" in the title. The map’s layout features a wide central path flanked by narrow side routes, requiring players to position their golems efficiently and defend against incoming assaults. Scattered resource boxes and mineral patches across the map accelerate golem evolution, making resource management a critical factor in victory. Though designed for five players, the gameplay leans more toward a solo defense experience, where individual players control their golems rather than relying on teamwork. Beginners may struggle initially due to unfamiliarity with golem mechanics or map layout, but mastering the golems’ skills and optimizing resource use makes the challenge rewarding. The real highlight lies in experimenting with different golem evolution paths and skill combinations. Before playing, it’s essential to study the golem’s evolution stages and abilities, identify key resource locations, and learn enemy attack patterns. Orange-base players should prioritize early defense, while those navigating the narrow central paths must carefully plan golem placements. For fans of defense games, this map offers a compelling challenge, delivering fresh strategic depth through golem management. Additionally, its bug-free design—reflected in the *No Double* name—ensures a stable and enjoyable experience.
해변 across the Cape (Across the Cape)
이 맵은 스타크래프트: 브루드워의 해변가 지형을 배경으로 한 멀티 플레이어 전투형 맵으로, 해변을 따라 펼쳐진 넓은 전장 위에서 벌어지는 전투가 특징이다. Across the Cape는 이름 그대로 곶(cape)을 가로지르는 전투를 의미하며, 넓은 개활지와 해안선을 따라 펼쳐진 다양한 지형이 플레이어들에게 전략적인 선택지를 제공한다. 맵의 중앙부는 비교적 평탄한 지형이지만, 해안선을 따라는 바위가 흩어져 있어 진영 방어와 진격로 설계에 영향을 미친다. 특히 해변가 주변의 얕은 물은 시야 방해 요소가 되지 않지만, 병력의 기동성을 제약하는 요소로 작용할 수 있어 유닛 조합과 타이밍을 신중히 고려해야 한다. 이 맵의 핵심은 해변가라는 독특한 지형을 활용한 방어와 공격의 균형이다. 플레이어들은 해안선을 따라 방어선을 구축하거나, 적의 후방을 교란하는 전략을 펼칠 수 있으며, 넓디넓은 전장 덕분에 소규모 병력 간의 교전이 빈번하게 발생한다. 맵의 중앙부는 비교적 개방되어 있어 테란의 벙커링이나 프로토스의 방어탑 전략이 유효할 수 있지만, 해안선 near의 좁은 길목은 치열한 난타전이 벌어질 가능성이 높다. 따라서 초반부터 병력의 양과 질을 균형 있게 유지하는 것이 중요하다. Across the Cape는 2~6명의 플레이어가 참여할 수 있는 멀티 플레이 전용 맵으로, 동맹 플레이 시에는 맵 설정(USE MAP SETTINGS)을 통해 팀별로 협력할 수 있도록 설계되었다. 해변가라는 특성상 테란의 시즈 탱크나 프로토스의 캐리어 같은 공중 유닛이 상대적으로 유리할 수 있지만, 지상 병력의 비중도 결코 낮지 않다. 따라서 유저들은 맵의 특징을 잘 파악하고, 자신의 종족과 전략에 맞는 유닛 조합을 준비해야 한다. 넓은 전장 덕분에 초보자와 숙련자 모두에게 매력적인 맵으로, 특히 해변가 전투의 묘미를 즐기고 싶은 플레이어들에게 추천한다. 플레이 전에는 해안선 near의 좁은 길목과 중앙부의 개활지를 미리 점검해 두는 것이 좋다. This map is a multiplayer combat-focused StarCraft: Brood War map set against a coastal terrain, featuring battles unfolding across a vast battlefield with diverse terrain along the shoreline. Across the Cape, as the name suggests, signifies combat spanning a cape, with a relatively flat central area but scattered rocks along the coastline that influence base defense and advance routes. The shallow waters near the shoreline do not obstruct vision but can limit unit mobility, necessitating careful consideration of unit compositions and timing. The core of this map lies in the balance between defense and offense leveraging the unique coastal terrain. Players can establish defensive lines along the shoreline or disrupt the enemy's rear with strategic maneuvers. The open central area allows for effective strategies like Terran bunker rushes or Protoss photon cannon setups, while the narrow passages near the shoreline are prone to intense close-quarters combat. Maintaining a balanced quantity and quality of units from the early game is crucial. Across the Cape is a multiplayer-exclusive map designed for 2 to 6 players, with team-based cooperation possible via map settings in allied play. The coastal terrain may favor aerial units like Terran siege tanks or Protoss carriers, but ground units remain significant. Players should familiarize themselves with the map's features and prepare unit compositions tailored to their race and strategy. Its vast battlefield appeals to both beginners and veterans, especially those seeking the thrill of coastal combat. Before playing, it’s advisable to scout the narrow shoreline passages and central open areas.
네메시스 (Nemesis)
스타크래프트: 브루드워의 네메시스(Nemesis)는 2인용 밀리전 맵으로, 플레이어 각각이 상대방의 넥서스를 파괴하는 것이 승리 조건이다. 평평한 플랫폼맵 형태의 맵은 중앙에 넓은 평지가 펼쳐져 있으며, 양쪽 기지 사이를 가로지르는 좁은 다리가 있다. 양 플레이어의 본진은 맵의 양쪽 끝 모서리에 위치해 있으며, 입구는 좁고 방어하기 쉬운 구조로 되어 있어 초반 러시가 중요해 보인다. 맵 중앙의 넓은 평지는 빠른 이동과 전투가 가능한 공간으로, 초반에 적을 제압하거나, 중반 이후에는 대규모 병력 교전지로 활용될 가능성이 크다. 맵 전체가 균형 잡힌 구조로, 양 플레이어의 시작 위치와 자원 분포가 동일하여 공정한 플레이가 가능하다. 다만, 좁은 입구와 중앙 다리로 인한 병력 이동의 제한이 게임의 긴장감을 높이는 요소로 작용할 수 있다. 초보 플레이어는 좁은 통로를 활용한 방어와 빠른 정찰을 중시해야 하며, 숙련된 플레이어는 중앙 평지에서 우위를 점하기 위한 전략적 움직임이 중요해 보인다. 맵의 간결한 구조는 빠른 게임 진행을 가능하게 하며, 특히 2인 대전이기에 긴장감과 박진감이 뛰어나다.Nemesis는 2인용 밀리전 맵으로, 상대 넥서스 파괴가 목표다. 중앙 넓은 평지와 양쪽 기지를 연결하는 좁은 다리가 특징이며, 입구는 좁고 방어하기 쉬운 구조로 초반 러시가 중요하다. 양 플레이어의 자원과 시작 위치가 동일해 공정성을 유지하며, 좁은 통로와 중앙 평지의 제한된 공간이 긴장감을 높인다. 초보자는 빠른 정찰과 방어에 중점을 두고, 숙련자는 중앙 평지에서 전략적 우위를 점하는 데 집중해야 한다. 맵의 간결한 구조는 빠른 게임 플레이를 지원하며, 2인 대전의 박진감이 뛰어나다. Nemesis from StarCraft: Brood War is a two-player melee map where the objective is to destroy the opponent's Nexus. The map features a flat platform design with a wide central plain and a narrow bridge connecting the two bases. Each player's main base is located at opposite corners of the map, with a narrow, easily defensible entrance that makes early rushes crucial. The central plain allows for quick movement and combat, making it ideal for early harassment or large-scale battles in the mid-to-late game. The balanced layout ensures fair play, as both players start with identical resource distribution and positions. However, the narrow entrances and central bridge can restrict troop movements, adding tension to the game. Beginners should focus on quick scouting and defense through the tight passages, while skilled players need to prioritize strategic positioning on the central plain to gain an advantage. The map's straightforward design enables fast-paced gameplay, and its two-player format delivers intense, thrilling matches.
맵 선택 가이드
태그는 맵의 핵심 특징을 빠르게 설명하지만 제작 버전마다 규칙이 다를 수 있습니다. 상세 설명에서 권장 인원, 난이도, 플레이 시간과 버전을 함께 확인한 뒤 다운로드하세요.