
보스 디펜스 스타크래프트 맵 모음
'보스 디펜스' 태그가 등록된 맵을 모았습니다. 장르 하나로 찾기 어려운 플레이 방식, 난이도와 특징을 중심으로 인기 맵과 최신 맵을 비교해 보세요.
- 등록 맵
- 2개
- 누적 다운로드
- 0
- 누적 조회
- 47
인기 맵
다운로드와 조회 반응이 높은 맵입니다.
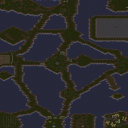
마진 Shenron (DBAF-Majin Shenron)
DBAF-Majin Shenron은 스타크래프트: 브루드워의 유즈맵으로, 사막 테마의 거대한 맵에서 펼쳐지는 흥미로운 전투를 경험할 수 있는 디펜스 장르의 맵입니다. 맵의 중앙에는 넓은 평원이 펼쳐져 있으며, 주변으로는 바위와 언덕 지형이 펼쳐져 있어 방어 거점을 확보하기에 적합한 구조를 가지고 있습니다. 맵의 외곽으로는 높은 언덕과 협곡이 자리 잡고 있어 적의 접근을 차단하거나 요새를 구축하기에 이상적인 환경을 제공합니다. 이 맵은 플레이어가 적의 공격을 방어하면서 주요 건물을 보호하는 동시에, 일정 시간마다 등장하는 보스급 유닛을 처치하는 것이 주요 목표로 보입니다. 맵의 구조상 중앙 평원은 넓은 시야를 확보할 수 있어 적의 움직임을 미리 포착할 수 있지만, 반대로 적의 기습 공격에 취약할 수 있는 구조이기도 합니다. 맵의 가장자리에 위치한 협곡과 언덕은 방어 시설을 구축하거나 요새를 건설하기에 적합한 장소로, 플레이어는 이곳을 활용해 전략적인 방어를 펼칠 수 있습니다. 플레이어는 7명의 인원으로 구성되며, 각 플레이어는 고유한 시작 지점에서 게임을 시작합니다. 맵의 중앙에 위치한 보스는 게임의 난이도를 높이는 요소로, 플레이어들은 협력하여 보스를 처치해야 합니다. 맵의 지형은 사막 특유의 황량한 분위기를 자아내며, 넓은 시야와 험준한 지형이 어우러져 전략적인 플레이가 요구됩니다. 맵의 구조상 중앙 평원은 개방되어 있지만, 외곽의 협곡과 언덕은 방어에 유리한 지형을 제공합니다. 이 맵은 디펜스 장르의 유즈맵으로써, 방어 시설을 구축하고 적의 공격을 막아내는 전략적인 요소가 강합니다. 또한, 보스급 유닛의 처치가 게임의 주요 목표 중 하나로, 플레이어 간의 협력이 요구되는 요소도 포함되어 있습니다. 맵의 크기와 지형은 넓은 시야와 험준한 지형을 제공하여 전략적인 플레이를 이끌어내며, 사막 테마의 분위기는 게임의 몰입감을 높이는 요소로 작용합니다. 이 맵은 방어와 협력이 주된 전략을 요구하는 맵으로, 디펜스 장르를 좋아하는 플레이어들에게 추천할 만한 작품입니다. 플레이 전에는 맵의 지형과 주요 방어 거점을 미리 파악하여 전략을 세우는 것이 중요합니다. DBAF-Majin Shenron is a user-made defense map in StarCraft: Brood War, set in a vast desert-themed battlefield where players must strategically defend against waves of enemies while targeting powerful boss units that appear periodically. The map features a central open plain surrounded by rocky hills and valleys, providing both expansive visibility and natural choke points for defensive positioning. The central area allows players to monitor enemy movements early, but its openness also makes it vulnerable to sudden rushes. The surrounding valleys and elevated terrain offer ideal spots for constructing defensive structures or towers, enabling players to control the battlefield more effectively. With a player count of seven, each participant starts from distinct positions, forcing coordination to protect shared objectives while tackling the recurring boss challenges. The desert aesthetic enhances immersion, while the terrain's mix of open fields and rugged high ground creates a dynamic environment that rewards strategic foresight. As a defense-focused UMS map, it emphasizes base-building, resource management, and teamwork to withstand enemy assaults. Players should familiarize themselves with high-ground positions and potential flanking routes to optimize their defensive setup before the first wave arrives. This map is ideal for those who enjoy tactical defense mechanics and cooperative boss hunts in a visually striking desert landscape.
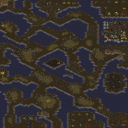
DBGT 헬즈 베스트 리턴즈 SE3 (DBGT Hells Best Returns SE3)
DBGT Hells Best Returns SE3는 드래곤볼 GT의 인기 캐릭터들을 주제로 한 스타크래프트 브루드워의 UMS(유즈맵) 유형의 맵으로, 7명의 플레이어가 한 팀을 이뤄 보스 몬스터를 상대로 전투를 펼치는 컴까기 장르의 디펜스 맵이다. 맵의 배경은 황무지 타일셋으로 구성되어 있으며, 맵 중앙에 위치한 거대한 보스 존에서 전투가 진행된다. 맵 제목에서 알 수 있듯이 DBGT(드래곤볼 GT)의 주요 캐릭터인 제네바, 힐데가른, 브롤리 등 강력한 보스들이 등장해 플레이어들에게 도전 과제를 제공한다. 이 맵은 ‘Art of Double Fusion’의 개선판으로, 원작의 스킬 밸런스와 진행 구조를 개선해 더 쾌적한 플레이 경험을 제공하도록 제작되었다. 맵의 구조는 비교적 심플한 편이지만, 보스 몬스터의 패턴과 등장 순서가 플레이어의 전략에 따라 달라질 수 있어 전략적 깊이가 존재한다. 특히 보스 존 주변의 자원과 방어 건물의 배치가 중요하며, 초보 플레이어의 경우 보스 몬스터의 강력한 공격에 대응하기 위한 준비가 필수적이다. 맵의 난이도는 보스 몬스터의 조합과 패턴에 따라 크게 달라질 수 있어, 숙련된 플레이어와 초보자 간의 차이가 두드러지는 특징이 있다. 이 맵을 플레이하기 위해서는 드래곤볼 GT의 팬이 아니더라도 캐릭터별 스킬과 보스의 패턴을 미리 숙지하는 것이 유리하며, 팀원과의 조율 또한 중요하다. 맵의 진행 방식은 보스를 물리치면 새로운 보스가 등장하는 방식으로 구성되어 있어, 끊임없는 전투와 전략적 대비를 요구한다. 또한 맵의 규모가 크고 타일셋이 황무지로 구성되어 있어 시야 확보가 용이한 편이지만, 보스 존 주변의 좁은 통로에서는 조종과 시야 관리가 어려울 수 있어 주의가 필요하다. 이 맵은 드래곤볼 GT의 팬들에게는 익숙한 캐릭터와 스토리를 체험할 수 있는 즐거운 경험을 제공하며, 컴까기 장르를 좋아하는 플레이어들에게는 흥미로운 도전 과제를 제공할 것이다. 특히 보스 몬스터의 패턴을 분석하고, 팀원과의 협력을 통해 승리를 쟁취하는 재미가 큰 맵으로 추천된다. 다만, 보스 몬스터의 난이도가 높고 진행 방식이 반복적일 수 있어, 새로운 전략을 시도해 보고 싶어 하는 플레이어들에게 더 적합할 수 있다. DBGT Hells Best Returns SE3 is a UMS (user-made scenario) type map for *StarCraft: Brood War* themed around popular characters from *Dragon Ball GT*, where seven players form a team to battle boss monsters in a defense-style "compete to kill" genre. The map features a wasteland tile set, with battles taking place in a massive boss zone located at the center of the map. As the title suggests, the map features powerful boss characters from *Dragon Ball GT*, such as Janemba, Hildegarn, and Broly, who present challenging objectives for players. This map is an improved version of "Art of Double Fusion," designed to enhance the original's skill balance and progression structure for a more enjoyable gameplay experience. While the map's layout is relatively simple, the boss monsters' patterns and spawn order can vary based on player strategies, adding depth to the gameplay. The placement of resources and defensive structures around the boss zone is crucial, and beginners must prepare thoroughly to counter the bosses' powerful attacks. The difficulty of the map can vary significantly depending on the bosses' combinations and patterns, making it a standout feature where experienced players and newcomers can clearly see the difference. Even if you're not a fan of *Dragon Ball GT*, familiarizing yourself with the characters' skills and the bosses' patterns beforehand is advantageous, and coordination with teammates is essential. The map progresses by defeating bosses to summon new ones, requiring constant combat readiness and strategic planning. While the map's large scale and wasteland tile set make visibility relatively easy, the narrow passages around the boss zone can make control and visibility management difficult, so caution is advised. For fans of *Dragon Ball GT*, this map offers a fun experience with familiar characters and lore, while also providing an engaging challenge for players who enjoy the "compete to kill" genre. It's especially recommended for those who enjoy analyzing boss patterns and working with teammates to secure victory. However, due to the high difficulty of the bosses and the somewhat repetitive progression, it may be better suited for players looking to experiment with new strategies.
최근 등록된 맵
새로 추가된 파일과 버전을 확인하세요.
DBGT 헬즈 베스트 리턴즈 SE3 (DBGT Hells Best Returns SE3)
DBGT Hells Best Returns SE3는 드래곤볼 GT의 인기 캐릭터들을 주제로 한 스타크래프트 브루드워의 UMS(유즈맵) 유형의 맵으로, 7명의 플레이어가 한 팀을 이뤄 보스 몬스터를 상대로 전투를 펼치는 컴까기 장르의 디펜스 맵이다. 맵의 배경은 황무지 타일셋으로 구성되어 있으며, 맵 중앙에 위치한 거대한 보스 존에서 전투가 진행된다. 맵 제목에서 알 수 있듯이 DBGT(드래곤볼 GT)의 주요 캐릭터인 제네바, 힐데가른, 브롤리 등 강력한 보스들이 등장해 플레이어들에게 도전 과제를 제공한다. 이 맵은 ‘Art of Double Fusion’의 개선판으로, 원작의 스킬 밸런스와 진행 구조를 개선해 더 쾌적한 플레이 경험을 제공하도록 제작되었다. 맵의 구조는 비교적 심플한 편이지만, 보스 몬스터의 패턴과 등장 순서가 플레이어의 전략에 따라 달라질 수 있어 전략적 깊이가 존재한다. 특히 보스 존 주변의 자원과 방어 건물의 배치가 중요하며, 초보 플레이어의 경우 보스 몬스터의 강력한 공격에 대응하기 위한 준비가 필수적이다. 맵의 난이도는 보스 몬스터의 조합과 패턴에 따라 크게 달라질 수 있어, 숙련된 플레이어와 초보자 간의 차이가 두드러지는 특징이 있다. 이 맵을 플레이하기 위해서는 드래곤볼 GT의 팬이 아니더라도 캐릭터별 스킬과 보스의 패턴을 미리 숙지하는 것이 유리하며, 팀원과의 조율 또한 중요하다. 맵의 진행 방식은 보스를 물리치면 새로운 보스가 등장하는 방식으로 구성되어 있어, 끊임없는 전투와 전략적 대비를 요구한다. 또한 맵의 규모가 크고 타일셋이 황무지로 구성되어 있어 시야 확보가 용이한 편이지만, 보스 존 주변의 좁은 통로에서는 조종과 시야 관리가 어려울 수 있어 주의가 필요하다. 이 맵은 드래곤볼 GT의 팬들에게는 익숙한 캐릭터와 스토리를 체험할 수 있는 즐거운 경험을 제공하며, 컴까기 장르를 좋아하는 플레이어들에게는 흥미로운 도전 과제를 제공할 것이다. 특히 보스 몬스터의 패턴을 분석하고, 팀원과의 협력을 통해 승리를 쟁취하는 재미가 큰 맵으로 추천된다. 다만, 보스 몬스터의 난이도가 높고 진행 방식이 반복적일 수 있어, 새로운 전략을 시도해 보고 싶어 하는 플레이어들에게 더 적합할 수 있다. DBGT Hells Best Returns SE3 is a UMS (user-made scenario) type map for *StarCraft: Brood War* themed around popular characters from *Dragon Ball GT*, where seven players form a team to battle boss monsters in a defense-style "compete to kill" genre. The map features a wasteland tile set, with battles taking place in a massive boss zone located at the center of the map. As the title suggests, the map features powerful boss characters from *Dragon Ball GT*, such as Janemba, Hildegarn, and Broly, who present challenging objectives for players. This map is an improved version of "Art of Double Fusion," designed to enhance the original's skill balance and progression structure for a more enjoyable gameplay experience. While the map's layout is relatively simple, the boss monsters' patterns and spawn order can vary based on player strategies, adding depth to the gameplay. The placement of resources and defensive structures around the boss zone is crucial, and beginners must prepare thoroughly to counter the bosses' powerful attacks. The difficulty of the map can vary significantly depending on the bosses' combinations and patterns, making it a standout feature where experienced players and newcomers can clearly see the difference. Even if you're not a fan of *Dragon Ball GT*, familiarizing yourself with the characters' skills and the bosses' patterns beforehand is advantageous, and coordination with teammates is essential. The map progresses by defeating bosses to summon new ones, requiring constant combat readiness and strategic planning. While the map's large scale and wasteland tile set make visibility relatively easy, the narrow passages around the boss zone can make control and visibility management difficult, so caution is advised. For fans of *Dragon Ball GT*, this map offers a fun experience with familiar characters and lore, while also providing an engaging challenge for players who enjoy the "compete to kill" genre. It's especially recommended for those who enjoy analyzing boss patterns and working with teammates to secure victory. However, due to the high difficulty of the bosses and the somewhat repetitive progression, it may be better suited for players looking to experiment with new strategies.
마진 Shenron (DBAF-Majin Shenron)
DBAF-Majin Shenron은 스타크래프트: 브루드워의 유즈맵으로, 사막 테마의 거대한 맵에서 펼쳐지는 흥미로운 전투를 경험할 수 있는 디펜스 장르의 맵입니다. 맵의 중앙에는 넓은 평원이 펼쳐져 있으며, 주변으로는 바위와 언덕 지형이 펼쳐져 있어 방어 거점을 확보하기에 적합한 구조를 가지고 있습니다. 맵의 외곽으로는 높은 언덕과 협곡이 자리 잡고 있어 적의 접근을 차단하거나 요새를 구축하기에 이상적인 환경을 제공합니다. 이 맵은 플레이어가 적의 공격을 방어하면서 주요 건물을 보호하는 동시에, 일정 시간마다 등장하는 보스급 유닛을 처치하는 것이 주요 목표로 보입니다. 맵의 구조상 중앙 평원은 넓은 시야를 확보할 수 있어 적의 움직임을 미리 포착할 수 있지만, 반대로 적의 기습 공격에 취약할 수 있는 구조이기도 합니다. 맵의 가장자리에 위치한 협곡과 언덕은 방어 시설을 구축하거나 요새를 건설하기에 적합한 장소로, 플레이어는 이곳을 활용해 전략적인 방어를 펼칠 수 있습니다. 플레이어는 7명의 인원으로 구성되며, 각 플레이어는 고유한 시작 지점에서 게임을 시작합니다. 맵의 중앙에 위치한 보스는 게임의 난이도를 높이는 요소로, 플레이어들은 협력하여 보스를 처치해야 합니다. 맵의 지형은 사막 특유의 황량한 분위기를 자아내며, 넓은 시야와 험준한 지형이 어우러져 전략적인 플레이가 요구됩니다. 맵의 구조상 중앙 평원은 개방되어 있지만, 외곽의 협곡과 언덕은 방어에 유리한 지형을 제공합니다. 이 맵은 디펜스 장르의 유즈맵으로써, 방어 시설을 구축하고 적의 공격을 막아내는 전략적인 요소가 강합니다. 또한, 보스급 유닛의 처치가 게임의 주요 목표 중 하나로, 플레이어 간의 협력이 요구되는 요소도 포함되어 있습니다. 맵의 크기와 지형은 넓은 시야와 험준한 지형을 제공하여 전략적인 플레이를 이끌어내며, 사막 테마의 분위기는 게임의 몰입감을 높이는 요소로 작용합니다. 이 맵은 방어와 협력이 주된 전략을 요구하는 맵으로, 디펜스 장르를 좋아하는 플레이어들에게 추천할 만한 작품입니다. 플레이 전에는 맵의 지형과 주요 방어 거점을 미리 파악하여 전략을 세우는 것이 중요합니다. DBAF-Majin Shenron is a user-made defense map in StarCraft: Brood War, set in a vast desert-themed battlefield where players must strategically defend against waves of enemies while targeting powerful boss units that appear periodically. The map features a central open plain surrounded by rocky hills and valleys, providing both expansive visibility and natural choke points for defensive positioning. The central area allows players to monitor enemy movements early, but its openness also makes it vulnerable to sudden rushes. The surrounding valleys and elevated terrain offer ideal spots for constructing defensive structures or towers, enabling players to control the battlefield more effectively. With a player count of seven, each participant starts from distinct positions, forcing coordination to protect shared objectives while tackling the recurring boss challenges. The desert aesthetic enhances immersion, while the terrain's mix of open fields and rugged high ground creates a dynamic environment that rewards strategic foresight. As a defense-focused UMS map, it emphasizes base-building, resource management, and teamwork to withstand enemy assaults. Players should familiarize themselves with high-ground positions and potential flanking routes to optimize their defensive setup before the first wave arrives. This map is ideal for those who enjoy tactical defense mechanics and cooperative boss hunts in a visually striking desert landscape.
맵 선택 가이드
태그는 맵의 핵심 특징을 빠르게 설명하지만 제작 버전마다 규칙이 다를 수 있습니다. 상세 설명에서 권장 인원, 난이도, 플레이 시간과 버전을 함께 확인한 뒤 다운로드하세요.