
벙커 디펜스 스타크래프트 맵 모음
'벙커 디펜스' 태그가 등록된 맵을 모았습니다. 장르 하나로 찾기 어려운 플레이 방식, 난이도와 특징을 중심으로 인기 맵과 최신 맵을 비교해 보세요.
- 등록 맵
- 17개
- 누적 다운로드
- 0
- 누적 조회
- 461
인기 맵
다운로드와 조회 반응이 높은 맵입니다.
Amazing TD Shadow Perfect
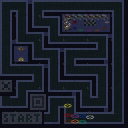
스타크래프트 브루드워 유즈맵 중 디펜스 장르를 선호하는 플레이어라면 'Amazing TD Shadow Perfect' 맵에 주목할 만합니다. 이 맵은 7인 협동 플레이에 최적화된 타워 디펜스(Turret Defense) 유형으로, 끊임없이 몰려오는 적들을 막아내는 전략적인 재미를 선사합니다. 맵 전체는 화산(Ashworld) 타일셋을 활용하여 어둡고 음침하면서도 긴장감 넘치는 분위기를 연출하며, 적 유닛들이 이동하는 복잡한 미로형 경로가 중앙에 자리하고 있습니다. 플레이어들은 맵 우측 상단에 위치한 방어 거점에 벙커를 건설하고, 그 안에 다양한 유닛들을 배치하여 방어선을 구축하게 됩니다. 내부 맵 설명에 따르면 '각 벙커에 3개의 유닛이 배치'되며, '더욱 강력해진 적들'이 등장한다고 명시되어 있어 기존 타워 디펜스 맵보다 한층 높은 난이도와 전략적 깊이를 기대할 수 있습니다. 또한 '향상된 금지(Improved Ban)' 기능과 '다양한 변화'가 적용되었다고 언급되어, 단순한 유닛 배치 외에 추가적인 시스템이나 업그레이드 요소가 존재할 것으로 추정됩니다. 맵 하단에는 7명의 플레이어를 위한 것으로 보이는 색상별 시작 지점이 마련되어 있으며, 좌측에는 방어해야 할 목표물로 추정되는 노란색 구조물들이 눈에 띕니다. 이 맵은 친구들과 함께 협동하여 난이도 높은 디펜스를 공략하고 싶은 유저들에게 특히 추천합니다. 강력한 적들에 맞서 최적의 방어 라인을 구축하고, 팀원들과의 유기적인 협력을 통해 승리하는 쾌감을 경험할 수 있을 것입니다. 플레이 전에는 팀원들과의 역할 분담 및 전략 수립이 중요합니다. For StarCraft Brood War UMS map players who enjoy the defense genre, 'Amazing TD Shadow Perfect' is a map worth noting. This map is a Tower Defense (Turret Defense) type optimized for 7-player cooperative play, offering strategic fun as players fend off relentless waves of enemies. The entire map utilizes the Ashworld tileset, creating a dark, gloomy, yet tense atmosphere, with a complex maze-like path for enemy units to traverse centrally located. Players establish their defense lines by constructing bunkers in the designated defense zone located at the top right of the map and deploying various units within them. According to the internal map description, "3 Units in each bunker" and "Stronger Foes" are featured, suggesting a higher difficulty and deeper strategic complexity compared to conventional tower defense maps. Furthermore, the mention of "Improved Ban" functionality and "Various other changes" implies the existence of additional systems or upgrade elements beyond simple unit placement. At the bottom of the map, there are colored starting points seemingly prepared for 7 players, and on the left, yellow structures are visible, presumed to be objectives that need defending. This map is particularly recommended for users who wish to cooperate with friends to tackle a high-difficulty defense challenge. Players can experience the satisfaction of building an optimal defense line against powerful foes and achieving victory through organic cooperation with teammates. Prior to playing, it is crucial to discuss role assignments and strategy with your teammates.
랜덤 벙커 디펜스 (Random Bunker Def)
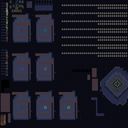
스타크래프트 브루드워의 대표적인 유즈맵 장르 중 하나인 ‘랜덤 벙커 디펜스’는 플레이어가 적의 공격을 막아내며 점차 강해지는 방어형 게임입니다. 맵은 중앙에 위치한 주요 벙커를 중심으로 주변에서 끊임없이 몰려드는 적들을 상대해야 하는데, 적의 종류와 스폰 위치는 랜덤으로 구성되어 매 플레이마다 다른 전략을 요구합니다. 벙커는 일정 시간마다 방어 건물이나 유닛을 생산할 수 있는 공간으로, 플레이어는 자원과 시간을 효율적으로 분배해 벙커를 강화하거나 유닛을 생산해야 합니다. 특히 맵의 오른쪽 상단과 왼쪽 하단에 위치한 보급고에서는 추가 자원을 확보할 수 있어, 이 곳을 얼마나 잘 활용하느냐가 승부의 관건으로 보입니다. 게임의 진행은 크게 세 단계로 나뉩니다. 초반에는 기본 유닛만으로 적을 막아내야 하며, 중반에는 방어 건물과 보조 유닛을 배치해 안정적으로 버티는 것이 중요합니다. 후반으로 갈수록 적의 공격력이 강해지고 스폰 속도도 빨라지므로, 벙커의 업그레이드와 자원 관리에 신경 써야 합니다. 또한, 맵 곳곳에 흩어져 있는 아이템이나 보너스 지역을 발견하면 일시적으로 powerful한 능력을 얻을 수 있어, 이를 잘 활용하는 플레이어가 승리할 확률이 높습니다. 전체적으로는 ‘막고 버티며 성장하기’라는 기본 틀을 지키면서도, 랜덤 요소와 아이템 운이 게임의 재미를 더하는 요소로 작용합니다. 이 맵은 일반적으로 1인 플레이가 권장되며, 혼자서도 충분히 즐길 수 있지만, 팀 플레이로도 변형해 플레이할 수 있습니다. 난이도는 초보자의 경우 적의 공격 패턴에 익숙해지는 데 시간이 걸릴 수 있지만, 몇 번 플레이하다 보면 방어 전술을 익히게 됩니다. 추천하는 대상은 방어형 게임을 좋아하거나, 전략적 사고를 즐기는 플레이어들에게 적합합니다. 특히 스타크래프트의 밸런스와 유닛 조합에 익숙한 유저라면 더 재미있게 즐길 수 있을 것입니다. 플레이 전에 맵의 주요 구조와 아이템 위치를 미리 확인해 두면 더 효과적인 플레이가 가능합니다. Random Bunker Def is a popular user-made defense map in StarCraft: Brood War where players must survive waves of randomly spawned enemies by fortifying bunkers and strategically managing resources. The central bunker serves as the core production hub, allowing players to train defensive units or upgrade defenses over time. The map features supply depots positioned in the upper right and lower left corners, providing additional resources to reinforce bunkers or expand unit production. The gameplay unfolds in distinct phases: early stages require holding the line with basic units, the mid-game demands efficient placement of defensive structures and auxiliary units, and the late-game escalates with stronger enemies spawning rapidly. Players must balance bunker upgrades, resource accumulation, and exploration to discover hidden items or bonus areas that grant temporary powerful abilities. These random elements add unpredictability, making each playthrough unique and challenging. Designed primarily for solo play, the map can also be adapted for team-based variations, though balancing may require adjustments. While beginners may struggle initially with enemy attack patterns, repeated play helps refine defensive strategies. This map appeals to players who enjoy strategic, endurance-focused gameplay and have a solid understanding of StarCraft’s unit interactions. Reviewing the map layout and item locations beforehand can significantly improve performance. Overall, it’s a well-structured defense challenge that rewards careful planning and adaptability.
CooltyDefense
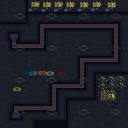
'쿨티 디펜스(Coolty Defense)'는 파일명 'BunkerUM.scx'에서 유추할 수 있듯 벙커와 방어 건물을 지어 입구를 틀어막고 끝없이 몰려오는 적 병력을 막아내는 전형적인 입구막기(벙커 디펜스) 유즈맵이다. 화산(Volcano) 타일셋 기반의 2048x2048 대형 전장에서 최대 7명이 한 팀이 되어 협력하는 구조로 보이며, 내부 맵 제목과 설명이 모두 'CooltyDefense'로 동일하게 표기되어 제작자의 기획 의도가 비교적 명확하게 전달된다. 플레이어는 제한된 자원과 공간 안에서 벙커, 미사일 터렛, 유닛을 적절히 배치하고 업그레이드하며 점점 거세지는 웨이브를 견뎌야 한다. 7인 풀파티 기준 난이도 스케일링이 어떻게 적용되는지가 핵심 변수로 보이며, 맵이 넓은 만큼 초반 자원 확보와 멀티태스킹, 후반부 대형 유닛 대응을 위한 병력 조합 및 컨트롤이 승패를 가를 것으로 예상된다. 별도의 시나리오 트리거나 복잡한 승리 조건보다는 순수한 생존과 방어 본연의 재미에 집중한 구성으로 보인다. 입문자부터 숙련자까지 인원 수에 맞춰 난이도를 조절하며 즐기기 좋으며, 게임 시작 전 팀원 간 역할 분담(건설, 자원, 컨트롤)과 웨이브 구성 파악을 미리 논의하면 더욱 원활한 공략이 가능할 것이다. 'Coolty Defense' appears to be a classic choke-point (bunker defense) use map where players build bunkers and defensive structures to block entrances and fend off endless enemy waves, as suggested by the filename 'BunkerUM.scx'. On a vast 2048x2048 battlefield using the Volcano tileset, up to 7 players seem to cooperate as a single team, with the internal map title and description both uniformly labeled 'CooltyDefense', indicating a clear design intent. Players must manage limited resources and space to place bunkers, missile turrets, and units, upgrading them to withstand increasingly difficult waves. The key variable appears to be difficulty scaling for a full 7-player party, and the large map size suggests early resource management, multitasking, and late-game unit composition and control against heavy units will determine victory. The composition seems focused on pure survival and defense fun rather than complex scenario triggers or win conditions. It is suitable for beginners to veterans adjusting difficulty by player count; discussing role assignments (building, economy, micro) and wave compositions before starting will lead to a smoother clear.
BunkerDefensePlatinum
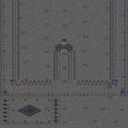
벙커 디펜스 플래티넘(Bunker Defense Platinum)은 스타크래프트 브루드워 유즈맵 중 전형적인 벙커 디펜스 장르에 속하는 협동 맵이다. 우주 타일셋 기반의 3072x3072 대형 전장에서 최대 6인의 플레이어가 하나의 팀을 이루어 적 유닛이 시작점에서 종점까지 도달하는 것을 저지하는 것이 핵심 목표다. 맵 내부 설명에 따르면 총 30단계의 레벨로 구성되어 있으며, 적을 처치할 때마다 민간인 유닛을 보상으로 받아 마린과 고스트를 생산하는 독특한 자원 시스템을 갖췄다. 10킬마다 추가 민간인이 지급되어 병력 확충이 용이하고, 25킬마다 영웅 선택 창이 열려 강력한 유닛으로 전세를 뒤집을 수 있는 기회가 주어진다. 여기에 무한 업그레이드 시스템이 더해져 게임이 길어질수록 공격력과 방어력을 끝없이 강화할 수 있는 것이 특징이다. 플레이어는 벙커와 미사일 터렛 등 방어 건물을 지어 길을 조성하고, 마린의 화력과 고스트의 특수 능력을 조합해 몰려오는 적 웨이브를 막아내야 한다. 초반부는 비교적 여유롭지만 중반 이후 적의 체력과 이동 속도, 수가 기하급수적으로 늘어나 팀원 간의 역할 분담과 업그레이드 우선순위 판단이 승패를 가른다. 직관적인 룰과 무한 성장의 쾌감을 동시에 제공해 디펜스 입문자부터 숙련자까지 폭넓게 즐길 수 있다. 플레이 전에는 6인 풀파티 구성 여부와 음성 채팅 가능 여부를 확인하면 더욱 원활한 공략이 가능하다. Bunker Defense Platinum is a classic cooperative bunker defense map for StarCraft: Brood War. Set on a spacious 3072x3072 space tileset, up to six players form a single team to prevent enemy units from traveling from start to finish. The map description outlines 30 distinct levels where kills reward civilian units used to produce Marines and Ghosts. Every 10 kills grants an extra civilian for army expansion, and every 25 kills opens a hero selector for a powerful game-changing unit. An infinite upgrade system allows attack and armor to scale endlessly into the late game. Players construct Bunkers and Missile Turrets to maze the path, combining Marine firepower with Ghost abilities to hold the line. Early waves are manageable, but mid-to-late game sees exponential spikes in enemy health, speed, and count, making role assignment and upgrade priority critical. The intuitive rules and endless growth loop appeal to both newcomers and veterans. Checking for a full 6-player party and voice chat availability beforehand ensures smoother coordination.
벙커 디펜스 2004 (BunkerDefense2004)
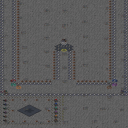
스타크래프트 브루드워의 디펜스 장르 유즈맵인 〈BunkerDefense2004〉는 이름 그대로 벙커를 방어하는 콘셉트로 설계된 맵으로, 플레이어는 끊임없이 몰려오는 적의 공세를 막아내며 생존을 도모해야 한다. 맵 중앙에 위치한 벙커가 주요 보호 대상이며, 주변에서 생성되는 적 유닛들을 지속적으로 제거해야 한다. 특히 맵 이미지에서 확인되는 다수의 자원 광물과 수정은 광물 채취를 통한 자원 수급이 아니라 방어 포인트 배치나 추가 방어 구조물의 건설을 위한 재원으로 추정된다. 맵의 입구는 세 방향으로 나뉘어 있으며, 각 입구마다 고유한 방어 라인이 형성되어 있어 플레이어는 전면 방어뿐만 아니라 측면을 노리는 적의 공세를 주의해야 한다. 또한 맵 상단의 오브젝트(예: 슬롯 모양 이미지)는 방어 포인트나 보너스 아이템을 표시하는 UI로 보이며, 플레이어는 이를 통해 추가 병력이나 보호를 확보할 수 있는 기회가 주어진다. 맵의 난이도는 입구 수와 적의 등장 속도, 그리고 방어 포인트의 제한으로 인해 보통 이상으로 설정되어 있으며, 특히 'UnarmedCivilian'에 의해 하향 조정되어 더욱 도전적인 플레이가 요구된다. 이 맵은 초보자보다는 중급 이상의 플레이어에게 적합하며, 방어 전략의 수립과 빠른 판단력이 요구된다. 무엇보다도, 지속적인 적의 공세를 버텨내며 벙커를 유지하는 것이 핵심 목표로 보인다. 플레이 전에는 입구별 방어 라인의 중요성과 자원의 효율적 사용 계획을 미리 세워두는 것이 중요하다. BunkerDefense2004 is a defense-style custom map for StarCraft: Brood War where players must defend a central bunker from relentless enemy assaults. The map features three main entry points, each with distinct defensive lines that players must reinforce and monitor closely. The mineral patches and vespene geysers scattered around the map are likely used for purchasing additional defensive structures or units rather than traditional resource gathering. The top section of the map includes UI elements, possibly representing defensive bonuses or special abilities that can be activated to aid in the battle. The difficulty appears to be set above average due to the limited number of defensive points and the speed at which enemies spawn, especially after modifications by UnarmedCivilian to increase challenge. This map is best suited for intermediate to advanced players who can adapt their strategies quickly and manage resources efficiently. Success hinges on maintaining a strong perimeter defense while balancing offensive countermeasures. Before playing, it is advisable to plan entry point priorities and resource allocation to maximize survival chances.
스페셜 포스 헬 벙커 (SPECIAL FORCES HELL BUNKER)
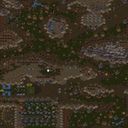
'스페셜 포스 헬 벙커(SPECIAL FORCES HELL BUNKER)'는 사막 타일셋 기반의 96x96 타일, 3072x3072 해상도 맵에서 최대 6인이 함께 즐기는 협동형 벙커 디펜스 유즈맵이다. 맵 중앙에 위치한 거대한 벙커 구조물을 거점으로 삼아 사방에서 밀려드는 적 유닛 웨이브를 막아내는 전형적인 생존 방어 방식으로 진행된다. 제목에 포함된 '헬(Hell)' 표기와 연관 맵인 '벙커 잇 셧 헬트윅드 4.7' 계열의 흐름을 볼 때, 기존 벙커 디펜스 공식을 유지하면서도 웨이브 구성과 적 유닛 스펙을 대폭 강화한 고난이도 조정판으로 추정된다. 내부 설명의 'Tweaked 3.2' 표기와 파일명 끝자리 '2'는 제작자 베게르(Vägér) 원작을 스타보이(Starboy)가 명칭 정리와 밸런스 수정을 거친 2차 개정판임을 시사한다. 플레이어는 특수부대라는 콘셉트에 맞춰 마린, 파이어뱃, 고스트 등 생체 유닛을 벙커에 탑승시켜 사거리와 화력을 확보하고, 웨이브 간 짧은 인터벌 동안 미네랄·가스 자원을 투자해 공격력·방어력 업그레이드와 특수 기술 해금, 추가 병력 생산을 병행해야 한다. 6인 풀파티 기준 예상 플레이 타임은 30~40분 내외로 보이며, 난이도가 '어려움' 이상으로 설정되어 있어 입문자보다는 디펜스 장르에 익숙하고 역할 분담·집중 포화·벙커 수리 타이밍 등 팀 단위 운영 숙련자에게 권장된다. 플레이 전 버전별 트리거 차이, 인원 수에 따른 난도 자동 조절 여부, 벙커 체력·최대 수용 인원 등 핵심 파라미터를 미리 확인하면 불필요한 시행착오를 줄일 수 있다. 'Special Forces Hell Bunker' is a cooperative bunker defense use-map for up to 6 players on a 96x96 tile, 3072x3072 resolution map using the Desert tileset. The game follows a classic survival defense structure where players hold a massive central bunker against waves of enemies attacking from all directions. The 'Hell' in the title and its lineage from the 'Bunk ur shit HellTWEAKED 4.7' series suggest this is a high-difficulty balance patch that significantly strengthens wave composition and enemy unit stats while keeping the core bunker defense formula. The internal description 'Tweaked 3.2' and the filename suffix '2' indicate a second revision where Starboy organized the naming and rebalanced Vägér's original work. Players must load biological units such as Marines, Firebats, and Ghosts—fitting the special forces concept—into the bunker to maximize range and firepower. During short intervals between waves, they must invest minerals and gas into attack/defense upgrades, unlock special abilities, and produce reinforcements. Estimated playtime for a full 6-player party is around 30–40 minutes. With difficulty rated 'Hard' or above, this map is recommended for veterans of the defense genre who are skilled in team role assignment, focus fire, and bunker repair timing, rather than beginners. Before starting, checking version-specific trigger differences, whether difficulty scales automatically with player count, and key parameters like bunker HP and max capacity will help reduce trial and error.
랜덤 벙커 디펜스 v1H (Random Bunker D! v1H)
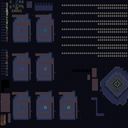
스타크래프트 브루드워 유즈맵 '랜덤 벙커 디펜스 v1H (Random Bunker D! v1H)'는 화산 타일셋을 배경으로 7인용 협동 벙커 디펜스 장르의 유즈맵이다. 제작자 Ahli가 제작한 v1H 버전으로, 7인용 단일 팀 구성의 협동 디펜스 장르에 속한다. 맵 크기는 192x96 타일 크기의 화산 지형으로 구성되어 있으며, cp949 인코딩으로 저장되어 있다. 핵심 구조는 '랜덤 벙커 디펜스'라는 장르명 그대로 무작위 위치에 생성되는 벙커를 활용해 몰려오는 적 웨이브를 막아내는 타워 디펜스 파생 장르다. 7명의 플레이어가 단일 팀을 이뤄 협동하며, 게임 시작 시 무작위 위치에 배치된 벙커를 중심으로 방어선을 구축하고 유닛을 생산해 몰려드는 적 웨이브를 막아내는 방식이다. 화산 지형 특유의 좁은 통로와 용암 지대가 방어선 형성에 변수로 작용하며, 무작위로 배치되는 초기 벙커 위치와 등장하는 적 조합이 매 판 다른 전략을 요구한다. 진행 방식은 웨이브 디펜스 전형적인 흐름을 따른다. 웨이브 간 간격 동안 자원을 채취해 벙커 업그레이드, 유닛 생산, 테크 트리 해금 등을 진행하며 다음 웨이브를 대비한다. 무작위 요소는 초기 벙커 위치뿐만 아니라 웨이브 구성에도 적용돼 매 게임 다른 조합의 적군이 등장하므로 고정된 빌드 오더 암기보다는 상황 대처 능력과 팀원 간 역할 분담이 중요하다. 화산 지형의 좁은 지형은 병목 지점을 자연스럽게 형성해 소수 벙커로도 효율적인 방어가 가능하지만, 다방향에서 몰려오는 웨이브에는 취약해 팀원 간 커버 플레이가 필수적이다. 추천 대상은 고정된 빌드 오더 암기보다 즉흥적인 판단과 협동 플레이를 선호하는 유저, 랜덤 디펜스와 벙커 디펜스의 혼합 장르를 즐기는 유저, 7인 풀파티 협동 플레이를 즐기는 그룹에게 적합하다. 플레이 전 확인 사항으로는 v1H 버전 이후 v1.2.1 등 후속 버전이 존재하므로 버전별 밸런스 차이를 확인할 것, cp949 인코딩 특성상 한글 채팅이나 트리거 텍스트 깨짐 여부 확인, 7인 풀방 미달 시 난이도 급상승 가능성 인지 등이 있다. Random Bunker D! v1H (Random Bunker D! v1H) is a StarCraft Brood War UMS map set on the Volcano tileset, designed as a 7-player cooperative Bunker Defense variant. Created by Ahli as version v1H, it supports 7 players in a single cooperative team. The map dimensions are 192x96 tiles on the Volcano tileset, encoded in cp949. True to its name 'Random Bunker Defense', this map belongs to the Tower Defense derivative genre where players utilize randomly placed bunkers to fend off incoming enemy waves. Seven players form a single cooperative team, building defensive lines around randomly positioned starting bunkers and producing units to withstand incoming waves. The Volcano terrain's narrow chasms and lava fields act as strategic variables for defense formation, while randomized initial bunker positions and wave compositions demand unique strategies each game. Gameplay follows the classic wave defense loop. During inter-wave intervals, players gather resources to upgrade bunkers, produce units, and unlock tech trees in preparation for the next onslaught. Randomness applies not only to initial bunker placement but also to wave composition, forcing players to adapt on the fly rather than relying on memorized build orders. Team coordination and role distribution become paramount. The Volcano terrain naturally creates choke points allowing efficient defense with fewer bunkers, yet multi-directional waves exploit vulnerabilities, making mutual cover play essential. Recommended for players who prefer improvisational judgment and cooperative play over memorized build orders, fans of hybrid Random Defense and Bunker Defense genres, and groups seeking 7-player full-party cooperative experiences. Pre-play checks include verifying balance differences in later versions like v1.2.1, checking for text corruption due to cp949 encoding, and acknowledging difficulty spikes when player count drops below seven.
벙커 워즈 2002 (Bunker Warz 2002)
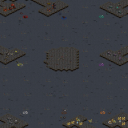
‘벙커 워즈 2002’는 스타크래프트 브루드워의 화려한 우주 맵에서 펼쳐지는 전술 디펜스 유즈맵으로, 진영별로 제공된 벙커와 방어 시설을 활용해 적의 공격을 방어하는 플레이가 핵심이다. 맵 중앙에는 넓은 개활지가 펼쳐져 있으며, 각 진영은 맵 외곽에 배치된 벙커와 요새를 기반으로 병력을 생산해 전선을 유지해야 한다. 맵 곳곳에는 자원 지대와 미네랄 멀티가 배치되어 있어Resource Management가 중요하며, 적의 기습 공격이나 대규모 공격 타이밍을 잘 예측해 방어선을 구축하는 것이 승리의 열쇠다. 플레이어는 초반부터 벙커를 활용한 방어와 동시에 자원을 확보해 병력을 증강해야 하며, 후반으로 갈수록 대규모 전투가 벌어지면서 맵의 넓은 시야를 활용한 전략적 판단이 요구된다. 맵의 공간 배치와 자원 분포는 균형을 이루며, 특히 중앙 지역의 개활지는 전면전이 자주 벌어지는 주요 전장이다. 초보자도 쉽게 접근할 수 있는 구조이지만, 숙련된 플레이어는 벙커와 요새의 배치, 병력 조합, 타이밍 공격을 통해 보다 전략적인 플레이가 가능하다는 점에서 깊이를 느낄 수 있다. 벙커를 중심으로 한 방어와 공격의 균형을 맞추는 것이 이 맵의 가장 큰 묘미라고 할 수 있다. 추천 대상은 스타크래프트의 디펜스 유즈맵을 любить하는 플레이어, 또는 팀 플레이를 통한 전략적 협동이 필요한 유저들에게 적합하며, 특히 우주 배경의 맵 디자인과 함께 긴장감 넘치는 전투를 즐기고 싶은 이들에게 강추한다. 플레이 전에는 벙커의 배치와 자원 멀티의 위치를 숙지해 두는 것이 중요하며, 초반 방어선을 빠르게 구축하는 것이 승리의 지름길이 될 수 있다. 또한, 적의 공격 패턴을 분석해 방어 전략을 미리 준비하는 것도 필수적이다. 맵의 완성도 높은 디자인과 긴장감 넘치는 전투는 유즈맵의 대표작 중 하나로 손색없을 정도다. Bunker Warz 2002 is a tactical defense custom map in StarCraft: Brood War set on a stunning space-themed map, where players must defend their base and attack enemy positions using bunkers and defensive structures. The map features a wide central open area surrounded by resource-rich zones and mineral patches, emphasizing resource management alongside strategic defense and offense. Players start by securing their bunkers and expanding toward nearby resources to build an army capable of countering enemy assaults. As the game progresses, large-scale battles erupt, especially in the central open area, requiring players to maintain strong defensive lines while coordinating attacks. The balanced layout and strategic depth make it accessible for beginners yet rewarding for experienced players who can optimize bunker placement, army composition, and timing-based assaults. The map’s immersive space design and intense combat create a thrilling experience ideal for fans of defense-focused custom maps. It’s recommended for players who enjoy strategic teamwork and tactical depth in StarCraft custom maps. Before playing, familiarize yourself with the bunker positions and resource locations to quickly establish your early defense. Analyzing enemy attack patterns and preparing counter-strategies is essential for securing victory. With its polished design and nail-biting gameplay, Bunker Warz 2002 stands out as a classic example of a well-crafted defense custom map.
랜덤 벙커 디펜스 (Random Bunker Def)
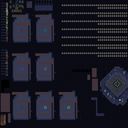
스타크래프트 브루드워 유즈맵 '랜덤 벙커 디펜스 (Random Bunker Def)'는 화산 타일셋을 배경으로 최대 7인이 협력해 몰려오는 적 웨이브를 막아내는 디펜스 장르 맵이다. 제목에 '랜덤'이 붙은 만큼 매 게임마다 등장하는 유닛 구성이나 업그레이드 옵션이 무작위로 결정되어 반복 플레이 시에도 예측 불가능한 변수가 생긴다. 플레이어는 주로 테란 벙커와 병력을 생산해 진입로를 틀어막는 방식으로 진행하며, 벙커 업그레이드와 유닛 조합 선택이 생존의 열쇠가 된다. 맵 크기는 192x96 타일로 비교적 넓은 전장을 제공하며, 다수의 진입로가 존재해 팀원 간 역할 분담과 자원 분배가 중요하다. 제작자 'Ahli' 표기에 따라 검증된 트리거 설계가 기대되며, v1.1.4c 버전 기준 밸런스 조정과 버그 수정이 반영된 것으로 보인다. 난이도는 랜덤 요소에 따라 편차가 크지만 기본적으로 협동 디펜스 경험이 있는 유저라면 무난히 즐길 수 있는 보통 수준으로 추정된다. 혼자서 모든 라인을 커버하기 어렵기 때문에 4인 이상 파티 플레이를 권장하며, 음성 채팅이나 빠른 핑 소통이 가능한 환경에서 진가를 발휘한다. 플레이 전 버전 호환성과 랜덤 시드 고정 여부, 시작 자원 설정을 확인하면 더 쾌적한 진행이 가능하다. StarCraft Brood War UMS map 'Random Bunker Def' is a defense genre map set on the Volcano tileset where up to 7 players cooperate to stop incoming enemy waves. As the title includes 'Random', the unit compositions and upgrade options appearing each game are randomly determined, creating unpredictable variables even in repeated playthroughs. Players primarily produce Terran Bunkers and troops to block entry routes, with bunker upgrades and unit combination choices being the key to survival. The map size of 192x96 tiles provides a relatively spacious battlefield, and the existence of multiple entry routes makes role division and resource distribution among teammates crucial. With the creator credited as 'Ahli', verified trigger design is expected, and version v1.1.4c appears to reflect balance adjustments and bug fixes. Difficulty varies significantly due to random elements, but it is estimated to be at a normal level that users with cooperative defense experience can enjoy comfortably. Since it is difficult for a single player to cover all lines, party play of 4 or more is recommended, and it shines in environments where voice chat or quick ping communication is possible. Checking version compatibility, random seed fixation, and starting resource settings before play will allow for a smoother progression.
벙커 디펜스 플래티넘 플러스 (Bunker Defense Platinum Plus)
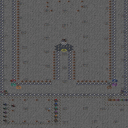
'벙커 디펜스 플래티넘 플러스'는 6인 협동으로 적의 진격을 막는 클래식 벙커 디펜스 유즈맵이다. 우주 타일셋의 96x96 크기 맵에서 플레이어는 시작점에서 종점까지 몰려오는 적 유닛을 벙커와 터렛, 유닛 생산으로 차단해야 한다. 설명에 따르면 총 30단계 레벨로 구성되며, 무한 업그레이드 시스템과 킬 수에 따른 보상(10킬마다 민간인 지급, 25킬마다 영웅 선택)이 특징이다. 마린과 고스트 전용 민간인 건물이 별도로 존재해 병종 선택의 전략성을 더한다. 초반에는 기본 벙커와 마린으로 버티지만, 중후반으로 갈수록 영웅 유닛과 업그레이드 효율이 생존을 가른다. 입구 막기 형태의 고정 루트라 맵 구조 파악이 쉽지만, 난이도 '플래티넘' 명성답게 웨이브 밀도가 높아 팀원 간 역할 분담과 자원 관리가 필수적이다. 무한 업그레이드 특성상 장기전으로 갈수록 밸런스 붕괴 우려가 있으나, 30웨이브 클리어라는 명확한 목표가 있다. 협력 디펜스와 성장형 빌드업을 즐기는 유저, 고전 벙커 디펜스 감성을 찾는 이에게 추천한다. 플레이 전 6인 풀파티 구성 여부와 음성 채팅 가능 여부를 확인하면 더 원활하다. 'Bunker Defense Platinum Plus' is a classic 6-player co-op bunker defense UMS map where players must stop enemy advances. On a 96x96 space tileset, players block units moving from start to finish using bunkers, turrets, and unit production. The map features 30 levels, infinite upgrades, and kill-based rewards (civilians every 10 kills, hero chooser every 25 kills). Separate civilian buildings for Marines and Ghosts add strategic depth. Early game relies on basic bunkers and Marines, but late-game survival depends on hero units and upgrade efficiency. While the fixed path makes layout reading easy, the 'Platinum' difficulty brings high wave density, demanding role assignment and resource management. Infinite upgrades risk balance issues in long games, but the clear goal of clearing 30 waves provides focus. Recommended for users who enjoy cooperative defense and progression builds, or those seeking classic bunker defense nostalgia. Check if you can form a full 6-player party and use voice chat for a smoother experience.
랜덤 벙커 디펜스 (Random Bunker Def)
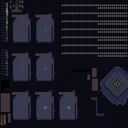
스타크래프트 브루드워 유즈맵 '랜덤 벙커 디펜스(Random Bunker Def)'는 국내 유명 맵 제작자 Ahli가 배포한 7인용 협동 디펜스 맵으로, 화산 타일셋 기반의 192x96 타일(6144x3072 픽셀) 전장에서 펼쳐진다. 맵 이름에서 알 수 있듯 핵심 메커니즘은 '벙커'와 '랜덤' 두 가지다. 플레이어는 게임 시작 시 할당된 좁은 초크 포인트 혹은 언덕 위에 벙커를 건설하고, 미네랄·가스를 투자해 매 웨이브마다 무작위로 제시되는 유닛 풀(Pool)에서 병력을 뽑아 벙커에 태운다. 유닛 조합은 마린·파이어뱃·고스트·메딕 등 테란 생체 유닛 위주로 랜덤하게 결정되며, 웨이브가 진행될수록 저글링·히드라리스크·울트라리스크·디파일러 등 저그 공중·지상 혼합 병력이 점점 강력해져 온다. 벙커 업그레이드(방어력·사거리·체력)와 유닛 특수 능력(스팀팩·락다운·옵티컬 플레어 등) 선택 타이밍이 생존 시간을 가르는 핵심 전략 포인트다. 7인 전원이 자원을 공유하거나 역할을 분담(탱커·딜러·서포터)하지 않으면 중반 이후 급증하는 적 화력에 순식간에 전선이 무너진다. 화산 타일셋의 붉은 지형과 용암은 시각적 피로도를 낮추면서도 위기감을 고조시키는 연출로 작용한다. 랜덤 디펜스 특유의 운 요소와 실력 기반 컨트롤·자원 관리·팀워크가 균형을 이루며, 매 판 다른 빌드와 위기 상황을 경험할 수 있다. 협동 디펜스 입문자부터 고정 파티로 랭킹 경쟁을 즐기는 유저까지 폭넓게 즐길 수 있으며, v1.1b 버전 기준 밸런스 패치 내역과 7인 풀파티 여부, 난이도 조절 트리거 존재 여부를 사전에 확인하고 시작하면 더 안정적인 플레이가 가능하다. Random Bunker Def is a 7-player cooperative defense map for StarCraft: Brood War created by the renowned Korean map maker Ahli. It takes place on a Volcano tileset measuring 192x96 tiles (6144x3072 pixels). As the name suggests, the core mechanics revolve around 'Bunkers' and 'Random' elements. Players start at assigned narrow choke points or high ground where they must build Bunkers. By spending minerals and gas, they recruit units from a randomly generated pool each wave—primarily Terran biological units like Marines, Firebats, Ghosts, and Medics—and load them into the Bunkers. Enemy waves consist of increasingly powerful Zerg forces, mixing Zerglings, Hydralisks, Ultralisks, and Defilers. The key strategic decisions lie in the timing of Bunker upgrades (armor, range, HP) and the selection of unit abilities (Stimpack, Lockdown, Optical Flare). If all seven players do not coordinate resource sharing or role assignment (tank, DPS, support), the front line collapses rapidly in the mid-to-late game as enemy firepower spikes. The volcanic terrain with its red hues and lava adds tension without hurting visibility. This map balances the luck factor inherent in random defense with skill-based micro, resource management, and teamwork, offering a fresh build and crisis scenario every playthrough. It appeals to a wide range of players, from cooperative defense beginners to fixed parties competing for high scores. Before starting, checking the v1.1b patch notes, ensuring a full 7-player party, and verifying the presence of difficulty adjustment triggers will ensure a smoother experience.
Amazing TD Shadow3.0BETA
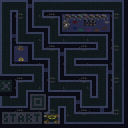
Amazing TD Shadow3.0BETA는 스타크래프트 브루드워 유저들 사이에서 꾸준히 사랑받는 타워 디펜스(TD) 장르의 유즈맵입니다. 이 맵은 미로처럼 얽힌 복잡한 경로를 따라 몰려오는 적 유닛들을 막아내는 전형적인 길막형 디펜스 방식을 채택하고 있습니다. 맵 이미지에서 확인할 수 있듯이, 어두운 화산 타일셋 위로 적들이 이동할 경로가 명확하게 그려져 있으며, 플레이어는 이 경로를 따라 전략적으로 방어 타워를 건설해야 합니다. 맵 내부 설명에 따르면, 이 맵의 주요 특징 중 하나는 "각 벙커에 3개의 유닛을 배치할 수 있다"는 점입니다. 이는 일반적인 벙커 디펜스 맵과 차별화되는 요소로, 플레이어가 더욱 다양한 유닛 조합과 시너지를 고려하여 방어선을 구축할 수 있게 합니다. 맵 상단에는 플레이어가 벙커를 건설하고 유닛을 생산하며 업그레이드할 수 있는 기지 영역이 위치한 것으로 보입니다. 다양한 색상의 벙커와 패드는 각 플레이어의 영역이거나 특정 유닛 유형을 나타내는 것으로 추정됩니다. "Stronger Foes"라는 설명은 난이도 있는 적들이 등장하여 플레이어에게 상당한 도전 과제를 제시할 것임을 암시합니다. 또한, "Difficulty Setting" 기능이 있어 플레이어는 자신의 숙련도에 맞춰 게임 난이도를 조절하며 플레이할 수 있습니다. "Improved Ban" 기능은 특정 유닛이나 전략에 대한 제한 또는 개선 사항을 의미할 수 있으며, 이는 게임의 전략적 깊이를 더하고 리플레이 가치를 높이는 요소로 작용할 것입니다. 총 7명의 플레이어가 함께 협동하여 방어선을 구축하고 몰려오는 적들을 막아내는 재미를 경험할 수 있습니다. 벙커 디펜스나 타워 디펜스 장르를 선호하는 플레이어, 그리고 친구들과 함께 전략적인 협동 플레이를 즐기는 스타크래프트 유저들에게 이 맵을 추천합니다. 승리를 위해서는 유닛 조합의 효율성과 방어선 배치 전략이 중요하며, 플레이 전 맵 설명을 통해 주요 특징과 난이도 설정을 확인하는 것이 좋습니다. "Amazing TD Shadow3.0BETA" is a StarCraft Brood War UMS map of the Tower Defense (TD) genre that has consistently been loved by users. This map adopts a classic "maze-block" defense style, where players must defend against waves of enemy units that advance along a complex, winding path. As seen in the map image, the enemy's path is clearly laid out on a dark volcanic tileset, and players must strategically construct defensive bunkers along this route. According to the internal map description, one of the key features of this map is that "3 units can be placed in each bunker." This distinguishes it from typical bunker defense maps, allowing players to consider a wider variety of unit combinations and synergies when building their defense lines. The top section of the map appears to be a base area where players can construct bunkers, produce units, and perform upgrades. The various colored bunkers and pads are presumed to represent individual player areas or specific unit types. The description "Stronger Foes" suggests that challenging enemies will appear, posing a significant test for players. Additionally, a "Difficulty Setting" feature allows players to adjust the game's difficulty according to their skill level. The "Improved Ban" feature might imply restrictions or improvements related to specific units or strategies, which would add strategic depth to the game and enhance its replayability. Up to 7 players can cooperate to build defensive lines and experience the fun of fending off incoming enemies. This map is recommended for players who enjoy bunker defense or tower defense genres, as well as StarCraft users who like strategic cooperative play with friends. Efficient unit combinations and strategic placement of defense lines will be crucial for victory. It is advisable to review the map description for key features and difficulty settings before playing.
최근 등록된 맵
새로 추가된 파일과 버전을 확인하세요.

벙커 워즈-X (Bunker Warz-X)
‘벙커 워즈-X’는 8명의 플레이어가 참여하는 스타크래프트 브루드워 유즈맵으로, ‘Bunker Warz-X’라는 제목 그대로 벙커를 중심으로 한 전략적 전투를 즐길 수 있는 맵이다. 내부 설명에 ‘Build Units - for a price’라는 문구가 포함된 점, 그리고 ‘Upgrades - 255 (fast)’라는 업그레이드 시스템이 언급된 점을 미루어 볼 때, 건물 건설과 유닛 생산을 기반으로 한 전략적 요소와 더불어 영웅 시스템이 도입되어 있는 것으로 추정된다. 또한 ‘Heroes’라는 키워드가 있는 만큼 개별 유닛에 영웅 시스템이 적용되어, 전사, 마법사, 지원가 등 다양한 역할을 부여받아 플레이어의 전략적 선택이 중요해진다. 맵의 구조는 중앙에 위치한 벙커를 중심으로 각 플레이어의 기지가 배치되어 있으며, 이 벙커를 방어하고 적진을 공격하는 방식으로 진행된다. 벙커는 단순히 방어용 건물이 아니라 생산 시설이자 방어의 핵심으로 기능하기 때문에, 이를 어떻게 관리하고 업그레이드하는지가 승패를 좌우할 수 있다. 또한 ‘for a price’라는 문구는 유닛 생산에 비용이 발생한다는 점을 시사하며, 이는 자원의 관리와 전략적 타이밍을 요구하는 요소로 작용할 것으로 보인다. 이 맵은 ‘UMS’ 장르에 속하며, 특히 컴까기(컴퓨터 상대) 형식의 유즈맵으로 제작된 것으로 보인다. 다수의 플레이어가 참여할 수 있으며, 각 플레이어는 영웅을 조종하여 상대방의 기지를 공격하거나 방어하는 동시에 자신의 벙커를 강화하는 등 다층적인 전략을 구사해야 한다. 맵의 특성상 팀 플레이보다는 개인전 형식이 강하지만, 협동 요소가 없지는 않기 때문에 팀워크가 중요한 경우도 있을 수 있다. 또한 업그레이드와 영웅 시스템을 통해 플레이어의 성장과 전략적 깊이가 더해지는 만큼, 단순히 실력뿐 아니라 자원의 관리와 타이밍 감각이 요구되는 맵이다. 이 맵을 플레이하기 위해서는 영웅의 특성과 업그레이드 시스템에 익숙해질 필요가 있으며, 특히 초보자의 경우 맵의 구조와 기본적인 전략에 대한 이해가 부족할 수 있어 어려움을 느낄 수 있다. 반면, 전략적 사고와 자원 관리를 즐기는 플레이어들에게는 매력적인 맵으로 평가될 수 있다. 맵의 난이도는 보통 수준으로 예상되며, 8명의 플레이어가 참여할 경우 약 30분 내외의 플레이 시간이 소요될 것으로 추정된다. 이 맵은 특히 스타크래프트 유즈맵 커뮤니티에서 인기 있는 ‘벙커’ 테마의 후속작 또는 변형작으로, 기존의 벙커 디펜스 맵과는 차별화된 영웅 시스템과 업그레이드 요소가 특징이다. 플레이 전에는 맵의 구조와 각 영웅의 역할, 업그레이드 가능 항목 등을 미리 숙지하는 것이 중요하며, 특히 중앙 벙커의 관리와 유닛 생산 타이밍을 잘 조절해야 한다. 또한 팀 플레이가 강제되지 않지만, 협동이 필요한 경우를 대비하여 팀원과의 사전 전략 수립도 고려해 볼 필요가 있다. ‘Bunker Wars-X’ is a *Brood War* custom map for *StarCraft* where eight players compete, and as the title suggests, it revolves around strategic combat centered on bunkers. Given the internal description mentioning "Build Units - for a price" and the upgrade system labeled "Upgrades - 255 (fast)," it’s clear the map emphasizes building structures and producing units alongside a hero system. With the keyword "Heroes," individual units are enhanced with hero mechanics, assigning roles like warrior, mage, or support, making strategic choices crucial for players. The map’s layout places bunkers at the center, with each player’s base positioned around them. The objective involves defending your bunker while attacking enemy bases. Far from being just a defensive structure, the bunker functions as a production facility and the key to defense, so how you manage and upgrade it can determine victory or defeat. The phrase "for a price" hints that unit production incurs costs, adding resource management and timing as critical strategic factors. This map falls under the UMS genre, designed specifically as a "campaign against AI" custom map. With multiple players participating, each controls a hero to attack or defend while simultaneously reinforcing their bunker, requiring layered strategies. While the format leans toward individual competition rather than team play, cooperative elements do exist, making teamwork important in certain situations. The hero and upgrade systems add depth to player progression and strategy, demanding not just skill but also resource management and timing. To play effectively, players need to familiarize themselves with hero abilities and the upgrade system—beginners might struggle if they lack understanding of the map’s structure and basic strategies. However, for those who enjoy strategic thinking and resource management, it’s an appealing map. The difficulty is moderate, and with eight players, matches typically last around 30 minutes. As a follow-up or variation of the popular "bunker" theme in *StarCraft* custom maps, it stands out with its hero system and upgrade mechanics, differing from traditional bunker defense maps. Before playing, it’s essential to study the map layout, each hero’s role, and available upgrades. Properly managing the central bunker and timing unit production are key to success. While team play isn’t mandatory, coordinating with teammates in advance is worth considering, as cooperative elements may arise during gameplay.
스페셜 포스 헬 벙커 (SPECIAL FORCES HELL BUNKER)
'스페셜 포스 헬 벙커(SPECIAL FORCES HELL BUNKER)'는 사막 타일셋 기반의 96x96 타일, 3072x3072 해상도 맵에서 최대 6인이 함께 즐기는 협동형 벙커 디펜스 유즈맵이다. 맵 중앙에 위치한 거대한 벙커 구조물을 거점으로 삼아 사방에서 밀려드는 적 유닛 웨이브를 막아내는 전형적인 생존 방어 방식으로 진행된다. 제목에 포함된 '헬(Hell)' 표기와 연관 맵인 '벙커 잇 셧 헬트윅드 4.7' 계열의 흐름을 볼 때, 기존 벙커 디펜스 공식을 유지하면서도 웨이브 구성과 적 유닛 스펙을 대폭 강화한 고난이도 조정판으로 추정된다. 내부 설명의 'Tweaked 3.2' 표기와 파일명 끝자리 '2'는 제작자 베게르(Vägér) 원작을 스타보이(Starboy)가 명칭 정리와 밸런스 수정을 거친 2차 개정판임을 시사한다. 플레이어는 특수부대라는 콘셉트에 맞춰 마린, 파이어뱃, 고스트 등 생체 유닛을 벙커에 탑승시켜 사거리와 화력을 확보하고, 웨이브 간 짧은 인터벌 동안 미네랄·가스 자원을 투자해 공격력·방어력 업그레이드와 특수 기술 해금, 추가 병력 생산을 병행해야 한다. 6인 풀파티 기준 예상 플레이 타임은 30~40분 내외로 보이며, 난이도가 '어려움' 이상으로 설정되어 있어 입문자보다는 디펜스 장르에 익숙하고 역할 분담·집중 포화·벙커 수리 타이밍 등 팀 단위 운영 숙련자에게 권장된다. 플레이 전 버전별 트리거 차이, 인원 수에 따른 난도 자동 조절 여부, 벙커 체력·최대 수용 인원 등 핵심 파라미터를 미리 확인하면 불필요한 시행착오를 줄일 수 있다. 'Special Forces Hell Bunker' is a cooperative bunker defense use-map for up to 6 players on a 96x96 tile, 3072x3072 resolution map using the Desert tileset. The game follows a classic survival defense structure where players hold a massive central bunker against waves of enemies attacking from all directions. The 'Hell' in the title and its lineage from the 'Bunk ur shit HellTWEAKED 4.7' series suggest this is a high-difficulty balance patch that significantly strengthens wave composition and enemy unit stats while keeping the core bunker defense formula. The internal description 'Tweaked 3.2' and the filename suffix '2' indicate a second revision where Starboy organized the naming and rebalanced Vägér's original work. Players must load biological units such as Marines, Firebats, and Ghosts—fitting the special forces concept—into the bunker to maximize range and firepower. During short intervals between waves, they must invest minerals and gas into attack/defense upgrades, unlock special abilities, and produce reinforcements. Estimated playtime for a full 6-player party is around 30–40 minutes. With difficulty rated 'Hard' or above, this map is recommended for veterans of the defense genre who are skilled in team role assignment, focus fire, and bunker repair timing, rather than beginners. Before starting, checking version-specific trigger differences, whether difficulty scales automatically with player count, and key parameters like bunker HP and max capacity will help reduce trial and error.
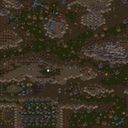
SF 헬 벙커 버전 6.18 (SF Hell Bunker ver. 6.18)
스타크래프트 브루드워 유즈맵 'SF 헬 벙커 버전 6.18'은 사막 타일셋의 광활한 96x96 맵에서 6인 협동으로 벙커를 지키며 몰려드는 적 웨이브를 막아내는 정통 디펜스 장르다. '헬(Hell)'이라는 부제답게 초반부터 강력한 유닛이 쏟아지며, 버전 6.18에 이르기까지 스타보이006(Starboy006) 제작자가 '트윅드 3.2' 원작을 기반으로 지속적으로 밸런스와 트리거를 다듬어온 흔적이 역력하다. 플레이어는 제한된 자원과 인구수 안에서 마린, 메딕, 파이어뱃 등 지상 병력을 벙커에 태우고 업그레이드 타이밍을 조율해야 하며, 공중 유닛 대응을 위한 미사일 터렛 배치와 사이언스 베슬 운용 등 세밀한 마이크로 컨트롤이 생존을 가른다. 맵 중앙의 벙커 클러스터를 중심으로 다방향에서 적이 침투하므로 6명 전원이 각자 구간을 맡아 입구를 막는 역할 분담이 필수적이다. 난이도가 매우 높아 초보자가 진입하기엔 장벽이 크지만, 숙련자끼리 호흡을 맞춰 고난이도 웨이브를 클리어했을 때의 성취감은 상당하다. 플레이 전에는 최신 버전 적용 여부와 6인 풀파티 구성 가능 여부를 확인하는 것이 좋으며, 장시간 플레이에 대비해 저장 슬롯 확보와 동맹 간 자원 공유 설정도 점검해야 한다. SF Hell Bunker ver. 6.18 is a classic defense map on a vast 96x96 desert tileset where six players cooperate to hold bunkers against endless enemy waves. True to its "Hell" subtitle, powerful units flood in from the early game, and the version 6.18 iteration shows clear signs of continuous balance and trigger refinements by creator Starboy006 based on the original "Tweaked 3.2." Players must manage limited resources and supply to load Marines, Medics, and Firebats into bunkers while timing upgrades precisely. Micro control is crucial for anti-air defense via Missile Turrets and Science Vessel operation. Since enemies penetrate from multiple directions toward the central bunker cluster, role assignment for all six players to block entrances is essential. The difficulty is very high, posing a steep barrier for beginners, but the sense of achievement when veterans coordinate to clear high-tier waves is immense. Before playing, verify the latest version is applied, ensure a full 6-player party can be formed, check save slot availability for long sessions, and confirm allied resource sharing settings.
랜덤 벙커 디펜스 (Random Bunker Def)
스타크래프트 브루드워 유즈맵 '랜덤 벙커 디펜스 (Random Bunker Def)'는 화산 타일셋을 배경으로 최대 7인이 협력해 몰려오는 적 웨이브를 막아내는 디펜스 장르 맵이다. 제목에 '랜덤'이 붙은 만큼 매 게임마다 등장하는 유닛 구성이나 업그레이드 옵션이 무작위로 결정되어 반복 플레이 시에도 예측 불가능한 변수가 생긴다. 플레이어는 주로 테란 벙커와 병력을 생산해 진입로를 틀어막는 방식으로 진행하며, 벙커 업그레이드와 유닛 조합 선택이 생존의 열쇠가 된다. 맵 크기는 192x96 타일로 비교적 넓은 전장을 제공하며, 다수의 진입로가 존재해 팀원 간 역할 분담과 자원 분배가 중요하다. 제작자 'Ahli' 표기에 따라 검증된 트리거 설계가 기대되며, v1.1.4c 버전 기준 밸런스 조정과 버그 수정이 반영된 것으로 보인다. 난이도는 랜덤 요소에 따라 편차가 크지만 기본적으로 협동 디펜스 경험이 있는 유저라면 무난히 즐길 수 있는 보통 수준으로 추정된다. 혼자서 모든 라인을 커버하기 어렵기 때문에 4인 이상 파티 플레이를 권장하며, 음성 채팅이나 빠른 핑 소통이 가능한 환경에서 진가를 발휘한다. 플레이 전 버전 호환성과 랜덤 시드 고정 여부, 시작 자원 설정을 확인하면 더 쾌적한 진행이 가능하다. StarCraft Brood War UMS map 'Random Bunker Def' is a defense genre map set on the Volcano tileset where up to 7 players cooperate to stop incoming enemy waves. As the title includes 'Random', the unit compositions and upgrade options appearing each game are randomly determined, creating unpredictable variables even in repeated playthroughs. Players primarily produce Terran Bunkers and troops to block entry routes, with bunker upgrades and unit combination choices being the key to survival. The map size of 192x96 tiles provides a relatively spacious battlefield, and the existence of multiple entry routes makes role division and resource distribution among teammates crucial. With the creator credited as 'Ahli', verified trigger design is expected, and version v1.1.4c appears to reflect balance adjustments and bug fixes. Difficulty varies significantly due to random elements, but it is estimated to be at a normal level that users with cooperative defense experience can enjoy comfortably. Since it is difficult for a single player to cover all lines, party play of 4 or more is recommended, and it shines in environments where voice chat or quick ping communication is possible. Checking version compatibility, random seed fixation, and starting resource settings before play will allow for a smoother progression.
랜덤 벙커 디펜스 (Random Bunker Def)
스타크래프트 브루드워의 대표적인 유즈맵 장르 중 하나인 ‘랜덤 벙커 디펜스’는 플레이어가 적의 공격을 막아내며 점차 강해지는 방어형 게임입니다. 맵은 중앙에 위치한 주요 벙커를 중심으로 주변에서 끊임없이 몰려드는 적들을 상대해야 하는데, 적의 종류와 스폰 위치는 랜덤으로 구성되어 매 플레이마다 다른 전략을 요구합니다. 벙커는 일정 시간마다 방어 건물이나 유닛을 생산할 수 있는 공간으로, 플레이어는 자원과 시간을 효율적으로 분배해 벙커를 강화하거나 유닛을 생산해야 합니다. 특히 맵의 오른쪽 상단과 왼쪽 하단에 위치한 보급고에서는 추가 자원을 확보할 수 있어, 이 곳을 얼마나 잘 활용하느냐가 승부의 관건으로 보입니다. 게임의 진행은 크게 세 단계로 나뉩니다. 초반에는 기본 유닛만으로 적을 막아내야 하며, 중반에는 방어 건물과 보조 유닛을 배치해 안정적으로 버티는 것이 중요합니다. 후반으로 갈수록 적의 공격력이 강해지고 스폰 속도도 빨라지므로, 벙커의 업그레이드와 자원 관리에 신경 써야 합니다. 또한, 맵 곳곳에 흩어져 있는 아이템이나 보너스 지역을 발견하면 일시적으로 powerful한 능력을 얻을 수 있어, 이를 잘 활용하는 플레이어가 승리할 확률이 높습니다. 전체적으로는 ‘막고 버티며 성장하기’라는 기본 틀을 지키면서도, 랜덤 요소와 아이템 운이 게임의 재미를 더하는 요소로 작용합니다. 이 맵은 일반적으로 1인 플레이가 권장되며, 혼자서도 충분히 즐길 수 있지만, 팀 플레이로도 변형해 플레이할 수 있습니다. 난이도는 초보자의 경우 적의 공격 패턴에 익숙해지는 데 시간이 걸릴 수 있지만, 몇 번 플레이하다 보면 방어 전술을 익히게 됩니다. 추천하는 대상은 방어형 게임을 좋아하거나, 전략적 사고를 즐기는 플레이어들에게 적합합니다. 특히 스타크래프트의 밸런스와 유닛 조합에 익숙한 유저라면 더 재미있게 즐길 수 있을 것입니다. 플레이 전에 맵의 주요 구조와 아이템 위치를 미리 확인해 두면 더 효과적인 플레이가 가능합니다. Random Bunker Def is a popular user-made defense map in StarCraft: Brood War where players must survive waves of randomly spawned enemies by fortifying bunkers and strategically managing resources. The central bunker serves as the core production hub, allowing players to train defensive units or upgrade defenses over time. The map features supply depots positioned in the upper right and lower left corners, providing additional resources to reinforce bunkers or expand unit production. The gameplay unfolds in distinct phases: early stages require holding the line with basic units, the mid-game demands efficient placement of defensive structures and auxiliary units, and the late-game escalates with stronger enemies spawning rapidly. Players must balance bunker upgrades, resource accumulation, and exploration to discover hidden items or bonus areas that grant temporary powerful abilities. These random elements add unpredictability, making each playthrough unique and challenging. Designed primarily for solo play, the map can also be adapted for team-based variations, though balancing may require adjustments. While beginners may struggle initially with enemy attack patterns, repeated play helps refine defensive strategies. This map appeals to players who enjoy strategic, endurance-focused gameplay and have a solid understanding of StarCraft’s unit interactions. Reviewing the map layout and item locations beforehand can significantly improve performance. Overall, it’s a well-structured defense challenge that rewards careful planning and adaptability.
랜덤 벙커 디펜스 (Random Bunker Def)
스타크래프트 브루드워 유즈맵 '랜덤 벙커 디펜스(Random Bunker Def)'는 국내 유명 맵 제작자 Ahli가 배포한 7인용 협동 디펜스 맵으로, 화산 타일셋 기반의 192x96 타일(6144x3072 픽셀) 전장에서 펼쳐진다. 맵 이름에서 알 수 있듯 핵심 메커니즘은 '벙커'와 '랜덤' 두 가지다. 플레이어는 게임 시작 시 할당된 좁은 초크 포인트 혹은 언덕 위에 벙커를 건설하고, 미네랄·가스를 투자해 매 웨이브마다 무작위로 제시되는 유닛 풀(Pool)에서 병력을 뽑아 벙커에 태운다. 유닛 조합은 마린·파이어뱃·고스트·메딕 등 테란 생체 유닛 위주로 랜덤하게 결정되며, 웨이브가 진행될수록 저글링·히드라리스크·울트라리스크·디파일러 등 저그 공중·지상 혼합 병력이 점점 강력해져 온다. 벙커 업그레이드(방어력·사거리·체력)와 유닛 특수 능력(스팀팩·락다운·옵티컬 플레어 등) 선택 타이밍이 생존 시간을 가르는 핵심 전략 포인트다. 7인 전원이 자원을 공유하거나 역할을 분담(탱커·딜러·서포터)하지 않으면 중반 이후 급증하는 적 화력에 순식간에 전선이 무너진다. 화산 타일셋의 붉은 지형과 용암은 시각적 피로도를 낮추면서도 위기감을 고조시키는 연출로 작용한다. 랜덤 디펜스 특유의 운 요소와 실력 기반 컨트롤·자원 관리·팀워크가 균형을 이루며, 매 판 다른 빌드와 위기 상황을 경험할 수 있다. 협동 디펜스 입문자부터 고정 파티로 랭킹 경쟁을 즐기는 유저까지 폭넓게 즐길 수 있으며, v1.1b 버전 기준 밸런스 패치 내역과 7인 풀파티 여부, 난이도 조절 트리거 존재 여부를 사전에 확인하고 시작하면 더 안정적인 플레이가 가능하다. Random Bunker Def is a 7-player cooperative defense map for StarCraft: Brood War created by the renowned Korean map maker Ahli. It takes place on a Volcano tileset measuring 192x96 tiles (6144x3072 pixels). As the name suggests, the core mechanics revolve around 'Bunkers' and 'Random' elements. Players start at assigned narrow choke points or high ground where they must build Bunkers. By spending minerals and gas, they recruit units from a randomly generated pool each wave—primarily Terran biological units like Marines, Firebats, Ghosts, and Medics—and load them into the Bunkers. Enemy waves consist of increasingly powerful Zerg forces, mixing Zerglings, Hydralisks, Ultralisks, and Defilers. The key strategic decisions lie in the timing of Bunker upgrades (armor, range, HP) and the selection of unit abilities (Stimpack, Lockdown, Optical Flare). If all seven players do not coordinate resource sharing or role assignment (tank, DPS, support), the front line collapses rapidly in the mid-to-late game as enemy firepower spikes. The volcanic terrain with its red hues and lava adds tension without hurting visibility. This map balances the luck factor inherent in random defense with skill-based micro, resource management, and teamwork, offering a fresh build and crisis scenario every playthrough. It appeals to a wide range of players, from cooperative defense beginners to fixed parties competing for high scores. Before starting, checking the v1.1b patch notes, ensuring a full 7-player party, and verifying the presence of difficulty adjustment triggers will ensure a smoother experience.
랜덤 벙커 디펜스 v1H (Random Bunker D! v1H)
스타크래프트 브루드워 유즈맵 '랜덤 벙커 디펜스 v1H (Random Bunker D! v1H)'는 화산 타일셋을 배경으로 7인용 협동 벙커 디펜스 장르의 유즈맵이다. 제작자 Ahli가 제작한 v1H 버전으로, 7인용 단일 팀 구성의 협동 디펜스 장르에 속한다. 맵 크기는 192x96 타일 크기의 화산 지형으로 구성되어 있으며, cp949 인코딩으로 저장되어 있다. 핵심 구조는 '랜덤 벙커 디펜스'라는 장르명 그대로 무작위 위치에 생성되는 벙커를 활용해 몰려오는 적 웨이브를 막아내는 타워 디펜스 파생 장르다. 7명의 플레이어가 단일 팀을 이뤄 협동하며, 게임 시작 시 무작위 위치에 배치된 벙커를 중심으로 방어선을 구축하고 유닛을 생산해 몰려드는 적 웨이브를 막아내는 방식이다. 화산 지형 특유의 좁은 통로와 용암 지대가 방어선 형성에 변수로 작용하며, 무작위로 배치되는 초기 벙커 위치와 등장하는 적 조합이 매 판 다른 전략을 요구한다. 진행 방식은 웨이브 디펜스 전형적인 흐름을 따른다. 웨이브 간 간격 동안 자원을 채취해 벙커 업그레이드, 유닛 생산, 테크 트리 해금 등을 진행하며 다음 웨이브를 대비한다. 무작위 요소는 초기 벙커 위치뿐만 아니라 웨이브 구성에도 적용돼 매 게임 다른 조합의 적군이 등장하므로 고정된 빌드 오더 암기보다는 상황 대처 능력과 팀원 간 역할 분담이 중요하다. 화산 지형의 좁은 지형은 병목 지점을 자연스럽게 형성해 소수 벙커로도 효율적인 방어가 가능하지만, 다방향에서 몰려오는 웨이브에는 취약해 팀원 간 커버 플레이가 필수적이다. 추천 대상은 고정된 빌드 오더 암기보다 즉흥적인 판단과 협동 플레이를 선호하는 유저, 랜덤 디펜스와 벙커 디펜스의 혼합 장르를 즐기는 유저, 7인 풀파티 협동 플레이를 즐기는 그룹에게 적합하다. 플레이 전 확인 사항으로는 v1H 버전 이후 v1.2.1 등 후속 버전이 존재하므로 버전별 밸런스 차이를 확인할 것, cp949 인코딩 특성상 한글 채팅이나 트리거 텍스트 깨짐 여부 확인, 7인 풀방 미달 시 난이도 급상승 가능성 인지 등이 있다. Random Bunker D! v1H (Random Bunker D! v1H) is a StarCraft Brood War UMS map set on the Volcano tileset, designed as a 7-player cooperative Bunker Defense variant. Created by Ahli as version v1H, it supports 7 players in a single cooperative team. The map dimensions are 192x96 tiles on the Volcano tileset, encoded in cp949. True to its name 'Random Bunker Defense', this map belongs to the Tower Defense derivative genre where players utilize randomly placed bunkers to fend off incoming enemy waves. Seven players form a single cooperative team, building defensive lines around randomly positioned starting bunkers and producing units to withstand incoming waves. The Volcano terrain's narrow chasms and lava fields act as strategic variables for defense formation, while randomized initial bunker positions and wave compositions demand unique strategies each game. Gameplay follows the classic wave defense loop. During inter-wave intervals, players gather resources to upgrade bunkers, produce units, and unlock tech trees in preparation for the next onslaught. Randomness applies not only to initial bunker placement but also to wave composition, forcing players to adapt on the fly rather than relying on memorized build orders. Team coordination and role distribution become paramount. The Volcano terrain naturally creates choke points allowing efficient defense with fewer bunkers, yet multi-directional waves exploit vulnerabilities, making mutual cover play essential. Recommended for players who prefer improvisational judgment and cooperative play over memorized build orders, fans of hybrid Random Defense and Bunker Defense genres, and groups seeking 7-player full-party cooperative experiences. Pre-play checks include verifying balance differences in later versions like v1.2.1, checking for text corruption due to cp949 encoding, and acknowledging difficulty spikes when player count drops below seven.
투명 벙커 디펜스 (Invisible Bunker Defense)
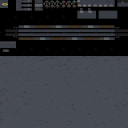
스타크래프트 브루드워의 숨은 보석 유즈맵 중 하나로, ‘Invisible Bunker Defense’는 이름 그대로 보이지 않는 벙커를 중심으로 한 디펜스 장르의 숨막히는 전투를 경험할 수 있는 맵이다. 플레이어는 시작 시점에서 벙커의 위치를 전혀 알 수 없으며, 적의 공격을 감지하거나 직접 벙커를 찾아내야 한다. 맵 중앙에는 회색 배경이 펼쳐져 있으며, 벙커는 투명한 상태로 배치되어 있어 초보자는 물론 숙련자도 실수를 할 가능성이 높은 구조다. 적의 공격 패턴은 랜덤으로 설정되어 있을 것으로 추정되며, 각 라운드가 진행되면서 점점 어려워지는 난이도 시스템이 적용되었을 가능성이 크다. 벙커를 찾기 위한 탐색 과정과 동시에 끊임없이 몰려드는 적들을 상대해야 하는 이중의 압박감이 이 맵의 핵심 매력이다. 기본적인 전략은 탐색과 방어의 균형을 잡는 것이며, 벙커를 빠르게 찾는 플레이어와 적을 효율적으로 막아내는 플레이어의 조합이 승리 확률을 높일 수 있다. 인공지능의 패턴이나 맵 내 숨겨진 트리거는 확인되지 않지만, 유즈맵 특유의 창의적인 설계가 돋보이는 작품으로 평가된다. 특히 숨은 요소와 랜덤성이 결합된 구조는 몇 번이고 다시 플레이하고 싶어지는 재플레이성을 높이는 요소다. 이 맵은 디펜스 장르를 любители(좋아하는) 유저뿐만 아니라 숨은 요소 찾기와 전략적 탐색을 즐기는 플레이어에게도 strong 하게 추천할 수 있다. 다만, 벙커의 위치를 빨리 찾지 못하면 초기 라운드에서부터 큰 어려움을 겪을 수 있으므로, 신중한 탐색과 동시에 빠른 판단력이 요구된다. 맵을 처음 플레이한다면 벙커의 위치를 예상하는 팁으로, 맵의 중앙보다는 가장자리에 가까울 가능성이 높다는 점을 참고할 수 있다. 또한, 적의 공격 패턴을 빠르게 파악하는 것이 중요하다. 벙커의 위치를 찾았다면, 해당 위치에 병력을 집중 배치하여 방어선을 구축하는 것이 핵심 전략이 된다. 이 맵은 기본적인 디펜스 메커니즘을 갖추고 있으나, 보이지 않는 요소와 랜덤성이 결합되면서 단순한 방어 이상의 재미를 제공한다. 특히 팀 플레이가 가능한 구조로 보이며, 팀원 간의 협력이 victoria(승리)를 좌우할 수 있다. 따라서 팀원과의 원활한 소통과 전략 공유가 필수적이다. 이 맵을 즐기기 위해서는 스타크래프트의 기본적인 조작과 맵 리딩 능력이 어느 정도 요구되지만, 숨은 재미와 도전 과제가 매력적으로 다가올 것이다. 디펜스 장르에 익숙하지 않더라도 숨은 요소와 전략적 탐색을 любители 하는 유저라면 충분히 즐길 수 있는 맵으로, 스타크래프트 유즈맵의 다양성을 보여주는 좋은 예시라고 할 수 있다. "Invisible Bunker Defense" is a hidden gem among StarCraft: Brood War custom maps, offering a tense defensive battle centered around invisible bunkers. Players start without knowing the bunker locations and must either detect enemy attacks or locate the bunkers themselves. The map features a gray background with transparent bunkers, making it easy to make mistakes even for experienced players. Enemy attack patterns appear random, and difficulty likely increases with each round. The core appeal lies in the dual pressure of searching for bunkers while fending off relentless waves of enemies. The key strategy involves balancing exploration and defense—quickly finding bunkers and efficiently blocking enemies boosts victory chances. While AI patterns and hidden triggers remain unverified, the map’s creative design stands out. Its blend of hidden elements and randomness enhances replayability, making it a must-replay experience. This map is highly recommended not only for defense genre fans but also for players who enjoy hidden elements and strategic exploration. However, failing to locate bunkers early can lead to significant difficulties in the initial rounds, so careful scouting and quick decision-making are essential. Beginners can start by assuming bunkers are more likely near the edges rather than the center. Quickly identifying enemy attack patterns is also crucial. Once bunkers are found, concentrating forces to establish defensive lines becomes the key strategy. While it follows basic defense mechanics, the invisible elements and randomness add depth beyond a typical defensive experience. The map seems designed for team play, where coordination and shared strategies can determine victory, making communication with teammates essential. Though it requires basic StarCraft skills and map-reading ability, the hidden challenges and rewards make it appealing. Even players unfamiliar with the defense genre can enjoy it if they appreciate hidden elements and strategic exploration, showcasing the diverse creativity of StarCraft custom maps.
맵 선택 가이드
태그는 맵의 핵심 특징을 빠르게 설명하지만 제작 버전마다 규칙이 다를 수 있습니다. 상세 설명에서 권장 인원, 난이도, 플레이 시간과 버전을 함께 확인한 뒤 다운로드하세요.