
벙커 스타크래프트 맵 모음
'벙커' 태그가 등록된 맵을 모았습니다. 장르 하나로 찾기 어려운 플레이 방식, 난이도와 특징을 중심으로 인기 맵과 최신 맵을 비교해 보세요.
- 등록 맵
- 31개
- 누적 다운로드
- 11
- 누적 조회
- 1,237
인기 맵
다운로드와 조회 반응이 높은 맵입니다.
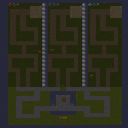
메이즈 디펜스 3-웨이 (Maze Defense 3-Way)
스타크래프트 브루드워 유즈맵 '메이즈 디펜스 3-웨이'는 3인 협력형 미로 디펜스 장르로, 사막 타일셋 위에서 벙커와 히어로 유닛을 활용해 몰려오는 적 웨이브를 막아내는 구조다. 맵 크기는 128×128 타일로 넓은 편이며, 세 갈래 길목이 중앙으로 모이는 3-웨이 지형이 특징이다. 각 플레이어는 입구 구간에서 벙커를 배치해 미로를 직접 설계하고, 히어로 유닛으로 보스나 특수 적을 제압하며 진행한다. 내부 설명에 따르면 11.0 버전에서 사토(Sato)라는 제작자가 히어로 밸런스를 조정하고 벙커 성능을 재조정했으며, 베타 2 단계에서 공개된 것으로 보인다. 플레이 초반에는 미로 형태를 어떻게 짜느냐에 따라 난이도가 크게 갈리므로, 벙커 업그레이드 순서와 히어로 스킬 타이밍을 익히는 것이 중요하다. 3인 고정 인원이라 인원 미달 시 난이도 급상승하므로 정해진 파티로 즐기길 권장한다. 디펜스 초보자보다는 미로 설계 경험이 있는 유저에게 적합하며, 긴 웨이브 지속 시간과 자원 관리가 핵심이다. 플레이 전 벙커 종류별 사거리·공속, 히어로별 스킬 쿨타임을 숙지하면 초반 붕괴를 막을 수 있다. Maze Defense 3-Way is a three-player cooperative maze defense map set on a desert tileset where players use bunkers and hero units to stop incoming enemy waves. The map spans 128×128 tiles, featuring a three-way layout where three lanes converge at the center. Each player builds their own maze by placing bunkers at the entrance and controls a hero to deal with bosses or special units. According to the internal description, version 11.0 introduced hero balance changes and bunker adjustments by a creator named Sato, and the file corresponds to a beta 2 release. Early maze design heavily influences difficulty, so learning bunker upgrade paths and hero skill timing is crucial. Since the map is balanced for exactly three players, missing members will spike the challenge; a pre-arranged party is recommended. The experience suits players familiar with maze design rather than pure defense beginners, as long wave durations and resource management are key. Checking bunker range, attack speed, and hero cooldowns before starting helps prevent early collapses.
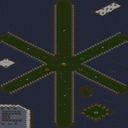
벙커(신)6웨이 (Star Bunker Defense)
스타크래프트 브루드워 유즈맵 'Star Bunker Defense'는 원본 파일명 '벙커(신)6웨이~~~~~.scx'에서도 드러나듯, 벙커를 활용한 협동 디펜스 맵으로 추정된다. 플랫폼 타일셋의 우주 정거장 분위기 속에서 최대 6인이 플레이하며, 각자 지정된 구역에 건설된 벙커 안에 유닛을 배치해 밀려오는 적을 막아내는 방식으로 보인다. 맵 크기는 128x128 타일로 넉넉한 편이며, 6개의 방어 라인이 중앙 또는 측면을 향해 배치되어 있어 다인 플레이에 최적화된 구조다. 내부 설명이 제공되지 않아 정확한 승리 조건이나 웨이브 수는 확인되지 않지만, 제목과 파일명에 '6웨이'가 명시된 점으로 미루어 6갈래의 루트에서 적이 생성되고, 이를 각 플레이어가 분담해 방어하는 전형적인 라인 디펜스 장르로 판단된다. 유닛 배치와 벙커 업그레이드, 체력 관리를 통한 생존이 핵심이며, 후반으로 갈수록 쏟아지는 적 유닛의 물량을 감당하기 위한 협동과 자원 관리가 중요할 것으로 예상된다. 플레이 경험 측면에서는 초반 정비 시간 이후 점차 고조되는 압박감과, 성공적으로 웨이브를 막아냈을 때의 성취감이 강점으로 보인다. 다만, 단순한 벙커 배치만으로는 후반을 버티기 어려울 수 있어, 유닛 조합이나 특수 능력 활용이 요구될 가능성도 있다. 이 맵은 친구들과 협력하여 물량 방어의 재미를 느끼고 싶은 플레이어에게 추천하며, 초보자도 쉽게 적응할 수 있는 직관적인 규칙을 가졌다고 추정된다. 단, 맵 설명이 부재하므로 플레이 전 반드시 게임 내 브리핑이나 팀원과의 소통으로 승리 조건을 확인하는 것이 좋다. 스타크래프트 유즈맵 특유의 협동 디펜스 경험을 찾는 유저에게 매력적인 선택지다. Star Bunker Defense is a StarCraft: Brood War UMS map that appears to be a cooperative defense scenario centered around bunkers, as indicated by its original filename '벙커(신)6웨이~~~~~.scx'. Set on a Platform tileset space station, it supports up to 6 players who likely place units inside bunkers along designated lanes to repel incoming enemies. The map size is a generous 128x128 tiles, optimized for multi-player defense with what seems to be six distinct attack routes. While the exact victory conditions and wave counts are unclear due to missing internal descriptions, the '6-way' in the filename strongly suggests a classic line defense where each player holds a lane. Core gameplay revolves around unit placement, bunker upgrades, and health management, demanding teamwork and resource control as enemy numbers escalate. The experience likely offers a satisfying sense of achievement from holding against intense assaults, though later waves may require advanced unit combinations or strategic positioning beyond simple bunker placement. This map is recommended for players seeking a straightforward yet intense cooperative defense with friends, and its intuitive rules make it accessible even to those new to the genre. However, players should verify victory conditions through in-game briefings or team chat before starting, given the lack of a written description. It is a solid choice for fans of StarCraft UMS cooperative defense experiences.
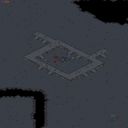
스타쉽 트루퍼스 (Starship Troopers)
스타쉽 트루퍼스 (Starship Troopers)는 영화 '스타쉽 트루퍼스' 세계관을 차용한 5인용 유즈맵으로, 우주 타일셋 위에서 벙커를 지키며 몰려드는 버그(저그) 세력과 맞서는 디펜스 장르의 맵입니다. 내부 설명인 'Defend your bunker against the Bug players until help arrives!'에서 알 수 있듯, 플레이어들은 제한된 시간 동안 벙커를 중심으로 방어선을 구축하고 지원 병력이 도착할 때까지 버텨야 합니다. 맵 크기는 128x128 타일로 표준적인 중형 맵이며, 우주 배경 특유의 어두운 시야와 좁은 통로 지형이 방어전 긴장감을 높입니다. 맵 파일명에 'NEW!'가 붙어 있어 기존 버전 대비 밸런스 조정이나 신규 트리거가 추가되었을 가능성이 높습니다. 관련 버전인 'Be the bug!!'는 버그 진영 플레이를 주축으로 한 변형판일 수 있으며, 'Advanced' 시리즈는 난이도 상승과 콘텐츠 확장이 이루어진 후속작으로 보입니다. 이러한 버전 계보를 통해 맵이 지속적으로 개선되어 왔음을 짐작할 수 있습니다. 진행 방식은 일반적인 컴까기 디펜스와 달리 'Bug players'라는 표현으로 보아 특정 플레이어가 버그 진영을 조종하거나, 트리거에 의한 웨이브형 적군이 등장하는 비대칭 대결 구도로 추정됩니다. 5인 플레이 인원 중 수비 측과 공격 측 인원 배분은 버전별로 다를 수 있으나, 협력하여 벙커를 지키는 팀플레이가 핵심입니다. 벙커 업그레이드, 유닛 생산, 자원 관리 등 밀리 요소가 가미되어 있으며, 지원 도착까지의 시간 제한이 있어 속도감 있는 판단이 요구됩니다. 추천 대상은 디펜스 장르를 즐기면서도 단순 웨이브 클리어가 아닌 상대 플레이어 혹은 지능형 AI와의 심리전, 자리싸움을 선호하는 유저입니다. 우주 타일셋 특성상 시야 확보가 어려워 관측선이나 스캔 활용법 숙지가 필요하며, 벙커 배치 위치와 초반 자원 분배가 승패를 가르는 주요 포인트입니다. 플레이 전 버전별 밸런스 차이가 있을 수 있으니 파일명과 설명을 확인하고 입장하는 것이 좋습니다. 협동과 전략적 판단이 어우러진 생존 디펜스를 찾는 팀에게 적합한 맵입니다. Starship Troopers is a 5-player use map setting based on the Starship Troopers franchise, set on a space tileset where players defend a bunker against bug (Zerg) forces in a defense genre map. As the internal description states, 'Defend your bunker against the Bug players until help arrives!', players must build defensive lines around the bunker and survive until reinforcements arrive within a time limit. The map size is a standard 128x128 tiles, and the dark vision and narrow corridors typical of the space tileset heighten the tension of the defensive battle. The filename includes 'NEW!', suggesting balance adjustments or new triggers compared to previous versions. Related versions like 'Be the bug!!' may be variants focused on playing as the bugs, while the 'Advanced' series appear to be sequels with increased difficulty and expanded content, indicating ongoing refinement. The gameplay differs from typical comp-stomp defenses; the term 'Bug players' suggests either a specific player controls the bug faction or trigger-based waves create an asymmetric confrontation. While the exact split of the 5 players between defense and offense may vary by version, cooperative teamplay to hold the bunker is central. Mil elements like bunker upgrades, unit production, and resource management are incorporated, and the time limit until support arrives demands quick decision-making. This map is recommended for users who enjoy defense genres but prefer psychological warfare and positional battles against human opponents or smart AI rather than simple wave clearing. Due to the space tileset, securing vision is difficult, requiring proficiency with observers or scans. Bunker placement and early resource allocation are key decisive factors. Since balance may differ across versions, checking the filename and description before joining is advised. It suits teams looking for a survival defense that blends cooperation and strategic judgment.
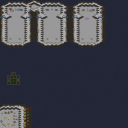
벙커지키기 한글판VER1.01!
「벙커지키기」는 스타크래프트 브루드워의 유즈맵 중에서도 디펜스 장르에 속하는 맵으로, 제한된 시간 동안 플레이어가 지키는 벙커를 적의 공격으로부터 지켜내는 것이 주요 목표다. 맵의 전체적인 구조는 중앙에 위치한 벙커를 중심으로 적의 공격로가 펼쳐져 있으며, 플레이어는 입구 주변에 배치된 방어 시설물을 활용해 적을 제압해야 한다. 벙커는 맵 중앙에 위치하고 있으며, 입구 주변에는 자원과 방어 구조물을 설치할 수 있는 공간이 마련되어 있어 전략적인 배치와 관리가 중요하다. 맵의 배경은 어두운 색조로 이루어져 있으며, 벙커와 방어 시설물은 밝은 색상으로 대비되어 있어 시각적으로 식별이 용이하다. 맵의 전체적인 분위기는 긴장감과 집중력을 요구하는 디펜스 게임의 특징을 잘 살리고 있다. 플레이 방식은 제한 시간 내에 적의 공격을 모두 방어하는 것이며, 벙커가 파괴되면 게임이 종료된다. 적의 공격 패턴은 랜덤하게 나타나며, 플레이어는 방어 시설물의 업그레이드와 자원 관리를 통해 공격을 방어해야 한다. 맵의 난이도는 제한 시간과 적의 공격 강도에 따라 조절되며, 초보자의 경우 방어 시설물의 배치와 자원 관리에 주의를 기울여야 한다. 또한, 맵의 구조상 입구 주변의 방어 시설물 배치와 업그레이드가 게임의 승패를 좌우할 수 있으므로, 신중한 전략 수립이 필요하다. 이 맵은 특히 디펜스 장르에 익숙한 플레이어들에게 적합하며, 제한 시간 내에 벙커를 지켜내는 성취감을 느낄 수 있는 재미있는 경험을 제공한다. 또한, 팀플레이를 지원하지 않지만, 개인의 전략적 사고와 판단력을 요구하는 맵이므로 혼자서도 충분히 즐길 수 있다. 맵의 전체적인 디자인과 분위기는 플레이어에게 긴장감을 조성하며, 방어와 관리의 균형을 잘 맞춰야만 승리를 거둘 수 있다. 따라서 이 맵은 디펜스 게임을 좋아하는 플레이어들에게 강력히 추천할 만한 작품이다. 플레이 전 확인해야 할 포인트는 벙커 주변의 방어 시설물 배치 공간과 자원 분포, 그리고 제한 시간 내에 공격을 방어할 수 있는 전략 수립 여부다. 방어 시설물의 올바른 배치와 업그레이드는 게임의 승패를 결정짓는 핵심 요소이므로, 미리 전략을 세워두는 것이 중요하다. 또한, 맵의 구조상 입구 주변의 방어선을 강화하는 것이 가장 효과적인 방어 방법임을 기억해야 한다. "Bunker Defense" is a defense genre map in *StarCraft: Brood War*'s custom maps, where the main objective is to protect a bunker from enemy attacks within a limited time. The map's overall structure features an enemy approach path centered around a bunker located in the middle, and players must suppress enemies by utilizing defensive structures placed around the entrance. The bunker is positioned in the center of the map, with designated spaces around the entrance for placing resources and defensive structures, making strategic placement and management crucial. The map's dark-toned background contrasts with the bright colors of the bunker and defensive structures, making them easy to identify visually. The overall atmosphere of the map effectively captures the tension and focus required for a defense game. The gameplay involves defending against all enemy attacks within the time limit, with the game ending if the bunker is destroyed. Enemy attack patterns appear randomly, and players must defend by upgrading defensive structures and managing resources. The map's difficulty is adjusted based on the time limit and the intensity of enemy attacks, so beginners should pay close attention to the placement and management of defensive structures. Additionally, since the placement and upgrades of defensive structures around the entrance can determine victory or defeat, careful strategy is essential. This map is particularly suitable for players familiar with the defense genre, offering an enjoyable experience of defending the bunker within the time limit. While it does not support team play, it requires individual strategic thinking and decision-making, making it enjoyable even when played alone. The map's overall design and atmosphere create tension, and victory can only be achieved by balancing defense and resource management. Therefore, this map is highly recommended for players who enjoy defense games. Before playing, important points to check include the placement spaces for defensive structures around the bunker, the distribution of resources, and whether a strategy to defend within the time limit can be established. The correct placement and upgrades of defensive structures are key factors in determining victory, so it's important to plan ahead. Also, remember that strengthening the defensive line around the entrance is the most effective way to defend in this map's structure.
아메이징 TD 섀도우 3.1 (Amazing TD Shadow 3.1)
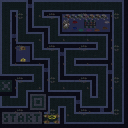
‘Amazing TD Shadow3.1’은 스타크래프트: 브루드워의 대표적인 타워 디펜스(터렛 디펜스) 유즈맵으로, 방어와 전략적 배치에 중점을 둔 플레이가 인상적이다. 맵 중앙을 가로지르는 길목에 배치된 벙커에서 3기의 유닛을 동시에 운용할 수 있으며, 각 웨이브마다 등장하는 적 유닛들은 점점 강해지는 특징을 보인다. 방어선을 구축하는 동시에 자원을 확보하고, 강력한 적들을 상대로 어떻게 효율적으로 대처하느냐가 관건이다. 맵 곳곳에 위치한 특수 구조물이나 보너스 지역이 보이며, 난이도 설정도 제공되어 초보자부터 숙련자까지 폭넓게 즐길 수 있다. 특히 ‘Stronger Foes’라는 설명처럼 후반부로 갈수록 적의 공격력이 급증하므로, 초반 자원 관리와 유닛 배치 계획을 철저히 세워야 한다. 또한 Improved Ban 기능으로 인해 특정 유닛이나 전략이 불리해지는 상황이 발생할 수 있어, 유연한 대처가 필요하다. 이 맵은 주로 1인용 또는 소규모 팀 플레이에 최적화되어 있으며, 디펜스 장르의 핵심 요소인 ‘막아내기’의 재미를 극대화한 작품이다. 플레이는 약 30분 내외로 마무리되며, 반복 플레이를 통해 최적의 전략을 구사할 수 있는 재미도 존재한다. 초보자라면 난이도를 낮춰 천천히 적응하는 것이 좋고, 숙련자라면 최대한의 효율로 자원을 확보해 후반부 공세에 대비해야 한다. 맵을 처음 플레이할 때는 벙커 주변의 지형과 길목을 꼼꼼히 살피는 것이 중요하며, 각 웨이브의 패턴을 익히는 데 집중하는 것이 좋다. 또한 Improved Ban 기능으로 인해 특정 유닛이 제한될 수 있으니, 다양한 조합을 시도해 보는 것도 추천한다. Amazing TD Shadow3.1 is a standout tower defense custom map in StarCraft: Brood War, focusing heavily on strategic placement and defense mechanics. Players control three units simultaneously from bunkers positioned along the central path, with enemy waves growing progressively stronger as the game advances. Effective resource management and tactical unit placement are crucial for survival, especially since the latter stages introduce significantly tougher foes. The map features bonus areas and special structures that can be leveraged for additional advantages, while difficulty settings allow players of all skill levels to enjoy the experience. The Improved Ban system adds another layer of challenge by restricting certain units or strategies, requiring adaptability. Designed primarily for solo play or small team coordination, this map emphasizes the core appeal of defense-based gameplay, delivering a satisfying 30-minute experience that rewards strategic refinement. Beginners should start on lower difficulties to grasp the mechanics, while experienced players can push their limits by optimizing resource allocation for late-game waves. Scouting the terrain around bunkers and understanding enemy wave patterns is essential, and experimenting with different unit combinations helps counter the Improved Ban restrictions effectively.
HELL 생존 시험 (Test of Survival - HELL)
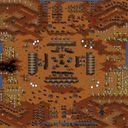
스타크래프트의 ‘Test of Survival - HELL’은 이름에서부터 느껴지듯 극한의 서바이벌 환경을 제공하는 유즈맵이다. 시작과 동시에 벙커로 진입하라는 지시가 있으며, 외부에서는 끊임없이 저글링과 질럿이 무한 스폰되어 플레이어를 압박한다. 맵 중앙의 성큰 콜로니가 방어의 핵심으로, 이를 중심으로 전진배치된 저글링 무리들을 상대하며 건물을 파괴하고 컴퓨터 유닛을 섬멸하는 것이 주요 목표로 보인다. 황혼 타일셋의 어두운 분위기와 붉은 색조가 맵의 긴장감을 한층 더해주며, 특히 성큰 주변의 지형이 복잡하게 배치되어 방어 라인을 구축하기 어렵게 만든다. 벙커와 성큰을 적절히 활용하지 않으면 순식간에 밀려나는 플레이가 예상되며, 끊임없는 적의 물량 공세 속에서Resource management와 위치 선정 능력이 중요할 것으로 추정된다. 초보자에게는 다소 난해할 수 있지만, 숙련된 플레이어라면 이 맵의 치밀한 구조와 전략적 깊이를 즐길 수 있을 것이다. 맵의 난이도는 대체로 높은 수준으로 보이며, 특히 성큰 주변의 좁은 길목에서 벌어지는 전투가 관건일 가능성이 크다. 5인 플레이를 상정하고 제작된 맵으로 보이나, 팀전보다는 개인전 또는 코옵 플레이에 최적화되어 있는 구조다. 플레이 전 반드시 벙커 내부 배치와 성큰의 위치를 숙지하고, 자원 확보 및 방어 전략을 미리 세워두는 것이 중요하다. 이 맵은 순수한 서바이벌 요소와 디펜스 요소가 혼합되어 있으며, 끊임없는 압박 속에서 생존과 공격의 균형을 잡아야 한다. 맵의 분위기와 장르 특성상 긴장감과 몰입도를 중시하는 플레이어에게 강추한다. 맵을 처음 플레이한다면 예상 플레이 시간은 30분 내외로 예상되지만, 난이도에 따라 크게 달라질 수 있으니 주의가 필요하다. StarCraft’s *Test of Survival - HELL* is a custom map that delivers an extreme survival experience, as the name suggests. Right from the start, players are instructed to enter a bunker, while outside, zerglings and zealots spawn endlessly, relentlessly pressuring the player. The core of the defense revolves around the sunkens at the map’s center, where players must fight through waves of zerglings, destroy buildings, and eliminate computer-controlled units. The twilight-themed tileset, with its dark atmosphere and red hues, amplifies the map’s tension, while the complex terrain around the sunkens makes establishing a solid defense line challenging. Without proper use of bunkers and sunkens, players will quickly get overwhelmed by the constant enemy waves. Resource management and strategic positioning are likely key factors in surviving this relentless onslaught. While the map may be difficult for beginners, experienced players will appreciate its intricate design and strategic depth. The difficulty is generally high, with the tight passages around the sunkens likely serving as critical battle points. Though designed with five players in mind, the map is better suited for solo or cooperative play rather than team battles. Before playing, it’s crucial to familiarize yourself with the bunker’s interior layout and the sunkens’ positions, and to plan out resource gathering and defense strategies ahead of time. This map blends pure survival and defense elements, requiring players to balance survival and offense under constant pressure. Given its tense and immersive atmosphere, it’s highly recommended for players who enjoy high-stakes, survival-focused gameplay. If you’re playing for the first time, expect a session to last around 30 minutes, though the difficulty may significantly alter this.
히드라리스크 어택 20,001 하드 (Hydralisk Attack 20,001 HARD)
'히드라리스크 어택 20,001 하드'는 제목 그대로 20,001마리의 히드라리스크 떼거리를 상대로 기지를 사수하는 초고난도 디펜스 유즈맵이다. 플랫폼 타일셋을 기반으로 64x256 타일, 세로로 긴 2048x8192 크기의 맵은 공격 루트가 명확한 직선형 구조로 보이며, 파일명에 명시된 '5벙커' 제한 사항이 핵심 제약 조건으로 작용한다. 최대 7인 협동 플레이를 지원하며, 제작자 ckhyam의 의도대로 'HARD' 난이도에 걸맞게 압도적인 물량 공세를 제한된 벙커와 유닛으로 막아내야 한다. 진행 방식은 별도의 자원 채취나 테크 트리 확장 없이 시작부터 주어진 전력으로 웨이브를 버티는 생존형에 가깝다. 히드라리스크의 사거리와 화력을 고려해 벙커 배치와 집중 사격, 유닛 컨트롤이 생존의 열쇠가 된다. 협동전 특성상 역할 분담과 화력 집중이 필수적이며, 솔로 플레이는 사실상 불가능에 가깝다. 추천 대상은 극한의 디펜스 상황을 즐기는 하드코어 유저나 팀워크 검증을 원하는 그룹이다. 플레이 전 벙커 수 제한과 맵의 세로 길이로 인한 시야 확보, 랙 가능성을 염두에 두어야 한다. 'Hydralisk Attack 20,001 HARD' is an ultra-high-difficulty defense UMS map where players must defend their base against a swarm of 20,001 Hydralisks, just as the title states. Based on the Platform tileset, the vertically long 64x256 tile map (2048x8192) appears to have a linear structure with a clear attack route, and the '5 Bunker' limit mentioned in the filename acts as a key constraint. Supporting up to 7-player co-op, the map lives up to its 'HARD' difficulty as intended by creator ckhyam, requiring players to withstand overwhelming waves with limited bunkers and units. The gameplay is survival-oriented, holding waves with starting forces without separate resource gathering or tech expansion. Bunker placement, focus fire, and unit control are key to survival considering the Hydralisk's range and damage. Role assignment and firepower concentration are essential for co-op, making solo play nearly impossible. Recommended for hardcore users who enjoy extreme defense scenarios or groups wanting to test teamwork. Before playing, keep in mind the bunker limit, visibility issues due to vertical map length, and potential lag.
랜덤 벙커 디펜스 (Random Bunker Def)
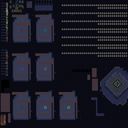
Random Bunker Def는 화산 타일셋을 배경으로 한 UMS 유즈맵으로, 이름 그대로 무작위 위치에 배치되는 벙커들을 활용해 방어 라인을 구축하는 디펜스형 맵이다. 맵 전체가 192×96 타일 규모이며, 각 벙커는 일정 시간마다 재생성되는 적군을 막아내야 하는 핵심 방어 거점으로 작동한다. 플레이어는 7명의 다인 플레이를 전제로 하며, 각자 시작 지점에서 자원을 확보하고 벙커를 적절히 배치해 적의 파동을 차단한다. 적은 주기적으로 다수의 유닛이 한 줄로 몰려오며, 벙커의 위치와 업그레이드 여부가 승패를 좌우한다. 지도 설계상 벙커가 무작위로 생성되므로 매 라운드마다 방어 전략을 새롭게 구성해야 하며, 자원 관리와 유닛 생산 타이밍이 중요한 요소로 작용한다. 특히 화산 타일셋 특유의 좁은 통로와 높은 지형 차이는 유닛 이동 경로를 제한해 방어를 더욱 집중시키는 효과를 낸다. 초보자도 기본적인 방어 메커니즘을 이해하면 즐길 수 있지만, 적의 파동이 점점 강해지는 후반부에서는 유닛 조합과 벙커 업그레이드 선택이 요구된다. 따라서 전략적인 사고를 즐기는 플레이어와 팀 협업을 통해 방어 라인을 최적화하고자 하는 유저에게 특히 추천한다. 플레이 전에는 벙커 재생성 간격과 자원 채집 포인트 위치를 확인해 초기 방어 배치를 미리 계획하는 것이 좋다. Random Bunker Def is a UMS user map set on a volcanic tileset, featuring a defense style where randomly placed bunkers serve as the core of the player's fortifications. The map spans 192×96 tiles, and each bunker must hold off waves of enemies that periodically spawn and advance in large groups. Designed for up to seven players, participants start at separate bases, gather resources, and strategically position or upgrade bunkers to block the enemy onslaught. Because bunkers appear at random locations each round, players must continuously adapt their defensive layouts, making resource management and unit production timing crucial. The volcanic terrain’s narrow passages and elevation differences further channel unit movement, concentrating defensive efforts. While beginners can grasp the basic mechanics and enjoy the map, the increasing intensity of enemy waves in later stages demands thoughtful unit composition and bunker upgrades. Consequently, the map is especially recommended for players who relish strategic planning and cooperative team defense. Before starting, checking the bunker respawn interval and resource node locations helps in pre‑planning an effective initial defense.
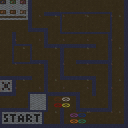
어메이징 터렛 디펜스 2.0 (Amazing Turret Defense 2.0)
'어메이징 터렛 디펜스 2.0'은 황무지 타일셋의 64x64 중형 맵에서 진행되는 7인용 타워 디펜스 유즈맵이다. 파일명상 2.1 버전으로 보이며, 핵심 규칙은 '터렛을 5기 이상 건설하면 모두 잃는다'는 독특한 페널티 구조에 있다. 플레이어들은 벙커를 얼리는 터렛의 특성을 활용해 몰려오는 적을 막아야 하지만, 과도한 터렛 건설 시 전력이 초기화되므로 최소한의 라인만 유지하며 자원과 업그레이드 효율을 극대화하는 운영이 요구된다. 일반적인 디펜스처럼 무한 증설이 불가능해 초반 배치 실수가 치명적이며, 벙커 동결이라는 공격 메커니즘 탓에 적 진형 붕괴 타이밍을 맞추는 컨트롤이 승부를 가른다. 7인 풀파티 협동 시 시너지가 크지만 인원 미달 시 난이도가 급상승하므로 인원 확보가 필수적이다. 고전 유즈맵 특유의 트리거 제약과 밸런스를 즐기는 유저, 제한된 자원 내에서 최적의 빌드를 연구하는 전략 애호가에게 추천한다. 플레이 전 버전 차이(2.0 vs 2.1)와 트리거 작동 여부를 확인하고, 터렛 제한 수치를 숙지한 뒤 시작하는 것이 좋다. 'Amazing Turret Defense 2.0' is a 7-player tower defense UMS played on a medium 64x64 Badlands tileset map. The filename suggests version 2.1, and the core rule revolves around a unique penalty: building more than 5 turrets causes you to lose them all. Players must utilize turrets that freeze bunkers to stop incoming waves, but excessive turret construction resets their firepower, demanding efficient management that maximizes upgrades with minimal defensive lines. Unlike standard defenses where infinite building is possible, early placement mistakes are fatal, and the bunker-freeze mechanic makes timing control crucial for breaking enemy formations. Full 7-player co-op yields strong synergy, but missing players spikes difficulty, making a full lobby essential. Recommended for fans of classic UMS trigger constraints and balance, or strategists who enjoy optimizing builds under strict limits. Before playing, verify version differences (2.0 vs 2.1), trigger functionality, and memorize the turret limit.
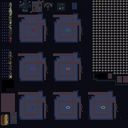
랜덤 벙커 디펜스 3S (Random Bunker Def 3S)
Random Bunker Def 3S 맵은 화산 타일셋을 사용한 4096×3072 해상도의 대형 전장으로, 랜덤으로 배치되는 벙커와 방어 구조물이 핵심 요소입니다. 플레이어는 7명의 유저가 동시에 참여해 각자 베이스를 구축하고, 무작위로 생성되는 적 유닛의 물결을 방어해야 합니다. 맵 전반에 걸쳐 벙커가 불규칙하게 배치되어 있어, 초반 진입로 확보와 방어 라인 구축이 매우 중요합니다. 자원은 중앙에 집중돼 있어, 초기 라인을 빠르게 확장하고 방어 타워와 유닛을 배치하는 전략이 승패를 좌우합니다. 적 유닛은 일정 시간마다 증가하는 파동 형태로 등장하며, 벙커를 이용해 차단하거나 직접 공격해 파괴할 수 있습니다. 플레이 경험은 방어 위치 선정과 자원 관리, 그리고 적 파동에 맞춘 유닛 조합 선택이 핵심이며, 특히 벙커를 효과적으로 활용하면 방어 효율이 크게 상승합니다. 초보자보다는 방어 전략에 익숙한 유저에게 적합하지만, 랜덤 요소가 강해 다양한 상황에 대응하는 연습에도 좋습니다. 플레이 전에는 벙커 배치와 자원 위치를 파악하고, 방어 라인을 어떻게 구성할지 미리 계획하는 것이 필요합니다. Random Bunker Def 3S is a large-scale map featuring a volcanic tileset at a resolution of 4096×3072, where randomly placed bunkers and defensive structures form the core gameplay. Up to seven players can join simultaneously, each building a base and defending against waves of enemy units that spawn unpredictably. The map’s random bunker distribution makes early path securing and defensive line construction crucial. Resources are concentrated in the center, so quickly expanding the initial front and placing towers and units determines success. Enemy units arrive in timed waves, and players can either block them with bunkers or destroy them directly. The experience focuses on choosing defensive positions, managing resources, and selecting unit compositions that match the incoming waves; effectively using bunkers greatly boosts defense efficiency. While more suitable for players familiar with defense tactics rather than beginners, the strong random element also provides good practice for adapting to varied situations. Before playing, it’s advisable to examine bunker locations and resource spots and plan the defensive layout in advance.
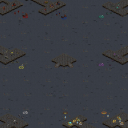
벙커 워즈 VI (Improved) (Bunker Warz VI (Improved))
스타크래프트 브루드워의 유즈맵으로 유명한 〈Bunker Warz VI (Improved)〉는 다수의 플레이어가 각각의 벙커를 방어하며 전투를 펼치는 독특한 디펜스 스타일의 맵이다. 맵은 8명의 플레이어가 참여할 수 있도록 설계되어 있으며, 각 플레이어는 자신의 기지와 벙커를 중심으로 적의 공격을 막아내야 한다. 맵의 구조는 섬 형태를 띄고 있어 중앙 바다를 사이에 두고 각 플레이어의 영토가 나뉘어져 있으며, 이는 전투와 자원 관리 전략을 복잡하게 만든다. 내부 메모리에서 확인되는 ‘Buildable Units’와 ‘Upgrades’라는 키워드는 기지 건설과 영웅 시스템이 포함되어 있음을 시사하며, 이를 통해 플레이어는 자원을 모아 방어 시설과 유닛을 업그레이드하거나 추가할 수 있다. 맵의 전체적인 분위기는 우주 배경 타일셋을 사용하여 매끄러운 전투 공간을 제공하며, 특히 벙커 간 전투가 중점적으로 이루어지는 만큼 시야와 방어 시설을 잘 활용하는 전략이 중요하다. 플레이어는 자원 수집, 방어 시설 구축, 적절한 시점에 공격과 방어 전환을 통해 승리를 노려야 한다. 이 맵은 특히 여러 명이 참여하는 팀 기반 전투를 즐기고자 하는 유저들에게 적합하며, 혼자서도 충분히 재미를 느낄 수 있는 구조로 설계되어 있다. 다만, 8인 동시 플레이를 고려한 밸런스 조정 여부는 명확하지 않으므로, 초보자의 경우 난이도 조절 가능한 모드를 찾는 것이 좋다. 맵의 개선된 버전(Improved)이라는 제목과 내부 메모리에서 언급된 ‘Edited by Deth_wil_meet_u (DidoServia)’는 개발자에 의해 지속적인 업데이트가 있었음을 짐작할 수 있다. 플레이 전에는 각 플레이어의 시작 위치와 자원 분배 방식, 업그레이드 시스템에 대한 사전 이해가 필요하며, 특히 중앙 바다를 통한 이동 경로와 벙커 간의 상호 방어 체계를 미리 숙지하는 것이 중요하다. 이 맵은 디펜스와 전략적 요소의 조화가 돋보이는 유즈맵으로, 브루드워의 유즈맵 문화에서 오랫동안 사랑받아 온 장르의 정수를 담고 있다. Bunker Warz VI (Improved), a well-known custom map from StarCraft: Brood War, features a unique defense-style gameplay where multiple players defend their bunkers. Designed for eight players, each must protect their base and bunker from enemy attacks. The map is structured as an island, with territories divided by a central sea, adding complexity to combat and resource management. Keywords like "Buildable Units" and "Upgrades" in the internal memory suggest a base-building and hero system, allowing players to gather resources, upgrade defenses, and add units. The overall aesthetic uses a space-themed tileset, creating a sleek battleground where vision and defensive structures play a crucial role in bunker-to-bunker combat. Success depends on resource collection, fortifying defenses, and strategically switching between offense and defense. The map caters to players who enjoy team-based battles, though it’s also enjoyable solo. However, balance for eight simultaneous players isn’t guaranteed, so beginners may want to look for difficulty-adjustable modes. The "Improved" title and the credit "Edited by Deth_wil_meet_u (DidoServia)" hint at ongoing updates by the developer. Before playing, familiarize yourself with starting positions, resource distribution, and the upgrade system, and pay special attention to movement routes across the central sea and the mutual defense mechanics between bunkers. Bunker Warz VI stands out for blending defense and strategy, encapsulating the essence of Brood War’s beloved custom map genre.
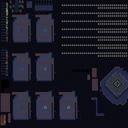
랜덤 벙커 디펜스 (Random Bunker Def)
랜덤 벙커 디펜스(Random Bunker Def)는 스타크래프트 브루드워 유즈맵 중에서도 독특한 벙커 방어 콘셉트를 랜덤 요소와 결합한 협동 디펜스 맵이다. 화산 타일셋을 배경으로 192x96 타일 크기의 전장에서 최대 7명의 플레이어가 한 팀을 이루어 몰려오는 적 유닛을 막아내는 것이 핵심 진행 방식이다. 맵 제목에서 알 수 있듯 각 웨이브마다 등장하는 적 조합과 공격 경로가 무작위로 결정되기 때문에 매 판마다 다른 공략이 요구되며, 고정된 빌드 오더보다는 상황 판단과 유연한 대처 능력이 승패를 가른다. 플레이어는 시작 자원으로 벙커와 유닛을 생산해 진지를 구축하고, 웨이브가 진행될수록 강화되는 적 공세에 맞춰 업그레이드와 추가 병력 배치를 병행해야 한다. 아흘리(Ahli) 제작자의 v1.2b 버전에서는 밸런스 조정과 버그 수정이 이뤄진 것으로 보이며, 난이도 곡선이 완만하게 시작해 중반 이후 급격히 상승하는 구조로 추정된다. 7인 협동 특성상 역할 분담이 자연스럽게 이루어지며, 초반 자원 관리와 벙커 배치 위치 선정이 후반 생존율을 좌우한다. 랜덤성이 강한 만큼 반복 플레이 시에도 지루함이 덜하고, 팀원 간 호흡을 맞추는 재미가 크다. 다만 맵 크기가 넓어 미니맵 확인과 병력 이동에 익숙하지 않은 초보자는 초반에 혼란을 겪을 수 있다. 승리 조건은 모든 웨이브를 성공적으로 방어하는 것이며, 핵심 건물이 파괴되거나 전원 전멸 시 패배하는 것으로 보인다. 추천 대상은 디펜스 장르를 즐기며 랜덤 요소와 협동 플레이를 선호하는 유저이며, 플레이 전에는 벙커 업그레이드 트리와 유닛 상성표를 숙지하고 팀원과 역할 분담을 논의하는 것이 좋다. 또한 시작 위치별 자원 차이와 적 유닛 종류별 공략법을 미리 파악하면 초반 안정적인 진지 구축에 도움이 된다. Random Bunker Def is a cooperative defense map for StarCraft: Brood War that combines a unique bunker defense concept with random elements. Set on a volcanic tileset across a 192x96 tile battlefield, up to seven players form a single team to hold off waves of enemy units. As the title suggests, each wave randomizes enemy compositions and attack paths, demanding a fresh strategy every game; rigid build orders fall short, and adaptability decides victory. Players spend starting resources to produce bunkers and units, establishing a defensive line, then must continuously upgrade and reinforce as enemy pressure escalates through the waves. The v1.2b release by creator Ahli appears to include balance tweaks and bug fixes, with a difficulty curve that starts gently before spiking sharply in the mid-to-late game. The seven-player format naturally encourages role division, where early resource management and bunker placement heavily influence late-game survival. Strong randomness keeps repeat playthroughs fresh and rewards team coordination. However, the large map size can overwhelm newcomers unfamiliar with minimap tracking and army movement. Victory is achieved by surviving all waves, while defeat comes when a key structure falls or all players are wiped out. The map suits fans of defense genres who enjoy randomness and teamwork. Before playing, study the bunker upgrade tree, unit matchups, and agree on roles with teammates. Knowing each start location’s resource differences and counter-strategies for enemy types also helps secure a stable early defense.
최근 등록된 맵
새로 추가된 파일과 버전을 확인하세요.
벌쳐 태그 II: 더 인베이전 (Vulture Tag II: the Invasion)
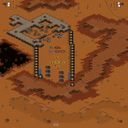
스타크래프트: 브루드워의 숨은 명작 유즈맵 가운데 하나로 꼽히는 《벌쳐 태그 II: 더 인베이전》은 벌쳐를 조종하며 Protoss 기지를 파괴하는 컴까기 맵이다. 맵의 핵심은 적 기지 방어塔와 벙커로 둘러싸인 Protoss 본진을 찾아내어 공격을 성공시키는 데 있다. 황혼 테마의 넓은 지형 위에 배치된 벙커와 방어 시설들은 플레이어의 전략적 선택을 끊임없이 요구하며, 맵의 전체적인 분위기는 긴장감과 집중력을 요구하는 디펜스 및 공격형 플레이가 조화를 이룬다. 벌쳐의 빠른 기동성과 Protoss 유닛의 강력한 방어력 간의 대결은 이 맵의 매력을 극대화하는 요소로, 초보자와 숙련자 모두에게 즐거움을 제공할 수 있는 구조로 설계되었다. 특히 맵의 중간 지점에 위치한 Protoss 방어시설은 플레이어의 실력에 따라 공략 난이도가 크게 달라지므로, 반복 플레이를 통해 전략을 다듬을 수 있는 장점이 있다. 벌쳐의 특수 능력인 공중 유닛이라는 점과 Protoss의 방어력 우위라는 상성을 고려한 밸런스는 이 맵의 핵심 경쟁력으로, 브루드워 유즈맵의 정수를 느낄 수 있는 작품이라 할 수 있다. Vulture Tag II: the Invasion is one of the hidden gems among StarCraft: Brood War custom maps, where players control Vultures to destroy Protoss bases. The core gameplay revolves around locating and attacking Protoss bases surrounded by bunkers and defensive towers. The twilight-themed terrain, featuring bunkers and defensive structures, demands constant strategic decision-making from players, blending defensive and offensive elements seamlessly. The tension between the Vulture's speed and the Protoss units' defensive power maximizes the map's appeal, offering an enjoyable experience for both beginners and veterans. The mid-map Protoss defensive structures vary in difficulty based on player skill, making the map ideal for refining strategies through repeated play. The balanced synergy between Vultures' aerial advantage and Protoss' defensive strength is a key competitive feature, encapsulating the essence of Brood War custom maps.
벙커(신)6웨이 (Star Bunker Defense)
스타크래프트 브루드워 유즈맵 'Star Bunker Defense'는 원본 파일명 '벙커(신)6웨이~~~~~.scx'에서도 드러나듯, 벙커를 활용한 협동 디펜스 맵으로 추정된다. 플랫폼 타일셋의 우주 정거장 분위기 속에서 최대 6인이 플레이하며, 각자 지정된 구역에 건설된 벙커 안에 유닛을 배치해 밀려오는 적을 막아내는 방식으로 보인다. 맵 크기는 128x128 타일로 넉넉한 편이며, 6개의 방어 라인이 중앙 또는 측면을 향해 배치되어 있어 다인 플레이에 최적화된 구조다. 내부 설명이 제공되지 않아 정확한 승리 조건이나 웨이브 수는 확인되지 않지만, 제목과 파일명에 '6웨이'가 명시된 점으로 미루어 6갈래의 루트에서 적이 생성되고, 이를 각 플레이어가 분담해 방어하는 전형적인 라인 디펜스 장르로 판단된다. 유닛 배치와 벙커 업그레이드, 체력 관리를 통한 생존이 핵심이며, 후반으로 갈수록 쏟아지는 적 유닛의 물량을 감당하기 위한 협동과 자원 관리가 중요할 것으로 예상된다. 플레이 경험 측면에서는 초반 정비 시간 이후 점차 고조되는 압박감과, 성공적으로 웨이브를 막아냈을 때의 성취감이 강점으로 보인다. 다만, 단순한 벙커 배치만으로는 후반을 버티기 어려울 수 있어, 유닛 조합이나 특수 능력 활용이 요구될 가능성도 있다. 이 맵은 친구들과 협력하여 물량 방어의 재미를 느끼고 싶은 플레이어에게 추천하며, 초보자도 쉽게 적응할 수 있는 직관적인 규칙을 가졌다고 추정된다. 단, 맵 설명이 부재하므로 플레이 전 반드시 게임 내 브리핑이나 팀원과의 소통으로 승리 조건을 확인하는 것이 좋다. 스타크래프트 유즈맵 특유의 협동 디펜스 경험을 찾는 유저에게 매력적인 선택지다. Star Bunker Defense is a StarCraft: Brood War UMS map that appears to be a cooperative defense scenario centered around bunkers, as indicated by its original filename '벙커(신)6웨이~~~~~.scx'. Set on a Platform tileset space station, it supports up to 6 players who likely place units inside bunkers along designated lanes to repel incoming enemies. The map size is a generous 128x128 tiles, optimized for multi-player defense with what seems to be six distinct attack routes. While the exact victory conditions and wave counts are unclear due to missing internal descriptions, the '6-way' in the filename strongly suggests a classic line defense where each player holds a lane. Core gameplay revolves around unit placement, bunker upgrades, and health management, demanding teamwork and resource control as enemy numbers escalate. The experience likely offers a satisfying sense of achievement from holding against intense assaults, though later waves may require advanced unit combinations or strategic positioning beyond simple bunker placement. This map is recommended for players seeking a straightforward yet intense cooperative defense with friends, and its intuitive rules make it accessible even to those new to the genre. However, players should verify victory conditions through in-game briefings or team chat before starting, given the lack of a written description. It is a solid choice for fans of StarCraft UMS cooperative defense experiences.
테스트 오브 서바이벌 - 크리스탈 (Test of Survival - Crystal)
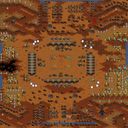
스타크래프트 브루드워 맵을 즐기는 유저들이라면 독특한 생존과 방어 메커니즘을 가진 유즈맵에 한 번쯤 관심을 가질 것이다. 이번에 살펴볼 테스트 오브 서바이벌 크리스탈은 황혼 타일셋을 배경으로 펼쳐지는 흥미로운 서바이벌 장르의 스타크래프트 맵이다. 내부 설명에 따르면 크리스탈 버전으로 수정된 이 맵은 유닛 선택 시스템과 새로운 벙커 관련 특징들을 포함하고 있어 플레이어에게 색다른 재미를 선사한다. 전체적인 맵 구조를 살펴보면 중앙의 거점 지역을 중심으로 사방에 적대 세력과 자원, 오브젝트들이 배치되어 있는 형태를 띤다. 중앙 구역에는 플레이어들이 초기에 활용할 수 있는 벙커와 다양한 방어 시설이 자리 잡고 있으며, 사방에서 다가오는 위협에 맞서기 위한 진형 구축이 중요하다. 특히 새롭게 추가된 벙커 기능들은 기존의 전형적인 방어 방식에서 벗어나 보다 유연하고 전략적인 대응을 가능하게 한다. 플레이어는 게임 시작과 함께 제공되는 유닛 선택 과정을 통해 자신의 전략에 알맞은 전력을 구성해야 하며, 이는 협동 플레이 시 팀원 간의 역할 분담에도 큰 영향을 미친다. 사방에서 압박해 오는 적들의 공세를 효과적으로 막아내기 위해서는 지형지물을 활용한 입구 관리와 자원 수급의 효율성이 핵심 과제로 떠오른다. 맵의 전반적인 난이도는 초보자부터 숙련자까지 각자의 위치에서 몰입할 수 있도록 설계되어 있으며, 특히 방어와 생존을 동시에 추구하는 유저들에게 높은 만족도를 준다. 친구들과 함께 역할을 나누어 협동하거나 혼자서 극한의 생존을 시험해보고 싶은 플레이어들에게 추천할 만하며, 새로운 벙커 전술을 시험해보고 싶다면 지금 바로 플레이해 보기를 바란다. For users who enjoy StarCraft: Brood War maps, custom maps with unique survival and defense mechanisms always draw interest. Test of Survival - Crystal is an engaging survival-genre StarCraft map set against a twilight tileset background. According to its internal description, this crystal-version map includes a unit selection system and new bunker features, offering players distinct gameplay experiences. Examining the overall structure, it features a central base area surrounded by hostile forces, resources, and various objects on all sides. The central zone contains bunkers and defensive facilities for early use, making formation setup crucial to counter threats approaching from multiple directions. Particularly, the newly added bunker functions allow for flexible and strategic responses, moving away from conventional defense methods. Players must configure their forces according to their strategies through a unit selection process at the start, heavily influencing role distribution in cooperative play. Efficient resource management and choke point control utilizing terrain are core tasks to effectively fend off incoming enemy waves. The overall difficulty is designed for both beginners and veterans to immerse themselves, providing high satisfaction for those pursuing both defense and survival. It is recommended for players looking to cooperate with friends by dividing roles or test extreme survival on their own, and anyone wanting to try out novel bunker tactics should check it out.
HELL 생존 시험 (Test of Survival - HELL)
스타크래프트의 ‘Test of Survival - HELL’은 이름에서부터 느껴지듯 극한의 서바이벌 환경을 제공하는 유즈맵이다. 시작과 동시에 벙커로 진입하라는 지시가 있으며, 외부에서는 끊임없이 저글링과 질럿이 무한 스폰되어 플레이어를 압박한다. 맵 중앙의 성큰 콜로니가 방어의 핵심으로, 이를 중심으로 전진배치된 저글링 무리들을 상대하며 건물을 파괴하고 컴퓨터 유닛을 섬멸하는 것이 주요 목표로 보인다. 황혼 타일셋의 어두운 분위기와 붉은 색조가 맵의 긴장감을 한층 더해주며, 특히 성큰 주변의 지형이 복잡하게 배치되어 방어 라인을 구축하기 어렵게 만든다. 벙커와 성큰을 적절히 활용하지 않으면 순식간에 밀려나는 플레이가 예상되며, 끊임없는 적의 물량 공세 속에서Resource management와 위치 선정 능력이 중요할 것으로 추정된다. 초보자에게는 다소 난해할 수 있지만, 숙련된 플레이어라면 이 맵의 치밀한 구조와 전략적 깊이를 즐길 수 있을 것이다. 맵의 난이도는 대체로 높은 수준으로 보이며, 특히 성큰 주변의 좁은 길목에서 벌어지는 전투가 관건일 가능성이 크다. 5인 플레이를 상정하고 제작된 맵으로 보이나, 팀전보다는 개인전 또는 코옵 플레이에 최적화되어 있는 구조다. 플레이 전 반드시 벙커 내부 배치와 성큰의 위치를 숙지하고, 자원 확보 및 방어 전략을 미리 세워두는 것이 중요하다. 이 맵은 순수한 서바이벌 요소와 디펜스 요소가 혼합되어 있으며, 끊임없는 압박 속에서 생존과 공격의 균형을 잡아야 한다. 맵의 분위기와 장르 특성상 긴장감과 몰입도를 중시하는 플레이어에게 강추한다. 맵을 처음 플레이한다면 예상 플레이 시간은 30분 내외로 예상되지만, 난이도에 따라 크게 달라질 수 있으니 주의가 필요하다. StarCraft’s *Test of Survival - HELL* is a custom map that delivers an extreme survival experience, as the name suggests. Right from the start, players are instructed to enter a bunker, while outside, zerglings and zealots spawn endlessly, relentlessly pressuring the player. The core of the defense revolves around the sunkens at the map’s center, where players must fight through waves of zerglings, destroy buildings, and eliminate computer-controlled units. The twilight-themed tileset, with its dark atmosphere and red hues, amplifies the map’s tension, while the complex terrain around the sunkens makes establishing a solid defense line challenging. Without proper use of bunkers and sunkens, players will quickly get overwhelmed by the constant enemy waves. Resource management and strategic positioning are likely key factors in surviving this relentless onslaught. While the map may be difficult for beginners, experienced players will appreciate its intricate design and strategic depth. The difficulty is generally high, with the tight passages around the sunkens likely serving as critical battle points. Though designed with five players in mind, the map is better suited for solo or cooperative play rather than team battles. Before playing, it’s crucial to familiarize yourself with the bunker’s interior layout and the sunkens’ positions, and to plan out resource gathering and defense strategies ahead of time. This map blends pure survival and defense elements, requiring players to balance survival and offense under constant pressure. Given its tense and immersive atmosphere, it’s highly recommended for players who enjoy high-stakes, survival-focused gameplay. If you’re playing for the first time, expect a session to last around 30 minutes, though the difficulty may significantly alter this.
스타쉽 트루퍼스 (Starship Troopers)
스타쉽 트루퍼스 (Starship Troopers)는 영화 '스타쉽 트루퍼스' 세계관을 차용한 5인용 유즈맵으로, 우주 타일셋 위에서 벙커를 지키며 몰려드는 버그(저그) 세력과 맞서는 디펜스 장르의 맵입니다. 내부 설명인 'Defend your bunker against the Bug players until help arrives!'에서 알 수 있듯, 플레이어들은 제한된 시간 동안 벙커를 중심으로 방어선을 구축하고 지원 병력이 도착할 때까지 버텨야 합니다. 맵 크기는 128x128 타일로 표준적인 중형 맵이며, 우주 배경 특유의 어두운 시야와 좁은 통로 지형이 방어전 긴장감을 높입니다. 맵 파일명에 'NEW!'가 붙어 있어 기존 버전 대비 밸런스 조정이나 신규 트리거가 추가되었을 가능성이 높습니다. 관련 버전인 'Be the bug!!'는 버그 진영 플레이를 주축으로 한 변형판일 수 있으며, 'Advanced' 시리즈는 난이도 상승과 콘텐츠 확장이 이루어진 후속작으로 보입니다. 이러한 버전 계보를 통해 맵이 지속적으로 개선되어 왔음을 짐작할 수 있습니다. 진행 방식은 일반적인 컴까기 디펜스와 달리 'Bug players'라는 표현으로 보아 특정 플레이어가 버그 진영을 조종하거나, 트리거에 의한 웨이브형 적군이 등장하는 비대칭 대결 구도로 추정됩니다. 5인 플레이 인원 중 수비 측과 공격 측 인원 배분은 버전별로 다를 수 있으나, 협력하여 벙커를 지키는 팀플레이가 핵심입니다. 벙커 업그레이드, 유닛 생산, 자원 관리 등 밀리 요소가 가미되어 있으며, 지원 도착까지의 시간 제한이 있어 속도감 있는 판단이 요구됩니다. 추천 대상은 디펜스 장르를 즐기면서도 단순 웨이브 클리어가 아닌 상대 플레이어 혹은 지능형 AI와의 심리전, 자리싸움을 선호하는 유저입니다. 우주 타일셋 특성상 시야 확보가 어려워 관측선이나 스캔 활용법 숙지가 필요하며, 벙커 배치 위치와 초반 자원 분배가 승패를 가르는 주요 포인트입니다. 플레이 전 버전별 밸런스 차이가 있을 수 있으니 파일명과 설명을 확인하고 입장하는 것이 좋습니다. 협동과 전략적 판단이 어우러진 생존 디펜스를 찾는 팀에게 적합한 맵입니다. Starship Troopers is a 5-player use map setting based on the Starship Troopers franchise, set on a space tileset where players defend a bunker against bug (Zerg) forces in a defense genre map. As the internal description states, 'Defend your bunker against the Bug players until help arrives!', players must build defensive lines around the bunker and survive until reinforcements arrive within a time limit. The map size is a standard 128x128 tiles, and the dark vision and narrow corridors typical of the space tileset heighten the tension of the defensive battle. The filename includes 'NEW!', suggesting balance adjustments or new triggers compared to previous versions. Related versions like 'Be the bug!!' may be variants focused on playing as the bugs, while the 'Advanced' series appear to be sequels with increased difficulty and expanded content, indicating ongoing refinement. The gameplay differs from typical comp-stomp defenses; the term 'Bug players' suggests either a specific player controls the bug faction or trigger-based waves create an asymmetric confrontation. While the exact split of the 5 players between defense and offense may vary by version, cooperative teamplay to hold the bunker is central. Mil elements like bunker upgrades, unit production, and resource management are incorporated, and the time limit until support arrives demands quick decision-making. This map is recommended for users who enjoy defense genres but prefer psychological warfare and positional battles against human opponents or smart AI rather than simple wave clearing. Due to the space tileset, securing vision is difficult, requiring proficiency with observers or scans. Bunker placement and early resource allocation are key decisive factors. Since balance may differ across versions, checking the filename and description before joining is advised. It suits teams looking for a survival defense that blends cooperation and strategic judgment.
벙커 잇 셧 헬트윅드 4.7 (Bunk ur shit HellTWEAKED 4.7)
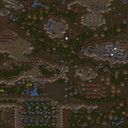
스타크래프트 브루드워 맵 중에서도 독특한 기조를 지닌 벙커 유즈맵을 찾는다면 Bunk ur shit HellTWEAKED 4.7 (벙커 잇 셧 헬트윅드 4.7)은 색다른 몰입감을 선사하는 작품이다. 사막 타일셋을 배경으로 펼쳐지는 이 스타크래프트 맵은 플레이어가 극초반에 주어지는 시민 유닛을 활용해 자원을 관리하고 업그레이드를 진행한 뒤, 방어선을 구축하고 본격적인 외부 진출을 시도하는 독특한 생존 및 방어 중심의 진행 방식을 채택하고 있다. 단순히 유닛을 생산해 밀어붙이는 전형적인 밀리 방식과 달리, 좁은 공간에서 거센 공세를 버텨내며 차근차근 세력을 확장해 나가는 묘미가 강조된다. 내부 맵 설명에 언급된 것처럼 시작과 동시에 주어진 자원을 어떻게 분배하고 업그레이드 타이밍을 잡느냐가 게임의 성패를 가르는 핵심 분기점이 되며, 이에 따라 치밀한 자원 운영과 타이밍 조절이 요구된다. 다수의 인원이 함께 협력하여 각자의 기지를 다지고 전선을 넓혀가는 구조이기 때문에, 팀원 간의 소통과 역할 분담이 플레이의 재미를 배가시킨다. 사방에서 몰려드는 적의 공세를 막아내며 조금씩 전진하는 쾌감을 선사하며, 협동 플레이의 진수를 느끼고 싶은 유저들에게 적합한 콘텐츠다. 본격적인 플레이에 앞서 초반 시민 유닛의 생존 경로와 업그레이드 순서를 미리 숙지하는 것이 원활한 진행을 위한 중요한 포인트가 될 것이다. For those looking for a bunker-based usemap with a unique tone among StarCraft: Brood War maps, Bunk ur shit HellTWEAKED 4.7 offers a distinct and immersive experience. Set against a desert tileset, this StarCraft map adopts a survival and defense-oriented gameplay style where players utilize civilian units provided at the very beginning to manage resources, perform upgrades, establish defensive lines, and eventually venture outward. Unlike typical melee matchups where players simply mass units to push forward, the map emphasizes the thrill of enduring intense assaults in confined spaces and expanding one's territory step by step. As noted in the internal map description, how you allocate resources and time your upgrades right from the start serves as a critical turning point determining success or failure, requiring careful resource management and precise timing. Because the structure allows multiple players to cooperate, build up their individual bases, and widen the front lines, communication and role division among teammates significantly enhance the fun. It delivers the satisfaction of holding off relentless enemy onslaughts from all directions and gradually advancing, making it well-suited for users who want to experience the essence of cooperative play. Before diving into serious gameplay, familiarizing yourself with the survival path and upgrade sequence of the early civilian units will be an important point for a smooth progression.
Special Forces Bunker V (Special Forces Hell Bunker 리메이크) (Special Forces Bunker V Gotshow)
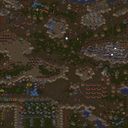
스타크래프트 브루드워 유즈맵 〈Special Forces Bunker V Gotshow〉는 사막 지형의 컴까기 장르에서 독특한 전략적 깊이를 제공하는 맵이다. 맵 이름은 내부 제목과 동일하게 〈Special Forces Bunker V Gotshow〉로 표기되며, 원본 파일명은 〈Special Forces Hell Bunker.scx〉로 추정된다. 플레이어는 총 6명으로 구성된 한 팀을 조종하며, 사막 지형에 배치된 벙커와 방어 시설을 활용해 적의 공격을 방어하고 목표를 달성해야 한다. 맵은 3072x3072 크기의 넓은 사막 타일셋을 기반으로 하며, 96x96 단위의 디자인으로 깔끔한 구조를 자랑한다. 이 맵의 핵심은 적절한 자원 관리와 방어선 구축에 있다. 플레이어는 초반부터 제한된 자원으로 방어 시설과 유닛을 확보해야 하며, 맵 곳곳에 흩어져 있는 보급선이나 자원 지점을 확보하는 것이 중요하다. 특히 사막 지형 특유의 시야 차단과 이동 제한이 플레이 경험을 긴장감 넘치게 만든다. 벙커 내부에서 유닛을 생산하거나 보수할 수 있으며, 외부에서는 적의 기습을 방어하는 동시에 전략적 요충지를 선점해야 한다. 맵 곳곳에 배치된 오브젝트와 장애물은 단순히 장식적 요소에 그치지 않고, 방어 전략의 핵심으로 기능한다. 추천 대상은 스타크래프트의 기본 전략을 익힌 플레이어 이상으로, 특히 컴까기 장르에 익숙한 유저에게 적합하다. 초보자의 경우 방어선 구축과 자원 관리에서 어려움을 느낄 수 있어, 난이도는 보통 정도로 설정하는 것이 바람직하다. 맵의 전체적인 밸런스는 리메이크 버전인 만큼 상당히 안정적이며, 원본 〈Special Forces Hell Bunker〉의 구조를 계승하면서도 새로운 전략적 요소를 추가했다는 평가가 많다. 플레이 전에는 맵의 주요 자원 지점과 방어 요충지를 미리 파악하고, 팀원 간의 역할 분담을 철저히 준비하는 것이 필수다. 또한, 맵의 리소스 관리와 병력 배치 타이밍을 연습할 수 있도록 충분한 연습 시간을 확보하는 것이 좋다. Special Forces Bunker V Gotshow is a unique UMS custom map in StarCraft: Brood War, offering deep strategic gameplay in a desert-themed defense genre. The map, titled 〈Special Forces Bunker V Gotshow〉, is a remastered version of the original 〈Special Forces Hell Bunker.scx〉, featuring a 3072x3072 desert tile set with a clean 96x96 unit design. The core gameplay revolves around resource management and base defense. Players, forming a single team of six, must secure limited resources early to build defensive structures and units while navigating the desert's limited visibility and movement constraints. The bunkers serve as production hubs, while external defenses require strategic placement to counter enemy assaults. Scattered supply lines and choke points add layers of tactical depth, forcing players to balance aggression and conservation. This map is ideal for intermediate to advanced StarCraft players familiar with UMS custom maps, particularly those experienced in defense genres. Beginners may struggle with resource allocation and base positioning, so a moderate difficulty is recommended. The remastered version maintains the original's balance while introducing refined mechanics, making it a polished choice for team-based strategy. Before playing, scout key resource points and defensive chokepoints, assign roles clearly, and practice timing for troop deployment and resource gathering to maximize effectiveness.
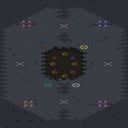
{-{-{ E-V-O-L-V-E-S }-}-}
스타크래프트 브루드워의 유즈맵 <E-V-O-L-V-E-S>는 4명의 플레이어가 협동하여 방어선을 구축하고 적의 공세를 버텨내는 디펜스 장르의 맵이다. 맵 중앙에 위치한 4개의 벙커가 주요 방어 거점으로, 각 플레이어는 자신의 벙커를 지키며 지속적으로 밀려드는 적 유닛을 상대해야 한다. 맵 내부 설명에 언급된 'Tank Bombs (+50 units)'는 벙커 업그레이드를 통해 추가할 수 있는 강력한 탱크 유닛을, 'Heroes (MNS)'는 특수 영웅 유닛을 의미하는 것으로 보인다. 이는 방어력을 강화하고 전투력을 보강할 수 있는 확장 요소를 제공하여, 플레이어가 전략적으로 자원을 관리하고 유닛을 배치할 수 있도록 설계되었다는 점을 시사한다. 게임의 진행은 중앙에서 끊임없이 생성되는 적 유닛을 상대하는 방식으로, 각 플레이어는 자신의 벙커를 중심으로 방어선을 구축하고, 필요에 따라 업그레이드와 영웅 유닛을 활용해 적의 공격을 막아내야 한다. 맵의 구조는 비교적 평탄한 지형으로 이루어져 있어, 유닛의 이동 및 배치에 큰 제약이 없지만, 벙커 주변의 좁은 길목에서는 적의 공격을 방어하기 쉬운 반면, 넓은 공간에서는 다수의 적을 상대해야 하는 전략적 선택이 요구된다. 특히, 탱크 폭탄과 같은 업그레이드는 방어력을 크게 향상시킬 수 있지만, 자원과 생산 타이밍을 신중히 고려해야 한다. 이 맵은 초보자부터 숙련자까지 즐길 수 있도록 난이도가 조절 가능하며, 4인 협동 플레이를 중시하기 때문에 팀워크와 전략적 계획이 중요하다. 또한, 맵의 이름은 진화(Evolution)를 연상시키며, 지속적인 적의 공격을 버텨내며 더 강한 유닛으로 진화해 나가는 재미를 강조하는 것으로 보인다. 다만, 맵의 내부 설명이 다소 간결하여 구체적인 승리 조건이나 스토리 요소는 파악하기 어려우며, 플레이어는 맵을 직접 플레이하며 그 의미를 파악해야 한다. 맵의 디자인과 구성은 단순하면서도 전략적 깊이를 제공하여, 디펜스 장르를 좋아하는 유저들에게 훌륭한 선택지가 될 것이다. StarCraft: Brood War's custom map <E-V-O-L-V-E-S> is a defense genre map where four players collaborate to build defensive lines and withstand enemy assaults. The four bunkers located at the center of the map serve as key defensive strongpoints, with each player tasked with protecting their own bunker while fending off relentlessly advancing enemy units. The in-game description mentions 'Tank Bombs (+50 units),' which appear to refer to powerful tank units that can be added through bunker upgrades, and 'Heroes (MNS),' which likely denote special hero units. These elements provide additional ways to strengthen defenses and bolster combat power, encouraging players to strategically manage resources and deploy units. The gameplay revolves around countering enemy units that continuously spawn from the center, with players building defensive lines around their bunkers and utilizing upgrades and hero units to repel attacks as needed. The map features relatively flat terrain, placing few restrictions on unit movement and deployment. However, while narrow pathways near the bunkers make it easier to defend against attacks, the open spaces require players to strategically handle large groups of enemies. Upgrades like Tank Bombs can significantly boost defensive capabilities, but players must carefully consider resource allocation and production timing. Designed to accommodate both beginners and experienced players, the map allows adjustable difficulty and emphasizes teamwork and strategic planning in its four-player cooperative mode. The name "E-V-O-L-V-E-S" evokes the concept of evolution, highlighting the enjoyment of enduring constant enemy attacks and evolving into stronger units over time. That said, the in-game description is somewhat brief, making it difficult to grasp specific victory conditions or narrative elements, so players will need to experience the map firsthand to fully understand its mechanics. With its simple yet strategically deep design, <E-V-O-L-V-E-S> is an excellent choice for fans of the defense genre.
맵 선택 가이드
태그는 맵의 핵심 특징을 빠르게 설명하지만 제작 버전마다 규칙이 다를 수 있습니다. 상세 설명에서 권장 인원, 난이도, 플레이 시간과 버전을 함께 확인한 뒤 다운로드하세요.