
방어형 유즈맵 스타크래프트 맵 모음
'방어형 유즈맵' 태그가 등록된 맵을 모았습니다. 장르 하나로 찾기 어려운 플레이 방식, 난이도와 특징을 중심으로 인기 맵과 최신 맵을 비교해 보세요.
- 등록 맵
- 6개
- 누적 다운로드
- 0
- 누적 조회
- 218
인기 맵
다운로드와 조회 반응이 높은 맵입니다.
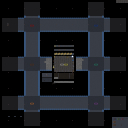
캐논 디펜스 10-Way V9.11 (Cannon Defense 10-Way V9.11)
스타크래프트 브루드워의 대표적인 디펜스 유즈맵인 〈Cannon Defense 10-Way V9.11〉은 플레이어가 중앙 요새를 방어하며 끊임없이 몰려오는 적의 공격을 막아내는 구조로 구성되어 있다. 맵 중앙에는 요새 건물이 있으며, 그 주위를 에워싸듯 10개의 방향에서 적 유닛이 끊임없이 진격해 온다. 플레이어는 요새를 보호하기 위해 각 방향에 배치된 포탑과 방어 건물, 그리고 자원 수집을 통해 보강할 수 있는 방어 시설을 활용해야 한다. 맵 상단 중앙에는 자원 채취 구역이 있으며, 이를 통해 포탑 업그레이드나 추가 병력 생산에 필요한 미네랄을 확보할 수 있다. 게임의 핵심은 중앙 요새의 체력 관리와 포탑 배치 전략이다. 초반에는 적은 유닛으로 공격해 오지만, 시간이 지나면서 점점 강력해지는 적군을 상대해야 하며, 특히 후반부로 갈수록 대규모 공세가 이어진다. 포탑의 종류와 위치를 어떻게 배치하느냐에 따라 방어 성공 여부가 갈리므로, 플레이어는 각 방향의 공격 패턴을 분석하고 효율적인 방어선을 구축해야 한다. 또한, 자원 관리를 통해 포탑의 공격력과 체력을 지속적으로 업그레이드하는 것이 중요하다. 이 맵은 초보자부터 고수까지 폭넓은 플레이어층을 아우르며, 특히 디펜스 장르에 익숙하지 않은 플레이어도 쉽게 접근할 수 있도록 난이도가 조절되어 있다. 10개의 방향에서 동시에 공격이 들어오기 때문에, 집중력과 전략적 사고가 요구되며, 긴장감 넘치는 전투가 지속된다. 방어에 성공하면 요새가 유지되면서 다음 웨이브가 시작되고, 반대로 요새가 파괴되면 게임이 종료된다. 반복 플레이를 통해 방어 패턴을 익히고, 최적의 포탑 배치와 자원 관리를 연마할 수 있는 점이 이 맵의 큰 매력이다. 주로 1인 플레이를 권장하지만, 팀 플레이로도 즐길 수 있는 구조로 설계되어 있어, 혼자서도 충분히 긴장감 넘치는 경험을 제공한다. 플레이 전에는 포탑의 종류와 효과를 숙지하고, 각 방향의 공격 타이밍을 파악하는 것이 중요하다. 또한, 자원 수집을 소홀히 하지 말고, 포탑 업그레이드 우선순위를 신중히 결정해야 한다. 맵의 난이도는 시간이 지날수록 상승하므로, 초반에 충분한 방어선을 구축하지 않으면 중반 이후부터 급격히 어려워진다. 이 맵을 즐기기 위해서는 꾸준한 연습과 전략적 사고가 필수적이며, 요새를 지켜내는 짜릿한 성취감을 느낄 수 있을 것이다. 이 맵은 디펜스 장르의 정수를 담고 있어, 스타크래프트 유즈맵 중에서 손꼽히는 작품으로 평가받고 있다. 특히 10-Way라는 독특한 구조는 플레이어에게 끊임없는 긴장감을 제공하며, 전략적 깊이를 더한다. 반복 플레이를 통해 점점 더 어려운 웨이브를 극복해 나가는 재미가 일품이다. 디펜스를 좋아하는 플레이어라면 반드시 한 번쯤 도전해 볼 가치가 있는 맵이다. StarCraft: Brood War's classic defense custom map, *Cannon Defense 10-Way V9.11*, challenges players to defend a central fortress against relentless waves of enemies. The map features a central base building surrounded by ten directional paths from which enemies continuously advance. Players must protect the fortress by strategically placing turrets, defensive structures, and resource-gathering facilities to reinforce their defenses. At the top center of the map lies a resource collection area, allowing players to gather minerals for upgrading turrets and producing additional forces. The core gameplay revolves around maintaining the fortress's health and optimizing turret placement. Early waves consist of weaker units, but the enemy grows progressively stronger over time, culminating in large-scale assaults in the later stages. Success hinges on analyzing each direction's attack patterns and constructing an efficient defensive line. Proper resource management is also critical, as upgrading turret damage and durability directly impacts survival. This map caters to a wide range of players, from beginners to experts, with adjustable difficulty that makes it accessible even to those unfamiliar with the defense genre. The simultaneous assaults from ten directions demand focus and strategic thinking, creating an intense and engaging experience. Each successful defense preserves the fortress for the next wave, while its destruction ends the game. Repeated play allows players to refine their strategies, master turret placement, and improve resource management—key elements that make the map so appealing. While designed primarily for solo play, the map also supports team-based strategies, ensuring an exciting experience even when played alone. Before starting, players should familiarize themselves with turret types and their effects, study attack timings for each direction, and avoid neglecting resource collection. Prioritizing turret upgrades wisely is essential, as the difficulty escalates rapidly if defenses are insufficient early on. Mastery requires consistent practice and tactical foresight, rewarding players with the thrill of protecting the fortress against overwhelming odds. Renowned for capturing the essence of the defense genre, *Cannon Defense 10-Way V9.11* stands out among StarCraft custom maps. Its unique ten-directional structure delivers constant tension and strategic depth, making each playthrough a rewarding challenge. The satisfaction of overcoming increasingly difficult waves ensures this map is a must-try for any fan of the genre.
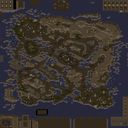
템플 시즈 vCHAOS (Temple Siege vCHAOS)
스타크래프트 브루드워의 유즈맵 중 하나인 《템플 시즈 vCHAOS》는 사막 테마의 디펜스 형식 맵으로, 플레이어들이 적의 끊임없는 공격을 방어하면서 성전을 펼치는 구조를 갖추고 있다. 맵 중앙에는 주요 건물이 위치하고 있으며, 그周围에 방어 건물이 배치되어 있어 적의 공격을 차단하는 것이 핵심이다. 맵 이미지에서 보이는 듯한 방어선은 좁은 통로와 요충지를 중심으로 설계되어 있어, 적의 움직임이 제한되고 플레이어는 전략적인 배치와 자원 관리로 승부를 내야 한다. 이 맵은 특히 멀티플레이어 환경에서 팀워크가 중요하며, 각 플레이어가 맡은 구역에서 방어와 공격을 병행해야 한다. 맵의 균형 잡힌 구조는 초보자부터 숙련자까지 모두 즐길 수 있도록 설계되어 있지만, 난이도는 대체로 중간 수준으로 평가된다. 적의 공격 패턴이 다양하고 방어 포인트가 여러 곳인 만큼, 플레이어는 맵의 지형을 숙지하고 효율적인 자원 배분을 통해 장기전을 준비해야 한다. 또한, 맵의 사막 테마는 시각적으로도 몰입감을 높이며, 건물이 밀집된 지역과 넓은 개활지 간의 조화가 인상적이다. 이 맵을 플레이하기 전, 방어선의 주요 포인트를 미리 확인하고 자원 관리 전략을 세우는 것이 중요하다. 맵의 복잡한 구조를 이해하지 못하면 적의 공격에 쉽게 무너질 수 있으므로, 첫 플레이 시에는 팀원들과의 원활한 소통을 통해 안정적인 방어선을 구축하는 것이 관건이다. 또한, 맵의 규모가 크기 때문에 자원의 확보와 건물의 건설 타이밍을 잘 조절해야 한다. 템플 시즈 vCHAOS는 디펜스 장르의 대표적인 유즈맵 중 하나로, 팀플레이를 중시하는 플레이어들에게 강력히 추천할 만한 작품이다. 《Temple Seige vCHAOS》 is a defense-style map from *StarCraft: Brood War*'s custom maps, set in a desert theme where players must fend off endless enemy waves while engaging in a holy war. The map centers around a main structure, surrounded by defensive buildings designed to block enemy advances. The defensive lines, visible in the map's layout, are structured around narrow passages and strategic chokepoints, restricting enemy movement and forcing players to rely on smart positioning and resource management to secure victory. Teamwork is crucial in multiplayer, as each player must handle both defense and offense in their assigned zones. The map’s balanced design makes it enjoyable for beginners and veterans alike, though its difficulty leans toward the intermediate range. With diverse enemy attack patterns and multiple defensive hotspots, players should familiarize themselves with the terrain and allocate resources efficiently for prolonged battles. The desert theme enhances immersion, with a striking contrast between densely packed structures and open expanses. Before playing, it’s vital to scout key defensive points and plan a resource strategy—failing to understand the map’s layout can lead to quick collapses against enemy assaults. During early matches, clear communication with teammates is essential for establishing a stable defense. Given the map’s large scale, players must also carefully time resource collection and building construction. *Temple Siege vCHAOS* stands as a standout in the defense genre, making it a strong recommendation for those who enjoy team-based gameplay.
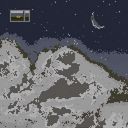
RDM BOUND Misty
스타크래프트 브루드워의 대표적인 유즈맵 장르 중 하나인 디펜스(RDM) 형식의 맵, 'RDM BOUND Misty'는 가로 4096, 세로 4096 크기의 넓은 필드에서 펼쳐지는 방어형 전투를 경험할 수 있는 작품이다. 맵의 이름은 'Misty'라는 이름에서 느껴지듯 안개 낀 듯한 분위기의 지형을 바탕으로 구축되었는데, 전체적으로 평평한 플랫폼 타일셋으로 구성되어 있으며 중앙을 가로지르는 넓은 통로와 사방에 흩어져 있는 소규모 고지대가 특징적이다. 이미지 상단에 위치한 기지 지역은 비교적 평탄한 지형을 이루고 있으며, 하단과 좌우측으로는 조금씩 고저차가 있는 언덕 지형이 분포하여 전략적 위치 선정을 요구한다. 넓은 맵 크기만큼이나 플레이어들은 넓은 시야를 기반으로 적의 움직임을 예측하며 방어선을 구축해야 한다. 장르적으로는 유즈맵(RDM) 계열의 디펜스에 속하며, 특히 'BOUND'라는 제목에서 유추할 수 있듯 일정 조건 또는 구역을 방어하는 목표가 있지 않을까 추정된다. 넓은 필드와 더불어 중앙 통로의 구조는 대규모 병력 소환과 진형 battaglia가 가능하도록 설계되어 있어, 다수의 유닛을 동시에 운용하는 전투가 예상된다. 또한 맵 곳곳에 흩어져 있는 소규모 언덕들은 시야 확보와 동시에 전략적據點으로서의 역할을 할 것으로 보인다. 맵의 밸런스는 넓고 평탄한 중앙 지역을 중심으로 한 공격로와 방어자의據點이 균형 있게 배치되어 있으며, 특히 고지대와 저지대의 조합은 지형적 이점을 활용한 전투가 가능하도록 유도하는 구조로 보인다. 이 맵은 초보자보다는 중급 이상의 플레이어를 대상으로 한 디펜스 유즈맵으로, 넓은 시야와 전략적 위치 선정, 대규모 병력 운용 능력을 요구한다. 넓은 맵에서 벌어지는 전투는Resource 관리와 동시에 지형 활용 능력이 중요한 포인트가 될 것이다. 또한 방어자와 공격자 간의 밸런스가 잘 맞춰져 있다면, 긴장감 넘치는 공방전이 펼쳐질 것으로 예상되며, 특히 중앙 통로의 좁아지는 지형은 대규모 전투의 클라이맥스를 형성할 가능성이 높다. 초보자의 경우 넓은 맵과 여러據點을 관리하는 데 다소 어려움을 느낄 수 있으나, 숙련된 플레이어에게는 전략적 깊이가 있는 매력적인 맵으로 느껴질 것이다. "RDM BOUND Misty" is a defense (RDM) genre map from *StarCraft: Brood War*, offering a large-scale defensive battle experience on a 4096x4096 field. The map’s name reflects its misty, foggy terrain, built with mostly flat platform tilesets, a wide central passage, and scattered small high grounds. The top area features a relatively flat base region, while the bottom and sides include hilly terrain with varying elevations, demanding strategic positioning. Given the map’s size, players must predict enemy movements and establish defenses based on wide visibility. As a defense (RDM) map, "BOUND" suggests a goal of defending specific zones or conditions. The expansive field and central corridor are designed to accommodate large-scale troop deployments and battlefield formations, enabling simultaneous control of multiple units. The scattered small hills not only provide vision but also serve as strategic strongpoints. The map’s balance is evident in its evenly distributed attack routes and defender strongholds around the central flat area, with the combination of high and low ground encouraging terrain-based combat. This map is tailored for intermediate to advanced players, requiring strong spatial awareness, strategic positioning, and large-scale unit management. Battles on the vast field emphasize resource control and terrain utilization. When balanced between defenders and attackers, the map promises intense back-and-forth combat, with the narrowing central passage likely becoming the focal point of large-scale clashes. While beginners may struggle with managing the wide field and multiple strongpoints, experienced players will appreciate its depth and strategic appeal.
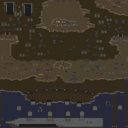
노르망디 상륙작전 (Normandy Landing Operation)
스타크래프트 브루드워의 유즈맵 ‘노르망디 상륙작전’은 제2차 세계대전에서 영감을 받은 대규모 디펜스형 맵으로, 플레이어는 연합군 측에 서서 해변가에서 적의 끊임없는 공격을 방어하는 임무를 수행한다. 맵의 전체적인 구조는 넓고 평평한 해변가와 뒤쪽의 참호, 그리고 다양한 고지대가 조화를 이룬다. 해변의 중앙부에는 폭파 가능한 벙커와 방어 시설이 배치되어 있어 전략적 요충지로 작용하며, 좌우측으로는 고지대가 펼쳐져 있어 시야 확보와 포격 지점이 된다. 적군은 해변의 전면에서 끊임없이 밀려오며, 보병, 차량, 항공기 등 다양한 유닛이 조합된 공격을 펼치기 때문에 방어 라인을 어떻게 구축하느냐가 승패를 좌우한다. 방어에 성공하려면 플레이어는 해변의 주요據點을 확보하고, 적의 주요 유닛을 효율적으로 제거할 수 있는 스킬이나 업그레이드 체계를 활용해야 한다. 맵의 인상적인 점은 해상도 대비 넓은 맵 크기로, 넓은 시야와 광활한 전장감을 느낄 수 있으며, 황무지 타일셋 덕분에 전쟁의 분위기를 강렬히 전달한다. 다만, 넓은 맵 크기 탓에 일부 지역은 시야가 가려져 예상치 못한 공격에 취약할 수 있으니, 후방 지역까지도 꾸준히 경계해야 한다. 이 맵은 다인용 디펜스 플레이를 즐기는 유저들에게 특히 추천되며, 팀 플레이 시에는 역할 분배와 소통이 필수적이다. 초보자의 경우 난이도가 다소 높을 수 있으니, 먼저 싱글 플레이나 연습 모드를 통해 맵의 구조와 적의 공격 패턴을 숙지하는 것이 좋다. 해변가에서 벌어지는 대규모 전투의 긴장감과 전략적 깊이는 이 맵의 가장 큰 매력으로, 전쟁 시뮬레이션의 재미를 한껏 느낄 수 있을 것이다. 플레이 전에는 방어 시설의 위치와 해변의 지형, 그리고 적의 주요 공격 루트를 미리 확인해 두는 것이 중요하다. The *Normandy Landing* custom map in *StarCraft: Brood War* is a large-scale defense-type map inspired by World War II, where players take on the role of Allied forces defending a beachhead from relentless enemy attacks. The map features a wide, flat shoreline backed by trenches and elevated terrain, creating a balanced mix of open spaces and strategic high ground. The central beach area is equipped with destructible bunkers and defensive structures, serving as key chokepoints, while the left and right flanks offer elevated positions for scouting and artillery support. The enemy launches continuous assaults from the front, deploying a mix of infantry, vehicles, and aircraft, making the player's defensive setup and unit management crucial to survival. To succeed, players must secure critical beach strongpoints and utilize skills or upgrades to efficiently counter the enemy's varied units. The map impresses with its vast scale relative to the in-game resolution, offering expansive sightlines and a sense of open warfare, amplified by its desolate tile set that heightens the wartime atmosphere. However, the large size can leave some areas obscured, leaving players vulnerable to unexpected flank attacks, so constant vigilance—even in the rear—is essential. This map is highly recommended for players who enjoy multiplayer defense modes, especially when teamwork and clear communication are prioritized. Beginners may find the difficulty steep, so practicing in single-player or training modes to learn the terrain and enemy attack patterns is advisable. The tense, large-scale battles and deep strategic elements make this one of the most engaging war simulations in *StarCraft*, rewarding players who study the defensive layouts, beach topography, and enemy attack routes before engaging in combat.
20,000드라군 디펜스 0.03 (20,000Dragoon Defense 0.03)
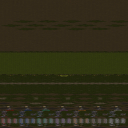
‘20,000DRAGOON DEFENSE 0.03’은 스타크래프트 브루드워의 유즈맵으로, 드라군과 같은 중장갑 유닛을 중심으로 한 방어형 맵이다. 맵의 핵심은 다수의 적을 상대로 방어선을 구축하고, 지속적인 웨이브를 막아내는 데 있다. 7명의 플레이어가 한 팀을 이루어 진행하며, 각 플레이어는 개별적으로 시작 지역을 확보하고 자원을 모아 유닛을 생산한다. 맵의 특징은 ‘드랍된 플레이어가 유닛을 넘겨받는다’는 시스템으로, 사망한 플레이어의 유닛이 자동으로 살아남은 플레이어에게 넘어가 전투력을 유지할 수 있도록 돕는다. 또한 ‘오토 벙커 고스트’와 ‘메카닉 유닛 강화’라는 새로운 기능이 추가되어 전략의 다양성을 높였다. 방어에 중점을 두고 있지만, 전투가 치열해질수록 유닛의 조합과 배치, 자원 관리 능력이 중요해지는 구조로 짜여 있다. 맵의 배경은 사막 타일셋으로, 넓은 평야와 언덕 지형이 어우러져 시야 확보와 기동성에 영향을 미친다. 플레이어들은 초반부터 적의 공격을 방어해야 하며, 후반부로 갈수록 적이 강력해지는 웨이브가 밀려온다. 따라서 초중반 자원 관리와 유닛 조합이 승패를 좌우할 가능성이 크며, 특히 드라군을 중심으로 한 조합이 유효한 편이다. 이 맵은 방어와 자원 관리에 익숙한 플레이어들에게 추천되며, 팀워크와 전략적 사고가 필요한 만큼 초보자와 숙련자 모두 즐길 수 있는 구조로 설계되었다. 다만, 메카닉 유닛의 강화 기능 등 일부 시스템은 익숙해질 때까지 시간이 필요할 수 있다. 플레이 전에는 맵의 새로운 기능과 유닛 조합에 대한 사전 학습을 권장한다. In ‘20,000DRAGOON DEFENSE 0.03’, a user-made defense map in StarCraft: Brood War, players team up to defend against waves of enemies using dragoons and other heavy-armored units. The map supports 7 players per team, each starting in a separate base with resources to gather and units to produce. A standout feature is the ‘dropped players give units’ system, where surviving players automatically inherit units from fallen teammates, ensuring no downtime in combat. Additional mechanics like ‘auto-bunker ghosts’ and ‘mech unit enhancements’ add complexity and strategic depth. The desert-themed map features open plains and elevated terrain, influencing visibility and unit mobility. Early-game defense is critical, as stronger enemy waves escalate in later stages. Effective resource management and unit composition—especially dragoon-centric builds—are key to success. This map caters to players who enjoy strategic defense and team coordination, offering challenges for both beginners and veterans. While the new mechanics may require some adjustment, the overall structure balances accessibility with depth. Players are advised to familiarize themselves with the updated systems before diving in.
캐논 D 온 유어 오운 (Cannon D On Your Own)
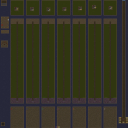
스타크래프트 브루드워의 유즈맵 중에서도 독특한 개성으로 주목받는 <Cannon D On Your Own>은 7명의 플레이어가 각각 독립된 기지를 지키며 적대 세력을 상대로 전투를 벌이는 '컴퓨터 상대 디펜스' 장르의 맵이다. 맵의 핵심은 이름에서 드러나듯 '캐논' 유닛을 기반으로 한 전략적 방어에 있으며, 각 플레이어는 제한된 자원으로 방어선을 구축하고 끊임없이 몰려오는 적군을 상대해야 한다. 맵의 구조는 중앙을 중심으로 대칭을 이루며, 각 플레이어의 기지는 외곽에 배치되어 있어Resource Management와 Positioning이 중요하다. 특히 캐논의 사정거리와 업그레이드 포인트를 어떻게 활용하느냐가 승패를 가르는 결정적 요소로 보인다. 전체적인 분위기는 밝고 개방적인 사막 타일셋으로 구성되어 있어, 긴장감 있는 전투 상황에서도 시각적 피로를 덜어준다. 다만, 7명의 플레이어가 각자 독립된 기지를 운영해야 하다 보니 초반 자원 확보와 방어 시설 구축 타이밍이 매우 중요하며, 이는 초보 플레이어에게는 다소 부담으로 다가올 수 있다. recommandedMapType이 UMS로 분류되지만, 실제로는 '컴퓨터 상대 디펜스'의 하위 장르에 가깝다는 점에서 전략적 깊이가 있는 유즈맵으로 평가할 수 있다. 이 맵의 가장 큰 매력은 개인의 판단과 전략에 따라 결과가 크게 달라질 수 있다는 점으로, 반복 플레이를 통해 최적의 방어 루틴을 찾아낼 수 있다는 점에서 장기적인 재미를 제공한다. 또한, 맵의 대칭성과 균일한 자원 분배는 모든 플레이어에게 공정한 경쟁 환경을 제공한다는 점에서도 장점으로 꼽을 수 있다. Cannon D On Your Own is a unique custom map in StarCraft: Brood War that stands out for its distinct personality. In this seven-player map, each player defends their own base against hostile forces in a "computer opponent defense" genre. As the name suggests, the core of the strategy revolves around using Cannon units for defense. Players must build defensive lines with limited resources and constantly fend off waves of enemies. The map features a symmetrical design centered around the middle, with each player's base positioned on the outskirts, making resource management and positioning crucial. The effectiveness of Cannon range and upgrades often determines victory or defeat. The overall atmosphere is bright and open, with a desert tileset that reduces visual fatigue even during intense battles. However, since seven players each manage their own bases, securing early resources and timing defensive structures can be overwhelming for beginners. Though classified as a UMS map, it leans more toward a subgenre of "computer opponent defense," offering deep strategic gameplay. The map's greatest appeal lies in how outcomes vary based on individual judgment and strategy, providing long-term enjoyment as players refine their optimal defense routines. Its symmetrical design and balanced resource distribution also ensure a fair competitive environment for all players.
최근 등록된 맵
새로 추가된 파일과 버전을 확인하세요.
노르망디 상륙작전 (Normandy Landing Operation)
스타크래프트 브루드워의 유즈맵 ‘노르망디 상륙작전’은 제2차 세계대전에서 영감을 받은 대규모 디펜스형 맵으로, 플레이어는 연합군 측에 서서 해변가에서 적의 끊임없는 공격을 방어하는 임무를 수행한다. 맵의 전체적인 구조는 넓고 평평한 해변가와 뒤쪽의 참호, 그리고 다양한 고지대가 조화를 이룬다. 해변의 중앙부에는 폭파 가능한 벙커와 방어 시설이 배치되어 있어 전략적 요충지로 작용하며, 좌우측으로는 고지대가 펼쳐져 있어 시야 확보와 포격 지점이 된다. 적군은 해변의 전면에서 끊임없이 밀려오며, 보병, 차량, 항공기 등 다양한 유닛이 조합된 공격을 펼치기 때문에 방어 라인을 어떻게 구축하느냐가 승패를 좌우한다. 방어에 성공하려면 플레이어는 해변의 주요據點을 확보하고, 적의 주요 유닛을 효율적으로 제거할 수 있는 스킬이나 업그레이드 체계를 활용해야 한다. 맵의 인상적인 점은 해상도 대비 넓은 맵 크기로, 넓은 시야와 광활한 전장감을 느낄 수 있으며, 황무지 타일셋 덕분에 전쟁의 분위기를 강렬히 전달한다. 다만, 넓은 맵 크기 탓에 일부 지역은 시야가 가려져 예상치 못한 공격에 취약할 수 있으니, 후방 지역까지도 꾸준히 경계해야 한다. 이 맵은 다인용 디펜스 플레이를 즐기는 유저들에게 특히 추천되며, 팀 플레이 시에는 역할 분배와 소통이 필수적이다. 초보자의 경우 난이도가 다소 높을 수 있으니, 먼저 싱글 플레이나 연습 모드를 통해 맵의 구조와 적의 공격 패턴을 숙지하는 것이 좋다. 해변가에서 벌어지는 대규모 전투의 긴장감과 전략적 깊이는 이 맵의 가장 큰 매력으로, 전쟁 시뮬레이션의 재미를 한껏 느낄 수 있을 것이다. 플레이 전에는 방어 시설의 위치와 해변의 지형, 그리고 적의 주요 공격 루트를 미리 확인해 두는 것이 중요하다. The *Normandy Landing* custom map in *StarCraft: Brood War* is a large-scale defense-type map inspired by World War II, where players take on the role of Allied forces defending a beachhead from relentless enemy attacks. The map features a wide, flat shoreline backed by trenches and elevated terrain, creating a balanced mix of open spaces and strategic high ground. The central beach area is equipped with destructible bunkers and defensive structures, serving as key chokepoints, while the left and right flanks offer elevated positions for scouting and artillery support. The enemy launches continuous assaults from the front, deploying a mix of infantry, vehicles, and aircraft, making the player's defensive setup and unit management crucial to survival. To succeed, players must secure critical beach strongpoints and utilize skills or upgrades to efficiently counter the enemy's varied units. The map impresses with its vast scale relative to the in-game resolution, offering expansive sightlines and a sense of open warfare, amplified by its desolate tile set that heightens the wartime atmosphere. However, the large size can leave some areas obscured, leaving players vulnerable to unexpected flank attacks, so constant vigilance—even in the rear—is essential. This map is highly recommended for players who enjoy multiplayer defense modes, especially when teamwork and clear communication are prioritized. Beginners may find the difficulty steep, so practicing in single-player or training modes to learn the terrain and enemy attack patterns is advisable. The tense, large-scale battles and deep strategic elements make this one of the most engaging war simulations in *StarCraft*, rewarding players who study the defensive layouts, beach topography, and enemy attack routes before engaging in combat.
템플 시즈 vCHAOS (Temple Siege vCHAOS)
스타크래프트 브루드워의 유즈맵 중 하나인 《템플 시즈 vCHAOS》는 사막 테마의 디펜스 형식 맵으로, 플레이어들이 적의 끊임없는 공격을 방어하면서 성전을 펼치는 구조를 갖추고 있다. 맵 중앙에는 주요 건물이 위치하고 있으며, 그周围에 방어 건물이 배치되어 있어 적의 공격을 차단하는 것이 핵심이다. 맵 이미지에서 보이는 듯한 방어선은 좁은 통로와 요충지를 중심으로 설계되어 있어, 적의 움직임이 제한되고 플레이어는 전략적인 배치와 자원 관리로 승부를 내야 한다. 이 맵은 특히 멀티플레이어 환경에서 팀워크가 중요하며, 각 플레이어가 맡은 구역에서 방어와 공격을 병행해야 한다. 맵의 균형 잡힌 구조는 초보자부터 숙련자까지 모두 즐길 수 있도록 설계되어 있지만, 난이도는 대체로 중간 수준으로 평가된다. 적의 공격 패턴이 다양하고 방어 포인트가 여러 곳인 만큼, 플레이어는 맵의 지형을 숙지하고 효율적인 자원 배분을 통해 장기전을 준비해야 한다. 또한, 맵의 사막 테마는 시각적으로도 몰입감을 높이며, 건물이 밀집된 지역과 넓은 개활지 간의 조화가 인상적이다. 이 맵을 플레이하기 전, 방어선의 주요 포인트를 미리 확인하고 자원 관리 전략을 세우는 것이 중요하다. 맵의 복잡한 구조를 이해하지 못하면 적의 공격에 쉽게 무너질 수 있으므로, 첫 플레이 시에는 팀원들과의 원활한 소통을 통해 안정적인 방어선을 구축하는 것이 관건이다. 또한, 맵의 규모가 크기 때문에 자원의 확보와 건물의 건설 타이밍을 잘 조절해야 한다. 템플 시즈 vCHAOS는 디펜스 장르의 대표적인 유즈맵 중 하나로, 팀플레이를 중시하는 플레이어들에게 강력히 추천할 만한 작품이다. 《Temple Seige vCHAOS》 is a defense-style map from *StarCraft: Brood War*'s custom maps, set in a desert theme where players must fend off endless enemy waves while engaging in a holy war. The map centers around a main structure, surrounded by defensive buildings designed to block enemy advances. The defensive lines, visible in the map's layout, are structured around narrow passages and strategic chokepoints, restricting enemy movement and forcing players to rely on smart positioning and resource management to secure victory. Teamwork is crucial in multiplayer, as each player must handle both defense and offense in their assigned zones. The map’s balanced design makes it enjoyable for beginners and veterans alike, though its difficulty leans toward the intermediate range. With diverse enemy attack patterns and multiple defensive hotspots, players should familiarize themselves with the terrain and allocate resources efficiently for prolonged battles. The desert theme enhances immersion, with a striking contrast between densely packed structures and open expanses. Before playing, it’s vital to scout key defensive points and plan a resource strategy—failing to understand the map’s layout can lead to quick collapses against enemy assaults. During early matches, clear communication with teammates is essential for establishing a stable defense. Given the map’s large scale, players must also carefully time resource collection and building construction. *Temple Siege vCHAOS* stands as a standout in the defense genre, making it a strong recommendation for those who enjoy team-based gameplay.
RDM BOUND Misty
스타크래프트 브루드워의 대표적인 유즈맵 장르 중 하나인 디펜스(RDM) 형식의 맵, 'RDM BOUND Misty'는 가로 4096, 세로 4096 크기의 넓은 필드에서 펼쳐지는 방어형 전투를 경험할 수 있는 작품이다. 맵의 이름은 'Misty'라는 이름에서 느껴지듯 안개 낀 듯한 분위기의 지형을 바탕으로 구축되었는데, 전체적으로 평평한 플랫폼 타일셋으로 구성되어 있으며 중앙을 가로지르는 넓은 통로와 사방에 흩어져 있는 소규모 고지대가 특징적이다. 이미지 상단에 위치한 기지 지역은 비교적 평탄한 지형을 이루고 있으며, 하단과 좌우측으로는 조금씩 고저차가 있는 언덕 지형이 분포하여 전략적 위치 선정을 요구한다. 넓은 맵 크기만큼이나 플레이어들은 넓은 시야를 기반으로 적의 움직임을 예측하며 방어선을 구축해야 한다. 장르적으로는 유즈맵(RDM) 계열의 디펜스에 속하며, 특히 'BOUND'라는 제목에서 유추할 수 있듯 일정 조건 또는 구역을 방어하는 목표가 있지 않을까 추정된다. 넓은 필드와 더불어 중앙 통로의 구조는 대규모 병력 소환과 진형 battaglia가 가능하도록 설계되어 있어, 다수의 유닛을 동시에 운용하는 전투가 예상된다. 또한 맵 곳곳에 흩어져 있는 소규모 언덕들은 시야 확보와 동시에 전략적據點으로서의 역할을 할 것으로 보인다. 맵의 밸런스는 넓고 평탄한 중앙 지역을 중심으로 한 공격로와 방어자의據點이 균형 있게 배치되어 있으며, 특히 고지대와 저지대의 조합은 지형적 이점을 활용한 전투가 가능하도록 유도하는 구조로 보인다. 이 맵은 초보자보다는 중급 이상의 플레이어를 대상으로 한 디펜스 유즈맵으로, 넓은 시야와 전략적 위치 선정, 대규모 병력 운용 능력을 요구한다. 넓은 맵에서 벌어지는 전투는Resource 관리와 동시에 지형 활용 능력이 중요한 포인트가 될 것이다. 또한 방어자와 공격자 간의 밸런스가 잘 맞춰져 있다면, 긴장감 넘치는 공방전이 펼쳐질 것으로 예상되며, 특히 중앙 통로의 좁아지는 지형은 대규모 전투의 클라이맥스를 형성할 가능성이 높다. 초보자의 경우 넓은 맵과 여러據點을 관리하는 데 다소 어려움을 느낄 수 있으나, 숙련된 플레이어에게는 전략적 깊이가 있는 매력적인 맵으로 느껴질 것이다. "RDM BOUND Misty" is a defense (RDM) genre map from *StarCraft: Brood War*, offering a large-scale defensive battle experience on a 4096x4096 field. The map’s name reflects its misty, foggy terrain, built with mostly flat platform tilesets, a wide central passage, and scattered small high grounds. The top area features a relatively flat base region, while the bottom and sides include hilly terrain with varying elevations, demanding strategic positioning. Given the map’s size, players must predict enemy movements and establish defenses based on wide visibility. As a defense (RDM) map, "BOUND" suggests a goal of defending specific zones or conditions. The expansive field and central corridor are designed to accommodate large-scale troop deployments and battlefield formations, enabling simultaneous control of multiple units. The scattered small hills not only provide vision but also serve as strategic strongpoints. The map’s balance is evident in its evenly distributed attack routes and defender strongholds around the central flat area, with the combination of high and low ground encouraging terrain-based combat. This map is tailored for intermediate to advanced players, requiring strong spatial awareness, strategic positioning, and large-scale unit management. Battles on the vast field emphasize resource control and terrain utilization. When balanced between defenders and attackers, the map promises intense back-and-forth combat, with the narrowing central passage likely becoming the focal point of large-scale clashes. While beginners may struggle with managing the wide field and multiple strongpoints, experienced players will appreciate its depth and strategic appeal.
캐논 D 온 유어 오운 (Cannon D On Your Own)
스타크래프트 브루드워의 유즈맵 중에서도 독특한 개성으로 주목받는 <Cannon D On Your Own>은 7명의 플레이어가 각각 독립된 기지를 지키며 적대 세력을 상대로 전투를 벌이는 '컴퓨터 상대 디펜스' 장르의 맵이다. 맵의 핵심은 이름에서 드러나듯 '캐논' 유닛을 기반으로 한 전략적 방어에 있으며, 각 플레이어는 제한된 자원으로 방어선을 구축하고 끊임없이 몰려오는 적군을 상대해야 한다. 맵의 구조는 중앙을 중심으로 대칭을 이루며, 각 플레이어의 기지는 외곽에 배치되어 있어Resource Management와 Positioning이 중요하다. 특히 캐논의 사정거리와 업그레이드 포인트를 어떻게 활용하느냐가 승패를 가르는 결정적 요소로 보인다. 전체적인 분위기는 밝고 개방적인 사막 타일셋으로 구성되어 있어, 긴장감 있는 전투 상황에서도 시각적 피로를 덜어준다. 다만, 7명의 플레이어가 각자 독립된 기지를 운영해야 하다 보니 초반 자원 확보와 방어 시설 구축 타이밍이 매우 중요하며, 이는 초보 플레이어에게는 다소 부담으로 다가올 수 있다. recommandedMapType이 UMS로 분류되지만, 실제로는 '컴퓨터 상대 디펜스'의 하위 장르에 가깝다는 점에서 전략적 깊이가 있는 유즈맵으로 평가할 수 있다. 이 맵의 가장 큰 매력은 개인의 판단과 전략에 따라 결과가 크게 달라질 수 있다는 점으로, 반복 플레이를 통해 최적의 방어 루틴을 찾아낼 수 있다는 점에서 장기적인 재미를 제공한다. 또한, 맵의 대칭성과 균일한 자원 분배는 모든 플레이어에게 공정한 경쟁 환경을 제공한다는 점에서도 장점으로 꼽을 수 있다. Cannon D On Your Own is a unique custom map in StarCraft: Brood War that stands out for its distinct personality. In this seven-player map, each player defends their own base against hostile forces in a "computer opponent defense" genre. As the name suggests, the core of the strategy revolves around using Cannon units for defense. Players must build defensive lines with limited resources and constantly fend off waves of enemies. The map features a symmetrical design centered around the middle, with each player's base positioned on the outskirts, making resource management and positioning crucial. The effectiveness of Cannon range and upgrades often determines victory or defeat. The overall atmosphere is bright and open, with a desert tileset that reduces visual fatigue even during intense battles. However, since seven players each manage their own bases, securing early resources and timing defensive structures can be overwhelming for beginners. Though classified as a UMS map, it leans more toward a subgenre of "computer opponent defense," offering deep strategic gameplay. The map's greatest appeal lies in how outcomes vary based on individual judgment and strategy, providing long-term enjoyment as players refine their optimal defense routines. Its symmetrical design and balanced resource distribution also ensure a fair competitive environment for all players.
캐논 디펜스 10-Way V9.11 (Cannon Defense 10-Way V9.11)
스타크래프트 브루드워의 대표적인 디펜스 유즈맵인 〈Cannon Defense 10-Way V9.11〉은 플레이어가 중앙 요새를 방어하며 끊임없이 몰려오는 적의 공격을 막아내는 구조로 구성되어 있다. 맵 중앙에는 요새 건물이 있으며, 그 주위를 에워싸듯 10개의 방향에서 적 유닛이 끊임없이 진격해 온다. 플레이어는 요새를 보호하기 위해 각 방향에 배치된 포탑과 방어 건물, 그리고 자원 수집을 통해 보강할 수 있는 방어 시설을 활용해야 한다. 맵 상단 중앙에는 자원 채취 구역이 있으며, 이를 통해 포탑 업그레이드나 추가 병력 생산에 필요한 미네랄을 확보할 수 있다. 게임의 핵심은 중앙 요새의 체력 관리와 포탑 배치 전략이다. 초반에는 적은 유닛으로 공격해 오지만, 시간이 지나면서 점점 강력해지는 적군을 상대해야 하며, 특히 후반부로 갈수록 대규모 공세가 이어진다. 포탑의 종류와 위치를 어떻게 배치하느냐에 따라 방어 성공 여부가 갈리므로, 플레이어는 각 방향의 공격 패턴을 분석하고 효율적인 방어선을 구축해야 한다. 또한, 자원 관리를 통해 포탑의 공격력과 체력을 지속적으로 업그레이드하는 것이 중요하다. 이 맵은 초보자부터 고수까지 폭넓은 플레이어층을 아우르며, 특히 디펜스 장르에 익숙하지 않은 플레이어도 쉽게 접근할 수 있도록 난이도가 조절되어 있다. 10개의 방향에서 동시에 공격이 들어오기 때문에, 집중력과 전략적 사고가 요구되며, 긴장감 넘치는 전투가 지속된다. 방어에 성공하면 요새가 유지되면서 다음 웨이브가 시작되고, 반대로 요새가 파괴되면 게임이 종료된다. 반복 플레이를 통해 방어 패턴을 익히고, 최적의 포탑 배치와 자원 관리를 연마할 수 있는 점이 이 맵의 큰 매력이다. 주로 1인 플레이를 권장하지만, 팀 플레이로도 즐길 수 있는 구조로 설계되어 있어, 혼자서도 충분히 긴장감 넘치는 경험을 제공한다. 플레이 전에는 포탑의 종류와 효과를 숙지하고, 각 방향의 공격 타이밍을 파악하는 것이 중요하다. 또한, 자원 수집을 소홀히 하지 말고, 포탑 업그레이드 우선순위를 신중히 결정해야 한다. 맵의 난이도는 시간이 지날수록 상승하므로, 초반에 충분한 방어선을 구축하지 않으면 중반 이후부터 급격히 어려워진다. 이 맵을 즐기기 위해서는 꾸준한 연습과 전략적 사고가 필수적이며, 요새를 지켜내는 짜릿한 성취감을 느낄 수 있을 것이다. 이 맵은 디펜스 장르의 정수를 담고 있어, 스타크래프트 유즈맵 중에서 손꼽히는 작품으로 평가받고 있다. 특히 10-Way라는 독특한 구조는 플레이어에게 끊임없는 긴장감을 제공하며, 전략적 깊이를 더한다. 반복 플레이를 통해 점점 더 어려운 웨이브를 극복해 나가는 재미가 일품이다. 디펜스를 좋아하는 플레이어라면 반드시 한 번쯤 도전해 볼 가치가 있는 맵이다. StarCraft: Brood War's classic defense custom map, *Cannon Defense 10-Way V9.11*, challenges players to defend a central fortress against relentless waves of enemies. The map features a central base building surrounded by ten directional paths from which enemies continuously advance. Players must protect the fortress by strategically placing turrets, defensive structures, and resource-gathering facilities to reinforce their defenses. At the top center of the map lies a resource collection area, allowing players to gather minerals for upgrading turrets and producing additional forces. The core gameplay revolves around maintaining the fortress's health and optimizing turret placement. Early waves consist of weaker units, but the enemy grows progressively stronger over time, culminating in large-scale assaults in the later stages. Success hinges on analyzing each direction's attack patterns and constructing an efficient defensive line. Proper resource management is also critical, as upgrading turret damage and durability directly impacts survival. This map caters to a wide range of players, from beginners to experts, with adjustable difficulty that makes it accessible even to those unfamiliar with the defense genre. The simultaneous assaults from ten directions demand focus and strategic thinking, creating an intense and engaging experience. Each successful defense preserves the fortress for the next wave, while its destruction ends the game. Repeated play allows players to refine their strategies, master turret placement, and improve resource management—key elements that make the map so appealing. While designed primarily for solo play, the map also supports team-based strategies, ensuring an exciting experience even when played alone. Before starting, players should familiarize themselves with turret types and their effects, study attack timings for each direction, and avoid neglecting resource collection. Prioritizing turret upgrades wisely is essential, as the difficulty escalates rapidly if defenses are insufficient early on. Mastery requires consistent practice and tactical foresight, rewarding players with the thrill of protecting the fortress against overwhelming odds. Renowned for capturing the essence of the defense genre, *Cannon Defense 10-Way V9.11* stands out among StarCraft custom maps. Its unique ten-directional structure delivers constant tension and strategic depth, making each playthrough a rewarding challenge. The satisfaction of overcoming increasingly difficult waves ensures this map is a must-try for any fan of the genre.
20,000드라군 디펜스 0.03 (20,000Dragoon Defense 0.03)
‘20,000DRAGOON DEFENSE 0.03’은 스타크래프트 브루드워의 유즈맵으로, 드라군과 같은 중장갑 유닛을 중심으로 한 방어형 맵이다. 맵의 핵심은 다수의 적을 상대로 방어선을 구축하고, 지속적인 웨이브를 막아내는 데 있다. 7명의 플레이어가 한 팀을 이루어 진행하며, 각 플레이어는 개별적으로 시작 지역을 확보하고 자원을 모아 유닛을 생산한다. 맵의 특징은 ‘드랍된 플레이어가 유닛을 넘겨받는다’는 시스템으로, 사망한 플레이어의 유닛이 자동으로 살아남은 플레이어에게 넘어가 전투력을 유지할 수 있도록 돕는다. 또한 ‘오토 벙커 고스트’와 ‘메카닉 유닛 강화’라는 새로운 기능이 추가되어 전략의 다양성을 높였다. 방어에 중점을 두고 있지만, 전투가 치열해질수록 유닛의 조합과 배치, 자원 관리 능력이 중요해지는 구조로 짜여 있다. 맵의 배경은 사막 타일셋으로, 넓은 평야와 언덕 지형이 어우러져 시야 확보와 기동성에 영향을 미친다. 플레이어들은 초반부터 적의 공격을 방어해야 하며, 후반부로 갈수록 적이 강력해지는 웨이브가 밀려온다. 따라서 초중반 자원 관리와 유닛 조합이 승패를 좌우할 가능성이 크며, 특히 드라군을 중심으로 한 조합이 유효한 편이다. 이 맵은 방어와 자원 관리에 익숙한 플레이어들에게 추천되며, 팀워크와 전략적 사고가 필요한 만큼 초보자와 숙련자 모두 즐길 수 있는 구조로 설계되었다. 다만, 메카닉 유닛의 강화 기능 등 일부 시스템은 익숙해질 때까지 시간이 필요할 수 있다. 플레이 전에는 맵의 새로운 기능과 유닛 조합에 대한 사전 학습을 권장한다. In ‘20,000DRAGOON DEFENSE 0.03’, a user-made defense map in StarCraft: Brood War, players team up to defend against waves of enemies using dragoons and other heavy-armored units. The map supports 7 players per team, each starting in a separate base with resources to gather and units to produce. A standout feature is the ‘dropped players give units’ system, where surviving players automatically inherit units from fallen teammates, ensuring no downtime in combat. Additional mechanics like ‘auto-bunker ghosts’ and ‘mech unit enhancements’ add complexity and strategic depth. The desert-themed map features open plains and elevated terrain, influencing visibility and unit mobility. Early-game defense is critical, as stronger enemy waves escalate in later stages. Effective resource management and unit composition—especially dragoon-centric builds—are key to success. This map caters to players who enjoy strategic defense and team coordination, offering challenges for both beginners and veterans. While the new mechanics may require some adjustment, the overall structure balances accessibility with depth. Players are advised to familiarize themselves with the updated systems before diving in.
맵 선택 가이드
태그는 맵의 핵심 특징을 빠르게 설명하지만 제작 버전마다 규칙이 다를 수 있습니다. 상세 설명에서 권장 인원, 난이도, 플레이 시간과 버전을 함께 확인한 뒤 다운로드하세요.