
방어형 맵 스타크래프트 맵 모음
'방어형 맵' 태그가 등록된 맵을 모았습니다. 장르 하나로 찾기 어려운 플레이 방식, 난이도와 특징을 중심으로 인기 맵과 최신 맵을 비교해 보세요.
- 등록 맵
- 20개
- 누적 다운로드
- 0
- 누적 조회
- 849
인기 맵
다운로드와 조회 반응이 높은 맵입니다.
썬켄 하드 10웨이 (Sunken HARD 10Way)
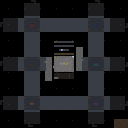
**«썬켄 하드»** 은 스타크래프트 브루드워의 유즈맵으로, 디펜스 장르에 속하는 컴까기(컴퓨터 상대 디펜스) 형식의 맵이다. 맵 이름은 ‘썬켄(Sunken)’이지만, 실제로는 수중 보다는 우주 배경의 타일셋을 사용하여 넓은 평원과 섬 형태의 지형을 조망할 수 있다. 10웨이(10Way)라는 명칭에서 알 수 있듯이, 플레이어는 맵 중앙에 위치한 기지에서 출발하며, 주변 10방향으로 뻗어나오는 길목을 따라 끊임없이 몰려드는 적 유닛을 방어해야 한다. 맵의 구조는 중앙 기지 주변에 좁은 다리 형식의 통로와 넓은 평원이 번갈아 배치되어 있어, 적의 공세를 효율적으로 저지할 수 있도록 설계되었다. especially, 맵의 가장자리는 바다(또는 우주)로 둘러싸여 있어, 적의 우회를 방지하는 역할을 한다. 또한, 맵 곳곳에 배치된 미네랄과 가스 멀티는 자원 확보를 위한 추가적인 선택지를 제공하며, 플레이어는 이를 활용해 병력을 보강하거나 방어 시설을 강화할 수 있다. 이 맵의 특징 중 하나는 난이도 옵션이 여러 단계로 제공된다는 점이다. 내부 설명에 ‘levelsEven MidImpossible’이라는 문구가 포함되어 있는데, 이는 초보자부터 숙련자까지 다양한 난이도에서 즐길 수 있도록 구성되었음을 시사한다. 특히 ‘Impossible’이라는 레이팅은 극한의 난이도를 자랑하며, 숙련자들에게 도전과 성취감을 제공할 것으로 예상된다. 또한, ‘SY’라는 버전 표기는 개발자 또는 커뮤니티에서 지속적인 업데이트가 있었음을 나타내며, 맵의 안정성과 완성도를 높이는 데 기여했을 것이다. 플레이어는 맵의 중앙 기지에서 출발해 주변의 적을 섬멸하며, 기지의 방어 라인을 유지하는 것이 주요 목표이다. 적의 공세는 끊임없이 지속되므로, 순간적인 판단과 전략적 배치력이 요구된다. 또한, 링크드 리소스를 효율적으로 관리하지 않으면 기지 자체가 위험에 처할 수 있어, 자원 관리 역시 중요한 요소로 작용한다. **«Sunken HARD»** is a custom map for StarCraft: Brood War, classified under the UMS genre as a computer-vs-player defense type map. Despite its name ‘Sunken’, the map utilizes a space-themed tileset, offering a vast plain and island-like terrain. The ‘10Way’ in its name indicates that players start from a central base and must defend against endless waves of enemy units approaching from ten different directions. The map’s layout alternates between narrow bridge-like pathways and wide plains around the central base, allowing players to efficiently block enemy offensives. Notably, the map is bordered by sea (or space), preventing enemies from bypassing defenses. One of the map’s standout features is its multiple difficulty settings, as suggested by the internal description ‘levelsEven MidImpossible’. This implies the map caters to both beginners and advanced players, with ‘Impossible’ representing an extreme challenge for experienced players. The ‘SY’ in the version name (e.g., ‘SunkenD 10Way 14.5 SY.scm’) likely denotes a developer or community update, reflecting ongoing improvements to stability and content. Players start at the central base, eliminating surrounding enemies while maintaining defensive lines. Since enemy waves are relentless, quick decision-making and strategic positioning are crucial. Poor resource management can jeopardize the base’s integrity, making economic balance a key factor in survival.
테스트 오브 서바이벌 - 프로토스 X (Test of Survival - Protoss X)
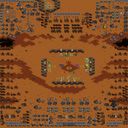
스타크래프트 브루드워 유즈맵 <테스트 오브 서바이벌 - 프로토스 X>는 서바이벌 장르의 맵으로, 플레이어가 프로토스 유닛을 조종하며 끊임없이 몰려드는 저그의 공격을 버텨내고 승리를 쟁취하는 것이 목표다. 맵 중앙에 위치한 프로토스 기지 주변으로 여러 개의 입구가 배치되어 있으며, 각 입구에서 끊임없이 저글링과 히드라리스크가 생산되어 공격해 온다. 플레이어는 초반 자원 수급을 통해 포토캐논과 미사일 터렛을 건설해 방어선을 구축해야 하며, 동시에 조이포나 아둔의 성지 같은 방어 건물들을 활용해 체력을 유지해야 한다. 맵의 특징은 입구마다 일정 주기로 적의 생산량이 증가하는 시스템으로, 초반에는 수월하게 느껴지지만 시간이 지날수록 압박이 심해지면서 방어 전략을 신중히 세워야 한다. 또한, 맵 곳곳에 흩어져 있는 추가 자원 지역을 확보하면 방어 건물의 업그레이드와 유닛 생산에 도움이 된다. 초보 플레이어는 방어 건물의 건설 우선순위를 신중히 고려해야 하며, 중급 이상 플레이어는 적의 생산 주기나 유닛 조합을 예측해 효율적인 대처가 필요하다. 추천 대상은 방어와 자원 관리에 익숙한 플레이어이며, 맵의 특성상 긴장감을 유지하며 플레이할 수 있어 서바이벌 장르를 좋아하는 유저들에게 적합하다. 플레이 전에는 맵의 입구 위치와 자원 분포를 미리 파악해 두는 것이 중요하다. 이 맵은 프로토스 유닛을 조종하는 것이 특징이지만, 테란이나 저그로도 플레이 가능한지는 내부 설명이나 이미지에서 확인되지 않으므로 유의해야 한다. StarCraft: Brood War custom map *Test of Survival - Protoss X* is a survival-style map where players control Protoss units, enduring endless waves of Zerg attacks to secure victory. Multiple entrances surround the central Protoss base, each continuously spawning Zerglings and Hydralisks to assault the player. Early on, players must gather resources to build Photon Cannons and Missile Turrets to establish defensive lines while maintaining health using structures like the Shield Battery or Templar Archives. A key feature is the periodic increase in enemy production at each entrance—initially manageable but growing increasingly oppressive over time, demanding careful defensive planning. Scattered resource points across the map can be secured to upgrade defenses and bolster unit production. Beginners should prioritize defensive structures wisely, while intermediate and advanced players must anticipate enemy production cycles and unit compositions for efficient counterplay. Ideal for players comfortable with defense and resource management, this map’s high-tension gameplay suits survival genre enthusiasts. Before playing, it’s crucial to study entrance locations and resource distribution. While the map emphasizes Protoss control, it’s unclear from descriptions or visuals whether Terran or Zerg can also be played, so players should verify this beforehand.
데저트 스트라이크 V2011 실버 (Desert Strike V2011 SILVER)
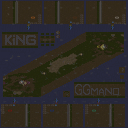
스타크래프트 브루드워의 사막 테마 디펜스 맵인 <Desert Strike V2011 SILVER>는 6명의 플레이어가 한 팀을 이루어 적의 공격을 방어하는 구조의 유즈맵이다. 맵은 전체적으로 넓은 사막 지형으로 구성되어 있으며, 중앙에 위치한 기지 주변으로 적의 공격로가 여러 갈래로 뻗어나가는 특징을 보인다. 플레이어는 기지 내 자원 생산 시설에서 자원을 채집하고, 병력을 생산하여 적의 침공을 막아내야 한다. 맵의 디자인상으로는 방어 시설 배치와 자원 분포가 비교적 균형 있게 배치되어 있으며, 적의 공격 패턴이 일정 주기로 발생하는 것으로 추정된다. 플레이 방식은 크게 자원 관리와 병력 생산, 그리고 방어선 구축으로 나뉜다. 자원은 맵 중앙에 위치한 광물 지대에서 채집할 수 있으며, 이를 바탕으로Lieutenant, Marine, Firebat 등 다양한 병력을 생산하여 적의 공격을 방어해야 한다. 맵의 특성상 초반에는 소규모 병력으로 방어선을 유지하다가, 자원이 충분히 모이면 대규모 병력을 동원하여 반격을 펼치는 전략이 효과적일 것으로 보인다. 또한, 맵의 좌우측에 위치한 고지대에서는 시야 확보와 공격로 차단이 용이하므로, 방어 시설을 배치하는 위치를 신중히 결정해야 한다. 이 맵은 초보와 숙련자 모두 즐길 수 있도록 설계된 것으로 보이며, 특히 디펜스 장르에 익숙한 유저라면 손쉽게 적응할 수 있을 것이다. 그러나 맵의 난이도는 내공에 따라 크게 달라질 수 있으므로, 초보자의 경우 난이도를 낮춰 플레이하는 것이 바람직하다. 또한, 맵의 특성상 팀워크가 중요한데, 자원 분배와 병력 생산 타이밍을 맞추는 것이 승리의 관건이 될 것이다. 맵의 전체적인 밸런스는 잘 조율된 편이지만, 특정 시점에서 적의 공격이 집중될 수 있으므로, 방어선을 유동적으로 재구축할 수 있는 전략을 준비하는 것이 좋다. 추천 대상으로는 스타크래프트의 디펜스 장르를 좋아하는 유저, 팀플레이를 즐기는 플레이어, 그리고 전략적 사고를 요하는 맵을 선호하는 게이머들에게 적합할 것이다. 특히, 사막 테마의 시각적 요소와 더불어, 디펜스 맵의 기본 틀을 벗어나지 않는 안정적인 구조는 초보자와 숙련자 모두에게 만족스러운 경험을 제공할 것으로 예상된다. 플레이 전에는 반드시 팀원과의 전략 협의를 통해 병력 생산 우선순위와 방어 시설 배치 계획을 미리 세워두는 것이 중요하다. Desert Strike V2011 SILVER is a UMS (User-Made Scenario) defense map in StarCraft: Brood War, set in a vast desert terrain where six players work together as a single team to fend off enemy attacks. The map features a central base surrounded by multiple attack paths, requiring strategic resource management and troop production to survive. The desert theme is prominently displayed through the terrain design, with mineral fields centrally located for easy access and high ground on the sides for optimal vision and defense. The gameplay revolves around gathering resources from the mineral fields, producing units such as Lieutenants, Marines, and Firebats, and constructing defensive structures to repel waves of enemy forces. Early gameplay demands cautious defense with small-scale units, while later stages allow for large-scale counterattacks once sufficient resources are accumulated. The map’s layout encourages players to utilize the high ground for better visibility and control over attack routes, making defensive positioning a critical factor. This map is designed to be accessible to both beginners and experienced players, offering a balanced challenge that can be adjusted in difficulty. While the core mechanics are straightforward, the timing of resource gathering and troop production plays a pivotal role in success, especially in team-based scenarios. Newer players may find it helpful to start with lower difficulty settings to familiarize themselves with the map’s flow. Ideal for fans of the defense genre, team-oriented gameplay, and strategic planning, Desert Strike V2011 SILVER delivers a visually engaging experience with its desert theme and well-structured defense mechanics. The map’s stability and adherence to classic UMS design principles make it a reliable choice for those seeking a structured yet challenging gameplay experience. Prior to playing, it is advisable to coordinate with teammates on resource allocation and defensive strategies to maximize efficiency.
임파서블 펑크 (Impossible Funk)
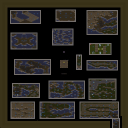
‘Impossible Funk’는 스타크래프트 브루드워의 유즈맵으로, 플레이어들에게 색다른 전투 경험을 제공하는 디펜스형 맵이다. 맵 이름은 다소 독특한데, ‘Funk’라는 단어는 음악 장르인 펑크를 뜻하며, 맵의 분위기나 진행 방식이 리듬감 있게 느껴질 수 있음을 암시하는 듯하다. 내부 맵 제목과 파일명에서도 확인되듯이, 제작자는 ‘FunkY’라는 닉네임을 사용했으며, 맵은 2012년 USEast에서 제작된 것으로 추정된다. 맵의 전체 크기는 8192x8192로 상당히 넓고, 사막 타일셋을 기반으로 하고 있어 열대 또는 사막 지역을 연상시킨다. 맵의 구조를 살펴보면, 중앙에는 넓은 개활지가 펼쳐져 있으며, 주변으로는 언덕과 협곡이 배치되어 있어 전략적인 위치를 선점할 수 있는 포인트가 많다. 또한, 맵 곳곳에 배치된 자원 지대와 건물을 활용한 방어 포인트가 눈에 띈다. 디펜스 장르임에도 불구하고 단순히 적을 막는 것에 그치지 않고, 맵의 지형을 활용한 기동전이나 위치 선정이 중요하다는 점에서 전략성이 강조된다. 플레이어는 7명으로 구성되며, 각 플레이어는 독립적인 진영을 운영하거나 팀을 이뤄서 플레이할 수 있을 것으로 보인다. 맵의 난이도는 제작자나 커뮤니티의 평가가 없으므로确切히 판단하기는 어렵지만, 넓은 맵과 다수의 적을 상대해야 하므로 ‘보통’에서 ‘어려움’ 사이로 예상된다. 맵의 진행 방식은 적의 끊임없는 공세를 방어하는 것이 주 목표로 보이며, 이를 위해 플레이어는 건물을 건설하고 유닛을 배치하는 동시에 맵의 지형을 활용해 방어선을 구축해야 한다. 특히, 사막 타일셋의 황량한 분위기가 맵의 긴장감을 높이는 데 기여하는 듯하다. 이 맵을 즐기기 위해서는 넓은 시야와 전략적인 판단력이 필요하며, 특히 초보 플레이어보다는 중간 이상의 실력을 가진 유저에게 더 적합할 것으로 보인다. 맵의 볼륨이 크고 디자인도 신경을 썼기 때문에, 디펜스 장르를 좋아하는 플레이어라면 한 번쯤 시도해 볼 만한 가치가 있다. 또한, 맵의 이름이 독특하고 음악적 요소가 포함되어 있어, 단순히 전투뿐만 아니라 색다른 경험을 원한다면 추천할 만하다. 'Impossible Funk' is a custom defense map in *StarCraft: Brood War* that offers players a unique combat experience. The map's name is somewhat distinctive, as "Funk" refers to the music genre, hinting at a rhythmic feel in its atmosphere or progression. The internal map title and file name confirm that the creator used the nickname "FunkY," and the map is believed to have been made in 2012 on the USEast server. With a massive size of 8192x8192, the map is quite expansive, featuring a desert tileset that evokes a tropical or arid region. Examining the map's layout, a vast open area occupies the center, surrounded by hills and ravines that provide strategic vantage points. Scattered throughout are resource zones and defensive structures, adding depth to the gameplay. Despite being a defense map, it goes beyond simply blocking enemies, emphasizing maneuvering and positioning by leveraging the terrain—highlighting its strategic depth. Players are likely to control seven separate factions, either operating independently or teaming up. Without official ratings from the creator or community, the difficulty is hard to pinpoint, but the large scale and numerous enemies suggest it falls somewhere between "moderate" and "hard." The primary objective appears to be defending against relentless enemy assaults by constructing buildings, deploying units, and fortifying defenses using the terrain. The barren atmosphere of the desert tileset further enhances the map's tense ambiance. To enjoy this map, players need strong map awareness and strategic decision-making, making it more suitable for intermediate to advanced users rather than beginners. Given its large scale and thoughtful design, it’s worth trying for fans of the defense genre. The unique name and musical elements also make it a compelling choice for those seeking something beyond standard combat experiences.
엘리먼츠 VI Nuclear Winter fix (Elements VI Nuclear Winter fix)
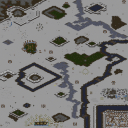
스타크래프트 브루드워의 유즈맵 중 하나로 알려진 'Elements VI Nuclear Winter fix'는 기존 Elements VI 맵의 핵심을 그대로 계승하면서도 시간 제한을 제거하고 워프 게이트의 오류를 수정한 개선판이다. 디펜스와 서바이벌 요소가 혼합된 이 맵은 플레이어가 끊임없이 밀려오는 적군을 방어하는 동시에 자원을 관리하고 건물을 건설하는 전략적 깊이를 제공한다. 맵의 특징으로는 수정된 워프 게이트가 오작동을 일으키지 않아 초중반 진행이 보다 안정적으로 이루어지며, 맵 곳곳에 배치된 자원 지역과 방어 시설들을 활용해 장기적인 공세를 버텨내야 한다. 특히 5인 플레이어가 각기 다른 진영을 선택해 협력하거나 경쟁할 수 있는 구조로 되어 있어 팀 플레이의 재미를 더한다. 맵의 배경은 겨울 테마로 설정되어 있으며, 눈과 얼음으로 뒤덮인 지형이 시각적 몰입감을 높이는 요소로 작용한다. 플레이어는 초반에 주어지는 한정된 자원을 바탕으로 건물을 짓고 유닛을 생산해 적의 공세를 버텨야 하며, 후반부로 갈수록 더욱 강력해진 적군을 상대해야 한다. 방어 시설의 배치와 자원 채취의 균형이 이 맵의 핵심 전략 포인트로, 미숙한 플레이어는 초반 자원 부족으로 인해 쉽게 무너질 수 있다. 반면, 효율적인 자원 관리와 방어선 구축을 통해 오랫동안 버텨내는 플레이어는 높은 성취감을 느낄 수 있는 구조다. 추천 대상은 디펜스와 서바이벌 장르를 좋아하는 플레이어로, 특히 팀 플레이를 통해 협동의 재미를 느낄 수 있는 유즈맵을 선호한다면 즐겁게 플레이할 수 있을 것이다. 플레이 전에는 워프 게이트가 정상적으로 작동하는지 확인하고, 맵의 자원 배치와 주요 방어 포인트를 미리 숙지하는 것이 중요하다. 'Elements VI Nuclear Winter fix' is a well-known custom map in *StarCraft: Brood War* that retains the core mechanics of the original Elements VI while removing the time limit and fixing warp gate malfunctions. Blending defense and survival elements, this map challenges players to fend off relentless enemy waves while managing resources and constructing buildings, adding strategic depth. A key feature is the corrected warp gates, which prevent malfunctions and ensure smoother progression in the early and mid-game. Players must strategically utilize scattered resource zones and defensive structures to withstand prolonged assaults. The map supports five players, each choosing a different faction to either cooperate or compete, enhancing team play. Set against a winter theme, the snowy and icy terrain immerses players visually. Starting with limited resources, players must build structures and produce units to survive early waves, facing increasingly powerful enemies as the game progresses. Balancing resource gathering with defensive positioning is crucial, as poor management can lead to collapse early on, while efficient play allows for long-term endurance and a rewarding experience. Ideal for fans of defense and survival genres, this map offers enjoyable teamwork dynamics, especially for those who prefer cooperative custom maps. Before playing, it’s important to verify that the warp gates are functioning correctly and to familiarize yourself with resource locations and key defensive points.
랜덤 벙커 디펜스 (Random Bunker Def)
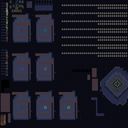
스타크래프트 브루드워의 대표적인 유즈맵 장르 중 하나인 ‘랜덤 벙커 디펜스’는 플레이어가 적의 공격을 막아내며 점차 강해지는 방어형 게임입니다. 맵은 중앙에 위치한 주요 벙커를 중심으로 주변에서 끊임없이 몰려드는 적들을 상대해야 하는데, 적의 종류와 스폰 위치는 랜덤으로 구성되어 매 플레이마다 다른 전략을 요구합니다. 벙커는 일정 시간마다 방어 건물이나 유닛을 생산할 수 있는 공간으로, 플레이어는 자원과 시간을 효율적으로 분배해 벙커를 강화하거나 유닛을 생산해야 합니다. 특히 맵의 오른쪽 상단과 왼쪽 하단에 위치한 보급고에서는 추가 자원을 확보할 수 있어, 이 곳을 얼마나 잘 활용하느냐가 승부의 관건으로 보입니다. 게임의 진행은 크게 세 단계로 나뉩니다. 초반에는 기본 유닛만으로 적을 막아내야 하며, 중반에는 방어 건물과 보조 유닛을 배치해 안정적으로 버티는 것이 중요합니다. 후반으로 갈수록 적의 공격력이 강해지고 스폰 속도도 빨라지므로, 벙커의 업그레이드와 자원 관리에 신경 써야 합니다. 또한, 맵 곳곳에 흩어져 있는 아이템이나 보너스 지역을 발견하면 일시적으로 powerful한 능력을 얻을 수 있어, 이를 잘 활용하는 플레이어가 승리할 확률이 높습니다. 전체적으로는 ‘막고 버티며 성장하기’라는 기본 틀을 지키면서도, 랜덤 요소와 아이템 운이 게임의 재미를 더하는 요소로 작용합니다. 이 맵은 일반적으로 1인 플레이가 권장되며, 혼자서도 충분히 즐길 수 있지만, 팀 플레이로도 변형해 플레이할 수 있습니다. 난이도는 초보자의 경우 적의 공격 패턴에 익숙해지는 데 시간이 걸릴 수 있지만, 몇 번 플레이하다 보면 방어 전술을 익히게 됩니다. 추천하는 대상은 방어형 게임을 좋아하거나, 전략적 사고를 즐기는 플레이어들에게 적합합니다. 특히 스타크래프트의 밸런스와 유닛 조합에 익숙한 유저라면 더 재미있게 즐길 수 있을 것입니다. 플레이 전에 맵의 주요 구조와 아이템 위치를 미리 확인해 두면 더 효과적인 플레이가 가능합니다. Random Bunker Def is a popular user-made defense map in StarCraft: Brood War where players must survive waves of randomly spawned enemies by fortifying bunkers and strategically managing resources. The central bunker serves as the core production hub, allowing players to train defensive units or upgrade defenses over time. The map features supply depots positioned in the upper right and lower left corners, providing additional resources to reinforce bunkers or expand unit production. The gameplay unfolds in distinct phases: early stages require holding the line with basic units, the mid-game demands efficient placement of defensive structures and auxiliary units, and the late-game escalates with stronger enemies spawning rapidly. Players must balance bunker upgrades, resource accumulation, and exploration to discover hidden items or bonus areas that grant temporary powerful abilities. These random elements add unpredictability, making each playthrough unique and challenging. Designed primarily for solo play, the map can also be adapted for team-based variations, though balancing may require adjustments. While beginners may struggle initially with enemy attack patterns, repeated play helps refine defensive strategies. This map appeals to players who enjoy strategic, endurance-focused gameplay and have a solid understanding of StarCraft’s unit interactions. Reviewing the map layout and item locations beforehand can significantly improve performance. Overall, it’s a well-structured defense challenge that rewards careful planning and adaptability.
Stacked Cannon Defense 10-Way
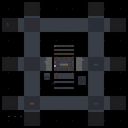
스타크래프트 브루드워의 대표적인 방어형 유즈맵인 〈Stacked Cannon Defense 10-Way〉는 10방향의 다양한 경로로 몰려드는 적을 상대하는 디펜스 장르의 정석으로 꼽힌다. 맵 중앙에 위치한 플레이어 기지에서부터 사방으로 뻗어나가는 길목을 따라 수많은 웨이브가 끊임없이 밀려오며, 각 라인은 각각의 포지션에 특화된 방어 건물과 유닛으로 무장되어 있다. 특히, 10개의 방향 중 일부는 좁고 복잡한 길로 구성되어 있어 유닛의 배치와 업그레이드 타이밍이 승패를 좌우하는 핵심 요소로 작용한다. 맵은 우주 테마의 타일셋을 사용해 우주 공간 속에서 전투가 벌어지는 듯한 분위기를 연출하며, 타일 단위는 128x128로 넓게 펼쳐진 맵의 스케일을 느낄 수 있다. 플레이어는 제한된 자원으로 최적의 방어 라인을 구축해야 하며, 자원 관리와 병력 배치를 동시에 신경 써야 한다. 또한, 맵의 난이도는 각 웨이브의 강도와 적의 조합에 따라 달라지며, 특히 후반부로 갈수록 강력한 적들이 등장해 전략의 변화가 요구된다. 초보자들은 기본적인 방어 라인 구축과 자원 확보에 집중하는 것이 중요하고, 숙련자들은 자원 효율과 업그레이드 우선순위를 고려한 플레이가 필요할 것이다. 맵의 구조상 중앙 기지 방어 외에도 측방 및 후방 경로도 중요하기 때문에, 모든 방향을 균형 있게 방어하는 능력이 요구된다. 또한, 적의 진로가 겹치는 지점에서는 다중 방어 라인을 구축해 효율성을 극대화할 수 있다. 이 맵은 디펜스 장르에 익숙한 플레이어뿐만 아니라, 새로운 전략을 시도해 보고 싶은 유저들에게도 좋은 도전 과제가 될 것이다. 맵의 인기는 오랜 기간 동안 유지되고 있으며, 다양한 커스텀 맵과의 비교를 통해 더욱 발전된 디펜스 전략을 세울 수 있는 기회를 제공한다. 플레이 전에는 맵의 구조를 미리 숙지하고, 각 방향의 진로와 주요 방어 포인트를 확인하는 것이 좋다. 또한, 자원 확보와 업그레이드 타이밍을 연습해 두면 실전에서도 보다 안정적인 플레이가 가능하다. 이 맵은 디펜스 유저라면 반드시 한 번쯤은 플레이해 볼 만한 가치가 있는 맵으로, 반복 플레이를 통해 자신의 전략을 다듬어 나갈 수 있을 것이다. 디펜스 장르의 기본기를 쌓기에 최적화된 맵으로, 방어의 묘미를 느낄 수 있는 작품이다. "Stacked Cannon Defense 10-Way" is a quintessential defense-style custom map in *StarCraft: Brood War*, renowned for its classic gameplay where players defend against waves of enemies approaching from ten distinct directions. Waves continuously surge along paths radiating from the central player base, with each route equipped with specialized defensive structures and units tailored to its challenges. Some of the ten paths feature narrow, intricate corridors, making unit placement and upgrade timing critical factors in determining victory or defeat. The map employs a space-themed tileset, immersing players in the sensation of combat unfolding in the vastness of outer space, with its expansive 128x128 tile layout amplifying the scale of the battlefield. Players must construct optimal defense lines under resource constraints, balancing resource management with strategic troop deployment. The difficulty escalates with each wave, as enemy compositions grow stronger, demanding adaptive strategies—especially in the later stages. Beginners should focus on establishing basic defense lines and securing resources, while experienced players must prioritize resource efficiency and upgrade timings. Given the map’s structure, defending side and rear paths is just as crucial as protecting the central base, requiring players to maintain balanced coverage across all directions. Where enemy routes converge, building multiple layers of defense can maximize efficiency. This map serves as an excellent challenge not only for seasoned defense players seeking to refine their strategies but also for those eager to experiment with new tactics. Its enduring popularity has fostered continuous evolution, allowing players to compare and integrate advanced defense strategies from various custom maps. Before playing, it’s advisable to familiarize yourself with the map’s layout, identifying key paths and critical defense points. Practicing resource gathering and upgrade timings beforehand will ensure smoother, more stable gameplay in actual matches. A must-play for defense enthusiasts, "Stacked Cannon Defense 10-Way" offers a rewarding experience that rewards repeated attempts, allowing players to hone their strategies over time. It stands as an ideal title for mastering the fundamentals of the defense genre while appreciating the artistry of strategic fortification.
더 제네시스 (The Genesis)
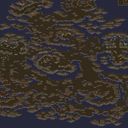
스타크래프트 브루드워의 유즈맵 《더 제네시스》는 사막 테마의 광대한 맵에서 펼쳐지는 디펜스 장르의 게임으로, 8명의 플레이어가 한 팀이 되어 끊임없이 몰려드는 적을 방어하는 구조로 구성되어 있다. 맵 중앙에는 거대한 요새가 자리 잡고 있으며, 주변으로는 좁고 복잡한 협곡과 평지가 펼쳐진다. 플레이어는 요새를 중심으로 배치된 방어 시설과 유닛을 활용해 끊임없이 쏟아지는 적의 공격을 버텨내야 한다. 맵의 특징은 사막 지형에 맞게 지형이 평탄하지 않고 언덕과 계곡이 복잡하게 얽혀 있어, 유닛의 이동 경로가 제한되고 전략적인 배치와 선택이 중요하다는 점이다. 또한, 맵의 규모가 크고 지형이 복잡해 시야 확보가 어려우며, 적의 공격 패턴도 다양해 예상치 못한 위기가 자주 발생한다. 초반에는 비교적 약한 적들이 규칙적으로 몰려오지만, 시간이 지나면서 강력한 유닛들이 포함된 조합으로 공격이 강화되므로, 플레이어는 자원 관리와 유닛 업그레이드를 효율적으로 진행해야 한다. 방어에 성공하면 보상을 받을 수 있지만, 한 번 무너지면 복구가 쉽지 않으므로 긴장감과 집중력이 요구되는 맵이다. 초보 플레이어는 맵의 복잡한 지형을 이해하는 데 시간이 걸릴 수 있지만, 익숙해지면 전략적 깊이를 느낄 수 있는佳作이다. 특히 사막 테마의 시각적 효과가 뛰어나며, 디펜스 장르를 좋아하는 유저들에게 강력히 추천할 만하다. 플레이 전에는 맵의 주요 길목과 방어 포인트를 미리 숙지하고, 자원 분배와 유닛 조합을 신중히 계획하는 것이 중요하다. 또한, 팀원과의 원활한 소통과 협력이 승리를 좌우할 수 있으니, 팀 플레이에 익숙하지 않다면 연습이 필요할 수 있다. 이 맵은 디펜스 장르의 묘미를 느낄 수 있는佳作로, 반복 플레이를 통해 점차 공략법을 익힐 수 있을 것이다. The Genesis is a UMS defense-type custom map in StarCraft: Brood War, set in a vast desert-themed landscape where eight players form a single team to defend against relentless enemy waves. The map centers around a massive fortress, surrounded by winding canyons and uneven terrain. Players must strategically place defenses and units to withstand continuous assaults. The desert terrain features hills and valleys that restrict unit movement, making positioning and pathfinding critical. The map's size and complexity limit visibility, adding unpredictability to enemy attacks. Early waves consist of weaker units, but later stages introduce stronger compositions, requiring efficient resource management and upgrades. Success brings rewards, but failure can be devastating, demanding high concentration and adaptability. While the intricate terrain may challenge beginners, it offers strategic depth for experienced players. The desert aesthetic enhances immersion, making it a standout in the defense genre. New players should study key chokepoints and defense placements, plan unit compositions carefully, and coordinate with teammates—teamwork is essential for victory. With practice, this map rewards persistence, offering a satisfying challenge for defense enthusiasts seeking replayability and skill progression.
미니타운 D 임파서블 4 J (MiniTown D Impossible 4 J)
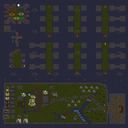
스타크래프트 브루드워의 유즈맵 <미니타운 D 임파서블 4 J>는 컴까기 장르의 디펜스 맵으로, 마을을 방어하면서 유닛을 강화하고 적을 물리치는 것이 주요 목표다. 맵 제목에서 알 수 있듯이 '임파서블'이라는 이름에 걸맞게 난이도가 매우 높으며, 기존 시리즈의 후속작으로 유닛 강화와 방어 전략이 한층 강화된 것이 특징이다. 맵 이미지에서 확인되는 바와 같이, 중앙에 위치한 마을과 이를 둘러싼 방어 시설, 그리고 각 방향으로 배치된 적 기지들이 눈에 띈다. 마을 중심부에는 방어용 건물이 집중되어 있으며, 좌우로 배치된 넓은 평야 지대에서는 적의 대규모 공격이 예상된다. 맵의 특징으로는 유닛 강화 시스템이 도입되어 있다는 점인데, 이는 기존 컴까기 맵과 차별화되는 요소로, 플레이어는 자원을 모아 유닛을 강화할 수 있어 전략적 선택의 폭이 넓어진다. 또한, 맵의 배경이 사막 타일셋으로 구성되어 있어 건조한 분위기가 강하게 느껴지며, 이는 맵의 긴장감을 더하는 요소로 작용한다. 플레이어는 5명의 인원으로 각 팀을 구성하여 마을을 방어해야 하며, 적의 끊임없는 공격으로부터 건물을 보호하는 동시에 유닛을 효율적으로 강화하는 것이 관건이다. 맵의 난이도가 '임파서블'로 명시되어 있듯이 초보자보다는 경험이 있는 플레이어에게 적합하며, 특히 방어와 전략적 자원 관리에 익숙한 유저에게 추천할 만한 맵이다. 플레이 전에는 유닛 강화 트리거와 방어 건물의 배치, 그리고 적의 공격 패턴을 미리 숙지하는 것이 중요하다. 또한, 맵의 넓이와 타일셋 특성상 시야 확보와 자원 수집 efficiency가 성패를 가를 수 있으므로, 맵의 지형을 충분히 숙지하고 전략을 세우는 것이 필수적이다. MiniTown D Impossible 4 J is a defense-based UMS map in StarCraft: Brood War, categorized under the 'compete against the computer' genre. The primary objective is to defend your town while upgrading units and eliminating enemy forces. As the name 'Impossible' suggests, this map is designed to be exceptionally challenging, featuring enhanced unit upgrades and fortified defenses compared to its predecessors. The map image reveals a central town area surrounded by defensive structures, with enemy bases strategically placed along the map's edges. The central village is fortified with buildings designed for defense, while the expansive plains on either side are likely to see heavy enemy assaults. A standout feature is the unit upgrade system, which allows players to strategically enhance their units by gathering resources, adding a layer of depth beyond traditional defense maps. The map uses a desert tile set, contributing to its tense and arid atmosphere. Players form teams of five to defend the town against relentless enemy attacks while balancing resource management and unit upgrades. Given the 'Impossible' difficulty, this map is best suited for experienced players who are comfortable with strategic planning and defense mechanics. Prior to playing, it's crucial to familiarize yourself with the unit upgrade triggers, defensive building placements, and enemy attack patterns. The map's vast size and tile set require careful attention to resource collection efficiency and map awareness, as these factors significantly influence the outcome of the game.
팀 디펜스 2.1 Official (Team Defense 2.1 Official)
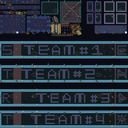
스타크래프트 브루드워의 대표적인 유즈맵 장르인 디펜스(Defense) 유형의 맵 'Team Defense 2.1 Official'은 8명의 플레이어가 한 팀이 되어 방어와 생존을 중심으로 진행되는 팀전 디펜스 맵이다. 맵의 핵심 목표는 맵 중앙에 위치한 출구를 보호하면서 적대 팀의 공격을 막아내고, 마지막까지 살아남아 승리를 차지하는 것이다. 맵은 화산 타일셋을 기반으로 제작되어 독특한 지형과 시각적 특징을 제공하며, 다양한 방어 구조물을 배치할 수 있는 공간이 마련되어 있다. 내부 설명에 따르면 '많은 영웅(Heros)'을 사용할 수 있도록 설계된 것으로 보이며, 새로운 맵(No Map)임을 강조하고 있다. 디펜스 맵의 특성상 전략적 배치와 협동 플레이가 중요하며, 출구 주변을 방어하는 동시에 적을 섬멸하는 균형 잡힌 플레이가 요구된다. 맵의 symmetrical한 구조는 팀 간의 공정한 경쟁을 가능하게 하며, 팀워크와 개개인의 실력이 모두 요구되는 종합적인 전략 게임으로 느껴진다. 특히 출구 주변의 좁은 길목에서 벌어지는 전투는 긴장감을 고조시키며, 순간적인 판단과 빠른 반응이 승리를 좌우할 수 있다. 초보자의 경우 방어 구조물의 배치와 영웅의 활용법에 대한 기본적인 이해가 필요하며, 숙련된 플레이어는 팀원 간의 호흡을 맞추어 효율적인 전략을 구사할 수 있다. 맵의 symmetrical한 디자인과 중앙 출구 구조는 팀 간의 전투가 집중되는 핫스팟을 형성하므로, 초반 방어 라인의 구축과 영웅의 선택이 게임의 흐름을 결정짓는 중요한 포인트가 될 것이다. 이 맵은 팀워크를 중시하는 디펜스 유형의 맵을 선호하는 플레이어들에게 특히 추천된다. 또한, 맵의 symmetrical한 구조는 밸런스 측면에서도 우수하여, 팀 간의 실력 차가 크지 않다면 공정한 경쟁이 가능할 것으로 보인다. 플레이 전에는 팀원과의 사전 전략 회의와 영웅 조합에 대한 논의가 필수적이며, 특히 출구 주변의 방어 타워나 유닛의 배치 위치를 숙지하고 있어야 한다. 맵의 난이도는 내부 설명에 명시되어 있지 않지만, symmetrical한 구조와 중앙 출구의 중요성, 그리고 '많은 영웅'의 활용 가능성을 고려할 때 대체로 '보통' 이상의 난이도로 예상된다. 이 맵은 디펜스 장르에 익숙한 플레이어라면 누구나 즐길 수 있으며, 특히 팀플레이를 선호하는 유저들에게 강렬한 재미를 제공할 것이다. StarCraft: Brood War’s classic Defense-style custom map, *Team Defense 2.1 Official*, is a team-based Defense mode where eight players work together to survive by focusing on defense and endurance. The core objective is to protect the exit located at the center of the map while fending off enemy attacks and securing victory by surviving until the end. Built on a volcanic tileset, the map features unique terrain and visuals, offering plenty of space to strategically place defensive structures. According to the in-game description, it appears designed to utilize a wide variety of heroes, emphasizing that it’s a brand-new map. As a Defense map, strategic positioning and teamwork are crucial, requiring balanced play that both defends the exit and eliminates enemies. The symmetrical layout ensures fair competition between teams, making it a well-rounded strategy game that demands both teamwork and individual skill. The tight choke points around the exit create high-tension battles where quick decisions and fast reactions can determine victory. Beginners should grasp the basics of placing defensive structures and using heroes effectively, while experienced players can coordinate with teammates to execute advanced strategies. The symmetrical design and central exit structure create hotspots where team battles converge, making early defense line setup and hero selection key factors that shape the game’s flow. This map is especially recommended for players who enjoy Defense-style maps that emphasize teamwork. The symmetrical design also ensures strong balance, allowing for fair competition even if there’s a slight skill gap between teams. Before playing, it’s essential to hold a pre-game strategy meeting with teammates and discuss hero compositions, particularly familiarizing yourselves with defensive tower and unit placements near the exit. While the in-game description doesn’t specify difficulty, considering the symmetrical layout, the exit’s importance, and the potential use of many heroes, the map is likely rated as "medium" or higher. Anyone familiar with the Defense genre can enjoy this map, and it offers intense fun for those who prefer team play.
소울 바운드 (Soul Bound)
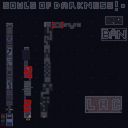
스타크래프트 브루드워의 유즈맵 <소울 바운드(Soul Bound)>는 6명이 플레이하는 UMS(Use Map Settings) 장르의 디펜스형 맵이다. 맵의 이름은 ‘영혼이 묶인 자’라는 의미를 담고 있으며, 화산 테마의 타일셋으로 구성된 넓은 필드에서 펼쳐지는 전투가 특징이다. 맵 중앙에는 커다란 건물 구조물이 자리하고 있으며, 맵 곳곳에 배치된 방어 타워와 자원 건물이 플레이어의 진영을 보호하는 역할을 한다. 이미지에서 확인되는 빨간색 원형 마커는 주요 거점이나 방어 포인트를 표시하는 것으로 추정된다. 맵의 구조는 방어와 자원 관리, 일꾼 생산의 균형을 요구하며, 다수의 유닛을 동원한 공세가 예상되는 만큼 전략적인 플레이가 필요하다. 맵의 규모가 4096x4096으로 상당히 크며, 화산 테마의 어두운 분위기와 대비되는 밝은 색상의 마커가 시야를 방해하지 않으면서도 플레이어를 안내하는 역할을 한다. 6인 플레이를 전제로 설계된 만큼, 팀워크와Resource management, multitasking이 중요한 요소로 작용할 것으로 보인다. 초보자는 맵의 광활한 공간과 방어 포인트의 중요성을 이해하지 못해 쉽게 무너질 수 있으므로, 해당 맵을 처음 플레이하는 경우 맵의 구조와 주요 거점을 미리 숙지하는 것이 중요하다. 또한, 자원 관리를 소홀히 하면 중후반부에 유닛 생산이나 방어 강화에 차질을 빚을 수 있으므로, 초반 자원 확보와 일꾼 배치에 신경을 써야 한다. 맵의 타이틀과 테마가 주는 ‘영혼’과 ‘구속’이라는 키워드는 perhaps the theme revolves around binding souls or resisting external forces, but the exact narrative is left to player interpretation. 이 맵은 방어와 자원 관리, 다중 테스크ing을 요구하는 만큼, 전략적인 사고와 빠른 판단력이 필요한 플레이어들에게 추천할 만하다. 특히, 디펜스와 UMS 유즈맵을 좋아하거나, 넓은 맵에서 펼쳐지는 대규모 전투를 즐기는 유저들에게 적합할 것이다. StarCraft: Brood War's custom map *Soul Bound* is a 6-player UMS (Use Map Settings) defense-style map. The map's name carries the meaning of "a soul bound," and its battles unfold across a vast field with a volcanic tile set. At the center of the map stands a large building structure, with defensive towers and resource buildings scattered throughout, protecting each player's base. The red circular markers visible in the image likely indicate key strongholds or defensive points. The map's design demands a balance between defense, resource management, and worker production, requiring strategic play given the expected large-scale assaults. With a scale of 4096x4096, the map is quite large, and its dark volcanic atmosphere is complemented by bright markers that guide players without obstructing visibility. Designed for six players, teamwork, resource management, and multitasking are crucial elements. Beginners may struggle due to the map's vastness and the importance of defensive points, so it's essential to familiarize yourself with the layout and key locations before playing. Neglecting resource management can hinder unit production or defensive upgrades in the mid-to-late game, so prioritize securing resources and worker placement early on. The map's title and theme—"soul" and "bound"—suggest a narrative tied to binding souls or resisting external forces, though the exact story is left to player interpretation. Given its emphasis on defense, resource management, and multitasking, this map is highly recommended for players who thrive on strategic thinking and quick decision-making. It's especially well-suited for those who enjoy defense and UMS custom maps or massive battles across expansive maps.
선큰 D 12웨이 파이널 (Sunken D 12 Way Final)
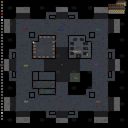
스타크래프트 브루드워의 유즈맵 중 하나로 주목받는 <Sunken D 12 Way Final>은 8명의 플레이어가 동시에 참여할 수 있는 대규모 디펜스형 맵입니다. 맵의 중심에는 거대한 건물이 자리 잡고 있으며, 주변으로 12개의 방향에서 끊임없이 몰려드는 적들을 방어하는 것이 주된 목표로 보입니다. 맵 구조는 중앙 건물을 중심으로 동심원 형태로 구성되어 있으며, 각 방향별로 적의 진입로가 배치되어 있어 전략적인 방어가 요구됩니다. 맵의 디자인에서 확인되는 여러 개의 무덤과 유령 같은 오브젝트는 공포스러운 분위기를 연출하며, 이는 디펜스 맵의 긴장감을 한층 높이는 요소로 작용합니다. 플레이어는 중앙 건물을 보호하면서 동시에 주변의 방어 건물을 보수하거나 추가로 설치하여 적의 공격을 버텨내야 합니다. 맵의 하단부에는 자원 기지가 배치되어 있으며, 이를 통해 추가 자원을 확보할 수 있어 장기적인 방어 전략을 세울 수 있습니다. 맵의 특징 중 하나는 12방향에서 동시에 공격이 들어온다는 점으로, 이는 플레이어들에게 끊임없는 긴장감을 부여하며 다각적인 방어 체계를 요구합니다. 또한, 맵의 규모가 크고 디자인 요소가 풍부하여 시각적으로도 즐거운 경험을 제공합니다. 초보 플레이어의 경우 중앙 건물을 보호하는 데에 집중하는 것이 중요하며, опыт 있는 플레이어는 방어 자원과 전략을 효율적으로 분배하여 최대한의 효율을 내야 합니다. 맵의 난이도는 보통 수준으로 설정되어 있으며, 특히 12방향의 공격을 동시에 방어해야 하는 점에서 전략적 사고와 빠른 판단력이 요구됩니다. 이 맵은 디펜스 장르를 좋아하는 플레이어들에게 강력히 추천할 만한 작품으로, 반복 플레이를 통해 다양한 전략을 시도해 볼 수 있습니다. 맵을 플레이하기 전에 중앙 건물의 위치와 각 방향별 방어 포인트를 미리 숙지하는 것이 중요하며, 자원 관리를 효율적으로 수행하는 것이 관건입니다. 또한, 적의 공격 패턴을 미리 예측하고 방어 시설을 적시에 보수하거나 업그레이드하는 것이 승리를 좌우할 수 있습니다. 이 맵은 스타크래프트 유즈맵 커뮤니티에서 오랫동안 사랑받아 온 작품으로, 디펜스 장르의 정수를 느낄 수 있는佳作입니다. Sunken D 12 Way Final is a large-scale defense-type custom map from *StarCraft: Brood War* that supports up to eight players. The map centers around a massive central building, with the primary objective being to defend against endless waves of enemies approaching from twelve different directions. The layout is structured in concentric circles around the central structure, with each direction featuring dedicated enemy entry points, demanding strategic defensive planning. The map’s design incorporates multiple tombs and ghostly objects, enhancing its eerie atmosphere and intensifying the tension of the defense challenge. Players must protect the central building while simultaneously repairing or constructing additional defensive structures to withstand the relentless assaults. The lower section of the map includes a resource base, allowing players to gather additional supplies for long-term defense strategies. A key feature of the map is the simultaneous attacks from all twelve directions, which keeps players constantly on edge and requires a versatile defensive system. The map’s expansive scale and rich design elements also deliver a visually engaging experience. For beginners, focusing on protecting the central building is crucial, while experienced players should efficiently allocate defensive resources and strategies to maximize efficiency. The difficulty is set at a moderate level, though the need to defend against twelve simultaneous attacks demands strategic thinking and quick decision-making. This map is highly recommended for fans of the defense genre, offering opportunities to experiment with various strategies through repeated play. Before playing, it’s important to familiarize yourself with the central building’s location and the defensive points in each direction, as well as mastering efficient resource management. Predicting enemy attack patterns and timely repairing or upgrading defensive structures can determine victory. Long beloved in the *StarCraft* custom map community, *Sunken D 12 Way Final* is a masterpiece that captures the essence of the defense genre.
최근 등록된 맵
새로 추가된 파일과 버전을 확인하세요.
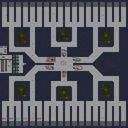
럭커 디펜스 36웨이 (Lucker Defense 36 Way)
‘럭커 디펜스 36웨이’는 스타크래프트: 브루드워의 유즈맵으로, 디펜스 장르의 핵심 아이디어에 ‘랜덤성’을 극대화한 대표적인 작품 중 하나다. 맵의 이름은 36개의 서로 다른 디펜스 루트를 의미하며, 플레이어는 각 라운드에서 등장하는 적을 방어해야 한다. 맵 중앙의 시작 지점에서 맵 외곽으로 뻗어나가는 36개의 길이 마치 거미줄처럼 펼쳐져 있으며, 각 길은 고유한 구조와 장애물을 보유하고 있다. 플레이어는 자신의 스타크래프트 실력과 전략에 따라 루트를 선택하거나, 랜덤으로 할당된 루트를 따라가며 적의 공격을 버텨내야 한다. 특히 ‘Lucker’라는 이름에서 느껴지듯, 운의 요소도 강하게 작용하는데, 각 루트는 난이도와 보상이 균일하지 않으며 예상치 못한 적의 조합이 등장하기도 한다. 맵의 배경은 어두운 톤의 플랫폼 타일셋으로 구성되어 있어 긴장감을 조성하며, 적의 웨이브가 밀려올 때마다 긴박감이 높아진다. 초보자는 단순한 루트를 선택하는 경향이 있지만, 숙련자들은 각 루트의 특징을 분석해 최적의 루트를 선택하거나 다중 루트를 활용하는 전략을 구사하기도 한다. 맵의 베타 버전(0.2)까지 개발되면서 버그가 수정되었지만, 여전히 랜덤성이 강하다는 특징은 여전하다. 이 맵은 디펜스 장르의 재미를 극대화하면서도, 플레이어의 자유도를 높인 점이 특징이다. 추천 대상은 디펜스 장르를 좋아하는 플레이어와, 랜덤성과 운의 요소를 즐기는 유저, 그리고 전략적 선택을 즐기는 게이머들이다. 플레이 전에는 각 루트의 특징을 미리 확인해 두는 것이 도움이 되며, 특히 ‘Untouchable’이라는 버그 수정 내역을 참고하면 더 안정적인 플레이가 가능하다. 맵의 구조상 중앙에서 외곽으로 뻗어나가는 길이 많기 때문에, 각 루트의 시작점과 종점 위치를 숙지하는 것이 중요하다. 또한, 다중 루트를 활용하는 경우 자원 관리와 방어 병력의 배치에 신경을 써야 한다. 이 맵은 디펜스 장르의 정석이자, 변주법을 모두 아우르는 매력적인 작품으로 평가된다. ‘Lucker Defense 36 Ways’ is a user-made map for *StarCraft: Brood War* and one of the most iconic works in the defense genre, maximizing the core idea of ‘randomness.’ The map’s name refers to its 36 unique defense routes, and players must defend against waves of enemies in each round. From the starting point at the center of the map, 36 paths stretch outward like a spiderweb, each with its own distinct layout and obstacles. Players can choose their routes based on their *StarCraft* skills and strategy or follow randomly assigned paths to withstand enemy attacks. As the name ‘Lucker’ suggests, luck plays a significant role—each route varies in difficulty and reward, and unexpected enemy compositions can appear. The map’s dark-toned platform tileset adds to the tension, intensifying the pressure as enemy waves surge forward. Beginners often opt for simpler routes, while experienced players analyze each path’s traits to select the optimal route or employ multi-path strategies. Though bugs were fixed by the beta version (0.2), the map’s strong randomness remains a defining feature. It maximizes the fun of the defense genre while enhancing player freedom. Recommended for fans of defense games, players who enjoy randomness and luck-based elements, and gamers who like strategic choices. Before playing, it’s helpful to review each route’s characteristics, and checking the ‘Untouchable’ bug-fix notes can lead to a smoother experience. Since many paths extend from the center to the outer edges, memorizing each route’s start and end points is crucial. When using multiple paths, careful resource management and troop positioning are essential. This map stands out as a classic in the defense genre, blending both traditional and innovative elements into an appealing experience.
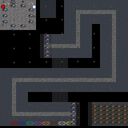
터렛 디펜스 35000 -Final- (Turret Defense 35000 -Final-)
스타크래프트 브루드워의 디펜스 장르 유즈맵인 《터렛 디펜스 35000 -Final-》은 전형적인 구조에서 한층 진화된 방어형 맵으로, 플레이어는 적의 끊임없는 공격을 효과적으로 저지하며 최종 목표까지 도달해야 한다. 이 맵은 우주 테마의 타일셋을 활용해 우주 공간에서 벌어지는 방어전을 연출하며, 곳곳에 배치된 터렛과 방어 건물들이 주요 전략 포인트가 된다. 맵 중앙에는 넓은 통로가 있으며, 좌우로 나뉜 базе 구역이 배치되어 있는데, 이는 적의 공격 루트를 예측하고 방어선을 구축하는 핵심 요소로 활용된다. 특히, 맵의 하단과 상단에는 추가적인 방어 시설이 배치되어 있어, 플레이어는 한정된 자원으로도 다층적인 방어망을 구축할 수 있다. 게임은 기본적으로 유닛 생산과 건물을 통한 방어 전략이 주를 이루며, 초반에는 소규모 유닛을 배치해 적의 약한 공격을 방어하는 데 집중해야 한다. 시간이 지남에 따라 적의 공격 패턴이 변하고 규모가 커지므로, 플레이어는 지속적으로 방어 건물을 업그레이드하거나 새로운 터렛을 배치해야 한다. 맵의 특징 중 하나는 중앙 통로의 넓이와 방어 시설의 배치로, 중앙을 확보하지 않으면 적의 공격이 한층 더 강력해지는 구조로 설계되어 있다. 또한, 맵의 가장자리를 따라 배치된 방어 건물들은 후방 공격을 방어하는 데 필수적이다. 이 맵은 초보 플레이어에게는 다소 난이도가 있을 수 있지만, 방어 건물의 배치와 업그레이드 타이밍을 익히면 점진적으로 클리어가 가능해진다. 반면, 숙련된 플레이어는 빠른 판단을 바탕으로 중앙 통로를 신속히 확보하고, 후방 공격을 차단하는 전략을 구사할 수 있다. 추천하는 플레이 방식은 방어 건물의 효율적인 배치와 자원 관리의 균형을 맞추는 것이며, 특히 초반 자원 확보가 중요하다. 맵의 난이도를 고려할 때, 초보자는 방어 건물의 기본 배치와 업그레이드 우선순위를 숙지한 후 플레이하는 것이 좋다. 또한, 맵의 구조상 중앙 통로를 확보하지 않으면 적의 공격이 지속적으로 밀려오므로, 이를 방지하기 위한 전략 수립이 필수다. StarCraft: Brood War's defense genre custom map, *Turret Defense 35000 -Final-*, is an evolved defensive map that goes beyond typical structures, requiring players to effectively repel endless enemy assaults and reach the final objective. The map employs a space-themed tileset to depict battles unfolding in outer space, with turrets and defensive structures scattered throughout serving as key strategic points. A wide central corridor dominates the map, flanked by base areas on the left and right—elements designed to help players predict enemy attack routes and establish defensive lines. Additional defensive facilities are positioned at the top and bottom of the map, allowing players to construct multi-layered defenses even with limited resources. The game revolves around unit production and defensive structures, with players initially focusing on deploying small units to fend off weaker early attacks. As time progresses, enemy attack patterns intensify and scale up, forcing players to continuously upgrade defensive buildings or deploy new turrets. A defining feature of the map is the width of the central corridor and the arrangement of defensive structures—holding the center not only secures a strategic advantage but also prevents enemy attacks from becoming overwhelmingly powerful. The defensive buildings placed along the map’s edges are also crucial for blocking rear assaults. While the map may pose a challenge for beginners, mastering turret placement and upgrade timing makes gradual completion achievable. Skilled players, on the other hand, can quickly secure the central corridor and employ strategies to cut off rear attacks with decisive judgment. The recommended playstyle emphasizes balancing efficient turret placement with resource management, with early resource acquisition being particularly vital. Given the map’s difficulty, beginners should familiarize themselves with basic turret layouts and upgrade priorities before playing. Additionally, since failing to secure the central corridor results in relentless enemy waves, devising a strategy to hold it is essential.
더 제네시스 (The Genesis)
스타크래프트 브루드워의 유즈맵 《더 제네시스》는 사막 테마의 광대한 맵에서 펼쳐지는 디펜스 장르의 게임으로, 8명의 플레이어가 한 팀이 되어 끊임없이 몰려드는 적을 방어하는 구조로 구성되어 있다. 맵 중앙에는 거대한 요새가 자리 잡고 있으며, 주변으로는 좁고 복잡한 협곡과 평지가 펼쳐진다. 플레이어는 요새를 중심으로 배치된 방어 시설과 유닛을 활용해 끊임없이 쏟아지는 적의 공격을 버텨내야 한다. 맵의 특징은 사막 지형에 맞게 지형이 평탄하지 않고 언덕과 계곡이 복잡하게 얽혀 있어, 유닛의 이동 경로가 제한되고 전략적인 배치와 선택이 중요하다는 점이다. 또한, 맵의 규모가 크고 지형이 복잡해 시야 확보가 어려우며, 적의 공격 패턴도 다양해 예상치 못한 위기가 자주 발생한다. 초반에는 비교적 약한 적들이 규칙적으로 몰려오지만, 시간이 지나면서 강력한 유닛들이 포함된 조합으로 공격이 강화되므로, 플레이어는 자원 관리와 유닛 업그레이드를 효율적으로 진행해야 한다. 방어에 성공하면 보상을 받을 수 있지만, 한 번 무너지면 복구가 쉽지 않으므로 긴장감과 집중력이 요구되는 맵이다. 초보 플레이어는 맵의 복잡한 지형을 이해하는 데 시간이 걸릴 수 있지만, 익숙해지면 전략적 깊이를 느낄 수 있는佳作이다. 특히 사막 테마의 시각적 효과가 뛰어나며, 디펜스 장르를 좋아하는 유저들에게 강력히 추천할 만하다. 플레이 전에는 맵의 주요 길목과 방어 포인트를 미리 숙지하고, 자원 분배와 유닛 조합을 신중히 계획하는 것이 중요하다. 또한, 팀원과의 원활한 소통과 협력이 승리를 좌우할 수 있으니, 팀 플레이에 익숙하지 않다면 연습이 필요할 수 있다. 이 맵은 디펜스 장르의 묘미를 느낄 수 있는佳作로, 반복 플레이를 통해 점차 공략법을 익힐 수 있을 것이다. The Genesis is a UMS defense-type custom map in StarCraft: Brood War, set in a vast desert-themed landscape where eight players form a single team to defend against relentless enemy waves. The map centers around a massive fortress, surrounded by winding canyons and uneven terrain. Players must strategically place defenses and units to withstand continuous assaults. The desert terrain features hills and valleys that restrict unit movement, making positioning and pathfinding critical. The map's size and complexity limit visibility, adding unpredictability to enemy attacks. Early waves consist of weaker units, but later stages introduce stronger compositions, requiring efficient resource management and upgrades. Success brings rewards, but failure can be devastating, demanding high concentration and adaptability. While the intricate terrain may challenge beginners, it offers strategic depth for experienced players. The desert aesthetic enhances immersion, making it a standout in the defense genre. New players should study key chokepoints and defense placements, plan unit compositions carefully, and coordinate with teammates—teamwork is essential for victory. With practice, this map rewards persistence, offering a satisfying challenge for defense enthusiasts seeking replayability and skill progression.
테스트 오브 서바이벌 - 프로토스 X (Test of Survival - Protoss X)
스타크래프트 브루드워 유즈맵 <테스트 오브 서바이벌 - 프로토스 X>는 서바이벌 장르의 맵으로, 플레이어가 프로토스 유닛을 조종하며 끊임없이 몰려드는 저그의 공격을 버텨내고 승리를 쟁취하는 것이 목표다. 맵 중앙에 위치한 프로토스 기지 주변으로 여러 개의 입구가 배치되어 있으며, 각 입구에서 끊임없이 저글링과 히드라리스크가 생산되어 공격해 온다. 플레이어는 초반 자원 수급을 통해 포토캐논과 미사일 터렛을 건설해 방어선을 구축해야 하며, 동시에 조이포나 아둔의 성지 같은 방어 건물들을 활용해 체력을 유지해야 한다. 맵의 특징은 입구마다 일정 주기로 적의 생산량이 증가하는 시스템으로, 초반에는 수월하게 느껴지지만 시간이 지날수록 압박이 심해지면서 방어 전략을 신중히 세워야 한다. 또한, 맵 곳곳에 흩어져 있는 추가 자원 지역을 확보하면 방어 건물의 업그레이드와 유닛 생산에 도움이 된다. 초보 플레이어는 방어 건물의 건설 우선순위를 신중히 고려해야 하며, 중급 이상 플레이어는 적의 생산 주기나 유닛 조합을 예측해 효율적인 대처가 필요하다. 추천 대상은 방어와 자원 관리에 익숙한 플레이어이며, 맵의 특성상 긴장감을 유지하며 플레이할 수 있어 서바이벌 장르를 좋아하는 유저들에게 적합하다. 플레이 전에는 맵의 입구 위치와 자원 분포를 미리 파악해 두는 것이 중요하다. 이 맵은 프로토스 유닛을 조종하는 것이 특징이지만, 테란이나 저그로도 플레이 가능한지는 내부 설명이나 이미지에서 확인되지 않으므로 유의해야 한다. StarCraft: Brood War custom map *Test of Survival - Protoss X* is a survival-style map where players control Protoss units, enduring endless waves of Zerg attacks to secure victory. Multiple entrances surround the central Protoss base, each continuously spawning Zerglings and Hydralisks to assault the player. Early on, players must gather resources to build Photon Cannons and Missile Turrets to establish defensive lines while maintaining health using structures like the Shield Battery or Templar Archives. A key feature is the periodic increase in enemy production at each entrance—initially manageable but growing increasingly oppressive over time, demanding careful defensive planning. Scattered resource points across the map can be secured to upgrade defenses and bolster unit production. Beginners should prioritize defensive structures wisely, while intermediate and advanced players must anticipate enemy production cycles and unit compositions for efficient counterplay. Ideal for players comfortable with defense and resource management, this map’s high-tension gameplay suits survival genre enthusiasts. Before playing, it’s crucial to study entrance locations and resource distribution. While the map emphasizes Protoss control, it’s unclear from descriptions or visuals whether Terran or Zerg can also be played, so players should verify this beforehand.
팀 디펜스 2.1 Official (Team Defense 2.1 Official)
스타크래프트 브루드워의 대표적인 유즈맵 장르인 디펜스(Defense) 유형의 맵 'Team Defense 2.1 Official'은 8명의 플레이어가 한 팀이 되어 방어와 생존을 중심으로 진행되는 팀전 디펜스 맵이다. 맵의 핵심 목표는 맵 중앙에 위치한 출구를 보호하면서 적대 팀의 공격을 막아내고, 마지막까지 살아남아 승리를 차지하는 것이다. 맵은 화산 타일셋을 기반으로 제작되어 독특한 지형과 시각적 특징을 제공하며, 다양한 방어 구조물을 배치할 수 있는 공간이 마련되어 있다. 내부 설명에 따르면 '많은 영웅(Heros)'을 사용할 수 있도록 설계된 것으로 보이며, 새로운 맵(No Map)임을 강조하고 있다. 디펜스 맵의 특성상 전략적 배치와 협동 플레이가 중요하며, 출구 주변을 방어하는 동시에 적을 섬멸하는 균형 잡힌 플레이가 요구된다. 맵의 symmetrical한 구조는 팀 간의 공정한 경쟁을 가능하게 하며, 팀워크와 개개인의 실력이 모두 요구되는 종합적인 전략 게임으로 느껴진다. 특히 출구 주변의 좁은 길목에서 벌어지는 전투는 긴장감을 고조시키며, 순간적인 판단과 빠른 반응이 승리를 좌우할 수 있다. 초보자의 경우 방어 구조물의 배치와 영웅의 활용법에 대한 기본적인 이해가 필요하며, 숙련된 플레이어는 팀원 간의 호흡을 맞추어 효율적인 전략을 구사할 수 있다. 맵의 symmetrical한 디자인과 중앙 출구 구조는 팀 간의 전투가 집중되는 핫스팟을 형성하므로, 초반 방어 라인의 구축과 영웅의 선택이 게임의 흐름을 결정짓는 중요한 포인트가 될 것이다. 이 맵은 팀워크를 중시하는 디펜스 유형의 맵을 선호하는 플레이어들에게 특히 추천된다. 또한, 맵의 symmetrical한 구조는 밸런스 측면에서도 우수하여, 팀 간의 실력 차가 크지 않다면 공정한 경쟁이 가능할 것으로 보인다. 플레이 전에는 팀원과의 사전 전략 회의와 영웅 조합에 대한 논의가 필수적이며, 특히 출구 주변의 방어 타워나 유닛의 배치 위치를 숙지하고 있어야 한다. 맵의 난이도는 내부 설명에 명시되어 있지 않지만, symmetrical한 구조와 중앙 출구의 중요성, 그리고 '많은 영웅'의 활용 가능성을 고려할 때 대체로 '보통' 이상의 난이도로 예상된다. 이 맵은 디펜스 장르에 익숙한 플레이어라면 누구나 즐길 수 있으며, 특히 팀플레이를 선호하는 유저들에게 강렬한 재미를 제공할 것이다. StarCraft: Brood War’s classic Defense-style custom map, *Team Defense 2.1 Official*, is a team-based Defense mode where eight players work together to survive by focusing on defense and endurance. The core objective is to protect the exit located at the center of the map while fending off enemy attacks and securing victory by surviving until the end. Built on a volcanic tileset, the map features unique terrain and visuals, offering plenty of space to strategically place defensive structures. According to the in-game description, it appears designed to utilize a wide variety of heroes, emphasizing that it’s a brand-new map. As a Defense map, strategic positioning and teamwork are crucial, requiring balanced play that both defends the exit and eliminates enemies. The symmetrical layout ensures fair competition between teams, making it a well-rounded strategy game that demands both teamwork and individual skill. The tight choke points around the exit create high-tension battles where quick decisions and fast reactions can determine victory. Beginners should grasp the basics of placing defensive structures and using heroes effectively, while experienced players can coordinate with teammates to execute advanced strategies. The symmetrical design and central exit structure create hotspots where team battles converge, making early defense line setup and hero selection key factors that shape the game’s flow. This map is especially recommended for players who enjoy Defense-style maps that emphasize teamwork. The symmetrical design also ensures strong balance, allowing for fair competition even if there’s a slight skill gap between teams. Before playing, it’s essential to hold a pre-game strategy meeting with teammates and discuss hero compositions, particularly familiarizing yourselves with defensive tower and unit placements near the exit. While the in-game description doesn’t specify difficulty, considering the symmetrical layout, the exit’s importance, and the potential use of many heroes, the map is likely rated as "medium" or higher. Anyone familiar with the Defense genre can enjoy this map, and it offers intense fun for those who prefer team play.
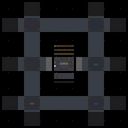
썬켄 디펜스 +12웨이 (Sunken Defense +12 Way)
스타크래프트 브루드워의 디펜스 장르 유즈맵인 '썬켄 디펜스 +12웨이(Sunken Defense +12 Way)'는 중앙 기지와 12방향의 입구에서 끊임없이 몰려드는 적을 방어하는 구조로 구성된 맵입니다. 맵의 중앙에 위치한 본진 주변으로 12개의 입구가 퍼져 있으며, 각 입구는 좁은 통로와 넓은 평지로 이어져 있습니다. 방어선은 주로 본진 앞의 좁은 길목을 중심으로 배치되며, 플레이어는 이 지점을 최대한 활용해 적을 효과적으로 막아야 합니다. 12방향에서 동시에 공격이 들어오기 때문에 초반에 모든 입구를 동시에 방어하는 것이 중요합니다. 각 통로마다 일정량의 방어 건물을 배치하거나, 유닛을 분배해 초반 러시를 막아내야 합니다. 특히 좁은 길목을 중심으로 입구막기 전략을 구사할 수 있으며, 넓은 평지에서는 다수의 유닛을 배치해 광역 공격을 펼칠 수 있습니다. 맵의 방어 지형이 비교적 단순하지만, 12방향의 균형 잡힌 공격 패턴을 예측하고 대비하는 것이 핵심입니다. 이 맵은 디펜스 장르의 기본 틀을 유지하면서도 12방향이라는 독특한 구조로 플레이어의 전략적 선택을 강제합니다. 모든 입구를 동시에 방어할 수 있는 자원이 제한적이기 때문에, 자원 관리와 유닛 배치의 타이밍이 승패를 좌우합니다. 또한, 적의 공격 패턴을 분석해 가장 취약한 지점을 집중 공격하는 전술을 사용할 수도 있습니다. 초보자부터 숙련자까지 즐길 수 있는 밸런스 잡힌 디펜스 맵으로, 특히 다인 플레이에서 협동이 중요해집니다. 플레이 전에는 맵의 구조를 숙지하고, 각 입구의 지형적 특징을 파악하는 것이 중요합니다. 좁은 길목은 입구막기용 건물을, 넓은 평지는 광역 공격용 유닛을 배치하는 데 유리합니다. 또한, 자원과 미네랄의 배치를 확인해 초반 방어 라인을 어떻게 구축할지 계획해야 합니다. 12방향의 공격 패턴을 예측하지 못하면 한곳이 뚫려 전체 방어선이 무너질 위험이 있으니, 각 입구의 공격을 주시하며 유동적으로 대처해야 합니다. 초반 방어에 성공한 후에는 중반부터는 유닛의 업그레이드와 조합을 신중히 결정해야 합니다. 이 맵은 디펜스 장르의 정석을 따르면서도 12웨이라는 변수를 더해 전략의 깊이를 한층 더했습니다. 디펜스 맵을 즐기는 유저라면 반드시 한 번 도전해 볼 만한 가치가 있는 맵입니다. Sunken Defense +12 Way is a StarCraft: Brood War defense custom map where players must protect their base from relentless waves of enemies attacking from 12 distinct directions. The map features a central base surrounded by 12 entry points, each connected by narrow pathways and open areas. The defensive strategy revolves around controlling these choke points while managing resources to deploy units and structures effectively. The 12-way layout ensures that attacks come from all directions simultaneously, making early game defense critical. Players must balance unit distribution across the narrow corridors and wider plains to counter incoming threats. The narrow paths are ideal for choke-point defenses, while the open areas allow for broader unit engagement. Balancing these defensive positions while anticipating enemy attack patterns is key to survival. This map retains the core mechanics of the defense genre but introduces a unique 12-way structure that challenges players to adapt their strategies dynamically. Limited resources force players to make tough decisions about where to allocate their forces, while the simultaneous attacks from multiple directions require precise timing and coordination. The map is accessible to both beginners and experienced players, though multiplayer scenarios demand strong teamwork to succeed. Before playing, it's essential to study the map's layout and understand the terrain advantages of each entry point. Narrow corridors favor choke-point defenses, while open areas are better suited for ranged unit engagements. Players should also plan their initial defensive lines based on mineral and resource placements. Failing to anticipate the 12-way attack pattern can lead to a critical breach in defenses, so constant vigilance is required. Early game success sets the stage for mid-game upgrades and unit compositions. For fans of the defense genre, Sunken Defense +12 Way offers a fresh twist with its multi-directional challenge, making it a must-try map.
선큰 D 12웨이 파이널 (Sunken D 12 Way Final)
스타크래프트 브루드워의 유즈맵 중 하나로 주목받는 <Sunken D 12 Way Final>은 8명의 플레이어가 동시에 참여할 수 있는 대규모 디펜스형 맵입니다. 맵의 중심에는 거대한 건물이 자리 잡고 있으며, 주변으로 12개의 방향에서 끊임없이 몰려드는 적들을 방어하는 것이 주된 목표로 보입니다. 맵 구조는 중앙 건물을 중심으로 동심원 형태로 구성되어 있으며, 각 방향별로 적의 진입로가 배치되어 있어 전략적인 방어가 요구됩니다. 맵의 디자인에서 확인되는 여러 개의 무덤과 유령 같은 오브젝트는 공포스러운 분위기를 연출하며, 이는 디펜스 맵의 긴장감을 한층 높이는 요소로 작용합니다. 플레이어는 중앙 건물을 보호하면서 동시에 주변의 방어 건물을 보수하거나 추가로 설치하여 적의 공격을 버텨내야 합니다. 맵의 하단부에는 자원 기지가 배치되어 있으며, 이를 통해 추가 자원을 확보할 수 있어 장기적인 방어 전략을 세울 수 있습니다. 맵의 특징 중 하나는 12방향에서 동시에 공격이 들어온다는 점으로, 이는 플레이어들에게 끊임없는 긴장감을 부여하며 다각적인 방어 체계를 요구합니다. 또한, 맵의 규모가 크고 디자인 요소가 풍부하여 시각적으로도 즐거운 경험을 제공합니다. 초보 플레이어의 경우 중앙 건물을 보호하는 데에 집중하는 것이 중요하며, опыт 있는 플레이어는 방어 자원과 전략을 효율적으로 분배하여 최대한의 효율을 내야 합니다. 맵의 난이도는 보통 수준으로 설정되어 있으며, 특히 12방향의 공격을 동시에 방어해야 하는 점에서 전략적 사고와 빠른 판단력이 요구됩니다. 이 맵은 디펜스 장르를 좋아하는 플레이어들에게 강력히 추천할 만한 작품으로, 반복 플레이를 통해 다양한 전략을 시도해 볼 수 있습니다. 맵을 플레이하기 전에 중앙 건물의 위치와 각 방향별 방어 포인트를 미리 숙지하는 것이 중요하며, 자원 관리를 효율적으로 수행하는 것이 관건입니다. 또한, 적의 공격 패턴을 미리 예측하고 방어 시설을 적시에 보수하거나 업그레이드하는 것이 승리를 좌우할 수 있습니다. 이 맵은 스타크래프트 유즈맵 커뮤니티에서 오랫동안 사랑받아 온 작품으로, 디펜스 장르의 정수를 느낄 수 있는佳作입니다. Sunken D 12 Way Final is a large-scale defense-type custom map from *StarCraft: Brood War* that supports up to eight players. The map centers around a massive central building, with the primary objective being to defend against endless waves of enemies approaching from twelve different directions. The layout is structured in concentric circles around the central structure, with each direction featuring dedicated enemy entry points, demanding strategic defensive planning. The map’s design incorporates multiple tombs and ghostly objects, enhancing its eerie atmosphere and intensifying the tension of the defense challenge. Players must protect the central building while simultaneously repairing or constructing additional defensive structures to withstand the relentless assaults. The lower section of the map includes a resource base, allowing players to gather additional supplies for long-term defense strategies. A key feature of the map is the simultaneous attacks from all twelve directions, which keeps players constantly on edge and requires a versatile defensive system. The map’s expansive scale and rich design elements also deliver a visually engaging experience. For beginners, focusing on protecting the central building is crucial, while experienced players should efficiently allocate defensive resources and strategies to maximize efficiency. The difficulty is set at a moderate level, though the need to defend against twelve simultaneous attacks demands strategic thinking and quick decision-making. This map is highly recommended for fans of the defense genre, offering opportunities to experiment with various strategies through repeated play. Before playing, it’s important to familiarize yourself with the central building’s location and the defensive points in each direction, as well as mastering efficient resource management. Predicting enemy attack patterns and timely repairing or upgrading defensive structures can determine victory. Long beloved in the *StarCraft* custom map community, *Sunken D 12 Way Final* is a masterpiece that captures the essence of the defense genre.
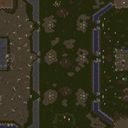
스타워즈: 코러산트 (Star Wars: Coruscant) v1.31
스타크래프트: 브루드워의 유즈맵 중에서도 독특한 우주 도시 코러산트를 배경으로 한 디펜스형 맵 ‘Star Wars Coruscant v1.31’은 스타워즈 팬이라면 한 번쯤 플레이해볼 만한 작품이다. 이 맵은 8명의 플레이어가 한 팀으로 뭉쳐 외계인 웨이브를 방어하는 구조로, 맵 중앙에 위치한 주요 거점을 지키며 끊임없이 밀려오는 적을 상대해야 한다. 특이하게도 전체 맵이 어두운 색조의 사막 타일셋으로 구성되어 있어 코러산트의 밤 풍경을 연상시키며, 곳곳에 배치된 오브젝트들은 스타워즈 세계관의 도시 구조를 연상케 한다. 맵의 규모는 6144x4096으로 상당히 넓지만, 주요 전투 지역은 중앙부와 주변 거점에 집중되어 있어 전략적인 포지셔닝이 중요하다. 방어선의 구축과 자원 관리, 그리고 적의 웨이브 패턴을 숙지하는 것이 핵심인데, 특히 후반부로 갈수록 적의 공격력이 급격히 상승하기 때문에 초반 자원 확보와 방어 시설의 효율적인 배치에 따라 승부가 갈린다. 이 맵은 스타워즈 팬 뿐만 아니라 디펜스 장르의 유즈맵을 선호하는 플레이어들에게도 좋은 선택지가 될 수 있으며, 팀원과의 협력이 필수적이기 때문에 소통이 중요한 맵이기도 하다. 플레이 전에는 맵의 중앙 거점 주변 지형과 주요 길목의 배치, 그리고 자원 분포를 미리 숙지하는 것이 좋다. 또한, 후반 웨이브에서 등장하는 보스급 유닛이나 특수 능력 유닛에 대한 대비도 미리 해두면 더 안정적인 플레이가 가능하다. 맵의 밸런스는 대체로 잘 짜여져 있지만, 초보 플레이어의 경우 AI의 공격 패턴을 파악하는 데 시간이 좀 걸릴 수 있으니 난이도 조절을 통해 천천히 적응해가는 것이 좋다. 이 맵은 한 번 플레이해본 후에도 여러 번 도전해볼 만한 재 플레이성이 높은 작품으로, 특히 팀 플레이를 중시하는 스타크래프트 유즈맵 커뮤니티에서 인기가 있을 것으로 예상된다. Star Wars Coruscant v1.31 is a unique defense-style custom map in StarCraft: Brood War that transports players to the Star Wars universe’s iconic city of Coruscant. Designed for 8 players working as a team, the objective is to defend the central stronghold against relentless waves of alien enemies. The map features a dark, desert-themed tileset that evokes the nighttime atmosphere of Coruscant, with scattered objects and structures reminiscent of the Star Wars franchise’s urban landscapes. While the map’s total size is large (6144x4096), the core combat zones are concentrated around the central area and key outposts, making strategic positioning critical. Players must focus on building defenses, managing resources, and memorizing enemy wave patterns, as the challenge escalates significantly in later stages. This map is ideal for Star Wars fans and defense-map enthusiasts alike, offering a cooperative experience where teamwork is essential. Before playing, it’s advisable to familiarize yourself with the terrain around the central stronghold, key pathways, and resource distribution. Additionally, preparing for late-game boss units or special abilities can make the experience smoother. While the map’s balance is generally well-executed, beginners may need time to adapt to the AI’s attack patterns, so adjusting the difficulty settings can help ease into the gameplay. With its replayability and emphasis on team coordination, Star Wars Coruscant v1.31 is likely to appeal to StarCraft custom map communities that prioritize cooperative and strategic play.
맵 선택 가이드
태그는 맵의 핵심 특징을 빠르게 설명하지만 제작 버전마다 규칙이 다를 수 있습니다. 상세 설명에서 권장 인원, 난이도, 플레이 시간과 버전을 함께 확인한 뒤 다운로드하세요.