
방어형 게임 스타크래프트 맵 모음
'방어형 게임' 태그가 등록된 맵을 모았습니다. 장르 하나로 찾기 어려운 플레이 방식, 난이도와 특징을 중심으로 인기 맵과 최신 맵을 비교해 보세요.
- 등록 맵
- 5개
- 누적 다운로드
- 1
- 누적 조회
- 211
인기 맵
다운로드와 조회 반응이 높은 맵입니다.
이세계 디펜스 (The Otherworld Defense)
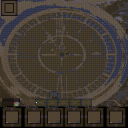
스타크래프트 브루드워의 유즈맵 장인에 의해 만들어진 이세계 디펜스가 제공하는 디펜스 형식의 흥미로운 게임 경험은 플레이어들에게 색다른 재미를 선사한다. 이 맵은 내부 설명에서 언급된 대로 「어느날 갑작스럽게 폭주한 팬덤이세돌」을 제어하는 내용을 담고 있는 것으로 보이며, 팬덤을 안정화시키는 과정이 하나의 스토리적 요소가 되어 플레이어의 몰입도를 높인다. 맵의 전체적인 구도는 넓은 사막 지형을 배경으로 펼쳐지며, 중앙에 위치한 주요 방어 지점을 중심으로 적의 공격을 막아내는 구조로 설계되어 있다. 타일셋이 사막으로 설정되어 있어 건조한 환경의 분위기를 잘 연출하고 있으며, 지형 자체는 비교적 평탄한 편이지만 곳곳에 있는 언덕과 오아시스 지역이 전략적 요소를 제공한다. 맵 상단과 하단, 좌우에 배치된 입구들을 통해 끊임없이 몰려드는 적들을 효과적으로 방어해야 하며, 방어 시설의 배치와 자원 관리가 승리의 핵심이다. 맵의 크기가 매우 크고 넓은 탓에 넓은 시야를 확보하는 것이 중요하며, 초반에는 소규모의 적들을 상대하다가 후반으로 갈수록 대규모의 웨이브가 등장하는 구조로 추정된다. 방어 시설의 종류나 특수 능력, 승리 조건 등은 맵 설명이나 이미지에서 명확히 확인되지 않지만, 넓은 공간을 활용한 방어 라인 구축과 적절한 자원 배분이 요구될 것으로 보인다. 이 맵은 특히 디펜스 장르에 익숙한 플레이어들에게는 익숙한 요소들이 많겠지만, 넓은 맵과 사막 지형의 조화로 인해 전략적인 깊이가 한 층 더해진다. 또한, 플레이어 간의 협력이 중요한 요소로 작용할 가능성이 높은데, 팀플레이가 필수적이지는 않지만 다수의 입구를 방어해야 하는 구조상 2인 이상의 팀 구성이 유리할 것으로 보인다. 추천하는 플레이 스타일은 방어 라인을 조기에 구축하고, 자원 수집을 지속적으로 병행하면서 후반 웨이브에 대비하는 것이다. 초보자의 경우 방어 라인의 중요성을 깨닫지 못하고 자원을 과도하게 소비하는 경우가 많으므로, 자원과 방어 시설 간의 균형을 carefully 관리하는 것이 중요하다. 또한, 맵의 넓은 크기 탓에 맵 리딩 능력이 부족한 플레이어는 시야 확보와 자원 분배를 소홀히 할 가능성이 있으니 맵의 주요 지점(입구, 자원 지역, 방어 포인트)을 미리 숙지하는 것이 좋다. 이세계 디펜스는 넓은 맵과 디펜스 장르의 특징을 잘 조합하여 플레이어들에게 긴장감과 전략적 재미를 동시에 제공하는 맵으로, 디펜스 매니아뿐만 아니라 넓은 맵과 전략적 요소가 좋아하는 유저들에게도 추천할 만한 작품이다. 다만, 맵의 넓은 크기와 복잡한 지형 탓에 첫 플레이 시에는 다소 버겁게 느껴질 수 있으니, 초반에 방어 라인을 안정화시키는 연습을 충분히 한 뒤 도전하는 것이 좋다. 또한, 팀플레이가 가능한 경우라면 팀원과의 원활한 소통을 통해 방어 라인을 분산시켜 더 효율적인 방어가 가능할 것이다. 이 맵의 특징은 넓은 공간을 활용한 넓은 시야와 전략적 배치에 있으며, 이러한 요소들이 플레이어의 전략적 사고를 자극하여 디펜스 장르에 대한 새로운 재미를 느낄 수 있도록 도와준다. This StarCraft: Brood War custom map, "이세계 디펜스(The Otherworld Defense)", offers a refreshing take on the defense genre by integrating narrative elements inspired by the internal description mentioning "a rampaging fandom." Set against a vast desert backdrop with the tile set clearly designed for arid environments, the map challenges players to defend multiple entrances from relentless enemy waves, with the central area serving as the primary defensive hub. The massive 6144x6144 map size ensures a sprawling battlefield where strategic positioning and resource management become critical, especially as enemy waves intensify in later stages. While the exact types of defensive structures and victory conditions remain unclear from the provided data, the map’s design suggests a need for balanced resource allocation and early establishment of defensive lines to withstand escalating assaults. Players familiar with defense maps will appreciate the strategic depth added by the desert terrain, which introduces natural choke points and elevated positions for better vantage points. Although the map does not explicitly require team play, coordinating with teammates—especially when defending multiple entrances—can significantly improve efficiency. Beginners may struggle with the map’s scale and resource management, so a focus on early defensive setup and controlled expansion is highly recommended. The combination of a large map, strategic terrain, and wave-based enemy assaults makes "이세계 디펜스" an engaging experience for both seasoned defense map enthusiasts and players who enjoy maps with a strong emphasis on spatial strategy. To fully enjoy this map, players should prioritize map awareness, early defensive planning, and efficient resource use, ensuring a smoother transition into the more intense later waves.
수켄 콜로니 디펜스 5웨이 V2 (Sunken Colony Defense 5 WayV2)
스타크래프트 브루드워의 디펜스 장르 유즈맵으로, ‘Sunken Colony Defense 5 WayV2’는 다섯 갈래의 길에서 끊임없이 몰려드는 적을 방어하는 것이 핵심이다. 맵의 구조는 중앙에 위치한 방어 거점 주변으로 다섯 개의 길이 퍼져 있으며, 각 길의 끝에 위치한 확장 기지 또는 생산 건물에서 수시로 적이 쏟아져 나온다. 플레이어는 스커지, 드론, 성큰 콜로니 등 다양한 유닛과 건물을 조합해 공격로를 차단하고, 적의 침공을 저지해야 한다. 게임은 시작과 동시에 공격로가 활성화되며, 시간이 지날수록 적의 물량이 증가하고, 스펙도 강화되는 경향이 보인다. 특히 ‘More drones. Sunkens more powerful’라는 설명에서 알 수 있듯이, 스커지와 성큰 콜로니의 조합이 필수적이며, 초반부터 강력한 방어를 구축할 수 있어야 한다. 맵의 난이도는 다섯 갈래 길 모두에서 동시에 적극적인 공격을 펼치는 적의 패턴에 따라 결정되며, 한 줄이라도 소홀히 하면 금세 뚫리게 된다. 방어에 성공하려면 각 길의 중요도를 우선순위에 따라 관리하고, 자원과 유닛 생산을 신속히 대응하는 전략적 플레이가 요구된다. 이 맵은 디펜스 장르의 클래식한 재미를 살리면서도, 다섯 갈래 길이라는 구조로 인해 전략적 깊이를 더한 것이 특징이다. 초보자도 쉽게 접근할 수 있지만, 다섯 갈래 길의 균형을 맞추는 난이도는 결코 만만치 않다. 방어에 실패하면 순식간에 밀리는 시스템이기 때문에, 플레이어의 집중력과 빠른 판단력이 무엇보다 중요하다. 특히 스커지와 성큰 콜로니의 조합을 어떻게 활용할 것인지, 각 길의 중요도를 어떻게 설정할 것인지를 고려해 플레이하는 것이 핵심이다. 이 맵을 즐기고자 한다면, 초반 방어 라인을 튼튼히 구축하고, 적의 물량 증가에 따라 유연하게 대응할 준비를 갖추는 것이 중요하다. 다섯 갈래 길의 균형을 유지하면서도, 자원 관리에 신경을 써야만 안정적인 플레이가 가능할 것이다. 이 맵은 디펜스 유저들에게는 필수급으로 검토해 볼 만한 작품으로, 다섯 갈래 길의 긴장감과 전략적 깊이가 매력적이다. 특히 같은 장르의 다른 맵들과 비교했을 때, 다섯 갈래 길이라는 독특한 구조가 제공하는 긴장감과 몰입도가 인상적이다. 방어에 성공했을 때의 성취감 또한 뛰어난 편으로, 디펜스 장르의 묘미를 제대로 느낄 수 있는 맵 중 하나로 손꼽을 만하다. 초보자부터 숙련자까지 폭넓은 대상을 겨냥하고 있지만, 특히 다섯 갈래 길의 균형을 맞추는 데 어려움을 겪는 플레이어들에게는 반복 플레이를 통해 전략을 다듬어 볼 만한 가치가 있다. StarCraft: Brood War's defense genre custom map, *Sunken Colony Defense 5 WayV2*, focuses on defending against relentless enemy waves from five branching paths. The map features a central defensive stronghold with five distinct routes extending outward, each ending in an expansion base or production structure where enemies continuously spawn. Players must block attack routes using a mix of units and buildings like Scourges, Drones, and Sunken Colonies to fend off the assault. The game activates all attack paths from the start, with enemy numbers and strength escalating over time. As highlighted in the description *"More drones. Sunkens more powerful,"* a balanced combination of Scourges and Sunken Colonies is essential, requiring players to establish a strong defense early on. The difficulty varies based on how aggressively enemies attack across all five paths simultaneously—neglecting even one can quickly lead to a breach. Success depends on prioritizing each path, managing resources efficiently, and responding swiftly to enemy waves with strategic unit production. While the map retains the classic fun of defense genres, its five-branch structure adds significant strategic depth. Though accessible to beginners, balancing all paths proves challenging due to the map's punishing system, where a single lapse can result in a swift defeat. Players must rely on sharp focus and quick decision-making, particularly in optimizing Scourge and Sunken Colony placements and prioritizing path defenses. To enjoy this map, securing a solid early defense and preparing flexible responses to increasing enemy waves are crucial. Balancing all five paths while managing resources effectively ensures stable gameplay. A must-try for defense enthusiasts, *Sunken Colony Defense 5 WayV2* stands out for its unique five-branch tension and immersive depth, offering a gripping experience compared to other maps in the genre. The sense of achievement upon successful defense is particularly rewarding, making it a standout title in the defense genre. While catering to all skill levels, it especially challenges players struggling to balance the five paths, rewarding repeated attempts to refine strategies.
2003 터렛 디펜스 (2003 Turret Defense)
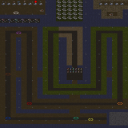
스타크래프트 브루드워의 대표적 디펜스 유즈맵인 〈2003 Turret Defense〉는_CLASSIC RESTORATION_ 프로젝트의 일환으로 재탄생한 클래식한 디펜스 맵이다. 내부 설명에서 확인할 수 있듯이 CentauriBoy에 의해 처음 제작되었고, Fleppy에 의해 업데이트가 진행되었다고 한다. 맵 제목에서도 알 수 있듯이 ‘터렛 디펜스’ 장르로, 플레이어는 주어진 기간 동안 공격해 오는 적 웨이브를 방어용 터렛과 유닛을 배치하여 막아내야 한다. 이미지에서 확인되는 사막 테마의 배경과 미네랄, 베스핀 가스 배치, 그리고 중앙에 위치한 방어 거점은 전형적인 디펜스 맵의 구조를 보여준다. 맵의 해상도와 타일 크기는 3072x3072에 96x96 단위로 나뉘어 있으며, 타일셋은 사막으로 설정되어 있어 건조한 사막 지형을 연상시킨다. 맵의 난이도와 플레이 시간은 게임 내 설정이나 내부 설명에서 직접 언급되지 않지만, 디펜스 맵의 특성상 반복 플레이를 통해 점차 난이도를 높이는 구조를 가지고 있을 것으로 추정된다. 이 맵의 가장 큰 특징은 ‘터렛’이라는 방어용 건물을 적극 활용하는 데 있다. 터렛은 적 유닛을 자동으로 공격하는 방어 시설로, 이를 적절히 배치하여 적의 웨이브를 차단하는 것이 핵심 전략이다. 또한, 맵의 구조상 중앙에 위치한 방어 거점은 상대적으로 접근이 용이하도록 설계되어 있으며, 플레이어는 이곳을 중심으로 터렛과 보조 유닛을 배치하여 방어 라인을 구축해야 한다. 맵의 배경 이미지에서 확인되는 여러 가지 기호와 아이콘은 맵의 기능이나 플레이어의 상태를 표시하는 UI 요소로 추정되며, 게임 진행 중 필수적으로 확인해야 하는 요소들이다. 이 맵은 디펜스 장르의 기본적인 재미 요소인 ‘방어와 공격의 균형’을 잘 살리면서도, 클래식한 스타일을 유지하여 오랜 시간 동안 사랑받아온 맵이라는 점에서 가치가 있다. 초보자부터 숙련자까지 모두 즐길 수 있도록 난이도가 조절 가능한 구조로 설계되었을 것으로 보이며, 특히 터렛의 배치와 업그레이드 전략을 세우는 것이 포인트일 것이다. 플레이 전에는 맵의 UI 요소와 터렛의 종류 및 성능을 미리 확인하고, 게임 내 제공되는 팁이나 가이드 라인을 숙지하는 것이 좋다. 또한, 방어 거점 주변의 미네랄과 베스핀 가스를 효율적으로 활용하여 자원을 관리하는 것도 중요한 전략 중 하나다. StarCraft: Brood War’s iconic defense custom map, *2003 Turret Defense*, is a classic remake as part of the *CLASSIC RESTORATION* project. According to the in-game description, it was originally created by CentauriBoy and later updated by Fleppy. As the name suggests, this is a "turret defense" genre map where players must fend off incoming enemy waves by strategically placing defensive turrets and units within a set time limit. The desert-themed background, mineral and Vespene gas layouts, and the central defensive stronghold visible in the image reflect the typical structure of a defense map. The map resolution is 3072x3072, divided into 96x96 tiles, with a desert tileset that evokes a dry, arid landscape. While the in-game settings or description do not explicitly mention the difficulty or playtime, the map likely follows a defense genre structure where players gradually increase difficulty through repeated play. The defining feature of this map is its heavy reliance on "turrets" as defensive structures. Turrets automatically attack enemy units, and proper placement is key to blocking enemy waves. The central stronghold is designed for easy access, allowing players to build their defense lines around it with turrets and supporting units. The various symbols and icons visible in the background image likely serve as UI elements indicating map functions or player status, which players must monitor closely during gameplay. The map excels at balancing defense and offense—the core appeal of the defense genre—while maintaining a classic style that has kept it beloved for years. It appears to be designed with adjustable difficulty, making it enjoyable for both beginners and veterans, with turret placement and upgrade strategies being the main focus. Before playing, it’s wise to review the map’s UI elements, turret types and performance, and familiarize yourself with in-game tips or guidelines. Efficiently managing resources—especially minerals and Vespene gas around the defensive stronghold—is also a crucial strategy.
침몰 디펜스 대회 (Sunken Defense Competition)
스타크래프트 브루드워의 유즈맵 장르 중 디펜스 장르에 속하는 ‘Sunken Defense Competition’은 침수된 전투 공간에서 펼쳐지는 흥미로운 방어형 게임으로, 최대 5명의 플레이어가 순차적으로 적의 공격을 막아내며 경쟁하는 구조로 구성되어 있다. 맵의 핵심 메커니즘은 ‘한 명만 통과시켜라’라는 간단한 규칙에 기반하며, 각 플레이어는 자신의 방어선을 구축하고 적 유닛을 섬멸해 다음 레벨로 넘어가야 한다. 맵 내부 설명에 따르면, 레벨을 완료할 때마다 8기의 추가 드론을 획득할 수 있으며, 10레벨을 먼저 클리어하거나 마지막까지 살아남은 플레이어가 승리하는 것으로 보인다. 해상도 4096x4096의 넓은 맵에서 펼쳐지는 전투는 전략적 배치와Micro 컨트롤이 요구되며, 특히 좁은 통로나 다리 지역에서의 전투가 승패를 좌우할 가능성이 높아 보인다. 맵의 분위기는 황무지 타일셋을 활용한 어두운 색감으로 침울한 바다 밑바닥을 연상시키며, 이는 디펜스 게임의 긴장감을 한층 더해준다. 초보자도 쉽게 진입할 수 있는 단순한 목표와 규칙이지만, 차근차근 레벨을 올라가며 전략을 다듬어야만 높은 레벨에서 승리할 수 있다. 특히 타워 배치와 자원 관리, 유닛 조합에 따라 난이도가 급변할 수 있어, 플레이어의 적응력이 중요하다. 추천 대상은 스타크래프트 유즈맵을 좋아하는 모든 유저로, 디펜스 장르에 익숙하지 않은 경우에도 규칙을 익히면 재미있게 플레이할 수 있다. 다만, 맵의 밸런스가 제작자의 의도대로 맞춰져 있는지는 확인되지 않았으므로, 플레이 전에는 레벨당 적의 구성과 배치에 대한 사전 조사나 시연 영상을 보는 것이 좋다. 플레이 전 확인 포인트는 자신의 방어선 구축 위치, 레벨 진행 시 드론 획득 타이밍, 그리고 적의 패턴 변화에 대응할 수 있는 유연성이다. 이 맵은 좁은 공간에서 벌어지는 치열한 전투를 선호하는 유저들에게 특히 어울릴 것으로 예상된다. This StarCraft: Brood War custom map, titled ‘Sunken Defense Competition’, falls under the defense genre, offering a unique underwater battlefield where up to five players compete to survive by eliminating enemies and advancing through levels. The core gameplay revolves around the simple yet strategic rule of allowing only one player to pass through while defending your position. Each player builds their own defense line, and upon completing a level, they receive eight additional drones, which can be crucial for progressing further. The map’s large 4096x4096 resolution provides ample space for tactical positioning, though tight corridors and bridges will likely become critical choke points during intense battles. The dark, murky aesthetic created by the wasteland tileset enhances the oppressive atmosphere of the sunken environment, making every encounter feel more immersive. While the rules are straightforward, mastering the game requires careful planning of tower placements, resource management, and unit combinations, especially as the difficulty ramps up in later levels. Beginners can easily start playing due to the simple objectives, but long-term success depends on adapting strategies to counter increasingly complex enemy patterns. This map is ideal for fans of StarCraft custom maps and defense games who enjoy high-stakes, close-quarters combat. Before diving in, players should check the enemy composition and layout per level or watch gameplay demonstrations to understand the balancing mechanics, as the difficulty curve may vary based on individual playstyles. Key points to verify before playing include optimal defense line positioning, drone acquisition timing, and adaptability to enemy strategies.
아트릭스 디펜스 (Atrix Defense)
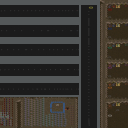
스타크래프트 브루드워의 유즈맵 '아트릭스 디펜스(Atrix Defense)'는 디펜스 장르의 대표적인 맵으로, 플레이어들이 끊임없이 몰려오는 적을 방어하면서 스테이지를 통과하는 구조를 갖추고 있다. 21개의 레벨을 보유하고 있으며, 각 레벨마다 보스가 등장해 플레이어의 능력을 시험한다. 맵은 총 6명의 플레이어가 참여할 수 있도록 설계되어 있으며, 한 전투에서 최대 20번의 목숨(life)을 사용할 수 있다. 내부 맵 설명에 따르면 '심지어 모디파이드 버전보다 어렵다'고 언급될 만큼 난이도가 높은 편으로, 초보자는 물론 숙련자도 신중히 접근해야 하는 도전적인 콘텐츠다. 맵의 타일셋은 황무지로 구성되어 있으며, 4096x4096의 넓은 공간에서 펼쳐지는 전투는 시각적으로도 웅장함을 자아낸다. 주요 특징으로는 레벨별 보스 전투와 제한된 생명 수를 꼽을 수 있는데, 이는 플레이어의 전략적 사고와 자원 관리를 요구한다. 또한, 맵의 난이도 상승 패턴이 명확히 드러나 있어, 단계적인 적응이 필요하다. 추천 대상은 디펜스 장르를 선호하는 플레이어이며, 특히 난이도를 즐기는 유저들에게 적합하다. 플레이 전에는 레벨별 보스 패턴과 맵의 주요 경로, 리스폰 위치 등을 숙지하는 것이 중요하다. 무엇보다도, 생명 수 관리가 핵심이며, 무리한 공격을 자제하고 방어 타워를 효율적으로 배치하는 전략이 필수적이다. 이 맵은 디펜스 장르의 깊이를 느낄 수 있는 작품으로, 반복 플레이를 통해 점차 숙련도를 높일 수 있는 장점이 있다. Atrix Defense is a popular StarCraft: Brood War custom map in the defense genre, where players must withstand waves of enemies to progress through 21 challenging levels. Each level culminates in a boss battle, adding an extra layer of difficulty. Designed for up to six players, the map allows for 20 lives per run, with the internal description emphasizing its difficulty as even harder than modified versions. The 4096x4096 terrain, set in a barren wasteland, provides ample space for strategic planning and tower placement. The core mechanics revolve around life management, boss encounters, and resource allocation, making it a test of both skill and adaptability. This map is best suited for players who enjoy high-stakes defense scenarios and are prepared for a steep learning curve. Prior to playing, familiarizing yourself with each level's boss patterns and map layout is crucial, as efficient tower placement and disciplined attacks are key to survival. Atrix Defense stands out for its depth and replayability, offering a rewarding experience for those willing to master its challenges.
최근 등록된 맵
새로 추가된 파일과 버전을 확인하세요.
침몰 디펜스 대회 (Sunken Defense Competition)
스타크래프트 브루드워의 유즈맵 장르 중 디펜스 장르에 속하는 ‘Sunken Defense Competition’은 침수된 전투 공간에서 펼쳐지는 흥미로운 방어형 게임으로, 최대 5명의 플레이어가 순차적으로 적의 공격을 막아내며 경쟁하는 구조로 구성되어 있다. 맵의 핵심 메커니즘은 ‘한 명만 통과시켜라’라는 간단한 규칙에 기반하며, 각 플레이어는 자신의 방어선을 구축하고 적 유닛을 섬멸해 다음 레벨로 넘어가야 한다. 맵 내부 설명에 따르면, 레벨을 완료할 때마다 8기의 추가 드론을 획득할 수 있으며, 10레벨을 먼저 클리어하거나 마지막까지 살아남은 플레이어가 승리하는 것으로 보인다. 해상도 4096x4096의 넓은 맵에서 펼쳐지는 전투는 전략적 배치와Micro 컨트롤이 요구되며, 특히 좁은 통로나 다리 지역에서의 전투가 승패를 좌우할 가능성이 높아 보인다. 맵의 분위기는 황무지 타일셋을 활용한 어두운 색감으로 침울한 바다 밑바닥을 연상시키며, 이는 디펜스 게임의 긴장감을 한층 더해준다. 초보자도 쉽게 진입할 수 있는 단순한 목표와 규칙이지만, 차근차근 레벨을 올라가며 전략을 다듬어야만 높은 레벨에서 승리할 수 있다. 특히 타워 배치와 자원 관리, 유닛 조합에 따라 난이도가 급변할 수 있어, 플레이어의 적응력이 중요하다. 추천 대상은 스타크래프트 유즈맵을 좋아하는 모든 유저로, 디펜스 장르에 익숙하지 않은 경우에도 규칙을 익히면 재미있게 플레이할 수 있다. 다만, 맵의 밸런스가 제작자의 의도대로 맞춰져 있는지는 확인되지 않았으므로, 플레이 전에는 레벨당 적의 구성과 배치에 대한 사전 조사나 시연 영상을 보는 것이 좋다. 플레이 전 확인 포인트는 자신의 방어선 구축 위치, 레벨 진행 시 드론 획득 타이밍, 그리고 적의 패턴 변화에 대응할 수 있는 유연성이다. 이 맵은 좁은 공간에서 벌어지는 치열한 전투를 선호하는 유저들에게 특히 어울릴 것으로 예상된다. This StarCraft: Brood War custom map, titled ‘Sunken Defense Competition’, falls under the defense genre, offering a unique underwater battlefield where up to five players compete to survive by eliminating enemies and advancing through levels. The core gameplay revolves around the simple yet strategic rule of allowing only one player to pass through while defending your position. Each player builds their own defense line, and upon completing a level, they receive eight additional drones, which can be crucial for progressing further. The map’s large 4096x4096 resolution provides ample space for tactical positioning, though tight corridors and bridges will likely become critical choke points during intense battles. The dark, murky aesthetic created by the wasteland tileset enhances the oppressive atmosphere of the sunken environment, making every encounter feel more immersive. While the rules are straightforward, mastering the game requires careful planning of tower placements, resource management, and unit combinations, especially as the difficulty ramps up in later levels. Beginners can easily start playing due to the simple objectives, but long-term success depends on adapting strategies to counter increasingly complex enemy patterns. This map is ideal for fans of StarCraft custom maps and defense games who enjoy high-stakes, close-quarters combat. Before diving in, players should check the enemy composition and layout per level or watch gameplay demonstrations to understand the balancing mechanics, as the difficulty curve may vary based on individual playstyles. Key points to verify before playing include optimal defense line positioning, drone acquisition timing, and adaptability to enemy strategies.
수켄 콜로니 디펜스 5웨이 V2 (Sunken Colony Defense 5 WayV2)
스타크래프트 브루드워의 디펜스 장르 유즈맵으로, ‘Sunken Colony Defense 5 WayV2’는 다섯 갈래의 길에서 끊임없이 몰려드는 적을 방어하는 것이 핵심이다. 맵의 구조는 중앙에 위치한 방어 거점 주변으로 다섯 개의 길이 퍼져 있으며, 각 길의 끝에 위치한 확장 기지 또는 생산 건물에서 수시로 적이 쏟아져 나온다. 플레이어는 스커지, 드론, 성큰 콜로니 등 다양한 유닛과 건물을 조합해 공격로를 차단하고, 적의 침공을 저지해야 한다. 게임은 시작과 동시에 공격로가 활성화되며, 시간이 지날수록 적의 물량이 증가하고, 스펙도 강화되는 경향이 보인다. 특히 ‘More drones. Sunkens more powerful’라는 설명에서 알 수 있듯이, 스커지와 성큰 콜로니의 조합이 필수적이며, 초반부터 강력한 방어를 구축할 수 있어야 한다. 맵의 난이도는 다섯 갈래 길 모두에서 동시에 적극적인 공격을 펼치는 적의 패턴에 따라 결정되며, 한 줄이라도 소홀히 하면 금세 뚫리게 된다. 방어에 성공하려면 각 길의 중요도를 우선순위에 따라 관리하고, 자원과 유닛 생산을 신속히 대응하는 전략적 플레이가 요구된다. 이 맵은 디펜스 장르의 클래식한 재미를 살리면서도, 다섯 갈래 길이라는 구조로 인해 전략적 깊이를 더한 것이 특징이다. 초보자도 쉽게 접근할 수 있지만, 다섯 갈래 길의 균형을 맞추는 난이도는 결코 만만치 않다. 방어에 실패하면 순식간에 밀리는 시스템이기 때문에, 플레이어의 집중력과 빠른 판단력이 무엇보다 중요하다. 특히 스커지와 성큰 콜로니의 조합을 어떻게 활용할 것인지, 각 길의 중요도를 어떻게 설정할 것인지를 고려해 플레이하는 것이 핵심이다. 이 맵을 즐기고자 한다면, 초반 방어 라인을 튼튼히 구축하고, 적의 물량 증가에 따라 유연하게 대응할 준비를 갖추는 것이 중요하다. 다섯 갈래 길의 균형을 유지하면서도, 자원 관리에 신경을 써야만 안정적인 플레이가 가능할 것이다. 이 맵은 디펜스 유저들에게는 필수급으로 검토해 볼 만한 작품으로, 다섯 갈래 길의 긴장감과 전략적 깊이가 매력적이다. 특히 같은 장르의 다른 맵들과 비교했을 때, 다섯 갈래 길이라는 독특한 구조가 제공하는 긴장감과 몰입도가 인상적이다. 방어에 성공했을 때의 성취감 또한 뛰어난 편으로, 디펜스 장르의 묘미를 제대로 느낄 수 있는 맵 중 하나로 손꼽을 만하다. 초보자부터 숙련자까지 폭넓은 대상을 겨냥하고 있지만, 특히 다섯 갈래 길의 균형을 맞추는 데 어려움을 겪는 플레이어들에게는 반복 플레이를 통해 전략을 다듬어 볼 만한 가치가 있다. StarCraft: Brood War's defense genre custom map, *Sunken Colony Defense 5 WayV2*, focuses on defending against relentless enemy waves from five branching paths. The map features a central defensive stronghold with five distinct routes extending outward, each ending in an expansion base or production structure where enemies continuously spawn. Players must block attack routes using a mix of units and buildings like Scourges, Drones, and Sunken Colonies to fend off the assault. The game activates all attack paths from the start, with enemy numbers and strength escalating over time. As highlighted in the description *"More drones. Sunkens more powerful,"* a balanced combination of Scourges and Sunken Colonies is essential, requiring players to establish a strong defense early on. The difficulty varies based on how aggressively enemies attack across all five paths simultaneously—neglecting even one can quickly lead to a breach. Success depends on prioritizing each path, managing resources efficiently, and responding swiftly to enemy waves with strategic unit production. While the map retains the classic fun of defense genres, its five-branch structure adds significant strategic depth. Though accessible to beginners, balancing all paths proves challenging due to the map's punishing system, where a single lapse can result in a swift defeat. Players must rely on sharp focus and quick decision-making, particularly in optimizing Scourge and Sunken Colony placements and prioritizing path defenses. To enjoy this map, securing a solid early defense and preparing flexible responses to increasing enemy waves are crucial. Balancing all five paths while managing resources effectively ensures stable gameplay. A must-try for defense enthusiasts, *Sunken Colony Defense 5 WayV2* stands out for its unique five-branch tension and immersive depth, offering a gripping experience compared to other maps in the genre. The sense of achievement upon successful defense is particularly rewarding, making it a standout title in the defense genre. While catering to all skill levels, it especially challenges players struggling to balance the five paths, rewarding repeated attempts to refine strategies.
아트릭스 디펜스 (Atrix Defense)
스타크래프트 브루드워의 유즈맵 '아트릭스 디펜스(Atrix Defense)'는 디펜스 장르의 대표적인 맵으로, 플레이어들이 끊임없이 몰려오는 적을 방어하면서 스테이지를 통과하는 구조를 갖추고 있다. 21개의 레벨을 보유하고 있으며, 각 레벨마다 보스가 등장해 플레이어의 능력을 시험한다. 맵은 총 6명의 플레이어가 참여할 수 있도록 설계되어 있으며, 한 전투에서 최대 20번의 목숨(life)을 사용할 수 있다. 내부 맵 설명에 따르면 '심지어 모디파이드 버전보다 어렵다'고 언급될 만큼 난이도가 높은 편으로, 초보자는 물론 숙련자도 신중히 접근해야 하는 도전적인 콘텐츠다. 맵의 타일셋은 황무지로 구성되어 있으며, 4096x4096의 넓은 공간에서 펼쳐지는 전투는 시각적으로도 웅장함을 자아낸다. 주요 특징으로는 레벨별 보스 전투와 제한된 생명 수를 꼽을 수 있는데, 이는 플레이어의 전략적 사고와 자원 관리를 요구한다. 또한, 맵의 난이도 상승 패턴이 명확히 드러나 있어, 단계적인 적응이 필요하다. 추천 대상은 디펜스 장르를 선호하는 플레이어이며, 특히 난이도를 즐기는 유저들에게 적합하다. 플레이 전에는 레벨별 보스 패턴과 맵의 주요 경로, 리스폰 위치 등을 숙지하는 것이 중요하다. 무엇보다도, 생명 수 관리가 핵심이며, 무리한 공격을 자제하고 방어 타워를 효율적으로 배치하는 전략이 필수적이다. 이 맵은 디펜스 장르의 깊이를 느낄 수 있는 작품으로, 반복 플레이를 통해 점차 숙련도를 높일 수 있는 장점이 있다. Atrix Defense is a popular StarCraft: Brood War custom map in the defense genre, where players must withstand waves of enemies to progress through 21 challenging levels. Each level culminates in a boss battle, adding an extra layer of difficulty. Designed for up to six players, the map allows for 20 lives per run, with the internal description emphasizing its difficulty as even harder than modified versions. The 4096x4096 terrain, set in a barren wasteland, provides ample space for strategic planning and tower placement. The core mechanics revolve around life management, boss encounters, and resource allocation, making it a test of both skill and adaptability. This map is best suited for players who enjoy high-stakes defense scenarios and are prepared for a steep learning curve. Prior to playing, familiarizing yourself with each level's boss patterns and map layout is crucial, as efficient tower placement and disciplined attacks are key to survival. Atrix Defense stands out for its depth and replayability, offering a rewarding experience for those willing to master its challenges.
2003 터렛 디펜스 (2003 Turret Defense)
스타크래프트 브루드워의 대표적 디펜스 유즈맵인 〈2003 Turret Defense〉는_CLASSIC RESTORATION_ 프로젝트의 일환으로 재탄생한 클래식한 디펜스 맵이다. 내부 설명에서 확인할 수 있듯이 CentauriBoy에 의해 처음 제작되었고, Fleppy에 의해 업데이트가 진행되었다고 한다. 맵 제목에서도 알 수 있듯이 ‘터렛 디펜스’ 장르로, 플레이어는 주어진 기간 동안 공격해 오는 적 웨이브를 방어용 터렛과 유닛을 배치하여 막아내야 한다. 이미지에서 확인되는 사막 테마의 배경과 미네랄, 베스핀 가스 배치, 그리고 중앙에 위치한 방어 거점은 전형적인 디펜스 맵의 구조를 보여준다. 맵의 해상도와 타일 크기는 3072x3072에 96x96 단위로 나뉘어 있으며, 타일셋은 사막으로 설정되어 있어 건조한 사막 지형을 연상시킨다. 맵의 난이도와 플레이 시간은 게임 내 설정이나 내부 설명에서 직접 언급되지 않지만, 디펜스 맵의 특성상 반복 플레이를 통해 점차 난이도를 높이는 구조를 가지고 있을 것으로 추정된다. 이 맵의 가장 큰 특징은 ‘터렛’이라는 방어용 건물을 적극 활용하는 데 있다. 터렛은 적 유닛을 자동으로 공격하는 방어 시설로, 이를 적절히 배치하여 적의 웨이브를 차단하는 것이 핵심 전략이다. 또한, 맵의 구조상 중앙에 위치한 방어 거점은 상대적으로 접근이 용이하도록 설계되어 있으며, 플레이어는 이곳을 중심으로 터렛과 보조 유닛을 배치하여 방어 라인을 구축해야 한다. 맵의 배경 이미지에서 확인되는 여러 가지 기호와 아이콘은 맵의 기능이나 플레이어의 상태를 표시하는 UI 요소로 추정되며, 게임 진행 중 필수적으로 확인해야 하는 요소들이다. 이 맵은 디펜스 장르의 기본적인 재미 요소인 ‘방어와 공격의 균형’을 잘 살리면서도, 클래식한 스타일을 유지하여 오랜 시간 동안 사랑받아온 맵이라는 점에서 가치가 있다. 초보자부터 숙련자까지 모두 즐길 수 있도록 난이도가 조절 가능한 구조로 설계되었을 것으로 보이며, 특히 터렛의 배치와 업그레이드 전략을 세우는 것이 포인트일 것이다. 플레이 전에는 맵의 UI 요소와 터렛의 종류 및 성능을 미리 확인하고, 게임 내 제공되는 팁이나 가이드 라인을 숙지하는 것이 좋다. 또한, 방어 거점 주변의 미네랄과 베스핀 가스를 효율적으로 활용하여 자원을 관리하는 것도 중요한 전략 중 하나다. StarCraft: Brood War’s iconic defense custom map, *2003 Turret Defense*, is a classic remake as part of the *CLASSIC RESTORATION* project. According to the in-game description, it was originally created by CentauriBoy and later updated by Fleppy. As the name suggests, this is a "turret defense" genre map where players must fend off incoming enemy waves by strategically placing defensive turrets and units within a set time limit. The desert-themed background, mineral and Vespene gas layouts, and the central defensive stronghold visible in the image reflect the typical structure of a defense map. The map resolution is 3072x3072, divided into 96x96 tiles, with a desert tileset that evokes a dry, arid landscape. While the in-game settings or description do not explicitly mention the difficulty or playtime, the map likely follows a defense genre structure where players gradually increase difficulty through repeated play. The defining feature of this map is its heavy reliance on "turrets" as defensive structures. Turrets automatically attack enemy units, and proper placement is key to blocking enemy waves. The central stronghold is designed for easy access, allowing players to build their defense lines around it with turrets and supporting units. The various symbols and icons visible in the background image likely serve as UI elements indicating map functions or player status, which players must monitor closely during gameplay. The map excels at balancing defense and offense—the core appeal of the defense genre—while maintaining a classic style that has kept it beloved for years. It appears to be designed with adjustable difficulty, making it enjoyable for both beginners and veterans, with turret placement and upgrade strategies being the main focus. Before playing, it’s wise to review the map’s UI elements, turret types and performance, and familiarize yourself with in-game tips or guidelines. Efficiently managing resources—especially minerals and Vespene gas around the defensive stronghold—is also a crucial strategy.
이세계 디펜스 (The Otherworld Defense)
스타크래프트 브루드워의 유즈맵 장인에 의해 만들어진 이세계 디펜스가 제공하는 디펜스 형식의 흥미로운 게임 경험은 플레이어들에게 색다른 재미를 선사한다. 이 맵은 내부 설명에서 언급된 대로 「어느날 갑작스럽게 폭주한 팬덤이세돌」을 제어하는 내용을 담고 있는 것으로 보이며, 팬덤을 안정화시키는 과정이 하나의 스토리적 요소가 되어 플레이어의 몰입도를 높인다. 맵의 전체적인 구도는 넓은 사막 지형을 배경으로 펼쳐지며, 중앙에 위치한 주요 방어 지점을 중심으로 적의 공격을 막아내는 구조로 설계되어 있다. 타일셋이 사막으로 설정되어 있어 건조한 환경의 분위기를 잘 연출하고 있으며, 지형 자체는 비교적 평탄한 편이지만 곳곳에 있는 언덕과 오아시스 지역이 전략적 요소를 제공한다. 맵 상단과 하단, 좌우에 배치된 입구들을 통해 끊임없이 몰려드는 적들을 효과적으로 방어해야 하며, 방어 시설의 배치와 자원 관리가 승리의 핵심이다. 맵의 크기가 매우 크고 넓은 탓에 넓은 시야를 확보하는 것이 중요하며, 초반에는 소규모의 적들을 상대하다가 후반으로 갈수록 대규모의 웨이브가 등장하는 구조로 추정된다. 방어 시설의 종류나 특수 능력, 승리 조건 등은 맵 설명이나 이미지에서 명확히 확인되지 않지만, 넓은 공간을 활용한 방어 라인 구축과 적절한 자원 배분이 요구될 것으로 보인다. 이 맵은 특히 디펜스 장르에 익숙한 플레이어들에게는 익숙한 요소들이 많겠지만, 넓은 맵과 사막 지형의 조화로 인해 전략적인 깊이가 한 층 더해진다. 또한, 플레이어 간의 협력이 중요한 요소로 작용할 가능성이 높은데, 팀플레이가 필수적이지는 않지만 다수의 입구를 방어해야 하는 구조상 2인 이상의 팀 구성이 유리할 것으로 보인다. 추천하는 플레이 스타일은 방어 라인을 조기에 구축하고, 자원 수집을 지속적으로 병행하면서 후반 웨이브에 대비하는 것이다. 초보자의 경우 방어 라인의 중요성을 깨닫지 못하고 자원을 과도하게 소비하는 경우가 많으므로, 자원과 방어 시설 간의 균형을 carefully 관리하는 것이 중요하다. 또한, 맵의 넓은 크기 탓에 맵 리딩 능력이 부족한 플레이어는 시야 확보와 자원 분배를 소홀히 할 가능성이 있으니 맵의 주요 지점(입구, 자원 지역, 방어 포인트)을 미리 숙지하는 것이 좋다. 이세계 디펜스는 넓은 맵과 디펜스 장르의 특징을 잘 조합하여 플레이어들에게 긴장감과 전략적 재미를 동시에 제공하는 맵으로, 디펜스 매니아뿐만 아니라 넓은 맵과 전략적 요소가 좋아하는 유저들에게도 추천할 만한 작품이다. 다만, 맵의 넓은 크기와 복잡한 지형 탓에 첫 플레이 시에는 다소 버겁게 느껴질 수 있으니, 초반에 방어 라인을 안정화시키는 연습을 충분히 한 뒤 도전하는 것이 좋다. 또한, 팀플레이가 가능한 경우라면 팀원과의 원활한 소통을 통해 방어 라인을 분산시켜 더 효율적인 방어가 가능할 것이다. 이 맵의 특징은 넓은 공간을 활용한 넓은 시야와 전략적 배치에 있으며, 이러한 요소들이 플레이어의 전략적 사고를 자극하여 디펜스 장르에 대한 새로운 재미를 느낄 수 있도록 도와준다. This StarCraft: Brood War custom map, "이세계 디펜스(The Otherworld Defense)", offers a refreshing take on the defense genre by integrating narrative elements inspired by the internal description mentioning "a rampaging fandom." Set against a vast desert backdrop with the tile set clearly designed for arid environments, the map challenges players to defend multiple entrances from relentless enemy waves, with the central area serving as the primary defensive hub. The massive 6144x6144 map size ensures a sprawling battlefield where strategic positioning and resource management become critical, especially as enemy waves intensify in later stages. While the exact types of defensive structures and victory conditions remain unclear from the provided data, the map’s design suggests a need for balanced resource allocation and early establishment of defensive lines to withstand escalating assaults. Players familiar with defense maps will appreciate the strategic depth added by the desert terrain, which introduces natural choke points and elevated positions for better vantage points. Although the map does not explicitly require team play, coordinating with teammates—especially when defending multiple entrances—can significantly improve efficiency. Beginners may struggle with the map’s scale and resource management, so a focus on early defensive setup and controlled expansion is highly recommended. The combination of a large map, strategic terrain, and wave-based enemy assaults makes "이세계 디펜스" an engaging experience for both seasoned defense map enthusiasts and players who enjoy maps with a strong emphasis on spatial strategy. To fully enjoy this map, players should prioritize map awareness, early defensive planning, and efficient resource use, ensuring a smoother transition into the more intense later waves.
맵 선택 가이드
태그는 맵의 핵심 특징을 빠르게 설명하지만 제작 버전마다 규칙이 다를 수 있습니다. 상세 설명에서 권장 인원, 난이도, 플레이 시간과 버전을 함께 확인한 뒤 다운로드하세요.