
방어형 스타크래프트 맵 모음
'방어형' 태그가 등록된 맵을 모았습니다. 장르 하나로 찾기 어려운 플레이 방식, 난이도와 특징을 중심으로 인기 맵과 최신 맵을 비교해 보세요.
- 등록 맵
- 39개
- 누적 다운로드
- 2
- 누적 조회
- 1,742
인기 맵
다운로드와 조회 반응이 높은 맵입니다.
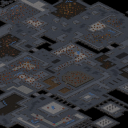
최종 결전 C (Final Battle C)
이 맵은 스타크래프트: 브루드워 유즈맵으로, UED(United Earth Directorate) 군대가 저그의 침공을 방어하는 디펜스 장르의 전투형 맵이다. 내부 설명에 따르면 지구에 상륙한 저그의 공격으로 인해 인간 거주지역이 10%로 줄어든 시점에서 UED가 반격을 준비하는 스토리가 전달된다. 맵의 전체적인 구조는 넓은 평야와 중앙에 위치한 주요 방어 거점이 특징으로, 플레이어는 제한된 자원으로 끊임없이 몰려오는 저그 웨이브를 막아내야 한다. 맵의 해상도가 6144x6144로 매우 크고 타일셋이 우주 기반이지만, 실제 진행은 지상 디펜스에 가까우며, 다양한 유닛과 건물을 배치할 수 있는 공간이 마련되어 있다. 방어선의 중요 거점마다 터렛이나 포탑 설치가 가능한 구조물이 보이며, 중앙 요새는 본진 역할을 하며 보급과 업그레이드가 가능한 것으로 추정된다. 플레이어는 초반 자원과 기술력을 바탕으로 방어선을 구축하고, 중후반에는 대규모 저그 군단을 상대해야 한다. 맵의 난이도는 내장된 설정이나 설명이 없어 명확하지 않지만, 'UED 조직 각지의 부대'라는 설명과 10% 남은 점령지라는 스토리상으로는 높은 난이도가 예상된다. 이 맵은 디펜스 장르를 선호하는 플레이어, 특히 저그 대처에 중점을 둔 전투형 유즈맵을 즐기는 유저들에게 추천할 만하다. 다만, 맵의 크기가 크고 디펜스 구조가 복잡한 만큼, 초보자는 게임 내 설정이나 팁을 참고하는 것이 좋다. 주요 플레이 전 확인 포인트는 중앙 요새의 방어력과 보급 능력, 그리고 저그 웨이브의 주기 및 강도다. 또한, 맵의 타일셋이 우주 기반이지만 실제 게임은 지상 기반이라는 점도 참고해야 한다. This map is a *StarCraft: Brood War* custom map where the United Earth Directorate (UED) defends against a Zerg invasion in a defense-focused combat scenario. According to the in-game description, the story takes place after the Zerg attack has reduced human settlements to just 10% of their original size, prompting the UED to launch a counteroffensive. The map features a vast open plain with a central stronghold as its core structure, requiring players to hold the line against relentless Zerg waves using limited resources. Despite its massive 6144x6144 resolution and space-themed tileset, the gameplay leans toward ground-based defense, offering ample space to deploy various units and structures. Key defensive positions include turrets and defensive towers, while the central fortress functions as a main base with supply and upgrade capabilities. Players must establish defenses early on with their starting resources and technology, later facing increasingly large Zerg armies in the mid-to-late game. While the difficulty isn’t explicitly defined in the map’s settings, the lore—such as "UED forces from across the galaxy" and the dire 10% remaining territory—suggests a high challenge level. This map is ideal for players who enjoy defense-focused custom maps, especially those who prefer strategies centered on countering the Zerg. However, due to its large scale and complex defensive structure, beginners should consult in-game tips or guides before playing. Key points to check before starting include the fortress’s defensive strength and supply capacity, as well as the frequency and intensity of Zerg waves. Additionally, keep in mind that despite its space-themed tileset, the gameplay is entirely ground-based.
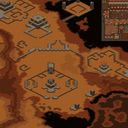
모래 베일 (SandVeil)
RP - SandVeil은 스타크래프트: 브루드워의 유즈맵으로, 거대한 사막 도시와 외계 동굴을 배경으로 펼쳐지는 디펜스 형식의 맵이다. 맵의 전체적인 분위기는 SF풍으로 조성되어 있으며, 거대한 스케일의 맵답게 플레이어는 광활한 맵 곳곳에서 벌어지는 전투를 경험할 수 있다. 맵 중앙에는 거대한 도시 구조물이 자리 잡고 있으며, 주변으로는 사막 지형과 외계 동굴이 펼쳐져 있다. 맵의 주요 특징은 맵의 규모와 디자인으로, 맵을 가득 메운 사막과 외계의 기운이 느껴지는 구조물이 인상적이다. 플레이어는 맵 곳곳에 배치된 방어 건물이나 유닛을 활용하여 적대적인 유닛이나 건물로부터 자신을 보호해야 한다. 맵의 진행 방식은 주로 방어에 중점을 두고 있으며, 맵의 지형을 활용한 전략적 플레이가 요구된다. 맵의 규모가 크기 때문에 맵을 빠르게 숙지하는 것이 중요하며, 맵의 주요 거점이나 위험한 지역을 미리 파악해두는 것이 좋다. 추천 대상은 디펜스 형식의 맵을 선호하는 플레이어들로, 특히 대규모 맵에서의 전략적 플레이를 즐기는 유저들에게 적합하다. 플레이 전에는 맵의 주요 거점과 위험 지역을 확인하고, 맵의 규모에 맞는 유닛 배치와 방어 전략을 미리 세워두는 것이 중요하다. 또한, 맵의 SF 분위기를 즐기고자 하는 플레이어들에게도 추천할 만한 맵이다. 맵의 디자인과 규모가 크기 때문에, 처음 접하는 플레이어는 맵의 전체적인 구조를 파악하는 데 다소 시간이 걸릴 수 있다. 하지만 맵의 디자인과 전략적 요소는 충분히 매력적이므로, 차분히 맵을 탐험하며 플레이하는 것이 좋다. RP - SandVeil is a user-made map for *StarCraft: Brood War*, set in a massive desert city and alien caverns, featuring a defense-style gameplay experience. The map’s overall atmosphere leans into a sci-fi aesthetic, and true to its grand scale, players engage in battles sprawled across vast terrain. At the center of the map stands a colossal urban structure, surrounded by desert landscapes and alien caves. The map’s standout features are its sheer size and design, with sprawling deserts and structures imbued with an otherworldly presence leaving a strong impression. Players must defend themselves using defensive buildings and units scattered throughout the map against hostile forces. The gameplay focuses primarily on defense, requiring strategic play that leverages the map’s terrain. Given the map’s large scale, quickly familiarizing yourself with it is crucial, and identifying key strongholds or dangerous zones in advance is highly recommended. This map is ideal for players who enjoy defense-style maps, especially those who relish strategic gameplay on a grand scale. Before playing, it’s important to review the map’s key locations and hazardous areas, and to prepare unit placements and defense strategies suited to its scale. The map also comes recommended for those looking to immerse themselves in its sci-fi atmosphere. Due to its expansive design and scale, newcomers may need some time to grasp the map’s overall structure. However, its compelling design and strategic depth make it worth exploring at a relaxed pace.
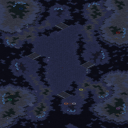
루나 더 파이널 (Luna the Final)
스타크래프트 브루드워의 UMS 유즈맵 'Luna the Final'은 화산 테마의 거대한 맵에서 펼쳐지는 디펜스 형식의 전략 게임이다. 맵 중앙의 넓은 공간에서 시작되는 전투는 플레이어가 일정 주기마다 밀려드는 적을 방어하는 방식으로 진행되며, 맵 곳곳에 배치된 방어 건물과 자원 수급 포인트를 활용해 어떻게든 살아남아야 한다. 맵의 크기가 4096x4096으로 상당히 넓고, 해상도도 4096x4096인 만큼 넓은 시야와 전략적 위치 선정이 중요하다. 특히 맵의 테마가 화산인 만큼, 배경에 녹색과 붉은색의 용암 지대가 눈에 띄며, 이는 분위기뿐만 아니라 시야 확보에도 영향을 미친다. 맵의 제작자인 I3aDa_FireFist에 의해 V.3.1 버전까지 업데이트되었으며, 강퇴 기능과 강제 옵션 기능이 추가되어 플레이어 간 커뮤니케이션과 게임 진행의 안정성이 높아졌다. 이 맵은 기본적으로 디펜스 장르에 속하지만, 단순한 방어뿐만 아니라 자원 관리와 위치 선정, 타이밍 공격 등 다층적인 전략을 요구한다. 플레이어는 초반에 주어지는 소량의 자원으로 방어 건물을 건설하거나 유닛을 생산해야 하며, 적의 공격 패턴을 예측해 방어선을 구축하는 것이 중요하다. 맵의 중앙 부분은 비교적 평탄한 지형이지만, 가장자리에는 언덕 지형이 있어 시야와 공격 범위를 확보하기 좋다. 또한, 맵 곳곳에 scattered한 리소스 지점이 존재해 자원 수급을 원활히 할 수 있도록 설계되어 있다. 이 맵을 즐기기 위해서는 기본적인 스타크래프트 전략 이해와 함께, 디펜스 게임의 기본적인 전략 감각이 필요하다. 초보자의 경우 난이도가 다소 높을 수 있지만, 꾸준한 플레이를 통해 방어 루틴을 익히고, 적의 공격 패턴을 분석하는 연습을 하면 점차 숙련될 수 있다. 또한, 팀 플레이를 지원하는 맵이므로 친구들과 함께 플레이하면 더욱 즐겁게 클리어할 수 있을 것이다. 맵의 거대한 규모와 화산 테마가 주는 분위기는 스타크래프트의Classic한Feel을 살리면서도, 새로운 전략적 깊이를 제공하는 훌륭한 UMS 유즈맵으로 꼽힌다. This Brood War UMS custom map, 'Luna the Final,' offers a strategic defense experience set against a volcanic theme on a massive 4096x4096 battlefield. Players must defend against waves of enemies by strategically placing buildings and managing resources across the expansive map. The volcanic terrain, with its distinct green and red lava textures, not only sets the mood but also influences visibility and positioning. Developed by I3aDa_FireFist up to version V.3.1, this map includes features like kick and forced option functions to enhance gameplay stability and player communication. While primarily a defense genre map, 'Luna the Final' demands more than just basic tactics. Players must balance resource collection, base construction, and timing attacks against enemy waves. The central area of the map is relatively flat, offering open space for expansions, while the edges feature elevated terrain that provides strategic vantage points. Scattered resource points across the map ensure a steady supply chain for continuous defense. For beginners, the map may present a steep learning curve due to its size and complexity. However, with practice, players can hone their defense strategies and adapt to enemy patterns. The map supports team play, making it ideal for multiplayer sessions with friends. The classic Brood War feel, combined with the volcanic aesthetic and strategic depth, makes 'Luna the Final' a standout UMS custom map that offers both challenge and immersion.
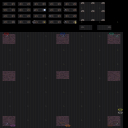
E V O L V E S 2007
스타크래프트 브루드워의 유즈맵 ‘E V O L V E S 2007’은 우주 테마의 넓은 맵에서 펼쳐지는 디펜스와 서바이벌 요소가 조화로운 작품이다. 6명의 플레이어가 한 팀을 이루어 중앙에 위치한 핵을 지키며 끊임없이 몰려드는 적들을 상대하는 구조로, 맵의 거대한 규모와 깔끔한 배치 덕분에 긴장감 넘치는 전투를 경험할 수 있다. 게임은 시작하자마자 중앙 핵 주변으로 좁아지는 방어 구역이 설정되며, 외부에서부터 끊임없이 쳐들어오는 적군과 플레이어의 자원 관리, 방어 시설 설치가 핵심 전략이 된다. 맵의 중앙부는 비교적 평탄한 지형이지만, 곳곳에 배치된 언덕과 소형 언덕 지형이 시야를 차단하고 전략적 우위를 제공하며, 우주 테마답게 배경은 어두운 우주 공간으로 이루어져 있어 몰입감을 높인다. 플레이어는 시작 시점에서 이미 제한된 자원을 보유하고 있으며, 이를 바탕으로 방어 타워나 유닛 생산 건물 등을 건설해야 한다. 적군은 맵의 외곽에서부터 일정 주기로 생성되며, 플레이어는 이를 방어하거나 역공할 수 있는 다양한 선택지를 강요받는다. 맵의 구조상 외부에서부터 서서히 좁아지는 형태이기 때문에 초반에는 넓은 지역을 방어해야 하지만, 시간이 지나면서 방어선이 점차 центра화되면서 전투의 강도가 높아진다. 맵의 크기가 상당히 크고, 타일셋이 우주 테마로 구성되어 있어 시야 확보와 기지 배치 전략이 매우 중요하며, 잘못된 위치에 건물을 짓거나 방어선을 구축하면 적군의 손쉬운 공격 루트가 될 수 있다. 이 맵의 또 다른 특징은 적군의 패턴이 반복되면서도 조금씩 변한다는 점이다. 초반에는 소규모 병력이 주기적으로 공격해 오지만, 점차 대규모 병력이 몰려오며 특정 시점에서는 보스급 유닛이나 특수한 능력을 가진 적들이 등장하기도 한다. 이러한 변칙적인 요소 덕분에 단순히 방어만 하는 것이 아니라, 능동적으로 자원을 확보하고 적군을 사냥하거나 보스를 사냥하는 전략도 유효해진다. 또한, 맵의 끝부분에는Resource Vespene Geyser가 배치되어 있어 가스 자원의 확보가 가능하며, 이를 활용한 고급 유닛의 생산이 게임의 후반부를 좌우할 수 있다. 이 맵은 초보자보다는 어느 정도 스타크래프트의 기본기를 익힌 플레이어들이 즐기기에 적합하며, 특히 팀워크가 중요한 유즈맵이기 때문에 친구들과 함께 플레이할 때 더욱 재미를 느낄 수 있다. 한 명의 플레이어가 실수하거나 방심하면 전체 팀의 패배로 이어질 수 있기 때문에, 각 플레이어의 역할 분배와 실시간 커뮤니케이션이 필수적이다. 또한, 맵의 크기가 크고 구조가 복잡하기 때문에 여러 번 플레이를 반복하면서 최적의 방어 전략과 자원 관리 방법을 익히는 것이 중요하다. 마지막으로, 맵의 분위기와 긴장감 덕분에 단조로워지지 않고 계속해서 흥미를 유발하는 구조로 이루어져 있다. 플레이 전에는 맵의 구조와 적군의 공격 패턴, 그리고 팀원 간의 역할 분담을 충분히 논의하는 것이 좋다. E V O L V E S 2007 is a UMS (Use Map Settings) custom map for StarCraft: Brood War, featuring a blend of defense and survival mechanics set in a vast cosmic-themed map. Designed for six players working as a single team, the core objective revolves around protecting a central core from relentless waves of enemy attacks. The expansive layout of the map, combined with its strategic terrain features such as hills and elevated areas, creates a tense and immersive combat experience where vision control and base positioning are critical. The gameplay begins with players starting in a relatively open area surrounding the central core, which gradually narrows as the game progresses. Players start with limited resources and must strategically construct defensive towers and production buildings to fend off periodic enemy invasions. The enemy units spawn from the outer edges of the map and advance inward, forcing players to adapt their defenses dynamically. The map's size and cosmic aesthetic enhance the sense of scale and urgency, making both macro and micro-management essential for survival. One of the standout features of E V O L V E S 2007 is the evolving enemy patterns. Early waves consist of smaller, manageable forces, but as the game advances, larger and more complex enemy groups emerge, including powerful boss-like units and special variants. This variability ensures that the gameplay remains engaging and requires players to shift from passive defense to proactive strategies, such as raiding enemy spawn points or hunting down bosses. Additionally, the map includes Resource Vespene Geysers, allowing players to gather gas for advanced units that can turn the tide in later stages. The map is best suited for players with a solid grasp of StarCraft mechanics, as coordination and teamwork are vital to success. A single mistake or lapse in judgment can lead to a cascading failure for the entire team, making clear communication and role assignment crucial. The complexity and scale of the map also demand repeated playthroughs to master optimal defensive strategies and resource management. Its atmospheric design and escalating challenges ensure that each play session feels fresh and engaging. Before starting, players should discuss base layouts, defensive priorities, and team roles to maximize their chances of success.
보이 밴드 매서커 (Boy Band Massacre)
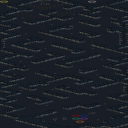
스타크래프트 브루드워의 유즈맵 <보이 밴드 매서커>는 5인용 디펜스 장르의 맵으로, 플레이어는 얼음으로 뒤덮인 넓은 필드에서 끊임없이 몰려오는 적들을 방어해야 한다. 맵의 배경은 차가운 설원이며, 플레이어 기지 주변은 얼음으로 둘러싸여 있어 시각적으로도 차가운 분위기를 연출한다. 맵은 넓고 복잡한 길로 구성되어 있으며, 중앙에 위치한 기지 주변으로 좁은 통로가 이어져 있어 방어선을 구축하기에 적합한 구조를 갖추고 있다. 내부 설명에 따르면, "보이 밴드가 당신의 여자친구들을 전부 빌리치로 만들었다"라는 스토리 요소가 있으며, 플레이어는 이 상황에 맞서 자신의 기지를 지켜내야 한다. 맵의 특징은 5인용으로 구성되어 있어 팀워크가 중요하며, 각 플레이어는 개인의 기지와 자원을 관리하면서 적의 공격을 방어해야 한다. 적의 물량이 지속적으로 증가하는 형식으로, 난이도는 점점 상승하여 플레이어의 전략과 대응력이 요구된다. 맵의 구조상 중앙 통로로 접근하는 적을 차단하는 것이 중요하며, 빙판 지형이 많아 이동 속도에도 영향을 미치는 것으로 추정된다. 초보 플레이어는 기지 방어뿐만 아니라 자원 관리와 적의 패턴을 숙지하는 데 주의를 기울여야 하며, 팀원과의 협력이 필수적이다. 또한, 넓은 맵을 활용한 전략적인 포지셔닝이 승패를 좌우할 수 있으므로, 맵의 지형을 잘 이해하고 활용하는 것이 중요하다. 추천 대상은 디펜스 장르를 좋아하는 플레이어, 특히 팀 기반의 전략적 플레이를 즐기는 유저들에게 적합하며, 5인용이라는 특성상 친구들과 함께 플레이하기에 알맞은 맵이다. 플레이 전, 맵의 구조와 적의 공격 패턴을 미리 확인하고, 팀원과의 역할 분담을 명확히 하는 것이 좋다. 또한, 자원 관리에 대한 기본적인 이해가 있다면 더 안정적인 플레이가 가능할 것이다. StarCraft: Brood War's custom map *Boy Band Massacre* is a 5-player defense-style map where players must defend against endless waves of enemies on a vast, icy battlefield. The map’s setting is a frozen tundra, with the player’s base surrounded by ice, creating a cold, desolate atmosphere. The terrain features wide, intricate paths leading to the central base, with narrow passages that make it ideal for setting up defensive lines. According to the in-game description, the premise is that "the boy band has turned all your girlfriends into Billy Zombies," and players must hold out against this onslaught to protect their base. Designed for five players, the map emphasizes teamwork, as each player manages their own base and resources while fending off attacks. The enemy’s numbers steadily increase, raising the difficulty and demanding sharper strategy and adaptability from players. A key aspect of the map’s design is blocking enemy advances through the central corridor, while the slippery ice terrain likely affects movement speed. Beginner players should focus not only on base defense but also on resource management and learning enemy attack patterns, with teamwork being essential. Strategic positioning across the vast map can determine victory or defeat, so understanding and utilizing the terrain is crucial. This map is recommended for fans of defense games, especially those who enjoy team-based strategic play, making it a great choice for playing with friends. Before starting, it’s wise to study the map layout and enemy attack patterns, clearly assign roles among teammates, and have a basic grasp of resource management for smoother gameplay.
데저트 스트라이크 나이트 FINAL (Desert Strike Night FINAL)
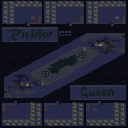
《데저트 스트라이크 나이트 FINAL》는 스타크래프트: 브루드워의 유즈맵으로, 사막 지형을 배경으로 펼쳐지는 전략 디펜스 장르의 맵입니다. 이 맵은 6명의 플레이어가 한 팀으로 모여 적의 끊임없는 공격을 방어하는 방식으로 진행되며, 맵 중앙의 거점에 위치한 건물을 보호하는 것이 핵심 목표입니다. 맵의 특징은 어두운 톤의 사막 배경과 야간 전투 Feel을 강조한 디자인으로, 특히 맵 중앙에 위치한 거대한 건물이 어두운 분위기를 한층 더해줍니다. 플레이어는 맵 곳곳에 배치된 방어 시설과 유닛을 활용해 적의 공격을 막아내야 하며, 시간이 지나면서 적의 공격 패턴이 increasingly 어려워지는 구조를 가지고 있습니다. 이 맵의 주요 특징은 방어 위주의 전투와 팀워크입니다. 플레이어는 각자의 역할을 맡아 방어선을 구축하고, 적의 공격을 효과적으로 차단해야 합니다. 맵의 구조는 중앙에서부터 사방으로 뻗어나가는 형태로, 초보자들은 중앙 거점 보호에 집중하는 것이 중요합니다. 반면, 숙련된 플레이어는 맵 외곽의 보조 방어선을 구축하거나, 적의 공격을 유도하는 전략을 구사할 수 있습니다. 맵의 분위기와 긴장감은 야간 전투라는 설정 덕분에 더욱 살아나며, 플레이어는 맵의 어두운 조명과 효과음으로 몰입감을 느낄 수 있습니다. 이 맵을 플레이하기 전에는 팀 구성과 역할 분담을 미리 정하는 것이 중요합니다. 또한, 방어 시설의 배치와 유닛 생산 타이밍을 잘 조율해야만 적의 공격을 효과적으로 막아낼 수 있습니다. 맵의 난이도는 방어의 중요성에 따라 달라지며, 팀워크가 원활할수록 성공 가능성이 높아집니다. 초보 플레이어도 팀원과의 협동을 통해 충분히 즐길 수 있지만, 숙련된 플레이어는 더 높은 난이도와 긴장감을 느낄 수 있습니다. 플레이어는 맵의 구조와 적의 공격 패턴을 파악한 후, 방어 전략을 수립하는 것이 중요합니다. 맵의 중앙 거점과 외곽 방어선을 모두 고려하여 균형 잡힌 방어망을 구축해야 합니다. 또한, 적의 공격이coming increasingly 어려워지므로, 시간 관리와 자원 효율화도 핵심 요소입니다. 이 맵은 단순히 방어만 하는 것이 아니라, 적의 공격을 유도하고 차단하는 전략적 사고가 요구되는 맵입니다. 팀원 간의 소통과 전략적 협력이 없으면 성공하기 어려운 맵이므로, 미리 팀원들과의 대화를 통해 전략을 공유하는 것이 좋습니다. 《Desert Strike NIGHT FINAL》 is a user-made map for *StarCraft: Brood War*, set in a desert terrain and featuring a strategic defense genre. Six players team up to defend against relentless enemy attacks, with the core objective being to protect the building located at the central stronghold. The map stands out with its dark-toned desert backdrop and nighttime combat atmosphere, amplified by the imposing structure at the center. Players must utilize defensive structures and units scattered across the map to fend off waves of enemies, whose attack patterns grow increasingly challenging over time. A key aspect of this map is its focus on defense and teamwork. Each player must fulfill their role in establishing defensive lines and effectively blocking enemy advances. The map’s layout radiates outward from the center, making it crucial for beginners to prioritize protecting the central stronghold. Meanwhile, experienced players can set up auxiliary defenses along the outer edges or employ tactics to lure and disrupt enemy movements. The nighttime setting enhances the map’s immersive tension, amplified by dim lighting and sound effects that heighten the player’s engagement. Before playing, it’s essential to coordinate team roles and responsibilities ahead of time. Proper placement of defensive structures and synchronization of unit production timings are vital to countering enemy attacks effectively. The difficulty of the map fluctuates with the importance of defense, and stronger teamwork directly correlates with higher chances of success. While beginners can enjoy the experience through collaboration with teammates, seasoned players will encounter greater challenges and heightened suspense. Players should analyze the map’s layout and enemy attack patterns to devise an effective defense strategy. Balancing protection of both the central stronghold and outer defensive lines is key. As enemy assaults intensify, efficient time management and resource optimization become critical factors. This map demands more than just defense—it requires strategic thinking to guide and intercept enemy movements. Success hinges on clear communication and coordinated strategy among teammates, so discussing plans beforehand is highly recommended.
타르핏 디펜스 3.3 FTW2 (TarPit Ðefense3.3 -FTW2-)
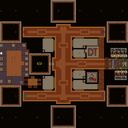
스타크래프트 브루드워의 대표적인 디펜스형 유즈맵인 《TarPit Ðefense3.3 -FTW2-》는 그 이름에서 알 수 있듯이 끈질기게 몰아치는 적을 방어하며 요새를 지켜내는 디펜스 장르에 속한다. 이 맵은 가로 32칸, 세로 32칸의 정사각형 공간으로 구성되어 있으며, 황혼 타일셋을 기반으로 깔끔한 시각적 느낌을 자아낸다. 플레이어는 중앙에 위치한 본진 건물을 지키며, 끊임없이 쏟아지는 저그 웨이브를 상대해야 하는데, 이 과정에서 타워를 건설하고 업그레이드하는 전략적 선택이 핵심으로 작용한다. 맵의 특징 중 하나는 상대적으로 넓은 맵 중앙을 가로질러 오는 적의 진로를 방해하는 장애물이나 지형이 배치되어 있어, 단순히 타워를 도배하는 것만으로는 승리를 장담할 수 없다는 점이다. 또한, FTW2 버전으로 표기된 이 맵은 이전 버전과의 밸런스 조절이나 레이아웃 개선이 있었음을 짐작할 수 있으며, 제작자 Speed[Fast]와 WiN-RaR가 참여했다는 점에서 신뢰성을 더한다. 디펜스라는 장르 특성상 이 맵은 실시간으로 몰려오는 적을 상대하는 긴장감이 특징이다. 7명의 플레이어가 동시에 참여할 수 있는 이 맵은 각자 본진을 방어하는 동시에, 서로의 협력이나 경쟁이 요구되는 구조로 보인다. 특히 FTW2 버전은 이전 버전보다 더 치밀한 방어 전략을 요구할 가능성이 높아, 숙련된 플레이어들에게는 도전적인 요소가 될 수 있다. 반면, 초보자들은 타워의 배치와 업그레이드 타이밍을 익히며 점차 숙련도를 높일 수 있는 구조로 설계되어 있다. 맵의 난이도를 조절하는 다양한 요소들이 내재되어 있지만, 기본적으로는 방어 타워의 최적 배치와 자원 관리가 승패를 좌우할 가능성이 크다. 맵의 중앙 지형이나 입구 구조는 방어선의 중요 위치를 결정짓는 요소로 작용하며, 이를 파악하지 못하면 예상치 못한 돌파구를 허용할 위험이 있다. 이 맵을 플레이하기 전에는 반드시 타워의 종류와 업그레이드 가능한 스펙, 그리고 각 웨이브별 등장하는 적의 종류와 패턴을 숙지해야 한다. 또한, 팀 플레이가 가능한 구조인지 여부를 확인하고, 혼자서 플레이할 것인지 아니면 협력 플레이를 중시할 것인지에 따라 전략이 달라질 수 있다. 맵의 중앙에 위치한 넓은 공간은 때로는 적의 진로를 교란하는 데 활용할 수 있는 지형적 이점을 제공하기도 하므로, 이를 적극 활용하는 것이 중요하다.TarPit Ðefense3.3 -FTW2- is a classic defense-style custom map in StarCraft: Brood War, where players must defend their base against relentless waves of enemies. The map is built on a 32x32 grid using the Twilight tileset, offering a clean and visually appealing design. Players are tasked with protecting their central base while strategically placing and upgrading towers to fend off incoming Zerg forces. Unlike straightforward tower-rush maps, this version features terrain obstacles that disrupt enemy pathways, adding a layer of complexity to the defense strategy. As a defense map, the core gameplay revolves around real-time strategy and adaptability. With support for up to seven players, the map can be played cooperatively or competitively, with each player responsible for their own base. The FTW2 iteration likely includes refined layouts or balance adjustments from previous versions, as suggested by the credits to Speed[Fast] and WiN-RaR. This makes the map more challenging for experienced players while still being accessible to newcomers who can learn tower placement and resource management over time. Before diving into a match, players should familiarize themselves with the tower types, their upgrade paths, and the enemy spawn patterns. The central terrain features strategic chokepoints and open spaces that can be leveraged to disrupt enemy advances. Whether playing solo or in a team, understanding the map's layout and enemy behavior is crucial for success. The balance between offense and defense, combined with the map's dynamic elements, ensures that each playthrough offers a fresh and engaging challenge.
플레인즈 투 힐 (Plains to Hill)
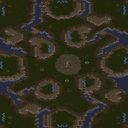
스타크래프트: 브루드워의 유즈맵 가운데 디펜스 장르로 분류되는 <Plains to Hill>은 사막 지형에서 펼쳐지는 전략적인 방어형 플레이를 제공하는 맵입니다. 8명의 플레이어가 한 팀으로 모여 중앙의 요충지를 지키며 끊임없이 몰려드는 적의 공격을 방어하는 구조로, 맵의 테두리에서 시작되는 적들은 지형과 시야를 활용해 전략적으로 대응해야 합니다. 사막 타일셋으로 구성된 평원과 언덕 지형은 시야 차단과 고지대 점령의 중요성을 강조하며, 언덕에 위치한 건물을 건설하거나 유지하는 것이 핵심입니다. 적의 공격 패턴은 랜덤으로 추정되나, 초반부터 끊임없이 밀어붙이는 유형의 공격을 주로 펼치며, 방어용 건물을 다수 설치하고 자원 관리를 병행해야 합니다. 맵의 중앙부는 비교적 평탄한 지형이지만, 외곽의 언덕과 협곡은 적의 시야를 차단하거나 요새를 구축하기에 적합한 장소로 보입니다. 플레이어는 자신의 위치에서 최적의 방어선을 형성하고, 언덕을 점령해 시야를 확보하며, 자원을 효율적으로 관리해 장기전에 대비해야 합니다. 초보자에게는 다소 어려운 난이도를 가질 수 있지만, 팀원과의 협력이 필수적이며, 전략적인 건물 배치와 자원 활용이 승패를 좌우합니다. 특히, 언덕의 높은 지형과 사막의 광범위한 시야 차단은 적의 움직임을 예측하고 방어선을 구축하는 데 중요한 요소로 작용합니다. 이 맵은 디펜스 유즈맵을 선호하는 플레이어뿐만 아니라, 팀워크와 전략적 사고를 즐기는 모든 유저에게 추천할 만한 작품입니다. 플레이 전에는 팀원 간의 역할 분배와 건물 배치 계획을 미리 논의하는 것이 중요합니다. 또한, 언덕과 평원의 균형 있는 활용, 자원의 안정적인 확보가 게임의 승패를 가르는 주요 포인트로 작용할 것입니다. Plains to Hill is a defense-style custom map in StarCraft: Brood War, set in a desert terrain where 8 players work together to defend a central strategic point against relentless enemy attacks. The map features a combination of flat plains and elevated hills, with desert tilesets providing natural cover and vantage points. Players spawn at the edges of the map and must utilize terrain and high ground to their advantage, constructing defensive structures while managing resources efficiently. The enemy AI appears to launch frequent attacks from multiple directions, requiring players to fortify key positions and maintain a balanced economy. Central areas are relatively open, but surrounding hills and valleys offer opportunities for strategic positioning and sightline control. Beginners may find the challenge steep due to the need for coordinated teamwork and resource management, but experienced players will appreciate the depth of tactical planning involved. Optimal play involves securing high ground, predicting enemy movements, and balancing defense with resource gathering. This map is highly recommended for fans of defense-style custom maps and players who enjoy teamwork and strategic depth. Before starting, teams should discuss role assignments and defensive layouts, focusing on hill control and resource sustainability to maximize their chances of victory.
에어 워즈 매스 (Air Wars Mass)
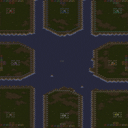
스타크래프트 브루드워의 유즈맵 ‘에어 워즈 매스(Air Wars Mass)’는 공중 유닛을 중심으로 한 대규모 디펜스 장르의 맵으로, 8명의 플레이어가 하나의 팀으로 뭉쳐 적의 공세를 방어하는 전략적인 전투를 체험할 수 있다. 맵은 사막 타일셋을 기반으로 펼쳐지며, 중앙Battle.net 스타일의 넓은 평야와 외곽을 감싸는 진지 구조가 특징적이다. 맵 상단과 하단에 배치된 미네랄 멀티와 가스 멀티는 자원 확보를 위한 필수 포인트로, 초반 자원 관리와 병력 생산 타이밍이 승패를 좌우할 가능성이 높다. 특히 공중 유닛을 중심으로 전투가 펼쳐지는데, 맵 곳곳에 배치된 공중 유닛 생산 건물을 확보하고 방어선을 구축하는 것이 핵심 전략이다. 방어선에 구멍이 생기거나 자원 부족으로 인해 병력이 늦게 나오면 적의 공세가 쉽게 뚫고 들어올 수 있어 긴장감 있는 플레이가 요구된다. 플레이 방식은 기본적으로 디펜스 장르의 정석에 따라 진행되지만, 공중 유닛의 비중이 크기 때문에 공중 유닛 전용 생산 건물(예: 스타포트)과 공중 방어 타워(예: 미사일 터렛)의 건설이 필수적이다. 맵 구조상 중앙에 위치한 넓은 평야는 공중 유닛의 이동 경로가 되며, 외곽의 높은 지형은 방어 타워 설치에 유리한 지점이다. 맵 이미지에서 확인되는 미네랄 멀티와 가스 멀티는 자원 확보를 위한 핵심 포인트로, 초반 자원 확보와 병력 생산 속도를 조절하는 것이 중요하다. 또한, 맵 외곽에 배치된 공중 유닛 생산 건물은 공중 병력의 주력이 되므로, 이 건물을 지키면서 동시에 방어 타워를 건설하는 균형 잡힌 플레이가 필요하다. 이 맵은 초보 플레이어보다는 공중 유닛의 특성과 디펜스 전략에 익숙한 중수 이상의 플레이어에게 적합하다. 공중 유닛의 컨트롤과 타워 관리, 자원 관리 등 다양한 요소를 고려해야 하기 때문에 난이도는 보통 이상으로 평가된다. 또한, 팀 플레이가 필수적이므로 팀원 간의 호흡이 중요하며, 전략적 의사소통이 부족하면 쉽게 무너질 위험이 있다. 맵의 구조상 외곽 방어선이 뚫리면 중앙으로의 진격이 용이하기 때문에, 외곽 방어 타워의 배치와 수리, 자원 확보의 타이밍을 잘 조절하는 것이 승리의 열쇠가 된다. 이 맵을 즐기기 위해서는 공중 유닛의 생산과 컨트롤, 방어 타워의 건설과 관리, 자원 관리 등 다방면의 전략적 요소를 숙지할 필요가 있다. 특히, 공중 유닛의 이동 경로와 적의 공격 루트를 미리 예상하고 방어선을 구축하는 것이 중요하다. Air Wars Mass is a UMS defense map in StarCraft: Brood War where 8 players work together as one team to defend against waves of aerial enemy attacks. Set in a desert tile, the map features a large central plain surrounded by defensive perimeters, with mineral and gas expansions placed at the top and bottom for resource gathering. The core gameplay revolves around securing air-producing structures, such as Starports, and building air defense towers like Missile Turrets to fend off enemy air raids. Effective resource management and timely troop production are critical, as gaps in the defense line or delays in unit creation can quickly lead to a breach. The map’s design emphasizes air unit dominance, making it essential to prioritize air tech buildings and defenses. The wide central plain serves as the main aerial battlefield, while the elevated outer terrain provides strategic spots for tower placement. Players must balance resource income with tower construction and unit production, ensuring that air defenses are always maintained. The map’s defensive lines are vulnerable if compromised at the outer edges, so players should anticipate enemy movement paths and reinforce weak points accordingly. This map is best suited for intermediate to advanced players who are familiar with air unit mechanics and defense strategies. The combined challenges of air unit control, tower management, and resource allocation make it a demanding experience that rewards strategic planning and teamwork. Communication and coordination among teammates are vital, as poor decision-making or misaligned defenses can lead to rapid defeat. To excel, players should focus on securing air production buildings, optimizing tower placements, and managing resources efficiently. Mastery of aerial combat and defensive positioning will determine success in this intense and strategic defense challenge.
![Obs Lovely [Extra] 맵 미리보기](https://cdn-star-data.huzy.net/thumbnail_ec3aab49fb984ae0bcfc1bcd62d0f595.jpg)
Obs Lovely [Extra]
스타크래프트 브루드워의 독특한 atmosphere와 뛰어난ーデザイン으로 유명한 'Obs Lovely [Extra]'는 겨울 설원 지형을 배경으로 펼쳐지는 디펜스형 유즈맵입니다. 맵의 넓은 2048×3072 해상도와 64×96의 거대한 타일셋은 눈 덮인 평원과 빙하, 절벽으로 구성된 지형을 자연스럽게 연출하며, 플레이어들에게 차가운 분위기의 전투를 선사합니다. 맵의 중앙에는 넓은 평야가 펼쳐져 있으며, 각 플레이어의 시작 지점은 빙하가 깎아지른 절벽 위에 위치해 있습니다. 시작 지점 주변에는 자원과 방어 건물을 배치할 수 있는 공간이 마련되어 있으며, 맵의 가장자리로 갈수록 빙하가 무한히 펼쳐지고 절벽으로 막혀 있어 외부의 침입을 방어할 수 있는 구조로 설계되었습니다. 게임의 진행 방식은 기본적으로 방어형 유즈맵으로, 플레이어는 시작 지점에서 자원을 모아 방어 건물을 건설하고, 끊임없이 몰려오는 적의 공격을 막아내야 합니다. 맵의 넓은 공간 덕분에 방어 라인을 구축할 수 있는 다양한 전략이 가능하며, 빙하와 절벽을 활용한 입구막기, 요새화된 방어선, 또는 외부의 적을 끌어들이는 함정 설치 등 여러 방식을 시도할 수 있습니다. 특히 맵의 중앙 지역은 평야와 빙하가 혼재되어 있어 기동성과 방어 전략의 밸런스를 맞춰야 하는 핵심 지역으로 작용합니다. 또한, 맵의 가장자리에 위치한 절벽은 자연스럽게 외부의 적을 차단하는 역할을 하며, 이를 활용해 방어 라인을 더 효율적으로 구축할 수 있습니다. 이 맵은 7인용으로 설계되어 있으며, 각 플레이어는 서로 경쟁하거나 협력하여 적의 공격을 방어하는 동시에 자원을 관리하는 전략적 선택을 해야 합니다. 넓은 맵과 복잡한 지형은 초보자에게는 다소 어렵게 느껴질 수 있지만, 숙련된 플레이어들에게는 다양한 전술을 시도할 수 있는 훌륭한 opportunities를 제공합니다. 특히, 방어 건물을 효율적으로 배치하고 자원을 최적화하는 능력이 승리 여부를 좌우할 수 있습니다. 추천하는 플레이 방식은 방어 라인을 sturdy하게 구축하고, 자원 채취를 지속적으로 유지하는 한편, 적의 공격을 예상해 미리 대비책을 마련하는 것입니다. 플레이 전 반드시 확인해야 할 점은 각 플레이어의 시작 지점 주변 자원 분포와 방어 건물 설치 가능 공간입니다. 자원이 풍부한 지역에서는 초반 방어 라인을 빠르게 구축할 수 있지만, 그렇지 않은 지역에서는 자원 관리와 방어 전략을 신중히 세워야 합니다. 또한, 맵의 빙하와 절벽을 활용한 입구막기 전략을 충분히 숙지하고, 적의 공격 패턴에 따라 유연하게 방어 라인을 조정하는 것이 중요합니다. 이러한 요소들을 고려하면 'Obs Lovely [Extra]'는 스타크래프트의 디펜스 장르의 묘미를 제대로 느낄 수 있는 훌륭한 유즈맵입니다. "Obs Lovely [Extra]" is a defense-style custom map from *StarCraft: Brood War*, renowned for its unique atmosphere and exceptional design. Set against a winter snowy landscape, this map features a vast 2048×3072 resolution and a massive 64×96 tileset that naturally depicts icy plains, glaciers, and cliffs, immersing players in a cold, intense battle. At the center of the map lies a broad plain, while each player’s starting position is perched atop a sheer glacial cliff. Surrounding the starting areas are spaces for resource gathering and defensive structures, with the map’s edges extending into endless glaciers and sheer cliffs, creating a natural barrier against external invasions. The gameplay revolves around a standard defense-style custom map, where players must gather resources from their starting points to construct defenses and fend off relentless enemy waves. The map’s expansive terrain allows for diverse defensive strategies, such as blocking entrances with glaciers and cliffs, fortifying defensive lines, or setting traps to lure enemies. The central region, where plains and glaciers converge, serves as a critical area where mobility and defensive balance are key. Additionally, the cliffs along the map’s edges naturally block external threats, enabling more efficient defensive setups. Designed for seven players, this map challenges each participant to either compete or cooperate while managing resources and defending against attacks. While its vast scale and complex terrain may seem daunting to beginners, experienced players will find ample opportunities to experiment with various tactics. Effective placement of defenses and optimized resource management often determine victory. A recommended strategy involves building a sturdy defensive line, maintaining steady resource collection, and preparing countermeasures against anticipated enemy assaults. Before playing, it’s crucial to check the resource distribution and available space for defensive structures around each player’s starting point. Areas rich in resources allow for rapid early defenses, whereas sparse regions demand careful resource planning and defensive tactics. Mastering strategies that utilize glaciers and cliffs to block entrances, while adapting defensive lines to enemy attack patterns, is essential. When all these elements come together, "Obs Lovely [Extra]" delivers a quintessential *StarCraft* defense experience.
스타쉽 트루퍼스 어드밴스드 5.64 (Starship Troopers Advanced 5.64)
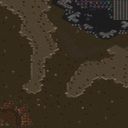
스타크래프트 브루드워의 대표적인 디펜스 유즈맵인 <스타쉽 트루퍼스 어드밴스드 5.64>는 5명의 플레이어가 한 팀을 이뤄 끊임없이 몰려오는 적 웨이브를 방어하는 전략적 디펜스 장르의 맵이다. 황무지 타일셋을 기반으로 한 넓은 맵 중앙에는 방어 거점이 배치되어 있으며, 각 플레이어는 자신의 기지 주변에 방어 시설을 설치하고 자원을 모아 병력을 강화할 수 있다. 맵은 4096x4096 크기로 상당히 넓은데, 이는 디펜스와 동시에 맵 곳곳의 자원 수집과 기지 확장을 고려한 설계로 보인다. 적의 공격 패턴은 일정 주기로 강화되어 초반에는 약한 저글링 위주였다가 후반에는 테란의 바이크, 프로토스의 질럿, 저그의 뮤탈리스크가 혼합된 조합으로 변모한다. 플레이어는 자원을 효율적으로 분배하여 방어 타워나 병력을 업그레이드하고, 팀원 간 협력이 필수적이다. 특히 맵 중앙의 주요 거점을 방어하는 동시에 외곽의 자원 지역을 확보하는 전략이 중요하며, 한 명이 무너지면 전체 팀의 방어선이 무너질 위험이 크다. 초보 플레이어는 방어 라인 구축과 자원 관리에서 어려움을 느낄 수 있지만, 팀원 간의 원활한 의사소통과 역할 분담이 승패를 좌우한다. 이 맵은 디펜스 장르에 익숙한 플레이어뿐 아니라 전략적 팀 플레이를 즐기는 유저들에게도 추천할 만한 작품으로, 특히 협동 플레이의 묘미를 느낄 수 있는 맵이다. 플레이 전에는 팀원과의 전략 협의와 자원 분배 계획을 미리 세워두는 것이 중요하다. 또한, 맵의 넓은 크기 때문에 미니맵을 적극 활용하여 적의 웨이브 이동 경로를 예측하는 것이 관건이다. StarCraft: Brood War’s classic defense custom map, *Starship Troopers Advanced 5.64*, is a strategic defense game where five players team up to fend off endless enemy waves. Set on a wasteland tile, the expansive central map features defensive strongpoints, while each player can build defenses around their base and gather resources to strengthen their forces. At 4096x4096, the map is quite large, designed to accommodate both defense and resource collection across its terrain for base expansion. Enemy attacks escalate in waves—starting with weak zerglings and evolving into mixed compositions of Terran vultures, Protoss zealots, and Zerg mutalisks by the late game. Players must allocate resources wisely, upgrading towers or units, and teamwork is essential. A key strategy involves defending central strongpoints while securing resource-rich outer areas, as the collapse of one player can jeopardize the entire team’s defense. Beginners may struggle with base layout and resource management, but smooth communication and clear role assignments among teammates often decide victory. This map is great for both defense veterans and those who enjoy strategic team play, offering a satisfying cooperative experience. Before starting, agree on a shared strategy and resource distribution plan. Given the map’s size, using the minimap effectively to track enemy wave movements is crucial.
디펜스 D (Defence D)
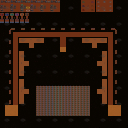
스타크래프트: 브루드워의 유즈맵_DEFENCE D_는 방어형 맵으로, 플레이어들이 끊임없이 밀려드는 적군을 상대로 건물과 유닛을 배치하며 버텨야 하는 디펜스 장르의 대표작 중 하나다. Defence D는 내부 설명에서 'SpeedNeverDream'과 'SnD_Minus[on]'이라는 트리거가 확인되며, 빠른 진행과 난이도 조절 기능을 탑재하고 있는 것으로 추정된다. 맵은 중앙에 넓은 평지가 펼쳐져 있으며, 그 주위를 거대한 벽과 방벽으로 둘러싸고 있어 적의 접근을 차단하는 구조가 보인다. 벽 주변에는 병력 생산 건물이 배치되어 있어 방어선에 구멍이 생기면 빠르게 보충할 수 있도록 설계된 듯하다. 플레이어는 시작 지점에서 출발해 맵 곳곳에 흩어져 있는 자원을 확보하며 방어선을 강화해야 하며, 중앙 평지에서는 대규모 전투가 벌어질 가능성이 높다. 방어에 성공하면 일정 시간 후 승리 조건이 달성되는 방식으로 보인다. Defence D는 디펜스 맵 특유의 긴장감과 전략적 깊이를 제공하며, 특히 방어선 구축과 자원 관리, 타이밍 공격에 대한 대처가 중요한 포인트로 작용할 것이다. 초보 플레이어보다는 방어선 배치와 유닛 컨트롤에 익숙한 중급 이상 플레이어에게 적합한 맵으로 보이며, 팀플레이 시에는 각자의 역할을 분담하며 협력하는 것이 핵심이다. 맵을 플레이하기 전에는 방어선에 구멍이 나지 않도록 벽과 건물을 꼼꼼히 배치하고, 자원 확보를 소홀히 하지 않도록 주의해야 한다. 또한, 적의 공격 패턴을 미리 분석해 방어 전략을 유동적으로 변경할 수 있도록 준비하는 것이 중요하다. Defence D는 디펜스 장르의 묘미를 느낄 수 있는 맵으로, 브루드워 유즈맵의 진수를 경험하고 싶다면 한 번쯤 도전해 볼 만하다. StarCraft: Brood War's user-made map *Defence D* is a defensive map where players must hold out against relentlessly advancing enemy forces by strategically placing buildings and units—one of the genre’s most iconic representatives. The internal description of Defence D reveals triggers like "SpeedNeverDream" and "SnD_Minus[on]," suggesting it incorporates fast-paced mechanics and adjustable difficulty settings. The map features a wide open central plain surrounded by massive walls and barriers that block enemy access, while production buildings near these walls allow for quick reinforcements if the defensive line is breached. Players start at designated points, secure scattered resources to strengthen their defenses, and brace for large-scale battles likely to erupt in the central area. Success in holding the line eventually triggers the victory condition after a set duration. Defence D delivers the tense, strategic depth characteristic of defense maps, with key focus on fortifying defenses, managing resources, and countering timing-based attacks. It appears best suited for intermediate or advanced players familiar with unit control and defensive positioning rather than beginners, and in team play, coordination and role division are essential. Before playing, carefully arrange walls and buildings to prevent gaps in defenses, maintain steady resource collection, and analyze enemy attack patterns to adapt strategies fluidly. For those seeking to experience the essence of Brood War custom maps, Defence D offers a chance to savor the full depth of the defense genre.
최근 등록된 맵
새로 추가된 파일과 버전을 확인하세요.
타르핏 디펜스 3.3 FTW2 (TarPit Ðefense3.3 -FTW2-)
스타크래프트 브루드워의 대표적인 디펜스형 유즈맵인 《TarPit Ðefense3.3 -FTW2-》는 그 이름에서 알 수 있듯이 끈질기게 몰아치는 적을 방어하며 요새를 지켜내는 디펜스 장르에 속한다. 이 맵은 가로 32칸, 세로 32칸의 정사각형 공간으로 구성되어 있으며, 황혼 타일셋을 기반으로 깔끔한 시각적 느낌을 자아낸다. 플레이어는 중앙에 위치한 본진 건물을 지키며, 끊임없이 쏟아지는 저그 웨이브를 상대해야 하는데, 이 과정에서 타워를 건설하고 업그레이드하는 전략적 선택이 핵심으로 작용한다. 맵의 특징 중 하나는 상대적으로 넓은 맵 중앙을 가로질러 오는 적의 진로를 방해하는 장애물이나 지형이 배치되어 있어, 단순히 타워를 도배하는 것만으로는 승리를 장담할 수 없다는 점이다. 또한, FTW2 버전으로 표기된 이 맵은 이전 버전과의 밸런스 조절이나 레이아웃 개선이 있었음을 짐작할 수 있으며, 제작자 Speed[Fast]와 WiN-RaR가 참여했다는 점에서 신뢰성을 더한다. 디펜스라는 장르 특성상 이 맵은 실시간으로 몰려오는 적을 상대하는 긴장감이 특징이다. 7명의 플레이어가 동시에 참여할 수 있는 이 맵은 각자 본진을 방어하는 동시에, 서로의 협력이나 경쟁이 요구되는 구조로 보인다. 특히 FTW2 버전은 이전 버전보다 더 치밀한 방어 전략을 요구할 가능성이 높아, 숙련된 플레이어들에게는 도전적인 요소가 될 수 있다. 반면, 초보자들은 타워의 배치와 업그레이드 타이밍을 익히며 점차 숙련도를 높일 수 있는 구조로 설계되어 있다. 맵의 난이도를 조절하는 다양한 요소들이 내재되어 있지만, 기본적으로는 방어 타워의 최적 배치와 자원 관리가 승패를 좌우할 가능성이 크다. 맵의 중앙 지형이나 입구 구조는 방어선의 중요 위치를 결정짓는 요소로 작용하며, 이를 파악하지 못하면 예상치 못한 돌파구를 허용할 위험이 있다. 이 맵을 플레이하기 전에는 반드시 타워의 종류와 업그레이드 가능한 스펙, 그리고 각 웨이브별 등장하는 적의 종류와 패턴을 숙지해야 한다. 또한, 팀 플레이가 가능한 구조인지 여부를 확인하고, 혼자서 플레이할 것인지 아니면 협력 플레이를 중시할 것인지에 따라 전략이 달라질 수 있다. 맵의 중앙에 위치한 넓은 공간은 때로는 적의 진로를 교란하는 데 활용할 수 있는 지형적 이점을 제공하기도 하므로, 이를 적극 활용하는 것이 중요하다.TarPit Ðefense3.3 -FTW2- is a classic defense-style custom map in StarCraft: Brood War, where players must defend their base against relentless waves of enemies. The map is built on a 32x32 grid using the Twilight tileset, offering a clean and visually appealing design. Players are tasked with protecting their central base while strategically placing and upgrading towers to fend off incoming Zerg forces. Unlike straightforward tower-rush maps, this version features terrain obstacles that disrupt enemy pathways, adding a layer of complexity to the defense strategy. As a defense map, the core gameplay revolves around real-time strategy and adaptability. With support for up to seven players, the map can be played cooperatively or competitively, with each player responsible for their own base. The FTW2 iteration likely includes refined layouts or balance adjustments from previous versions, as suggested by the credits to Speed[Fast] and WiN-RaR. This makes the map more challenging for experienced players while still being accessible to newcomers who can learn tower placement and resource management over time. Before diving into a match, players should familiarize themselves with the tower types, their upgrade paths, and the enemy spawn patterns. The central terrain features strategic chokepoints and open spaces that can be leveraged to disrupt enemy advances. Whether playing solo or in a team, understanding the map's layout and enemy behavior is crucial for success. The balance between offense and defense, combined with the map's dynamic elements, ensures that each playthrough offers a fresh and engaging challenge.
타르핏 디펜스 (Tarpit Defence)
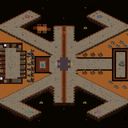
스타크래프트 브루드워의 대표적인 디펜스형 유즈맵인 ‘Tarpit Defence’를 소개합니다. 이 맵은 플레이어가 미네랄과 가스 채취를 통해 자원을 모아 방어 시설을 구축하고, 끊임없이 몰려오는 적 유닛들을 상대로 생존하는 구조로 설계되었습니다. 맵 중앙에는 넓은 방어 공간이 펼쳐져 있으며, 외곽에는Resource가 배치되어 있습니다. 방어 공간은 다수의 입구와 요새화 가능한 지점으로 나뉘어 있어, 플레이어는 전략적으로 요새를 건설하고 병력을 배치해야 합니다. 맵 상단과 하단에는 각각의 플레이어 기지가 위치하며, 중앙을 가로지르는 넓은 길목을 통해 적들이 진격합니다. özel 유닛과 방어 건물, 그리고 다양한 전략 수정이 가능한 구조가 특징입니다. 맵의 난이도는 초보자부터 숙련자까지 폭넓게 즐길 수 있도록 조절 가능하며, 특히 방어 시설과 자원 관리의 균형을 맞추는 것이 핵심 포인트입니다. 다인용 플레이를 고려하여 설계된 만큼, 팀원과의 협력과 전략적 의사소통이 중요합니다. 이 맵의 가장 큰 매력은 끊임없이 변화하는 전투 패턴과 제한된 자원으로도 승리를 쟁취할 수 있는 전략적 깊이에 있습니다. 초보자는 간단한 방어 라인으로 시작해 점차 복잡한 전략을 구사할 수 있으며, 숙련자는 최적의 자원 배분과 병력 운용으로Record를 갱신할 수 있습니다. 플레이 전에는 방어 건물의 배치와 자원 채취 루트를 미리 계획하는 것이 중요합니다. 또한, 적의 공격 패턴을 분석해 요새화 우선순위를 정해야 합니다. 맵의 특성상 초반resource 확보가 승패를 가를 수 있으므로, 초기 미네랄과 가스를 어떻게 활용할지 신중히 결정해야 합니다. 마지막으로, 팀원과의 역할 분담과 실시간 커뮤니케이션이 원활할수록 더 높은 승률을 기대할 수 있습니다. Tarpit Defence is a classic defense-style custom map in StarCraft: Brood War, where players gather resources to build defensive structures and survive against waves of enemy units. The map features a central open area with multiple entrances and resource points scattered along the edges. Players must strategically place buildings and units to fortify their defenses, with bases located at the top and bottom of the map. The wide central path serves as the main battlefield where enemies advance. The map offers special units and buildings, allowing for diverse strategic modifications. Designed for multiplayer, it requires teamwork and communication to succeed. The difficulty is adjustable, catering to both beginners and experienced players. The core challenge lies in balancing resource management and defensive tactics. Beginners can start with simple strategies, while advanced players can optimize resource allocation and unit deployment for high scores. Before playing, plan the placement of defensive structures and resource gathering routes. Analyze enemy attack patterns to prioritize fortifications. Early resource collection is crucial, as it can determine the outcome of the game. Effective team coordination and real-time communication significantly increase the chances of victory.
침수된 시계 반대 방향 디펜스! (Sunken CLOCKWISE Defence!)
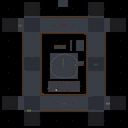
§unken CLOCKWISE defence!는 스타크래프트: 브루드워의 UMS(유즈맵) 장르에 속하는 디펜스형 맵으로, 4인용 멀티플레이어 환경에서 적의 공격을 방어하는 것이 주 목표다. 맵은 중앙에 위치한 방어 건물을 중심으로 네 방향의 입구가 펼쳐져 있으며, 각 입구는 ‘시계 반대 방향(CLOCKWISE)’으로 배치된 방어 구조물로 연결된다. 플레이어는 자신의 기지에 침입하는 적군 유닛을 저지하거나, 건물을 강화하여 지속적인 공격을 버텨야 한다. 맵의 특징은 방어선의 복잡한 배치와 입구 간의 연계성으로, 한 곳을 집중 방어하다가 다른 쪽에서 빈틈이 발생하지 않도록 균형을 잡아야 한다는 점이다. 또한, 맵의 타이틀 ‘§unken’은 아마도 ‘Submerged’(침수된) 또는 ‘Sunken’(가라앉은)을 의미하는 것으로 보이며, 우주 타일셋을 활용한 어두운 분위기의 배경이 전체적인 긴장감을 더한다. 초보자 입장에서는 방어선의 흐름을 파악하는 데 다소 시간이 걸릴 수 있지만, 익숙해지면 각 입구를 효율적으로 관리하며 장기전을 펼칠 수 있는 전략적 깊이가 매력적인 맵이다. 특히, 팀플레이보다는 개인의 판단력이 중요하며, 한 곳에서 무너지면 전체 방어선이 흔들릴 수 있어 신중한 플레이가 요구된다. 맵을 플레이하기 전에는 각 입구의 구조와 주요 방어 지점을 미리 확인하고, 적의 공격 패턴에 따라 대처할 준비를 하는 것이 중요하다. 추천 대상은 디펜스 게임을 좋아하는 플레이어, 전략적 사고를 즐기는 유저, 그리고 팀 플레이보다는 개인 역량을 발휘하고 싶은 게이머들이다. 단, 입구 간의 연계가 복잡하므로 처음 플레이 시에는 난이도가 높게 느껴질 수 있다. 꾸준한 연습을 통해 방어선의 흐름을 익히면, 이 맵만의 독특한 매력을 느낄 수 있을 것이다. Sunken CLOCKWISE Defence! is a UMS (user-made scenario) defense map in StarCraft: Brood War, where the main objective is to defend against enemy attacks in a 4-player multiplayer environment. The map features four entrances radiating from a central defensive building, each connected by 'counter-clockwise (CLOCKWISE)' arranged defensive structures. Players must block invading enemy units from their base or reinforce buildings to withstand continuous assaults. The map's key trait lies in its intricate defensive layout and interlinked entrances, requiring players to balance defenses to avoid gaps when focusing on one side. The map's title, '§unken,' likely derives from 'Submerged' or 'Sunken,' and its dark, space-themed tile set enhances the overall tense atmosphere. While beginners may need time to grasp the flow of defensive lines, mastering the map allows for efficient management of each entrance and strategic depth in prolonged battles. The map emphasizes individual decision-making over teamwork, as a collapse in one area can destabilize the entire defensive line, demanding careful play. Before playing, it's crucial to study each entrance's structure and key defensive points, preparing responses to enemy attack patterns. Recommended for players who enjoy defense games, strategic thinkers, and those who prefer showcasing personal skills over team play. However, the complex connections between entrances can make the map feel challenging at first. With consistent practice, you'll grow accustomed to the defensive flow and appreciate the map's unique charm.
스타쉽 트루퍼스 어드밴스드 5.64 (Starship Troopers Advanced 5.64)
스타크래프트 브루드워의 대표적인 디펜스 유즈맵인 <스타쉽 트루퍼스 어드밴스드 5.64>는 5명의 플레이어가 한 팀을 이뤄 끊임없이 몰려오는 적 웨이브를 방어하는 전략적 디펜스 장르의 맵이다. 황무지 타일셋을 기반으로 한 넓은 맵 중앙에는 방어 거점이 배치되어 있으며, 각 플레이어는 자신의 기지 주변에 방어 시설을 설치하고 자원을 모아 병력을 강화할 수 있다. 맵은 4096x4096 크기로 상당히 넓은데, 이는 디펜스와 동시에 맵 곳곳의 자원 수집과 기지 확장을 고려한 설계로 보인다. 적의 공격 패턴은 일정 주기로 강화되어 초반에는 약한 저글링 위주였다가 후반에는 테란의 바이크, 프로토스의 질럿, 저그의 뮤탈리스크가 혼합된 조합으로 변모한다. 플레이어는 자원을 효율적으로 분배하여 방어 타워나 병력을 업그레이드하고, 팀원 간 협력이 필수적이다. 특히 맵 중앙의 주요 거점을 방어하는 동시에 외곽의 자원 지역을 확보하는 전략이 중요하며, 한 명이 무너지면 전체 팀의 방어선이 무너질 위험이 크다. 초보 플레이어는 방어 라인 구축과 자원 관리에서 어려움을 느낄 수 있지만, 팀원 간의 원활한 의사소통과 역할 분담이 승패를 좌우한다. 이 맵은 디펜스 장르에 익숙한 플레이어뿐 아니라 전략적 팀 플레이를 즐기는 유저들에게도 추천할 만한 작품으로, 특히 협동 플레이의 묘미를 느낄 수 있는 맵이다. 플레이 전에는 팀원과의 전략 협의와 자원 분배 계획을 미리 세워두는 것이 중요하다. 또한, 맵의 넓은 크기 때문에 미니맵을 적극 활용하여 적의 웨이브 이동 경로를 예측하는 것이 관건이다. StarCraft: Brood War’s classic defense custom map, *Starship Troopers Advanced 5.64*, is a strategic defense game where five players team up to fend off endless enemy waves. Set on a wasteland tile, the expansive central map features defensive strongpoints, while each player can build defenses around their base and gather resources to strengthen their forces. At 4096x4096, the map is quite large, designed to accommodate both defense and resource collection across its terrain for base expansion. Enemy attacks escalate in waves—starting with weak zerglings and evolving into mixed compositions of Terran vultures, Protoss zealots, and Zerg mutalisks by the late game. Players must allocate resources wisely, upgrading towers or units, and teamwork is essential. A key strategy involves defending central strongpoints while securing resource-rich outer areas, as the collapse of one player can jeopardize the entire team’s defense. Beginners may struggle with base layout and resource management, but smooth communication and clear role assignments among teammates often decide victory. This map is great for both defense veterans and those who enjoy strategic team play, offering a satisfying cooperative experience. Before starting, agree on a shared strategy and resource distribution plan. Given the map’s size, using the minimap effectively to track enemy wave movements is crucial.
섹시 포르노 (Sexy Porn)
‘SEXY PORN!!!!!’은 스타크래프트 브루드워의 유즈맵으로, 내부 설명과 파일명만으로는 장르나 플레이 방식을 명확히 판단하기 어렵지만, 맵 이미지를 통해 ‘컴퓨터 상대 디펜스’ 형식의 유즈맵으로 추정된다. 맵의 구조는 4096x4096의 거대한 화산 타일셋을 배경으로 펼쳐지며, 중앙에 위치한 본진 주변으로 다수의 다크 스웜과 디파일러 마운드가 배치된 것이 보인다. 이러한 요소는 방어선을 구축하는 디펜스 장르의 특징을 띄며, 특히 적의 공격 패턴을 차단하는 방어 구조물이 주요 특징으로 보인다. 플레이어는 본진을 지키며 지속적으로 몰려오는 적 유닛들을 상대해야 하며, 맵의 규모와 배치된 방어 건물들을 고려할 때 전략적 판단과 빠른 반응이 요구된다. 맵의 제목과 설명이 자극적인 단어들로 구성되어 있지만, 실제 게임 플레이에서는 전략적 요소와 방어 메커니즘이 중심이 될 것으로 예상된다. 초보자보다는 방어와 자원 관리에 익숙한 플레이어에게 적합하며, 긴 플레이 시간을 요구할 가능성이 높다. 맵의 난이도는 중간 수준으로 설정되어 있을 가능성이 크며, 방어선 구축과 리소스 관리에 중점을 두고 설계된 것으로 보인다. 플레이 전에는 맵의 방어 구조와 적의 공격 패턴을 충분히 분석한 후 진행하는 것이 좋다. 또한, 맵의 규모가 크기 때문에 빠른 이동과 시야 확보가 중요할 것으로 보인다. 이 맵은 유즈맵 커뮤니티에서 ‘컴퓨터 상대 디펜스’ 장르로 인기를 얻을 가능성이 있으며, 방어와 전략적 플레이를 좋아하는 유저들에게 추천할 만하다. “SEXY PORN!!!!!” is a custom map for *StarCraft: Brood War*, though its genre and gameplay style aren’t immediately clear from the internal description or filename alone. However, based on the map image, it appears to be a "computer opponent defense" type of custom map. The layout unfolds across a massive 4096x4096 volcanic tileset, with the player’s main base surrounded by multiple Dark Swarms and Defiler Mounds. These elements strongly suggest a defense-focused genre, where the key feature is blocking enemy attack patterns with defensive structures. Players must protect their base while continuously fending off waves of enemy units. Given the map’s scale and the placement of defensive buildings, strategic decision-making and quick reactions are essential. While the title and description use provocative language, the actual gameplay centers on strategy and defensive mechanics. This map is better suited for players familiar with defense and resource management rather than beginners, and it likely requires a longer playtime. The difficulty is probably set at an intermediate level, with a focus on building and maintaining defenses while managing resources. Before playing, it’s wise to thoroughly analyze the defensive structures and enemy attack patterns. Due to the map’s size, securing fast movement and vision is also crucial. Given its design, this map has strong potential to gain popularity in the custom map community as a "computer opponent defense" title, making it a solid recommendation for players who enjoy strategic and defensive gameplay.
SST -BotD-PM- 2.0
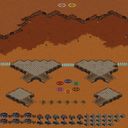
스타크래프트 브루드워의 클래식한 타워 디펜스 맵인 <SST -BotD-PM- 2.0>은 ‘Roughneck’이라는 설치기지를 방어하며 행성을 침공하는 외계 곤충을 섬멸하는 것이 목표인 유즈맵이다. 맵은 황혼 테마의 황량한 지형 위에 구축되어 있으며, 중앙에 위치한 기지 주변으로 버그 캐브(곤충 둥지)가 산재해 있어 이를 파괴해야만 진행이 가능하다. 플레이어는 6명의 인원으로 구성된 팀으로 참여하며, 맵 곳곳에 설치된 터렛, 포토 캐논, 미사일 터렛 등으로 방어선을 구축해야 한다. 외계 곤충은 끊임없이 몰려오며, 특정 시점에는 강렬한 공격을 펼치기도 하므로 순간적인 자원 관리와 배치 전환이 중요하다. 맵의 구조는 대칭형이 아니며, 기지의 입구가 여러 갈래로 나뉘어 있어 방어 전술을 다양하게 구사할 수 있도록 설계되어 있다. 또한, 맵 상단과 하단에 위치한 ‘버그 캐브’ 파괴를 통해 추가 보상을 획득할 수 있어, 단순히 방어만 하는 것이 아니라 능동적인 플레이가 요구된다. 초보자도 쉽게 접근할 수 있는 평이한 난이도지만, 고난이도 모드로 전환할 경우 빠른 판단력과 효율적인 자원 운용이 필수적이다. 특히, 맵의 중앙에 위치한 넓은 공간은 대규모 전투가 벌어지는 핵심 지역으로, 이곳에서의 방어 성공 여부가 승패를 좌우할 가능성이 높다. 플레이 전에는 맵의 주요 입구와 버그 캐브의 위치를 미리 숙지하고, 자원 수급 및 방어 건물의 배치 계획을 세워둘 필요가 있다. 또한, 팀원 간의 역할 분배(예: 특정 입구 전담, 자원 관리 등)가 원활히 이루어진다면 더욱 안정적인 플레이가 가능하다. SST -BotD-PM- 2.0 is a classic tower defense custom map in StarCraft: Brood War where players must defend the 'Roughneck' installation base on a planet by eliminating invading alien insects. The map features a twilight-themed desolate terrain with bug caves scattered around the central base, which must be destroyed to progress. Players participate as a team of six, building defense lines using turrets, photon cannons, and missile turrets. The alien insects continuously swarm the base, with intense attacks at certain stages, requiring quick resource management and strategic repositioning. The asymmetrical map design features multiple entry points to the base, allowing for diverse defensive tactics. Additionally, destroying the bug caves located at the top and bottom of the map grants bonus rewards, encouraging proactive play beyond passive defense. While the map is accessible to beginners with moderate difficulty, higher difficulty modes demand rapid decision-making and efficient resource allocation. The central area of the map serves as a critical battle zone where large-scale combat occurs, often determining victory or defeat. Before playing, it is essential to familiarize yourself with the main entry points and bug cave locations, and plan the placement of defensive structures and resource gathering. Effective team coordination, such as assigning roles (e.g., entrance specialists, resource managers), significantly enhances gameplay stability and success.
벙커 디펜스 (Remove Bunker Defense)
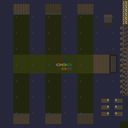
스타크래프트 브루드워의Remove Bunker Defense13.scx 맵은 디펜스 장르의 유즈맵으로, 기지 내부에 위치한 벙커를 방어하는 것이 핵심 목표다. 맵의 중앙에는 플레이어가 방어해야 할 벙커가 있으며, 주변으로 적의 유닛들이 끊임없이 몰려들어 공격해 온다. 플레이어는 벙커를 보호하면서 동시에 공격형 건물을 건설하거나 유닛을 생산해 적을 제압해야 한다. 맵의 구조는 사막 타일셋을 기반으로 하며, 중앙에 위치한 벙커가 눈에 띄게 배치되어 있어 전략적인 방어 포인트를 제공한다. 적의 유닛들은 다양한 루트를 통해 접근하기 때문에, 방어 라인을 효율적으로 구축하는 것이 중요하다. 이 맵의 특징은 방어와 공격을 동시에 고려해야 한다는 점이다. 벙커를 보호하는 동시에, 적의 공격을 막아내면서도 역공을 가할 수 있는 건물을 배치해야 한다. 맵의 난이도는 적의 공격 패턴과 유닛 조합에 따라 달라지는데, 초반에는 상대적으로 약한 유닛들이 몰려오지만, 시간이 지날수록 강력한 유닛들이 등장한다. 따라서 플레이어는 자원 관리와 유닛 생산을 신중히 계획해야 한다. 또한, 맵의 크기는 3072x3072로 достаточно 넓어, 방어 라인을 충분히 확보할 수 있지만, 동시에 넓은 지역을 커버해야 하므로 관리의 어려움이 따른다. 이 맵은 초보자보다는 어느 정도의 전략적 사고와 경험이 필요한 플레이어에게 적합하다. 방어 라인을 구축하는 방법, 자원 수집 및 관리, 유닛 생산 타이밍 등을 숙지하고 있다면 더욱 효과적으로 플레이할 수 있다. 또한, 팀 플레이를 지원하는 맵이므로, 팀원과의 협력이 원활하다면 더 좋은 결과를 얻을 수 있을 것이다. 마지막으로, 맵의 해상도와 타일셋이 사막 지역을 연상케 하므로, 건조하고 넓은 사막 지형을 배경으로 한 디펜스 게임을 즐기고자 하는 플레이어에게 추천할 만하다. 방어 전략을 세우고, 끊임없이 몰려오는 적을 막아내며, 벙커를 보호하는 재미가 있는 맵이다. This StarCraft: Brood War custom map, Remove Bunker Defense13.scx, falls under the defense genre, where the core objective is to defend a bunker located inside the base from relentless enemy attacks. The map features a desert tileset with the bunker centrally positioned, making it a focal point for strategic defense. Players must construct defensive structures and produce units to fend off waves of enemies approaching from multiple directions. The gameplay revolves around balancing defense and offense. While protecting the bunker, players must also set up offensive buildings to counterattack and eliminate threats. The difficulty escalates over time as enemies escalate in strength, requiring careful resource management and timely unit production. The map's large size (3072x3072) allows for expansive defensive setups but demands efficient area coverage and strategic planning. This map is better suited for players with some prior experience in strategy games, as it demands thoughtful planning, resource allocation, and unit management. Team coordination is also beneficial, as the map supports collaborative play. The desert-themed tileset enhances the immersive experience, making it ideal for those who enjoy defense maps set in arid environments. The challenge of devising a solid defense strategy while countering relentless enemy waves ensures an engaging and rewarding experience for players.
레인보우 6.3 (Rainbow 6.3 Complete)
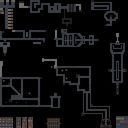
스타크래프트의 고전 디펜스형 유즈맵 '레인보우 6.3'은 우주 테마를 기반으로 한 7개의 미션을 클리어하는 구조로 구성된 맵입니다. 맵의 전체적인 분위기는 어두운 우주 공간을 배경으로 하며, 각 미션은 일정한 패턴의 적군 웨이브를 방어하는 방식으로 진행됩니다. 미션 성공 시 다음 단계로 넘어가는 구조로 되어 있어, 플레이어는 지속적으로 전략을 갱신하며 진행해야 합니다. 맵의 특징 중 하나는 우주 테마에 맞는 타일셋과 색상 구성이며, 어두운 톤의 배경과 대비되는 밝은 색상의 건물/건설로 플레이어의 시선을 집중시킵니다. 각 미션은 고유한 배치와 장애물을 가지고 있어, 단순히 방어만 하는 것이 아니라 지형 활용과 자원 관리가 중요합니다. 특히 미션 간 전환 시 맵 일부가 리셋되지 않고 그대로 유지되는 구조로 추정되어, 이전 미션의 경험이 다음 미션에 영향을 미칠 수 있습니다. 추천 대상으로는 디펜스 맵을 즐기는 플레이어라면 누구나 즐길 수 있지만, 특히 우주 테마와 전략적 깊이를 좋아하는 유저에게 추천합니다. 플레이 전에는 각 미션의 목표와 배치된 방어 건물의 위치, 그리고 자원 확보 전략을 미리 숙지하는 것이 중요합니다. 또한, 미션 간 전환 시 발생할 수 있는 새로운 적의 패턴에 대비해야 합니다. 이 맵은 오랜 시간 사랑받아 온 고전 유즈맵답게, 단순한 디펜스 이상의 재미를 제공합니다. 특히 우주라는 독특한 무대에 익숙하지 않은 플레이어에게는 새로운 경험을 선사할 수 있습니다. Rainbow 6.3 is a classic defense-style custom map for StarCraft, structured around clearing seven missions set in a space-themed environment. The map features a dark cosmic backdrop with tile sets and color schemes that contrast sharply with the bright construction elements, drawing the player's focus to key areas. Each mission presents unique terrain layouts and obstacles, requiring players to adapt their strategies beyond mere defense. Resource management and strategic positioning are crucial, as missions appear to maintain continuity rather than reset entirely, allowing prior experience to influence subsequent challenges. Ideal for fans of defense maps, Rainbow 6.3 particularly appeals to those who enjoy space themes and strategic depth. Before playing, it is recommended to familiarize yourself with each mission's objectives, the placement of defensive structures, and resource management tactics. Additionally, players should prepare for evolving enemy patterns during mission transitions. As a long-standing classic custom map, Rainbow 6.3 offers more than just simple defense gameplay, especially for those new to the cosmic setting, providing a fresh and engaging experience.
맵 선택 가이드
태그는 맵의 핵심 특징을 빠르게 설명하지만 제작 버전마다 규칙이 다를 수 있습니다. 상세 설명에서 권장 인원, 난이도, 플레이 시간과 버전을 함께 확인한 뒤 다운로드하세요.