
방어전략 스타크래프트 맵 모음
'방어전략' 태그가 등록된 맵을 모았습니다. 장르 하나로 찾기 어려운 플레이 방식, 난이도와 특징을 중심으로 인기 맵과 최신 맵을 비교해 보세요.
- 등록 맵
- 7개
- 누적 다운로드
- 0
- 누적 조회
- 294
인기 맵
다운로드와 조회 반응이 높은 맵입니다.
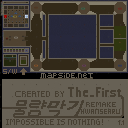
물량막기 마지막이야기2 (Water Quantity Blocking: The Final Story 2)
물량막기 마지막이야기2는 스타크래프트: 브루드워의 대표적인 디펜스(방어) 유즈맵으로, 적의 끊임없는 물량을 막아내며 생존을 다투는 긴장감 넘치는 플레이가 특징이다. 맵의 전체적인 구조는 넓은 사막 지형을 기반으로 중앙에 플레이어 기지가 위치하며, 외곽을 따라 적의 웨이브가 끊임없이 공격해 온다. 방어선은 좁은 통로와 요새화된 구역으로 설계되어 있어, 플레이어는 제한된 자원으로 효율적인 방어를 구축해야 한다. 맵 곳곳에는 미네랄과 가스가 배치되어 있어, 자원을 채취하며 유닛을 생산하고 업그레이드할 수 있도록 돕는다. 특히 맵 하단에 위치한 자원 지대는 방어의 핵심으로, 적의 공격 루트에 따라 자원 확보가 쉽거나 어려워지는 변수가 존재한다. 게임의 목표는 정해진 웨이브를 모두 방어하거나, 특정 조건을 달성하는 것으로 추정된다. 플레이어는 주로 테란의 방어 건물을 활용하여 방어선을 구축하며, 자원 관리와 유닛 배치 타이밍이 승패를 좌우한다. 맵의 디자인상으로는 적의 물량이 점차 증가하는 패턴이 반복되며, 후반으로 갈수록 방어의 난이도가 급격히 상승한다. 초보 플레이어의 경우 방어 라인을 제대로 구축하지 못해 쉽게 뚫릴 수 있으며, 숙련자라면 자원과 유닛의 효율적인 배분을 통해 장기전을 펼칠 수 있다. 추천 대상은 디펜스 맵을 즐기는 모든 플레이어로, 특히 방어 전략과 자원 관리에 관심이 있는 유저들에게 적합하다. 플레이 전에는 맵의 주요 방어 포인트와 자원 분포를 숙지하고, 초반 방어 라인을 빠르게 구축하는 것이 중요하다. Water Quantity Blocking: The Final Story 2 is a classic defense custom map in StarCraft: Brood War, where players must withstand endless waves of enemy attacks while defending their base. The map features a vast desert terrain with the player's base centrally located and enemy waves constantly assaulting from the outer edges. The defensive structure is designed with narrow pathways and fortified zones, requiring efficient resource management and unit placement. Minerals and gas are scattered across the map, allowing players to gather resources for unit production and upgrades. Notably, the resource area at the bottom of the map serves as a critical point for defense, as its accessibility varies depending on the enemy's attack routes. The objective appears to be surviving all waves or meeting specific conditions. Players primarily use Terran defensive buildings to fortify their lines, with resource management and timely unit deployment being key to victory. The map escalates in difficulty as the waves progress, with early mistakes leading to quick defeats for beginners, while experienced players can strategize for long-term survival. This map is ideal for fans of defense maps, particularly those interested in strategic defense planning and resource allocation. Before playing, it's crucial to familiarize yourself with key defensive points and resource distribution to quickly establish early defensive lines.
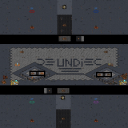
빌더스 앤 파이터즈 X-3s4b (Builders & Fighters X-3s4b)
스타크래프트 브루드워의 유즈맵인 〈Builders & Fighters X-3s4b〉는 ‘건설’과 ‘전투’가 조화롭게 어우러지는 타워 디펜스 장르의 맵으로, 플레이어는 자원을 모아 기지 건축물을 건설하고 강력한 유닛들을 업그레이드하며 적의 기지 함선을 파괴하는 목표를 달성해야 한다. 맵은 우주 테마로 디자인되어 있으며, 중앙에 위치한 적의 기지 함선 주변을 방어거점으로 활용할 수 있는 구조물이 배치되어 있다. 이미지 상단과 하단에는 방어시설과 유닛 생산 건물이 배치된 것을 확인할 수 있으며, 중간 중앙에는 넓은 평지가 펼쳐져 있어 대규모 전투가 벌어질 수 있는 공간으로 추정된다. 맵의 핵심은 자원 관리와 방어선 구축에 있으며, 적의 끊임없는 공격으로부터 기지를 보호하면서 동시에 자원을 확보해 유닛을 생산하고 업그레이드하는 전략적인 플레이가 요구된다. 플레이어는 게임 초반에 건설 가능한 건물과 유닛 생산 건물을 적절히 배치해야 하며, 중앙 평지 주변의 언덕이나 돌출부를 활용해 방어거점을 강화할 수 있다. 이미지 하단 중앙의 큰 건물은 기지 본부로 보이며, 주변의 작은 건물들은 자원 채취나 유닛 생산에 사용될 것으로 추정된다. 방어건물과 유닛을 효율적으로 배치하지 않으면 적의 공격에 기지가 쉽게 무너질 위험이 있으며, 반대로 너무 방어에 치중하면 자원이 부족해져 업그레이드와 유닛 생산이 느려질 수 있다. 따라서 자원 밸런스를 맞추면서도 적절한 타이밍에 공격과 방어를 전환하는 판단력이 필요하다. 이 맵은 초보자보다는 중급 이상의 플레이어에게 적합하며, 특히 전략적 사고와 자원 관리 능력이 요구된다. 맵의 구조상 넓은 시야를 확보할 수 있는 위치에 건물을 배치하면 적의 움직임을 미리 파악할 수 있어 방어에 유리하다. 또한, 적의 공격 패턴을 분석해 방어건물의 배치와 유닛 생산 시기를 조절하는 것이 승리 조건을 달성하는 핵심이다. 게임 진행 중에는 적의 기지 함선 파괴뿐만 아니라 기지의 생존도 중요하므로, 방어선 유지와 공격 타이밍을 잘 조율해야 한다. 이 맵을 플레이하기 전에는 맵의 주요 건물과 유닛 생산 건물의 위치, 자원 채취 및 업그레이드 시스템을 미리 숙지하는 것이 좋다. Builders & Fighters X-3s4b is a tower defense-style custom map in StarCraft: Brood War, where players must balance construction and combat to destroy the enemy base ship. The map features a space-themed design with defensive structures and unit production buildings strategically placed around the central enemy base. The top and bottom sections of the map show clustered buildings likely used for defense and resource management, while the middle area appears to be a large open field ideal for large-scale battles. Players must manage resources efficiently to construct buildings and produce units while defending against waves of enemy attacks. The central large building in the lower section likely serves as the main base, with smaller structures around it dedicated to resource gathering or unit production. Poor placement of defenses or over-commitment to either offense or defense can lead to resource shortages or base destruction. Balancing these elements requires strategic foresight and adaptability. This map suits intermediate to advanced players who enjoy strategic depth and resource management challenges. Optimal building placement for visibility and early enemy detection is crucial, as is analyzing enemy attack patterns to adjust defenses and unit production timings. Survival of the base is as critical as destroying the enemy ship, so players must carefully coordinate defense lines and offensive timing. Before playing, it is advisable to familiarize yourself with the key building and unit production locations, resource gathering points, and upgrade systems on the map.
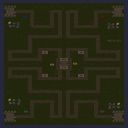
미로 디펜스 7.0 파이널 (Maze Defense 7.0 Final)
미로 디펜스 7.0 파이널는 사막 타일셋을 활용한 4096×4096 규모의 방어형 유즈맵이다. 중앙에 배치된 핵심 지점을 방어하는 것이 목표이며, 적군은 여러 방향에서 동시에 몰려와 러시를 시도한다. 플레이어는 4명까지 참여할 수 있고, 각자 독립된 기지를 운영하면서 자원을 수집해 방어 건물을 건설한다. 건물 배치는 미로 형태의 지형을 고려해 효율적인 라인을 만들 필요가 있다. 적의 이동 경로가 복잡하게 얽혀 있어, 적절한 타워 배치와 업그레이드 타이밍이 승패를 좌우한다. 초반에는 저렴한 방어 타워와 스카우트 유닛을 활용해 적의 흐름을 파악하고, 중반 이후에는 레이저 캐논이나 미사일 포와 같은 고위험 타워를 추가해 집중적인 방어 라인을 구축한다. 맵의 특성상 자원 공급이 제한적이므로, 자원을 과도하게 소비하기보다 방어 효율을 극대화하는 설계가 필요하다. 또한, 적의 러시 패턴이 주기적으로 변하기 때문에, 상황에 맞춰 방어 포지션을 재배치하거나 보조 유닛을 활용하는 것이 효과적이다. 이 맵은 방어 전략을 중점으로 연습하고 싶은 플레이어, 특히 타워 배치와 업그레이드 순서를 고민하는 유저에게 적합하다. 플레이 전에는 적의 진입 경로와 자원 노드 위치를 미리 확인하고, 방어 건물의 사정거리와 공격 속도를 고려한 배치를 계획하는 것이 승리 확률을 높인다. Maze Defense 7.0 Final is a desert‑tileset defense map sized at 4096×4096. The objective is to protect a central core while waves of enemies rush from multiple directions. Up to four players can join, each managing an independent base and gathering resources to build defensive structures. Because the terrain forms a maze‑like layout, positioning towers along efficient choke points is crucial. Early game favors cheap turrets and scout units to gauge enemy flow; mid‑game shifts to high‑damage laser cannons or missile launchers to create a solid line of defense. Resources are limited, so players should prioritize efficient builds over spamming. Enemy rush patterns change periodically, requiring occasional repositioning of defenses or the use of support units. This map suits players who want to hone tower placement and upgrade sequencing, especially those who enjoy strategic defense play. Before starting, review enemy entry routes and resource node locations, and plan tower ranges and fire rates to maximize survivability.
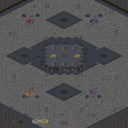
Bunker 2009
Bunker 2009는 스타크래프트 브루드워용 UMS 유즈맵으로, 2048×2048 타일맵에 우주 타일셋을 사용해 넓은 전장을 구현했다. 맵은 중앙에 대형 벙커 구조물이 배치되어 있어, 플레이어는 벙커를 방어하거나 적의 진입을 차단하는 전략을 선택한다. 초기 자원 배치가 균등하게 이루어져 있어 어느 쪽이든 방어 기반을 빠르게 구축할 수 있다. 주요 진행 방식은 적군의 파동을 막아내는 디펜스 형태이며, 벙커 내부와 주변에 배치된 고지대에서 유닛을 배치하면 시야 확보와 화력 집중에 유리하다. 플레이 경험은 방어 라인을 어떻게 설계하느냐에 따라 크게 달라지며, 벙커를 강화하거나 주변 지형을 활용해 적의 공격 경로를 바꾸는 것이 핵심이다. 추천 대상은 방어 전술을 즐기는 유저와 팀플레이보다는 1인 플레이를 선호하는 사람이다. 플레이 전에 확인할 포인트는 벙커의 체력과 재생 속도, 적 파동의 스폰 타이밍, 그리고 자원 수급 위치이다. 이를 파악하면 초반 방어 구축과 중후반 전투 전환을 원활히 할 수 있다. Bunker 2009 is a UMS custom map for StarCraft: Brood War that uses a 2048×2048 tile map with a space tileset to create a large battlefield. The map features a massive bunker structure in the center, allowing players to either defend the bunker or block enemy entry. Initial resources are evenly distributed, enabling either side to quickly establish a defensive base. The main gameplay is a defense‑oriented wave‑survival, where high ground around the bunker provides vision and firepower advantages. The experience varies greatly depending on how you design your defensive lines, with key tactics involving strengthening the bunker and manipulating terrain to alter enemy attack routes. This map is recommended for players who enjoy defensive strategies and prefer solo play over team matches. Before starting, check the bunker’s health and regeneration rate, the timing of enemy wave spawns, and the locations of resource nodes; understanding these elements helps build a solid early defense and transition smoothly into mid‑ and late‑game battles.
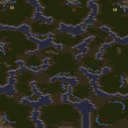
Twin Hunters (트윈 헌터스)
스타크래프트 브루드워 유즈맵 'Twin Hunters'는 두 명의 플레이어가 컴까기 형식으로 상대하는 팀 밀리 맵이다. 내부 설명에 따르면 '2 humans vs 4 comps'로 구성되어 있으며, 두 플레이어는 사냥꾼(Hunters)으로서 무한한 자원을 바탕으로 네 명의 컴퓨터를 상대하게 된다. 맵은 사막 타일셋을 기반으로 4096x4096의 넓은 공간을 차지하고 있어 넓은 시야와 전략적 움직임이 요구된다. 사냥꾼은 초반부터 강력한 유닛을 보유하고 있으며, 컴퓨터는 두 배의 기지를 운영하며 끊임없이 공격을 펼치기 때문에 방어와 자원 관리가 핵심 포인트가 된다. 맵의 구조는 중앙을 가로지르는 협곡과 평지, 언덕 지대가 조화를 이루며, 이곳에서Resource gathering과 병력 운용이 이루어지게 된다. 플레이어는 초반에 빠르게 자원을 확보하여 방어선을 구축하고, 중반부터는 사냥꾼의 우수한 기동성과 공격력을 살려 컴퓨터의 기지를 공략해야 한다. 특히 사냥꾼의 특수 능력이나 조합이 맵에서 어떻게 활용되는지 미리 숙지하고 있어야 효율적인 플레이가 가능하다. 추천 대상은 스타크래프트 유즈맵을 즐기는 유저 중에서도 팀 밀리나 컴까기 경험이 있는 플레이어이며, 넓은 맵에서 전략적인 움직임과 실시간 전투 능력을 발휘하고자 하는 이들에게 적합하다. 플레이 전에는 사냥꾼의 유닛 구성과 컴퓨터의 공격 패턴, 맵의 주요 지형지물을 반드시 확인해 둬야 한다. 또한, 자원 관리를 소홀히 하면 중반 이후 공격 타이밍을 놓칠 수 있으므로 자원 확보와 병력 생산의 균형을 잘 맞추는 것이 중요하다. Two human players face off against four computer opponents in the *Brood War* custom map *Twin Hunters*, designed as a team melee map. According to the in-game description, the matchup is structured as "2 humans vs 4 comps," where the two players take on the role of Hunters with infinite resources against four AI-controlled factions. Set on a vast 4096x4096 desert tileset, the map demands strong strategic positioning and wide map awareness. The Hunters start with powerful units from the beginning, while the computers operate two bases each, launching relentless assaults—making defense and resource management critical to survival. The terrain features a central canyon flanked by open plains and elevated areas, where resource gathering and troop movements take place. Players must secure early resources to establish defensive lines, then shift focus to mid-game by leveraging the Hunters’ superior mobility and firepower to strike at the computer’s bases. Understanding how the Hunters’ special abilities or unit compositions synergize with the map’s layout is essential for efficient play. This map is best suited for *Brood War* custom-map enthusiasts with prior experience in team melee or versus-AI scenarios, particularly those who enjoy strategic movement and real-time combat across a large battlefield. Before jumping in, players should familiarize themselves with the Hunters’ unit roster, the AI’s attack patterns, and the map’s key terrain features. Neglecting resource management can lead to missed mid-game offensive windows, so balancing income generation with troop production is vital.
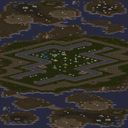
최후의 일격 (Final Blow)
E02FinalBlow는 사막 타일셋을 배경으로 한 유즈맵(UMS)으로, 네오 콘클레이브의 주요 기지를 탈취한 뒤 마지막 전투를 펼치는 구조를 가지고 있다. 맵은 넓은 3072×6144 픽셀 영역에 여러 방어 라인과 고지대를 배치해 플레이어가 기지를 방어하거나 공격하는 두 가지 흐름을 동시에 경험하도록 설계되었다. 시작 시점에 기지 내부에 기본 방어 건물과 자원 채취 포인트가 배치되어 있어, 초반에는 자원을 확보하고 방어 유닛을 생산하는 것이 핵심이다. 이후 적 유닛이 파동 형태로 등장하는데, 적의 진입 경로가 여러 갈래로 나뉘어 있어 어느 한쪽에만 집중하기보다는 전반적인 방어 라인을 고르게 강화해야 한다. 맵 곳곳에 숨겨진 고지와 중립 건물은 전략적 요충지로 활용될 수 있으며, 특히 고지에 배치한 포탑은 넓은 시야와 사거리 덕분에 적 파동을 조기에 차단하는 데 유리하다. 플레이 경험상, 초반 자원 관리와 방어 유닛 조합이 승패를 가르는 요소이며, 중반 이후에는 적의 파동이 점점 강력해지므로 방어 라인을 재배치하거나 추가 방어 건물을 건설하는 것이 필요하다. 추천 대상은 혼자서도 충분히 플레이할 수 있는 1인용 유즈맵을 찾는 유저와, 방어 중심의 전략을 연습하고 싶은 플레이어이다. 플레이 전 확인할 포인트는 맵에 배치된 자원 포인트의 위치와 방어 건물의 건설 가능 구역을 미리 파악하는 것이다. 이를 통해 초반 자원 확보와 방어 라인 구축을 빠르게 진행할 수 있다. E02FinalBlow is a user-made map (UMS) set on a desert tileset, featuring a scenario where the player must secure the final stronghold of the Neo-Conclave. The map spans a large 3072×6144 pixel area with multiple defensive lines and elevated positions, allowing players to experience both offensive and defensive phases. At the start, basic defensive structures and resource nodes are placed inside the base, making early resource gathering and unit production essential. Enemy waves arrive in several directions, requiring balanced reinforcement of the entire perimeter rather than focusing on a single front. Hidden high grounds and neutral buildings serve as strategic points; positioning turrets on these heights provides early interception of incoming waves due to their wide sight and range. The gameplay emphasizes early resource management and unit composition, while mid‑game sees increasingly stronger enemy waves that demand repositioning of defenses or construction of additional structures. This map is recommended for solo players seeking a 1‑player UMS experience and those who wish to practice defense‑oriented strategies. Before playing, identify the locations of resource points and buildable zones for defensive structures to ensure swift early development and a solid defensive layout.
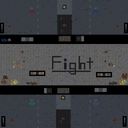
Builders & Fighters X5
스타크래프트 브루드워의 유즈맵 「Builders & Fighters X5」는 타워 디펜스 장르의 대표적인 작품으로, 6명의 플레이어가 협력하여 방어선을 구축하고 적의 공격을 막아내는 재미를 느낄 수 있는 맵이다. 맵 중앙에는 넓게 펼쳐진 길들이 존재하며, 이 길들을 따라 끊임없이 몰려오는 적 유닛들을 상대로 플레이어들은 각자의 타워를 건설하고 업그레이드할 수 있다. 맵 상단과 하단에는 각 플레이어 전용의 건물을 배치할 수 있는 공간이 마련되어 있으며, 이 건물들을 통해 자원을 획득하거나 추가적인 타워를 건설할 수 있는 공간을 확보할 수 있다. 특히 이 맵의 특징은 「Builders」와 「Fighters」라는 두 가지 역할로 나뉘어 플레이할 수 있다는 점이다. Builders는 주로 자원 관리와 타워 건설을 담당하며, Fighters는 전투 유닛을 소환하거나 방어선을 보강하는 역할을 맡는다. 이를 통해 플레이어들은 역할 분담을 통해 효율적인 방어 전략을 펼칠 수 있으며, 특히 초보 플레이어도 쉽게 접근할 수 있도록 설계되어 있다. 맵 곳곳에 배치된 방어 건물들과 특수 타워들은 다양한 공격 패턴을 가진 적들에게 대응할 수 있도록 다양하게 구성되어 있어, 전략적 깊이를 더한다. Builders & Fighters X5는 타워 디펜스 장르의 특성상 긴 플레이 시간을 요구하지만, 각기 다른 전략을 시도해 볼 수 있는 요소들이 많아 반복 플레이를 즐길 수 있는 구조로 설계되어 있다. 또한, 맵의 디자인과 타일셋(우주)이 조화를 이루어 시각적으로도 흥미로운 환경을 제공한다. 이 맵을 플레이하기 위해서는 각각의 역할에 맞게 팀원들과의 원활한 소통이 중요하며, 특히 초반 자원 관리와 타워 배치 계획이 승패를 좌우할 수 있다.Builders & Fighters X5는 초보자와 숙련자 모두에게 적합한 타워 디펜스 유즈맵으로, 협동 플레이를 통해 방어의 재미를 느낄 수 있는 작품이다. 맵의 넓은 공간과 다양한 타워 옵션을 활용하여 적절한 전략을 수립하고, 끊임없이 밀려오는 적들을 상대로 자신의 방어선을 지켜내는 짜릿한 경험을 제공한다. 특히, Builders와 Fighters라는 역할 분담을 통해 팀원 간의 역할이 명확해지며, 이를 통해 전략적 협력이 자연스럽게 이루어진다. 맵의 디자인과 타일셋도 타워 디펜스 장르의 특성을 잘 살려내어 시각적인 즐거움도 더한다. 이 맵을 플레이하기 전에는 각 역할의 책임과 기본적인 타워의 특성을 숙지하는 것이 중요하며, 초반 자원 관리와 타워 배치 계획을 철저히 세워야 한다. 또한, 적의 공격 패턴을 분석하고 그에 맞는 방어 전략을 준비하는 것이 핵심이다.Builders & Fighters X5 is a tower defense game in StarCraft: Brood War, designed for up to six players to collaborate in building and defending against waves of enemy units. The map features a central pathway where enemies spawn and advance, while players have designated spaces at the top and bottom to construct towers, gather resources, and reinforce their defenses. A standout feature of this map is the dual-role system: Builders focus on resource management and tower construction, while Fighters handle combat unit summoning and defensive reinforcements. This division allows players to specialize, making it easier for beginners to contribute meaningfully. The map includes a variety of defensive structures and special towers, each designed to counter different enemy attack patterns, adding depth and replayability. The map’s spacious design and cosmic-themed tileset provide a visually engaging environment, enhancing the overall experience. While the gameplay requires strategic planning and teamwork, the clear role distribution and intuitive mechanics make it accessible. Players should prioritize early resource management and tower placement, as these factors significantly influence the outcome. Analyzing enemy attack patterns and adapting defenses accordingly is key to success in Builders & Fighters X5.
최근 등록된 맵
새로 추가된 파일과 버전을 확인하세요.
최후의 일격 (Final Blow)
E02FinalBlow는 사막 타일셋을 배경으로 한 유즈맵(UMS)으로, 네오 콘클레이브의 주요 기지를 탈취한 뒤 마지막 전투를 펼치는 구조를 가지고 있다. 맵은 넓은 3072×6144 픽셀 영역에 여러 방어 라인과 고지대를 배치해 플레이어가 기지를 방어하거나 공격하는 두 가지 흐름을 동시에 경험하도록 설계되었다. 시작 시점에 기지 내부에 기본 방어 건물과 자원 채취 포인트가 배치되어 있어, 초반에는 자원을 확보하고 방어 유닛을 생산하는 것이 핵심이다. 이후 적 유닛이 파동 형태로 등장하는데, 적의 진입 경로가 여러 갈래로 나뉘어 있어 어느 한쪽에만 집중하기보다는 전반적인 방어 라인을 고르게 강화해야 한다. 맵 곳곳에 숨겨진 고지와 중립 건물은 전략적 요충지로 활용될 수 있으며, 특히 고지에 배치한 포탑은 넓은 시야와 사거리 덕분에 적 파동을 조기에 차단하는 데 유리하다. 플레이 경험상, 초반 자원 관리와 방어 유닛 조합이 승패를 가르는 요소이며, 중반 이후에는 적의 파동이 점점 강력해지므로 방어 라인을 재배치하거나 추가 방어 건물을 건설하는 것이 필요하다. 추천 대상은 혼자서도 충분히 플레이할 수 있는 1인용 유즈맵을 찾는 유저와, 방어 중심의 전략을 연습하고 싶은 플레이어이다. 플레이 전 확인할 포인트는 맵에 배치된 자원 포인트의 위치와 방어 건물의 건설 가능 구역을 미리 파악하는 것이다. 이를 통해 초반 자원 확보와 방어 라인 구축을 빠르게 진행할 수 있다. E02FinalBlow is a user-made map (UMS) set on a desert tileset, featuring a scenario where the player must secure the final stronghold of the Neo-Conclave. The map spans a large 3072×6144 pixel area with multiple defensive lines and elevated positions, allowing players to experience both offensive and defensive phases. At the start, basic defensive structures and resource nodes are placed inside the base, making early resource gathering and unit production essential. Enemy waves arrive in several directions, requiring balanced reinforcement of the entire perimeter rather than focusing on a single front. Hidden high grounds and neutral buildings serve as strategic points; positioning turrets on these heights provides early interception of incoming waves due to their wide sight and range. The gameplay emphasizes early resource management and unit composition, while mid‑game sees increasingly stronger enemy waves that demand repositioning of defenses or construction of additional structures. This map is recommended for solo players seeking a 1‑player UMS experience and those who wish to practice defense‑oriented strategies. Before playing, identify the locations of resource points and buildable zones for defensive structures to ensure swift early development and a solid defensive layout.
Builders & Fighters X5
스타크래프트 브루드워의 유즈맵 「Builders & Fighters X5」는 타워 디펜스 장르의 대표적인 작품으로, 6명의 플레이어가 협력하여 방어선을 구축하고 적의 공격을 막아내는 재미를 느낄 수 있는 맵이다. 맵 중앙에는 넓게 펼쳐진 길들이 존재하며, 이 길들을 따라 끊임없이 몰려오는 적 유닛들을 상대로 플레이어들은 각자의 타워를 건설하고 업그레이드할 수 있다. 맵 상단과 하단에는 각 플레이어 전용의 건물을 배치할 수 있는 공간이 마련되어 있으며, 이 건물들을 통해 자원을 획득하거나 추가적인 타워를 건설할 수 있는 공간을 확보할 수 있다. 특히 이 맵의 특징은 「Builders」와 「Fighters」라는 두 가지 역할로 나뉘어 플레이할 수 있다는 점이다. Builders는 주로 자원 관리와 타워 건설을 담당하며, Fighters는 전투 유닛을 소환하거나 방어선을 보강하는 역할을 맡는다. 이를 통해 플레이어들은 역할 분담을 통해 효율적인 방어 전략을 펼칠 수 있으며, 특히 초보 플레이어도 쉽게 접근할 수 있도록 설계되어 있다. 맵 곳곳에 배치된 방어 건물들과 특수 타워들은 다양한 공격 패턴을 가진 적들에게 대응할 수 있도록 다양하게 구성되어 있어, 전략적 깊이를 더한다. Builders & Fighters X5는 타워 디펜스 장르의 특성상 긴 플레이 시간을 요구하지만, 각기 다른 전략을 시도해 볼 수 있는 요소들이 많아 반복 플레이를 즐길 수 있는 구조로 설계되어 있다. 또한, 맵의 디자인과 타일셋(우주)이 조화를 이루어 시각적으로도 흥미로운 환경을 제공한다. 이 맵을 플레이하기 위해서는 각각의 역할에 맞게 팀원들과의 원활한 소통이 중요하며, 특히 초반 자원 관리와 타워 배치 계획이 승패를 좌우할 수 있다.Builders & Fighters X5는 초보자와 숙련자 모두에게 적합한 타워 디펜스 유즈맵으로, 협동 플레이를 통해 방어의 재미를 느낄 수 있는 작품이다. 맵의 넓은 공간과 다양한 타워 옵션을 활용하여 적절한 전략을 수립하고, 끊임없이 밀려오는 적들을 상대로 자신의 방어선을 지켜내는 짜릿한 경험을 제공한다. 특히, Builders와 Fighters라는 역할 분담을 통해 팀원 간의 역할이 명확해지며, 이를 통해 전략적 협력이 자연스럽게 이루어진다. 맵의 디자인과 타일셋도 타워 디펜스 장르의 특성을 잘 살려내어 시각적인 즐거움도 더한다. 이 맵을 플레이하기 전에는 각 역할의 책임과 기본적인 타워의 특성을 숙지하는 것이 중요하며, 초반 자원 관리와 타워 배치 계획을 철저히 세워야 한다. 또한, 적의 공격 패턴을 분석하고 그에 맞는 방어 전략을 준비하는 것이 핵심이다.Builders & Fighters X5 is a tower defense game in StarCraft: Brood War, designed for up to six players to collaborate in building and defending against waves of enemy units. The map features a central pathway where enemies spawn and advance, while players have designated spaces at the top and bottom to construct towers, gather resources, and reinforce their defenses. A standout feature of this map is the dual-role system: Builders focus on resource management and tower construction, while Fighters handle combat unit summoning and defensive reinforcements. This division allows players to specialize, making it easier for beginners to contribute meaningfully. The map includes a variety of defensive structures and special towers, each designed to counter different enemy attack patterns, adding depth and replayability. The map’s spacious design and cosmic-themed tileset provide a visually engaging environment, enhancing the overall experience. While the gameplay requires strategic planning and teamwork, the clear role distribution and intuitive mechanics make it accessible. Players should prioritize early resource management and tower placement, as these factors significantly influence the outcome. Analyzing enemy attack patterns and adapting defenses accordingly is key to success in Builders & Fighters X5.
미로 디펜스 7.0 파이널 (Maze Defense 7.0 Final)
미로 디펜스 7.0 파이널는 사막 타일셋을 활용한 4096×4096 규모의 방어형 유즈맵이다. 중앙에 배치된 핵심 지점을 방어하는 것이 목표이며, 적군은 여러 방향에서 동시에 몰려와 러시를 시도한다. 플레이어는 4명까지 참여할 수 있고, 각자 독립된 기지를 운영하면서 자원을 수집해 방어 건물을 건설한다. 건물 배치는 미로 형태의 지형을 고려해 효율적인 라인을 만들 필요가 있다. 적의 이동 경로가 복잡하게 얽혀 있어, 적절한 타워 배치와 업그레이드 타이밍이 승패를 좌우한다. 초반에는 저렴한 방어 타워와 스카우트 유닛을 활용해 적의 흐름을 파악하고, 중반 이후에는 레이저 캐논이나 미사일 포와 같은 고위험 타워를 추가해 집중적인 방어 라인을 구축한다. 맵의 특성상 자원 공급이 제한적이므로, 자원을 과도하게 소비하기보다 방어 효율을 극대화하는 설계가 필요하다. 또한, 적의 러시 패턴이 주기적으로 변하기 때문에, 상황에 맞춰 방어 포지션을 재배치하거나 보조 유닛을 활용하는 것이 효과적이다. 이 맵은 방어 전략을 중점으로 연습하고 싶은 플레이어, 특히 타워 배치와 업그레이드 순서를 고민하는 유저에게 적합하다. 플레이 전에는 적의 진입 경로와 자원 노드 위치를 미리 확인하고, 방어 건물의 사정거리와 공격 속도를 고려한 배치를 계획하는 것이 승리 확률을 높인다. Maze Defense 7.0 Final is a desert‑tileset defense map sized at 4096×4096. The objective is to protect a central core while waves of enemies rush from multiple directions. Up to four players can join, each managing an independent base and gathering resources to build defensive structures. Because the terrain forms a maze‑like layout, positioning towers along efficient choke points is crucial. Early game favors cheap turrets and scout units to gauge enemy flow; mid‑game shifts to high‑damage laser cannons or missile launchers to create a solid line of defense. Resources are limited, so players should prioritize efficient builds over spamming. Enemy rush patterns change periodically, requiring occasional repositioning of defenses or the use of support units. This map suits players who want to hone tower placement and upgrade sequencing, especially those who enjoy strategic defense play. Before starting, review enemy entry routes and resource node locations, and plan tower ranges and fire rates to maximize survivability.
Bunker 2009
Bunker 2009는 스타크래프트 브루드워용 UMS 유즈맵으로, 2048×2048 타일맵에 우주 타일셋을 사용해 넓은 전장을 구현했다. 맵은 중앙에 대형 벙커 구조물이 배치되어 있어, 플레이어는 벙커를 방어하거나 적의 진입을 차단하는 전략을 선택한다. 초기 자원 배치가 균등하게 이루어져 있어 어느 쪽이든 방어 기반을 빠르게 구축할 수 있다. 주요 진행 방식은 적군의 파동을 막아내는 디펜스 형태이며, 벙커 내부와 주변에 배치된 고지대에서 유닛을 배치하면 시야 확보와 화력 집중에 유리하다. 플레이 경험은 방어 라인을 어떻게 설계하느냐에 따라 크게 달라지며, 벙커를 강화하거나 주변 지형을 활용해 적의 공격 경로를 바꾸는 것이 핵심이다. 추천 대상은 방어 전술을 즐기는 유저와 팀플레이보다는 1인 플레이를 선호하는 사람이다. 플레이 전에 확인할 포인트는 벙커의 체력과 재생 속도, 적 파동의 스폰 타이밍, 그리고 자원 수급 위치이다. 이를 파악하면 초반 방어 구축과 중후반 전투 전환을 원활히 할 수 있다. Bunker 2009 is a UMS custom map for StarCraft: Brood War that uses a 2048×2048 tile map with a space tileset to create a large battlefield. The map features a massive bunker structure in the center, allowing players to either defend the bunker or block enemy entry. Initial resources are evenly distributed, enabling either side to quickly establish a defensive base. The main gameplay is a defense‑oriented wave‑survival, where high ground around the bunker provides vision and firepower advantages. The experience varies greatly depending on how you design your defensive lines, with key tactics involving strengthening the bunker and manipulating terrain to alter enemy attack routes. This map is recommended for players who enjoy defensive strategies and prefer solo play over team matches. Before starting, check the bunker’s health and regeneration rate, the timing of enemy wave spawns, and the locations of resource nodes; understanding these elements helps build a solid early defense and transition smoothly into mid‑ and late‑game battles.
빌더스 앤 파이터즈 X-3s4b (Builders & Fighters X-3s4b)
스타크래프트 브루드워의 유즈맵인 〈Builders & Fighters X-3s4b〉는 ‘건설’과 ‘전투’가 조화롭게 어우러지는 타워 디펜스 장르의 맵으로, 플레이어는 자원을 모아 기지 건축물을 건설하고 강력한 유닛들을 업그레이드하며 적의 기지 함선을 파괴하는 목표를 달성해야 한다. 맵은 우주 테마로 디자인되어 있으며, 중앙에 위치한 적의 기지 함선 주변을 방어거점으로 활용할 수 있는 구조물이 배치되어 있다. 이미지 상단과 하단에는 방어시설과 유닛 생산 건물이 배치된 것을 확인할 수 있으며, 중간 중앙에는 넓은 평지가 펼쳐져 있어 대규모 전투가 벌어질 수 있는 공간으로 추정된다. 맵의 핵심은 자원 관리와 방어선 구축에 있으며, 적의 끊임없는 공격으로부터 기지를 보호하면서 동시에 자원을 확보해 유닛을 생산하고 업그레이드하는 전략적인 플레이가 요구된다. 플레이어는 게임 초반에 건설 가능한 건물과 유닛 생산 건물을 적절히 배치해야 하며, 중앙 평지 주변의 언덕이나 돌출부를 활용해 방어거점을 강화할 수 있다. 이미지 하단 중앙의 큰 건물은 기지 본부로 보이며, 주변의 작은 건물들은 자원 채취나 유닛 생산에 사용될 것으로 추정된다. 방어건물과 유닛을 효율적으로 배치하지 않으면 적의 공격에 기지가 쉽게 무너질 위험이 있으며, 반대로 너무 방어에 치중하면 자원이 부족해져 업그레이드와 유닛 생산이 느려질 수 있다. 따라서 자원 밸런스를 맞추면서도 적절한 타이밍에 공격과 방어를 전환하는 판단력이 필요하다. 이 맵은 초보자보다는 중급 이상의 플레이어에게 적합하며, 특히 전략적 사고와 자원 관리 능력이 요구된다. 맵의 구조상 넓은 시야를 확보할 수 있는 위치에 건물을 배치하면 적의 움직임을 미리 파악할 수 있어 방어에 유리하다. 또한, 적의 공격 패턴을 분석해 방어건물의 배치와 유닛 생산 시기를 조절하는 것이 승리 조건을 달성하는 핵심이다. 게임 진행 중에는 적의 기지 함선 파괴뿐만 아니라 기지의 생존도 중요하므로, 방어선 유지와 공격 타이밍을 잘 조율해야 한다. 이 맵을 플레이하기 전에는 맵의 주요 건물과 유닛 생산 건물의 위치, 자원 채취 및 업그레이드 시스템을 미리 숙지하는 것이 좋다. Builders & Fighters X-3s4b is a tower defense-style custom map in StarCraft: Brood War, where players must balance construction and combat to destroy the enemy base ship. The map features a space-themed design with defensive structures and unit production buildings strategically placed around the central enemy base. The top and bottom sections of the map show clustered buildings likely used for defense and resource management, while the middle area appears to be a large open field ideal for large-scale battles. Players must manage resources efficiently to construct buildings and produce units while defending against waves of enemy attacks. The central large building in the lower section likely serves as the main base, with smaller structures around it dedicated to resource gathering or unit production. Poor placement of defenses or over-commitment to either offense or defense can lead to resource shortages or base destruction. Balancing these elements requires strategic foresight and adaptability. This map suits intermediate to advanced players who enjoy strategic depth and resource management challenges. Optimal building placement for visibility and early enemy detection is crucial, as is analyzing enemy attack patterns to adjust defenses and unit production timings. Survival of the base is as critical as destroying the enemy ship, so players must carefully coordinate defense lines and offensive timing. Before playing, it is advisable to familiarize yourself with the key building and unit production locations, resource gathering points, and upgrade systems on the map.
Twin Hunters (트윈 헌터스)
스타크래프트 브루드워 유즈맵 'Twin Hunters'는 두 명의 플레이어가 컴까기 형식으로 상대하는 팀 밀리 맵이다. 내부 설명에 따르면 '2 humans vs 4 comps'로 구성되어 있으며, 두 플레이어는 사냥꾼(Hunters)으로서 무한한 자원을 바탕으로 네 명의 컴퓨터를 상대하게 된다. 맵은 사막 타일셋을 기반으로 4096x4096의 넓은 공간을 차지하고 있어 넓은 시야와 전략적 움직임이 요구된다. 사냥꾼은 초반부터 강력한 유닛을 보유하고 있으며, 컴퓨터는 두 배의 기지를 운영하며 끊임없이 공격을 펼치기 때문에 방어와 자원 관리가 핵심 포인트가 된다. 맵의 구조는 중앙을 가로지르는 협곡과 평지, 언덕 지대가 조화를 이루며, 이곳에서Resource gathering과 병력 운용이 이루어지게 된다. 플레이어는 초반에 빠르게 자원을 확보하여 방어선을 구축하고, 중반부터는 사냥꾼의 우수한 기동성과 공격력을 살려 컴퓨터의 기지를 공략해야 한다. 특히 사냥꾼의 특수 능력이나 조합이 맵에서 어떻게 활용되는지 미리 숙지하고 있어야 효율적인 플레이가 가능하다. 추천 대상은 스타크래프트 유즈맵을 즐기는 유저 중에서도 팀 밀리나 컴까기 경험이 있는 플레이어이며, 넓은 맵에서 전략적인 움직임과 실시간 전투 능력을 발휘하고자 하는 이들에게 적합하다. 플레이 전에는 사냥꾼의 유닛 구성과 컴퓨터의 공격 패턴, 맵의 주요 지형지물을 반드시 확인해 둬야 한다. 또한, 자원 관리를 소홀히 하면 중반 이후 공격 타이밍을 놓칠 수 있으므로 자원 확보와 병력 생산의 균형을 잘 맞추는 것이 중요하다. Two human players face off against four computer opponents in the *Brood War* custom map *Twin Hunters*, designed as a team melee map. According to the in-game description, the matchup is structured as "2 humans vs 4 comps," where the two players take on the role of Hunters with infinite resources against four AI-controlled factions. Set on a vast 4096x4096 desert tileset, the map demands strong strategic positioning and wide map awareness. The Hunters start with powerful units from the beginning, while the computers operate two bases each, launching relentless assaults—making defense and resource management critical to survival. The terrain features a central canyon flanked by open plains and elevated areas, where resource gathering and troop movements take place. Players must secure early resources to establish defensive lines, then shift focus to mid-game by leveraging the Hunters’ superior mobility and firepower to strike at the computer’s bases. Understanding how the Hunters’ special abilities or unit compositions synergize with the map’s layout is essential for efficient play. This map is best suited for *Brood War* custom-map enthusiasts with prior experience in team melee or versus-AI scenarios, particularly those who enjoy strategic movement and real-time combat across a large battlefield. Before jumping in, players should familiarize themselves with the Hunters’ unit roster, the AI’s attack patterns, and the map’s key terrain features. Neglecting resource management can lead to missed mid-game offensive windows, so balancing income generation with troop production is vital.
물량막기 마지막이야기2 (Water Quantity Blocking: The Final Story 2)
물량막기 마지막이야기2는 스타크래프트: 브루드워의 대표적인 디펜스(방어) 유즈맵으로, 적의 끊임없는 물량을 막아내며 생존을 다투는 긴장감 넘치는 플레이가 특징이다. 맵의 전체적인 구조는 넓은 사막 지형을 기반으로 중앙에 플레이어 기지가 위치하며, 외곽을 따라 적의 웨이브가 끊임없이 공격해 온다. 방어선은 좁은 통로와 요새화된 구역으로 설계되어 있어, 플레이어는 제한된 자원으로 효율적인 방어를 구축해야 한다. 맵 곳곳에는 미네랄과 가스가 배치되어 있어, 자원을 채취하며 유닛을 생산하고 업그레이드할 수 있도록 돕는다. 특히 맵 하단에 위치한 자원 지대는 방어의 핵심으로, 적의 공격 루트에 따라 자원 확보가 쉽거나 어려워지는 변수가 존재한다. 게임의 목표는 정해진 웨이브를 모두 방어하거나, 특정 조건을 달성하는 것으로 추정된다. 플레이어는 주로 테란의 방어 건물을 활용하여 방어선을 구축하며, 자원 관리와 유닛 배치 타이밍이 승패를 좌우한다. 맵의 디자인상으로는 적의 물량이 점차 증가하는 패턴이 반복되며, 후반으로 갈수록 방어의 난이도가 급격히 상승한다. 초보 플레이어의 경우 방어 라인을 제대로 구축하지 못해 쉽게 뚫릴 수 있으며, 숙련자라면 자원과 유닛의 효율적인 배분을 통해 장기전을 펼칠 수 있다. 추천 대상은 디펜스 맵을 즐기는 모든 플레이어로, 특히 방어 전략과 자원 관리에 관심이 있는 유저들에게 적합하다. 플레이 전에는 맵의 주요 방어 포인트와 자원 분포를 숙지하고, 초반 방어 라인을 빠르게 구축하는 것이 중요하다. Water Quantity Blocking: The Final Story 2 is a classic defense custom map in StarCraft: Brood War, where players must withstand endless waves of enemy attacks while defending their base. The map features a vast desert terrain with the player's base centrally located and enemy waves constantly assaulting from the outer edges. The defensive structure is designed with narrow pathways and fortified zones, requiring efficient resource management and unit placement. Minerals and gas are scattered across the map, allowing players to gather resources for unit production and upgrades. Notably, the resource area at the bottom of the map serves as a critical point for defense, as its accessibility varies depending on the enemy's attack routes. The objective appears to be surviving all waves or meeting specific conditions. Players primarily use Terran defensive buildings to fortify their lines, with resource management and timely unit deployment being key to victory. The map escalates in difficulty as the waves progress, with early mistakes leading to quick defeats for beginners, while experienced players can strategize for long-term survival. This map is ideal for fans of defense maps, particularly those interested in strategic defense planning and resource allocation. Before playing, it's crucial to familiarize yourself with key defensive points and resource distribution to quickly establish early defensive lines.
맵 선택 가이드
태그는 맵의 핵심 특징을 빠르게 설명하지만 제작 버전마다 규칙이 다를 수 있습니다. 상세 설명에서 권장 인원, 난이도, 플레이 시간과 버전을 함께 확인한 뒤 다운로드하세요.