
방어맵 스타크래프트 맵 모음
'방어맵' 태그가 등록된 맵을 모았습니다. 장르 하나로 찾기 어려운 플레이 방식, 난이도와 특징을 중심으로 인기 맵과 최신 맵을 비교해 보세요.
- 등록 맵
- 5개
- 누적 다운로드
- 0
- 누적 조회
- 189
인기 맵
다운로드와 조회 반응이 높은 맵입니다.
포토18웨이 (Photo18Way)
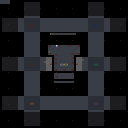
★포토18웨이^_^(성큰아님)★은 스타크래프트 브루드워의 유즈맵으로, 디펜스 장르의 대표적인 맵 중 하나로 꼽힌다. 맵 이름은 '포토'라는 단어와 '18웨이'가 조합되어 있어 다소 독특한 느낌을 주지만, 실제 플레이에서는 중앙에 위치한 건물을 surrounded(둘러싸는) 방식으로 방어하는 구조가 특징이다. 맵의 가운데에 위치한 주 건물 주변으로 여러 개의 입구가 있으며, 각 입구는 좁고 복잡한 길로 연결되어 있다. 이 구조는 적의 공격을 효과적으로 차단하고, 아군의 방어선을 구축하기에 최적화되어 있다. 특히 맵 좌우에 위치한 넓은 공간은 방어 건물이나 유닛을 배치하기에 적합하며, 중앙 건물의 후방으로 연결된 통로는 기습 방어에 유용하게 활용할 수 있다. 맵의 전체적인 분위기는 우주 테마를 기반으로 하고 있으며, 어두운 색조의 타일셋이 어우러져 전략적 긴장감을 높인다. 플레이어는 초반에 자원을 충분히 확보한 후, 방어 건물이나 보조 유닛을 배치하여 적의 공격을 방어해야 한다. 맵의 난이도는 입구 수와 길의 복잡성에 따라 달라지며, 초보자의 경우 방어 라인을 쉽게 구축하기 어려울 수 있어, 적절한 전략과 조합이 요구된다. 이 맵은 특히 방어에 집중된 플레이를 선호하는 유저들에게 적합하며, 팀 플레이보다는 개인 또는 소규모 그룹의 방어에 최적화되어 있다. 맵의 이름에 '성큰아님'이라는 주석이 포함되어 있는 점으로 보아, 성큰 콜로니를 중심으로 한 다른 디펜스 맵과의 차별점을 강조한 것으로 추정된다. 플레이 전에는 각 입구의宽度와 길의 복잡성을 미리 확인하고, 방어 건물의 배치와 유닛 조합을 신중히 계획하는 것이 중요하다. 또한, 맵의 넓은 공간을 활용한Resource gathering도 고려해볼 만하다. This StarCraft: Brood War custom map, titled ★포토18웨이^_^(성큰아님)★, stands out as a classic defense genre map. The name combines '포토' and '18웨이,' suggesting 18 distinct entry points or pathways surrounding the central structure. The map features a central building surrounded by multiple narrow and intricate paths, forcing players to strategically block enemy advances. The left and right expanses provide ample space for defensive structures or unit placements, while the rear corridors allow for counterattacks or reinforcements. The cosmic-themed tile set, with its dark tones, enhances the strategic depth and intensity of the gameplay. Players must gather resources efficiently in the early stages before deploying defense buildings or support units to fend off waves of attacks. The difficulty varies based on the number of entry points and path complexity, making it challenging for beginners to establish a solid defense line without careful planning. This map is ideal for players who enjoy defense-focused gameplay, particularly in solo or small-group scenarios rather than large-scale team battles. The note '성큰아님' in the title hints at a deliberate distinction from maps centered around the Zerg's Sunken Colony. Before playing, it's crucial to assess the width and complexity of each entry point and plan the placement of defensive structures and unit compositions meticulously. Additionally, leveraging the map's spacious areas for resource collection can provide a strategic advantage during gameplay.
하이드라리스크 공격 40,002 HARD! (Hydralisk Attack 40,002 HARD!)
‘하이드라리스크 공격 40,002 HARD!’는 스타크래프트 브루드워의 디펜스 장르 유즈맵으로, 플레이어들이 끊임없이 쏟아지는 저글링과 히드라리스크 무리를 상대로 기지를 지켜내는 것이 목표인 컴까기 형식의 맵이다. 맵은 가로로 길게 펼쳐진 구조로, 중앙에 위치한 플레이어 기지에서 시작하여 좌측과 우측으로 적의 유닛들이 끊임없이 몰려온다. 맵의 레이아웃은 중앙에 좁은 통로를 두고 좌우로 넓은 평지가 펼쳐져 있으며, 각 평지에는 방어 건물 설치가 가능한 위치가 배치되어 있다. 플레이어는 초반에 제공되는 미네랄과 가스를 바탕으로 방어 건물을 건설하고,随着时间的推移, 점점 강해지는 적의 공세를 막아내야 한다. 특히 ‘HARD!’라는 제목에서 알 수 있듯이 난이도가 상당히 높은 편으로, 초반의 소규모 웨이브를 넘기더라도 중반 이후에는 한 번에 수십 마리의 적 유닛이 쏟아지는 경우가 빈번하다. 맵의 특징 중 하나는 적 유닛의 종류와 수량이 무작위로 조절되지 않고, 일정한 패턴에 따라 지속적으로 공격한다는 점이다. 이는 플레이어에게 긴장감을 높이며, 방어 전술을 끊임없이 변화시켜야 한다는 도전 과제를 제공한다. 또한, 맵 중앙에는 보급고와 같은 자원 건물들이 배치되어 있어, 자원 관리를 통해 방어 라인을 강화할 수 있는 전략적 요소가 포함되어 있다. 이 맵은 스타크래프트의 기본 디펜스 맵과는 달리, 한정된 공간에서 다수의 적을 상대해야 하며, 방어 건물의 배치와 업그레이드, 그리고 유닛의 조합이 필수적으로 요구된다. 따라서 초보자보다는 중급 이상 플레이어에게 적합한 맵으로, 디펜스와 전략적 사고를 동시에 요구하는 점에서 흥미로운 경험을 제공한다. 플레이 전에는 방어 건물의 종류와 업그레이드 가능 여부, 그리고 적의 유닛 조합에 대한 기본적인 이해가 필요하며, 특히 후반부로 갈수록 적의 공격 패턴이 다양해지므로 미리 대비하는 것이 중요하다. 또한, 맵의 길이가 상당히 길기 때문에 장시간 플레이에 대비한 체력과 집중력도 요구된다. 이 맵을 즐기기 위해서는 스타크래프트의 기본 조작법과 빌드 오더에 익숙해야 하며, 디펜스 맵에 대한 기본적인 이해가 필수적이다. 특히 ‘HARD!’ 모드에서는 적의 공격력이 급격히 상승하므로, 방어 건물의 배치와 유닛의 조합을 신중히 결정해야 한다. 또한, 맵의 넓이가 넓어 시야 확인이 중요하므로, 미네랄을 최대한 활용하여 시야 확보와 방어 라인 구축을 동시에 진행해야 한다. 이 맵은 디펜스 유즈맵의 정석적인 재미와 더불어, 긴장감과 전략적 깊이를 제공하는佳作로 평가할 수 있다. ‘Hydralisk Rush 40,002 HARD!’ is a StarCraft: Brood War defense-style custom map where players must defend their base against endless waves of Zerglings and Hydralisks. The map features a long horizontal layout, with players starting at a central base while enemies continuously swarm in from both the left and right sides. The terrain consists of narrow central pathways flanked by wide open plains, where defensive structures can be placed. Players begin with a set amount of minerals and gas, using them to build defenses while gradually fending off increasingly powerful enemy assaults. As the title suggests, the difficulty is exceptionally high—even after surviving the early small-scale waves, players will frequently face waves of dozens of enemy units in the mid-to-late game. A key feature of the map is its structured enemy spawns: instead of random unit types and quantities, enemies follow a fixed pattern, adding tension and forcing players to adapt their defensive strategies constantly. Additionally, resource buildings like supply depots are placed in the center, allowing players to reinforce their defenses through resource management. Unlike traditional StarCraft defense maps, this one demands players to handle large numbers of enemies in confined spaces, requiring careful building placement, upgrades, and unit compositions. As such, it’s best suited for intermediate to advanced players rather than beginners, offering an engaging challenge that tests both defensive skills and strategic thinking. Before playing, it’s essential to understand the available defensive structures, their upgrade paths, and the enemy’s unit compositions—especially since late-game waves become more varied and unpredictable. The map’s length also demands stamina and focus, as sessions can be quite lengthy. To enjoy this map fully, players should be familiar with StarCraft’s basic controls, build orders, and core defense-map mechanics. In ‘HARD!’ mode, enemy attack power spikes dramatically, so defensive layouts and unit choices must be carefully planned. Given the map’s wide open areas, scouting and vision control are crucial—players should maximize mineral usage to secure vision while reinforcing their defenses. Combining classic defense-map fun with high tension and deep strategy, this is truly a masterpiece worth trying.
![-터렛 M 디펜스 XP (-Turret-[]M[]-Defense- XP) 맵 미리보기](https://cdn-star-data.huzy.net/thumbnail_e52544ddc085467abf72de3f763864ac.jpg)
-터렛 M 디펜스 XP (-Turret-[]M[]-Defense- XP)
스타크래프트 브루드워의 대표적인 디펜스 장르 유즈맵인 ‘-Turret-[]M[]-Defense- XP’는 플레이어에게 끊임없는 전략적 선택과 긴장감을 제공하는 컴까기 디펜스 맵이다. 이 맵은 ‘Turret M Defense’라는 원제에 XP 버전으로 개선된 요소들이 추가되어, 기존의 디펜스 맵과는 차별화된 플레이 경험을 선사한다. 맵의 구성은 중앙에 위치한 방어 타워와 주변을 둘러싼 입구들로 나뉘며, 다양한 유닛과 공격 패턴을 가진 적들이 끊임없이 몰려온다. 특히 ‘XP’ 버전은 난이도를 한층 높인 수정 사항들이 포함되어 있어, 초보자는 물론 숙련자까지도 긴장감을 놓칠 수 없게 만든다.Warning: Very Hard! Experts Only!라는 내부 설명에서도 알 수 있듯, 이 맵은 매우 어려운 난이도를 자랑하며, 오직 전문가만을 위한 도전 과제로 설계되었다고 볼 수 있다. 플레이어는 제한된 자원과 시간 속에서 방어 타워를 건설하고 업그레이드해야 하며, 동시에 들어오는 적의 공격을 효과적으로 차단해야 한다. 맵의 구조는 비교적 단순해 보이지만, 적의 공격 패턴과 타이밍이 복잡하게 짜여져 있어 전략적인 대처가 요구된다. 예를 들어, 특정 시점에는 대규모의 공중 유닛이, 다른 시점에는 지상 유닛의 조합이 공격해 오며, 이들을 효율적으로 방어하기 위해서는Resource Management(자원 관리)와 Unit Positioning(유닛 배치)이 핵심이다. 또한, 맵의 끝부분에는 ‘XP’ 버전 특유의 추가적인 방어 지점이 존재하며, 이곳을 어떻게 활용하느냐에 따라 전체적인 방어 성공 여부가 갈릴 수 있다. 이 맵은 초보자보다는 중상급 이상의 플레이어에게 적합하며, 디펜스 장르에 익숙한 유저라면 특히 도전해 볼 만한 가치가 있다. 맵의 난이도가 높기 때문에 플레이 전에는 내부 설명과 함께 제공되는 팁을 숙지하는 것이 중요하다. 또한, 방어 타워의 배치와 업그레이드 타이밍을 연습할 수 있는 연습 모드를 제공한다면 더할 나위 없이 좋을 것이다. ‘-Turret-[]M[]-Defense- XP’는 단순히 방어하는 것을 넘어, 전략적 사고와 순간적인 판단력이 요구되는 맵으로, 스타크래프트 유즈맵의 정수를 느낄 수 있는 작품 중 하나다. Starcraft: Brood War’s classic defense genre custom map, “-Turret-[]M[]-Defense- XP,” delivers a nonstop stream of strategic choices and nail-biting tension in a tower-defense format. An evolved “XP” iteration of the original “Turret M Defense,” it layers on fresh mechanics that set it apart from ordinary defense maps. The layout splits into a central defensive tower surrounded by multiple entry points, all under constant assault from waves of enemies sporting diverse unit compositions and attack patterns. The “XP” tweaks crank up the difficulty even further, keeping both newcomers and veterans on the edge of their seats—evidenced by the internal warning “Very Hard! Experts Only!” Players must erect and upgrade towers under tight resource and time constraints while fending off relentless waves. Despite the map’s straightforward appearance, the enemies’ intricate attack schedules demand sharp, adaptable strategy. Massive air strikes may hit at one moment, while ground-force mixes strike the next; success hinges on tight resource management and precise unit positioning. A late-game “XP” addition introduces extra defensive chokepoints whose strategic use can tip the balance between victory and defeat. Though the map is punishing, it rewards players who already have a solid grasp of defense mechanics. Anyone comfortable with the genre will find it a worthy challenge. Before jumping in, study the internal tips and notes, since the difficulty leaves little room for error. A dedicated practice mode for tower placement and upgrade timing would be the icing on the cake. Ultimately, “-Turret-[]M[]-Defense- XP” transcends mere fortification—it’s a test of forward planning and split-second decisions, standing as one of Starcraft’s finest custom-map creations.
RP - 페이버른 v1.80 (RP - Fèyvern v1.80)
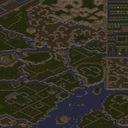
RP - Fèyvern v1.80은 스타크래프트: 브루드워의 유즈맵으로, 사막 테마의 광활한 맵에서 펼쳐지는 전략적 디펜스 장르의 숨은 보석이다. 이 맵은 플레이어가 끊임없이 몰려오는 적 무리를 상대로 요새를 지켜내야 하는 구조로, 방어선 구축과 자원 관리의 균형을 중시하는 플레이 경험을 제공한다. 맵의 특징은 넓고 복잡한 지형으로, 사막의 언덕과 골짜기가 자연스럽게 방어 거점을 형성하며, 이는 플레이어에게 전략적인 배치와 진형 유지를 요구한다. 특히 사막 타일셋의 황량한 분위기와 어우러진 맵 디자인은 플레이어의 긴장감을 고조시키며, 방어에 성공했을 때의 성취감을 극대화한다. 이 맵은 6인 플레이를 상정하고 있으며, 각 플레이어는 중앙에 위치한 주요 건물을 중심으로 방어선을 구축해야 한다. 맵의 규모가 크고 타일 단위가 넓어(256x256) 시야 확보와 기지 확장이 중요한 요소로 작용한다. 또한, 맵에 배치된 특수 효과와 확장된 지형은 단순히 방어만 하는 것이 아니라, 능동적인 공격과Resource management가 요구되는 구조로 설계되어 있다. 맵의 제목에 등장하는 'Fèyvern'은 피어나는(Fey) 용(Dragon)을 연상시키는 이름으로, 아마도 맵의 컨셉이나 스토리를 상징하는 것으로 추정된다. RP - Fèyvern v1.80은 특히 방어와 자원 관리 능력이 뛰어난 플레이어들에게 추천되며, 넓은 맵과 복잡한 지형을 활용한 전략적 플레이를 즐기는 유저들에게 최적의 경험을 제공할 것이다. 또한, 사막 분위기의 독특한 시각적 요소와 긴장감 넘치는 전투가 어우러져, 단순 반복 플레이를 넘어 진정한 전략적 깊이를 느낄 수 있는 맵이다. 플레이 전에는 맵의 크기와 지형 특성을 충분히 숙지하고, 방어선 배치와 자원 관리에 대한 계획을 미리 세워두는 것이 중요하다. RP - Fèyvern v1.80 is a hidden gem among StarCraft: Brood War custom maps, offering a strategic defense experience set in a vast desert-themed map. The gameplay revolves around protecting your stronghold against relentless waves of enemies, emphasizing base construction and resource management. The map's defining feature is its expansive and intricate terrain, where desert hills and valleys naturally form defensive positions, challenging players to carefully position their units and maintain formations. Designed for up to 6 players, the map centers around each player's main building, where they must establish and fortify their defenses. The large scale of the map (8192x8192 with 256x256 tiles) demands strategic placement of structures and units, as well as vigilant resource management. The special effects and extended terrain add depth to the gameplay, transforming it from a passive defense into an active strategy that requires both offensive and defensive prowess. The name 'Fèyvern' hints at a concept involving dragons (from 'Fey' meaning magical or fairy-like and 'dragon'), suggesting a thematic or narrative element that enhances immersion. RP - Fèyvern v1.80 is highly recommended for players who excel in defense and resource management, as well as those who enjoy strategic gameplay in expansive, complex terrains. The unique desert aesthetic, combined with intense combat scenarios, ensures a memorable experience beyond mere repetitive play. Before diving in, players should familiarize themselves with the map's scale and terrain features, and plan their defense lines and resource strategies in advance to maximize their chances of success.
YsTiC 디펜스 XP7.4 (YsTiC Defense XP7.4)
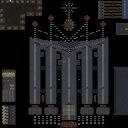
스타크래프트 브루드워의 디펜스 장르 유즈맵인 '/\/\YsTiC DeFeNSe XP7.4'는 오랜 시간 동안 사랑받아온Classic 디펜스 맵의 최신 버전으로, 고전적인 디펜스 구조에 다양한 전략적 요소와 업그레이드 시스템을 더해 플레이어들에게 긴장감 넘치는 전투를 제공합니다. 맵은 중앙에 위치한 본진을 보호하며 끊임없이 몰려오는 적 웨이브를 막아내는 것이 주요 목표로, 중앙 통로와 외곽 지역을 오가며 방어 건물을 배치하고 자원을 관리해야 합니다. 특히 XP7.4 버전은 기존 버전의 문제점을 개선한 후속작으로, 밸런스 조절과 새로운 유닛, 업그레이드 옵션이 추가되어 더 풍부한 전략적 선택지를 제공합니다. 플레이어는 맵 곳곳에 흩어져 있는 자원 건물을 확보해 방어 건물을 건설하고, 적의 공격 패턴에 맞춰 유닛을 배치하거나 업그레이드해야 합니다. 맵의 좌우 대칭 구조와 중앙 통로가 좁아지는 지형은 방어의 핵심 포인트로, 이곳을 어떻게 관리하느냐에 따라 게임의 승패가 갈립니다. 또한, периодически 등장하는 특수 웨이브나 보스 유닛은 추가적인 전략을 요구하며, 플레이어 간의 협동이나 경쟁 요소가 있는지는 맵 설명만으로는确切히 판단하기 어렵습니다. 맵의 분위기는 어둡고 몰입감 있는 그래픽으로 구성되어 있으며, 적의 공격을 효과적으로 방어하는 재미와 긴장감을 동시에 느낄 수 있습니다. 이 맵은 디펜스 장르에 익숙한 플레이어는 물론, 전략적 사고와 자원 관리를 즐기는 모든 스타크래프트 유저에게 추천할 만합니다. 특히, 고전 디펜스 맵의 재미를 계승하면서도 새로운 요소들을 추가한 점은 이 버전의 큰 장점입니다. 다만, 맵의 난이도와 길이는 버전별로 상이할 수 있으니, 플레이 전 미리 확인해보는 것이 좋습니다. 이 맵을 즐기기 위해서는 방어 건물의 배치와 업그레이드 타이밍을 신중히 계획하는 전략적 접근이 필수적입니다. This classic StarCraft: Brood War defense custom map, '/\/\YsTiC DeFeNSe XP7.4', represents the latest evolution of a long-standing strategy genre favorite. The core gameplay revolves around protecting your central base from relentless enemy waves while strategically placing defensive structures and managing resources across the map. The XP7.4 version introduces refined balance adjustments, new unit types, and upgrade systems that significantly expand tactical possibilities compared to earlier iterations. Players must navigate a symmetrical layout with a narrow central corridor, which serves as the primary chokepoint for defense. Resource nodes scattered throughout the map allow for construction of defensive buildings, while periodic special waves and boss units demand adaptive strategies. The dark, immersive aesthetic enhances the tension of each battle, though cooperative or competitive multiplayer elements cannot be determined from the available information. Ideal for both seasoned defense map veterans and players who enjoy strategic resource management, '/\/\YsTiC DeFeNSe XP7.4' delivers a satisfying blend of tension and tactical depth. The addition of new mechanics while preserving the core defense gameplay makes this version particularly appealing. Players should note that difficulty and duration may vary between versions, so verifying these details beforehand is recommended. Success hinges on careful planning of structure placement and timely upgrades, making it a rewarding challenge for strategic thinkers.
최근 등록된 맵
새로 추가된 파일과 버전을 확인하세요.
-터렛 M 디펜스 XP (-Turret-[]M[]-Defense- XP)
스타크래프트 브루드워의 대표적인 디펜스 장르 유즈맵인 ‘-Turret-[]M[]-Defense- XP’는 플레이어에게 끊임없는 전략적 선택과 긴장감을 제공하는 컴까기 디펜스 맵이다. 이 맵은 ‘Turret M Defense’라는 원제에 XP 버전으로 개선된 요소들이 추가되어, 기존의 디펜스 맵과는 차별화된 플레이 경험을 선사한다. 맵의 구성은 중앙에 위치한 방어 타워와 주변을 둘러싼 입구들로 나뉘며, 다양한 유닛과 공격 패턴을 가진 적들이 끊임없이 몰려온다. 특히 ‘XP’ 버전은 난이도를 한층 높인 수정 사항들이 포함되어 있어, 초보자는 물론 숙련자까지도 긴장감을 놓칠 수 없게 만든다.Warning: Very Hard! Experts Only!라는 내부 설명에서도 알 수 있듯, 이 맵은 매우 어려운 난이도를 자랑하며, 오직 전문가만을 위한 도전 과제로 설계되었다고 볼 수 있다. 플레이어는 제한된 자원과 시간 속에서 방어 타워를 건설하고 업그레이드해야 하며, 동시에 들어오는 적의 공격을 효과적으로 차단해야 한다. 맵의 구조는 비교적 단순해 보이지만, 적의 공격 패턴과 타이밍이 복잡하게 짜여져 있어 전략적인 대처가 요구된다. 예를 들어, 특정 시점에는 대규모의 공중 유닛이, 다른 시점에는 지상 유닛의 조합이 공격해 오며, 이들을 효율적으로 방어하기 위해서는Resource Management(자원 관리)와 Unit Positioning(유닛 배치)이 핵심이다. 또한, 맵의 끝부분에는 ‘XP’ 버전 특유의 추가적인 방어 지점이 존재하며, 이곳을 어떻게 활용하느냐에 따라 전체적인 방어 성공 여부가 갈릴 수 있다. 이 맵은 초보자보다는 중상급 이상의 플레이어에게 적합하며, 디펜스 장르에 익숙한 유저라면 특히 도전해 볼 만한 가치가 있다. 맵의 난이도가 높기 때문에 플레이 전에는 내부 설명과 함께 제공되는 팁을 숙지하는 것이 중요하다. 또한, 방어 타워의 배치와 업그레이드 타이밍을 연습할 수 있는 연습 모드를 제공한다면 더할 나위 없이 좋을 것이다. ‘-Turret-[]M[]-Defense- XP’는 단순히 방어하는 것을 넘어, 전략적 사고와 순간적인 판단력이 요구되는 맵으로, 스타크래프트 유즈맵의 정수를 느낄 수 있는 작품 중 하나다. Starcraft: Brood War’s classic defense genre custom map, “-Turret-[]M[]-Defense- XP,” delivers a nonstop stream of strategic choices and nail-biting tension in a tower-defense format. An evolved “XP” iteration of the original “Turret M Defense,” it layers on fresh mechanics that set it apart from ordinary defense maps. The layout splits into a central defensive tower surrounded by multiple entry points, all under constant assault from waves of enemies sporting diverse unit compositions and attack patterns. The “XP” tweaks crank up the difficulty even further, keeping both newcomers and veterans on the edge of their seats—evidenced by the internal warning “Very Hard! Experts Only!” Players must erect and upgrade towers under tight resource and time constraints while fending off relentless waves. Despite the map’s straightforward appearance, the enemies’ intricate attack schedules demand sharp, adaptable strategy. Massive air strikes may hit at one moment, while ground-force mixes strike the next; success hinges on tight resource management and precise unit positioning. A late-game “XP” addition introduces extra defensive chokepoints whose strategic use can tip the balance between victory and defeat. Though the map is punishing, it rewards players who already have a solid grasp of defense mechanics. Anyone comfortable with the genre will find it a worthy challenge. Before jumping in, study the internal tips and notes, since the difficulty leaves little room for error. A dedicated practice mode for tower placement and upgrade timing would be the icing on the cake. Ultimately, “-Turret-[]M[]-Defense- XP” transcends mere fortification—it’s a test of forward planning and split-second decisions, standing as one of Starcraft’s finest custom-map creations.
RP - 페이버른 v1.80 (RP - Fèyvern v1.80)
RP - Fèyvern v1.80은 스타크래프트: 브루드워의 유즈맵으로, 사막 테마의 광활한 맵에서 펼쳐지는 전략적 디펜스 장르의 숨은 보석이다. 이 맵은 플레이어가 끊임없이 몰려오는 적 무리를 상대로 요새를 지켜내야 하는 구조로, 방어선 구축과 자원 관리의 균형을 중시하는 플레이 경험을 제공한다. 맵의 특징은 넓고 복잡한 지형으로, 사막의 언덕과 골짜기가 자연스럽게 방어 거점을 형성하며, 이는 플레이어에게 전략적인 배치와 진형 유지를 요구한다. 특히 사막 타일셋의 황량한 분위기와 어우러진 맵 디자인은 플레이어의 긴장감을 고조시키며, 방어에 성공했을 때의 성취감을 극대화한다. 이 맵은 6인 플레이를 상정하고 있으며, 각 플레이어는 중앙에 위치한 주요 건물을 중심으로 방어선을 구축해야 한다. 맵의 규모가 크고 타일 단위가 넓어(256x256) 시야 확보와 기지 확장이 중요한 요소로 작용한다. 또한, 맵에 배치된 특수 효과와 확장된 지형은 단순히 방어만 하는 것이 아니라, 능동적인 공격과Resource management가 요구되는 구조로 설계되어 있다. 맵의 제목에 등장하는 'Fèyvern'은 피어나는(Fey) 용(Dragon)을 연상시키는 이름으로, 아마도 맵의 컨셉이나 스토리를 상징하는 것으로 추정된다. RP - Fèyvern v1.80은 특히 방어와 자원 관리 능력이 뛰어난 플레이어들에게 추천되며, 넓은 맵과 복잡한 지형을 활용한 전략적 플레이를 즐기는 유저들에게 최적의 경험을 제공할 것이다. 또한, 사막 분위기의 독특한 시각적 요소와 긴장감 넘치는 전투가 어우러져, 단순 반복 플레이를 넘어 진정한 전략적 깊이를 느낄 수 있는 맵이다. 플레이 전에는 맵의 크기와 지형 특성을 충분히 숙지하고, 방어선 배치와 자원 관리에 대한 계획을 미리 세워두는 것이 중요하다. RP - Fèyvern v1.80 is a hidden gem among StarCraft: Brood War custom maps, offering a strategic defense experience set in a vast desert-themed map. The gameplay revolves around protecting your stronghold against relentless waves of enemies, emphasizing base construction and resource management. The map's defining feature is its expansive and intricate terrain, where desert hills and valleys naturally form defensive positions, challenging players to carefully position their units and maintain formations. Designed for up to 6 players, the map centers around each player's main building, where they must establish and fortify their defenses. The large scale of the map (8192x8192 with 256x256 tiles) demands strategic placement of structures and units, as well as vigilant resource management. The special effects and extended terrain add depth to the gameplay, transforming it from a passive defense into an active strategy that requires both offensive and defensive prowess. The name 'Fèyvern' hints at a concept involving dragons (from 'Fey' meaning magical or fairy-like and 'dragon'), suggesting a thematic or narrative element that enhances immersion. RP - Fèyvern v1.80 is highly recommended for players who excel in defense and resource management, as well as those who enjoy strategic gameplay in expansive, complex terrains. The unique desert aesthetic, combined with intense combat scenarios, ensures a memorable experience beyond mere repetitive play. Before diving in, players should familiarize themselves with the map's scale and terrain features, and plan their defense lines and resource strategies in advance to maximize their chances of success.
YsTiC 디펜스 XP7.4 (YsTiC Defense XP7.4)
스타크래프트 브루드워의 디펜스 장르 유즈맵인 '/\/\YsTiC DeFeNSe XP7.4'는 오랜 시간 동안 사랑받아온Classic 디펜스 맵의 최신 버전으로, 고전적인 디펜스 구조에 다양한 전략적 요소와 업그레이드 시스템을 더해 플레이어들에게 긴장감 넘치는 전투를 제공합니다. 맵은 중앙에 위치한 본진을 보호하며 끊임없이 몰려오는 적 웨이브를 막아내는 것이 주요 목표로, 중앙 통로와 외곽 지역을 오가며 방어 건물을 배치하고 자원을 관리해야 합니다. 특히 XP7.4 버전은 기존 버전의 문제점을 개선한 후속작으로, 밸런스 조절과 새로운 유닛, 업그레이드 옵션이 추가되어 더 풍부한 전략적 선택지를 제공합니다. 플레이어는 맵 곳곳에 흩어져 있는 자원 건물을 확보해 방어 건물을 건설하고, 적의 공격 패턴에 맞춰 유닛을 배치하거나 업그레이드해야 합니다. 맵의 좌우 대칭 구조와 중앙 통로가 좁아지는 지형은 방어의 핵심 포인트로, 이곳을 어떻게 관리하느냐에 따라 게임의 승패가 갈립니다. 또한, периодически 등장하는 특수 웨이브나 보스 유닛은 추가적인 전략을 요구하며, 플레이어 간의 협동이나 경쟁 요소가 있는지는 맵 설명만으로는确切히 판단하기 어렵습니다. 맵의 분위기는 어둡고 몰입감 있는 그래픽으로 구성되어 있으며, 적의 공격을 효과적으로 방어하는 재미와 긴장감을 동시에 느낄 수 있습니다. 이 맵은 디펜스 장르에 익숙한 플레이어는 물론, 전략적 사고와 자원 관리를 즐기는 모든 스타크래프트 유저에게 추천할 만합니다. 특히, 고전 디펜스 맵의 재미를 계승하면서도 새로운 요소들을 추가한 점은 이 버전의 큰 장점입니다. 다만, 맵의 난이도와 길이는 버전별로 상이할 수 있으니, 플레이 전 미리 확인해보는 것이 좋습니다. 이 맵을 즐기기 위해서는 방어 건물의 배치와 업그레이드 타이밍을 신중히 계획하는 전략적 접근이 필수적입니다. This classic StarCraft: Brood War defense custom map, '/\/\YsTiC DeFeNSe XP7.4', represents the latest evolution of a long-standing strategy genre favorite. The core gameplay revolves around protecting your central base from relentless enemy waves while strategically placing defensive structures and managing resources across the map. The XP7.4 version introduces refined balance adjustments, new unit types, and upgrade systems that significantly expand tactical possibilities compared to earlier iterations. Players must navigate a symmetrical layout with a narrow central corridor, which serves as the primary chokepoint for defense. Resource nodes scattered throughout the map allow for construction of defensive buildings, while periodic special waves and boss units demand adaptive strategies. The dark, immersive aesthetic enhances the tension of each battle, though cooperative or competitive multiplayer elements cannot be determined from the available information. Ideal for both seasoned defense map veterans and players who enjoy strategic resource management, '/\/\YsTiC DeFeNSe XP7.4' delivers a satisfying blend of tension and tactical depth. The addition of new mechanics while preserving the core defense gameplay makes this version particularly appealing. Players should note that difficulty and duration may vary between versions, so verifying these details beforehand is recommended. Success hinges on careful planning of structure placement and timely upgrades, making it a rewarding challenge for strategic thinkers.
포토18웨이 (Photo18Way)
★포토18웨이^_^(성큰아님)★은 스타크래프트 브루드워의 유즈맵으로, 디펜스 장르의 대표적인 맵 중 하나로 꼽힌다. 맵 이름은 '포토'라는 단어와 '18웨이'가 조합되어 있어 다소 독특한 느낌을 주지만, 실제 플레이에서는 중앙에 위치한 건물을 surrounded(둘러싸는) 방식으로 방어하는 구조가 특징이다. 맵의 가운데에 위치한 주 건물 주변으로 여러 개의 입구가 있으며, 각 입구는 좁고 복잡한 길로 연결되어 있다. 이 구조는 적의 공격을 효과적으로 차단하고, 아군의 방어선을 구축하기에 최적화되어 있다. 특히 맵 좌우에 위치한 넓은 공간은 방어 건물이나 유닛을 배치하기에 적합하며, 중앙 건물의 후방으로 연결된 통로는 기습 방어에 유용하게 활용할 수 있다. 맵의 전체적인 분위기는 우주 테마를 기반으로 하고 있으며, 어두운 색조의 타일셋이 어우러져 전략적 긴장감을 높인다. 플레이어는 초반에 자원을 충분히 확보한 후, 방어 건물이나 보조 유닛을 배치하여 적의 공격을 방어해야 한다. 맵의 난이도는 입구 수와 길의 복잡성에 따라 달라지며, 초보자의 경우 방어 라인을 쉽게 구축하기 어려울 수 있어, 적절한 전략과 조합이 요구된다. 이 맵은 특히 방어에 집중된 플레이를 선호하는 유저들에게 적합하며, 팀 플레이보다는 개인 또는 소규모 그룹의 방어에 최적화되어 있다. 맵의 이름에 '성큰아님'이라는 주석이 포함되어 있는 점으로 보아, 성큰 콜로니를 중심으로 한 다른 디펜스 맵과의 차별점을 강조한 것으로 추정된다. 플레이 전에는 각 입구의宽度와 길의 복잡성을 미리 확인하고, 방어 건물의 배치와 유닛 조합을 신중히 계획하는 것이 중요하다. 또한, 맵의 넓은 공간을 활용한Resource gathering도 고려해볼 만하다. This StarCraft: Brood War custom map, titled ★포토18웨이^_^(성큰아님)★, stands out as a classic defense genre map. The name combines '포토' and '18웨이,' suggesting 18 distinct entry points or pathways surrounding the central structure. The map features a central building surrounded by multiple narrow and intricate paths, forcing players to strategically block enemy advances. The left and right expanses provide ample space for defensive structures or unit placements, while the rear corridors allow for counterattacks or reinforcements. The cosmic-themed tile set, with its dark tones, enhances the strategic depth and intensity of the gameplay. Players must gather resources efficiently in the early stages before deploying defense buildings or support units to fend off waves of attacks. The difficulty varies based on the number of entry points and path complexity, making it challenging for beginners to establish a solid defense line without careful planning. This map is ideal for players who enjoy defense-focused gameplay, particularly in solo or small-group scenarios rather than large-scale team battles. The note '성큰아님' in the title hints at a deliberate distinction from maps centered around the Zerg's Sunken Colony. Before playing, it's crucial to assess the width and complexity of each entry point and plan the placement of defensive structures and unit compositions meticulously. Additionally, leveraging the map's spacious areas for resource collection can provide a strategic advantage during gameplay.
하이드라리스크 공격 40,002 HARD! (Hydralisk Attack 40,002 HARD!)
‘하이드라리스크 공격 40,002 HARD!’는 스타크래프트 브루드워의 디펜스 장르 유즈맵으로, 플레이어들이 끊임없이 쏟아지는 저글링과 히드라리스크 무리를 상대로 기지를 지켜내는 것이 목표인 컴까기 형식의 맵이다. 맵은 가로로 길게 펼쳐진 구조로, 중앙에 위치한 플레이어 기지에서 시작하여 좌측과 우측으로 적의 유닛들이 끊임없이 몰려온다. 맵의 레이아웃은 중앙에 좁은 통로를 두고 좌우로 넓은 평지가 펼쳐져 있으며, 각 평지에는 방어 건물 설치가 가능한 위치가 배치되어 있다. 플레이어는 초반에 제공되는 미네랄과 가스를 바탕으로 방어 건물을 건설하고,随着时间的推移, 점점 강해지는 적의 공세를 막아내야 한다. 특히 ‘HARD!’라는 제목에서 알 수 있듯이 난이도가 상당히 높은 편으로, 초반의 소규모 웨이브를 넘기더라도 중반 이후에는 한 번에 수십 마리의 적 유닛이 쏟아지는 경우가 빈번하다. 맵의 특징 중 하나는 적 유닛의 종류와 수량이 무작위로 조절되지 않고, 일정한 패턴에 따라 지속적으로 공격한다는 점이다. 이는 플레이어에게 긴장감을 높이며, 방어 전술을 끊임없이 변화시켜야 한다는 도전 과제를 제공한다. 또한, 맵 중앙에는 보급고와 같은 자원 건물들이 배치되어 있어, 자원 관리를 통해 방어 라인을 강화할 수 있는 전략적 요소가 포함되어 있다. 이 맵은 스타크래프트의 기본 디펜스 맵과는 달리, 한정된 공간에서 다수의 적을 상대해야 하며, 방어 건물의 배치와 업그레이드, 그리고 유닛의 조합이 필수적으로 요구된다. 따라서 초보자보다는 중급 이상 플레이어에게 적합한 맵으로, 디펜스와 전략적 사고를 동시에 요구하는 점에서 흥미로운 경험을 제공한다. 플레이 전에는 방어 건물의 종류와 업그레이드 가능 여부, 그리고 적의 유닛 조합에 대한 기본적인 이해가 필요하며, 특히 후반부로 갈수록 적의 공격 패턴이 다양해지므로 미리 대비하는 것이 중요하다. 또한, 맵의 길이가 상당히 길기 때문에 장시간 플레이에 대비한 체력과 집중력도 요구된다. 이 맵을 즐기기 위해서는 스타크래프트의 기본 조작법과 빌드 오더에 익숙해야 하며, 디펜스 맵에 대한 기본적인 이해가 필수적이다. 특히 ‘HARD!’ 모드에서는 적의 공격력이 급격히 상승하므로, 방어 건물의 배치와 유닛의 조합을 신중히 결정해야 한다. 또한, 맵의 넓이가 넓어 시야 확인이 중요하므로, 미네랄을 최대한 활용하여 시야 확보와 방어 라인 구축을 동시에 진행해야 한다. 이 맵은 디펜스 유즈맵의 정석적인 재미와 더불어, 긴장감과 전략적 깊이를 제공하는佳作로 평가할 수 있다. ‘Hydralisk Rush 40,002 HARD!’ is a StarCraft: Brood War defense-style custom map where players must defend their base against endless waves of Zerglings and Hydralisks. The map features a long horizontal layout, with players starting at a central base while enemies continuously swarm in from both the left and right sides. The terrain consists of narrow central pathways flanked by wide open plains, where defensive structures can be placed. Players begin with a set amount of minerals and gas, using them to build defenses while gradually fending off increasingly powerful enemy assaults. As the title suggests, the difficulty is exceptionally high—even after surviving the early small-scale waves, players will frequently face waves of dozens of enemy units in the mid-to-late game. A key feature of the map is its structured enemy spawns: instead of random unit types and quantities, enemies follow a fixed pattern, adding tension and forcing players to adapt their defensive strategies constantly. Additionally, resource buildings like supply depots are placed in the center, allowing players to reinforce their defenses through resource management. Unlike traditional StarCraft defense maps, this one demands players to handle large numbers of enemies in confined spaces, requiring careful building placement, upgrades, and unit compositions. As such, it’s best suited for intermediate to advanced players rather than beginners, offering an engaging challenge that tests both defensive skills and strategic thinking. Before playing, it’s essential to understand the available defensive structures, their upgrade paths, and the enemy’s unit compositions—especially since late-game waves become more varied and unpredictable. The map’s length also demands stamina and focus, as sessions can be quite lengthy. To enjoy this map fully, players should be familiar with StarCraft’s basic controls, build orders, and core defense-map mechanics. In ‘HARD!’ mode, enemy attack power spikes dramatically, so defensive layouts and unit choices must be carefully planned. Given the map’s wide open areas, scouting and vision control are crucial—players should maximize mineral usage to secure vision while reinforcing their defenses. Combining classic defense-map fun with high tension and deep strategy, this is truly a masterpiece worth trying.
맵 선택 가이드
태그는 맵의 핵심 특징을 빠르게 설명하지만 제작 버전마다 규칙이 다를 수 있습니다. 상세 설명에서 권장 인원, 난이도, 플레이 시간과 버전을 함께 확인한 뒤 다운로드하세요.