
방어 타워 스타크래프트 맵 모음
'방어 타워' 태그가 등록된 맵을 모았습니다. 장르 하나로 찾기 어려운 플레이 방식, 난이도와 특징을 중심으로 인기 맵과 최신 맵을 비교해 보세요.
- 등록 맵
- 3개
- 누적 다운로드
- 0
- 누적 조회
- 57
인기 맵
다운로드와 조회 반응이 높은 맵입니다.
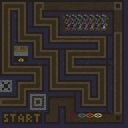
아마징 터렛 디펜스 비사가트 (Amazing Turret Defense Visagot)
‘Amazing Turret Defense Visagot’는 스타크래프트 브루드워의 디펜스 장르 유즈맵으로, 다수의 적 웨이브를 상대로 방어 타워를 건설하고 전략을 펼치는 게임이다. 맵의 전체적인 구조는 중앙에 위치한 기지 주변을 빙 둘러싼 넓은 평지로 구성되어 있으며, 맵 곳곳에 배치된 건설 가능 지역과 자원 수급 포인트를 활용해 방어 체계를 강화할 수 있다. 이 맵은 2048×2048의 넓은 공간을 활용해 여러 개의 방어 라인을 구축할 수 있도록 설계되어 있으며, 특히 맵 좌측 상단에 위치한 큰 공간은 타워 배치와 자원 관리의 핵심적인 역할을 한다. 맵의 배경은 황무지로, 건조한 지형이 타워와 유닛의 움직임을 돋보이게 한다. 플레이어는 시작 시 주어지는 자금을 이용해 초기 타워를 건설한 후, 지속적으로 밀려오는 적 유닛을 상대로 방어선을 유지해야 한다. 적의 공격 패턴은 랜덤한 웨이브 형태로 구성되어 있어, 초반에는 약한 유닛이, 후반부로 갈수록 강력한 조합의 유닛이 등장한다. 방어 타워는 일반적으로 지상 공격형과 공중 공격형으로 나뉘며, 플레이어는 자원의 한계를 고려해 효율적인 타워 배치를 고민해야 한다. 맵의 우측 하단에는 자원 채취가 가능한 구역이 있지만, 제한된 수의 채취 건물이 있어 자원의 효율적 관리가 필수적이다. 또한, 맵의 일부 구역은 지형적 제약으로 인해 타워 건설이 불가능한데, 이러한 지형을 활용해 적의 진격을 방해하거나 우회시킬 수 있다. 이 맵의 가장 큰 특징은 방어 타워의 배치와 자원 관리뿐만 아니라, 맵의 넓은 공간을 활용한 전략적 플레이에 있다. 플레이어는 중앙 기지를 중심으로 한 방어 라인을 구축하면서도, 적의 예상 경로에 따라 타워를 보강하거나 보조 건물을 건설해야 한다. 또한, 맵의 특정 지점에 배치된 특별한 구조물(예: 보호막 생성기나 보급고)은 게임의 흐름을 크게 좌우할 수 있어, 신중한 선택이 요구된다. 맵의 난이도는 초반에는 비교적 쉬운 편이지만, 웨이브가 거듭될수록 적의 공격 패턴이 복잡해지고, 자원의 압박이 커지면서 난이도가 급격히 상승한다. 이 맵은 디펜스 장르에 익숙한 플레이어는 물론, 전략적 사고와 자원 관리에 자신 있는 플레이어에게 추천할 만하다. 특히, 넓은 공간을 활용한 창의적인 방어 전략을 시도해 보고 싶은 유저들에게 적합하며, 친구와 함께 팀 플레이를 즐기기에도 좋다. 단, 초보 플레이어의 경우 타워의 효율적 배치와 자원 관리의 중요성을 충분히 숙지한 후 플레이하는 것이 좋다. 맵의 난이도는 개인차가 있지만, 일반적으로 ‘보통’ 수준으로 평가되며, 7명의 플레이어가 참여할 수 있도록 설계되어 있어 다인 플레이에서도 좋은 시너지를 발휘할 수 있다. Turret placement and resource management are the core mechanics of Amazing Turret Defense Visagot, a StarCraft: Brood War UMS defense map. The map features a spacious 2048×2048 terrain dominated by a barren wasteland, with a central base surrounded by multiple expansion zones. Players start with limited funds and must strategically position ground and air defense towers to fend off increasingly aggressive enemy waves. The map allows for creative tower layouts, with some areas restricted by terrain, forcing players to adapt their defenses accordingly. The gameplay revolves around balancing immediate investments in defenses with long-term resource sustainability. Early waves consist of weaker units, but later stages introduce powerful combinations, requiring players to upgrade or rebuild towers dynamically. Resource nodes are scattered across the map, particularly in the top-left quadrant, where efficient expansion becomes crucial. Some sections feature terrain that blocks tower construction, allowing players to manipulate enemy movement paths or create bottlenecks. Special structures, such as shield generators or supply depots, can provide critical advantages if utilized wisely. This map stands out for its emphasis on strategic depth over pure reflex-based challenges. While the learning curve is moderate, mastering tower placement and timing is essential for survival. The difficulty scales significantly as waves progress, making it ideal for players who enjoy tactical planning and resource optimization. The map supports up to seven players, making it suitable for team-based play, though solo players can also enjoy its challenges. Beginners should familiarize themselves with tower types and resource mechanics before attempting higher difficulties. Overall, it offers a rewarding experience for those who appreciate well-designed defense scenarios in StarCraft.
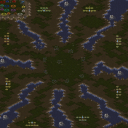
커비 매드니스 eXe- (Kirby Madness eXe-)
스타크래프트: 브루드워의 대표적인 유즈맵 중 하나인 '커비 매드니스 eXe-'는 8인의 플레이어가 참여하는 경쟁형 디펜스 맵으로, 맵 전체가 사막 타일셋으로 구성되어 있으며 중앙에 거대한 거대 기계형 건물이 자리 잡고 있다. 맵의 구조는 동심원 형태로 배치된 방어 건물과 자원 채취 지역, serta 중간 지점의 전투 지역으로 나뉘며, 플레이어는 각자의 기지에서 자원을 수집하고 방어 타워를 건설해 적의 공격을 막아내야 한다. 맵 중앙의 거대 기계는 일정 주기마다 공격 패턴을 발동하며, 이를 저지하지 못할 경우 맵 전체가 파괴되면서 패배하게 된다. 방어 건물의 종류는 다양하며, 각 플레이어는 개인의 전략에 따라 타워 배치를 최적화할 수 있다. 맵의 특징은 빠른 진행과Resource management(자원 관리)의 중요성으로, 초반 자원 확보가 승패를 좌우할 수 있다. 또한, 중앙 기계의 공격 패턴을 예측하고 대응하는 것이 핵심 전략 요소로 꼽힌다. 추천 대상은 스타크래프트 유즈맵을 즐기는 플레이어, 특히 디펜스와 전략적 자원 관리에 관심이 있는 유저들에게 적합하며, 팀 플레이보다는 각자 독립적인 플레이가 요구되는 맵 구조로 인해 경쟁심과 전략적 사고를 동시에 요구한다. 플레이 전 확인해야 할 포인트는 중앙 기계의 공격 주기, 방어 타워의 배치 가능 위치, 그리고 자원 채취 지역 간의 이동 경로다. 이 맵은 특히 방어 건물의 효율적인 배치와 자원 수집의 균형이 잘 맞춰져야만 안정적인 방어가 가능하다는 점을 기억해야 한다. StarCraft: Brood War’s classic custom map, *Kirby Madness eXe-*, is a competitive defense map for eight players set entirely in a desert tileset, featuring a massive mechanical structure at its center. The map is divided into concentric rings of defensive buildings, resource-gathering zones, and midfield battle areas. Players must harvest resources from their bases, construct defensive towers, and fend off enemy assaults while preventing the central machine from activating its periodic attack patterns—failure to stop it results in total map destruction and defeat. The map offers a variety of defensive structures, allowing players to optimize tower placements based on their strategies. Its fast-paced gameplay and heavy emphasis on resource management mean early resource control can decide the match. Predicting and countering the central machine’s attack patterns is also a key strategic element. Ideal for players who enjoy Brood War custom maps—especially those interested in defense and strategic resource handling—the map demands independent play rather than team coordination, testing both competitive drive and tactical thinking. Before jumping in, check the central machine’s attack cycle, valid tower placement spots, and the best routes between resource zones. Success hinges on balancing efficient tower placement with steady resource collection to maintain stable defenses.
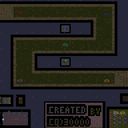
Splash Defense v.3.1
스타크래프트 브루드워의 유즈맵 ‘Splash Defense v.3.1’은 이름 그대로 물 splash 효과와 함께 펼쳐지는 디펜스 장르의 맵입니다. 맵의 전체적인 분위기는 사막을 배경으로 하며, 중앙에 위치한 본진을 surrounded하는 형태로 적의 공격을 막아내는 구조가 눈에 띕니다. 맵의 가장 큰 특징은 물 splash 효과가 시각적으로 강조되어 있으며, 이는 맵의 테마와 플레이 감각을 한층 더 끌어올립니다. 플레이어는 중앙 본진을 방어하는 동시에, 일정 주기로 등장하는 적 유닛들에게 대처해야 합니다. 적의 공격 패턴은 일정 주기로 변동되며, 이를 예측하고 방어 건물을 적재적소에 배치하는 전략이 요구됩니다. 특히 splash damage가 적용된 적 유닛이 등장하는 만큼, 방어 타워의 배치와 업그레이드 타이밍이 승패를 가르는 중요한 포인트가 됩니다. 맵의 난이도는 중간 정도로, 초반 방어 라인을 구축하는 것이 관건이며, 후반으로 갈수록 적의 공격 패턴이 복잡해지고 빈도도 증가합니다. 초보 플레이어의 경우, 방어 타워의 종류와 특성을 숙지한 뒤 플레이하는 것이 좋습니다. 또한, 물 splash 효과는 단순히 시각적인 요소에 그치지 않고, 맵의 분위기를 살리는 동시에 방어 전략을 짜는 데에도 영향을 미치므로, 이 점을 잘 활용해야 합니다. 이 맵은 디펜스 장르를 좋아하는 유저들에게 특히 추천되며, 사막 테마와 splash 효과의 조화가 인상적인 작품입니다. 플레이 전에는 방어 타워의 업그레이드 가능 여부와 적의 공격 패턴을 미리 확인하는 것이 좋습니다. 특히, splash damage가 적용된 적이 등장한다면 방어 타워의 배치와 업그레이드 우선순위를 신중히 결정해야 합니다. Splash Defense v.3.1 is a defense genre custom map in StarCraft: Brood War, featuring a striking water splash visual effect as its core theme. Set against a desert backdrop, the map challenges players to protect their central base from waves of enemy units that emerge periodically. The standout feature is the dynamic splash effect, which not only enhances the map's aesthetic but also plays a role in gameplay mechanics, particularly with splash damage mechanics from certain enemy units. Players must strategically place and upgrade defensive structures to counter evolving attack patterns. The difficulty is moderate, requiring careful planning in the early stages, as enemy attacks intensify and become more complex over time. For beginners, understanding the types and strengths of defensive towers is crucial before diving into the game. The splash effect, while visually impressive, also influences strategic decisions, making it a key element to leverage. This map is highly recommended for fans of the defense genre, offering a unique blend of visual flair and tactical depth. Before playing, it's advisable to check the upgrade options for defensive towers and familiarize yourself with enemy attack patterns, especially when splash damage units appear, as they demand careful tower placement and prioritized upgrades.
최근 등록된 맵
새로 추가된 파일과 버전을 확인하세요.
아마징 터렛 디펜스 비사가트 (Amazing Turret Defense Visagot)
‘Amazing Turret Defense Visagot’는 스타크래프트 브루드워의 디펜스 장르 유즈맵으로, 다수의 적 웨이브를 상대로 방어 타워를 건설하고 전략을 펼치는 게임이다. 맵의 전체적인 구조는 중앙에 위치한 기지 주변을 빙 둘러싼 넓은 평지로 구성되어 있으며, 맵 곳곳에 배치된 건설 가능 지역과 자원 수급 포인트를 활용해 방어 체계를 강화할 수 있다. 이 맵은 2048×2048의 넓은 공간을 활용해 여러 개의 방어 라인을 구축할 수 있도록 설계되어 있으며, 특히 맵 좌측 상단에 위치한 큰 공간은 타워 배치와 자원 관리의 핵심적인 역할을 한다. 맵의 배경은 황무지로, 건조한 지형이 타워와 유닛의 움직임을 돋보이게 한다. 플레이어는 시작 시 주어지는 자금을 이용해 초기 타워를 건설한 후, 지속적으로 밀려오는 적 유닛을 상대로 방어선을 유지해야 한다. 적의 공격 패턴은 랜덤한 웨이브 형태로 구성되어 있어, 초반에는 약한 유닛이, 후반부로 갈수록 강력한 조합의 유닛이 등장한다. 방어 타워는 일반적으로 지상 공격형과 공중 공격형으로 나뉘며, 플레이어는 자원의 한계를 고려해 효율적인 타워 배치를 고민해야 한다. 맵의 우측 하단에는 자원 채취가 가능한 구역이 있지만, 제한된 수의 채취 건물이 있어 자원의 효율적 관리가 필수적이다. 또한, 맵의 일부 구역은 지형적 제약으로 인해 타워 건설이 불가능한데, 이러한 지형을 활용해 적의 진격을 방해하거나 우회시킬 수 있다. 이 맵의 가장 큰 특징은 방어 타워의 배치와 자원 관리뿐만 아니라, 맵의 넓은 공간을 활용한 전략적 플레이에 있다. 플레이어는 중앙 기지를 중심으로 한 방어 라인을 구축하면서도, 적의 예상 경로에 따라 타워를 보강하거나 보조 건물을 건설해야 한다. 또한, 맵의 특정 지점에 배치된 특별한 구조물(예: 보호막 생성기나 보급고)은 게임의 흐름을 크게 좌우할 수 있어, 신중한 선택이 요구된다. 맵의 난이도는 초반에는 비교적 쉬운 편이지만, 웨이브가 거듭될수록 적의 공격 패턴이 복잡해지고, 자원의 압박이 커지면서 난이도가 급격히 상승한다. 이 맵은 디펜스 장르에 익숙한 플레이어는 물론, 전략적 사고와 자원 관리에 자신 있는 플레이어에게 추천할 만하다. 특히, 넓은 공간을 활용한 창의적인 방어 전략을 시도해 보고 싶은 유저들에게 적합하며, 친구와 함께 팀 플레이를 즐기기에도 좋다. 단, 초보 플레이어의 경우 타워의 효율적 배치와 자원 관리의 중요성을 충분히 숙지한 후 플레이하는 것이 좋다. 맵의 난이도는 개인차가 있지만, 일반적으로 ‘보통’ 수준으로 평가되며, 7명의 플레이어가 참여할 수 있도록 설계되어 있어 다인 플레이에서도 좋은 시너지를 발휘할 수 있다. Turret placement and resource management are the core mechanics of Amazing Turret Defense Visagot, a StarCraft: Brood War UMS defense map. The map features a spacious 2048×2048 terrain dominated by a barren wasteland, with a central base surrounded by multiple expansion zones. Players start with limited funds and must strategically position ground and air defense towers to fend off increasingly aggressive enemy waves. The map allows for creative tower layouts, with some areas restricted by terrain, forcing players to adapt their defenses accordingly. The gameplay revolves around balancing immediate investments in defenses with long-term resource sustainability. Early waves consist of weaker units, but later stages introduce powerful combinations, requiring players to upgrade or rebuild towers dynamically. Resource nodes are scattered across the map, particularly in the top-left quadrant, where efficient expansion becomes crucial. Some sections feature terrain that blocks tower construction, allowing players to manipulate enemy movement paths or create bottlenecks. Special structures, such as shield generators or supply depots, can provide critical advantages if utilized wisely. This map stands out for its emphasis on strategic depth over pure reflex-based challenges. While the learning curve is moderate, mastering tower placement and timing is essential for survival. The difficulty scales significantly as waves progress, making it ideal for players who enjoy tactical planning and resource optimization. The map supports up to seven players, making it suitable for team-based play, though solo players can also enjoy its challenges. Beginners should familiarize themselves with tower types and resource mechanics before attempting higher difficulties. Overall, it offers a rewarding experience for those who appreciate well-designed defense scenarios in StarCraft.
Splash Defense v.3.1
스타크래프트 브루드워의 유즈맵 ‘Splash Defense v.3.1’은 이름 그대로 물 splash 효과와 함께 펼쳐지는 디펜스 장르의 맵입니다. 맵의 전체적인 분위기는 사막을 배경으로 하며, 중앙에 위치한 본진을 surrounded하는 형태로 적의 공격을 막아내는 구조가 눈에 띕니다. 맵의 가장 큰 특징은 물 splash 효과가 시각적으로 강조되어 있으며, 이는 맵의 테마와 플레이 감각을 한층 더 끌어올립니다. 플레이어는 중앙 본진을 방어하는 동시에, 일정 주기로 등장하는 적 유닛들에게 대처해야 합니다. 적의 공격 패턴은 일정 주기로 변동되며, 이를 예측하고 방어 건물을 적재적소에 배치하는 전략이 요구됩니다. 특히 splash damage가 적용된 적 유닛이 등장하는 만큼, 방어 타워의 배치와 업그레이드 타이밍이 승패를 가르는 중요한 포인트가 됩니다. 맵의 난이도는 중간 정도로, 초반 방어 라인을 구축하는 것이 관건이며, 후반으로 갈수록 적의 공격 패턴이 복잡해지고 빈도도 증가합니다. 초보 플레이어의 경우, 방어 타워의 종류와 특성을 숙지한 뒤 플레이하는 것이 좋습니다. 또한, 물 splash 효과는 단순히 시각적인 요소에 그치지 않고, 맵의 분위기를 살리는 동시에 방어 전략을 짜는 데에도 영향을 미치므로, 이 점을 잘 활용해야 합니다. 이 맵은 디펜스 장르를 좋아하는 유저들에게 특히 추천되며, 사막 테마와 splash 효과의 조화가 인상적인 작품입니다. 플레이 전에는 방어 타워의 업그레이드 가능 여부와 적의 공격 패턴을 미리 확인하는 것이 좋습니다. 특히, splash damage가 적용된 적이 등장한다면 방어 타워의 배치와 업그레이드 우선순위를 신중히 결정해야 합니다. Splash Defense v.3.1 is a defense genre custom map in StarCraft: Brood War, featuring a striking water splash visual effect as its core theme. Set against a desert backdrop, the map challenges players to protect their central base from waves of enemy units that emerge periodically. The standout feature is the dynamic splash effect, which not only enhances the map's aesthetic but also plays a role in gameplay mechanics, particularly with splash damage mechanics from certain enemy units. Players must strategically place and upgrade defensive structures to counter evolving attack patterns. The difficulty is moderate, requiring careful planning in the early stages, as enemy attacks intensify and become more complex over time. For beginners, understanding the types and strengths of defensive towers is crucial before diving into the game. The splash effect, while visually impressive, also influences strategic decisions, making it a key element to leverage. This map is highly recommended for fans of the defense genre, offering a unique blend of visual flair and tactical depth. Before playing, it's advisable to check the upgrade options for defensive towers and familiarize yourself with enemy attack patterns, especially when splash damage units appear, as they demand careful tower placement and prioritized upgrades.
커비 매드니스 eXe- (Kirby Madness eXe-)
스타크래프트: 브루드워의 대표적인 유즈맵 중 하나인 '커비 매드니스 eXe-'는 8인의 플레이어가 참여하는 경쟁형 디펜스 맵으로, 맵 전체가 사막 타일셋으로 구성되어 있으며 중앙에 거대한 거대 기계형 건물이 자리 잡고 있다. 맵의 구조는 동심원 형태로 배치된 방어 건물과 자원 채취 지역, serta 중간 지점의 전투 지역으로 나뉘며, 플레이어는 각자의 기지에서 자원을 수집하고 방어 타워를 건설해 적의 공격을 막아내야 한다. 맵 중앙의 거대 기계는 일정 주기마다 공격 패턴을 발동하며, 이를 저지하지 못할 경우 맵 전체가 파괴되면서 패배하게 된다. 방어 건물의 종류는 다양하며, 각 플레이어는 개인의 전략에 따라 타워 배치를 최적화할 수 있다. 맵의 특징은 빠른 진행과Resource management(자원 관리)의 중요성으로, 초반 자원 확보가 승패를 좌우할 수 있다. 또한, 중앙 기계의 공격 패턴을 예측하고 대응하는 것이 핵심 전략 요소로 꼽힌다. 추천 대상은 스타크래프트 유즈맵을 즐기는 플레이어, 특히 디펜스와 전략적 자원 관리에 관심이 있는 유저들에게 적합하며, 팀 플레이보다는 각자 독립적인 플레이가 요구되는 맵 구조로 인해 경쟁심과 전략적 사고를 동시에 요구한다. 플레이 전 확인해야 할 포인트는 중앙 기계의 공격 주기, 방어 타워의 배치 가능 위치, 그리고 자원 채취 지역 간의 이동 경로다. 이 맵은 특히 방어 건물의 효율적인 배치와 자원 수집의 균형이 잘 맞춰져야만 안정적인 방어가 가능하다는 점을 기억해야 한다. StarCraft: Brood War’s classic custom map, *Kirby Madness eXe-*, is a competitive defense map for eight players set entirely in a desert tileset, featuring a massive mechanical structure at its center. The map is divided into concentric rings of defensive buildings, resource-gathering zones, and midfield battle areas. Players must harvest resources from their bases, construct defensive towers, and fend off enemy assaults while preventing the central machine from activating its periodic attack patterns—failure to stop it results in total map destruction and defeat. The map offers a variety of defensive structures, allowing players to optimize tower placements based on their strategies. Its fast-paced gameplay and heavy emphasis on resource management mean early resource control can decide the match. Predicting and countering the central machine’s attack patterns is also a key strategic element. Ideal for players who enjoy Brood War custom maps—especially those interested in defense and strategic resource handling—the map demands independent play rather than team coordination, testing both competitive drive and tactical thinking. Before jumping in, check the central machine’s attack cycle, valid tower placement spots, and the best routes between resource zones. Success hinges on balancing efficient tower placement with steady resource collection to maintain stable defenses.
맵 선택 가이드
태그는 맵의 핵심 특징을 빠르게 설명하지만 제작 버전마다 규칙이 다를 수 있습니다. 상세 설명에서 권장 인원, 난이도, 플레이 시간과 버전을 함께 확인한 뒤 다운로드하세요.