
방어 전략 스타크래프트 맵 모음
'방어 전략' 태그가 등록된 맵을 모았습니다. 장르 하나로 찾기 어려운 플레이 방식, 난이도와 특징을 중심으로 인기 맵과 최신 맵을 비교해 보세요.
- 등록 맵
- 85개
- 누적 다운로드
- 7
- 누적 조회
- 3,214
인기 맵
다운로드와 조회 반응이 높은 맵입니다.
임파서블 크레그미 아쿠아 (Impossible Kregmy Aqua v1.1)
스타크래프트 브루드워의 유즈맵 ‘Impossible Kregmy Aqua v1.1’은 우주 테마를 배경으로 한 디펜스 장르의 유즈맵으로, 6명의 플레이어가 각자 기지를 방어하며 적의 공격을 버텨내야 하는 컴까기 형식을 갖추고 있다. 맵의 전체적인 구조는 중앙 광장과 같은 넓은 공간을 중심으로 각 플레이어의 기지가 배치되어 있으며, 기지 주변에는 방어 건물과 자원 채취 지역이 배치되어 있다. 맵의 이름은 ‘Kregmy’라는 단어와 ‘Aqua’라는 단어가 결합된 형태로, ‘Kregmy’는 제작자 Flemy의 닉네임에서, ‘Aqua’는 물 또는 우주를 연상시키는 테마에서 유래했을 것으로 추정된다. 맵의 제목에 포함된 ‘Impossible’이라는 단어가 시사하듯, 난이도는 상당히 높은 편으로 보이며, 플레이어는 제한된 자원과 지속적인 적의 공격을 효율적으로 방어해야만 생존할 수 있는 구조로 설계되어 있다. 플레이 방식은 기본적으로 컴까기(컴퓨터 상대 유즈맵)로, 플레이어는 각자의 기지에서 자원을 채취하고 방어 건물을 건설하여 적의 공격을 방어하는 동시에, 공격 유닛을 생산해 적 기지를 공격하는 형태로 진행된다. 맵의 중앙에는 넓은 평지가 펼쳐져 있으며, 각 기지 주변에는 높은 언덕과 좁은 통로가 있어 방어 라인을 구축하기 용이하다. 또한, 맵 곳곳에 배치된 자원 지역은 플레이어가 자원을 안정적으로 확보할 수 있도록 돕지만, 적의 공격에 노출되어 있어 신중한 자원 관리가 요구된다. 맵의 디자인상으로는 우주 테마에 걸맞게 어두운 배경과 푸른빛의 액체 같은 질감이 느껴지는 타일셋이 사용되어, 우주 공간의 분위기를 잘 살리고 있다. 이 맵을 추천하는 대상은 스타크래프트 브루드워의 유즈맵을 즐겨 플레이하는 유저, 특히 디펜스 장르에 익숙한 플레이어와 컴까기 형식을 선호하는 유저들이다. 난이도가 높기 때문에 초보자는 다소 어려움을 느낄 수 있지만, 방어 전략과 자원 관리, 유닛 생산의 밸런스를 carefully 다룰 수 있다면 충분히 도전해 볼 만한 가치가 있다. 플레이 전에는 맵의 초기 배치와 방어 건물의 위치, 자원 지역의 분포를 꼼꼼히 확인하고, 적의 공격 패턴을 예측하는 연습을 하는 것이 중요하다. 또한, 맵의 제작자 Discord 채널로 피드백을 남길 수 있어, 개선점을 제안하거나 다른 플레이어들과의 교류도 가능하다. 이 맵은 단순히 방어만 하는 것이 아니라, 공격과 방어의 균형을 맞추며 적 기지를 파괴하는 전략적 요소가 강하기 때문에, 한 번의 실수로 게임이 끝날 수 있는 긴장감을 느낄 수 있다. 맵의 디자인과 난이도가 조화를 이룬 만큼, 숙련된 플레이어들에게는 매우 흥미로운 경험을 제공할 것이다. *Impossible Kregmy Aqua v1.1* is a defense-style custom map in *StarCraft: Brood War* set in a space-themed universe. Six players each defend their own base against waves of enemy attacks in a tower-defense format. The map features a central plaza-like open space with player bases arranged around it, each surrounded by defensive structures and resource-gathering zones. The name combines "Kregmy," likely derived from the creator Flemy’s nickname, and "Aqua," evoking imagery of water or outer space. As the title suggests, the difficulty is exceptionally high. Players must manage limited resources and withstand relentless enemy assaults to survive, with the map designed to test both defensive strategy and efficient unit production. Gameplay follows a tower-defense structure where players gather resources, construct defenses, and launch counterattacks from their bases. The central area is a vast plain, while each base is bordered by elevated terrain and narrow pathways, ideal for setting up choke points. Scattered resource nodes across the map ensure steady income but are exposed to enemy raids, requiring careful resource management. The tile set features dark backgrounds with a fluid, blue-tinged texture, perfectly capturing the essence of a cosmic battlefield. This map is best suited for *Brood War* custom map enthusiasts, particularly those who enjoy tower-defense mechanics and prefer playing against AI opponents. While the high difficulty may overwhelm beginners, experienced players who can balance resource management, unit production, and defense strategies will find it a rewarding challenge. Before playing, it’s crucial to study the initial base layout, defensive building placements, and resource node distribution, as well as to anticipate enemy attack patterns. Players can also leave feedback or engage with others through the map creator’s Discord channel. The map emphasizes strategic balance between offense and defense, where a single mistake can lead to defeat, offering a tense, high-stakes experience. Its well-crafted design and challenging difficulty make it a compelling choice for seasoned players seeking a fresh and demanding challenge.
메이즈 디펜스 6.2.4 (Maze Defense 6.2.4)
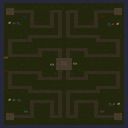
스타크래프트 브루드워의 인기 디펜스 유즈맵 시리즈인 ‘메이즈 디펜스’의 최신 버전인 6.2.4를 리뷰합니다. 이 맵은 사막 테마의 미로를 배경으로 몬스터가 플레이어 기지를 침입하지 못하도록 막아내는 것이 주된 목표입니다. 맵은 거대한 4096x4096 크기의 사막 지형으로 구성되어 있으며, 미로 형태의 길과 복도들이 복잡하게 배치되어 있습니다. 플레이어는 기지 주변에 방어 건물을 건설하고, 몬스터가 미로 내부를 통과하지 못하도록 길을 차단하거나 요격해야 합니다. 몬스터는 맵의 가장자리로부터 일정 주기로 출현하며, 플레이어의 기지까지 도달하지 못하게 해야 승리할 수 있습니다. 맵의 특징은 미로 구조를 활용한 방어 전략과 건물 배치의 중요성입니다. 괴물들이 미로를 통과하는 경로가 제한적이기 때문에, 플레이어는 입구와 복도마다 적절한 방어 건물을 배치해야 합니다. 또한 맵 곳곳에 흩어져 있는 보너스 아이템이나 추가 자원을 획득할 수 있어, 자원 관리와 건물 업그레이드도 전략의 핵심 요소로 작용합니다. 초보자부터 숙련자까지 즐길 수 있도록 난이도가 조절 가능한 구조로 설계되어 있지만, 복잡한 미로와 몬스터의 공격 패턴을 숙지하지 않으면 어려움을 느낄 수 있습니다. 특히 입구와 주요 길목에 방어 건물을 집중 배치하는 플레이가 중요합니다. 추천 대상은 디펜스 맵을 좋아하는 플레이어이며, especially 사막 테마와 미로 디펜스 장르를 선호하는 유저들에게 적합합니다. 사전 준비를 위해서는 맵의 주요 길목을 미리 확인하고, 방어 건물의 배치와 업그레이드 계획을 세워두는 것이 중요합니다. 또한, 몬스터의 공격 패턴을 분석하여 효율적인 방어 라인을 구축하는 것이 관건입니다. 맵을 플레이하기 전에는 건물과 유닛의 특성을 충분히 숙지하고, 맵의 구조를 미리 파악해두는 것이 좋습니다. 복잡한 미로 구조를 이해해야만 몬스터를 효과적으로 저지할 수 있으므로, 초반에는 맵 탐색에 집중하는 것도 좋은 전략입니다. 이 맵은 디펜스 장르의 classic한 재미와 전략적 깊이를 동시에 제공하며, 특히 미로 디펜스 특유의 긴장감과 성취감을 느낄 수 있습니다. StarCraft: Brood War’s popular defense custom map series *Maze Defense* has been updated to version 6.2.4. This map sets players against waves of monsters in a sprawling desert-themed maze, where the goal is to prevent the creatures from reaching your base. The terrain spans a massive 4096x4096 desert landscape filled with winding corridors and dead ends, forcing players to block or intercept the advancing foes before they breach the defenses. The map’s design emphasizes strategic building placement and maze navigation. Since monsters are funneled through predictable paths, players must carefully position defensive structures at choke points and intersections. Scattered throughout the maze are bonus items and resources that reward efficient resource management and allow for critical upgrades, adding another layer of strategy to each run. While the difficulty is adjustable to suit both beginners and veterans, the intricate maze and enemy attack patterns demand careful study—especially when prioritizing key entry points and critical pathways. This makes *Maze Defense 6.2.4* ideal for fans of defense maps, particularly those who enjoy desert themes and maze-based gameplay. To prepare, familiarize yourself with the maze layout, plan your defensive structures and upgrades, and analyze monster behavior to build an effective blockade. Understanding the map’s layout early on is crucial, so spending time exploring the maze before the first wave hits is a smart move. Combining classic defense mechanics with deep strategy, this version delivers the tension and satisfaction unique to maze defense, rewarding players who master its challenges.
블루 랜서즈 리크루트먼트 (Blue Lancers Recruitment)
스타크래프트 브루드워의 유즈맵이자 컴까기 장르로 유명한 'Blue Lancers Recruitment'는 플레이어에게 끊임없는 공격을 방어하며 '채용관'의 기준을 충족시키라는 목표를 제시하는 흥미로운 맵입니다. 맵의 배경은 사막으로 설정되어 있으며, 중앙에 위치한 채용관 건물이 주요 방어 목표로 보입니다. 초반부터 강력한 적의 공격을 받기 시작해 시간이 지나면서 점점 더 많은 유닛과 병력이 몰려오며, 이를 효과적으로 방어해야 합니다. 맵은 3인 플레이를 기준으로 설계된 것으로 보이며, 각각의 플레이어가 독립적인 방어 라인을 구축하거나 협력하여 중앙 건물을 지켜야 합니다. 게임의 핵심은 방어에 집중되어 있지만, 단순히 막는 것만이 아닌, 재화나 자원을 관리하며 효율적으로 유닛을 생산하고 배치하는 전략적 요소가 중요합니다. 맵의 구조는 비교적 평탄한 지형을 바탕으로 구성되어 있어, 유닛의 기동성과 배치 전략이 승패를 좌우할 가능성이 높습니다. 또한, 맵의 난이도는 플레이어의 실력에 따라 크게 달라질 수 있으며, 초보자보다는 어느 정도의 경험이 있는 플레이어에게 더 적합한 것으로 보입니다. 플레이어는 초반 자원을 carefully 관리해야 하며, 적의 공격 패턴을 분석해 방어 타워나 유닛을 적시에 배치하는 것이 중요합니다. 맵의 타일셋이 사막인 만큼, 시야 확보와 유닛의 이동 경로 설계가 특히 중요할 수 있습니다. 맵의 진행은 일정 시간 동안 방어에 성공하면 '채용관'으로부터 승인이 주어지는 방식으로 보이며, 이를 통해 맵의 목표가 달성됩니다. 이 맵은 방어와 자원 관리의 균형을 잘 맞추고자 하는 플레이어에게 특히 흥미로울 것입니다. 이 맵을 플레이하기 전에는 방어 타워의 배치와 유닛 생산 우선순위를 미리 계획해두는 것이 좋습니다. 또한, 팀 플레이를 할 경우, 각 플레이어의 역할 분담을 명확히 하는 것도 중요합니다. 맵의 난이도가 높을 것으로 예상되므로, 도전적인 플레이를 즐기는 유저들에게 추천할 만한 맵입니다. Blue Lancers Recruitment is a popular StarCraft: Brood War custom map in the 'compete vs AI' genre, where players must defend against relentless waves of enemies until they meet the recruiter's criteria. Set in a desert-themed battlefield, the central recruiter building serves as the primary objective that must be protected. From the start, players face escalating enemy attacks that intensify over time, requiring strategic unit placement and resource management. Designed for three players, the map allows for independent defense lines or cooperative strategies to safeguard the recruiter. While the core gameplay revolves around defense, efficient resource allocation and unit production are critical to success. The flat terrain of the desert map emphasizes mobility and tactical positioning, making it essential for players to analyze enemy attack patterns and deploy defenses accordingly. The game's difficulty scales with player skill, making it more suitable for experienced players. Early game resource management is crucial, and players should plan tower placements and unit priorities in advance. For team play, clear role assignment among players enhances coordination. Given its challenging nature, this map is highly recommended for players seeking a competitive and strategic experience.
베이스 디펜스 1.7 (Base Defence 1.7)
‘베이스 디펜스 1.7’은 스타크래프트 브루드워의 대표적인 유즈맵 장르 중 하나인 디펜스 게임으로, 플레이어는 고정된 유닛 비용과 보너스 비용을 고려하며 적의 기지를 파괴하는 목표를 달성해야 한다. 맵은 우주 타일셋을 기반으로 3072x3072 크기의 넓은 필드에서 펼쳐지며, 중앙에 위치한 플레이어 기지 주변으로 적의 공격이 끊임없이 몰려온다. 맵의 특징은 ‘고정 유닛 비용’과 ‘보너스 비용’이라는 두 가지 요소로, 플레이어는 공격 시 추가 보상을 얻거나 패널티를 받을 수 있어 전략적 선택이 요구된다. 또한, ‘비밀스러운 트릭’이 추가되어 있어 맵 곳곳에 숨겨진 요소나 함정, 또는 보너스 포인트가 존재할 가능성이 보인다. 적의 기지를 파괴하기 위해선 공격력과 방어력의 균형이 중요하며, 특히 기지 방어에 중점을 둬야 한다. 초보자도 쉽게 접근할 수 있는 구조이지만, 적의 공격 패턴과 맵 내 숨은 요소들을 파악해야만 안정적으로 승리할 수 있다. 맵의 난이도는 보편적으로 ‘보통’ 수준으로 평가되며, 플레이 시간은 약 20~30분 정도로 추정된다. 이 맵은 디펜스 장르를 любителей, 특히 스타크래프트의 기본 전략을 학습하고 싶은 유저들에게 추천할 만하다. 플레이 전에는 맵의 숨은 요소와 보너스 시스템을 미리 확인해 두는 것이 좋다. Base Defence 1.7 is a classic UMS (User-Made Scenario) defense-style map in StarCraft: Brood War, where players must strategically destroy the enemy base while managing fixed unit costs and bonus rewards. Set on a spacious 3072x3072 map with a space-themed tileset, the gameplay revolves around constant enemy waves attacking the player’s central base. The core mechanics include fixed unit costs and bonus rewards, which add depth to decision-making, as players must balance offensive and defensive strategies. The map also hints at hidden tricks, suggesting the presence of secret elements like traps or bonus points scattered across the field. While the structure is accessible to beginners, mastering the enemy’s attack patterns and uncovering hidden features are key to securing victory. The difficulty is generally moderate, with an estimated playtime of 20 to 30 minutes. This map is ideal for defense genre enthusiasts, especially those looking to refine their StarCraft strategy skills. Players are advised to explore the map and understand its bonus system before diving into the game.
롱기누스 (Longinus)
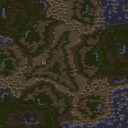
스타크래프트 브루드워의 유즈맵 Longinus(롱기누스)는 사막 지형을 배경으로 펼쳐지는 대규모 디펜스 장르의 최고傑作으로 손꼽히는 작품이다. 맵의 이름과 디자인에서 느껴지는 신비로운 기운은 플레이어에게 흥미로운 도전 과제를 제시하며, 8인의 플레이어가 한 팀으로 힘을 합쳐 외계의 침공을 방어해내는 구조가 특징이다. 맵 전체가 사막 타일셋으로 구성되어 있어 건조한 분위기와 넓은 시야가 어우러져 전략적 깊이를 한층 더해준다. 중앙에 위치한 거대 구조물 ‘롱기누스’는 방어의 핵심으로, 외계 유닛들이 끊임없이 몰려오는 가운데 이를 보호하며 생존하는 것이 목표로 추정된다. 맵 곳곳에 배치된 방어 시설과 자원 수집 지역은 전략적 선택을 강요하며, 초보자와 숙련자 모두에게 흥미로운 플레이 경험을 제공할 것으로 보인다. 특히 방어선의 중요도가 높아 팀워크와 빠른 판단력이 요구되는 점에서 경쟁력을 갖춘 유즈맵으로 평가된다. 이 맵은 MBCgame Dept.에 의해 수정되었으며, KuKulZa라는 제작자의 손을 거쳐 완성된 만큼 퀄리티가 보장된 작품이다. 사막이라는 독특한 배경과 대규모 전투의 조화가 돋보이며, 디펜스 장르를 좋아하는 플레이어라면 한 번쯤 도전해볼 만한 가치가 충분하다. 다만, 방어선의 균형이나 유닛 배치에 따라 난이도가 크게 달라질 수 있으니 사전 전략 수립이 중요할 것이다. 이 맵은 디펜스 장르의 정석을 보여주는 동시에, 유즈맵으로서의 재미와 몰입도를 극대화한佳作로 손색이 없다. 사막의 광활한 지형과 외계 유닛의 끊임없는 공격은 플레이어에게 끊임없는 긴장감을 선사할 것이며, 팀워크와 전략의 중요성을 깨닫게 해줄 것이다. Longinus is a legendary UMS defense map set in a vast desert landscape, where eight players unite to defend against an alien invasion. The map’s mysterious atmosphere, amplified by its desert tileset, creates a strategic depth that challenges both beginners and veterans. At the heart of the map lies the colossal "Longinus" structure, the focal point of defense. Players must protect this central entity while managing resources and fending off relentless waves of enemy units. The strategic placement of defensive buildings and resource nodes forces players to make critical decisions, making this a dynamic and engaging experience. Originally created by KuKulZa and later modified by MBCgame Dept., Longinus exemplifies high-quality UMS design. The desert setting not only provides a unique visual backdrop but also enhances the strategic elements of the game. While the map’s difficulty can vary significantly based on unit placement and defense balance, its immersive gameplay and teamwork-focused mechanics make it a must-try for defense map enthusiasts. Longinus stands as a masterpiece in the UMS genre, offering an unparalleled blend of strategy, tension, and teamwork. The endless desert sands and the relentless assault of alien forces create an experience that keeps players on the edge of their seats. Whether you're a seasoned player or new to the genre, this map promises hours of engaging gameplay and strategic depth.
인디비주얼 랜덤 콜로니 디펜스 (IndividualRandomColonyDEF)
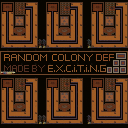
《인디비주얼 랜덤 콜로니 디펜스》는 스타크래프트: 브루드워의 인기 유즈맵 장르 중 하나로, 6명의 플레이어가 각자 독립된 기지 구역을 방어하며 적의 끊임없는 공격을 막아내는 디펜스 장르의 유즈맵이다. 맵은 넓은 황혼 테마의 필드에 플레이어별로 분리된 공간이 배치되어 있으며, 각 구역은 자체 미네랄과 베스핀 가스를 보유하고 있다. 플레이어는 맵 중앙에서 끊임없이 생성되는 적 유닛을 상대하며, 방어선 구축과 자원 관리가 핵심 전략이 된다. 맵의 특징은 ‘랜덤 콜로니’라는 이름에서 알 수 있듯이, 각 플레이어의 시작 위치와 자원 배치, 그리고 방어 구조가 랜덤으로 결정되어 매 게임마다 다른 전술을 요구한다는 점이다. 이는 맵의 재플레이 가치를 크게 높이며, 초보자부터 숙련자까지 모두 즐길 수 있는 구조로 설계되었다. 또한, 맵 중앙의 대규모 적군 웨이브가 지속적으로 밀어붙이기 때문에 순발력과micro컨트롤이 요구되며, 팀원 간 협력이 필수적이다. 방어에 실패하면 개인의 기지가 파괴되면서 게임에서 탈락하게 되므로, 긴장감과 몰입도가 높은 플레이가 가능하다는 특징이 있다. 게임의 승리 조건은 맵에 명시되어 있지 않지만, 일반적으로 마지막까지 살아남거나 특정 조건을 달성하는 방식으로 진행되며, 맵의 난이도는 보통 수준으로 설정되어 있어 무난한 난이도와 밸런스를 유지하고 있다. 특히, 자원 수급과 방어 시설 건설 타이밍이 승패를 좌우하므로,Resource Management 능력과 전략적 판단력이 요구된다. 이 맵을 즐기기 위해서는 최소 6명의 플레이어가 필요하며, 팀전보다는 각자의 기지를 지키며 경쟁하는 개별 디펜스 구조를 즐기는 유저들에게 적합하다. 또한, 맵의 랜덤 요소와 지속적인 적Wave가 제공하는 긴장감 덕분에, 반복 플레이를 하더라도 질리지 않고 재미를 느낄 수 있는 장점이 있다. 플레이 전에는 각 플레이어의 시작 위치와 자원 배치를 확인하고, 방어에 필요한 유닛과 건물을 미리 준비하는 것이 중요하다. 또한, 중앙에서 오는 적군을 효율적으로 막기 위해 방어 라인의 구축 위치를 신중히 선택해야 한다. 이 맵은 디펜스 장르를 любителей 뿐 아니라, 전략적 사고와 팀워크를 동시에 즐기고 싶은 유저들에게 강력히 추천할 만한 작품이다. 《Individual Random Colony Defense》 is a popular custom map genre in *StarCraft: Brood War*, where six players each defend their own isolated base area against endless enemy waves. The map features a wide twilight-themed field divided into separate zones for each player, each with its own mineral and vespene gas deposits. Players must battle enemy units continuously spawned from the map’s center, with base construction and resource management serving as key strategic elements. As the name "Random Colony" suggests, each player’s starting position, resource layout, and defensive structures are randomized every game, forcing players to adapt their tactics each time. This design significantly boosts replay value and is structured to appeal to both beginners and experienced players alike. The constant large-scale enemy waves pushing from the center demand quick reflexes and precise micro-management, while teamwork becomes essential for survival. Failing to defend properly results in your base being destroyed, eliminating you from the game—adding high tension and immersion. Although the victory condition isn’t explicitly stated, the general goal is to survive until the end or meet specific objectives, with the map offering a moderate difficulty level for balanced gameplay. Resource gathering and the timing of defensive structure construction often determine the outcome, so strong resource management and strategic decision-making are crucial. This map requires a minimum of six players and is best suited for those who enjoy individual defense mechanics over team-based play. The random elements and relentless enemy waves create a thrilling experience that remains engaging even after multiple playthroughs. Before starting, it’s important to check your starting position and resource distribution, preparing units and buildings in advance. Careful placement of your defensive lines is also vital to efficiently counter the waves coming from the center. Overall, this map is highly recommended not just for defense genre fans, but also for players who want to hone strategic thinking and teamwork simultaneously.
테란 디펜스 V2.0 (Terran Defence V2.0)
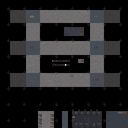
테란 디펜스 V2.0은 스타크래프트 브루드워의 대표적인 유즈맵 중 하나로, 테란 종족을 조종하여 끊임없이 몰려드는 적들을 방어하는 디펜스 장르의 게임입니다. 맵은 중앙에 플레이어 기지 역할을 하는 커맨드 센터가 배치되어 있으며, 주변으로 여러 개의 입구가 뚫려 있습니다. 각 입구는 지정된 경로로 적 유닛이 끊임없이 생성되어 플레이어를 공격합니다. 플레이어는 커맨드 센터를 중심으로 방어 건물을 건설하고, 업그레이드를 통해 방어력을 강화해야 합니다. 맵의 특징은 입구별로 난이도와 적의 공격 패턴이 다르다는 점으로, 특정 입구는 더 강력한 적이나 다수의 적을 동시에 상대해야 하는 경우가 있습니다. 또한, 맵 곳곳에 숨겨진 자원이나 보너스 건물들이 배치되어 있어 전략적인 자원 관리도 필요합니다. 이 맵은 주로 6명의 플레이어가 각자의 입구를 방어하는 협동형 플레이가 가능하며, 적의 공세를 막아내며 생존하는 것이 목표입니다. 초보자와 숙련자 모두 즐길 수 있도록 난이도가 조절 가능한데, 입구별로 난이도를 설정할 수 있어 자신에 맞는 난이도를 선택할 수 있습니다. 특히, 방어 건물을 효율적으로 배치하고 업그레이드를 적시에 진행하는 것이 승리의 핵심입니다. 테란 디펜스 V2.0은 오랜 기간 사랑받아온 디펜스 유즈맵의 정수라 할 수 있으며, 전략성과 긴장감을 동시에 느낄 수 있는佳作입니다. 이 맵을 플레이하기 전에는 각 입구의 난이도와 공격 패턴을 미리 확인하고, 방어 건물의 배치와 업그레이드 계획을 세워두는 것이 좋습니다. 또한, 팀원과의 원활한 소통이 필수적이기에, 팀플레이가 가능한 맵이라는 점을 유념해야 합니다. Terran Defence V2.0 is a classic custom map in StarCraft: Brood War, where players control the Terran faction to defend against endless waves of enemies. The map features a central Command Center as the player's base, surrounded by multiple entry points where enemies spawn in designated paths. Players must construct defensive buildings and upgrade their defenses to withstand the attacks. Each entry point varies in difficulty and enemy patterns, with some requiring players to handle stronger or more numerous enemies. Hidden resources and bonus buildings are scattered throughout the map, adding a layer of strategic resource management. The map supports cooperative play for up to 6 players, each defending their own entry point, with the goal of surviving the enemy onslaught. The difficulty can be adjusted per entry point, making it accessible for both beginners and experienced players. The key to victory lies in efficient building placement and timely upgrades. Terran Defence V2.0 is a refined masterpiece of the defence custom map genre, offering both strategy and tension. Before playing, it's advisable to review the difficulty and attack patterns of each entry point and plan the placement of defensive buildings and upgrades. Team communication is essential, as this map is designed for team play.
캐논 디펜스 10-Way V9.11 (Cannon Defense 10-Way V9.11)
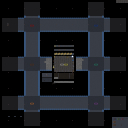
스타크래프트 브루드워의 대표적인 디펜스 유즈맵인 〈Cannon Defense 10-Way V9.11〉은 플레이어가 중앙 요새를 방어하며 끊임없이 몰려오는 적의 공격을 막아내는 구조로 구성되어 있다. 맵 중앙에는 요새 건물이 있으며, 그 주위를 에워싸듯 10개의 방향에서 적 유닛이 끊임없이 진격해 온다. 플레이어는 요새를 보호하기 위해 각 방향에 배치된 포탑과 방어 건물, 그리고 자원 수집을 통해 보강할 수 있는 방어 시설을 활용해야 한다. 맵 상단 중앙에는 자원 채취 구역이 있으며, 이를 통해 포탑 업그레이드나 추가 병력 생산에 필요한 미네랄을 확보할 수 있다. 게임의 핵심은 중앙 요새의 체력 관리와 포탑 배치 전략이다. 초반에는 적은 유닛으로 공격해 오지만, 시간이 지나면서 점점 강력해지는 적군을 상대해야 하며, 특히 후반부로 갈수록 대규모 공세가 이어진다. 포탑의 종류와 위치를 어떻게 배치하느냐에 따라 방어 성공 여부가 갈리므로, 플레이어는 각 방향의 공격 패턴을 분석하고 효율적인 방어선을 구축해야 한다. 또한, 자원 관리를 통해 포탑의 공격력과 체력을 지속적으로 업그레이드하는 것이 중요하다. 이 맵은 초보자부터 고수까지 폭넓은 플레이어층을 아우르며, 특히 디펜스 장르에 익숙하지 않은 플레이어도 쉽게 접근할 수 있도록 난이도가 조절되어 있다. 10개의 방향에서 동시에 공격이 들어오기 때문에, 집중력과 전략적 사고가 요구되며, 긴장감 넘치는 전투가 지속된다. 방어에 성공하면 요새가 유지되면서 다음 웨이브가 시작되고, 반대로 요새가 파괴되면 게임이 종료된다. 반복 플레이를 통해 방어 패턴을 익히고, 최적의 포탑 배치와 자원 관리를 연마할 수 있는 점이 이 맵의 큰 매력이다. 주로 1인 플레이를 권장하지만, 팀 플레이로도 즐길 수 있는 구조로 설계되어 있어, 혼자서도 충분히 긴장감 넘치는 경험을 제공한다. 플레이 전에는 포탑의 종류와 효과를 숙지하고, 각 방향의 공격 타이밍을 파악하는 것이 중요하다. 또한, 자원 수집을 소홀히 하지 말고, 포탑 업그레이드 우선순위를 신중히 결정해야 한다. 맵의 난이도는 시간이 지날수록 상승하므로, 초반에 충분한 방어선을 구축하지 않으면 중반 이후부터 급격히 어려워진다. 이 맵을 즐기기 위해서는 꾸준한 연습과 전략적 사고가 필수적이며, 요새를 지켜내는 짜릿한 성취감을 느낄 수 있을 것이다. 이 맵은 디펜스 장르의 정수를 담고 있어, 스타크래프트 유즈맵 중에서 손꼽히는 작품으로 평가받고 있다. 특히 10-Way라는 독특한 구조는 플레이어에게 끊임없는 긴장감을 제공하며, 전략적 깊이를 더한다. 반복 플레이를 통해 점점 더 어려운 웨이브를 극복해 나가는 재미가 일품이다. 디펜스를 좋아하는 플레이어라면 반드시 한 번쯤 도전해 볼 가치가 있는 맵이다. StarCraft: Brood War's classic defense custom map, *Cannon Defense 10-Way V9.11*, challenges players to defend a central fortress against relentless waves of enemies. The map features a central base building surrounded by ten directional paths from which enemies continuously advance. Players must protect the fortress by strategically placing turrets, defensive structures, and resource-gathering facilities to reinforce their defenses. At the top center of the map lies a resource collection area, allowing players to gather minerals for upgrading turrets and producing additional forces. The core gameplay revolves around maintaining the fortress's health and optimizing turret placement. Early waves consist of weaker units, but the enemy grows progressively stronger over time, culminating in large-scale assaults in the later stages. Success hinges on analyzing each direction's attack patterns and constructing an efficient defensive line. Proper resource management is also critical, as upgrading turret damage and durability directly impacts survival. This map caters to a wide range of players, from beginners to experts, with adjustable difficulty that makes it accessible even to those unfamiliar with the defense genre. The simultaneous assaults from ten directions demand focus and strategic thinking, creating an intense and engaging experience. Each successful defense preserves the fortress for the next wave, while its destruction ends the game. Repeated play allows players to refine their strategies, master turret placement, and improve resource management—key elements that make the map so appealing. While designed primarily for solo play, the map also supports team-based strategies, ensuring an exciting experience even when played alone. Before starting, players should familiarize themselves with turret types and their effects, study attack timings for each direction, and avoid neglecting resource collection. Prioritizing turret upgrades wisely is essential, as the difficulty escalates rapidly if defenses are insufficient early on. Mastery requires consistent practice and tactical foresight, rewarding players with the thrill of protecting the fortress against overwhelming odds. Renowned for capturing the essence of the defense genre, *Cannon Defense 10-Way V9.11* stands out among StarCraft custom maps. Its unique ten-directional structure delivers constant tension and strategic depth, making each playthrough a rewarding challenge. The satisfaction of overcoming increasingly difficult waves ensures this map is a must-try for any fan of the genre.
썬켄 디펜스 6웨이 10.0 (Sunken Defense 6 Way 10.0)
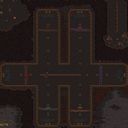
‘썬켄 디펜스 6웨이 10.0(Sunken D 6 way 10.0)’은 스타크래프트: 브루드워의 유즈맵 중에서도 정글 지형을 배경으로 한 디펜스 장르의 대표작으로, 플레이어는 맵 중앙에 위치한 기지 주변으로 몰려드는 다수의 적 웨이브를 방어하는 것이 주된 목표다. 맵은 6개의 진출로(웨이)가 방사형으로 배치되어 있어 각 방향에서 끊임없이 몰려드는 적을 상대해야 하며, 이 때문에 맵을 빙 둘러싼 방어 시설과 유닛 관리 능력이 핵심 포인트가 된다. 해상도와 타일셋은 일반 정글 지형을 사용해 시각적 몰입감을 높였고, 맵 중앙의 넓은 공간은 방어 타워나 건물을 배치할 수 있는 전략적 요충지로 기능한다. 플레이 방식은 크게 세 가지로 나뉜다. 첫째, 각 웨이(6방향)에 배치된 방어선을 유지하며 적의 공격을 막아내는 ‘기본 디펜스’ 단계다. 둘째, 일정 웨이브가 지나면 더 강력한 적들이 등장하거나 진형이 변화하는 ‘난이도 상승’ 단계로, 이때는 방어 자원과 유닛을 재배치해야 생존이 가능하다. 셋째, 보스급 유닛이 등장하는 ‘최종 웨이브’로, 이 단계에서는 모든 방어선을 통합해 보스를 상대해야 한다. 특히 6개의 웨이가 동시에 공격을 받기 때문에 멀티태스킹 능력이 요구되며, 방어 타워의 배치와 업그레이드 타이밍이 승패를 좌우한다. 이 맵의 가장 큰 특징은 ‘랜덤성과 변동성’이다. 각 웨이브마다 등장하는 적의 조합이 달라지며, 때로는 공중 유닛이나 특수 유닛이 다수 포함되어 기존의 방어 라인을 무력화시킬 수 있다. 또한 맵 중앙의 넓은 공간을 활용한 ‘보스 사냥’이나 ‘후퇴-재정비’ 전략도 가능해, 숙련된 플레이어는 단순히 방어에 머무르지 않고 능동적으로 플레이를 전개할 수 있다. 반면 초보자의 경우, 방어 라인의 중요성을 간과하고 중앙에만 집중하다가 웨이의 균형이 무너지는 경우가 많다. ‘썬켄 디펜스 6웨이 10.0’을 추천하는 대상은 크게 두 부류다. 첫째, 디펜스 장르를 좋아하는 유저들로, 특히 다중 웨이와 랜덤한 웨이브가 주는 긴장감을 즐기는 플레이어에게 적합하다. 둘째, 스타크래프트의 기본 전략과 유닛 조합을 익히고 싶어 하는 유저들로, 이 맵을 통해 방어 시설의 배치, 자원 관리, 유닛 업그레이드 등 다양한 전략적 요소들을 실전처럼 경험할 수 있다. 반면, 한 번의 실수로 모든 것이 무너질 수 있는 높은 난이도와 긴 플레이 시간(예상 40분 내외)을 감당할 수 있는 체력이 요구된다. 플레이 전에는 반드시 방어 라인의 균형을 점검하고, 각 웨이의 특징(예: 공중 유닛 비중, 속도優位 유닛 등)을 숙지한 뒤 임하는 것이 좋다. 또한, 맵 에디터의 특성상_VERSION_이나_EDIT_ 태그가 포함된 내부 설명은 버전 관리와 개선 이력을 확인하는 데 도움이 된다. ‘Sunken Defense 6-Way 10.0’ is one of the most iconic defense maps in *StarCraft: Brood War*, set in a jungle terrain where players must defend their base from waves of enemies swarming from the map’s center. The map features six radial paths (ways) spreading outward, forcing players to constantly fend off attacks from all directions. This makes perimeter defense and unit management the key to survival. The resolution and tileset use a standard jungle aesthetic to enhance immersion, while the wide central area serves as a strategic zone for placing defensive towers and structures. The gameplay is divided into three main phases. First is the ‘Basic Defense’ stage, where players maintain the six-way perimeter and repel enemy attacks. Next is the ‘Difficulty Escalation’ phase, triggered after certain waves, where stronger enemies appear or formations change—requiring players to reorganize their defenses and units to survive. Finally, the ‘Final Wave’ introduces elite boss units, demanding a coordinated defense across all six paths. Since all six ways can be attacked simultaneously, multitasking is essential, and the timing of tower placements and upgrades often determines victory or defeat. The map’s standout feature is its ‘randomness and variability.’ Each wave introduces different enemy compositions, sometimes overwhelming existing defenses with air units or specialized units. The central area also enables advanced strategies like ‘boss hunting’ or ‘retreat and regroup,’ allowing skilled players to go beyond passive defense. Beginners, however, often focus too much on the center while neglecting the perimeters, leading to imbalanced defenses. This map is recommended for two main groups. First, fans of the defense genre who enjoy the tension of multi-directional waves and unpredictable enemy compositions. Second, players looking to master *StarCraft*’s core strategies and unit synergies—this map lets them practice defensive positioning, resource management, and unit upgrades in a dynamic, real-time setting. However, the high difficulty—where a single mistake can collapse everything—and the lengthy playtime (around 40 minutes) demand stamina. Before playing, it’s crucial to balance the perimeter defenses and study each path’s characteristics (e.g., air unit ratios, speed advantages). Additionally, internal notes tagged with _VERSION_ or _EDIT_ in the map editor can help track updates and improvements.
엘드리치 레이크 1.6 (Eldritch Lake 1.6)
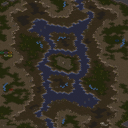
스타크래프트 브루드워의 유즈맵 《엘드리치 레이크 1.6》(Eldritch Lake1.6)은 수중 테마의 디펜스형 맵으로, 최대 8명의 플레이어가 한 팀을 이뤄 협동하는 구조다. 맵 중앙에는 거대한 호수가 자리 잡고 있으며, 주변에는 지형과 자원이 배치되어 있는 가운데 플레이어는 이 공간을 방어하며 지속적인 공격을 버텨내야 한다. 맵의 이름은 ‘엘드리치’라는 다소 낯선 단어가 포함되어 있지만, 사실상 ‘이상한 호수’라는 뜻의 상징적 제목으로 보인다. 맵의 분위기는 사막 타일셋을 기반으로 하지만 수중 지역과 섬 지형이 조화를 이뤄 신비로운 느낌을 자아낸다. 맵의 주요 특징은 중앙 호수 주변의 좁은 길목을 중심으로 적의 공격을 허용하지 않고 방어 구조물을 구축하는 데 있다. 맵의 구조상 플레이어는 호수 주변의 고지대와 섬 지형을 활용해 방어선을 구축할 수 있으며, 자원의 확보와 건물을 배치하는 공간이 한정적이므로 전략적 선택이 중요하다. 특히, 맵의 지형이 복잡하고 좁은 통로로만 접근이 가능한 구조이기 때문에, 초반부터 방어 태세를 갖추지 않으면 순식간에 밀리기 십상이다. 맵의 진행은 주로 적의 웨이브가 지속적으로 밀려오는 방식으로, 각 웨이브마다 적의 종류와 수가 조금씩 달라지는 것으로 추정된다. 플레이어는 각자의 역할을 분담해 방어 타워를 건설하고, 자원을 효율적으로 관리하며, 적의 공격을 효과적으로 방어해야 한다. 맵의 난이도는 맵의 구조상 초보자보다는 중급 이상의 플레이어에게 적합한 편으로 보인다. 초보자의 경우 좁은 길목과 복잡한 지형 때문에 자원 관리와 방어 전략 수립이 어려울 수 있으며, 적의 공격 패턴을 파악하지 못해 순식간에 무너질 위험이 크다. 반면, 중급 이상의 플레이어는 지형의 이점을 최대한 활용해 방어선을 구축하고, 자원의 흐름을 예측하며, 적의 공격을 분산시키는 전략을 구사할 수 있을 것이다. 맵을 플레이하기 전에는 반드시 맵의 지형과 자원 분포를 숙지해야 하며, 방어 타워의 배치와 자원 확보의 우선순위를 신중히 결정해야 한다. 또한, 팀원과의 원활한 소통과 역할 분담을 통해 효율적인 방어 체계를 구축하는 것이 성패의 관건이다. 이 맵은 디펜스 장르에 익숙한 플레이어에게는 흥미로운 도전 과제가 될 것이며, 협동 플레이를 중시하는 유저들에게는 훌륭한 선택지가 될 것이다. 그러나 복잡한 지형과 제한된 공간 때문에 플레이 시간이 다소 길어질 수 있으며, 자원의 부족으로 인한 타워 건설의 지연이 발생할 가능성이 있으니 주의가 필요하다. StarCraft: Brood War's custom map *Eldritch Lake 1.6* is a defense-style map with an underwater theme, designed for up to eight players to team up and collaborate. At the center of the map lies a massive lake, surrounded by terrain and resources, where players must defend the area while enduring continuous enemy attacks. Though the name includes the somewhat unfamiliar word "Eldritch," it likely symbolizes a title meaning "strange lake." The map’s atmosphere is based on a desert tileset but harmonizes with underwater regions and island terrain to evoke a mysterious feel. The map’s key feature revolves around the narrow pathways surrounding the central lake, where players must build defensive structures to fend off enemy assaults. Due to the map’s layout, players can establish defensive lines by utilizing high ground and islands, but limited space for resource gathering and building placement makes strategic decisions crucial. The complex terrain and restricted access through narrow passages mean that failing to set up defenses early can lead to quick defeat. The gameplay primarily involves waves of enemies continuously pushing forward, with each wave featuring varying enemy types and numbers. Players must assign roles, construct defensive towers, manage resources efficiently, and effectively counter attacks. The map’s difficulty seems better suited for intermediate to advanced players rather than beginners, as the narrow paths and intricate terrain can make resource management and defense planning difficult for newcomers. Novices may struggle to grasp enemy attack patterns and could collapse quickly without a solid strategy. In contrast, intermediate or advanced players can leverage the terrain to build strong defenses, predict resource flow, and disperse enemy attacks strategically. Before playing, it’s essential to thoroughly understand the map’s terrain and resource distribution, carefully deciding where to place defensive towers and prioritize resource collection. Effective communication and role distribution among teammates are critical to building a cohesive defense. For players familiar with defense genres, this map offers an engaging challenge, while cooperative players will find it an excellent choice. However, the complex terrain and limited space may result in longer playtimes, and resource shortages could delay tower construction, so caution is advised.
스타 포톤 디펜스 V 4.3 (Star Photon Defense V 4.3)
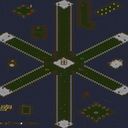
‘스타 포톤 디펜스 V 4.3(Star Photon Defense V 4.3)’은 스타크래프트 브루드워의 대표적인 디펜스 유즈맵으로, 포톤 캐논을 중심으로 한 전략적 방어 플레이를 경험할 수 있는 맵이다. 맵 중앙에는 거대한 포톤 캐논을 건설할 수 있는 공간이 마련되어 있으며, 적의 끊임없는 공격을 효과적으로 저지하기 위해 포톤 캐논뿐만 아니라 보조 건물과 유닛들을 적시에 배치해야 한다. 맵의 가장 큰 특징은 ‘포트리스’와 같은 입체적인 구조물로, 중앙 요새를 중심으로 방어선을 구축하는 동시에 적의 공세를 분산시키는 전략이 요구된다. 특히 버전 4.3에서는 난이도가 한층 높아졌으며, 새로운 유닛과 금지 목록이 추가되어 플레이어의 적응력을 테스트한다. 플레이어는 시작과 동시에 제한된 자원으로 빠르게 방어 체계를 구축해야 하며, 적의 공격 패턴에 따라 포톤 캐논의 배치와 업그레이드 타이밍을 신중히 결정해야 한다. 맵의 링 모양 구조는 입구를 좁혀서 방어 효율을 높이는 동시에, 적의 다중 루트를 고려한 전략적 포지셔닝이 필요하다는 점에서 디펜스 맵의 정수를 담고 있다. 또한, 맵의 난이도 상승으로 인해 초보 플레이어보다는 어느 정도의 전략적 사고와 경험이 있는 유저에게 더 어울리는 편이다. 맵의 진행은 끊임없는 적의 웨이브를 막아내며 생존하는 방식으로, 플레이어의 집중력과 자원 관리 능력을 동시에 요구한다. 이 맵은 특히 포톤 캐논을 중심으로 한 방어 전략을 연마하고자 하는 유저들에게 추천되며, 디펜스 맵의 묘미인 ‘최후의 방어선’을 지키며 승리하는 성취감을 느낄 수 있다. 또한, 팀플레이가 가능한 구조로 되어 있어 친구들과 함께 협력하여 더 어려운 난이도를 공략할 수도 있다. 맵의 볼륨이 크고 구조가 복잡할 수 있으므로, 플레이 전 맵의 주요 포인트를 숙지하고 각 입구에 대한 방어 전략을 미리 준비하는 것이 중요하다. 포톤 캐논의 업그레이드와 보조 유닛의 활용 여부가 승패를 가를 수 있는 핵심 포인트이므로, 이를 염두에 두고 플레이를 시작하는 것이 좋다. ‘Star Photon Defense V 4.3’ is a renowned defense custom map in *StarCraft: Brood War*, offering players a chance to experience strategic defensive gameplay centered around Photon Cannons. At the center of the map lies a large space where players can construct Photon Cannons, requiring timely placement of auxiliary buildings and units to effectively counter relentless enemy assaults. The map’s standout feature is its three-dimensional structures, similar to those in *Fortress*, which demand players to build defensive lines around the central fortress while simultaneously dispersing enemy forces. Version 4.3 introduces heightened difficulty with new units and banned units, testing players’ adaptability. From the start, players must quickly establish a defense system with limited resources, carefully deciding when to deploy Photon Cannons and upgrade them based on enemy attack patterns. The map’s ring-like structure enhances defensive efficiency by narrowing entry points, but it also necessitates strategic positioning to account for multiple enemy routes—a hallmark of top-tier defense maps. Due to its increased difficulty, the map is better suited for players with some strategic thinking and experience rather than beginners. The gameplay revolves around surviving wave after wave of enemy attacks, demanding both sharp focus and efficient resource management. This map is especially recommended for players looking to refine their Photon Cannon-based defense strategies, offering the thrill of holding the ‘last line of defense’ to achieve victory. It also supports team play, allowing friends to collaborate and tackle even greater challenges. Given its large scale and complex structure, familiarizing yourself with key map points and preparing defensive strategies for each entrance beforehand is crucial. The upgrade of Photon Cannons and the effective use of auxiliary units can determine victory or defeat, so keeping these factors in mind before starting is essential.
SCD 5 -- Space
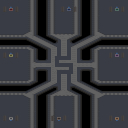
SCD 5 -- Space는 스타크래프트 브루드워의 공식 유즈맵 시리즈로, SCD 리그 시즌 5를 위해 제작된 타워 디펜스 맵이다. 우주 배경의 넓은 맵에서 8명의 플레이어가 협동하여 적의 공격을 방어하는 구조로, 스타크래프트 디펜스(FMP) 스타일을 계승한 정석적인 디펜스 게임이다. 맵 중앙에는 50개의 미네랄이 층층이 쌓여 있으며, 방어선의 중요 포인트를 중심으로 타워를 건설하고 자원을 관리해야 한다. 맵 이름은 'Space'이지만 우주전투보다는 방어 초소와 요새를 구축하는 전략적 요소가 stronger emphasized되며, 맵 디자인은 표준 FMP(Fog of War Map) 스타일을 따르고 있어 익숙한 스타크래프트 유저라면 빠르게 적응할 수 있다. 맵의 크기는 4096x4096으로 상당히 넓지만, 방어 구조물이 집중된 중앙 구역을 중심으로 플레이가 진행되므로 전투는 비교적 조밀한 공간에서 이루어진다. 타워 디펜스라는 장르의 특징상, 초반 자원 관리와 적절한 타워 배치, 그리고 적의 공격 패턴을 읽는 능력이Victory의 핵심 요소이며, 8명이 모두 협동하지 않으면 어려움을 겪을 수 있다. 특히 미네랄이 층층이 쌓인 구조는 자원 확보뿐만 아니라 방어선의 시각적 가이드 역할도 하는데, 이를 잘 활용하면 효율적인 타워 배치를 계획할 수 있다. 맵의 난이도는 제작자나 리그 규정에 따라 조정될 가능성이 있지만, 기본적으로는 초보자가 осво하기 어려운 수준은 아니며, 디펜스 맵에 익숙한 플레이어에게는 흥미로운 전략적 도전을 제공한다. 맵을 플레이하기 전에는 타워 건설 가능 구역과 이동 불가 지역을 정확히 파악하는 것이 중요하며, 특히 적의 주요 공격 경로인 길목 주변은 사전에 방어선을 구축해두는 것이 좋다. 또한, 자원의 확보와 관리, 그리고 팀원 간의 의사소통이 Victory의 큰 부분을 차지하므로, 혼자가 아닌 팀 플레이를 전제로 한 맵임을 유념해야 한다. 맵의 배경은 우주이지만 실제 전투는 지상과 공중 유닛 위주로 이루어지며, 맵의 넓은 공간을 활용한 방어 전략보다는 타워의 효율성과 적절한 배치에 중점을 둔다. 맵의 전체적인 분위기는 깔끔한 구조와 함께 전략적 깊이를 제공하며, SCD 리그의 공식 맵답게 균형 잡힌 밸런스를 지향하고 있다. 이 맵은 디펜스 장르를 좋아하는 유저들에게는 필수 플레이 대상 중 하나로, 특히 다인용 협동 플레이를 즐기는 유저들에게 추천할 만한佳作이다. 플레이 전에는 맵의 주요 방어 포인트와 자원 분포를 먼저 숙지하고, 팀원과의 역할 분담을 확실히 하는 것이 Victory에 가까워지는 지름길이 될 것이다. SCD 5 -- Space is an official StarCraft: Brood War custom map series, designed as a tower defense game for SCD League Season 5. Set in a vast space-themed map, eight players collaborate to defend against enemy attacks, inheriting the classic StarCraft Defense (FMP) style. At the center of the map, 50 mineral patches are stacked in layers, requiring players to strategically build towers and manage resources around key defensive points. Despite its name, Space emphasizes base fortification and strategic outpost construction over space combat, following the standard FMP (Fog of War Map) design for easy adaptation by StarCraft players familiar with the genre. The map spans 4096x4096, but gameplay revolves around the densely packed central area where defensive structures are concentrated, ensuring tight and intense battles. As a tower defense map, victory hinges on efficient early resource management, strategic tower placement, and reading enemy attack patterns—especially since eight players must coordinate effectively to succeed. The layered mineral structure not only secures resources but also serves as a visual guide for defense, aiding in optimal tower positioning. While difficulty may vary by creator or league rules, the map remains accessible to beginners and offers engaging strategic challenges for experienced defense players. Before playing, it’s crucial to identify buildable and impassable areas, particularly pre-constructing defenses along enemy approach routes. Resource acquisition, management, and team communication are vital, reinforcing that this is a cooperative team-based map. Though set in space, combat primarily involves ground and air units, prioritizing tower efficiency and placement over spatial defense strategies. The map’s clean design and strategic depth reflect its balance, aiming for fairness as an official SCD League map. A must-play for defense genre fans, it’s especially recommended for those who enjoy multiplayer cooperative gameplay. To succeed, study key defense points and resource distribution beforehand, and clarify team roles to pave the way for victory.
최근 등록된 맵
새로 추가된 파일과 버전을 확인하세요.
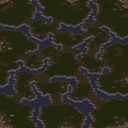
미네랄4겹 빅헌터 느린무한 AI
스타크래프트 브루드워의 유즈맵 중 하나로, ‘미네랄4겹 빅헌터 느린무한 AI’는 싱글 플레이어 전용의 무한 디펜스 형식 맵이다. 맵의 핵심은 이름에서도 유추할 수 있듯 미네랄이 4겹으로 배치되어 있다는 점으로, 이는 플레이어가 끊임없이 자원을 확보할 수 있도록 설계된 구조다. ‘빅헌터’는 맵 곳곳에 배치된 강력한 적 유닛을 의미하며, ‘느린무한’이란 이름에서 알 수 있듯 적의 스폰 텀과 속도가 비교적 느리게 설정되어 초보자도 안정적으로 플레이할 수 있도록 배려된 점이 특징이다. 맵의 진행 방식은 단순하면서도 중독성 있는 디펜스 게임으로, 플레이어는 본진에서 자원을 채취하며 방어 건물이나 유닛을 지속적으로 생산하고 배치해야 한다. 4겹으로 배치된 미네랄은 자원 확보의 용이성을 높여주지만, 동시에 적의 공격 루트와 방어 포인트가 복잡해질 수 있어 전략적인 배치와 관리가 요구된다. 맵 곳곳의 ‘빅헌터’는 일정 주기마다 등장하는 강력한 적 유닛으로, 이를 상대하기 위해 플레이어는 방어 건물의 업그레이드나 특수 유닛의 생산을 고려해야 한다. ‘느린무한’이라는 설명처럼 적의 스폰 텀과 이동 속도가 느리게 설정되어 있어, 리소스 관리와 방어 전략을 차근차근 세워나갈 수 있다. 이 맵은 특히 스타크래프트의 AI를 활용한 무한 디펜스라는 장르에 특화된 경험을 제공하며, 싱글 플레이어용으로 설계되어 있어 타 플레이어와의 협동이나 경쟁 없이도 혼자서 긴장감 있는 플레이를 즐길 수 있다. 초보자도 쉽게 접근할 수 있도록 난이도가 조절되어 있지만, 지속적인 자원 관리와 방어 전략의 최적화가 필요해 고수 유저에게도 도전을 제공한다. 또한, 맵의 구조가 비교적 크고 복잡하지 않아 자원 확보와 방어 포인트의 선택이 중요하며, 이를 통해 플레이어의 전략적 사고력을 키울 수 있는 좋은 연습용 맵으로도 활용할 수 있다. 이 맵을 플레이하기 전에, 맵의 구조와 자원 배치, 적의 스폰 위치를 미리 확인하는 것이 중요하다. 또한, 방어 건물의 종류와 특성, 그리고 ‘빅헌터’의 패턴을 숙지하여 효율적인 방어 전략을 세우는 것이 관건이다. 초보자라면 먼저 느린 템포의 AI와 전투를 경험해보며 자원 관리와 방어 건물의 배치에 익숙해지는 것이 좋으며, 고수라면 보다 효율적인 자원 활용과 공격 루트의 차단에 중점을 두고 플레이해볼 만하다. This StarCraft: Brood War custom map, titled ‘Mineral Quad-layer Big Hunter Slow Infinite AI,’ is a single-player infinite defense game designed for solo play. The map’s title already hints at its core mechanics: the mineral fields are arranged in four concentric layers, ensuring a steady stream of resources for the player. The term ‘Big Hunter’ refers to the powerful enemy units scattered across the map, while ‘Slow Infinite’ indicates that the enemy spawn rate and movement speed are deliberately slowed down, making the game accessible even to beginners. The gameplay revolves around a classic defense strategy where the player must gather resources, construct and upgrade defensive buildings, and deploy units to fend off waves of enemies. The four-layered mineral structure simplifies resource collection but adds complexity to enemy approach routes, requiring careful planning for optimal defense placement. The ‘Big Hunters’ appear periodically as powerful foes, necessitating strategic upgrades or specialized unit production to counter them effectively. The ‘slow infinite’ pacing ensures that players have ample time to manage resources and refine their defensive setups without feeling overwhelmed. This map is tailored for fans of AI-driven infinite defense games and offers a satisfying solo experience without the need for multiplayer coordination. While the difficulty is balanced for beginners, the strategic depth lies in resource management and adaptive defense planning, making it equally engaging for advanced players. The map’s size and structure are manageable, emphasizing the importance of mineral distribution and choke point control, which helps players hone their tactical thinking. Before playing, it’s advisable to familiarize yourself with the map layout, mineral distribution, and enemy spawn points. Understanding the capabilities of defensive structures and the patterns of ‘Big Hunters’ is crucial for building an effective strategy. Beginners should start by acclimating to the slower pace and practicing resource management, while experienced players can focus on optimizing their mineral income and blocking enemy routes for maximum efficiency.
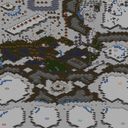
세계 최악의 컴까기 (The Worst Compkki)
‘세계 최악의 컴까기’는 스타크래프트 브루드워 유즈맵의 대표적인 컴퓨터 상대 디펜스 장르로, 그 이름에서부터 느껴지듯 극악의 난이도를 자랑하는 맵이다. 맵 구조는 중앙에 위치한 본진을 중심으로 광활한 방어 지역이 펼쳐지며, 곳곳에 배치된 방어 건물과 병력 생산 시설이 플레이어의 생존을 시험한다. 맵 상단과 하단에는 각각의 시작 지점이 존재하며, 이 곳에서부터 끊임없이 몰려오는 적군을 상대로 방어선을 구축해야 한다. particularly, 맵의 가장 큰 특징은 방어 건물의 배치와 자원 수급의 불리함에 있다. 광물과 가스가 중앙 본진에 집중되어 있어 초반 자원 확보가 원활하지 않으며, 방어 건물의 위치가 플레이어의 전략적 선택을 강제한다. 또한, 적군의 병력 구성과 공격 패턴이 끊임없이 변화하여 플레이어는 지속적인 대비를 요구받는다. 이 맵은 초보자보다는 경험이 있는 유저를 대상으로 하며, 특히 디펜스 게임의 기본기를 충실히 다진 플레이어에게 추천할 만하다. 방어 건물의 효율적인 배치와 자원 관리가 승패를 좌우하므로, 맵을 플레이하기 전에는 기본 전략을 숙지하고 다양한 시나리오를 연습해 보는 것이 중요하다. 맵의 극악 난이도는 플레이어의 실력을 한 단계 끌어올리는 데 도움이 될 것이다. 무엇보다도, 이 맵은 단순히 방어만을 요구하지 않으며, 적군의 공격을 유도하고 반격하는 전략적 요소가 포함되어 있어 디펜스 게임의 깊이를 느낄 수 있다. 게임을 마스터하기 위해서는 맵의 구조를 정확히 이해하고, 각 공격 타이밍에 맞춘 방어 및 반격 계획을 수립하는 것이 필수적이다. 이처럼 ‘세계 최악의 컴까기’는 디펜스 유즈맵의 진수를 보여주는 동시에, 플레이어의 실력을 시험하는 도전 과제의 장으로 자리매김하고 있다. "World's Worst AI Defense" is a representative defense genre map in *StarCraft: Brood War* custom maps where players battle against computer opponents, boasting an extreme difficulty that lives up to its name. The map centers around a main base surrounded by vast defensive zones, with defensive structures and production facilities scattered throughout to test the player's survival skills. Each side—top and bottom—has its own starting point, from which waves of enemies continuously assault, requiring players to build and maintain a strong defense line. A key feature of the map is the restrictive placement of defensive buildings and the disadvantageous resource distribution. Minerals and Vespene Gas are concentrated near the central main base, making early resource collection difficult, while the positioning of defensive structures forces players to make strategic choices. Additionally, the enemy's constantly shifting unit compositions and attack patterns demand continuous adaptation from the player. This map is aimed at experienced players rather than beginners, making it especially suitable for those who have honed their defensive gameplay fundamentals. Efficient placement of defensive buildings and resource management are critical to victory, so it's important to study basic strategies and practice various scenarios before playing. The map's brutal difficulty helps elevate a player's skill level, but it also incorporates strategic elements beyond simple defense—such as luring and counterattacking enemy forces—allowing players to experience the depth of defense games. Mastering this map requires a deep understanding of its layout and the ability to devise defense and counterattack plans tailored to each enemy assault timing. In this way, "World's Worst AI Defense" not only showcases the essence of defense custom maps but also stands as a challenging test of a player's skill.
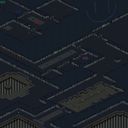
침투 (Proniknovenie)
이 맵은 스타크래프트 브루드워의 유즈맵으로, 광물 가스 채취를 테마로 한 디펜스 및 생존형 게임입니다. 맵의 제목인 ‘Ïðîíèêíîâåíèå’는 러시아어로 ‘침투’를 뜻하며, 내부 설명에 따르면 레이더들이 계획을 세운 것으로 보입니다. 내부 맵 제목과 설명이 깨져 있어 정확한 스토리를 파악하기는 어렵지만, 광물과 가스를 둘러싼Resource Wars(자원 전쟁) 형식의 플레이가 예상됩니다. 설원/얼음 타일셋으로 구성된 맵은 시각적으로 차가운 분위기를 연출하며, 플레이어는 광물과 가스 채취를 방해하는 적의 공격을 방어해야 합니다. 맵의 구조는 중앙에 광물과 가스가 배치되어 있으며, 주변으로 적의 기지가 분포되어 있습니다. 플레이어는 베이스에서 유닛을 생산하고,Resource를 확보하며, 적의 침공을 저지해야 합니다. 맵의 크기가 3072x3072로 상당히 넓고, 타일 단위가 96x96로 디자인되어 있어 넓은 시야와 전략적 위치 선정이 중요합니다.Resource Wars 장르의 특징인 자원 관리와 방어가 주가 되며, 적의 기지를 파괴하거나 일정 조건을 만족하면 승리할 것으로 추정됩니다. 특히Resource Wars는 스타크래프트 유즈맵 중에서도 인기 있는 장르 중 하나로,Resource 확보와 방어 전략이 균형을 이룰 때 플레이의 재미가 극대화됩니다. 이 맵은Resource Wars 장르에 익숙한 플레이어들에게 추천됩니다.Resource Wars는Resource 관리와 방어 전략이 동시에 요구되므로,Resource 확보와 유닛 생산의 밸런스를 잘 맞춰야 합니다.Resource Wars를 처음 플레이하는 경우,Resource 확보 우선순위와 방어 라인 구축 방법을 익히는 것이 중요합니다.Resource Wars 장르의 핵심을 이해하고 있다면Resource Wars 맵의 재미를 충분히 느낄 수 있을 것입니다. 플레이 전에는Resource 확보와 유닛 생산의 균형을 미리 계획하고,Resource 확보 우선순위를 정해두는 것이 좋습니다.Resource Wars는Resource 확보가 늦어지면 방어가 약해지기 때문에,Resource 확보와 방어의 균형을 맞추는 것이 핵심입니다.Resource Wars 맵의Resource 확보와 방어 전략을 미리 연습해두면Resource Wars의 재미를 더 높일 수 있습니다. This map is a StarCraft: Brood War custom map centered around gathering minerals and gas, featuring a defense and survival-style gameplay. The map’s title, *Ïðîíèêíîâåíèå*, translates to "infiltration" in Russian, and the internal description suggests that the raiders are plotting something. While the broken internal title and description make it difficult to fully grasp the story, the gameplay likely revolves around a *Resource Wars* (resource war) format, where players compete over minerals and gas. The map uses a snowy/ice tileset, giving it a cold, stark visual atmosphere. Players must defend their bases while securing resources, fending off enemy attacks aimed at disrupting their mining operations. The layout features minerals and gas centrally located, with enemy bases scattered around the perimeter. Players construct units from their base, gather resources, and repel enemy invasions. The map is large at 3072x3072 with 96x96 tile units, emphasizing wide vision and strategic positioning. As a *Resource Wars* map, the core mechanics revolve around resource management and defense, with victory likely achieved by destroying enemy bases or fulfilling specific conditions. *Resource Wars* is one of the most popular custom map genres in StarCraft, and its appeal peaks when resource management and defensive strategies are balanced. Players who enjoy this genre will find this map particularly engaging. For those familiar with *Resource Wars*, this map comes highly recommended. Balancing resource gathering and unit production is crucial, as delays in securing resources weaken defenses. Beginners should prioritize learning resource management and how to establish defensive lines early. Understanding the genre’s core mechanics will allow players to fully enjoy the map’s depth. Before playing, plan your resource gathering and unit production carefully, setting clear priorities. Since resource delays weaken defenses, maintaining a balance between resource collection and defense is key. Practicing resource and defense strategies beforehand will enhance the overall enjoyment of the *Resource Wars* experience.
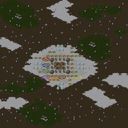
나무도굴단2 (Namu Doguldan 2)
스타크래프트 브루드워의 유즈맵 ‘나무도굴단2’는 플레이어가 컴퓨터를 상대로 자원을 채취하고 방어전을 펼치는 컴까기 장르의 맵으로, 비행기 유닛이 포함된 특징을 가지고 있다. 맵은 넓은 평야와 조밀한 나무 지역으로 구성되어 있으며, 플레이어는 초반에 자원을 확보해 유닛을 생산하고, 중반부터는 방어와Resource Gathering을 병행해야 한다. 맵의 중앙과 외곽에는 높은 지형과 숲이 배치되어 있어 시야 확보와 진형 잡기가 중요한 요소로 작용한다. 특히 비행기 유닛이 제공되는 만큼 공중 유닛을 활용한 대처가 가능해 전략의 다양성이 늘어나며, 컴퓨터의 공격 패턴도 공중과 지상 혼합으로 예상된다. 1.05 버전으로 추정되는 이 맵은 제작자 Lejewk에 의해 제작되었으며, ‘Error도굴많이 해주세요’라는 메시지가 포함되어 있어 제작자의 유머 감각이 느껴진다. 플레이어는 초보자부터 숙련자까지 폭넓게 즐길 수 있지만, 방어 라인 구축과 자원 관리에서 전략적 사고가 요구된다. 맵을 플레이하기 전에는 비행기 유닛의 특성과 컴퓨터의 공격 패턴에 맞춰 빌드와 유닛 조합을 미리 준비하는 것이 중요하다. 초반 자원 확보와 방어 타워의 적절한 배치가 게임의 승패를 좌우할 수 있으며, 특히 숲 지형과 높은 지형을 활용한 우회 공격에 대응할 수 있는 대비를 갖추는 것이 필수적이다. 게임의 재미는 공중 유닛의 활용과 방어 전략의 균형을 맞추는 데 있으며, 이는 컴까기 장르의 핵심이기도 하다. 또한, 맵의 넓은 공간을 활용한 기동성과 다양한 유닛 조합을 시도해 볼 수 있어, 반복 플레이 시에도 새로운 전략을 시도해 볼 수 있는 장점이 있다. StarCraft: Brood War's custom map *Treasure Hunters 2* is a computer-vs-human resource-gathering and defense map with a unique feature: flying units are included. The map consists of wide open plains interspersed with dense forests, forcing players to secure early resources for unit production while balancing defense and gathering as the game progresses. High ground and trees are strategically placed in both the center and outer regions, making vision control and positioning crucial. With access to flying units, players can diversify their strategies, and the AI’s attacks are expected to mix air and ground approaches. Estimated to be version 1.05, the map was created by Lejewk, whose humor shines through in the message “Please make lots of errors” included in the file. Suitable for players of all skill levels, the challenge lies in building defensive lines and managing resources effectively. Before playing, it’s important to prepare builds and unit compositions tailored to the flying units and the AI’s attack patterns. Early resource collection and smart tower placement can determine victory or defeat, and players must be ready to counter flanking attacks using the terrain’s forests and high ground. The fun comes from balancing aerial unit use with defensive play—a core aspect of the comp-stomp genre. The map’s expansive layout also encourages experimentation with unit combinations and mobility, offering fresh strategies even after multiple playthroughs.
테란 디펜스 V2.0 (Terran Defence V2.0)
테란 디펜스 V2.0은 스타크래프트 브루드워의 대표적인 유즈맵 중 하나로, 테란 종족을 조종하여 끊임없이 몰려드는 적들을 방어하는 디펜스 장르의 게임입니다. 맵은 중앙에 플레이어 기지 역할을 하는 커맨드 센터가 배치되어 있으며, 주변으로 여러 개의 입구가 뚫려 있습니다. 각 입구는 지정된 경로로 적 유닛이 끊임없이 생성되어 플레이어를 공격합니다. 플레이어는 커맨드 센터를 중심으로 방어 건물을 건설하고, 업그레이드를 통해 방어력을 강화해야 합니다. 맵의 특징은 입구별로 난이도와 적의 공격 패턴이 다르다는 점으로, 특정 입구는 더 강력한 적이나 다수의 적을 동시에 상대해야 하는 경우가 있습니다. 또한, 맵 곳곳에 숨겨진 자원이나 보너스 건물들이 배치되어 있어 전략적인 자원 관리도 필요합니다. 이 맵은 주로 6명의 플레이어가 각자의 입구를 방어하는 협동형 플레이가 가능하며, 적의 공세를 막아내며 생존하는 것이 목표입니다. 초보자와 숙련자 모두 즐길 수 있도록 난이도가 조절 가능한데, 입구별로 난이도를 설정할 수 있어 자신에 맞는 난이도를 선택할 수 있습니다. 특히, 방어 건물을 효율적으로 배치하고 업그레이드를 적시에 진행하는 것이 승리의 핵심입니다. 테란 디펜스 V2.0은 오랜 기간 사랑받아온 디펜스 유즈맵의 정수라 할 수 있으며, 전략성과 긴장감을 동시에 느낄 수 있는佳作입니다. 이 맵을 플레이하기 전에는 각 입구의 난이도와 공격 패턴을 미리 확인하고, 방어 건물의 배치와 업그레이드 계획을 세워두는 것이 좋습니다. 또한, 팀원과의 원활한 소통이 필수적이기에, 팀플레이가 가능한 맵이라는 점을 유념해야 합니다. Terran Defence V2.0 is a classic custom map in StarCraft: Brood War, where players control the Terran faction to defend against endless waves of enemies. The map features a central Command Center as the player's base, surrounded by multiple entry points where enemies spawn in designated paths. Players must construct defensive buildings and upgrade their defenses to withstand the attacks. Each entry point varies in difficulty and enemy patterns, with some requiring players to handle stronger or more numerous enemies. Hidden resources and bonus buildings are scattered throughout the map, adding a layer of strategic resource management. The map supports cooperative play for up to 6 players, each defending their own entry point, with the goal of surviving the enemy onslaught. The difficulty can be adjusted per entry point, making it accessible for both beginners and experienced players. The key to victory lies in efficient building placement and timely upgrades. Terran Defence V2.0 is a refined masterpiece of the defence custom map genre, offering both strategy and tension. Before playing, it's advisable to review the difficulty and attack patterns of each entry point and plan the placement of defensive buildings and upgrades. Team communication is essential, as this map is designed for team play.
터렛 디펜스 8ooo -Final- (Turret Defense 8ooo -Final-)
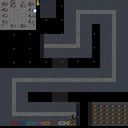
스타크래프트 유즈맵의 인기 장르 중 하나인 디펜스 게임의 정점을 보여주는 'Turret Defense 8ooo -Final-'은 강력한 테크니컬 디자인과 전략적 깊이를 동시에 요구하는本作品の 특징을 가지고 있다. 맵은 2048x2048의 거대한 우주 타일셋 위에 펼쳐지며, 플레이어는 중앙 기지에서 적의 끊임없는 웨이브를 막아내며 방어선을 구축하는 임무를 수행한다. 맵의 구조는 총 6명의 플레이어가 참여할 수 있도록 설계되어 있으며, 각각의 플레이어는 독자적인 진영을 확보하고 타워나 터렛을 배치하여 적의 공격을 방어해야 한다. 특히 맵 우측 하단에 위치한 'Turret Defense 8ooo'라는 타이틀 로고와 함께 배치된 초록색 장식 테두리, 그리고 좌측 상단과 하단에 배치된 붉은색과 파란색의 장식용 유닛들은 단순히 미관을 위한 장식이 아니라, 맵의 테마와 분위기를 한층 끌어올리는 핵심 요소로 기능한다. 맵의 중앙부는 비교적 평탄한 지형으로 이루어져 있어 타워나 방어 건물을 배치하기 용이하며, 주변부로 갈수록 지형이 복잡해지며 자연스럽게 요새화된 거점을 형성할 수 있도록 디자인되어 있다. 또한 맵의 곳곳에 배치된 작은 언덕이나 돌출부는 적의 진격을 방해하는 자연스러운 장애물로 활용될 수 있어, 전략적인 배치와 타워의 조합이 필수적이다. 플레이어들은 초반에 제공되는 제한된 자원으로 빠르게 방어 체계를 구축해야 하며, 중반 이후에는 적의 공격 패턴이 변하면서 다층 방어선을 구축하는 것이 관건이다. 맵의 난이도는 내부 설명에서 제작자나 버전 정보가 누락되어 명확하지 않지만, 맵의 구조와 배치된 방어 시설의 밀도를 고려했을 때 초보자보다는 적당한 경험을 보유한 플레이어에게 더욱 적합할 것으로 추정된다. 특히 'Turret Defense'라는 제목에서 알 수 있듯이, 타워나 터렛을 중심으로 한 방어 전략이 주를 이루며, 이를 통해 적의 웨이브를 효과적으로 차단하는 것이 목표다. 맵의 플레이 시간은 명확히 제시되지 않았지만, 6인용 디펜스 게임의 특성과 맵의 복잡성을 고려했을 때 30분 내외의 플레이 시간을 예상해 볼 수 있다. 이 맵은 단순히 적을 막아내는 것을 넘어, 플레이어 간의 협력과 경쟁이 동시에 이루어질 수 있는 구조로 설계되어 있어 팀 플레이를 즐기는 유저들에게도 훌륭한 선택지가 될 수 있을 것이다. 마지막으로, 맵의 제작자나 버전 정보가 내부 설명에 일부 누락되어 있지만, 'Final'이라는 제목에서 알 수 있듯이 완성도가 높은 작품임을 짐작할 수 있다. 맵을 플레이하기 전에 반드시 확인해야 할 점은 방어 건물의 배치 가능 범위와 각 플레이어의 진영 경계선이며, 이를 바탕으로 효율적인 방어 전략을 수립하는 것이 중요하다. 또한 맵의 복잡한 지형과 다양한 방어 포인트를 활용하여 적의 예상 진로와 공격을 예측하는 능력이 요구된다. 이 맵은 디펜스 장르의 팬이라면 반드시 플레이해 볼 가치가 있으며, 특히 타워 디펜스의 깊이를 즐기고 싶은 유저들에게는 더할 나위 없이 훌륭한 작품이다. One of the most popular genres in StarCraft custom maps, *Turret Defense 8ooo -Final-* showcases the pinnacle of defense games by demanding both technical design and strategic depth. The map unfolds across a vast 2048x2048 space-themed tileset, where players must build defensive lines from a central base to fend off endless enemy waves. Designed for up to six players, each controls their own territory, placing towers or turrets to repel attacks. The green decorative borders flanking the "Turret Defense 8ooo" title logo in the bottom-right corner, along with the red and blue decorative units in the top-left and bottom-left corners, aren’t just aesthetic—they enhance the map’s theme and atmosphere. The central area is relatively flat, ideal for tower or defensive structure placement, while the terrain grows more complex toward the edges, naturally forming fortified strongpoints. Scattered hills and outcrops throughout the map serve as obstacles to disrupt enemy advances, making strategic tower placement and combinations essential. Players must quickly establish defenses with limited early resources, later shifting to multilayered lines as enemy attack patterns evolve. Though difficulty specifics are missing from the internal description, the map’s structure and dense defensive setups suggest it’s better suited for players with some experience rather than beginners. As the title implies, the focus is on tower-based defense, with the goal of effectively blocking enemy waves. While playtime isn’t specified, the six-player format and intricate design likely result in sessions around 30 minutes. Beyond mere survival, the map encourages both cooperation and competition among players, making it an excellent choice for those who enjoy team-based gameplay. Although the creator and version details are partially omitted in the internal notes, the "Final" in the title hints at a polished, high-quality work. Before playing, it’s crucial to check tower placement ranges and territorial boundaries to devise an efficient defense strategy. Mastery also requires predicting enemy routes and attacks by leveraging the map’s varied terrain and defense points. A must-play for defense game fans, *Turret Defense 8ooo -Final-* is especially ideal for those seeking deeper tower defense mechanics.
터렛 디펜스 8000 파이널 (Turret Defense 8ooo -Final-)
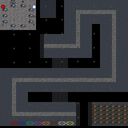
스타크래프트 브루드워의 대표적인 디펜스 장르 유즈맵인 <터렛 디펜스 8000 파이널>은 이름에서 알 수 있듯이 터렛(포탑)을 중심으로 한 방어 전략을 펼치는 맵입니다. 맵 우측 상단에 위치한 시작 지점에서 플레이어는 일정 주기마다 등장하는 적 유닛들을 상대로 포탑을 건설하고, 업그레이드를 통해 방어력을 강화해야 합니다. 맵 중앙의 넓은 평지에는 적의 웨이브가 끊임없이 밀려오며, 이들을 효과적으로 저지하지 못하면 본진이 파괴되어 게임 오버가 됩니다. 맵 좌측 하단에 위치한 자원 지대에서는 미네랄과 가스를 채취할 수 있어, 이를 활용해 포탑을 구매하고 업그레이드하는 것이 핵심 전략입니다. 맵 곳곳에 배치된 장애물과 좁은 길은 적의 진격을 방해하는 요소로 작용하기도 하지만, 때로는 포탑 배치의 제약으로도 작용할 수 있어 신중한 자원 관리와 배치 플래닝이 요구됩니다. 특히, 맵 우측 하단과 좌측 상단에 위치한 좁은 통로는 적의 주요 침입 루트로, 이곳을 집중 방어하는 것이 게임의 승패를 좌우합니다. 맵의 배경은 우주 테마로 구성되어 있어, SF 분위기의 디펜스 게임을 즐기고자 하는 플레이어들에게 특별한 몰입감을 제공합니다. 이 맵은 특히 다인 플레이보다는 1인 또는 소수의 플레이어가 협력하여 방어전을 펼치는 구조로, 팀워크와 전략적 사고가 중요한 요소로 작용합니다. 추천 대상은 디펜스 장르를 선호하는 유저들이며, 포탑의 배치와 업그레이드 타이밍을 신중히 판단해야 합니다. 또한, 게임 초반의 자원 부족을 극복하기 위해 초반 웨이브를 어떻게 넘길지에 대한 전략이 필요합니다. 맵을 플레이하기 전에는 포탑의 종류와 업그레이드 비용, 적 유닛의 특성 등을 미리 숙지하는 것이 좋습니다. 특히, 맵의 좁은 통로와 장애물 배치를 고려한 포탑 배치 전략을 세우는 것이 중요합니다. 이 맵은 반복 플레이를 통해 점차 자신만의 방어 전략을 개발할 수 있는 재미가 있어, 디펜스 장르의 팬들에게 오랫동안 사랑받아 온 classic한 작품입니다. StarCraft: Brood War's classic defense genre custom map, <Turret Defense 8000 Final>, is a map centered around turret (tower)-based defensive strategies, as the name suggests. Players start from the top-right corner of the map and must construct turrets to fend off waves of enemies that appear at regular intervals, upgrading them to strengthen defenses. The wide open area in the center sees continuous enemy waves pushing forward, and failing to stop them will result in your base being destroyed and a game over. The mineral and gas resource zone in the bottom-left corner allows for resource gathering to buy and upgrade turrets, making this the core strategy. Obstacles scattered across the map and narrow paths can hinder enemy movements but may also restrict turret placement, requiring careful resource management and strategic planning. The narrow passages in the bottom-right and top-left corners are key invasion routes, and defending them effectively can determine the outcome of the game. With its space-themed background, the map immerses players in a sci-fi defense experience. Designed for solo or small-team play rather than large groups, teamwork and strategic thinking are essential. It’s recommended for players who enjoy defense maps, where timing turret placements and upgrades is crucial. Overcoming early-game resource shortages with smart strategies is also key. Before playing, it’s wise to familiarize yourself with turret types, upgrade costs, and enemy unit behaviors. Planning turret placements around narrow paths and obstacles is especially important. The map’s replayability allows players to refine their own defensive strategies over time, making it a beloved classic among defense genre fans.
터렛 디펜스 10004 (Turret Defense 10004 V.1.6)
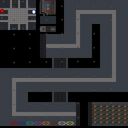
스타크래프트 브루드워의 디펜스 장르 유즈맵인 〈Turret Defense 10004 V.1.6〉은 플레이어가 설치형 터렛으로 적의Wave를 방어하는 구조의 맵이다. 중앙에 위치한 플레이어의 기지 주변으로 동심원형 구조의 방어선이 펼쳐지며, 적이 일정 주기로 몰려오는 시스템을 기반으로 한다. 이미지를 살펴보면 맵 중앙의 연결된 타일들이 터렛을 설치할 수 있는 핵심 지역으로 보이며, 주변으로 방어선을 강화할 수 있는 추가 공간이 배치된 구조다. 맵의 좌측 상단에 있는 붉은색 점은 시작 지점으로 추정되며, 우측 하단의 붉은색 점은 적의 시작 지점으로 보인다. 플레이어는 터렛의 종류와 배치 전략을 통해 각 Wave에 대응해야 하며, 방어 라인의 균형과 자원의 효율적 사용이 승리의 열쇠로 보인다. 맵의 디자인 상으로는 초반에는 소수의 적을 상대하지만, Wave가 진행될수록 적의 수가 기하급수적으로 증가하는 시스템으로 보이며, 맵의 규모와 구조는 6인 플레이를 고려한 것으로 추정된다. 다만, 제작자 정보와 승리 조건, 밸런스 수치는 명시되어 있지 않아 실제 난이도나 게임성은 플레이어의 경험에 따라 달라질 수 있다. 이 맵은 디펜스 장르의 기본 틀을 따르면서도, 터렛의 배치와 업그레이드를 통한 전략적 깊이를 제공하는 것이 특징으로 보인다. 초보자도 쉽게 접근할 수 있지만, 숙련된 플레이어는 더 높은 난이도와 복잡한 방어 전략을 요구할 수 있어 광범위한 플레이어층을 타겟으로 한 맵으로 보인다. 게임을 시작하기 전에 터렛의 종류와 성능, 자원의 획득 방식, Wave의 진행 패턴을 미리 숙지하는 것이 중요할 것으로 판단된다. StarCraft: Brood War's defense genre custom map, *Turret Defense 10004 V.1.6*, tasks players with defending against waves of enemies using deployable turrets. Concentric defensive lines surround the player's base at the center of the map, with enemies arriving in periodic waves. The connected tiles in the map's center appear to be the key area for turret placement, surrounded by additional space to reinforce defensive lines. The red dot in the top-left corner likely marks the starting point, while the one in the bottom-right indicates the enemy's starting location. Players must respond to each wave by selecting turret types and optimizing their placement, with victory hinging on balancing defenses and managing resources efficiently. Early waves feature small numbers of enemies, but their numbers grow exponentially as the game progresses. The map's scale and structure suggest it's designed for six players, though details like the creator's information, victory conditions, and balance metrics aren't specified, leaving difficulty and gameplay largely dependent on player experience. While the map follows standard defense genre conventions, its standout feature is the strategic depth provided by turret placement and upgrades. It appeals to a broad audience, from beginners to experienced players, who may face higher difficulty and more complex strategies. Before starting, players should familiarize themselves with turret types, performance, resource acquisition, and wave progression patterns.
맵 선택 가이드
태그는 맵의 핵심 특징을 빠르게 설명하지만 제작 버전마다 규칙이 다를 수 있습니다. 상세 설명에서 권장 인원, 난이도, 플레이 시간과 버전을 함께 확인한 뒤 다운로드하세요.