
방어 시설 스타크래프트 맵 모음
'방어 시설' 태그가 등록된 맵을 모았습니다. 장르 하나로 찾기 어려운 플레이 방식, 난이도와 특징을 중심으로 인기 맵과 최신 맵을 비교해 보세요.
- 등록 맵
- 18개
- 누적 다운로드
- 0
- 누적 조회
- 557
인기 맵
다운로드와 조회 반응이 높은 맵입니다.
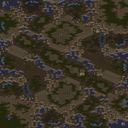
오디세이:RE 1.91 (Odyssey:RE 1.91)
스타크래프트 브루드워의 대형 유즈맵 ‘Odyssey:RE 1.91’은 8인용으로 설계된 대규모 컴까기(컴퓨터 상대) 맵으로, 사막 테마의 광활한 맵에서 펼쳐지는 한층 더 진화된 전투를 경험할 수 있다. 맵의 전체 크기는 3584x4096 타일로, 넓은 개활지와 복잡한 지형이 조화를 이룬 구조가 특징이다. 플레이어는 각자의 기지를 지키며 끊임없이 몰려드는 적군을 상대해야 하며, 맵 곳곳에 배치된 자원과 방어 시설이 전투의 성패를 좌우한다. 특히, 맵의 중앙과 외곽에 위치한 넓은 평야는 대규모 병력 이동을 가능케 하며, 협곡과 절벽은 전략적 우위를 제공하는 동시에 기동력을 제한하는 요소로 작용한다. 이 맵은 기본적인 컴까기 구조를 유지하면서도 맵의 규모와 디자인에서 상당한 발전이 느껴진다. 다양한 고저차와 장애물이 있는 지형은 단순한 공격 루트를 넘어 전략적 깊이를 더하며, 플레이어는 자원의 확보와 방어 시설의 배치, 그리고 적절한 병력 조합을 끊임없이 고민해야 한다. 맵의 난이도는 중간 정도로, 초보자와 숙련자 모두 즐길 수 있도록 설계되었으나, 넓은 맵을 활용한 대규모 전투는 숙련된 플레이어에게 더 큰 재미를 제공할 것으로 보인다. 또한, 맵의 사막 테마는 건조한 분위기와 탁 트인 시야를 제공하여 전투의 몰입감을 높인다. 이 맵을 플레이하기 위해서는 넓은 시야와 빠른 판단력이 요구되며, 특히 자원의 희소성과 병력의 관리 능력이 승패를 가를 수 있다. 맵의 복잡한 지형은 적군의 움직임을 예측하기 어렵게 만들기 때문에, 플레이어는 끊임없이 지형을 분석하고 자신의 전략을 유연하게 변화시켜야 한다. 또한, 맵 곳곳에 숨겨진 자원과 보너스 지역을 발견하는 것도 중요하며, 이를 위해 맵의 전체적인 구조를 숙지하는 것이 필수적이다. 추천 대상으로는 스타크래프트의 컴까기 맵을 즐겨온 플레이어와 넓은 맵에서의 전략적 전투를 선호하는 유저들이며, 특히 8인 대전이 가능한 환경에서 플레이하고자 하는 유저들에게 적합하다. 플레이 전에는 맵의 주요 자원 분포와 주요 루트를 먼저 파악하고, 방어 시설의 배치와 병력 조합을 미리 계획하는 것이 좋다. StarCraft: Brood War’s large-scale custom map *Odyssey:RE 1.91* is an 8-player melee (computer opponent) map where you can experience an evolved battle unfolding across a vast desert-themed landscape. The map spans 3,584 by 4,096 tiles, featuring a harmonious blend of open terrain and intricate geography. Players must defend their bases while fending off relentless waves of enemies, with resources and defensive structures scattered throughout the map determining the outcome of each engagement. The wide plains at the center and periphery facilitate large-scale troop movements, while canyons and cliffs offer strategic advantages while limiting mobility. While maintaining the core structure of a melee map, this title introduces noticeable improvements in scale and design. The varied elevation and obstacles transform the battlefield from a simple attack route into a deep, strategic experience. Players must constantly weigh resource collection, defensive positioning, and troop composition. Designed for intermediate difficulty, the map caters to both beginners and veterans, though its large-scale battles promise greater satisfaction for skilled players. The desert theme further enhances immersion with its dry atmosphere and expansive visibility. Success on this map demands sharp vision and quick decision-making, with resource scarcity and troop management often deciding victory or defeat. The complex terrain obscures enemy movements, forcing players to analyze the landscape and adapt their strategies dynamically. Scouting hidden resources and bonus areas is crucial, making familiarity with the map’s layout essential. Ideal for fans of Brood War’s melee maps and those who enjoy strategic battles on expansive terrain, it’s especially well-suited for players seeking an 8-player experience. Before diving in, study the key resource locations and main routes, and plan your defensive setups and troop compositions in advance.
![크레이지 볼 v2.0 (CrAzY Ball v[2.0]) 맵 미리보기](https://cdn-star-data.huzy.net/thumbnail_f219a194183e4ccb91624deeaef4bbc7.jpg)
크레이지 볼 v2.0 (CrAzY Ball v[2.0])
스타크래프트 브루드워의 유즈맵 중 하나인 〈CrAzY Ball v[2.0]〉은 6인 협동 플레이를 기반으로 한 재미있는 디펜스 형식의 맵이다. 제목에서 느껴지듯이, 이 맵은 ‘크레이지 볼’이란 이름에 걸맞게 플레이어들에게 예측불허의 재미와 긴장감을 선사한다. 맵 이미지에서 확인되는 거대한 ‘CrAzY BALL’이라는 중앙 구조물은 이 게임의 핵심 콘텐츠로 보이며, 주변에 배치된 플레이어 진영과 방어 시설이 이를 중심으로 펼쳐진다. 맵의 구조는 중앙의 커다란 볼을 보호하거나 제어하는 방식으로 진행되는 듯해, 디펜스 장르의 특성을 강하게 띠고 있다. 내부 맵 설명에서도 버전 1.2 또는 1.5의 결함 버전을 사용하지 말라는 권고가 포함되어 있어, 안정성과 밸런스가 개선된 v[2.0]이 공식 버전임을 시사한다. 플레이 방식은 중앙의 볼을 둘러싼 방어 시설을 활용해 적의 공격을 막아내는 데 중점을 두고 있으며, 볼을 조작하거나 보호하는 추가 메커니즘이 포함될 가능성이 크다. 맵의 디자인과 내부 설명을 종합해 볼 때, 이 맵은 단순히 방어만 하는 것이 아니라 볼을 조작하는 재미있는 요소와 다양한 적의 웨이브가 등장하는 서바이벌 디펜스 형식으로 추정된다. 또한, 6인 협동 플레이를 지원하므로 팀워크와 전략적 협력이 중요할 것으로 보인다. 플레이어들은 중앙 볼의 유지와 방어 시설의 보호를 동시에 신경 써야 하며, 예상치 못한 적의 공격 패턴이나 볼 조작 메커니즘 때문에 긴장감과 재미를 동시에 느낄 수 있을 것이다. 이 맵은 초보자와 숙련자 모두 즐길 수 있도록 적절한 난이도로 구성되어 있으며, 특히 디펜스와 서바이벌 요소에 익숙한 유저들에게 strong recommendation 된다. 플레이 전 반드시 버전 2.0을 사용해야 한다는 내부 설명의 주의사항을 숙지하고, 팀원과의 원활한 커뮤니케이션을 통해 전략을 세우는 것이 중요하다. 또한, 맵의 구조상 중앙 볼 주변의 방어 시설 배치와 통로의 넓이, 적의 진입 경로 등을 미리 확인하고 대비하는 것이 성공의 열쇠가 될 것이다. Crazy Ball v[2.0] is a fun and engaging defense-style custom map for StarCraft: Brood War designed for 6-player cooperative play. The name and the central structure depicted in the map—"CrAzY BALL"—hint at an exciting gameplay loop centered around controlling or protecting a massive ball in the middle of the battlefield. The surrounding player bases and defensive structures suggest a survival defense format, where players must fend off waves of enemies while managing the central ball’s mechanics or safety. The gameplay likely revolves around strategic coordination, as players work together to fortify defenses, manage the ball’s movement or integrity, and respond to unpredictable enemy attacks. The internal map description explicitly warns against using versions 1.2 or 1.5 due to glitches, emphasizing the stability and balance improvements in v[2.0]. This version is the recommended choice for an optimal experience. Due to its cooperative nature, Crazy Ball v[2.0] is ideal for players who enjoy teamwork and strategic depth in defense scenarios. While the difficulty isn’t officially rated, the map’s design and mechanics are accessible enough for beginners yet challenging enough to keep experienced players engaged. Players should familiarize themselves with the central ball’s mechanics, defensive layout, and potential enemy spawn points to maximize their chances of success. Communication and adaptability are key, as the map’s unpredictable elements add a layer of excitement and challenge.
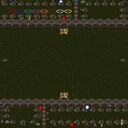
네덱스 디스트로이 Z 3.8 (Nexus Destroy Z 3.8)
스타크래프트 브루드워의 유즈맵 <네덱스 디스트로이 Z 3.8(Nexus Destroy Z 3.8)>은 네트워크 파괴를 주제로 한 디펜스 장르의 유즈맵으로, 플레이어는 적의 넥서스를 파괴하는 동시에 자신의 기지를 방어해야 하는 전략적 긴장감을 느낄 수 있다. 맵은 사막 타일셋으로 구성되어 있으며, 중앙에 위치한 주요 전투 지역을 중심으로 네 개의 플레이어 기지가 배치되어 있다. 각 기지 주변에는 방어 시설이 상주하며, 적의 공격 패턴에 따라 유동적으로 대응해야 한다. 게임은 크게 두 가지 목표로 나뉘는데, 하나는 적 넥서스의 체력을 0으로 만드는 것이고, 다른 하나는 자신의 넥서스가 파괴되지 않도록 보호하는 것이다. 맵 곳곳에 배치된 미네랄과 가스는Resource Management를 요구하며, 초반에는 자원 확보가 중요하지만 중반 이후에는 방어와 공격의 균형을 맞추는 것이 핵심이다. 특히 적의 대규모 공격 타이밍을 예측하고, 유닛을 효율적으로 배치하는 것이 승리 열쇠가 된다. 맵의 난이도는 중상급으로, 적의 공격 패턴이 랜덤하게 변화하기 때문에 플레이어의 전략적 사고와 적응력이 요구된다. 이 맵은 초보 플레이어보다는 중급 이상의 유저들에게 적합하며, 디펜스와 공격의 밸런스를 맞추는 재미가 있는 한편, 다수의 유닛을 동시에 조종해야 하는 복잡성도 갖추고 있다. 또한, 맵의 구조상 방어선이 무너지면 순식간에 역전이 가능하다는 점에서 긴장감 있는 플레이가 특징이다. 추천하는 플레이 방식은 방어塔와 유닛의 조합을 미리 준비하고, 적의 공격 루트를 차단하는 것이다. 자원 관리와 병력 생산 타이밍을 잘 조절하면 보다 수월하게 진행할 수 있다. 이 맵을 플레이하기 전에는 자신의 기지 주변의 방어 시설과 자원 분포를 미리 확인하는 것이 좋다. 또한, 적 넥서스의 위치와 접근 루트를 파악하여 효율적인 공격 루트를 설정하는 것이 중요하다. 맵의 디자인상 특정 위치에서만 공격을 집중하는 전략이 유효할 수 있으므로, 게임을 시작하기 전에 맵을 충분히 분석해 두는 것이 좋다. StarCraft: Brood War's custom map *Nexus Destroy Z 3.8* is a defense-style map centered around the theme of network destruction, where players must destroy the enemy's Nexus while simultaneously defending their own base, creating a strategic and tense experience. The map features a desert tileset with four player bases positioned around a central combat zone. Each base is equipped with defensive structures, requiring players to adapt dynamically to the enemy's attack patterns. The game has two main objectives: reducing the enemy Nexus's health to zero and preventing your own Nexus from being destroyed. Scattered throughout the map, minerals and gas demand effective resource management. While securing resources early is crucial, balancing defense and offense becomes key in the mid-game. Predicting large-scale enemy attacks and deploying units efficiently are vital to victory. With a difficulty rating of medium-high, the map challenges players with randomized enemy attack patterns, demanding strong strategic thinking and adaptability. This map is best suited for intermediate to advanced players, offering a satisfying balance between defense and offense while also requiring the management of multiple units simultaneously. Its structure allows for dramatic comebacks if defensive lines collapse, adding to the excitement. Recommended strategies include preparing defensive towers and unit compositions in advance and blocking enemy attack routes. Proper resource management and timely troop production can make the game significantly smoother. Before playing, it’s wise to scout your base’s defensive structures and resource distribution. Identifying the enemy Nexus’s location and access routes helps in planning efficient attack strategies. Since certain positions on the map may lend themselves to focused attacks, thoroughly analyzing the map beforehand is essential.
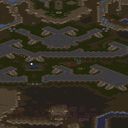
헬름즈 딥: 코디아카이 1.8v2 (Helms Deep: Kodiakai 1.8v2)
스타크래프트 브루드워의 디펜스 장르 유즈맵 '헬름즈 딥: 코디아카이 1.8v2'는 사막 테마의 광활한 맵에서 펼쳐지는 대규모 방어전을 경험할 수 있는 작품이다. 맵의 이름은 '헬름즈 딥'으로, 반지의 제왕 세계관의 유명한 방어전인 '헬름즈 딥 전투'를 모티브로 삼은 것으로 추정된다. 맵은 7명이 플레이할 수 있도록 설계되었으며, 사막 타일셋을 기반으로 한 황량한 지형과 절묘한 구조물이 방어전의 긴장감을 극대화한다. 맵의 중앙에는 거대한 요새가 위치하고 있으며, 그 주변으로는 적의 공격을 방어할 수 있는 성벽과 요새가 복잡하게 배치되어 있다. 플레이어는 이러한 방어 시설을 보수하고 강화하는 동시에, 끊임없이 몰려오는 적군으로부터 본진을 지켜내야 한다. 맵의 구조는 방어선의 중요성을 강조하며, 플레이어 간 협력이 필수적인 만큼 팀워크가 중요한 요소로 작용할 것이다. 맵의 배경 음악과 효과음은 사막의 분위기를 살리기 위해 디자인된 것으로 보이며, 이는 플레이어의 몰입감을 높이는 데 기여한다. 특히 맵의 규모가 크고 세부적인 구조물이 많아, 한 번의 실수가 승패를 가를 수 있는 긴장감이 특징이다. 이 맵은 디펜스 장르를 любителей 대규모 방어전과 전략적 협동 플레이를 즐기는 유저들에게 강력히 추천한다. 방어 시설을 효율적으로 관리하고, 적의 패턴을 분석하는 능력이 요구되므로, 초보자보다는 어느 정도의 전략적 이해와 팀워크가 있는 플레이어에게 더 적합할 것이다. 또한, 맵의 특성상 지속적인 플레이로 적의 패턴을 익히고 방어 전술을 연마할 수 있는 장점이 있다.Helms Deep: Kodiakai's 1.8v2 is a defense-type custom map in StarCraft: Brood War set in a vast desert-themed battlefield, inspired by the Helm's Deep battle from The Lord of the Rings universe. Designed for seven players, the map features intricate defensive structures including walls, fortresses, and outposts centered around a large main stronghold. Players must collaborate closely to reinforce structures, manage resources, and repel relentless enemy waves that attack from multiple directions. The map's large scale and detailed layout demand strategic foresight and team coordination, as a single mistake can lead to a breach in defenses. The immersive atmosphere is enhanced by sound design that complements the desert setting, creating a tense and engaging experience. This map is ideal for players who enjoy large-scale defense scenarios with cooperative elements. While accessible to beginners, it rewards players with strategic depth and the opportunity to refine defensive tactics through repeated play. The complex layout and dynamic enemy AI make it a challenging yet rewarding experience for those seeking a deep defense challenge.
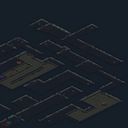
데이터 파괴자 (Data Destroyer)
스타크래프트 브루드워의 유즈맵 "Data Destroyer"는 단일 플레이어용 디펜스 장르의 맵으로, 적의 요새 한가운데에 숨어 있는 데이터 저장 장치를 파괴하는 것이 목표다. 맵은 설원 타일셋으로 구성되어 있으며, 적의 방어 시설이 촘촘히 배치된 가운데 상대적으로 좁은 통로를 통해 접근해야 한다. 플레이어는 시작 지점에서 출발해 적의 방어선을 뚫고 나아가야 하며, 중간에 배치된 방어 타워와 지상/공중 유닛들의 공격을 피해가며 목표 지점에 도달해야 한다. 맵의 구조는 중앙 통로와 측면을 포함한 몇 개의 길로 나뉘어져 있으며, 각 길마다 다양한 방어 시설이 설치되어 있다. 특히 중앙 통로는 가장 직접적인 경로이지만 가장 치열한 전투가 벌어지는 장소로, 플레이어는 이곳을 통과하면서 적의 공격을 효율적으로 방어하거나 우회해야 한다. 측면을 통한 우회 루트는 상대적으로 안전하지만, 적의 방어 시설이 덜 치밀한 대신 맵의 복잡도로 인해 길을 잃기 쉬운 구조다. 맵의 타일셋은 설원 분위기를 살려 차가운 색감을 기반으로 하며, 흰색과 파란색을 주로 사용하여 적대적인 환경을 강조하고 있다. 플레이 방식은 기본적으로 디펜스와 서바이벌 요소가 혼합되어 있다. 플레이어는 적의 공격으로부터 살아남으면서 목표 지점까지 도달해야 하며, 중간에 배치된 트리거나 아이템을 통해 일시적으로 방어력을 강화하거나 이동 속도를 증가시킬 수 있다. 맵의 난이도는 적의 방어 시설과 유닛 배치에 따라 달라지며, 초보자의 경우 중앙 통로의 방어선을 돌파하는 데 어려움을 느낄 수 있다. 반면, 경험이 있는 플레이어는 측면을 통한 우회 루트를 활용하거나 방어 시설의 약점을 공격하여 보다 안전하게 목표를 달성할 수 있다. 이 맵은 단일 플레이어용으로 설계되어 있으며, 플레이어는 제한된 자원을 활용해 적의 공격을 방어하면서 목표를 달성해야 한다. 맵의 구조상 지속적인 공격과 방어가 요구되며, 플레이어의 전략적 선택이 성패를 좌우할 수 있다. 특히, 방어 시설의 배치를 미리 파악하고 각 루트의 장단점을 분석하는 것이 중요하다. 또한, 아이템이나 보너스를 획득할 수 있는 위치도 전략적으로 활용해야 한다. Data Destroyer는 디펜스 장르의 유즈맵 중에서도 비교적 정교한 구조와 전략적 깊이를 제공하는 맵으로, 단일 플레이어용으로 설계된 만큼 플레이어의 집중력과 판단력이 요구된다. 맵의 분위기는 차가운 설원 배경으로 인해 긴장감을 조성하며, 적의 방어 시설과 맞서는 도전적인 과제를 제공한다. 경험이 풍부한 스타크래프트 플레이어라면 이 맵을 통해 전략적 사고와 긴장감 있는 플레이를 즐길 수 있을 것이다. Data Destroyer is a single-player defense-style custom map in StarCraft: Brood War, where the objective is to infiltrate a heavily fortified enemy encampment and destroy the data stored in their computers. The map features a snowy tile set, with dense enemy defenses surrounding a narrow central corridor that serves as the primary route to the target. The layout includes multiple paths, with the central corridor being the most direct but most heavily defended route. Side paths offer safer alternatives but require navigating a more complex terrain where getting lost is a risk. The snowy tile set uses cool tones of white and blue to emphasize the hostile environment, enhancing the atmosphere of tension and challenge. Gameplay blends defense and survival mechanics. Players must survive relentless enemy attacks while advancing toward the objective. Temporary upgrades or power-ups placed along the way can provide bursts of speed or defensive boosts, offering strategic advantages. Difficulty varies based on enemy placement and defense density, with beginners likely struggling through the central corridor, while experienced players can exploit side paths or target weak points in the defenses. Designed exclusively for single-player use, the map tests resource management, decision-making, and adaptability under pressure. The well-balanced structure requires players to analyze each route’s strengths and weaknesses, with strategic item collection playing a key role in success. The cold, snowy setting not only enhances immersion but also intensifies the challenge of overcoming the enemy’s defenses. Ideal for StarCraft players seeking a strategic challenge, Data Destroyer delivers a tense, skill-based experience that rewards careful planning and quick reactions. The map’s thoughtful design ensures replayability, making it a standout choice for those who enjoy defense-focused custom maps.
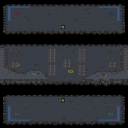
빌더스 & 파이터즈 PRO (Builders & Fighters PRO)
《Builders & Fighters PRO》는 스타크래프트: 브루드워의 유즈맵으로, 디펜스 장르를 기반으로 한 컴까기형 맵입니다. 맵의 이름은 '건설자(Builder)'와 '전투원(Fighter)'의 조합에서 유래했으며, 이름 그대로 자원 수집과 기지 건설, 그리고 끊임없는 적의 침공을 방어하는 플레이가 특징입니다. 맵의 중앙에는 기지 건물이 배치되어 있으며, 주변으로 자원 지대가 분포되어 있습니다. 플레이어는 초기 자원을 확보한 후, 건물을 지어 병력을 생산하고 방어 시설을 구축해야 합니다. 맵 상단과 하단에는 각각 적의 기지가 있으며, 이들은 일정 주기마다 다양한 유닛을 이끌고 공격해 옵니다. 특히 맵의 설명에서 언급된 'Last Defense Turrets'는 기지의 최후 방어선을 강화하는 역할을 하며, 적의 대규모 공세를 효과적으로 차단할 수 있도록 돕습니다. 이 맵은 방어뿐만 아니라 자원 관리와 병력 강화가 필수적인데, 초기 자원이 넉넉하지 않기 때문에 자원 수집과 활용을 carefully 해야 합니다. 또한, 기지 건물의 체력이 낮아졌다는 설명을 고려하면, 방어 시설의 중요성이 더욱 부각됩니다. 적의 공격 패턴은 맵의 상단과 하단에서 동시에 이루어지며, 이를 대비하기 위해 방어 라인을 효율적으로 배치해야 합니다. 맵의 구조는 비교적 단순하지만, 적의 공격 타이밍과 병력 구성이 다양해지기 때문에 플레이어의 전략적 판단이 요구됩니다. 초보 플레이어는 기지 방어에 집중하는 것이 중요하며, 숙련된 플레이어는 자원 관리와 병력 구성을 최적화하여 보다 효율적으로 적을 제압할 수 있습니다. 《Builders & Fighters PRO》는 디펜스 장르의 유즈맵을 즐기는 플레이어들에게 추천할 만한 맵입니다. 특히, 팀 플레이보다는 개인 또는 소규모 팀으로 플레이하는 것이 적합하며, 방어와 자원 관리, 병력 생산의 균형을 잘 맞추는 것이 관건입니다. 맵의 난이도는 맵의 설명에서 언급된 변경 사항(자원 증가, 방어 시설 추가, 기지 체력 감소)을 고려하면 '보통' 수준으로 판단됩니다. 플레이 전, 기지 주변의 자원 분포와 방어 시설을 미리 확인하여 전략을 수립하는 것이 중요합니다. 《Builders & Fighters PRO》 is a user-created map for *StarCraft: Brood War*, a defense-style game where players must gather resources, build bases, and defend against endless enemy attacks. The map’s name comes from the combination of "Builder" and "Fighter," reflecting its core mechanics of resource collection, base construction, and constant defense. At the center of the map sits the main base building, surrounded by resource areas. Players start with limited resources, which they must use to construct buildings, produce units, and establish defenses. At the top and bottom of the map are enemy bases that periodically launch waves of attacks with varied units. The "Last Defense Turrets" mentioned in the map’s description play a crucial role in strengthening the base’s final line of defense, helping to block large-scale assaults effectively. While defense is key, the map also demands strong resource management and unit reinforcement. Since initial resources are scarce, players must carefully collect and allocate them. Additionally, the low durability of base buildings makes defensive structures even more vital. Enemy attacks occur simultaneously from both the top and bottom, requiring players to strategically position their defenses to counter the assaults. Though the map’s layout is straightforward, the unpredictable timing and composition of enemy waves demand sharp strategic decisions from players. For beginners, focusing on base defense is essential, while experienced players can optimize resource management and unit production to efficiently overwhelm enemies. 《Builders & Fighters PRO》 is a recommended map for fans of the defense genre, particularly suited for solo or small-team play. Balancing defense, resource gathering, and unit production is the key to success. Considering the adjustments mentioned in the map’s description—such as increased resources, additional defensive structures, and reduced base durability—the difficulty is rated as moderate. Before starting, players should scout the resource distribution around their base and review defensive setups to plan their strategy effectively.
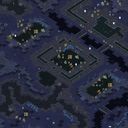
보스티니에 (Vostaniye)
이 맵은 스타크래프트: 브루드워에서 즐기는 컴까기 장르의 유즈맵으로, 플레이어가 단독으로 컴퓨터의 대규모 공격을 방어하는 구조를 갖추고 있다. 맵의 배경은 화산 테마로 꾸며져 있으며, 중앙의 주요 건물을 중심으로 다수의 적 기지가 배치되어 있다. 적들은 끊임없이 생산되어 플레이어의 기지를 향해 공격을 퍼붓는데, 이를 저지하는 것이 주된 목표다. 맵의 전경은 어두운 분위기의 화산 지형으로 이루어져 있어, 적의 공격이 다가오는 장면을 조명하는 듯한 디자인으로 긴장감을 고조시킨다. 맵의 규모는 4096x3072로 상당히 넓지만, 주요 전투 지역은 중앙과 주변의 좁은 통로에 집중되어 있어 플레이어는 전략적 요충지를 점거하며 장기전을 펼칠 수 있다. 적들의 공격 패턴은 일정 주기로 증원되므로, 자원 관리와 방어 시설의 구축이 무엇보다 중요하다. 초반에는 소수의 적 유닛이 등장하지만, 시간이 지나면서 대규모 병력이 몰려오므로 방어선을 구축하고, 필요에 따라 역공을 펼칠 수 있는 위치 선정이 필수적이다. 맵의 특징상, 플레이어는 끊임없이 밀려드는 적을 상대해야 하므로 집중력이 요구되며, 특히 후반부로 갈수록 적의 공격력이 강해지므로 방어 시설의 업그레이드와 유닛 관리가 승패를 좌우할 것이다. 초보 플레이어는 방어선을 쉽게 무너뜨리지 않도록 신중히 배치해야 하며, 숙련된 플레이어는 적의 공격을 예측하고 역습을 가할 타이밍을 노려야 한다. 이 맵은 단독 플레이를 전제로 설계되었으므로, 팀플레이보다는 혼자서도 충분히 즐길 수 있는 구조로 구성되어 있다. 맵의 긴장감과 전략적 깊이가 돋보이는 이 작품은, 컴까기 장르를 좋아하거나 단독 플레이를 선호하는 유저들에게 추천할 만하다. 특히 방어 시설과 자원의 최적화를 중시하는 플레이 스타일을 선호하는 유저들에게는 훌륭한 선택지가 될 것이다. 플레이 전에는 맵의 주요 길목과 자원 분포를 미리 확인하고, 방어선을 어떻게 구축할 것인지 전략을 세우는 것이 중요하다. 또한, 적의 공격 주기와 패턴을 숙지하여 방어선을 강화하는 데 초점을 맞추는 것이 좋다. This StarCraft: Brood War custom map is a solo defense genre where players must fend off relentless waves of enemy attacks. Set against a volcanic backdrop, the map features a central main structure surrounded by multiple enemy bases. Waves of enemies continuously spawn and push toward the player’s base, with the goal of holding out as long as possible. The dark, rugged volcanic terrain enhances the tension, as enemy movements are highlighted against the ominous landscape. While the map spans a massive 4096x3072, key combat zones are concentrated in the center and narrow corridors, forcing players to secure strategic chokepoints for prolonged battles. Enemies reinforce their attacks in predictable cycles, making resource management and defensive infrastructure crucial. Early waves consist of small groups, but as time progresses, overwhelming forces emerge. Players must fortify their defenses, choose positions wisely for counterattacks, and adapt their strategies accordingly. As the game advances, the enemy’s offensive power escalates, so upgrading defenses and unit control becomes vital to survival. Novices should carefully place their defenses to avoid early collapses, while experienced players can anticipate enemy movements and strike back at opportune moments. Designed for solo play, the map emphasizes individual skill over teamwork, making it enjoyable even without a team. Its high tension and strategic depth make it ideal for fans of the defense genre or those who prefer playing alone. Players who enjoy optimizing defenses and resource distribution will find this map particularly rewarding. Before starting, it’s important to study the map’s key paths and resource locations, plan defensive layouts, and familiarize yourself with enemy attack cycles and patterns to strengthen your lines effectively.
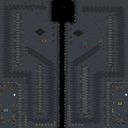
터렛 워즈 그리디우스+14 (Turret Wars Gradius+14)
스타크래프트의 대표적인 유즈맵 장르 중 하나인 디펜스 게임, 'Turret Wars Gradius+14'는 플레이어가 적군의 끊임없는 공격을 방어하며 생존하는 구조로 구성되어 있다. 맵은 우주 테마의 타일셋을 활용해 광활한 우주 공간을 연출하며, 중앙에 위치한 플레이어 기지 주변으로 적의 공격로가 형성되어 있다. 게임은 6명의 플레이어가 각자 독립된 기지를 방어하는 방식으로 진행되며, 적의 유닛들은 일정 주기로 생성되어 기지를 향해 진격한다. 플레이어는 기지 주변에 터렛이나 방어 시설물을 건설해 적을 요격할 수 있으며, 일정 시간마다 제공되는 자원을 활용해 방어력을 강화하거나 추가 병력을 배치할 수 있다. 게임의 핵심은 적의 공격을 얼마나 효율적으로 방어하느냐에 있으며, 터렛의 배치와 자원 관리 능력이 승패를 좌우한다. 맵 상단에는 시간과 자원 상태가 표시되어 실시간으로 전투 상황을 파악할 수 있다. 또한, 맵의 구조상 중앙보다는 외곽 지역에 방어 시설을 집중하는 전략이 효과적일 수 있다. 게임은 적의 공격이 끊임없이 이어지는 서바이벌 형식으로, 플레이어는 꾸준한 집중력과 전략적 판단을 요구받는다. 이 맵은 호스트가 불리해지지 않도록 설계되어 공정한 게임 환경을 제공한다는 특징이 있다. 또한, 'Squink-KLS'에 의해 수정된 버전으로, 초기 버전의 문제점이 개선되어 더욱 안정적인 플레이 경험을 제공한다. 우주 테마의 배경과 함께 적의 끊임없는 공격은 긴장감을 높이며, 특히 방어 시설물의 배치와 자원 관리에 대한 전략적 깊이가 있어 초보자와 숙련자 모두에게 매력적인 요소로 작용할 것이다. 다만, 방어 시설물의 초기 배치와 자원 관리 실패는 치명적인 결과를 초래할 수 있어 신중한 플레이가 요구된다. 이 맵은 디펜스 장르에 익숙한 플레이어뿐만 아니라, 새로운 전략을 시도해 보고 싶은 유즈맵愛好者에게도 추천할 만하다. 특히, 팀 플레이보다는 개인전 형식으로 진행되므로 각 플레이어의 실력이 직접적으로 결과에 반영된다. 게임의 지속적인 긴장감과 전략적 깊이는 플레이어의 몰입도를 높이는 요소로 작용할 것이다. "Turret Wars Gradius+14" is a defense game, one of StarCraft's most representative custom map genres, where players defend against endless enemy attacks to survive. The map uses a space-themed tileset to depict a vast cosmic expanse, with enemy attack routes forming around the player's base at the center. The game progresses with six players each defending their own independent bases, while enemy units spawn at regular intervals and advance toward the bases. Players can intercept enemies by constructing turrets or defensive structures around their bases and strengthen their defenses or deploy additional forces using resources provided at set intervals. The core of the game lies in how efficiently players defend against attacks, with turret placement and resource management determining victory or defeat. The top of the map displays time and resource status, allowing real-time assessment of the battle situation. Strategically, focusing defensive structures on outer areas rather than the center can be more effective due to the map's layout. The game follows a survival format with relentless enemy assaults, demanding constant focus and strategic decision-making from players. A key feature of this map is its design to prevent host disadvantages, ensuring a fair gaming environment. As a modified version by "Squink-KLS," it improves upon the original, offering a more stable and refined gameplay experience. The space-themed backdrop combined with unending enemy waves heightens tension, while the strategic depth of turret placement and resource management makes it appealing to both beginners and experienced players. However, poor initial turret placement or mismanagement of resources can lead to devastating consequences, requiring careful play. This map is highly recommended not only for players familiar with defense games but also for custom map enthusiasts looking to experiment with new strategies. Since it is structured as a free-for-all rather than team play, each player's skill directly impacts the outcome. The game's sustained tension and strategic depth enhance player immersion, making it a compelling experience.
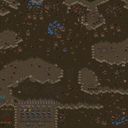
§pêciàl Forçês Extrëmé
이 맵은 '§pêciàl Forçês Extrëmé'라는 제목의 스타크래프트 브루드워 유즈맵으로, 특수부대 테마의 디펜스 및 서바이벌 장르에 속한다. 맵 이미지에서 확인되는 바와 같이, 사막 지형 위에 다양한 건물과 구조물이 배치되어 있으며, 중앙에는 거대한 방어 시설이 자리 잡고 있다. 맵의 가장 큰 특징은 다양한 종류의 적들이 끊임없이 몰려오는 사이드 스크롤링 디펜스 방식으로, 플레이어는 건물을 건설하고 유닛을 배치하여 적의 공격을 방어해야 한다. 맵 전체가 어두운 톤의 색채로 이루어져 있어 긴장감과 긴박감을 조성하며, 적들이 붉은 색과 파란 색으로 표시되어 있어 시각적 구분이 용이하다. 또한, 맵의 구조상 왼쪽에서 오른쪽으로 적들이 공격해 오는 방식으로 진행되는 것으로 추정된다. 이러한 구성은 플레이어에게 끊임없는 긴장감을 제공하며, 전략적 배치와 자원 관리가 중요한 포인트로 작용할 것으로 보인다. 이 맵은 초보자보다는 중급 이상의 플레이어에게 적합하며, 특히 디펜스 및 서바이벌 장르에 익숙한 유저들에게 추천된다. 맵을 플레이하기 전에는 건물을 짓는 위치와 유닛 배치 전략을 충분히 고민해 보는 것이 중요하다. 또한, ресур스 관리와 방어 시설의 효율적인 배치가 승패를 좌우할 수 있으므로, 초반과 중반의 전개를 신중히 계획해야 한다. 맵의 분위기와 진행 방식은 플레이어에게 전략적 사고와 긴장감을 동시에 요구하므로, 디펜스 장르를 좋아하는 유저들에게는无疑한 선택지가 될 것이다. This StarCraft: Brood War custom map, titled *Special Forces Extreme*, falls under the defense and survival genre with a special forces theme. As seen in the map image, various buildings and structures are arranged on a desert terrain, with a massive defensive facility positioned at the center. The map’s defining feature is its side-scrolling defense format, where waves of diverse enemies continuously attack from the sides, requiring players to construct buildings and deploy units to fend off the assaults. The map’s overall dark color palette enhances the tension and urgency of the gameplay, while enemies are distinctly marked in red and blue for easy visual differentiation. The layout suggests that enemies advance from left to right, steadily increasing the pressure on players. This design keeps players on edge, making strategic placement and resource management critical to success. The map is best suited for intermediate to advanced players, particularly those familiar with defense and survival mechanics. Before playing, it’s important to carefully consider building placement and unit deployment strategies. Efficient resource allocation and the strategic positioning of defensive structures can determine victory or defeat, so players should plan their early and mid-game progression meticulously. The map’s atmosphere and progression demand both strategic thinking and quick reflexes, making it an ideal choice for fans of the defense genre.
헬름즈 딥 vs. 안나타르 (Helms Deep v. Annatar 0.6 X)
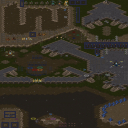
《헬름즈 딥 v. 안나타르》는 스타크래프트 브루드워의 UMS 장르 유즈맵으로, 중세 판타지 배경의 대규모 디펜스 게임이다. 맵은 사막 타일셋을 기반으로 3072x4096 크기의 거대한 맵을 자랑하며, 8명의 플레이어가 참여할 수 있는 구조로 설계되었다. 맵의 특징은 ‘Generation 2.5 히어로 제공자’, ‘Generation 2.1 히어로 특별 트리거’, ‘Generation 2 대량 트리거’를 포함하고 있어 다양한 영웅과 특수 능력을 활용한 전략적 플레이가 가능하다. 내부 설명에 따르면, 10.5와 17.0 버전의 요소를 결합하면서 추가적인 기능과 밸런스를 개선한 2.5세대 맵으로, 제작자 Mr.Stinky에 의해 편집되었다고 명시되어 있다. 플레이어는 맵 중앙에 위치한 요새를 방어하는 역할을 맡으며, 다수의 적 웨이브와 보스 몬스터가 몰려오는 공격을 버텨내야 한다. 맵 곳곳에 배치된 방어 시설과 영웅 유닛을 활용해 적을 제압하는 것이 핵심인데, 특히 ‘히어로 제공자’ 시스템을 통해 영웅을 획득하고 전략적으로 배치하는 것이 중요하다. 맵의 거대한 규모와 복잡한 구조는 초보자에게 다소 난해할 수 있지만, 반복 플레이를 통해 방어 루트를 숙지하고 영웅 조합을 최적화할 수 있다. 또한, 대량 트리거를 통해 다수의 유닛을 한꺼번에 생산할 수 있어 빠른 대응이 가능하다는 장점이 있다. 이 맵은 디펜스 장르의 유즈맵 중에서도 대규모 팀 플레이와 전략적 깊이를 중시하는 플레이어에게 추천되며, 특히 중세 판타지 테마를 좋아하는 유저라면 몰입감 있게 즐길 수 있을 것이다. 다만, 8인 동시 플레이를 전제로 설계된 만큼 팀원 간의 호흡이 중요하다는 점을 유념해야 한다. 맵을 시작하기 전에 방어 시설의 위치와 영웅의 특성을 숙지하는 것이 원활한 플레이의 열쇠가 될 것이다. This StarCraft: Brood War UMS custom map,《Helm's Deep v. Annatar》, immerses players in a large-scale medieval fantasy defense experience. Set on a massive 3072x4096 desert-themed map, it supports up to eight players in a cooperative struggle against relentless waves of enemies. The map incorporates advanced systems like the 'Generation 2.5 Hero Giver,' 'Generation 2.1 Hero Special Trigger,' and 'Generation 2 Mass Trigger,' enabling strategic hero acquisition and mass unit deployment. Players defend a central fortress against escalating enemy assaults, utilizing placed defenses and recruited heroes to withstand each wave. The map’s scale and complexity demand familiarity with hero abilities and defensive positioning, making initial playthroughs challenging for newcomers. However, its depth rewards strategic planning, especially in team coordination where roles such as hero selection, resource management, and defensive tower placement can turn the tide. Ideal for fans of intricate defense mechanics and team-based strategy,《Helm's Deep v. Annatar》offers a rich, immersive experience for those who enjoy UMS custom maps with depth and replayability. Prospective players should prioritize learning hero synergies and map layout to optimize their defensive strategy from the outset.
루커 D 18 웨이 FINAL HARD (Lurker D 18 Way FINAL HARD)
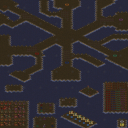
스타크래프트 브루드워의 유즈맵 중 하나로, ‘Lurker D 18 Way FINAL HARD’는 다중 지뢰와 프로브를 활용한Resource Management(자원 관리)형 디펜스 맵으로 주목받고 있다. 맵의 중앙에는 거대한 둥근 성역이 자리하고 있으며, 그 주변을 따라 18개의 지뢰가 배치되어 있는데, 이 지뢰들은 일정 시간마다 자동으로 보급되는 프로브를 통해 추가 자원을 확보할 수 있는 구조로 설계되어 있다. 플레이어는 이 자원을 활용해 업그레이드와 방어 시설을 강화해야 하는데, 특히 30초 단위의 라운드가 지나면서 자원 확보 속도가 빨라지며, 업그레이드 한도가 255까지 허용되어 långvarig(장기적인) 전략 구사가 가능하다. 공격을 받기 전까지는 비교적 안정적인 자원 수급이 가능하지만, 방어선을 구축하지 못하면 순식간에 자원이 고갈되어 게임이 어렵게 전개될 수 있다. 맵의 난이도는 ‘HARD’로 명시되어 있지만, 자원 관리와 타이밍 감각이 뛰어난 플레이어라면 충분히 극복할 수 있는 수준으로 보인다. 또한, 맵의 규모는 4096x4096의 넓은 공간을 자랑하며, 황무지 타일셋을 기반으로 한 황량한 분위기가 전체적인 플레이感(감)을 더해준다. 이 맵은 특히Resource Management(자원 관리)와Defense(방어) 요소가 결합된 하이브리드 스타일의 유즈맵으로, 초보자와 숙련자 모두에게 흥미로운 도전을 제공할 것으로 예상된다. 플레이를 시작하기 전에는 자원 확보 루틴과 방어 시설의 배치 타이밍을 충분히 숙지하는 것이 중요하다. This StarCraft: Brood War custom map, ‘Lurker D 18 Way FINAL HARD’, stands out as a Resource Management defense title where players must strategically handle multiple mines and Probes. The map features a central circular zone surrounded by 18 mines, which can be upgraded and supplied with resources through Probes that appear at regular intervals. Players earn resources that can be invested in upgrades, with the cap set at 255, allowing for long-term strategic planning as rounds progress every 30 seconds. While the map starts with steady income, neglecting defense lines can quickly deplete resources and escalate difficulty. Although labeled ‘HARD’, the challenge is balanced for players with strong resource management and timing skills. The 4096x4096 map size, set in a barren wasteland tile, adds to the immersive experience. This hybrid custom map blends Resource Management and Defense mechanics, offering engaging gameplay for both beginners and veterans. Prior to playing, familiarizing oneself with resource income patterns and optimal defense setups is crucial for success.
RP - Mirage
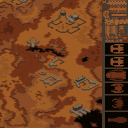
‘RP - Mirage’는 사막 테마의 디펜스 유즈맵으로, 황혼 타일셋과 넓은 8192x8192 크기의 맵을 활용해 독특한 분위기를 연출한다. 맵 중앙에 위치한 오아시스를 중심으로 방어 거점을 구축하는 구조로, 플레이어는 끊임없이 밀려오는 적의 공세를 효과적으로 저지해야 한다. 맵 곳곳에 배치된 자원과 방어 시설은 전략적 배치와 관리가 필수적이며, 특히 오아시스 주변의 좁은 통로를 활용한 방어 전략이 핵심이다. 맵 좌측 상단에 보이는 건물들은 방어 거점으로 추정되며, 적의 공격 루트는 주로 중앙과 우측 하단으로 보인다. 넓은 맵 크기와 함께 제공되는 다양한 방어 시설들은 플레이어의Build Order와 자원 관리 능력을 시험한다. 이 맵은 초보자보다는 어느 정도의 전략과Build Order에 익숙한 플레이어에게 적합하며, 팀플레이보다는 개인보다는 1인 또는 2인으로 플레이하는 것이 유리할 것으로 추정된다. 맵의 디자인과 테마가 사막 분위기를 잘 살리고 있어 몰입감 있는 플레이 경험을 제공할 것으로 보인다. 플레이 전 미리 방어 시설의 배치와 자원 분배 계획을 세워두는 것이 성공의 열쇠다. 특히 오아시스 주변의 좁은 길목을 어떻게 활용하느냐가 승패를 좌우할 가능성이 높다. 사막 분위기의 디펜스 맵인 ‘RP - Mirage’는 넓은 맵과 독특한 구조로 플레이어의 전략적 사고를 요구한다. 황혼 타일셋과 8192x8192의 거대한 맵 크기는 넓은 시야와Build Order의 중요성을 강조하며, 중앙 오아시스를 중심으로 한 방어 거점은 전략적 배치와 자원 관리의 핵심 요소로 작용한다. 맵 좌측 상단과 우측 하단의 방어 시설은 끊임없이 밀려오는 적의 공격을 효과적으로 저지할 수 있는 키 포인트로 보인다. 넓은 맵과 함께 제공되는 다양한 방어 시설들은Build Order와 자원 관리 능력을 시험하며, 특히 오아시스 주변의 좁은 통로를 활용한 방어 전략이 승패를 결정짓는 주요 요인으로 작용할 것으로 예상된다. 초보자는 물론, 어느 정도의 전략적 감각을 가진 플레이어에게도 흥미로운 도전이 될 것이다. 미리 방어 시설의 배치와 자원 분배 계획을 세우는 것이 성공의 열쇠다. ‘RP - Mirage’ is a desert-themed defense custom map that creates a unique atmosphere using a twilight tileset and a vast 8192x8192 map size. The map is structured around an oasis at the center, where defensive strongholds are built, and players must effectively repel the enemy’s relentless assaults. Strategic placement and management of resources and defensive structures scattered throughout the map are essential, with the narrow pathways around the oasis serving as a key defensive focal point. The buildings in the top-left corner appear to be defensive strongholds, while enemy attack routes mainly come from the center and bottom-right. The large map size, combined with the variety of defensive structures, tests players’ build orders and resource management skills. This map is better suited for players with some experience in strategy and build orders rather than beginners, and it’s likely more advantageous to play solo or in a 1v1 or 2v2 rather than in team play. The map’s design and theme perfectly capture the desert atmosphere, offering an immersive gameplay experience. Planning the placement of defensive structures and resource distribution before starting is crucial for success, and how well players utilize the narrow passages around the oasis could determine victory or defeat. Desert-themed defense map ‘RP - Mirage’ challenges players’ strategic thinking with its expansive map and unique layout. The twilight tileset and massive 8192x8192 map size highlight the importance of wide vision and build orders, while the defensive strongholds centered around the oasis serve as key strategic points for resource management. The defensive structures in the top-left and bottom-right corners act as critical checkpoints to effectively fend off the enemy’s constant attacks. Alongside the large map, the variety of defensive structures tests players’ build orders and resource control, with the narrow paths around the oasis likely playing a decisive role in determining the outcome. It offers an engaging challenge not just for beginners but also for players with a solid grasp of strategy. Planning the placement of defensive structures and resource distribution beforehand is key to success.
최근 등록된 맵
새로 추가된 파일과 버전을 확인하세요.
보스티니에 (Vostaniye)
이 맵은 스타크래프트: 브루드워에서 즐기는 컴까기 장르의 유즈맵으로, 플레이어가 단독으로 컴퓨터의 대규모 공격을 방어하는 구조를 갖추고 있다. 맵의 배경은 화산 테마로 꾸며져 있으며, 중앙의 주요 건물을 중심으로 다수의 적 기지가 배치되어 있다. 적들은 끊임없이 생산되어 플레이어의 기지를 향해 공격을 퍼붓는데, 이를 저지하는 것이 주된 목표다. 맵의 전경은 어두운 분위기의 화산 지형으로 이루어져 있어, 적의 공격이 다가오는 장면을 조명하는 듯한 디자인으로 긴장감을 고조시킨다. 맵의 규모는 4096x3072로 상당히 넓지만, 주요 전투 지역은 중앙과 주변의 좁은 통로에 집중되어 있어 플레이어는 전략적 요충지를 점거하며 장기전을 펼칠 수 있다. 적들의 공격 패턴은 일정 주기로 증원되므로, 자원 관리와 방어 시설의 구축이 무엇보다 중요하다. 초반에는 소수의 적 유닛이 등장하지만, 시간이 지나면서 대규모 병력이 몰려오므로 방어선을 구축하고, 필요에 따라 역공을 펼칠 수 있는 위치 선정이 필수적이다. 맵의 특징상, 플레이어는 끊임없이 밀려드는 적을 상대해야 하므로 집중력이 요구되며, 특히 후반부로 갈수록 적의 공격력이 강해지므로 방어 시설의 업그레이드와 유닛 관리가 승패를 좌우할 것이다. 초보 플레이어는 방어선을 쉽게 무너뜨리지 않도록 신중히 배치해야 하며, 숙련된 플레이어는 적의 공격을 예측하고 역습을 가할 타이밍을 노려야 한다. 이 맵은 단독 플레이를 전제로 설계되었으므로, 팀플레이보다는 혼자서도 충분히 즐길 수 있는 구조로 구성되어 있다. 맵의 긴장감과 전략적 깊이가 돋보이는 이 작품은, 컴까기 장르를 좋아하거나 단독 플레이를 선호하는 유저들에게 추천할 만하다. 특히 방어 시설과 자원의 최적화를 중시하는 플레이 스타일을 선호하는 유저들에게는 훌륭한 선택지가 될 것이다. 플레이 전에는 맵의 주요 길목과 자원 분포를 미리 확인하고, 방어선을 어떻게 구축할 것인지 전략을 세우는 것이 중요하다. 또한, 적의 공격 주기와 패턴을 숙지하여 방어선을 강화하는 데 초점을 맞추는 것이 좋다. This StarCraft: Brood War custom map is a solo defense genre where players must fend off relentless waves of enemy attacks. Set against a volcanic backdrop, the map features a central main structure surrounded by multiple enemy bases. Waves of enemies continuously spawn and push toward the player’s base, with the goal of holding out as long as possible. The dark, rugged volcanic terrain enhances the tension, as enemy movements are highlighted against the ominous landscape. While the map spans a massive 4096x3072, key combat zones are concentrated in the center and narrow corridors, forcing players to secure strategic chokepoints for prolonged battles. Enemies reinforce their attacks in predictable cycles, making resource management and defensive infrastructure crucial. Early waves consist of small groups, but as time progresses, overwhelming forces emerge. Players must fortify their defenses, choose positions wisely for counterattacks, and adapt their strategies accordingly. As the game advances, the enemy’s offensive power escalates, so upgrading defenses and unit control becomes vital to survival. Novices should carefully place their defenses to avoid early collapses, while experienced players can anticipate enemy movements and strike back at opportune moments. Designed for solo play, the map emphasizes individual skill over teamwork, making it enjoyable even without a team. Its high tension and strategic depth make it ideal for fans of the defense genre or those who prefer playing alone. Players who enjoy optimizing defenses and resource distribution will find this map particularly rewarding. Before starting, it’s important to study the map’s key paths and resource locations, plan defensive layouts, and familiarize yourself with enemy attack cycles and patterns to strengthen your lines effectively.
오디세이:RE 1.91 (Odyssey:RE 1.91)
스타크래프트 브루드워의 대형 유즈맵 ‘Odyssey:RE 1.91’은 8인용으로 설계된 대규모 컴까기(컴퓨터 상대) 맵으로, 사막 테마의 광활한 맵에서 펼쳐지는 한층 더 진화된 전투를 경험할 수 있다. 맵의 전체 크기는 3584x4096 타일로, 넓은 개활지와 복잡한 지형이 조화를 이룬 구조가 특징이다. 플레이어는 각자의 기지를 지키며 끊임없이 몰려드는 적군을 상대해야 하며, 맵 곳곳에 배치된 자원과 방어 시설이 전투의 성패를 좌우한다. 특히, 맵의 중앙과 외곽에 위치한 넓은 평야는 대규모 병력 이동을 가능케 하며, 협곡과 절벽은 전략적 우위를 제공하는 동시에 기동력을 제한하는 요소로 작용한다. 이 맵은 기본적인 컴까기 구조를 유지하면서도 맵의 규모와 디자인에서 상당한 발전이 느껴진다. 다양한 고저차와 장애물이 있는 지형은 단순한 공격 루트를 넘어 전략적 깊이를 더하며, 플레이어는 자원의 확보와 방어 시설의 배치, 그리고 적절한 병력 조합을 끊임없이 고민해야 한다. 맵의 난이도는 중간 정도로, 초보자와 숙련자 모두 즐길 수 있도록 설계되었으나, 넓은 맵을 활용한 대규모 전투는 숙련된 플레이어에게 더 큰 재미를 제공할 것으로 보인다. 또한, 맵의 사막 테마는 건조한 분위기와 탁 트인 시야를 제공하여 전투의 몰입감을 높인다. 이 맵을 플레이하기 위해서는 넓은 시야와 빠른 판단력이 요구되며, 특히 자원의 희소성과 병력의 관리 능력이 승패를 가를 수 있다. 맵의 복잡한 지형은 적군의 움직임을 예측하기 어렵게 만들기 때문에, 플레이어는 끊임없이 지형을 분석하고 자신의 전략을 유연하게 변화시켜야 한다. 또한, 맵 곳곳에 숨겨진 자원과 보너스 지역을 발견하는 것도 중요하며, 이를 위해 맵의 전체적인 구조를 숙지하는 것이 필수적이다. 추천 대상으로는 스타크래프트의 컴까기 맵을 즐겨온 플레이어와 넓은 맵에서의 전략적 전투를 선호하는 유저들이며, 특히 8인 대전이 가능한 환경에서 플레이하고자 하는 유저들에게 적합하다. 플레이 전에는 맵의 주요 자원 분포와 주요 루트를 먼저 파악하고, 방어 시설의 배치와 병력 조합을 미리 계획하는 것이 좋다. StarCraft: Brood War’s large-scale custom map *Odyssey:RE 1.91* is an 8-player melee (computer opponent) map where you can experience an evolved battle unfolding across a vast desert-themed landscape. The map spans 3,584 by 4,096 tiles, featuring a harmonious blend of open terrain and intricate geography. Players must defend their bases while fending off relentless waves of enemies, with resources and defensive structures scattered throughout the map determining the outcome of each engagement. The wide plains at the center and periphery facilitate large-scale troop movements, while canyons and cliffs offer strategic advantages while limiting mobility. While maintaining the core structure of a melee map, this title introduces noticeable improvements in scale and design. The varied elevation and obstacles transform the battlefield from a simple attack route into a deep, strategic experience. Players must constantly weigh resource collection, defensive positioning, and troop composition. Designed for intermediate difficulty, the map caters to both beginners and veterans, though its large-scale battles promise greater satisfaction for skilled players. The desert theme further enhances immersion with its dry atmosphere and expansive visibility. Success on this map demands sharp vision and quick decision-making, with resource scarcity and troop management often deciding victory or defeat. The complex terrain obscures enemy movements, forcing players to analyze the landscape and adapt their strategies dynamically. Scouting hidden resources and bonus areas is crucial, making familiarity with the map’s layout essential. Ideal for fans of Brood War’s melee maps and those who enjoy strategic battles on expansive terrain, it’s especially well-suited for players seeking an 8-player experience. Before diving in, study the key resource locations and main routes, and plan your defensive setups and troop compositions in advance.
데이터 파괴자 (Data Destroyer)
스타크래프트 브루드워의 유즈맵 "Data Destroyer"는 단일 플레이어용 디펜스 장르의 맵으로, 적의 요새 한가운데에 숨어 있는 데이터 저장 장치를 파괴하는 것이 목표다. 맵은 설원 타일셋으로 구성되어 있으며, 적의 방어 시설이 촘촘히 배치된 가운데 상대적으로 좁은 통로를 통해 접근해야 한다. 플레이어는 시작 지점에서 출발해 적의 방어선을 뚫고 나아가야 하며, 중간에 배치된 방어 타워와 지상/공중 유닛들의 공격을 피해가며 목표 지점에 도달해야 한다. 맵의 구조는 중앙 통로와 측면을 포함한 몇 개의 길로 나뉘어져 있으며, 각 길마다 다양한 방어 시설이 설치되어 있다. 특히 중앙 통로는 가장 직접적인 경로이지만 가장 치열한 전투가 벌어지는 장소로, 플레이어는 이곳을 통과하면서 적의 공격을 효율적으로 방어하거나 우회해야 한다. 측면을 통한 우회 루트는 상대적으로 안전하지만, 적의 방어 시설이 덜 치밀한 대신 맵의 복잡도로 인해 길을 잃기 쉬운 구조다. 맵의 타일셋은 설원 분위기를 살려 차가운 색감을 기반으로 하며, 흰색과 파란색을 주로 사용하여 적대적인 환경을 강조하고 있다. 플레이 방식은 기본적으로 디펜스와 서바이벌 요소가 혼합되어 있다. 플레이어는 적의 공격으로부터 살아남으면서 목표 지점까지 도달해야 하며, 중간에 배치된 트리거나 아이템을 통해 일시적으로 방어력을 강화하거나 이동 속도를 증가시킬 수 있다. 맵의 난이도는 적의 방어 시설과 유닛 배치에 따라 달라지며, 초보자의 경우 중앙 통로의 방어선을 돌파하는 데 어려움을 느낄 수 있다. 반면, 경험이 있는 플레이어는 측면을 통한 우회 루트를 활용하거나 방어 시설의 약점을 공격하여 보다 안전하게 목표를 달성할 수 있다. 이 맵은 단일 플레이어용으로 설계되어 있으며, 플레이어는 제한된 자원을 활용해 적의 공격을 방어하면서 목표를 달성해야 한다. 맵의 구조상 지속적인 공격과 방어가 요구되며, 플레이어의 전략적 선택이 성패를 좌우할 수 있다. 특히, 방어 시설의 배치를 미리 파악하고 각 루트의 장단점을 분석하는 것이 중요하다. 또한, 아이템이나 보너스를 획득할 수 있는 위치도 전략적으로 활용해야 한다. Data Destroyer는 디펜스 장르의 유즈맵 중에서도 비교적 정교한 구조와 전략적 깊이를 제공하는 맵으로, 단일 플레이어용으로 설계된 만큼 플레이어의 집중력과 판단력이 요구된다. 맵의 분위기는 차가운 설원 배경으로 인해 긴장감을 조성하며, 적의 방어 시설과 맞서는 도전적인 과제를 제공한다. 경험이 풍부한 스타크래프트 플레이어라면 이 맵을 통해 전략적 사고와 긴장감 있는 플레이를 즐길 수 있을 것이다. Data Destroyer is a single-player defense-style custom map in StarCraft: Brood War, where the objective is to infiltrate a heavily fortified enemy encampment and destroy the data stored in their computers. The map features a snowy tile set, with dense enemy defenses surrounding a narrow central corridor that serves as the primary route to the target. The layout includes multiple paths, with the central corridor being the most direct but most heavily defended route. Side paths offer safer alternatives but require navigating a more complex terrain where getting lost is a risk. The snowy tile set uses cool tones of white and blue to emphasize the hostile environment, enhancing the atmosphere of tension and challenge. Gameplay blends defense and survival mechanics. Players must survive relentless enemy attacks while advancing toward the objective. Temporary upgrades or power-ups placed along the way can provide bursts of speed or defensive boosts, offering strategic advantages. Difficulty varies based on enemy placement and defense density, with beginners likely struggling through the central corridor, while experienced players can exploit side paths or target weak points in the defenses. Designed exclusively for single-player use, the map tests resource management, decision-making, and adaptability under pressure. The well-balanced structure requires players to analyze each route’s strengths and weaknesses, with strategic item collection playing a key role in success. The cold, snowy setting not only enhances immersion but also intensifies the challenge of overcoming the enemy’s defenses. Ideal for StarCraft players seeking a strategic challenge, Data Destroyer delivers a tense, skill-based experience that rewards careful planning and quick reactions. The map’s thoughtful design ensures replayability, making it a standout choice for those who enjoy defense-focused custom maps.
터렛 워즈 그리디우스+14 (Turret Wars Gradius+14)
스타크래프트의 대표적인 유즈맵 장르 중 하나인 디펜스 게임, 'Turret Wars Gradius+14'는 플레이어가 적군의 끊임없는 공격을 방어하며 생존하는 구조로 구성되어 있다. 맵은 우주 테마의 타일셋을 활용해 광활한 우주 공간을 연출하며, 중앙에 위치한 플레이어 기지 주변으로 적의 공격로가 형성되어 있다. 게임은 6명의 플레이어가 각자 독립된 기지를 방어하는 방식으로 진행되며, 적의 유닛들은 일정 주기로 생성되어 기지를 향해 진격한다. 플레이어는 기지 주변에 터렛이나 방어 시설물을 건설해 적을 요격할 수 있으며, 일정 시간마다 제공되는 자원을 활용해 방어력을 강화하거나 추가 병력을 배치할 수 있다. 게임의 핵심은 적의 공격을 얼마나 효율적으로 방어하느냐에 있으며, 터렛의 배치와 자원 관리 능력이 승패를 좌우한다. 맵 상단에는 시간과 자원 상태가 표시되어 실시간으로 전투 상황을 파악할 수 있다. 또한, 맵의 구조상 중앙보다는 외곽 지역에 방어 시설을 집중하는 전략이 효과적일 수 있다. 게임은 적의 공격이 끊임없이 이어지는 서바이벌 형식으로, 플레이어는 꾸준한 집중력과 전략적 판단을 요구받는다. 이 맵은 호스트가 불리해지지 않도록 설계되어 공정한 게임 환경을 제공한다는 특징이 있다. 또한, 'Squink-KLS'에 의해 수정된 버전으로, 초기 버전의 문제점이 개선되어 더욱 안정적인 플레이 경험을 제공한다. 우주 테마의 배경과 함께 적의 끊임없는 공격은 긴장감을 높이며, 특히 방어 시설물의 배치와 자원 관리에 대한 전략적 깊이가 있어 초보자와 숙련자 모두에게 매력적인 요소로 작용할 것이다. 다만, 방어 시설물의 초기 배치와 자원 관리 실패는 치명적인 결과를 초래할 수 있어 신중한 플레이가 요구된다. 이 맵은 디펜스 장르에 익숙한 플레이어뿐만 아니라, 새로운 전략을 시도해 보고 싶은 유즈맵愛好者에게도 추천할 만하다. 특히, 팀 플레이보다는 개인전 형식으로 진행되므로 각 플레이어의 실력이 직접적으로 결과에 반영된다. 게임의 지속적인 긴장감과 전략적 깊이는 플레이어의 몰입도를 높이는 요소로 작용할 것이다. "Turret Wars Gradius+14" is a defense game, one of StarCraft's most representative custom map genres, where players defend against endless enemy attacks to survive. The map uses a space-themed tileset to depict a vast cosmic expanse, with enemy attack routes forming around the player's base at the center. The game progresses with six players each defending their own independent bases, while enemy units spawn at regular intervals and advance toward the bases. Players can intercept enemies by constructing turrets or defensive structures around their bases and strengthen their defenses or deploy additional forces using resources provided at set intervals. The core of the game lies in how efficiently players defend against attacks, with turret placement and resource management determining victory or defeat. The top of the map displays time and resource status, allowing real-time assessment of the battle situation. Strategically, focusing defensive structures on outer areas rather than the center can be more effective due to the map's layout. The game follows a survival format with relentless enemy assaults, demanding constant focus and strategic decision-making from players. A key feature of this map is its design to prevent host disadvantages, ensuring a fair gaming environment. As a modified version by "Squink-KLS," it improves upon the original, offering a more stable and refined gameplay experience. The space-themed backdrop combined with unending enemy waves heightens tension, while the strategic depth of turret placement and resource management makes it appealing to both beginners and experienced players. However, poor initial turret placement or mismanagement of resources can lead to devastating consequences, requiring careful play. This map is highly recommended not only for players familiar with defense games but also for custom map enthusiasts looking to experiment with new strategies. Since it is structured as a free-for-all rather than team play, each player's skill directly impacts the outcome. The game's sustained tension and strategic depth enhance player immersion, making it a compelling experience.
슬로터 디펜스 베타 v7 (Slaughter Defence Beta v7)
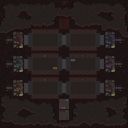
‘슬로터 디펜스 베타 v7’는 스타크래프트 브루드워의 UMS 유즈맵으로, 끊임없이 몰려오는 적군을 저지하고 생존하는 디펜스 장르의 핵심 재미를 극대화한 맵이다. 맵의 주요 특징은 중앙에 위치한 본진을 surrounded 하며 끊임없이 쏟아지는 적을 상대로 버티며 업그레이드를 통해 유닛의 체력과 공격력을 강화하는 데 중점을 둔다. 플레이어는 초반에 주어지는 제한된 자원으로 최대한 효율적으로 유닛을 배치하고, 적의 공격을 버텨내며 시간이 지날수록 강해지는 적에 맞서 전술을 유동적으로 바꿔야 한다. 특히, 맵 중앙의 본진 주변에 배치된 방어 건물과 유닛들은 적의 진격을 끊어내는 핵심 역할을 하며, 업그레이드 시스템은 플레이어의 생존 시간을 좌우하는 중요한 요소로 자리 잡는다. 맵의 배경은 정글 타일셋으로 어둡고 긴장감 넘치는 분위기를 연출하며, 적의 공격 패턴이 일정하지 않고 점점 강해지는 구조로 인해 플레이어는 끊임없는 긴장감 속에서 전략을 짜야 한다. 이 맵은 초보자와 숙련자 모두에게 흥미로운 도전 과제를 제공하며, 특히 디펜스 장르를 즐기는 플레이어에게 강력히 추천할 만하다. 플레이 전에는 본진 주변의 방어 시설과 업그레이드 경로, 적의 공격 패턴을 숙지하고, 초반 자원 배분을 신중히 결정하는 것이 성공의 열쇠가 될 것이다. Slaughter Defence Beta v7 is a UMS custom map in StarCraft: Brood War that maximizes the core fun of the defense genre by relentlessly stopping enemies and surviving. The map's main feature is its focus on upgrading unit health and attack power while defending the main base surrounded by enemies pouring in from all sides. Players must strategically place units with limited early resources and adapt tactics to counter increasingly stronger enemies over time. The defensive structures and units around the central main base play a crucial role in cutting off enemy advances, while the upgrade system becomes a key factor in determining survival time. With a jungle tileset background that evokes a dark and tense atmosphere, the map features unpredictable enemy attack patterns that intensify over time, requiring players to devise strategies under constant tension. This map offers engaging challenges for both beginners and experienced players, making it highly recommended for fans of the defense genre. Before playing, it's essential to familiarize yourself with the defensive facilities around the main base, upgrade paths, and enemy attack patterns, while carefully deciding initial resource allocation as it will be the key to success.
§pêciàl Forçês Extrëmé
이 맵은 '§pêciàl Forçês Extrëmé'라는 제목의 스타크래프트 브루드워 유즈맵으로, 특수부대 테마의 디펜스 및 서바이벌 장르에 속한다. 맵 이미지에서 확인되는 바와 같이, 사막 지형 위에 다양한 건물과 구조물이 배치되어 있으며, 중앙에는 거대한 방어 시설이 자리 잡고 있다. 맵의 가장 큰 특징은 다양한 종류의 적들이 끊임없이 몰려오는 사이드 스크롤링 디펜스 방식으로, 플레이어는 건물을 건설하고 유닛을 배치하여 적의 공격을 방어해야 한다. 맵 전체가 어두운 톤의 색채로 이루어져 있어 긴장감과 긴박감을 조성하며, 적들이 붉은 색과 파란 색으로 표시되어 있어 시각적 구분이 용이하다. 또한, 맵의 구조상 왼쪽에서 오른쪽으로 적들이 공격해 오는 방식으로 진행되는 것으로 추정된다. 이러한 구성은 플레이어에게 끊임없는 긴장감을 제공하며, 전략적 배치와 자원 관리가 중요한 포인트로 작용할 것으로 보인다. 이 맵은 초보자보다는 중급 이상의 플레이어에게 적합하며, 특히 디펜스 및 서바이벌 장르에 익숙한 유저들에게 추천된다. 맵을 플레이하기 전에는 건물을 짓는 위치와 유닛 배치 전략을 충분히 고민해 보는 것이 중요하다. 또한, ресур스 관리와 방어 시설의 효율적인 배치가 승패를 좌우할 수 있으므로, 초반과 중반의 전개를 신중히 계획해야 한다. 맵의 분위기와 진행 방식은 플레이어에게 전략적 사고와 긴장감을 동시에 요구하므로, 디펜스 장르를 좋아하는 유저들에게는无疑한 선택지가 될 것이다. This StarCraft: Brood War custom map, titled *Special Forces Extreme*, falls under the defense and survival genre with a special forces theme. As seen in the map image, various buildings and structures are arranged on a desert terrain, with a massive defensive facility positioned at the center. The map’s defining feature is its side-scrolling defense format, where waves of diverse enemies continuously attack from the sides, requiring players to construct buildings and deploy units to fend off the assaults. The map’s overall dark color palette enhances the tension and urgency of the gameplay, while enemies are distinctly marked in red and blue for easy visual differentiation. The layout suggests that enemies advance from left to right, steadily increasing the pressure on players. This design keeps players on edge, making strategic placement and resource management critical to success. The map is best suited for intermediate to advanced players, particularly those familiar with defense and survival mechanics. Before playing, it’s important to carefully consider building placement and unit deployment strategies. Efficient resource allocation and the strategic positioning of defensive structures can determine victory or defeat, so players should plan their early and mid-game progression meticulously. The map’s atmosphere and progression demand both strategic thinking and quick reflexes, making it an ideal choice for fans of the defense genre.
헬름즈 딥: 코디아카이 1.8v2 (Helms Deep: Kodiakai 1.8v2)
스타크래프트 브루드워의 디펜스 장르 유즈맵 '헬름즈 딥: 코디아카이 1.8v2'는 사막 테마의 광활한 맵에서 펼쳐지는 대규모 방어전을 경험할 수 있는 작품이다. 맵의 이름은 '헬름즈 딥'으로, 반지의 제왕 세계관의 유명한 방어전인 '헬름즈 딥 전투'를 모티브로 삼은 것으로 추정된다. 맵은 7명이 플레이할 수 있도록 설계되었으며, 사막 타일셋을 기반으로 한 황량한 지형과 절묘한 구조물이 방어전의 긴장감을 극대화한다. 맵의 중앙에는 거대한 요새가 위치하고 있으며, 그 주변으로는 적의 공격을 방어할 수 있는 성벽과 요새가 복잡하게 배치되어 있다. 플레이어는 이러한 방어 시설을 보수하고 강화하는 동시에, 끊임없이 몰려오는 적군으로부터 본진을 지켜내야 한다. 맵의 구조는 방어선의 중요성을 강조하며, 플레이어 간 협력이 필수적인 만큼 팀워크가 중요한 요소로 작용할 것이다. 맵의 배경 음악과 효과음은 사막의 분위기를 살리기 위해 디자인된 것으로 보이며, 이는 플레이어의 몰입감을 높이는 데 기여한다. 특히 맵의 규모가 크고 세부적인 구조물이 많아, 한 번의 실수가 승패를 가를 수 있는 긴장감이 특징이다. 이 맵은 디펜스 장르를 любителей 대규모 방어전과 전략적 협동 플레이를 즐기는 유저들에게 강력히 추천한다. 방어 시설을 효율적으로 관리하고, 적의 패턴을 분석하는 능력이 요구되므로, 초보자보다는 어느 정도의 전략적 이해와 팀워크가 있는 플레이어에게 더 적합할 것이다. 또한, 맵의 특성상 지속적인 플레이로 적의 패턴을 익히고 방어 전술을 연마할 수 있는 장점이 있다.Helms Deep: Kodiakai's 1.8v2 is a defense-type custom map in StarCraft: Brood War set in a vast desert-themed battlefield, inspired by the Helm's Deep battle from The Lord of the Rings universe. Designed for seven players, the map features intricate defensive structures including walls, fortresses, and outposts centered around a large main stronghold. Players must collaborate closely to reinforce structures, manage resources, and repel relentless enemy waves that attack from multiple directions. The map's large scale and detailed layout demand strategic foresight and team coordination, as a single mistake can lead to a breach in defenses. The immersive atmosphere is enhanced by sound design that complements the desert setting, creating a tense and engaging experience. This map is ideal for players who enjoy large-scale defense scenarios with cooperative elements. While accessible to beginners, it rewards players with strategic depth and the opportunity to refine defensive tactics through repeated play. The complex layout and dynamic enemy AI make it a challenging yet rewarding experience for those seeking a deep defense challenge.
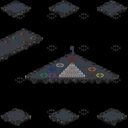
POP THE ZIT!
‘POP THE ZIT!’은 스타크래프트 브루드워의 유즈맵으로, 여러 플레이어가 동시에 협동하거나 경쟁하며 진행하는 디펜스 및 서바이벌 장르의 맵이다. 맵 이미지를 보면 중앙에 거대한 ‘종양’ 형태의 적 건물이 배치되어 있으며, 주변으로 일정 주기마다 리젠되는 적 유닛을 처리해야 한다. 이 적들은 맵 외곽의 크립 존에서 지속적으로 생성되며, 플레이어는 제한된 자원으로 방어선을 구축하고, 적의 공격을 버티며 종양을 파괴하는 것이 주요 목표로 보인다. 맵의 구조는 동심원 형태로 구성되어 있어, 중앙으로 접근할수록 적의 밀집도가 높아지는 특징이 있다. 또한, 맵 곳곳에 배치된 포토캐논이나 터렛 같은 방어 시설은 플레이어의 생존을 돕는 역할을 하며, 일정 시간이 지나면 보너스 자원이 제공되어 더 강력한 방어선을 구축할 수 있도록 돕는 시스템으로 추정된다. 플레이어는 초기 자원을 확보한 뒤, 중앙으로 진격하는 적을 저지하면서 점차적으로 종양을 공격할 수 있는 기회를 얻는 방식으로 진행된다. 맵의 분위기는 다소 혐오스럽지만, 그만큼 독특한 색채로 기억에 남을 수 있으며, 특히 협동 플레이 시 각 플레이어의 역할 분담이 중요하게 느껴진다. 초보 플레이어는 방어 시설의 배치와 자원 관리에 어려움을 느낄 수 있으나, 반복 플레이를 통해 점차 전략을 다듬을 수 있는 장점이 있다. 이 맵은 주로 6인 팀 플레이를 상정한 구조로 보이며, 각 플레이어의 역할이 명확히 나뉘어 있어 팀워크가 중요한 요소로 작용할 것으로 보인다. 또한, 맵의 난이도는 초보자보다는 중급 이상의 플레이어에게 더 적합할 수 있으며, 긴장감 있는 전투와 전략적 플레이가 요구된다. 플레이 전에는 방어 시설의 배치 위치와 자원 수급 루트를 미리 숙지하는 것이 중요하다. 맵의 인게임 설명이 없지만, ‘POP THE ZIT!’이라는 제목과 이미지에서 확인되는 종양 형태의 적 건물은 맵의 핵심 콘셉트를 담고 있어, 플레이어는 이를 파괴하는 것이 주 목표임을 쉽게 유추할 수 있다. 맵의 구조적 특징상, 플레이어 간 협동이 없으면 방어선을 유지하기 어려우며, 이는 이 맵의 가장 큰 매력 포인트 중 하나다. “Pop the Zit!” is a custom map for StarCraft: Brood War where multiple players either cooperate or compete in a defense and survival-style game. The map features a massive enemy structure shaped like a tumor at its center, surrounded by waves of enemies that spawn periodically around the map’s outer creep zones. Players must build defensive lines with limited resources, withstand enemy assaults, and ultimately destroy the tumor. The layout is circular, with enemy density increasing toward the center. Scattered turrets and photon cannons provide key defensive support, and a bonus resource system kicks in after a set time, allowing players to reinforce their lines. After securing initial resources, players push forward to block advancing enemies before gradually opening opportunities to attack the tumor itself. The map has a grotesque yet memorable aesthetic, and teamwork is crucial, especially in cooperative mode. While beginners may struggle with turret placement and resource management, repeated play helps refine strategies. Designed primarily for six-player teams, the map assigns clear roles to each player, making teamwork essential. It leans toward intermediate to advanced players, demanding tense combat and strategic planning. Before jumping in, players should familiarize themselves with turret placement and resource routes, as the in-game instructions are minimal. The title “Pop the Zit!” and the tumor-shaped enemy building make the core objective—destroying the tumor—obvious. Without strong cooperation, maintaining the defense becomes nearly impossible, which is one of the map’s biggest draws.
맵 선택 가이드
태그는 맵의 핵심 특징을 빠르게 설명하지만 제작 버전마다 규칙이 다를 수 있습니다. 상세 설명에서 권장 인원, 난이도, 플레이 시간과 버전을 함께 확인한 뒤 다운로드하세요.