
방어 건물 스타크래프트 맵 모음
'방어 건물' 태그가 등록된 맵을 모았습니다. 장르 하나로 찾기 어려운 플레이 방식, 난이도와 특징을 중심으로 인기 맵과 최신 맵을 비교해 보세요.
- 등록 맵
- 15개
- 누적 다운로드
- 0
- 누적 조회
- 612
인기 맵
다운로드와 조회 반응이 높은 맵입니다.
스타게이트 2: 생명?(Stargate(2): ¿Vida inteligente?)
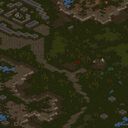
스타크래프트 브루드워 유즈맵 〈Stargate(2): ¿Vida inteligente?〉는 단일 플레이어용 디펜스 장르로, 플레이어는 ‘스타게이트’ 팀의 생존을 책임지는 임무를 맡는다. 맵은 사막 타일셋으로 구성되어 있으며, 중앙의 본진과 주변으로 펼쳐지는 넓은 평지에서 적의 끊임없는 공격을 방어해야 한다. 이미지에서 확인되는 바와 같이, 본진 주변에는 자원 미네랄과 가스 геisers가 배치되어 있어 지속적인 자원 수급이 가능하고, 방어 건물과 유닛 생산 건물을 건설할 수 있는 공간이 마련되어 있다. 맵의 특이한 점은 오른쪽 상단에 위치한 ‘훈련소’( предположительно barracks)로 보이는 건물로, 이곳에서 유닛을 생산하여 방어에 활용할 수 있다. 왼쪽 하단에는 ‘기지 확장 지역’이 있으며, 이곳을 활용해 두 번째 방어선을 구축할 수 있어 전략적 깊이를 더한다. 적의 공격은 초반에는 저글링과 히드라리스크 위주로 시작되나, 진행에 따라 울트라리스크와 디바우러까지 등장하는 등 점차 강해지는 패턴을 보인다. 플레이어는 제한된 자원으로 효율적인 방어선을 구축하고, 유닛 조합을 신중히 결정해야 한다. 맵의 난이도는 ‘보통’ 정도로 설정되어 있으며, 초보자도 기본적인 방어 전략을 익히면 클리어할 수 있지만, 높은 난이도로 도전하고자 한다면 자원 관리와 유닛 컨트롤에 대한 숙련도가 요구된다. 맵을 플레이하기 전에는 본진 주변의 방어 건물 배치 가능 지역과 확장 기지의 위치를 미리 확인하고, 자원 수급이 원활한지 점검하는 것이 중요하다. 또한, 훈련소에서 생산 가능한 유닛의 특성을 숙지하여 적의 공격 패턴에 맞춰 대응할 준비를 해야 한다. 이 맵은 디펜스 게임을 즐기는 플레이어뿐만 아니라, 전략적 사고와 자원 관리를 연마하고 싶은 유저에게도 좋은 연습 opportunities를 제공한다. 특히, 한정된 공간에서 최대한의 효율성을 추구하는 플레이 스타일이 매력적으로 느껴질 것이다. Stargate(2): ¿Vida inteligente? is a single-player defense-style custom map for StarCraft: Brood War, where the player takes on the role of protecting the Stargate team's survival. Set in a desert tileset, the map features a central base with mineral patches and gas geisers, allowing for continuous resource gathering and unit production. The top-right section includes what appears to be a barracks, enabling the construction of defensive units, while the bottom-left area offers an expansion zone for establishing a secondary defensive line. Enemy attacks escalate from early-game Zerglings and Hydralisks to later Ultralisk and Devourer units, requiring strategic adaptation. Players must balance resource management with unit composition to effectively counter escalating threats. Designed with a 'medium' difficulty level, the map is accessible to beginners who grasp basic defense tactics but demands refined skills for higher difficulties. Before playing, it's crucial to scout the base layout, identify potential defensive structures, and ensure smooth resource flow. Familiarizing yourself with unit production options at the barracks will also enhance your ability to respond to enemy strategies. This map appeals to both defense game enthusiasts and players looking to refine strategic thinking and resource management. Its emphasis on maximizing efficiency in limited space makes it a compelling choice for strategic players.
Protect The Queen Gold
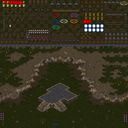
스타크래프트 브루드워의 대표적인 디펜스 유즈맵인 'Protect The Queen Gold'는 플레이어가 매 라운드마다 쏟아지는 적의 공격을 막아내며 여왕을 보호하는 전략적 재미를 제공한다. 맵의 주된 목표는 25라운드에 걸쳐 버티는 데 있으며, 여왕의 체력을 유지하면서 적의 공격을 효율적으로 방어하는 것이 핵심이다. 게임은 사막 테마의 맵 위에서 펼쳐지며, 중앙에 위치한 여왕을 중심으로 방어 건물이 배치되어 있다. 각 라운드가 시작될 때마다 다양한 종류의 적 유닛들이 등장하는데, 초반에는 약한 유닛들이 몰려오지만 후반부로 갈수록 강력한 적들이 등장하여 방어 난이도가 급격히 상승한다. 플레이어는 시작 지점에서 방어 건물과 병력을 배치할 수 있으며, 자원 관리와 전략적 배치의 중요성이 크다. 특히 여왕의 체력을 관리하는 것이 중요하며, 체력이 바닥나면 게임 오버가 되므로 신중한 플레이가 요구된다. 맵의 구조는 비교적 단순하지만, 각 라운드별로 등장하는 적의 조합과 패턴이 다양하여 매번 새로운 전략을 요구한다. 방어 건물의 업그레이드와 병력 조합을 효율적으로 활용하는 것이 승리의 열쇠이며, 초보 플레이어는 난이도가 급격히 높아지는 후반 라운드에서 어려움을 느낄 수 있다. 이 맵은 전략적 사고와 빠른 판단력을 필요로 하므로, 스타크래프트의 기본 메커니즘에 익숙한 플레이어에게 적합하며, 디펜스 장르를 좋아하는 유저들에게는 필수 경험작으로 추천할 만하다. 방어 건물의 배치와 병력 조합을 연습하여 여왕을 안전하게 보호하는 플레이가 관건이다. "Protect The Queen Gold" is a classic defense custom map in *StarCraft: Brood War* where players must fend off relentless enemy waves while protecting the Queen. The primary objective is to survive 25 rounds, keeping the Queen’s health intact while efficiently defending against escalating threats. Set on a desert-themed map, the Queen is centrally located, with defensive structures arranged around her. Each round introduces waves of enemies—starting with weaker units but growing progressively stronger—dramatically increasing the challenge as the game advances. Players begin by placing defensive buildings and troops from their starting position, with resource management and strategic positioning playing a crucial role. Maintaining the Queen’s health is vital, as running out means game over, demanding careful play. While the map’s layout is straightforward, the varied enemy compositions and patterns each round require fresh tactics. Upgrading defenses and optimizing troop compositions are key to victory, though newer players may struggle with the steep difficulty spike in later rounds. This map demands strategic thinking and quick decision-making, making it best suited for those familiar with *StarCraft*’s core mechanics. A must-play for defense genre fans, it rewards practice in defensive positioning and troop coordination to ensure the Queen’s safety.
픽 유어 디펜스 (Pick Your Defense)
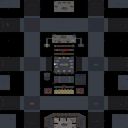
스타크래프트 브루드워 유즈맵 〈픽 유어 디펜스〉는 플레이어와 컴퓨터가 번갈아 가며 방어와 공격을 펼치는 독특한 디펜스 장르의 맵이다. 맵은 중앙에 위치한 본진과 주변의 방어 건물들, 그리고 적의 공격 루트가 명확히 나뉘어 있어 전략적인 배치와 자원 관리가 무엇보다 중요하다. 플레이어는 각 라운드마다 주어지는 자원을 활용해 방어 건물을 건설하고 업그레이드하며, 컴퓨터는 정해진 패턴으로 공격을 시도한다. 특히 ‘픽’이라는 이름에 걸맞게, 각 라운드마다 제공되는 선택지가 플레이어의 전략을 좌우하는데, 이는 단순한 디펜스 맵을 넘어 선택과 집중의 재미를 더하는 요소다. 맵의 분위기는 우주 타일셋을 기반으로 하여Dark, 차분한 톤으로 조성되어 있으며, 긴장감 있는 전투가 펼쳐지는 동안에도 고요한 공간감이 느껴진다. 중간중간 등장하는 특수 건물이나 아이템 선택지는 플레이어에게 일시적인 우위를 제공하기도 한다. 초보자는 방어 건물의 기본 배치와 자원 관리에 익숙해지는 데 집중해야 하며, 숙련자는 효율적인 자원 분배와 공격 타이밍을 노려야 한다. 맵의 난이도는 라운드가 진행될수록 점차 높아지므로, 꾸준한 전략 수정이 필요하다. 추천 대상은 디펜스 장르를 좋아하는 플레이어와 전략적 사고를 즐기는 유저들로, 특히 ‘선택지와 통제’라는 새로운 재미를 경험하고 싶은 이들에게 적합하다. 플레이 전에는 방어 건물의 종류와 특수 능력, 그리고 컴퓨터의 공격 패턴을 미리 숙지하는 것이 좋다. 또한, 맵의 긴장감을 유지하기 위해 소리와 그래픽 설정을 조절하는 것도 중요한 포인트다. StarCraft: Brood War custom map *Pick Your Defense* is a unique defense genre map where players and the computer take turns defending and attacking. The map is divided into a clearly separated main base in the center, surrounding defensive structures, and enemy attack routes, making strategic placement and resource management crucial. Each round, players use given resources to construct and upgrade defensive buildings, while the computer attempts attacks in predetermined patterns. True to its name, "Pick," the choices provided each round heavily influence the player's strategy, adding layers of selection and focus beyond a typical defense map. The map's atmosphere is built on a space-themed tileset, creating a dark, subdued tone that enhances the sense of calm even during intense battles. Special buildings or item selections appearing at intervals grant temporary advantages. Beginners should focus on mastering basic defensive building placement and resource management, while experienced players must optimize resource allocation and attack timing. The difficulty gradually increases with each round, requiring continuous strategic adjustments. This map is recommended for players who enjoy defense genres and those who appreciate strategic thinking, especially those looking to experience the new fun of "choices and control." Before playing, it's wise to familiarize yourself with defensive building types, special abilities, and the computer's attack patterns. Adjusting sound and graphics settings can also help maintain the map's tension.
아트 오브 디펜스 3.2 (Art of Defence 3.2)
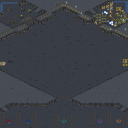
‘아트 오브 디펜스 3.2’는 스타크래프트 브루드워의 유즈맵으로, 우주 배경의 디펜스 장르에 속한다. 맵은 3072×3072 크기의 정사각형 구조로 이루어져 있으며, 플레이어는 맵 가장자리를 따라 배치된 기지를 지키며 끊임없이 몰려오는 적의 웨이브를 상대로 45분 동안 버텨야 한다. 게임의 핵심은 방어선의 구축과 자원의 효율적 관리에 있으며, 각 웨이브마다 다양한 종류의 유닛이 등장해 플레이어의 전략과 대처 능력을 시험한다. 맵의 특징은 우주 타일셋을 활용한 독특한 시각적 구성으로, 어두운 배경과 밝은 조명 효과가 어우러져 웨이브가 다가올 때마다 긴장감을 조성한다. 특히, 중앙에 위치한 넓은 공간은 방어선 구축을 위한 최적의 위치로, 이곳을 중심으로 터렛, 포토캐논, 미사일 터렛 등 방어 건물을 배치할 수 있다. 게임 진행은 웨이브가 끝날 때마다 주어지는 일정량의 미네랄과 가스를 바탕으로 추가 건물을 건설하거나 유닛을 업그레이드할 수 있어, 장기적인 시야와 자원 관리 능력이 요구된다. 초보자의 경우 웨이브가 몰려오기 전에 방어선을 충분히 구축하지 못해 패배할 가능성이 높으므로, 방어 건물의 배치와 업그레이드 우선순위를 신중히 결정해야 한다. 반면, 숙련된 플레이어는 자원의 효율적 분배와 다중 방어선의 구축을 통해 웨이브를 가볍게 넘길 수 있다. 이 맵은 주로 컴퓨터를 상대로 한 플레이를 상정하고 있으며, 5명의 플레이어가 동시에 참여할 수 있지만, 팀 플레이보다는 개별 플레이가 주가 된다. 추천 대상은 디펜스 장르를 즐기는 플레이어, 특히 방어 건물의 배치와 자원 관리 전략을 배우고 싶은 유저들에게 적합하다. 플레이 전에는 맵의 구조와 방어 건물의 종류, 웨이브의 패턴을 미리 숙지하고, 각 웨이브별로 등장하는 유닛의 특성을 분석하는 것이 중요하다. 또한, 방어선의 재구축을 위한 충분한 자원 확보와 중앙 공간의 활용도를 높이기 위한 건물 배치 전략을 미리 세워두는 것이 좋다. 이 맵은 45분 동안의 긴장감과 전략적 깊이를 제공하며, 디펜스 장르의 매력을 경험할 수 있는佳作이다. 특히, 우주 배경의 시각적 요소와 웨이브의 박진감이 어우러져 몰입감을 높이는 데 기여한다. 초보와 숙련자 모두에게 도전 과제를 제공할 수 있는 구조로, 다양한 전략을 시도해 보며 자신의 실력을 향상시킬 수 있는 좋은 기회가 될 것이다. ‘Art of Defense 3.2’ is a user-created defense map in *StarCraft: Brood War* set in a space-themed universe. The map features a square layout measuring 3072×3072, where players defend their bases positioned along the edges against endless waves of enemies for 45 minutes. The core gameplay revolves around building and maintaining a strong defense line while efficiently managing resources. Each wave introduces different enemy units, testing the player’s adaptability and strategic planning. The map stands out with its unique visual design using a space-themed tileset, blending dark backgrounds with striking lighting effects to heighten tension as waves approach. The spacious center area serves as the ideal spot for constructing defenses, allowing players to place turrets, photon cannons, and missile turrets strategically. After each wave, players receive a set amount of minerals and vespene gas, enabling them to expand their defenses or upgrade units—demanding long-term resource management and foresight. Beginners often struggle if they fail to establish a solid defense line before waves hit, making careful placement and prioritization of defensive structures crucial. Skilled players, however, can easily navigate waves by efficiently allocating resources and setting up multiple defense lines. Designed primarily for solo play against AI, the map supports up to five players, though individual performance takes precedence over teamwork. This map is ideal for players who enjoy defense games, especially those looking to refine their skills in defensive structure placement and resource management. To succeed, it’s essential to study the map layout, familiarize yourself with defensive buildings, and analyze the patterns of each wave. Planning ahead for resource accumulation and optimizing the use of the central space for defense layouts will greatly improve your chances. Offering 45 minutes of intense, strategic gameplay, ‘Art of Defense 3.2’ delivers an immersive defense experience with its cosmic visuals and adrenaline-pumping waves. The map’s design caters to both beginners and veterans, providing a challenging yet rewarding opportunity to experiment with different strategies and sharpen your skills.
경계와 방어 2 (Bound and Defend 2)
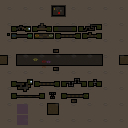
스타크래프트 브루드워의 유즈맵 〈Bound and Defend 2〉는 이름 그대로 '경계하고 방어하라'는 간단한 규칙으로 구성된 디펜스 장르의 맵이다. 맵의 핵심은 중앙에 위치한 방어 기지 주변을 둘러싼 적의 끊임없는 공격을 효과적으로 방어하는 데 있다. 플레이어는 시작과 동시에 적의 소규모 부대를 상대하며, 적의 공격을 막아내면서 점차 확장하고 자원을 모아 방어 태세를 강화해야 한다. 맵은 사막 타일셋으로 구성되어 있으며, 넓은 평야와 오아시스, 요새가 특징적인 구조를 자아낸다. 방어 기지 주변에는 건물이 배치되어 있어 초반 방어에 유리한 환경을 제공하며, 후방으로는 보급로와 자원 채취 지역이 마련되어 있어 전략적 확장을 가능케 한다. 적의 공격 패턴은 일정 주기로 반복되며, 방어에 실패하면 기지가 파괴되어 게임 오버로 이어진다. 맵의 난이도는 방어의 중요성과 자원 관리의 균형을 요구하며, 초보자와 숙련자 모두에게 적절한 도전 과제를 제공한다. 특히 방어에 집중하면서도 자원을 얼마나 효율적으로 확보하는지가 승패를 좌우하는 핵심 요소로 보인다. 한국어 설명은 'Title says it. You bound then you defend... lol.'이라는 간단한 구절로 맵의 핵심 전략을 요약하고 있으며, 이름 그대로의 플레이 경험을 강조한다. 맵을 플레이할 때에는 초반 방어 라인을 단단히 구축하는 것이 중요하며, 중반 이후에는 확장과 자원 확보를 병행하는 균형 잡힌 전략이 필요하다. 또한, 적의 공격 패턴을 미리 예측하고 방어 건물의 위치를 조정하는 것이 승리의 열쇠가 될 것이다. 추천 대상은 디펜스 장르를 좋아하는 플레이어뿐만 아니라, 전략적 사고와Resource management 능력을 키우고자 하는 유저들에게도 적합하다. 게임의 난이도는 보통 수준으로 설정되어 있지만, 방어 라인을 잘못 구축하면 예기치 못한 공격에 무너질 수 있으니 주의가 필요하다. 맵의 구성은 비교적 단순해 보이지만, 실제 플레이에서는 긴장감과 전략적 깊이가 요구되는 매력적인 유즈맵이다. 특히 방어에 실패했을 때의 절박한 순간과 성공했을 때의 성취감이 게임의 재미를 한층 높이는 요소로 작용할 것이다. 초보자는 방어 건물의 배치와 자원 확보에 집중하고, 숙련자는 보다 공격적인 전략과 효율적인 자원 운용을 시도해 볼 수 있다. 맵의 구조상 방어에 실패하면 곧바로 게임이 종료될 수 있으므로, 초반 방어 라인 구축에 많은 신경을 써야 한다. 또한, 후방 자원 채취 지역을 확보하지 않으면 중반 이후 자원의 고갈로 인해 방어가 어려워질 수 있으니, 확장과 방어의 밸런스를 잘 맞춰야 한다. 맵의 분위기는 사막이라는 타일셋 덕분에 건조하고 긴박한 느낌을 주며, 적의 끊임없는 공격 속에서 생존을 위해 싸우는 플레이어의 긴장감을 배가시킨다. 이러한 요소들이 어우러져 〈Bound and Defend 2〉는 디펜스 장르의 유즈맵 중에서도 손꼽히는 재미와 도전을 제공하는 맵으로 평가된다. 플레이 전에는 반드시 방어 건물의 배치와 자원 확보 계획을 미리 세워두는 것이 좋다. 또한, 적의 공격 패턴을 미리 파악하고 그에 맞춰 방어 태세를 조정하는 연습을 한다면, 보다 수월하게 게임을 진행할 수 있을 것이다. 맵의 난이도는 보통이지만, 방어에 실패하면 곧바로 게임이 끝날 수 있으므로 항상 긴장감을 유지하며 플레이해야 한다. 초보자는 기본 방어 전략을 익히고, 숙련자는 보다 공격적인 전략과 자원 운용을 시도해 볼 수 있는 기회를 제공하는 것이 이 맵의 가장 큰 장점이다. 마지막으로, 맵의 재미는 방어에 성공했을 때의 성취감과 긴박한 순간의 스릴에서 비롯된다는 점을 잊지 말자. 이러한 요소들이 〈Bound and Defend 2〉를 디펜스 장르의 필수 유즈맵으로 자리매김하게 할 것이다. Bound and Defend 2, a custom map from StarCraft: Brood War, is a defense-focused game where the core objective is to protect a central base from relentless enemy attacks, as the title suggests. Players start by fending off small enemy waves and must gradually expand, gather resources, and strengthen their defenses to survive. The map features a desert tile set, with wide plains, oases, and fortresses creating a distinctive layout. Buildings are strategically placed around the defensive base, making early defense easier, while supply routes and resource-gathering areas in the rear allow for strategic expansion. Enemy attacks follow a predictable cycle, and failing to defend properly results in base destruction and game over. The map balances the importance of defense and resource management, offering a fair challenge for both beginners and experienced players. The Korean description humorously sums up the core strategy with the phrase, "Title says it. You bound then you defend... lol," emphasizing the map's straightforward yet engaging gameplay. A solid early defense is crucial, but mid-game requires balancing expansion and resource collection. Predicting enemy attack patterns and adjusting defensive structures accordingly can be the key to victory. The map is recommended not only for defense genre fans but also for players looking to improve strategic thinking and resource management. While the difficulty is moderate, a poorly constructed defense line can lead to unexpected collapses, so caution is advised. Despite its simple appearance, the map delivers tense, strategic depth in actual gameplay, with the thrill of near-misses during failed defenses and the satisfaction of overcoming challenges in successful ones. Beginners should focus on defensive structure placement and resource gathering, while experienced players can experiment with more aggressive strategies and efficient resource use. Since a single defense failure can end the game, special attention must be paid to early defensive lines. Additionally, neglecting rear resource zones can lead to mid-game resource shortages, making defense harder, so balancing expansion and defense is essential. The desert tile set enhances the tense, high-stakes atmosphere, amplifying the player’s stress as they fight to survive endless enemy assaults. These elements combine to make Bound and Defend 2 one of the standout defense genre custom maps, offering both fun and challenge. Before playing, it’s wise to plan defensive structure placement and resource collection strategies. Familiarizing yourself with enemy attack patterns and adjusting defenses accordingly will make the game smoother. Though the difficulty is moderate, the risk of sudden defeat keeps tension high throughout. The map’s greatest strength is its accessibility for beginners to learn basic defense strategies while offering experienced players room to try aggressive tactics and refined resource management. Ultimately, the excitement of Bound and Defend 2 comes from the thrill of narrow escapes and the rewarding feeling of overcoming tough defenses, cementing its place as a must-play in the defense genre.
파일론 디펜스 (Pylon Defense v1.08i)
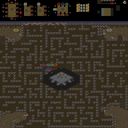
스타크래프트 브루드워의 대표적인 디펜스 유즈맵 ‘파일론 디펜스(Pylon Defense)’는 플레이어가 보호해야 할 파일런을 중심으로 끊임없이 몰려드는 적 유닛을 방어하는 전형적인 구조를 갖추고 있다. 맵 상단 중앙에 위치한 파일런을 중심으로 하단 진영에서 적의 공격을 차단하며, 적의 파상 공세를 효과적으로 막아내야만 승리를 거둘 수 있다. 게임은 정해진 웨이브 수만큼 적의 공격을 버텨내는 방식으로 진행되며, 파일런 주변의 방어 건물과 유닛 생산 건물을 최대한 효율적으로 배치해 지속적인 방어를 구축하는 것이 핵심 전략이다. 적의 공격 패턴은 시간이 지날수록 점점 강력해지며, 때로는 공중 유닛이나 특수 유닛이 등장하기도 해서 플레이어는 방어뿐만 아니라 공격력 강화와 자원 관리에 신경을 써야 한다. 파일론 디펜스는 기본적인 디펜스 맵이지만, 방어 건물 배치와 유닛 생산 타이밍, 자원 수급의 균형을 맞추는 것이 승리의 관건이다. 초보 플레이어는 방어 건물과 유닛 생산의 기본 구성만으로도 충분히 즐길 수 있지만, 숙련된 플레이어는 최적의 방어 라인 구축과 효율적인 자원 운용을 통해 더 긴 웨이브를 버텨내는 도전을 즐길 수 있다. 이 맵은 디펜스라는 장르의 정석을 보여주면서도, 간단한 조작과 명확한 승리 조건 덕분에 누구나 쉽게 접근할 수 있으며, 반복 플레이를 통해 전략적 깊이를 더할 수 있다. 파일론 디펜스는 특히 디펜스 유즈맵을 좋아하는 유저들에게 강력히 추천할 만한 작품으로, 오랜 기간 사랑받아 온 classic 맵 중 하나이다. 플레이 전에는 방어 건물의 배치와 유닛 생산 건물의 위치를 미리 숙지하고, 초반 자원 수급을 안정적으로 유지하는 것이 중요하다. 또한, 적의 공격 패턴을 예측하고 방어 라인을 강화하는 타이밍을 잘 잡는 것이 승리의 열쇠가 된다. 파일론 디펜스는 단순한 방어 게임이 아니라, 전략과 집중력을 요구하는Challenge가 매력적인 유즈맵이다. 파일론 디펜스를 플레이하기 전에는 방어 건물의 배치와 유닛 생산 건물의 위치를 미리 확인하고, 초반 자원 수급을 안정적으로 유지하는 것이 중요하다. 또한, 적의 공격 패턴을 예측하고 방어 라인을 강화하는 타이밍을 잘 잡는 것이 승리의 열쇠가 된다. 이 맵은 디펜스 장르의 정석을 보여주며, 누구나 쉽게 접근할 수 있지만, 전략적 깊이를 더하기 위해 반복 플레이가 권장된다. 특히 방어 건물과 유닛 생산의 균형을 맞추는 것이 핵심이며, 숙련될수록 더 긴 웨이브를 버텨내는 도전에 도전할 수 있다. 파일론 디펜스는 classic 디펜스 유즈맵으로써 오랜 기간 사랑받아 온 작품으로, 디펜스 장르를 좋아하는 유저라면 반드시 한 번쯤 플레이해 볼 만한 가치가 있다. Pylon Defense is one of the classic defense-style custom maps in StarCraft: Brood War, where players must protect a central pylon from relentless waves of enemy units. The gameplay revolves around building and managing a defense around the pylon located at the top center of the map, while fending off attacks from the lower enemy base. The core strategy involves efficiently placing defensive structures and producing units to withstand increasingly powerful enemy assaults as waves progress. Over time, the enemy introduces stronger units, including air and special units, requiring players to balance defense, resource management, and offensive capabilities. While the map is accessible to beginners, experienced players can enhance their strategy by optimizing defensive lines and resource allocation to survive longer waves. Pylon Defense exemplifies the essence of defense maps with its straightforward mechanics and clear victory conditions, making it a timeless favorite among custom map enthusiasts. Before playing, it is crucial to familiarize yourself with the placement of defensive buildings and unit production structures, and to maintain stable early-game resource gathering. Predicting enemy attack patterns and reinforcing defenses at the right moments are key to achieving victory. Beyond its simple premise, the map offers a rewarding challenge that blends strategy and focus, making it a must-play for fans of the defense genre. Repeated playthroughs are encouraged to refine tactics and explore deeper strategic layers.
미나스 티리스의 전투 (The Battle of Minas Tirith)
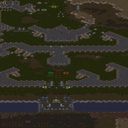
스타크래프트 브루드워의 ‘미나스 티리스 전투’를 배경으로 한 대규모 디펜스형 유즈맵 ‘The Battle of Minas Tirith’는 중세 판타지 세계관을 압축적으로 재현한 작품으로, 플레이어는 곤도르의 수비대로서 사우론의 군대와 맞서는 전장을 경험할 수 있다. 맵은 중앙의 요새를 중심으로 삼은 원형 구조로, 외부에서 끊임없이 몰려드는 오크, 우르크하이, 나즈굴 등 적군 유닛을 상대해야 한다. 지형은 성벽과 성문, 요새, 그리고 방어 시설로 촘촘히 구성되어 있으며, 특히 성문과 성벽은 초토화될 위험이 있어 지속적인 수리가 필요하다. 플레이 방식은 기본적으로 ‘컴퓨터 상대 디펜스’로, 한 팀의 플레이어가 요새를 방어하며 적의 공격을 저지하는 것이 목표로 추정된다. 맵 곳곳에 배치된 방어 건물과 유닛 생산 시설, 그리고 보급로를 관리하는 전략이 요구되며, 적의 물량과 조합에 따라Build Order와 유닛 조합을 유동적으로 변화시켜야 한다. 맵의 규모는 상당히 넓은데, 이는 넓은 시야와 전략적 기동력을 요구하며, 특히 성문 앞의 좁은 길목에서 벌어지는 접전은 치열한 혈전을 연출한다. 추천 대상은 디펜스와 전략 게임을 좋아하는 유저로, 특히 대규모 물량전을 즐기는 플레이어에게 적합하다. 또한, 중세 판타지 세계관에 흥미가 있거나, 팀 플레이를 통한 협동이 필요한 맵을 선호하는 유저라면 즐거운 경험을 할 수 있을 것이다. 다만, 넓은 맵과 끊임없는 적의 공격으로 인해 초보자에게는 다소 난이도가 높을 수 있으니, 방어 건물과 유닛의 배치, 그리고 자원의 효율적 사용에 대한 이해가 선행되어야 한다. 플레이 전에는 맵의 주요 방어 지점과 보급로, 그리고 적의 주요 공격 루트를 미리 파악해 두는 것이 좋다. The Battle of Minas Tirith is a large-scale defense-focused custom map in StarCraft: Brood War, set against the backdrop of the iconic battle from Middle-earth. Players take on the role of Gondor’s defenders, battling waves of Sauron’s forces including orcs, Uruk-hai, and Nazgûl in a meticulously designed fantasy battlefield. The map features a central fortress surrounded by layered defenses, including walls, gates, and key structures that must be repaired and reinforced throughout the game. The gameplay revolves around a classic computer-vs-player defense format, where the team must hold the line against relentless enemy waves. Strategic placement of defensive buildings, unit production facilities, and supply lines is crucial, as players must adapt their build orders and unit compositions based on the evolving threats. The map’s expansive layout demands strong spatial awareness and tactical mobility, especially during close-quarters battles near chokepoints like the main gates. This map is ideal for players who enjoy defense mechanics and strategic depth, particularly those who thrive in large-scale, high-intensity battles. Fans of medieval fantasy settings or cooperative gameplay will also find it appealing. However, due to its size and the constant pressure from enemy waves, it may pose a challenge for beginners. Prior understanding of defensive structures, resource management, and unit positioning is highly recommended. Before playing, scouting the map’s critical defense points, supply routes, and enemy attack paths will give players a significant advantage.
U 디펜스 v4.0 (U' Defense v4.0)
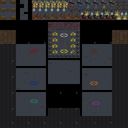
스타크래프트 브루드워의 ‘U’ Defense v4.0은 디펜스 장르의 유즈맵으로, 6명이 동시에 즐길 수 있는 컴까기 스타일의 맵이다. 우주 테마의 배경에서 펼쳐지는 전투는 플레이어들이 각자의 기지를 지키며 끊임없이 몰려드는 적의 공격을 방어하는 것이 핵심 전략이다. 맵의 구조는 중앙에 위치한 넥서스를 중심으로 방어 건물과 자원 분배 시스템이 배치되어 있어,Resource Management와 건물 배치의 중요성이 부각된다. ‘U’ Defense v4.0은 UI상으로는 DEFENSE로 분류되어 있지만, 실제 gameplay는 다수의 플레이어가 각자 기지를 방어하며 상대방의 넥서스를 파괴하는 컴까기(컴퓨터 상대 키우기) 요소와 유사하다. 맵의 특징은 진영 간 밸런스가 비교적 잘 맞춰져 있으며, 방어 건물의 업그레이드와 자원 수집을 통해 효율적인 전략을 수립할 수 있다. 또한, 맵 내부에 배치된 다양한 방어 건물과 특수 유닛들은 플레이어의 선택에 따라 전투 스타일을 다변화할 수 있게 한다. 초보자는 기본적인 방어와 자원 관리부터 시작해 점차 전략을 확장할 수 있으며, 숙련자는 업그레이드 타이밍과 유닛 조합을 최적화하는 고난이도 플레이를 즐길 수 있다. 다만, 6명의 인원이 동시에 플레이하는 구조상 팀워크와 커뮤니케이션이 중요하며, 개인의 실수가 전체 팀의 패배로 이어질 수 있어 주의가 필요하다. 맵을 플레이하기 전에는 방어 건물의 위치와 자원 분포를 미리 파악하고, 적의 공격 패턴을 분석하는 것이 중요하다. 또한, 업그레이드와 유닛 생산의 우선순위를 신중히 결정해야 한다. ‘U’ Defense v4.0은 디펜스와 컴까기의 장점을 결합한 유즈맵으로, 스타크래프트의 전략적 깊이를 즐기고자 하는 플레이어들에게 추천할 만한 작품이다. *U* Defense v4.0 is a custom *StarCraft: Brood War* defense map designed for six players, featuring a "comp stomp" (AI enemy rush) gameplay style. Set against a cosmic-themed backdrop, the core objective revolves around defending your base while fending off relentless waves of enemy attacks. The map centers around a Nexus, with defensive structures and resource distribution systems strategically placed around it, emphasizing resource management and building placement. While classified as a defense map in the UI, *U* Defense v4.0 incorporates elements akin to a multiplayer "comp stomp," where players defend their bases while simultaneously attempting to destroy opponents' Nexuses. The map boasts well-balanced factions, allowing players to devise effective strategies through defensive upgrades and resource gathering. Additionally, the variety of defensive structures and special units scattered across the map enables players to diversify their combat approaches based on their preferences. Beginners can start with basic defense and resource management, gradually expanding their strategies, while advanced players can refine their skills by optimizing upgrade timings and unit compositions for high-level play. However, since the map supports six players simultaneously, teamwork and communication are crucial—individual mistakes can lead to the entire team’s defeat, so caution is advised. Before playing, it’s essential to familiarize yourself with defensive structure placements and resource distribution, analyze enemy attack patterns, and carefully prioritize upgrades and unit production. Combining the strengths of defense and comp stomp mechanics, *U* Defense v4.0 is a recommended custom map for players seeking to experience the strategic depth of *StarCraft*.
좀비의 역습: 언데드 리메이크 (THE UNDEAD !! REMAKED)
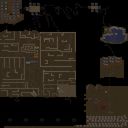
스타크래프트 브루드워의 고전 유즈맵인 《THE UNDEAD !! REMAKED》는 좀비 outbreak를 컨셉으로 한 디펜스 장르의 유즈맵으로, 8명의 플레이어가 한 팀을 이루어 좀비 웨이브를 방어하는 구조를 갖추고 있다. 맵은 사막 타일셋으로 구성되어 있으며, 중앙에 위치한 넥서스를 중심으로 방어 건물을 건설하고 유닛을 배치하여 끊임없이 몰려오는 좀비를 막아내는 것이 주된 목표다. 맵의 특징 중 하나는 각 플레이어의 시작 지점이 넓게 배치되어 있어 초반 자원 수집과 방어 준비에 유리하다는 점이다. 또한, 맵 곳곳에 배치된 크리스탈과 미네랄을 채취하여 자원을 확보할 수 있으며, 방어 건물 외에도 특수 유닛이나 스킬을 사용할 수 있는 요소가 포함되어 있어 전략의 깊이를 더한다. 좀비는 일정 주기마다 다른 루트에서 침공해 오며, 후반으로 갈수록 강력한 개체나 다수의 적들이 등장하여 난이도가 상승한다. 초보 플레이어는 방어 건물의 배치와 자원 관리, 그리고 좀비의 침공 패턴을 파악하는 데 집중해야 하며, 숙련된 플레이어는 자원 효율과 유닛 조합을 최적화하여 장기전을 준비해야 한다. 추천하는 플레이 방식은 방어 건물의 조합을 미리 계획하고, 초반 자원을 빠르게 확보하여 초반 공격을 막아내는 것이며, 특히 넥서스 주변의 방어선을 강화하는 것이 중요하다. 이 맵은 디펜스 장르를 선호하는 플레이어뿐만 아니라, 전략적 사고와 팀워크를 중시하는 유저들에게도 적합하다. 플레이 전에는 맵의 주요 침공 루트를 확인하고, 방어 건물의 건설 위치와 자원 채취 구역을 미리 숙지하는 것이 좋다. 또한, 팀원 간의 역할 분배(예: 자원 관리, 방어 건물 건설, 공격 유닛 생산)를 명확히 하는 것이 성공적인 플레이의 열쇠가 될 수 있다. 맵의 인기는 좀비라는 소재와 함께 방어와 자원 관리라는 기본적인 전략 요소의 조합이 어우러진 점에서 비롯된 것으로 보이며, 이를 통해 다양한 전략적 시도를 해볼 수 있는 장점이 있다. 《THE UNDEAD !! REMAKED》 is a classic Brood War custom map that blends the zombie outbreak theme with a defense-style gameplay. Eight players team up to fend off relentless zombie waves, constructing defensive structures around a central Nexus in a desert-themed map. The spacious starting positions give early advantages for resource gathering and setup, while scattered crystals and minerals provide additional income. Beyond standard defenses, the map introduces special units and skill-based mechanics, adding layers of strategy. Zombies surge in periodic waves, escalating in difficulty as stronger variants and larger groups appear in later stages. Beginners should focus on placement, resource management, and recognizing attack patterns, while veterans optimize unit compositions and long-term planning. A recommended approach involves pre-planning defenses, securing early resources to repel initial assaults, and reinforcing the Nexus perimeter. This map appeals to defense enthusiasts and players who value teamwork and tactical thinking. Before starting, study the primary invasion routes, memorize resource zones, and assign clear roles—such as resource management, base construction, or unit production—to maximize team synergy. Its enduring popularity stems from the fusion of zombie-themed action with core strategic elements, offering ample room for creative tactics.
썬쿠엔D 10웨이 17.9 임파서블 (SunkenD 10Way 17.9 Impossible)
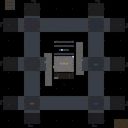
‘썬쿠엔D 10웨이 17.9 임파서블(SunkenD 10Way 17.9 Impossible)’은 25단계에 달하는 장렬한 디펜스 유즈맵으로, 끊임없는 적의 웨이브를 막아내며 방어선을 지켜내는 짜릿한 긴장감을 자아낸다. 맵 곳곳에 배치된 방어 건물과 구축로, 그리고 맵 중앙에 자리한 대규모 건물이 이 맵의 특징인데, 특히 10개의 웨이브가 끊임없이 몰아치는 구조는 플레이어의 집중력과 전략적 대처 능력을 극한까지 시험한다. 적들은 다양한 유닛으로 구성되어 있으며, 후반부로 갈수록 난이도가 기하급수적으로 상승하는 탓에 초보자는 물론 숙련자까지도 끊임없는 긴장감을 느낄 수밖에 없다. 방어 건물과 자원 관리, 그리고 시야 확보가 핵심 포인트로, 잘못된 배치나 소홀한 자원 관리는 금세 패인으로 이어질 수 있다. 이 맵은 다인 플레이보다는 혼자서 또는 소규모 팀으로 도전하는 것이 효과적이며, 특히 방어 시설을 최대한 효율적으로 배치해 자원을 절약하는 것이 관건이다. 맵의 전체적인 분위기는 어둡고 칙칙한 색조로 조성되어 있어, 몰입감 있는 디펜스 경험을 제공한다. 이 맵을 즐기기 위해서는 일정 수준 이상의 미네랄과 가스 관리가 필요하며, 방어 건물의 업그레이드와 보조 건물의 적절한 활용이 필수적이다. 초보자의 경우 1~5단계까지는 무난히 클리어할 수 있지만, 10단계 이후부터는 상당한 숙련도가 요구된다. 맵의 복잡한 구조와 끊임없는 공격 패턴은 초반에는 당황스러울 수 있지만, 점차 적의 패턴을 익히고 방어 전략을 다듬어 나갈수록 그 짜릿한 재미에 흠뻑 빠질 수 있을 것이다. 이 맵은 디펜스 유즈맵의 정수를 느낄 수 있는佳作으로, 반복 플레이를 통해 자신의 실력을 한층 더 끌어올릴 수 있는 좋은 기회가 될 것이다. This intense defense custom map, ‘SunkenD 10Way 17.9 Impossible’, delivers thrilling tension through relentless enemy waves across 25 escalating stages. The map features strategically placed defensive structures and pathways, with a large central building anchoring the layout. Its defining trait is the continuous 10-way assaults that push players to their limits, demanding sharp focus and adaptive strategies. Enemy compositions vary, and the difficulty spikes exponentially as stages progress, making it a challenge even for seasoned players. Effective resource management, building placement, and vision control are critical to survival. While multiplayer is possible, the map is best enjoyed solo or in small teams, where efficient use of defenses and resources becomes paramount. The dark, muted color palette enhances immersion, creating a tense atmosphere ideal for defense gameplay. Newcomers may comfortably clear early stages (1–5), but mastery is essential beyond stage 10 due to complex enemy patterns and resource demands. The map rewards perseverance with a gratifying sense of progression as players refine their strategies and adapt to evolving threats. A standout title in the defense genre, it offers ample replay value and a pathway to skill improvement through repeated challenges.
터렛 디펜스 35000 -Final- (Turret Defense 35000 -Final-)
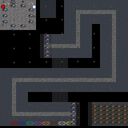
스타크래프트 브루드워의 디펜스 장르 유즈맵인 《터렛 디펜스 35000 -Final-》은 전형적인 구조에서 한층 진화된 방어형 맵으로, 플레이어는 적의 끊임없는 공격을 효과적으로 저지하며 최종 목표까지 도달해야 한다. 이 맵은 우주 테마의 타일셋을 활용해 우주 공간에서 벌어지는 방어전을 연출하며, 곳곳에 배치된 터렛과 방어 건물들이 주요 전략 포인트가 된다. 맵 중앙에는 넓은 통로가 있으며, 좌우로 나뉜 базе 구역이 배치되어 있는데, 이는 적의 공격 루트를 예측하고 방어선을 구축하는 핵심 요소로 활용된다. 특히, 맵의 하단과 상단에는 추가적인 방어 시설이 배치되어 있어, 플레이어는 한정된 자원으로도 다층적인 방어망을 구축할 수 있다. 게임은 기본적으로 유닛 생산과 건물을 통한 방어 전략이 주를 이루며, 초반에는 소규모 유닛을 배치해 적의 약한 공격을 방어하는 데 집중해야 한다. 시간이 지남에 따라 적의 공격 패턴이 변하고 규모가 커지므로, 플레이어는 지속적으로 방어 건물을 업그레이드하거나 새로운 터렛을 배치해야 한다. 맵의 특징 중 하나는 중앙 통로의 넓이와 방어 시설의 배치로, 중앙을 확보하지 않으면 적의 공격이 한층 더 강력해지는 구조로 설계되어 있다. 또한, 맵의 가장자리를 따라 배치된 방어 건물들은 후방 공격을 방어하는 데 필수적이다. 이 맵은 초보 플레이어에게는 다소 난이도가 있을 수 있지만, 방어 건물의 배치와 업그레이드 타이밍을 익히면 점진적으로 클리어가 가능해진다. 반면, 숙련된 플레이어는 빠른 판단을 바탕으로 중앙 통로를 신속히 확보하고, 후방 공격을 차단하는 전략을 구사할 수 있다. 추천하는 플레이 방식은 방어 건물의 효율적인 배치와 자원 관리의 균형을 맞추는 것이며, 특히 초반 자원 확보가 중요하다. 맵의 난이도를 고려할 때, 초보자는 방어 건물의 기본 배치와 업그레이드 우선순위를 숙지한 후 플레이하는 것이 좋다. 또한, 맵의 구조상 중앙 통로를 확보하지 않으면 적의 공격이 지속적으로 밀려오므로, 이를 방지하기 위한 전략 수립이 필수다. StarCraft: Brood War's defense genre custom map, *Turret Defense 35000 -Final-*, is an evolved defensive map that goes beyond typical structures, requiring players to effectively repel endless enemy assaults and reach the final objective. The map employs a space-themed tileset to depict battles unfolding in outer space, with turrets and defensive structures scattered throughout serving as key strategic points. A wide central corridor dominates the map, flanked by base areas on the left and right—elements designed to help players predict enemy attack routes and establish defensive lines. Additional defensive facilities are positioned at the top and bottom of the map, allowing players to construct multi-layered defenses even with limited resources. The game revolves around unit production and defensive structures, with players initially focusing on deploying small units to fend off weaker early attacks. As time progresses, enemy attack patterns intensify and scale up, forcing players to continuously upgrade defensive buildings or deploy new turrets. A defining feature of the map is the width of the central corridor and the arrangement of defensive structures—holding the center not only secures a strategic advantage but also prevents enemy attacks from becoming overwhelmingly powerful. The defensive buildings placed along the map’s edges are also crucial for blocking rear assaults. While the map may pose a challenge for beginners, mastering turret placement and upgrade timing makes gradual completion achievable. Skilled players, on the other hand, can quickly secure the central corridor and employ strategies to cut off rear attacks with decisive judgment. The recommended playstyle emphasizes balancing efficient turret placement with resource management, with early resource acquisition being particularly vital. Given the map’s difficulty, beginners should familiarize themselves with basic turret layouts and upgrade priorities before playing. Additionally, since failing to secure the central corridor results in relentless enemy waves, devising a strategy to hold it is essential.
선켄 10-웨이 60 드론즈 (Sunken 10-Way 60 Drones)
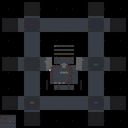
스타크래프트 브루드워의 유즈맵 '선켄 10-웨이 60 드론즈(Sunken 10-Way 60 Drones)'는 대규모 다중 플레이어 디펜스 게임으로, 중앙 기지에서 끊임없이 쏟아지는 적의 공격을 방어하는 것이 핵심이다. 맵 중앙에 위치한 플레이어 기지에서 6명의 플레이어가 협력하여 10개의 다중 방향에서 몰려오는 저글링, 히드라리스크, 뮤탈리스크, 울트라리스크 등 다양한 적 유닛을 상대로 버텨야 한다. 각 방향은 고유한 길목을 통해 접근하며, 플레이어는 제한된 자원으로 방어 건물을 설치하고 업그레이드해야 한다. 적의 공격 패턴은 시간에 따라 점점 강해지므로 초반 방어 체계를 신속히 구축하는 것이 중요하다. 맵의 특징은 10개의 방향이 모두 균형 있게 배치되어 있어 각 플레이어가 맡은 구역을 철저히 방어해야 한다는 점이다. 또한, 맵 곳곳에 scattered resources(산개 자원)가 배치되어 있어 자원 수집을 통한 지속적인 업그레이드가 가능하지만, 자원이 부족한 경우엔 신중한 선택이 요구된다. 맵의 난이도는 보통 수준으로, 초반에는 상대적으로 쉬운 적들이 몰려오지만 후반부로 갈수록 강력한 조합의 적들이 끊임없이 공격해오므로, 팀원 간의 호흡과 전략적 배치, 그리고 자원 관리 능력이 승패를 좌우한다. 이 맵은 특히 컴까기 유즈맵을 좋아하는 플레이어들에게 추천되며, 긴장감 넘치는 협동 플레이와 지속적인 전투가 특징이다. 방어에 실패하면 기지가 파괴되며 패배하므로, 초보자는 물론 숙련자까지도 끊임없이 전략을 고민하게 만드는 매력이 있다. 플레이 전에는 각 방향의 길목과 적의 공격 패턴을 숙지하고, 자원 분배와 방어 건물의 배치 계획을 미리 세워두는 것이 중요하다. 또한, 팀원과의 원활한 의사소통을 통해 방어 라인을 효율적으로 구축하는 것이 성패를 가른다. 이 맵은 스타크래프트의 클래식한 디펜스 장르를 любителям에게 다시 한 번 각인시켜 주는 걸작으로, 긴장감과 짜릿함을 동시에 느낄 수 있는 경험을 제공한다. 무엇보다도, 팀워크와 전략적 사고가 요구되는 만큼 혼자서는 결코 클리어하기 어려운 구조로 설계되어 있어, 진정한 협동의 가치를 느낄 수 있다. Sunken 10-Way 60 Drones is a multiplayer defense game in StarCraft: Brood War where six players collaborate to protect their central base from relentless waves of enemies approaching from ten different directions. The core gameplay revolves around constructing and upgrading defensive structures using limited resources scattered across the map to withstand increasingly powerful enemy attacks over time. Each of the ten pathways is uniquely designed, requiring players to focus on their assigned zones while coordinating with teammates to cover gaps in defense. The map’s balanced layout ensures that no single direction becomes an easy target, while scattered resources allow for strategic upgrades but demand careful management to avoid shortages. With a moderate difficulty level, the challenge escalates as stronger enemy compositions emerge in later waves, testing players’ adaptability, resource allocation, and teamwork. This map is ideal for fans of team-based defense UMS maps, offering a high-stakes cooperative experience where failure to hold the line results in base destruction. Before playing, it’s crucial to study the pathways and enemy patterns, plan resource distribution, and establish clear communication with teammates to optimize defense layouts. The map’s design rewards strategic foresight and collaboration, making it a standout title in StarCraft’s classic defense genre. Its reliance on teamwork ensures that solo players will struggle to progress, reinforcing the value of coordination and shared decision-making in achieving victory.
최근 등록된 맵
새로 추가된 파일과 버전을 확인하세요.
스타게이트 2: 생명?(Stargate(2): ¿Vida inteligente?)
스타크래프트 브루드워 유즈맵 〈Stargate(2): ¿Vida inteligente?〉는 단일 플레이어용 디펜스 장르로, 플레이어는 ‘스타게이트’ 팀의 생존을 책임지는 임무를 맡는다. 맵은 사막 타일셋으로 구성되어 있으며, 중앙의 본진과 주변으로 펼쳐지는 넓은 평지에서 적의 끊임없는 공격을 방어해야 한다. 이미지에서 확인되는 바와 같이, 본진 주변에는 자원 미네랄과 가스 геisers가 배치되어 있어 지속적인 자원 수급이 가능하고, 방어 건물과 유닛 생산 건물을 건설할 수 있는 공간이 마련되어 있다. 맵의 특이한 점은 오른쪽 상단에 위치한 ‘훈련소’( предположительно barracks)로 보이는 건물로, 이곳에서 유닛을 생산하여 방어에 활용할 수 있다. 왼쪽 하단에는 ‘기지 확장 지역’이 있으며, 이곳을 활용해 두 번째 방어선을 구축할 수 있어 전략적 깊이를 더한다. 적의 공격은 초반에는 저글링과 히드라리스크 위주로 시작되나, 진행에 따라 울트라리스크와 디바우러까지 등장하는 등 점차 강해지는 패턴을 보인다. 플레이어는 제한된 자원으로 효율적인 방어선을 구축하고, 유닛 조합을 신중히 결정해야 한다. 맵의 난이도는 ‘보통’ 정도로 설정되어 있으며, 초보자도 기본적인 방어 전략을 익히면 클리어할 수 있지만, 높은 난이도로 도전하고자 한다면 자원 관리와 유닛 컨트롤에 대한 숙련도가 요구된다. 맵을 플레이하기 전에는 본진 주변의 방어 건물 배치 가능 지역과 확장 기지의 위치를 미리 확인하고, 자원 수급이 원활한지 점검하는 것이 중요하다. 또한, 훈련소에서 생산 가능한 유닛의 특성을 숙지하여 적의 공격 패턴에 맞춰 대응할 준비를 해야 한다. 이 맵은 디펜스 게임을 즐기는 플레이어뿐만 아니라, 전략적 사고와 자원 관리를 연마하고 싶은 유저에게도 좋은 연습 opportunities를 제공한다. 특히, 한정된 공간에서 최대한의 효율성을 추구하는 플레이 스타일이 매력적으로 느껴질 것이다. Stargate(2): ¿Vida inteligente? is a single-player defense-style custom map for StarCraft: Brood War, where the player takes on the role of protecting the Stargate team's survival. Set in a desert tileset, the map features a central base with mineral patches and gas geisers, allowing for continuous resource gathering and unit production. The top-right section includes what appears to be a barracks, enabling the construction of defensive units, while the bottom-left area offers an expansion zone for establishing a secondary defensive line. Enemy attacks escalate from early-game Zerglings and Hydralisks to later Ultralisk and Devourer units, requiring strategic adaptation. Players must balance resource management with unit composition to effectively counter escalating threats. Designed with a 'medium' difficulty level, the map is accessible to beginners who grasp basic defense tactics but demands refined skills for higher difficulties. Before playing, it's crucial to scout the base layout, identify potential defensive structures, and ensure smooth resource flow. Familiarizing yourself with unit production options at the barracks will also enhance your ability to respond to enemy strategies. This map appeals to both defense game enthusiasts and players looking to refine strategic thinking and resource management. Its emphasis on maximizing efficiency in limited space makes it a compelling choice for strategic players.
U 디펜스 v4.0 (U' Defense v4.0)
스타크래프트 브루드워의 ‘U’ Defense v4.0은 디펜스 장르의 유즈맵으로, 6명이 동시에 즐길 수 있는 컴까기 스타일의 맵이다. 우주 테마의 배경에서 펼쳐지는 전투는 플레이어들이 각자의 기지를 지키며 끊임없이 몰려드는 적의 공격을 방어하는 것이 핵심 전략이다. 맵의 구조는 중앙에 위치한 넥서스를 중심으로 방어 건물과 자원 분배 시스템이 배치되어 있어,Resource Management와 건물 배치의 중요성이 부각된다. ‘U’ Defense v4.0은 UI상으로는 DEFENSE로 분류되어 있지만, 실제 gameplay는 다수의 플레이어가 각자 기지를 방어하며 상대방의 넥서스를 파괴하는 컴까기(컴퓨터 상대 키우기) 요소와 유사하다. 맵의 특징은 진영 간 밸런스가 비교적 잘 맞춰져 있으며, 방어 건물의 업그레이드와 자원 수집을 통해 효율적인 전략을 수립할 수 있다. 또한, 맵 내부에 배치된 다양한 방어 건물과 특수 유닛들은 플레이어의 선택에 따라 전투 스타일을 다변화할 수 있게 한다. 초보자는 기본적인 방어와 자원 관리부터 시작해 점차 전략을 확장할 수 있으며, 숙련자는 업그레이드 타이밍과 유닛 조합을 최적화하는 고난이도 플레이를 즐길 수 있다. 다만, 6명의 인원이 동시에 플레이하는 구조상 팀워크와 커뮤니케이션이 중요하며, 개인의 실수가 전체 팀의 패배로 이어질 수 있어 주의가 필요하다. 맵을 플레이하기 전에는 방어 건물의 위치와 자원 분포를 미리 파악하고, 적의 공격 패턴을 분석하는 것이 중요하다. 또한, 업그레이드와 유닛 생산의 우선순위를 신중히 결정해야 한다. ‘U’ Defense v4.0은 디펜스와 컴까기의 장점을 결합한 유즈맵으로, 스타크래프트의 전략적 깊이를 즐기고자 하는 플레이어들에게 추천할 만한 작품이다. *U* Defense v4.0 is a custom *StarCraft: Brood War* defense map designed for six players, featuring a "comp stomp" (AI enemy rush) gameplay style. Set against a cosmic-themed backdrop, the core objective revolves around defending your base while fending off relentless waves of enemy attacks. The map centers around a Nexus, with defensive structures and resource distribution systems strategically placed around it, emphasizing resource management and building placement. While classified as a defense map in the UI, *U* Defense v4.0 incorporates elements akin to a multiplayer "comp stomp," where players defend their bases while simultaneously attempting to destroy opponents' Nexuses. The map boasts well-balanced factions, allowing players to devise effective strategies through defensive upgrades and resource gathering. Additionally, the variety of defensive structures and special units scattered across the map enables players to diversify their combat approaches based on their preferences. Beginners can start with basic defense and resource management, gradually expanding their strategies, while advanced players can refine their skills by optimizing upgrade timings and unit compositions for high-level play. However, since the map supports six players simultaneously, teamwork and communication are crucial—individual mistakes can lead to the entire team’s defeat, so caution is advised. Before playing, it’s essential to familiarize yourself with defensive structure placements and resource distribution, analyze enemy attack patterns, and carefully prioritize upgrades and unit production. Combining the strengths of defense and comp stomp mechanics, *U* Defense v4.0 is a recommended custom map for players seeking to experience the strategic depth of *StarCraft*.
터렛 디펜스 35000 -Final- (Turret Defense 35000 -Final-)
스타크래프트 브루드워의 디펜스 장르 유즈맵인 《터렛 디펜스 35000 -Final-》은 전형적인 구조에서 한층 진화된 방어형 맵으로, 플레이어는 적의 끊임없는 공격을 효과적으로 저지하며 최종 목표까지 도달해야 한다. 이 맵은 우주 테마의 타일셋을 활용해 우주 공간에서 벌어지는 방어전을 연출하며, 곳곳에 배치된 터렛과 방어 건물들이 주요 전략 포인트가 된다. 맵 중앙에는 넓은 통로가 있으며, 좌우로 나뉜 базе 구역이 배치되어 있는데, 이는 적의 공격 루트를 예측하고 방어선을 구축하는 핵심 요소로 활용된다. 특히, 맵의 하단과 상단에는 추가적인 방어 시설이 배치되어 있어, 플레이어는 한정된 자원으로도 다층적인 방어망을 구축할 수 있다. 게임은 기본적으로 유닛 생산과 건물을 통한 방어 전략이 주를 이루며, 초반에는 소규모 유닛을 배치해 적의 약한 공격을 방어하는 데 집중해야 한다. 시간이 지남에 따라 적의 공격 패턴이 변하고 규모가 커지므로, 플레이어는 지속적으로 방어 건물을 업그레이드하거나 새로운 터렛을 배치해야 한다. 맵의 특징 중 하나는 중앙 통로의 넓이와 방어 시설의 배치로, 중앙을 확보하지 않으면 적의 공격이 한층 더 강력해지는 구조로 설계되어 있다. 또한, 맵의 가장자리를 따라 배치된 방어 건물들은 후방 공격을 방어하는 데 필수적이다. 이 맵은 초보 플레이어에게는 다소 난이도가 있을 수 있지만, 방어 건물의 배치와 업그레이드 타이밍을 익히면 점진적으로 클리어가 가능해진다. 반면, 숙련된 플레이어는 빠른 판단을 바탕으로 중앙 통로를 신속히 확보하고, 후방 공격을 차단하는 전략을 구사할 수 있다. 추천하는 플레이 방식은 방어 건물의 효율적인 배치와 자원 관리의 균형을 맞추는 것이며, 특히 초반 자원 확보가 중요하다. 맵의 난이도를 고려할 때, 초보자는 방어 건물의 기본 배치와 업그레이드 우선순위를 숙지한 후 플레이하는 것이 좋다. 또한, 맵의 구조상 중앙 통로를 확보하지 않으면 적의 공격이 지속적으로 밀려오므로, 이를 방지하기 위한 전략 수립이 필수다. StarCraft: Brood War's defense genre custom map, *Turret Defense 35000 -Final-*, is an evolved defensive map that goes beyond typical structures, requiring players to effectively repel endless enemy assaults and reach the final objective. The map employs a space-themed tileset to depict battles unfolding in outer space, with turrets and defensive structures scattered throughout serving as key strategic points. A wide central corridor dominates the map, flanked by base areas on the left and right—elements designed to help players predict enemy attack routes and establish defensive lines. Additional defensive facilities are positioned at the top and bottom of the map, allowing players to construct multi-layered defenses even with limited resources. The game revolves around unit production and defensive structures, with players initially focusing on deploying small units to fend off weaker early attacks. As time progresses, enemy attack patterns intensify and scale up, forcing players to continuously upgrade defensive buildings or deploy new turrets. A defining feature of the map is the width of the central corridor and the arrangement of defensive structures—holding the center not only secures a strategic advantage but also prevents enemy attacks from becoming overwhelmingly powerful. The defensive buildings placed along the map’s edges are also crucial for blocking rear assaults. While the map may pose a challenge for beginners, mastering turret placement and upgrade timing makes gradual completion achievable. Skilled players, on the other hand, can quickly secure the central corridor and employ strategies to cut off rear attacks with decisive judgment. The recommended playstyle emphasizes balancing efficient turret placement with resource management, with early resource acquisition being particularly vital. Given the map’s difficulty, beginners should familiarize themselves with basic turret layouts and upgrade priorities before playing. Additionally, since failing to secure the central corridor results in relentless enemy waves, devising a strategy to hold it is essential.
터렛 디펜스 10K -Final- (Turret Defense 10K -Final-)
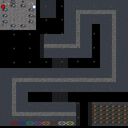
스타크래프트 브루드워의 디펜스 장르 유즈맵인 《터렛 디펜스 10K -Final-》은 방어전 중심의 전략적인 플레이를 제공하는 맵입니다. 맵의 주요 특징은 수많은 적 웨이브를 상대하며 터렛과 방어 건물들을 배치하고 관리하는 것입니다. 게임 시작 후 중앙에 위치한 기지에서부터 서서히 밀려오는 저그 웨이브를 막아내야 하며, 각 웨이브마다 증가하는 적의 수와 공격 패턴을 예측하고 대처해야 합니다. 맵의 구조는 비교적 평평한 지형 위에 방어 건물이 설치될 수 있는 공간이 넓게 배치되어 있으며, 중앙 통로와 외곽을 따라 적들이 접근합니다. 플레이어는 제한된 자원으로 터렛을 건설하고 업그레이드할 수 있으며, 자원은 웨이브를 막아낼 때마다 획득할 수 있습니다. 또한, 맵 곳곳에 배치된 보너스 자원 지역을 확보하는 것이 중요합니다. 게임은 웨이브가 지속적으로 이어지며, 일정 횟수의 웨이브를 성공적으로 막아내면 승리합니다. 맵의 디자인과 밸런스는 초보자부터 숙련자까지 공정한 도전을 제공하도록 설계된 것으로 보입니다. 특히, 방어 건물의 효율적인 배치와 자원 관리가 승리의 열쇠가 되며, 각 웨이브의 패턴을 학습하며 전략을 수립하는 재미가 있습니다. 추천 대상은 디펜스 장르를 좋아하는 플레이어이며, 특히 방어 건물의 배치와 전략적 사고를 즐기는 유저들에게 적합합니다. 게임을 시작하기 전 방어 건물의 종류와 업그레이드 비용, 자원 획득 방법 등을 미리 숙지하는 것이 좋습니다. 또한, 빠른 반응과 정확한 클릭이 요구되므로 마우스 조작에 익숙한 플레이어가 유리할 수 있습니다. 《Turret Defense 10K -Final-》 is a defense-genre custom map in StarCraft: Brood War that offers strategic gameplay focused on defense. The main feature of the map is placing and managing turrets and defensive structures while facing numerous enemy waves. Starting from the central base, you must fend off Zerg waves that gradually advance, predicting and countering the increasing number and attack patterns of enemies in each wave. The map features a relatively flat terrain with ample space for defensive structures, and enemies approach through the central corridor and outer paths. Players can construct and upgrade turrets with limited resources, which are earned by successfully blocking waves. Securing bonus resource areas scattered throughout the map is also crucial. The game continues with waves persisting until you successfully defend a set number of them to win. The map’s design and balance appear to offer fair challenges for both beginners and experienced players. Efficient placement of defensive structures and resource management are key to victory, with the enjoyment of learning each wave’s patterns and devising strategies. It’s recommended for players who enjoy defense games, especially those who like strategizing and placing defensive buildings. Before starting, it’s advisable to familiarize yourself with the types of defensive structures, upgrade costs, and resource-gathering methods. Additionally, quick reactions and precise mouse control are essential, making it advantageous for players comfortable with fast-paced mouse operations.
썬쿠엔D 10웨이 17.9 임파서블 (SunkenD 10Way 17.9 Impossible)
‘썬쿠엔D 10웨이 17.9 임파서블(SunkenD 10Way 17.9 Impossible)’은 25단계에 달하는 장렬한 디펜스 유즈맵으로, 끊임없는 적의 웨이브를 막아내며 방어선을 지켜내는 짜릿한 긴장감을 자아낸다. 맵 곳곳에 배치된 방어 건물과 구축로, 그리고 맵 중앙에 자리한 대규모 건물이 이 맵의 특징인데, 특히 10개의 웨이브가 끊임없이 몰아치는 구조는 플레이어의 집중력과 전략적 대처 능력을 극한까지 시험한다. 적들은 다양한 유닛으로 구성되어 있으며, 후반부로 갈수록 난이도가 기하급수적으로 상승하는 탓에 초보자는 물론 숙련자까지도 끊임없는 긴장감을 느낄 수밖에 없다. 방어 건물과 자원 관리, 그리고 시야 확보가 핵심 포인트로, 잘못된 배치나 소홀한 자원 관리는 금세 패인으로 이어질 수 있다. 이 맵은 다인 플레이보다는 혼자서 또는 소규모 팀으로 도전하는 것이 효과적이며, 특히 방어 시설을 최대한 효율적으로 배치해 자원을 절약하는 것이 관건이다. 맵의 전체적인 분위기는 어둡고 칙칙한 색조로 조성되어 있어, 몰입감 있는 디펜스 경험을 제공한다. 이 맵을 즐기기 위해서는 일정 수준 이상의 미네랄과 가스 관리가 필요하며, 방어 건물의 업그레이드와 보조 건물의 적절한 활용이 필수적이다. 초보자의 경우 1~5단계까지는 무난히 클리어할 수 있지만, 10단계 이후부터는 상당한 숙련도가 요구된다. 맵의 복잡한 구조와 끊임없는 공격 패턴은 초반에는 당황스러울 수 있지만, 점차 적의 패턴을 익히고 방어 전략을 다듬어 나갈수록 그 짜릿한 재미에 흠뻑 빠질 수 있을 것이다. 이 맵은 디펜스 유즈맵의 정수를 느낄 수 있는佳作으로, 반복 플레이를 통해 자신의 실력을 한층 더 끌어올릴 수 있는 좋은 기회가 될 것이다. This intense defense custom map, ‘SunkenD 10Way 17.9 Impossible’, delivers thrilling tension through relentless enemy waves across 25 escalating stages. The map features strategically placed defensive structures and pathways, with a large central building anchoring the layout. Its defining trait is the continuous 10-way assaults that push players to their limits, demanding sharp focus and adaptive strategies. Enemy compositions vary, and the difficulty spikes exponentially as stages progress, making it a challenge even for seasoned players. Effective resource management, building placement, and vision control are critical to survival. While multiplayer is possible, the map is best enjoyed solo or in small teams, where efficient use of defenses and resources becomes paramount. The dark, muted color palette enhances immersion, creating a tense atmosphere ideal for defense gameplay. Newcomers may comfortably clear early stages (1–5), but mastery is essential beyond stage 10 due to complex enemy patterns and resource demands. The map rewards perseverance with a gratifying sense of progression as players refine their strategies and adapt to evolving threats. A standout title in the defense genre, it offers ample replay value and a pathway to skill improvement through repeated challenges.
선켄 10-웨이 60 드론즈 (Sunken 10-Way 60 Drones)
스타크래프트 브루드워의 유즈맵 '선켄 10-웨이 60 드론즈(Sunken 10-Way 60 Drones)'는 대규모 다중 플레이어 디펜스 게임으로, 중앙 기지에서 끊임없이 쏟아지는 적의 공격을 방어하는 것이 핵심이다. 맵 중앙에 위치한 플레이어 기지에서 6명의 플레이어가 협력하여 10개의 다중 방향에서 몰려오는 저글링, 히드라리스크, 뮤탈리스크, 울트라리스크 등 다양한 적 유닛을 상대로 버텨야 한다. 각 방향은 고유한 길목을 통해 접근하며, 플레이어는 제한된 자원으로 방어 건물을 설치하고 업그레이드해야 한다. 적의 공격 패턴은 시간에 따라 점점 강해지므로 초반 방어 체계를 신속히 구축하는 것이 중요하다. 맵의 특징은 10개의 방향이 모두 균형 있게 배치되어 있어 각 플레이어가 맡은 구역을 철저히 방어해야 한다는 점이다. 또한, 맵 곳곳에 scattered resources(산개 자원)가 배치되어 있어 자원 수집을 통한 지속적인 업그레이드가 가능하지만, 자원이 부족한 경우엔 신중한 선택이 요구된다. 맵의 난이도는 보통 수준으로, 초반에는 상대적으로 쉬운 적들이 몰려오지만 후반부로 갈수록 강력한 조합의 적들이 끊임없이 공격해오므로, 팀원 간의 호흡과 전략적 배치, 그리고 자원 관리 능력이 승패를 좌우한다. 이 맵은 특히 컴까기 유즈맵을 좋아하는 플레이어들에게 추천되며, 긴장감 넘치는 협동 플레이와 지속적인 전투가 특징이다. 방어에 실패하면 기지가 파괴되며 패배하므로, 초보자는 물론 숙련자까지도 끊임없이 전략을 고민하게 만드는 매력이 있다. 플레이 전에는 각 방향의 길목과 적의 공격 패턴을 숙지하고, 자원 분배와 방어 건물의 배치 계획을 미리 세워두는 것이 중요하다. 또한, 팀원과의 원활한 의사소통을 통해 방어 라인을 효율적으로 구축하는 것이 성패를 가른다. 이 맵은 스타크래프트의 클래식한 디펜스 장르를 любителям에게 다시 한 번 각인시켜 주는 걸작으로, 긴장감과 짜릿함을 동시에 느낄 수 있는 경험을 제공한다. 무엇보다도, 팀워크와 전략적 사고가 요구되는 만큼 혼자서는 결코 클리어하기 어려운 구조로 설계되어 있어, 진정한 협동의 가치를 느낄 수 있다. Sunken 10-Way 60 Drones is a multiplayer defense game in StarCraft: Brood War where six players collaborate to protect their central base from relentless waves of enemies approaching from ten different directions. The core gameplay revolves around constructing and upgrading defensive structures using limited resources scattered across the map to withstand increasingly powerful enemy attacks over time. Each of the ten pathways is uniquely designed, requiring players to focus on their assigned zones while coordinating with teammates to cover gaps in defense. The map’s balanced layout ensures that no single direction becomes an easy target, while scattered resources allow for strategic upgrades but demand careful management to avoid shortages. With a moderate difficulty level, the challenge escalates as stronger enemy compositions emerge in later waves, testing players’ adaptability, resource allocation, and teamwork. This map is ideal for fans of team-based defense UMS maps, offering a high-stakes cooperative experience where failure to hold the line results in base destruction. Before playing, it’s crucial to study the pathways and enemy patterns, plan resource distribution, and establish clear communication with teammates to optimize defense layouts. The map’s design rewards strategic foresight and collaboration, making it a standout title in StarCraft’s classic defense genre. Its reliance on teamwork ensures that solo players will struggle to progress, reinforcing the value of coordination and shared decision-making in achieving victory.
특수부대 익스트림 V.6 (Special Forces Extreme V.6)
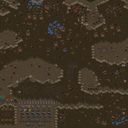
《§pêciàl Forçês Extrëmé V.6》는 스타크래프트 브루드워의 디펜스 장르 유즈맵으로, 총 6명의 플레이어가 협동하여 적의 끊임없는 공격을 방어해내는 것이 핵심 목표다. 맵의 중앙 구역은 넓은 개활지로 펼쳐져 있으며, 각 플레이어는 자신의 기지 주변에 배치된 방어 건물과 유닛을 활용해 적의 러시를 막아내야 한다. 맵 곳곳에는 보라색과 파란색의 방어 건물이 배치되어 있는데, 이 건물들은 적의 공격을 자동으로 반사하거나 추가 피해를 입히는 등 전략적인 역할을 한다. 또한, 맵의 외곽 지역에는 특수한 구조물이 보이며, 이 구조물들은 플레이어 간의 협력을 유도하거나 추가적인 방어선을 제공하는 것으로 추정된다. 진행 방식은 정해진 웨이브가 주어지는 일종의 웨이브 디펜스로 보이며, 각 웨이브마다 등장하는 적의 종류와 수가 점차 증가하는 특징을 가지고 있다. 플레이어는 자원을 모아 유닛을 생산하거나 방어 건물을 업그레이드할 수 있으며, 적의 공격을 허용하지 않고 얼마나 오랫동안 버티느냐가 관건이다. 맵의 분위기는 사막 타일셋을 기반으로 한 황량한 황무지로, 적대감이 느껴지는 붉은 빛과 모래 먼지가 시야를 가리는 효과가 있어 긴장감을 더한다. 초보 플레이어는 방어 건물의 배치와 업그레이드 타이밍을 잘못 잡으면 기지가 순식간에 무너질 위험이 있으므로, 방어 우선순위를 신중히 결정해야 한다. 또한, 팀원 간의 실시간 소통이 필수적이며, 각 플레이어의 역할 분배(예:Resource Manager, Defender, Support)가 명확히 정해져 있다면 훨씬 수월하게 진행할 수 있다. 맵의 밸런스는 웨이브의 난이도 상승이 점진적이지만, 후반부로 갈수록 적의 공격 패턴이 다양해지고 강해지므로 집중력이 요구된다. 추천 플레이 시간은 약 30~40분 정도로, 각 웨이브 간의 간격이 짧아지면 플레이 시간이 늘어날 수 있으며, 반대로 장시간의 협동 플레이를 선호한다면 Progressive Mode가 포함된 버전인지 확인하는 것이 좋다. 맵을 처음 플레이할 때는 방어 건물을 가능한 한 기지 근처에 배치하고, 자원 수급을 안정적으로 유지하는 데 중점을 두는 것이 중요하다. 이 맵은 팀플레이를 중시하는 유저들에게 적합하며, 혼자서는 극복하기 어려운 높은 난이도의 웨이브도 팀원과의 조화로운 플레이로 극복할 수 있는 매력이 있다. 《§pêciàl Forçês Extrëmé V.6》 is a cooperative defense map for *StarCraft: Brood War*, where six players must work together to fend off endless enemy waves. The map features a wide open central area, with each player relying on defensive structures and units placed around their base to withstand the onslaught. Scattered throughout the map are purple and blue defensive buildings that automatically reflect damage or deal extra hits, adding a strategic layer to the defense. The outer regions contain unique structures that seem designed to encourage teamwork or provide additional defensive lines. The gameplay follows a wave-based defense format, where enemy types and numbers escalate with each successive wave. Players gather resources to produce units or upgrade defenses, with survival time being the ultimate measure of success. The map’s aesthetic is a desolate wasteland with a desert tile set, enhanced by a hostile red-tinged atmosphere and sandstorms that obscure vision, heightening tension. Beginners must be cautious—poor placement of defensive buildings or mistimed upgrades can lead to a swift base collapse, so prioritizing defenses wisely is crucial. Real-time communication among teammates is essential, and having clearly defined roles (such as resource manager, defender, or support) makes coordination much smoother. While the difficulty ramps up gradually, later waves introduce more varied and powerful enemy patterns, demanding sustained focus. A typical playthrough lasts around 30 to 40 minutes, though this can extend if waves arrive in quick succession. For those who prefer longer sessions, checking for a version with a progressive mode is advisable. First-time players should focus on placing defenses near their base and maintaining steady resource income. This map is ideal for team-oriented players, offering a rewarding challenge where even the toughest waves can be overcome through cohesive teamwork.
좀비의 역습: 언데드 리메이크 (THE UNDEAD !! REMAKED)
스타크래프트 브루드워의 고전 유즈맵인 《THE UNDEAD !! REMAKED》는 좀비 outbreak를 컨셉으로 한 디펜스 장르의 유즈맵으로, 8명의 플레이어가 한 팀을 이루어 좀비 웨이브를 방어하는 구조를 갖추고 있다. 맵은 사막 타일셋으로 구성되어 있으며, 중앙에 위치한 넥서스를 중심으로 방어 건물을 건설하고 유닛을 배치하여 끊임없이 몰려오는 좀비를 막아내는 것이 주된 목표다. 맵의 특징 중 하나는 각 플레이어의 시작 지점이 넓게 배치되어 있어 초반 자원 수집과 방어 준비에 유리하다는 점이다. 또한, 맵 곳곳에 배치된 크리스탈과 미네랄을 채취하여 자원을 확보할 수 있으며, 방어 건물 외에도 특수 유닛이나 스킬을 사용할 수 있는 요소가 포함되어 있어 전략의 깊이를 더한다. 좀비는 일정 주기마다 다른 루트에서 침공해 오며, 후반으로 갈수록 강력한 개체나 다수의 적들이 등장하여 난이도가 상승한다. 초보 플레이어는 방어 건물의 배치와 자원 관리, 그리고 좀비의 침공 패턴을 파악하는 데 집중해야 하며, 숙련된 플레이어는 자원 효율과 유닛 조합을 최적화하여 장기전을 준비해야 한다. 추천하는 플레이 방식은 방어 건물의 조합을 미리 계획하고, 초반 자원을 빠르게 확보하여 초반 공격을 막아내는 것이며, 특히 넥서스 주변의 방어선을 강화하는 것이 중요하다. 이 맵은 디펜스 장르를 선호하는 플레이어뿐만 아니라, 전략적 사고와 팀워크를 중시하는 유저들에게도 적합하다. 플레이 전에는 맵의 주요 침공 루트를 확인하고, 방어 건물의 건설 위치와 자원 채취 구역을 미리 숙지하는 것이 좋다. 또한, 팀원 간의 역할 분배(예: 자원 관리, 방어 건물 건설, 공격 유닛 생산)를 명확히 하는 것이 성공적인 플레이의 열쇠가 될 수 있다. 맵의 인기는 좀비라는 소재와 함께 방어와 자원 관리라는 기본적인 전략 요소의 조합이 어우러진 점에서 비롯된 것으로 보이며, 이를 통해 다양한 전략적 시도를 해볼 수 있는 장점이 있다. 《THE UNDEAD !! REMAKED》 is a classic Brood War custom map that blends the zombie outbreak theme with a defense-style gameplay. Eight players team up to fend off relentless zombie waves, constructing defensive structures around a central Nexus in a desert-themed map. The spacious starting positions give early advantages for resource gathering and setup, while scattered crystals and minerals provide additional income. Beyond standard defenses, the map introduces special units and skill-based mechanics, adding layers of strategy. Zombies surge in periodic waves, escalating in difficulty as stronger variants and larger groups appear in later stages. Beginners should focus on placement, resource management, and recognizing attack patterns, while veterans optimize unit compositions and long-term planning. A recommended approach involves pre-planning defenses, securing early resources to repel initial assaults, and reinforcing the Nexus perimeter. This map appeals to defense enthusiasts and players who value teamwork and tactical thinking. Before starting, study the primary invasion routes, memorize resource zones, and assign clear roles—such as resource management, base construction, or unit production—to maximize team synergy. Its enduring popularity stems from the fusion of zombie-themed action with core strategic elements, offering ample room for creative tactics.
맵 선택 가이드
태그는 맵의 핵심 특징을 빠르게 설명하지만 제작 버전마다 규칙이 다를 수 있습니다. 상세 설명에서 권장 인원, 난이도, 플레이 시간과 버전을 함께 확인한 뒤 다운로드하세요.