
방어 스타크래프트 맵 모음
'방어' 태그가 등록된 맵을 모았습니다. 장르 하나로 찾기 어려운 플레이 방식, 난이도와 특징을 중심으로 인기 맵과 최신 맵을 비교해 보세요.
- 등록 맵
- 650개
- 누적 다운로드
- 47
- 누적 조회
- 27,295
인기 맵
다운로드와 조회 반응이 높은 맵입니다.
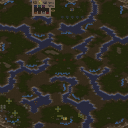
7인 공유컴까기 (7-Person Shared Computer Defense)
스타크래프트 브루드워의 유즈맵 7인공유컴까기는 7명의 플레이어가 한 팀으로 협력하여 컴퓨터의 공격을 방어하는 디펜스 장르의 맵이다. 맵의 핵심은 팀워크와 전략적 배치로, 적절한 자원 관리와 방어 라인 구축이 승리의 열쇠가 된다. 중앙에 위치한 본진 주위에 복잡한 길목과 방어 시설을 배치하여, 끊임없는 적의 웨이브를 효과적으로 막아내야 한다. 특히 7인이라는 인원이 한 팀으로 활동하기 때문에 각자의 역할 분배가 중요하며, 개인의 실수 하나가 전체 방어 체계를 무너뜨릴 수 있다. 맵의 분위기는 사막 타일셋을 기반으로 하여 건조한 느낌을 주며, 넓은 시야와 길목이 страте적 판단을 요구한다. 공격 패턴은 일정 주기로 쏟아지는 적군을 상대로 방어 타워, 병력 생산, 자원 채취를 동시에 진행해야 한다. 방어 라인을 강화하기 위한 자원 수집과 병력 생산의 밸런스를 맞추는 것이 관건이다. 맵의 구조상 중앙 통로가 좁아 폭격이 집중될 가능성이 높으므로, 방어 시설의 밀집도가 승패를 좌우할 수 있다. 또한, 컴퓨터의 공격력은 난이도 상승에 따라 점점 강해지므로, 초반부터 철저히 준비를 갖추는 것이 중요하다. 7인 공유컴까기는 팀워크와 전략적 사고가 요구되는 맵으로, 초보부터 숙련자까지 모두 즐길 수 있는 디펜스 장르의 대표적인 유즈맵 중 하나다. 이 맵을 플레이하기 전에는 팀원 간의 역할 분배와 커뮤니케이션 계획을 미리 세워두는 것이 좋다. 또한, 방어 타워의 배치와 자원 수집 우선순위를 신중히 결정해야 한다. 맵의 구조상 일부 길목은 방어가 취약할 수 있으므로, 해당 지역을 보완할 수 있는 병력 생산과 방어 시설의 업그레이드를 잊지 않도록 하자. 맵의 난이도는 보통 수준이지만, 팀워크가 부족하면 쉽게 무너질 수 있으므로 협동심을 발휘할 준비가 되어 있어야 한다. 7인공유컴까기는 단순히 방어만을 요구하는 것이 아니라, 팀워크와 전략적 사고를 함께 요구하는 매력적인 유즈맵이다. This Brood War custom map, 7인공유컴까기, is a defense-style UMS where seven players collaborate as a single team to fend off waves of AI-controlled enemies. The map emphasizes teamwork and strategic placement, as players must manage resources and build defensive lines effectively to survive relentless assaults. Positioned around a central base, the map features intricate pathways and defensive structures, requiring precise coordination to prevent breaches. With seven players sharing one team, individual mistakes can compromise the entire defense, making role distribution crucial. The game unfolds in cycles of enemy attacks, demanding simultaneous resource collection, troop production, and tower defense. Balancing these elements is key to maintaining a strong defense, especially as the AI's aggression intensifies with each wave. The map's desert-themed tileset enhances visibility and strategic depth, with narrow central paths posing high-risk choke points. Players must prioritize tower placements and resource management to withstand escalating difficulties, which increase progressively. Before diving in, teams should establish clear communication and role assignments to streamline defense strategies. Identifying vulnerable sections of the map and reinforcing them with upgraded towers and troops is essential. While the difficulty is moderate, poor teamwork can lead to quick defeat, making coordination the cornerstone of success. 7인공유컴까기 stands out for blending teamwork with tactical depth, offering a rewarding challenge for players of all skill levels in the defense genre.
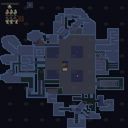
SCV 지키기 4 (SCV Guard 4)
SCV 지키기 4는 6명의 플레이어가 동시에 참여해 각각의 SCV를 보호하는 목표를 갖는 방어형 유즈맵이다. 맵 전체가 화산 타일셋으로 꾸며져 있어 시야가 제한된 지형과 용암 지대가 자연스럽게 배치돼 있다. 시작 지점마다 SCV가 일정 수량 스폰되며, 플레이어는 유닛을 생산하거나 방어 건물을 배치해 적의 공격을 차단한다. 적군은 주기적으로 파동 형태로 몰려오며, 파동이 강해질수록 SCV가 손실되는 속도가 빨라진다. 따라서 초반에는 방어 라인을 빠르게 구축하고, 중후반에는 자원을 효율적으로 관리해 추가 방어 설비나 유닛을 보강하는 것이 핵심이다. 맵은 대칭 구조가 아니며, 일부 지역은 용암으로 가득 차 있어 이동 경로를 제한한다. 이 때문에 플레이어는 방어 위치를 전략적으로 선택하고, 적의 진입로를 차단하는 데 집중해야 한다. 게임 진행 중에는 일정 시간마다 새로운 적 파동이 등장하고, 파동마다 적 유형이 달라져 전술 변화를 요구한다. 예를 들어 초기 파동은 주로 저그 유닛이지만, 이후에는 프로토스 기계 유닛이나 테란 메딕이 섞여 나타난다. 이러한 다양성은 플레이어가 방어 전략을 유연하게 조정하도록 만든다. 추천 대상은 방어 전술을 즐기는 유저와 팀플레이보다는 개인 플레이를 선호하는 1인 혹은 소규모 그룹이다. 플레이 전에는 SCV 스폰 위치와 주요 방어 포인트를 미리 파악하고, 자원 수급 라인을 확보해 놓는 것이 좋다. 또한, 용암 지대 주변에 방어 건물을 배치하면 적의 이동을 효과적으로 억제할 수 있다. 전체적으로 SCV 지키기 4는 방어와 자원 관리, 유닛 조합을 동시에 요구하는 균형 잡힌 맵으로, 초중급 플레이어가 전략적 사고를 연습하기에 적합하다. SCV Guard 4 is a defensive user map that allows up to six players to simultaneously protect their SCVs. The entire map is built with a volcanic tileset, featuring limited sightlines and natural lava zones that shape the terrain. At each starting point a number of SCVs spawn, and players must produce units or place defensive structures to block incoming enemy waves. Enemy forces arrive in periodic pulses, and as the waves intensify, SCV losses accelerate, making early rapid fortification and mid‑game resource management essential. The layout is asymmetrical, with some areas completely filled with lava, restricting movement paths and forcing strategic placement of defenses. Throughout the match, new enemy waves appear at set intervals, each introducing different unit types—early waves favor Zerg, later ones mix Protoss machines and Terran medics—requiring players to adapt their tactics. This map suits players who enjoy defensive play and prefer solo or small‑group sessions over team‑based combat. Before playing, identify SCV spawn points and key defensive positions, secure resource lines, and consider placing structures near lava to hinder enemy movement. Overall, SCV Guard 4 offers a balanced blend of defense, resource management, and unit composition, making it an ideal training ground for intermediate players looking to sharpen their strategic thinking.
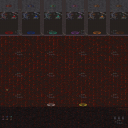
히드라2000부대막기HELL
‘히드라2000부대막기HELL’은 스타크래프트 브루드워의 유즈맵으로, 디펜스(방어) 장르에 속하는 맵입니다. 맵 제목에서 알 수 있듯이 히드라리스크 2,000마리의 공격을 방어하는 것이 주요 목표로 보입니다. 맵의 구조는 중앙에 위치한 플레이어 기지 주변으로 적의 공격로가 형성되어 있으며, 다수의 히드라리스크가 끊임없이 몰려오는 방식으로 진행됩니다. 맵 상단과 하단에 위치한 방어 건물과 유닛 배치로 인해 방어 라인이 여러 층으로 나뉘어 있어 전략적인 대처가 요구됩니다. 히드라리스크의 물량과 지속적인 공격 패턴은 플레이어에게 끊임없는 압박을 가하며, 이를 효과적으로 방어하기 위해서는 자원 관리와 유닛 배치, 그리고 타이밍을 잘 조절해야 합니다. 맵의 분위기는 치열한 전투와 방어전이 주를 이뤄, 긴장감 넘치는 플레이 경험을 제공합니다. 초보자의 경우 방어 라인을 쉽게 무너뜨릴 수 있으므로, 게임의 난이도를 고려하여 충분한 연습이 필요할 것으로 보입니다. 또한, 맵의 크기가 2048x3072로 비교적 넓은 편이어서, 넓은 시야를 활용한 전략적 플레이가 중요할 것으로 보입니다. 이 맵은 히드라리스크의 물량전에 도전하고자 하는 플레이어들에게 흥미로운 경험을 제공할 것입니다. 다만, 히드라리스크의 공격을 효과적으로 방어하기 위해서는 최소한의 방어 건물과 유닛 생산 능력이 요구되며, 자원의 효율적 사용이 관건이 될 것입니다. 따라서, 이 맵을 즐기기 전에 방어 전략과 자원 관리, 그리고 유닛 조합에 대한 이해가 필요한 만큼, 초보자의 경우 난이도가 다소 높을 수 있습니다. 플레이 전, 맵의 구조와 방어 라인을 미리 숙지하고, 히드라리스크의 공격 패턴을 분석하는 것이 중요합니다. 또한, 방어 건물의 배치와 업그레이드, 그리고 보조 유닛의 사용 여부를 신중히 결정해야 합니다. 이 맵은 방어전이라는 장르의 특성을 살려, 플레이어의 전략적 사고와 긴장감을 동시에 자극하는 재미있는 유즈맵으로 평가됩니다. 히드라리스크의 공격을 성공적으로 방어하고 나면 성취감을 느낄 수 있을 것입니다. ‘Hydra 2000 Squad Defense HELL’ is a custom map in *StarCraft: Brood War* that falls under the defense (tower defense) genre. As the name suggests, the main objective appears to be defending against an onslaught of 2,000 Hydralisks. The map’s structure features enemy attack paths surrounding the player’s base in the center, with waves of Hydralisks continuously swarming in. Multiple defensive layers are created by the placement of defensive structures and units at the top and bottom of the map, requiring strategic responses. The sheer number of Hydralisks and their relentless attack patterns create constant pressure, demanding careful resource management, unit positioning, and precise timing to defend effectively. The map’s atmosphere is dominated by intense battles and defensive warfare, delivering a tense and engaging gameplay experience. For beginners, the defensive lines can be easily overwhelmed, so sufficient practice is necessary given the map’s difficulty. Additionally, with a size of 2048x3072, the map is relatively large, making strategic play that leverages a wide field of view crucial. This map offers an exciting challenge for players looking to test their defenses against a massive Hydralisk swarm. However, to effectively counter the Hydralisk attacks, a minimum level of defensive structures and unit production is required, with efficient resource use being key. Thus, prior understanding of defense strategies, resource management, and unit compositions is essential before enjoying this map, which may present a higher difficulty for newcomers. Before playing, it’s important to familiarize yourself with the map’s structure and defensive lines and analyze the Hydralisk attack patterns. You must also carefully decide on the placement and upgrades of defensive buildings, as well as whether to use auxiliary units. By capturing the essence of the defense genre, this custom map stimulates both strategic thinking and tension, making it a fun experience. Successfully defending against the Hydralisk assault will leave you with a strong sense of accomplishment.
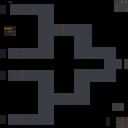
스포어 D 2003 (Spore D 2003)
스타크래프트 브루드워의 유즈맵 <스포어 D 2003>은 우주를 배경으로 한 디펜스 장르의 맵으로, 플레이어는 중앙에 위치한 기지에서 끊임없이 몰려드는 적들을 방어하는 임무를 수행합니다. 맵의 특징적인 구조는 중앙에 위치한 본진 주변을 다양한 지형과 요소가 둘러싸고 있으며, 각 구역은 빨간색과 파란색으로 나뉘어 있어 시야를 제한하거나 전략적 움직임을 유도합니다. 적들은 맵 가장자리에서 끊임없이 생성되어 본진으로 접근을 시도하며, 플레이어는 제한된 자원과 병력으로 이들을 처치해야 합니다. 플레이 방식은 크게 세 가지로 나뉘는데, 첫째는 적의 공격을 효과적으로 방어하는 것입니다. 중앙 본진 주변에는 방어용 건물이 배치되어 있지만, 플레이어는 직접 유닛을 생산하고 배치하여 전선을 유지해야 합니다. 둘째는 자원의 관리입니다. 미네랄과 가스는 제한되어 있으며, 이를 효율적으로 활용하여 유닛을 생산하고 업그레이드를 진행해야 합니다. 셋째는 맵의 특성을 활용한 전략적 플레이입니다. 맵 곳곳에 숨겨진 자원 지점이나 지형적 이점을 활용하여 적의 공격을 분산시키거나 방어선을 구축할 수 있습니다. 특히 맵의 빨간색과 파란색 구역은 시야를 가리는 효과가 있어, 적의 공격을 사전에 감지하거나 회피하는 데 유용합니다. 이 맵은 초보자보다는 중급 이상의 플레이어에게 적합한데, 자원 관리와 유닛 컨트롤, 맵 리딩 능력이 요구됩니다. 또한 팀플레이가 가능한 구조로 되어 있어, 협력 플레이를 중시하는 유저들에게도 좋은 선택이 될 수 있습니다. 맵의 난이도는 적의 공격 패턴과 생성 주기에 따라 크게 달라지며, 경험이 쌓일수록 더 효율적인 방어 전략을 세울 수 있습니다. 추천하는 플레이 방식은 초반에 자원을 충분히 확보한 후, 중반에는 방어선을 구축하며, 후반에는 강력한 유닛으로 반격을 준비하는 것입니다. 맵의 긴 플레이 시간과 전략적 깊이를 감안할 때, 한 번 플레이할 때마다 새로운 전략을 시도해 볼 수 있습니다. 이 맵을 즐기기 위해서는 스타크래프트 브루드워가 설치되어 있어야 하며, 유즈맵으로 분류되어 있어 별도의 설치 없이도 플레이할 수 있습니다. 또한, 맵의 특성상 높은 스펙의 PC가 필요하지 않지만, 부드러운 그래픽과 원활한 플레이를 위해서는 그래픽 설정을 조정하는 것이 좋습니다. 마지막으로, 이 맵은 디펜스 장르의 유즈맵 중에서 비교적 인기 있는 작품으로, 다양한 커뮤니티에서 공유되고 있습니다. 플레이 전에는 맵의 구조와 적의 공격 패턴을 충분히 숙지한 후, 전략을 세워 도전해 보기를 권장합니다. StarCraft: Brood War's custom map *Spore D 2003* is a defense genre map set in space, where players must defend a central base against endless waves of enemies. The map's distinctive layout features the main base surrounded by varied terrain and elements, with each area divided by red and blue zones that restrict visibility or guide strategic movement. Enemies spawn continuously at the map's edges and attempt to reach the player's base, requiring them to eliminate threats with limited resources and forces. The gameplay is divided into three key aspects: first, effectively defending against enemy attacks. While defensive structures are placed around the central base, players must produce and deploy units to maintain the frontline. Second is resource management—minerals and gas are scarce, so efficient use is essential for unit production and upgrades. Third is strategic play that leverages the map's features. Hidden resource points and terrain advantages can be used to disperse enemy attacks or reinforce defenses. The red and blue zones in particular obscure vision, aiding in early detection or evasion of enemy movements. This map is best suited for intermediate to advanced players, as it demands strong resource management, unit control, and map awareness. Its team-friendly design also makes it a great choice for cooperative play. Difficulty varies depending on enemy attack patterns and spawn rates, but experience allows for more refined defense strategies. A recommended approach is to secure resources early, establish defense lines in the mid-game, and prepare counterattacks with powerful units late in the game. Given its long playtime and strategic depth, each session offers opportunities to experiment with new tactics. To play this map, *StarCraft: Brood War* must be installed, though as a custom map, it can be played without additional downloads. While the map doesn't require high-end PC specs, adjusting graphics settings can enhance smoothness and visual clarity. As one of the more popular defense genre custom maps, it's widely shared across various communities. Before playing, it's advisable to study the map layout and enemy attack patterns to develop a solid strategy.
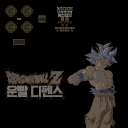
드래곤볼운빨디펜스3.21C
드래곤볼 운빨 디펜스는 스타크래프트 브루드워의 유즈맵으로, 드래곤볼 시리즈의 분위기를 살린 디펜스 장르의 맵이다. 맵의 구조는 중앙에 위치한 본진을 중심으로 적의 여러 웨이브가 끊임없이 몰려오며, 플레이어는 제한된 자원으로 유닛을 생산하고 방어선을 구축해야 한다. 이미지에서 확인할 수 있는 것처럼 본진 주변은 넓게 트여 있으며, 방어 건물과 장애물을 배치할 수 있는 공간이 비교적 여유로운 편이다. 맵은 사막 타일셋을 기반으로 디자인되어 건조한 분위기를 자아내고, 곳곳에 배치된 바위나 절벽 등이 방어선을 강화할 수 있는 포인트로 활용된다. 맵의 좌측 상단에는 미니맵이 표시되어 있어 전체적인 상황을 한눈에 확인할 수 있으며, 우측 상단에는 본진과 연결된 주요 통로와 방어 시설들이 배치되어 있다. 플레이어는 각 웨이브가 시작될 때마다 소정의 미네랄과 가스를 확보할 수 있으며, 이를 바탕으로 다양한 유닛을 조합하여 적을 막아내야 한다. 드래곤볼 시리즈의 캐릭터들을 모티브로 한 유닛들이 등장한다는 점에서 팬들에게는 익숙한 요소로 다가올 것이다. 다만, 맵의 난이도는 웨이브가 진행될수록 급격히 상승하여, 초보 플레이어에게는 다소 어려운 도전이 될 수 있다. 방어선을 어떻게 구축하느냐에 따라 생존 여부가 갈리므로, 미리 전략을 세워두는 것이 중요하다. 또한, 맵의 특성상 운빨 요소가 일부 포함되어 있어, 예상치 못한 적의 공격 패턴이나 유닛 조합에 당황하지 않도록 대비해야 한다. 이 맵은 드래곤볼 팬은 물론, 디펜스 장르의 유즈맵을 좋아하는 플레이어들에게도 추천할 만하다. 특히, 팀 플레이가 가능한 구조로 되어 있어 친구들과 함께 플레이하면 더욱 재미를 느낄 수 있을 것이다. 다만, 맵의 난이도가 높기 때문에 초보자는 난이도를 낮춰서 플레이하거나, 먼저 연습 모드를 통해 적응하는 것이 좋다. Dragon Ball Unreliable Defense is a custom map for StarCraft: Brood War, blending the atmosphere of the Dragon Ball series with a defense-style gameplay. The map features a central main base that is constantly under siege by waves of enemies, requiring players to strategically produce units and fortify their defenses with limited resources. As seen in the image, the area around the main base is spacious, allowing ample room for defensive structures and obstacles. The map uses a desert tileset, which enhances its arid and rugged aesthetic, with rocks and cliffs strategically placed to serve as natural barriers. A minimap is located in the top-left corner, providing a broad view of the battlefield, while the top-right section highlights key pathways and defensive installations connected to the main base. Players earn a set amount of minerals and gas at the start of each wave, which they must allocate wisely to deploy units and counter incoming threats. The map incorporates elements inspired by characters from the Dragon Ball series, adding a nostalgic touch for fans. However, the difficulty escalates rapidly with each wave, making it a challenging experience for newcomers. The unpredictability of enemy attack patterns and unit compositions adds an element of chance, so players should prepare for unexpected scenarios. This map is highly recommended for both Dragon Ball enthusiasts and fans of defense-style custom maps. Its design supports team play, making it ideal for group sessions with friends. Beginners may find it helpful to start with a lower difficulty setting or practice mode to get accustomed to the gameplay. Proper strategizing and adaptability are key to surviving the relentless waves of enemies.
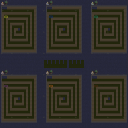
빙글 터렛디펜스 1.3.1 (EUD Spinning Turret Defense 1.3.1)
‘빙글 터렛디펜스 1.3.1’은 스타크래프트: 브루드워의 디펜스 장르 유즈맵으로, 이름 그대로 끊임없이 회전하는 터렛을 기반으로 한 아케이드형 디펜스 맵이다. 맵의 전체적인 구조는 원형에 가까운 배치로 되어 있으며, централь에 위치한 방어 구조물을 중심으로 적의 웨이브가 끊임없이 몰려드는 구조로 추정된다. 맵의 배경은 사막 타일셋으로 깔끔하게 연출되어 있으며, 맵 중앙에는 거대한 회전 터렛이 배치되어 있어 시각적인 포인트를 제공한다. 맵의 이름에서 알 수 있듯이 ‘빙글빙글’이라는 키워드에서 유추해 볼 때, 터렛이 주기적으로 회전하거나 적을 자동으로 추적하는 기능이 포함되어 있을 가능성이 높다. 이 맵의 핵심 재미 요소는 회전하는 터렛의 공격 패턴과 그에 맞춰 플레이어가 방어 구조물을 배치하고 업그레이드하는 전략적 선택에 있다. 맵의 방어 라인은 중앙 터렛 주변으로 몇 개의 방어 포인트가 배치되어 있으며, 각 포인트마다 터렛이나 방어 건물을 건설할 수 있는 공간이 마련되어 있는 것으로 보인다. 또한, 맵의 가장자리로 갈수록 점점 더 강한 적들이 몰려오므로, 중앙 터렛의 역할이 매우 중요할 것으로 예상된다. 이 맵을 플레이하기 위해서는 우선 중앙 터렛의 회전 패턴과 사정거리, 공격 타이밍을 숙지하는 것이 중요하며, 추가로 방어 건물을 적절히 배치하여 보조를 맞추는 전략이 필요하다. 맵의 난이도는 중앙 터렛의 성능에 따라 크게 좌우되며, 초보자는 중앙 터렛의 성능을 최대한 활용하는 데 집중해야 하고, 숙련자는 추가 방어 건물을 적재적소에 배치하여 보완하는 전략을 구사할 수 있다. 이 맵은 디펜스 장르를 좋아하는 유저들에게는Refreshing한 경험을 제공할 수 있으며, 특히 자동 회전 터렛이라는 독특한 메커니즘을 통해 기존의 정적인 디펜스 맵과는 차별화된 재미를 느낄 수 있을 것이다. 또한, 맵의 크기가 4096x3072로 достаточно 커서 넓은 시야와 전략적 깊이를 제공하며, 사막 타일셋의 깔끔한 배경 덕분에 플레이에 집중할 수 있도록 돕는다. 이 맵을 추천하는 대상은 디펜스 장르를 즐기며 새로운 메커니즘에 도전하고 싶은 유저들, 그리고 자동 터렛의 공격 패턴과 방어 건물의 배치에 대한 전략적 사고를 즐기는 유저들이다. 플레이 전에는 맵의 중앙 터렛의 회전 패턴과 공격 범위를 미리 확인하고, 추가 방어 건물의 건설 가능 여부와 업그레이드 옵션을 꼼꼼히 살펴볼 필요가 있다. 또한, 맵의 해시 값과 파일명이 ‘2026 EUD 빙글빙글 터렛디펜스’라는 점에서 알 수 있듯이, EUD(End User Development) 기술을 활용한 커스텀 맵임을 고려하여 플레이 시 예상치 못한 버그가 발생할 수 있음을 염두에 두는 것이 좋다. ‘Binggling Turret Defense 1.3.1’ is a defense genre user-made map in *StarCraft: Brood War*, an arcade-style defense map centered around continuously rotating turrets. The map’s overall structure is arranged in a near-circular formation, with enemy waves constantly surging toward a central defensive structure. The background features a clean desert tile set, and a massive rotating turret at the center serves as a visual focal point. As suggested by the map’s name, the keyword "binggling" implies that the turrets likely rotate periodically or automatically track targets. The core fun element of this map lies in the rotating turrets’ attack patterns and the strategic choices players make in placing and upgrading defensive structures around them. Defensive lines are positioned around the central turret, with designated spaces for constructing turrets or defensive buildings at each point. Since stronger enemies appear as you move toward the edges, the central turret’s role becomes crucial. To play this map effectively, it’s essential to first understand the central turret’s rotation pattern, range, and attack timing. Additionally, players must strategically place defensive buildings to complement its performance. The difficulty heavily depends on the central turret’s capabilities—beginners should focus on maximizing its potential, while experienced players can refine their strategy by placing supplementary defensive structures in optimal locations. This map offers a refreshing experience for defense genre enthusiasts, particularly with its unique dynamic mechanism of auto-rotating turrets, setting it apart from static defense maps. The large 4096x3072 map size provides ample visibility and strategic depth, while the clean desert tile set keeps the focus on gameplay. Recommended for players who enjoy defense maps and seek new mechanics, as well as those who appreciate strategic thinking in turret attack patterns and defensive building placement. Before playing, check the central turret’s rotation pattern and attack range, and review the construction and upgrade options for additional defensive structures. Given that the map’s hash value and filename include "2026 EUD Bingbing Turret Defense," it’s important to note that this is a custom map utilizing EUD (End User Development) technology, which may introduce unexpected bugs during gameplay.
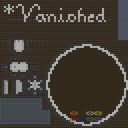
1 Million Zerglings (100만 저글링)
스타크래프트 브루드워의 유즈맵 중에서도 손꼽히는 괴작이자, 플레이어들에게 강한 인상을 남기는 ‘1 Million Zerglings(원 밀리언 저글링)’은 이름 그대로 저글링 100만 마리를 상대로 싸우는 디펜스 형식의 컴까기 맵이다. 맵의 전체적인 배경은 어두운 톤의 우주 공간으로, 중앙에 위치한 플레이어의 본진을 중심으로 거대한 저글링 웨이브가 끊임없이 밀려오는 구조로 구성되어 있다. 플레이어는 초반부터 끊임없이 쏟아지는 저글링 무리를 방어해야 하며, 유닛을 생산하거나 업그레이드를 진행하는 동시에 전략을 세워야만 살아남을 수 있다. 맵의 특징은 단순히 숫자에만 의존하지 않고, 저글링의 스펙과 배치 패턴이 조금씩 변화한다는 점이다. 초반에는 약한 개체들이 무더기로 몰려오지만, 시간이 지날수록 체력이 높아지고 공격력이 증가하는 저글링이 등장하며, 특정 시점부터는 다수의 브루탈리스크나 뮤탈리스크까지 등장하는 등 난이도가 급격히 상승한다. 방어에 실패하면 본진이 순식간에 무너질 수 있기 때문에, 플레이어는 자원을 효율적으로 관리하며 빠른 판단력과 손놀림을 요구받는다. 또한, 맵 곳곳에 배치된 방어 건물이나 특수 아이템(추정됨)을 활용하여 생존 확률을 높일 수 있다. 이 맵은 초보 플레이어에게는 엄청난 난이도를 자랑하지만, 숙련된 유저들에게는 극한의 조작력과 전략을 시험하는 도전 과제로 다가온다. 특히, 저글링의 물량과 스펙 변화에 맞춰 빌드를 유연하게 변경하는 능력이 핵심이며, 지속적인 업그레이드와 건물 관리가 필수적이다. 오랜 시간동안 플레이어들에게 사랑받는 이유 중 하나는 바로 이 ‘도전과 극복’의 재미에 있다. 맵을 처음 접하는 플레이어는 저글링의 물량을 버티지 못하고 순식간에 무너질 수 있지만, 몇 번의 시도 끝에 패턴을 익히고 전략을 세우면 그 쾌感은 이루 말할 수 없다. 또한, 맵의 атмосphere와 긴장감이 조성된 사운드 디자인(추정됨)이 플레이어의 몰입감을 더해준다. 이 맵을 추천하는 대상은 ‘스타크래프트의 기본기를 다지고 싶다’는 생각이 있는 유저들이나, 유즈맵의 새로운 장르를 탐험하고 싶은 이들에게 적합하다. 반대로, 손이 느리거나 전략적인 사고가 약한 플레이어에게는 추천하기 어려운 맵이기도 하다. 플레이 전에는 맵의 구조와 저글링의 패턴 변화 시점을 미리 확인하고, 방어 건물의 배치와 유닛 생산 라인을 미리 세워두는 것이 중요하다. 또한, 맵의 특성상 자원 수급이 제한적이므로, 초반 자원 관리에 특히 신경을 써야 한다. 마지막으로, 맵의 긴장감을 높이기 위해 사운드와 그래픽 설정을 최적화하는 것도 좋은 방법이다. ‘1 Million Zerglings’는 단순히 저글링을 막는 것이 아니라, 자신을 극한으로 몰아세우는 듯한 플레이 경험을 제공하는 맵으로, 스타크래프트 유즈맵의 진수를 느낄 수 있는 작품 중 하나다. 이 맵을 통해 자신의 실력을 시험해보고, 그 짜릿한 승리감을 느껴보길 바란다. 이 맵을 즐기기 위한 필수 조건은 ‘빠른 손놀림’과 ‘유연한 전략’뿐이다. Among Brood War custom maps, *1 Million Zerglings* stands out as one of the most notorious and unforgettable experiences. As the name suggests, it’s a defense-style "comp stomp" map where you fight against a relentless horde of 1 million Zerglings. The map’s atmosphere is set in a dark, cosmic void, with the player’s main base at the center and waves of Zerglings continuously surging toward it. From the start, you must defend against an endless tide of Zerglings while producing units, upgrading, and devising strategies to survive. What makes this map challenging isn’t just the sheer numbers—it’s the evolving specs and patterns of the Zerglings. Early waves consist of weak, swarming units, but as time passes, tougher variants appear with higher HP and attack power. Later stages introduce Brutalisks and Mutalisks, drastically increasing the difficulty. A single mistake can lead to your base collapsing in seconds, forcing you to manage resources efficiently and make quick decisions with precise execution. You can also improve your odds by utilizing defensive structures scattered across the map and special items (likely power-ups). While the map is brutally difficult for beginners, seasoned players see it as the ultimate test of mechanical skill and strategy. The key to success lies in adapting your build dynamically to the changing Zergling waves, constantly upgrading, and meticulously managing your buildings. What keeps players coming back is the thrill of overcoming this brutal challenge. Newcomers may crumble under the initial onslaught, but once they learn the patterns and refine their strategies, the satisfaction is unmatched. The immersive atmosphere and tense sound design (likely) further heighten the experience. This map is ideal for players looking to sharpen their Brood War fundamentals or explore fresh custom map genres. However, it’s not recommended for those with slow reflexes or weak strategic thinking. Before jumping in, study the map layout and the points where Zergling patterns shift, plan your defensive structures and unit production lines, and prioritize resource management—since income is limited. Optimizing sound and graphics settings can also enhance the intense atmosphere. *1 Million Zerglings* isn’t just about surviving waves of Zerglings; it’s an experience that pushes you to your limits, offering a taste of the best that Brood War custom maps have to offer. Give it a try if you’re ready to test your skills and chase that exhilarating sense of victory. The only requirements? Quick reflexes and adaptable strategy.
![[EUD] 히드라2000부대막기_EX 맵 미리보기](https://cdn-star-data.huzy.net/thumbnail_0cd40c8e9d7745ad8a0a6ebaa8401744.jpg)
[EUD] 히드라2000부대막기_EX
스타크래프트 브루드워의 유즈맵 중 하나인 '[EUD] 히드라2000부대막기_EX'는 디펜스 장르에 속하는 맵으로, 플레이어는 끊임없이 몰려오는 적 유닛을 막아내야 하는 구조를 가지고 있다. 맵의 제목에서 알 수 있듯이 주로 히드라리스크로 구성된 대규모 적 부대를 상대하는 것이 주요 목표이며, EUD(Extended Unit Death) 기술을 활용해 복잡한 트리거가 구현되어 있는 특징이 있다. 맵은 화산 타일셋을 기반으로 제작되어 visually한 분위기를 자아내며, 2048x3072라는 넓은 맵 사이즈 덕분에 다양한 배치와 진형이 가능하다는 장점이 있다. 게임은 일정 시간마다 등장하는 적 웨이브를 방어하는 방식으로 진행되며, 각 웨이브마다 조금씩 강화된 적 부대가 등장해 플레이어의 전략과 대처 능력을 시험한다. 방어에 성공할 때마다 보상을 얻으며, 일정 조건을 달성하면 승리하거나 추가적인 기능을 해금할 수 있는 구조로 보인다. 맵의 넓은 공간을 활용해 방어선을 구축하고, 적의 공격을 효율적으로 분산시키는 것이 핵심 전략이 될 것이다. 또한, EUD 기술이 적용되어 있어 일반적인 맵과는 다른 특수 효과나 인터페이스가 포함되어 있을 가능성이 높다. 이 맵은 주로 1인 플레이를 상정하고 제작되었으나, 팀 플레이로도 충분히 즐길 수 있을 것으로 추정된다. 방대한 맵 크기와 복잡한 적 웨이브 시스템 덕분에 플레이어는 여러 번의 시도와 전략 수정을 통해 자신만의 방어 노하우를 쌓아갈 수 있을 것이다. 초보자보다는 어느 정도의 경험이 있는 플레이어에게 더 적합할 것으로 보이며, 디펜스 장르에 익숙한 유저라면 재미있게 즐길 수 있는 맵이다. 다만, 넓은 맵을 활용한 전략적 플레이가 요구되므로, 시야 확보와 자원 관리에 주의를 기울일 필요가 있다. 이 맵을 플레이하기 전에는 EUD 맵에 대한 기본적인 이해와 디펜스 장르의 특성을 숙지하는 것이 좋다. 또한, 넓은 맵에서 발생할 수 있는 자원 부족이나 방어선 붕괴 scenarios를 대비하기 위해 미리 방어 건물이나 유닛 배치 계획을 세워두는 것이 중요하다. 맵의 난이도는 난이도 설정이나 웨이브 강도에 따라 달라질 수 있으므로, 처음 플레이할 때는 쉬운 난이도로 시작하는 것이 추천된다. 특히 히드라리스크는 스플래시 대미지를 입히므로, 방어 건물이나 탱커 유닛을 적절히 배치해 효율적인 대처가 필요할 것이다. This StarCraft: Brood War custom map, '[EUD] 히드라2000부대막기_EX', falls under the defense genre, challenging players to withstand relentless waves of enemy units, primarily Hydralisks as indicated by the title. Utilizing EUD (Extended Unit Death) technology, the map incorporates advanced triggers that enhance gameplay mechanics beyond standard custom maps. Set against a volcanic tileset, the 2048x3072 map size provides ample space for strategic unit placement and dynamic combat scenarios. The gameplay revolves around a wave-based defense system where players must fortify their positions and repel increasingly powerful enemy assaults. Successful defense yields rewards, and achieving specific objectives unlocks additional features or leads to victory. The vast map area allows for creative defensive setups, encouraging players to spread out units and manage resources efficiently. Given the EUD implementation, players can expect unique mechanics or interfaces that differ from conventional custom maps. While designed primarily for single-player experiences, the map can also accommodate team-based play. The expansive layout and complex enemy waves make it ideal for players seeking a challenge and the opportunity to refine their strategies over multiple attempts. Beginners may find it daunting, but intermediate to advanced players familiar with defense maps will appreciate its depth and replayability. Strategic vision and resource management are crucial, as overlooking potential weaknesses in defensive lines can lead to failure. Before diving into gameplay, players should familiarize themselves with EUD mechanics and the nuances of defense maps. It is advisable to plan defensive structures and unit placements carefully to mitigate risks such as resource shortages or line breaches. Starting on easier difficulties is recommended for newcomers, as the Hydralisk's splash damage requires thoughtful positioning of defensive buildings and tank units. The map's difficulty can vary based on settings and wave intensity, so adjusting these parameters can help tailor the experience to individual skill levels.
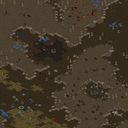
T6) 신년 대첩 (New Year's Day)
스타크래프트 브루드워의 유즈맵 ‘T6) New Year's Day’는 캠페인 스타일의 서바이벌 디펜스 맵으로, 단일 플레이어가 적의 끊임없는 공격을 막아내는 형식의 플레이 경험을 제공한다. 맵의 배경은 황무지로 추정되며, 중앙에 위치한 방어 거점을 중심으로 적의 공세가 끊임없이 이어진다. 플레이어는 듀크라는 유닛을 조종해 적의 공격을 방어해야 하며, 맵 곳곳에 배치된 방어 시설과 유닛 생산 건물을 활용해 전선을 유지하는 것이 핵심 전략이다. 이미지에서 확인되는 다수의 적 유닛과 방어 거점의 배치로 미루어보아, 맵은 난이도가 점차 상승하는 구조로 구성되어 있으며, 후반부로 갈수록 적의 공격 패턴이 복잡해지고 강해지는 특징을 지닌다. 추천 대상은 스타크래프트의 맵 디펜스 장르를 선호하는 플레이어로, 긴장감 있는 서바이벌 플레이를 즐기고자 하는 유저에게 적합하다. 플레이 전에는 맵의 방어 거점 위치와 주요 자원 분포를 미리 확인해, 초반 방어 라인을 어떻게 구축할지를 계획하는 것이 중요하다. 또한, 적의 공격 패턴이 시간에 따라 변화하므로, 맵의 진행 상황에 따라 유닛 생산과 방어 전략을 유연하게 조정해야 한다. 맵의 분위기는campaign-terran-terran06.scm 파일명과 내부 설명에서 유추할 수 있듯 테란 캠페인 스타일을 반영하고 있으며, 듀크와 Mengsk, Raynor, Kerrigan 같은 인물들이 언급되어 스토리성이 일부 포함되어 있음을 짐작할 수 있다. 그러나 맵의 실제 플레이 경험은 서바이벌 디펜스에 중점을 두고 있으므로, 스토리보다는 전투와 방어에 집중하는 것이 좋다. 맵의 난이도는 초보자의 경우 적응이 필요할 수 있으나, 점차적인 패턴 학습을 통해 익숙해질 수 있는 구조로 설계되어 있다. 특히, 후반부로 갈수록 적의 공격이 치열해지므로, 자원 관리와 유닛 업그레이드에 신경을 써야 한다. 맵의 타일셋은 황무지로 구성되어 있으며, 황량한 분위기가 긴장감을 더하는 요소로 작용한다. 마지막으로, 맵의 해상도와 타일 단위가 크고 세밀하게 배치되어 있어, 디펜스 맵으로서의 완성도를 높이는 데 기여하고 있다. The StarCraft: Brood War custom map *T6) New Year's Day* is a campaign-style survival defense map where a single player must fend off endless waves of enemy attacks. Set in a desolate wasteland, the map centers around a key defensive stronghold that faces constant assaults. Players control the unit Duke, using scattered defensive structures and production buildings to hold the line. Enemy units and the stronghold’s layout suggest a progressively increasing difficulty, with attacks growing more complex and intense as the game advances. Ideal for fans of the map defense genre, this map offers tense survival gameplay. Before playing, it’s crucial to study the stronghold’s location and resource distribution to plan your initial defense line. Since enemy attack patterns evolve over time, adapt your unit production and strategy dynamically as the match progresses. The map’s atmosphere, hinted at by filenames like *campaign-terran-terran06.scm* and references to characters such as Duke, Mengsk, Raynor, and Kerrigan, carries a Terran campaign feel with some narrative elements. However, the core experience revolves around survival defense rather than storytelling, so focus on combat and fortification. While the difficulty may require adjustment for beginners, the map is designed to become manageable through pattern recognition. Late-game attacks are brutal, so prioritize resource management and unit upgrades. With its expansive, meticulously detailed wasteland tileset, the map enhances the defensive experience with its stark, immersive setting.
Z4) 무리의 요원 (Agent of the Swarm)
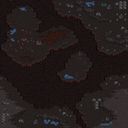
정글 타일셋을 배경으로 한 이 싱글플레이어 유즈맵은 제목 그대로 플레이어가 저그 무리의 일원이 되어 특별한 임무를 수행하는 체험을 제공한다. 내부 설명에 적힌 “번데기를 보호하라”는 단 한 줄의 지시문이 이 맵의 핵심 목표를 함축하고 있으며, 그 간결함이 오히려 플레이어의 호기심을 자극한다. 시작 지점에서 마주하는 정글 지형은 복잡하게 얽힌 언덕과 좁은 협곡으로 구성되어 있어 단순한 전투보다는 유닛의 위치 선정과 시야 확보가 중요한 긴장감을 조성한다. 적대 세력이 어디서 등장할지 모르는 불확실성 속에서 제한된 자원과 유닛을 운용하며 번데기를 지켜내는 것이 핵심 과제로 보인다. 맵의 구조는 전형적인 캠페인 미션의 흐름을 띠지만, 특정 승리 조건이나 이벤트 트리거에 대한 정보가 제공되지 않았기에 플레이어는 직접 탐색하며 임무를 파악해야 한다. 이는 초기 긴장감을 높이는 요소로 작용하지만, 동시에 뚜렷한 목표 없이 방황할 가능성도 내포한다. 정글 타일셋 특유의 어둡고 축축한 분위기는 고립된 저그 개체의 생존기를 연출하는 데 효과적이며, 제한된 유닛만으로 버티는 플레이 경험은 생존과 방어에 특화된 색다른 재미를 선사한다. 다만 맵 설명이 지나치게 짧아 임무의 전체적인 윤곽이나 난이도를 짐작하기 어려운 점은 플레이 전에 감안해야 할 부분이다. 이 맵은 복잡한 대규모 전투보다는 소수의 유닛을 세심하게 컨트롤하는 마이크로 플레이를 즐기는 이들에게 적합하다. 특히 저그 종족의 생체 유닛이 가진 특수 능력을 활용한 생존 전략을 선호하거나, 짧은 시간 동안 집중하여 하나의 목표만을 완수하는 미션형 맵을 찾는 유저에게 추천할 만하다. 플레이 전 확인할 사항으로는, 맵이 UMS 형식이므로 싱글 플레이 전용임을 인지하고, 내부 설명 외에 별도의 안내가 없을 수 있으니 탐색과 실험을 통해 임무를 추론할 준비가 필요하다는 점이다. 만약 번데기가 파괴되면 즉시 실패하는 조건일 경우, 초반 몇 분간의 시행착오가 반드시 따를 수 있다. This single-player Use Map Settings experience, set against a Jungle tileset, casts the player as an agent of the Swarm tasked with a very specific duty. The internal description, “Take care of the Chrysalis,” encapsulates the entire mission objective in one line, and its stark brevity powerfully fuels the player’s curiosity. The jungle terrain encountered at the start is composed of intricately tangled cliffs and narrow ravines, creating a tense atmosphere where unit positioning and vision control matter far more than raw firepower. The core challenge appears to be managing limited resources and units to defend the Chrysalis against enemies whose approach routes remain uncertain, making every moment feel precarious. The map structure follows a classic campaign mission flow, yet without explicit information on victory triggers or scripted events, players must deduce their tasks through direct exploration. While this heightens the initial tension, it also carries the risk of aimless wandering without a clear sense of progression. The dark, damp ambience of the jungle tileset effectively emphasizes the survival story of an isolated Zerg organism, and the experience of holding out with only a handful of units offers a unique flavor of concentrated defense. However, the extreme scarcity of in-game guidance makes it difficult to gauge the mission’s overall scope or difficulty, which is a notable caveat to consider before launching the game. This map is best suited for players who enjoy meticulous micro-management of a few units rather than sprawling macro-scale battles. It is particularly recommended for those who favor survival strategies that exploit the organic traits of the Zerg race or enjoy minimalist maps that demand intense focus on a single objective for a short duration. Before playing, users should confirm that this UMS format is strictly for single-player and be prepared for a lack of additional instructions beyond the internal description, meaning the mission parameters must be inferred through trial and error. If the condition is an immediate defeat upon the Chrysalis being destroyed, expect a phase of early trial and error as you learn the map’s hidden rules.
P3) Higher Ground
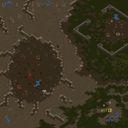
스타크래프트 브루드워의 Protoss 캠페인 맵 3번째 미션인 'P3) Higher Ground'는 프로토스 군단의 힘을 다시 한 번 확인할 수 있는 흥미로운 전투 맵이다. 이 맵은 프로토스가 테란과 저그를 상대로 전통적인 전술로 승리를 거두는 내용을 담고 있으며, 미션 목표는 '모든 적을 제거하라'로 명시되어 있다. 맵의 전체적인 분위기는 사막 테마의 타일셋으로 구성되어 있으며, 넓은 개활지와 요새화된 고지대가 조화를 이루고 있어 전략적 깊이를 더한다. 플레이어는 프로토스 종족을 선택해 광전사, 집정관, 다크 템플러 등 다양한 유닛을 활용해야 하며, 지형을 활용한 방어와 공격이 핵심이다. 맵의 특징 중 하나는 중앙 고지대가 여러 개의 입구로 나뉘어져 있어 방어와 공세를 펼치기에 적합한 구조로 설계되어 있다는 점이다. 특히, 맵의 왼쪽과 오른쪽 고지대는 각각의 방어 거점으로 활용할 수 있으며, 중앙 평야는 병력 집결과 진격로로 기능한다. 초반에는 적은 소수의 병력으로 공격해오지만, 중반 이후에는 점차 병력의 규모가 커지면서 방어선을 유지하는 동시에 반격을 가해야 한다. 맵의 난이도는 맵의 구조상 프로토스 유저에게 비교적 유리한 편이지만, 테란의 시즈 탱크나 저그의 뮤탈리스크 같은 위협적인 유닛을 상대해야 하기 때문에 신중한 플레이가 요구된다. 추천 대상은 프로토스 유저로, 특히 광전사와 집정관의 조합을 활용한 방어와 반격을 선호하는 플레이어에게 적합하다. 다만, 광전사 위주의 플레이를 선호한다면 테란의 시즈 탱크나 저그의 뮤탈리스크에 취약할 수 있어, 적절한 유닛 조합과 컨트롤이 중요하다. 플레이 전에는 맵의 지형과 주요 거점을 미리 숙지하고, 초반 방어선을 어떻게 구축할 것인지 계획을 세워야 한다. 또한, 자원 관리와 생산 라인의 균형을 유지하는 것도 승리를 좌우하는 중요한 요소다. 맵의 플레이 시간은 개인별 실력에 따라 다르지만, 일반적으로 20~40분 내외로 예상된다. 이 맵은 프로토스 캠페인의 세 번째 미션답게 전략적 깊이를 느낄 수 있는佳作이며, 브루드워의 클래식한Feel을 그대로 느낄 수 있는 작품이다. 특히, 프로토스만의 독특한 유닛 조합과 지형 활용이 매력적인 맵으로, 캠페인 미션의 재미를 극대화하고 싶다면 반드시 플레이해볼 만한 가치가 있다. The third Protoss mission in *StarCraft: Brood War*, "P3) Higher Ground," is an engaging combat map that showcases the might of the Protoss once again. The mission focuses on the Protoss securing victory over Terran and Zerg forces using traditional tactics, with the objective clearly stated as "Destroy all enemies." The map features a desert-themed tileset, blending open plains with fortified high ground to enhance strategic depth. Players control the Protoss, deploying a variety of units such as Zealots, Archons, and Dark Templars, while leveraging the terrain for both defense and offense. A key feature of the map is its central high ground, divided into multiple entrances, making it ideal for both defensive positioning and offensive maneuvers. The left and right high ground areas serve as strong defensive points, while the central plain acts as a gathering point and primary advance route. Early on, enemies attack with small forces, but as the mission progresses, their numbers swell, requiring players to maintain defenses while launching counterattacks. While the map’s structure favors Protoss players, careful play is essential to handle threats like Terran Siege Tanks and Zerg Mutalisks. This mission is best suited for Protoss players, particularly those who favor Zealot and Archon combinations for defense and counterattacks. However, those who rely heavily on Zealots may struggle against Siege Tanks and Mutalisks, making balanced unit composition and control crucial. Before playing, familiarize yourself with the terrain and key strongpoints, and plan your initial defensive setup. Proper resource management and balanced production lines are also vital to securing victory. Playtime varies by skill level but typically ranges between 20 to 40 minutes. As the third Protoss mission in the campaign, "Higher Ground" delivers a deep strategic experience while staying true to *Brood War*’s classic feel. Its unique Protoss unit synergies and terrain utilization make it a standout map, well worth playing for anyone looking to maximize their campaign enjoyment.
![[2]过河拆桥 맵 미리보기](https://cdn-star-data.huzy.net/thumbnail_e585b704ebc847868dfa726211a0504d.jpg)
[2]过河拆桥
스타크래프트 브루드워의 유즈맵 ‘[2]过河拆桥’는 단독 플레이를 전제로 한 디펜스·컴퓨터 상대형 맵으로, 맵의 전체적인 흐름은 중앙을 가로지르는 좁은 길목을 중심으로 펼쳐진다. 맵 중앙에는 적 유닛들이 끊임없이 몰려드는 좁은 통로가 있으며, 양쪽 플랫폼에는 방어 건물과 자원 채취 지역이 배치되어 있어 지속적인 방어와 자원 관리가 요구된다. 맵의 이름은 ‘강을 건너면 다리를 부수라’는 뜻으로, 적 유닛이 몰려오는 좁은 길목의 중요성을 상징하는 제목으로 보인다. 맵의 구조는 비교적 단순하지만, 적의 공격 패턴이 점점 강해지는 디자인으로 구성되어 있어 플레이어는 초반의 안정적인 방어부터 후반의 대규모 공격을 차근차근 준비해야 한다. 초보 플레이어는 방어 건물의 배치와 자원 관리에 집중해야 하며, 숙련된 플레이어는 효율적인 유닛 생산과 스킬 사용을 통해 맵을 클리어할 수 있는 전략적 깊이를 제공한다. 맵의 진행은 트리거로 제어되는 것으로 보이며, 승리 조건은 맵 설명에 따라 ‘일부 적 유닛을 제거한 후 연합 함대와 연락’을 맺는 것으로 추정된다. 이 맵은 ‘컴퓨터 상대 디펜스’ 장르에 특화된 맵으로, 초보부터 숙련자까지 즐길 수 있는 구조이지만, 방어 라인을 잘못 설정하면 쉽게 무너질 수 있으므로 주의가 필요하다. 또한, 맵의 제목과 내부 설명에서 알 수 있듯 ‘스타크래프트 세계관’의 오버레이를 느낄 수 있는 요소는 없지만, 디펜스라는 장르 자체의 재미를 강조하는 데 중점을 둔 디자인이다. 플레이 전에는 방어 건물의 배치와 자원 채취 지역을 미리 확인하고, 적의 공격 패턴을 예측하는 연습을 권장한다. 맵의 전체적인 색감은 어두운 톤으로 통일되어 있어 긴장감을 조성하며, 좁은 길목의 디자인은 플레이어의 방어 집중을 유도하는 효과적인 공간 구성이다. StarCraft: Brood War's custom map "[2]过河拆桥" is a defense-focused, computer opponent-based map designed for solo play. The map's overall flow centers around a narrow passage running through the middle. At the center of the map lies a tight corridor where enemy units continuously swarm in, with defensive structures and resource-gathering areas positioned on both platforms, demanding constant defense and resource management. The map's title, meaning "burn your bridges once you cross the river," symbolizes the importance of the narrow corridor where enemies surge in. Though the map's structure is relatively simple, it escalates in difficulty with increasingly powerful enemy attacks, requiring players to gradually shift from early-stage stability to late-game preparations for large-scale assaults. Beginners should focus on positioning defensive buildings and managing resources, while experienced players can leverage efficient unit production and skill usage to clear the map. The progression appears to be controlled by triggers, with the victory condition likely involving "contacting the allied fleet after eliminating a portion of enemy units," as suggested by the map description. Tailored for the "computer opponent defense" genre, this map offers a structure enjoyable for players of all skill levels, though improperly set defense lines can easily collapse, so caution is advised. While the map lacks overt StarCraft universe overlays—evident in its title and internal descriptions—it emphasizes the fun of the defense genre through its design. Before playing, it’s recommended to check defensive building placements and resource areas, and practice predicting enemy attack patterns. The map’s overall dark color palette enhances tension, and the narrow passage design effectively guides the player’s focus toward defense.
최근 등록된 맵
새로 추가된 파일과 버전을 확인하세요.
러커 D 골렘즈 하이브리드 3.0 (Lurker D Golemz Hybrid 3.0)
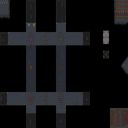
Lurker DGolemz Hybrid 3.0은 8방향에서 끊임없이 incoming하는 유닛 웨이브를 막아내는 방어형 유즈맵이다. 맵은 총 30단계로 구성되며, 각 단계마다 증가하는 적 숫자와 조합이 플레이어를 압박한다. 중앙의 비콘에 배치된 네 마리의 유령이 보너스를 제공하는데, 빨간 유령을 활성화하면 안 된다는 조건이 추가되어 전략적 선택을 요구한다. 플레이어는 고렘을 생산하여 frontline에 배치하고, 이들의 체력과 공격력을 활용해 파도를 소멸시켜야 한다. 고렘은 기본 생산 외에 특정 조건에서 업그레이드가 가능하며, 이를 통해 후기 단계의 강력한 적에 대응할 수 있다. 지형은 우주 타일셋을 바탕으로 넓은 평원이지만, 8방향에서 동시에 접근하는 적 때문에 시야 관리와 병력 배치가 중요하다. 초반에는 저렴한 고렘으로 버티다가, 중반부터는 숫자와 타이밍을 조율하여 효율적인 방어를 구축해야 한다. 맵은 솔로 플레이를 기준으로 설계되었으며, 최대 6명이협력하여 각자 다른 방향을 담당할 수도 있지만, 기본적으로는 개인의 미크로와 타이밍이 승부를 가른다. 따라서 이 맵은 micromanagement와 리소스 관리에 자신 있는 플레이어, 혹은 웨이브 방어류 유즈맵을 좋아하는 이들에게 적합하다. 플레이 전에는 비콘 근처의 유령 색상을 확인하고, 빨간 유령을 건드리지 않도록 주의해야 하며, 고렘 생산 타이밍을 사전에 연습하는 것이 좋다. Lurker DGolemz Hybrid 3.0 is a defense-type UMS map where players fend off endless waves of units coming from eight directions. The map consists of 30 stages, with each stage increasing the number and variety of enemies, putting pressure on the player. Four ghosts placed on a central beacon grant a bonus, but activating the red ghost is prohibited, adding a strategic choice. Players produce golems to place on the front line, using their health and attack power to eradicate the waves. Golems can be upgraded under certain conditions, allowing a response to stronger foes in later stages. The terrain uses the space tile set, offering a broad plain, yet enemies approach from all eight sides simultaneously, making vision control and unit placement crucial. In the early game, cheap golems hold the line; from mid‑game onward, players must balance numbers and timing to build an effective defense. Designed for solo play, the map also supports up to six players cooperating, each taking a different direction, but ultimately individual micro‑management and timing decide victory. This map suits players confident in micromanagement and resource management, or fans of wave‑defense UMS. Before playing, check the beacon’s ghost colors and avoid touching the red ghost, and practice golem production timing in advance.
방어 반격 전투 (Defend counterattack battle)
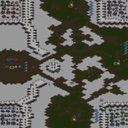
방어 반격 전투는 플랫폼 타일셋을 사용한 1024x1024 크기의 유즈맵으로, 기본적인 방어와 이후 반격을 동시에 강조하는 하드 난이도의 맵이다. 게임 시작 시 각 플레이어는 상대 진영을 견제하면서 자체 기지를 구축해야 하며, 초기에는 제한된 유닛으로 입구를 막고 방어塔를 설치하는 것이 필수적이다. 충분한 자원을 모아 업그레이드된 유닛과 기술을 확보하면 상대 진영을 뚫고 반격 작전을 개시할 수 있다. 맵은 대칭 구조로 설계되어 양측이 동일한 조건에서 경쟁하며, 중앙 자원 지점을 차지하는 것이 승부의 핵심이다. 플레이 흐름은 초반 방어 구축 → 중반 자원 채굴 및 기술 트리 진행 → 후반 대규모 반격으로 구분되며, 각 단계마다 적절한 타이밍에 건물을 짓고 유닛을 생산해야 한다. 이로 인해 전략적 사고와 멀티태스킹 능력이 시험되며, 초보자는 방어 위주로 플레이하고 숙련자는 타이밍을 잡은 반격을 노릴 수 있다. 플레이 전 확인해야 할 점은 맵이 하드 난이도로 설정되어 있어 초기 자원 부족이 심할 수 있다는 점과, 팀 플레이가 아닌 개인전 형태이므로 동맹이 없음을 인지해야 한다. 또한 플랫폼 타일셋 특성상 지형 높이가 거의 없으므로 시야 확보와 유닛 이동이 비교적 자유롭지만, 이로 인해 기습 공격에 취약할 수 있다는 점을 기억해야 한다. 예상 플레이 시간은 약 30분 정도이며, 이는 자원 채굴 속도와 전투 강도에 따라 변동될 수 있다. 이렇게 방어와 반격을 동시에 경험할 수 있는 이 맵은 전략적 깊이와 긴장감을求하는 유저에게 적합하며, 특히 스타크래프트 브루드워의 전술적 요소를 연습하고 싶은 중급 이상의 플레이어에게 추천한다. Defend counterattack battle is a UMS map using the platform tileset with a size of 1024x1024, emphasizing both basic defense and subsequent counterattacks in a hard difficulty setting. At the start, each player must contain the opposing force while building their own base; initially, limited units are used to block entrances and construct defense towers, which is essential. After gathering sufficient resources to upgrade units and secure technologies, players can break through enemy lines and launch a counteroffensive. The map features a symmetrical layout, giving both sides equal conditions, and controlling the central resource point is key to victory. The gameplay progresses in three phases: early‑game defense construction, mid‑game resource gathering and tech tree advancement, and late‑game large‑scale counterattacks, with appropriate timing for building structures and producing units at each stage. This tests strategic thinking and multitasking ability; beginners tend to focus on defense, while experienced players look for the right timing to strike back. Before playing, note that the map is set to hard difficulty, so early resource scarcity can be severe, and because it is a free‑for‑all match there are no allies. Additionally, the platform tileset provides almost no height variation, making vision and unit movement relatively free but also leaving bases vulnerable to surprise attacks. Estimated play time is about 30 minutes, varying with resource gathering speed and combat intensity. This map, which lets players experience both defense and counterattack, suits users seeking strategic depth and tension, and is especially recommended for intermediate‑to‑advanced players who want to practice the tactical elements of StarCraft: Brood War.
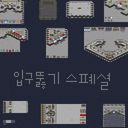
입구 through Special (Entrance Through Special)
스타크래프트 브루드워의 유즈맵 <Entrance Through Special>은 6인용으로 설계된 특수한 방어형 맵으로, 플레이어들이 중앙 요새를 보호하며 끊임없이 몰려드는 적을 상대하는 구조를 갖추고 있다. 맵 중앙에는 커다란 요새가 자리 잡고 있으며, 외곽으로 갈수록 좁아지는 통로와 다수의 입구가 존재해 적의 침입을 전략적으로 차단할 수 있도록 배치되어 있다. 각 플레이어는 요새 주변에 배치된 방어 시설물을 활용해 적을 섬멸하거나, 요새 내부로 침입하려는 적을 저지하는 동시에 요새를 보수하는 역할을 맡는다. 진행 방식은 대체로 방어전 형태로, 적의 공격 타이밍과 패턴이 일정하게 반복되면서 맵의 구조적 특징을 살린 전술이 요구된다. 좁은 입구나 통로를 활용한 잠복 공격, 요새 주변의 시야 확보, 그리고 자원 관리 등이 핵심 전략 요소로 보인다. 또한, 맵의 해상도와 타일셋이 플랫폼 기반으로 구성되어 있어, 시각적 디자인보다는 기능성과 플레이abilidad에 중점을 둔 것으로 추정된다. 플레이어들은 요새 내부로 침입하려는 적군을 막아내며 요새를 유지하는 동시에, 일정 조건 하에서 승리 조건을 달성해야 하는 구조로 보인다. 이 맵은 방어와 협동이 강조되는 만큼, 초보자보다는 적응력이 뛰어난 플레이어들이 즐기기에 적합하며, 특히 팀워크와 전략적 사고가 중요한 포인트로 작용할 것으로 예상된다. 맵의 난이도는 적의 공격 패턴과 요새의 내구도에 따라 크게 달라질 수 있어, 처음 플레이 시 небольшое 어려움을 느낄 수도 있지만, 점차 맵의 구조와 적의 움직임을 익히면 안정적인 방어가 가능해질 것이다. 꾸준한 연습을 통해 요새를 유지하는 타이밍과 자원 관리법을 익히는 것이 이 맵의 핵심 포인트라 할 수 있다. 이 맵은 6인용으로 설계되어 있어, 친구들과 팀을 이뤄 플레이하기에 최적화되어 있으며, 특히 협동 플레이와 전략적 의사소통이 중요한 유즈맵으로 분류된다. 맵의 특성상, 적의 공격을 효과적으로 방어하고 요새를 유지하는 것이 승리 조건으로 추정되므로, 플레이 전 맵의 입구와 요새의 구조를 꼼꼼히 살피고, 팀원들과의 역할 분담을 미리 조정하는 것이 중요하다. 또한, 적의 패턴을 분석하고 대응책을 마련하는 것이 반복 플레이를 통해 더 큰 재미를 느낄 수 있는 방법일 것이다. StarCraft: Brood War's custom map *Entrance Through Special* is a unique 6-player defensive map where players must protect a central fortress while fending off endless waves of enemies. The map features a large fortress at its heart, surrounded by narrowing pathways and multiple entrances that allow strategic blocking of enemy advances. Each player is responsible for utilizing defensive structures around the fortress—eliminating foes, preventing intruders from breaching the inner sanctum, and repairing the fortress as needed. The gameplay primarily revolves around a defense-focused format, with enemy attacks arriving in predictable cycles that demand tactical use of the map’s layout. Key strategies include ambushing enemies in narrow passages, securing vision around the fortress, and managing resources efficiently. The map’s resolution and tile set appear optimized for functionality and playability rather than visual flair, prioritizing clear gameplay over aesthetic design. Players must hold the line against invaders while maintaining the fortress, eventually meeting victory conditions under specific circumstances. Given its emphasis on defense and teamwork, this map is better suited for experienced players rather than beginners. Strong teamwork and strategic thinking are crucial, as the difficulty fluctuates based on enemy attack patterns and the fortress’s durability. While newcomers may struggle at first, repeated play allows for a better grasp of the map’s layout and enemy behavior, enabling more stable defenses. Mastering timing for repairs and resource management is essential to success. Designed for six players, the map is ideal for group play with friends, particularly excelling in cooperative and communication-heavy custom maps. Success hinges on effectively defending against attacks and maintaining the fortress, so studying the entrances and fortress layout beforehand—and coordinating roles with teammates—is vital. Analyzing enemy patterns and developing counter-strategies will also enhance the experience through repeated play.
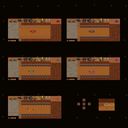
에이아이 스플래시 디펜스 (A.I. Splash Def)
스타크래프트 브루드워 맵 중에서도 독특한 플레이 방식을 가진 유즈맵을 찾는다면 에이아이 스플래시 디펜스(A.I. Splash Def)는 눈여겨볼 만한 작품이다. 이 맵은 스타크래프트 맵 파일 내부에 기록된 제작 정보에 따르면 2005년 7월에 Touchpad_Master 제작자에 의해 완성되었으며, 스플래시 데미지와 AI 러커 디펜스 계열의 전통적인 디펜스 장르 스타일에서 영감을 받아 제작된 것으로 보인다. 전체적인 맵 구조를 살펴보면 플레이어가 유닛을 배치하거나 방어선을 구축할 수 있는 독립된 공간들이 여러 개 마련되어 있으며, 각 구역마다 다양한 건물과 유닛 배치 형태가 확인된다. 화면 구성으로 미루어 볼 때 다수의 플레이어가 각자의 진영에서 밀려오는 적을 상대하는 방식을 취하고 있는 것으로 추정된다. 특히 스플래시라는 장르명과 내부 설명에서 유추할 수 있듯이, 광역 공격 능력을 적극적으로 활용하거나 특정 유닛의 특성을 극대화하여 몰려오는 적을 효율적으로 저지하는 것이 핵심 재미 요소가 된다. 플레이어는 제한된 공간 안에서 최적의 방어 진형을 고민해야 하며, 아군과의 협동이나 각자 진영의 방어력을 꾸준히 유지하는 전략적 판단이 요구된다. 전통적인 디펜스 유즈맵의 문법을 따르면서도 스플래시 공격의 시원한 타격감과 방어선 유지의 긴장감을 동시에 즐길 수 있어, 클래식한 디펜스 장르를 선호하는 유저들에게 적합하다. 플레이를 시작하기 전에는 각 플레이어 진영의 자원 공급 방식과 적이 진입하는 경로, 그리고 배치된 방어 건물의 사거리와 공격 속도를 미리 파악하는 것이 중요하며, 초보자라면 지형의 특성을 이해하고 방어선을 튼튼하게 구축하는 데 집중하는 편이 좋다. For those looking for a Use Map with a unique gameplay style among StarCraft Brood War maps, A.I. Splash Def is a work worth noting. According to the production information recorded inside the map file, this map was completed in July 2005 by the creator Touchpad_Master, and it appears to have been created with inspiration from the traditional defense genre styles of splash damage and AI lurker defense series. Looking at the overall map structure, several independent spaces are provided where players can deploy units or build defensive lines, and various building and unit placement forms are confirmed in each zone. Judging by the screen composition, it is presumed to adopt a method where multiple players deal with approaching enemies in their respective camps. In particular, as can be inferred from the genre name Splash and the internal description, the core fun factor is to actively utilize wide-area attack capabilities or maximize the characteristics of specific units to efficiently block swarming enemies. Players must ponder the optimal defensive formation within a limited space, and strategic judgment is required to maintain cooperation with allies and steadily preserve the defense of each camp. While following the grammar of traditional defense use maps, it allows users to enjoy the refreshing hitting feel of splash attacks and the tension of maintaining defensive lines at the same time, making it suitable for users who prefer the classic defense genre. Before starting to play, it is important to grasp in advance the resource supply method of each player's camp, the route where enemies enter, and the range and attack speed of deployed defensive buildings, and for beginners, it is better to focus on understanding the characteristics of the terrain and building a solid defense line.
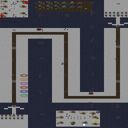
H 더블 디펜스 (HDoubleDefence(SVer.2))
이 맵은 플랫폼 타일셋 위에 펼쳐진 전형적인 6인 협동 디펜스 장르의 유즈맵이다. 제목에서 암시하듯 이중 방어선을 구축하는 독특한 구조가 핵심이며, 플레이어들은 좁은 통로와 넓은 개활지가 교차하는 우주 정거장 같은 공간에서 적의 파도를 막아내야 한다. 맵의 레이아웃은 단순해 보이지만, 두 겹으로 나뉜 방어 구역 때문에 병력 배치와 시야 확보가 상당히 까다롭다. 전방 라인에서 적의 진격을 지연시키는 동안 후방 라인에서 누적된 화력을 퍼붓는 방식이 기본 전술로 자리 잡으며, 이 과정에서 아군 여섯 명의 포지션과 유닛 조합이 자연스럽게 분업화된다. 특히 좁은 골목에서는 근접 유닛의 몸빵이, 탁 트인 중앙부에서는 원거리 화망이 빛을 발하기 때문에, 누군가는 탱킹을 전담하고 누군가는 지속 딜링을 맡는 역할 분담이 게임 초반부터 뚜렷하게 드러난다. 플랫폼 타일셋 특유의 어둡고 기계적인 분위기는 긴박한 전투의 몰입도를 높여 주며, 적 유닛이 쏟아져 나오는 타이밍도 점진적으로 빨라져 후반으로 갈수록 긴장을 늦출 수 없다. 다만 이 맵은 유즈맵 특성상 게임 내부 설명이 매우 간결하고, 승리 조건이나 예상 플레이 시간이 명시되어 있지 않다. 따라서 시작 전에 여섯 명의 플레이어가 각자 어떤 유닛을 특화할지 간단히 합의하는 것이 좋다. 또한 스태프 버전이라는 부제가 붙어 있어 밸런스나 난이도가 원작보다 조정되었을 가능성이 있으므로, 첫 판은 탐색적으로 플레이하며 적의 체력과 공격 패턴을 파악하는 것이 중요하다. 전형적인 디펜스 맵에 익숙한 유저라면 직관적으로 이해할 수 있는 구조지만, 이중 방어선이라는 컨셉이 주는 전략적 깊이 덕분에 단순 반복 작업으로 흐르지 않고 지속적인 소통과 긴장을 요구한다. 친구들과 파티를 짜서 각자 역할을 맡아 한 시간 남짓 집중해서 즐기기에 적합하며, 초보자보다는 어느 정도 협동 디펜스 경험이 있는 플레이어에게 더욱 추천할 만하다. This map is a classic six-player cooperative defense use map set on the platform tileset, featuring a distinctive double-layer defense structure as hinted by its title. Players must hold back waves of enemies in a space that resembles a dark, mechanical space station where narrow corridors intersect with wide open areas. The layout appears straightforward at first glance, but the split defensive zones make unit positioning and facility placement critically demanding. The fundamental strategy revolves around stalling the enemy advance on the front line while the back line unleashes accumulated firepower, naturally distributing roles and unit compositions among the six allies. In the tight alleyways, melee units serve as essential damage sponges, whereas ranged firepower dominates the open central area, so a clear division of labor emerges early on with dedicated tanks and sustained damage dealers. The dark, metallic atmosphere of the platform tileset enhances the immersion during tense battles, and the progressively intensifying enemy spawns ensure that there is no room for complacency as the game wears on. One thing to note is that, typical of use map settings, the internal description is quite minimal and lacks explicit victory conditions or estimated playtime. It is therefore advisable for all six players to briefly agree on their unit specializations before starting. The “Staff Version” label also suggests possible balance or difficulty adjustments from the original, so playing the first round cautiously to gauge enemy health and attack patterns is a wise approach. For veterans of defense maps, the layout is intuitive, yet the double-defense concept provides enough strategic depth to prevent the gameplay from becoming a mindless grind, demanding constant communication and sustained focus. It is best suited for a group of friends ready to commit to an hour of concentrated role-based cooperation, and is recommended more for players with some prior defense map experience than for complete beginners.
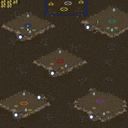
파일런 디펜스 v5.05 (Pylon Defense v5.05)
사막 한복판에 세워진 수정탑을 끝까지 지켜내는 것이 목표인 5인 협동 디펜스 맵이다. 제목에서 풍기듯 수호해야 할 핵심 구조물은 프로토스의 수정탑이며, 이 수정탑이 파괴되면 게임이 종료되는 전형적인 생존형 디펜스 장르에 속한다. 플레이어 다섯 명은 각자 지정된 지역에서 몰려오는 적 유닛의 파도를 협력하여 막아내야 하며, 한 명이라도 방어선이 뚫리면 공동의 목표가 위험해질 수 있기 때문에 끊임없는 소통과 역할 분담이 중요하게 작용한다. 사막 타일셋 특유의 탁 트인 시야와 황량한 분위기는 전장의 긴장감을 한층 끌어올리며, 좁은 골목이나 언덕을 활용한 시야 싸움보다는 넓은 평지에서 다수의 병력을 운용하는 대규모 전투에 초점이 맞춰져 있다. 맵은 초반부터 후반까지 적 유닛의 구성과 물량이 점진적으로 강해지는 전형적인 웨이브 방식을 채택하고 있다. 초반에는 저글링이나 마린 같은 기본 유닛이 몰려오지만, 회차가 거듭될수록 고위 기사, 울트라리스크, 배틀크루저 같은 고급 유닛이 등장하며 플레이어의 대응력을 시험한다. 특정 구간에서는 적의 공성 전차나 리버가 원거리에서 수정탑을 직접 타격하려 하기 때문에 단순히 병력을 전방에 쌓아두는 것만으로는 버티기 어렵고, 적의 공격 경로를 예측해 기동성 있는 유닛으로 빠르게 차단하는 전술적 판단이 요구된다. 플레이어별로 주어지는 자원과 건설 가능한 지역은 제한되어 있어, 초반 빌드 오더와 유닛 조합을 어떻게 가져가느냐에 따라 중후반 안정성이 크게 갈린다. 테란의 시즈 탱크와 벌처, 저그의 럴커와 디파일러, 프로토스의 리버와 하이 템플러 등 종족별 핵심 유닛을 적재적소에 배치하는 재미가 상당하다. 이 맵은 특히 스타크래프트 디펜스 장르에 익숙한 플레이어들에게 강력히 추천할 만하다. 웨이브 패턴을 외우고 최적의 방어 라인을 구축하는 과정에서 오는 성취감이 뚜렷하며, 다섯 명이 함께 호흡을 맞춰야 하므로 친구들과의 파티 플레이에서 진가를 발휘한다. 다만 입문자에게는 후반으로 갈수록 쏟아지는 고급 유닛의 압박이 다소 가혹하게 느껴질 수 있으므로, 초반 방어에 실패하더라도 빠르게 재정비할 수 있도록 팀원 간의 백업 전략을 미리 상의해두는 것이 좋다. 플레이 전에 반드시 확인해야 할 점은, 이 맵이 일반적인 밀리나 유즈맵과 달리 수정탑의 체력이 공유되지 않는다는 사실이다. 즉 한 명의 구역이 뚫려 수정탑이 파괴되면 그 즉시 게임이 끝나므로, 모든 플레이어가 균등하게 성장해야 한다는 부담감이 존재한다. 따라서 특정 유저에게 자원을 몰아주는 전략보다는 전원이 고르게 강해지는 방향으로 협력하는 것이 클리어의 핵심이다. This is a five-player cooperative defense map where the core objective is to protect a Pylon standing in the middle of a desert wasteland. As the title suggests, the Pylon is the vital structure that must survive at all costs, and if it is destroyed, the game ends immediately, placing this squarely in the classic survival defense genre. Five players each hold their designated zones against waves of incoming enemies, and because a single breach can jeopardize the entire team's goal, constant communication and clear role distribution are essential. The open sightlines and desolate atmosphere of the Desert tileset heighten the tension on the battlefield, shifting the focus away from narrow chokepoint vision play toward large-scale engagements that require managing massed armies across wide open spaces. The map follows a typical wave-based progression where enemy composition and volume gradually intensify from start to finish. Early waves send basic units like Zerglings and Marines, but as the rounds advance, high-tier threats such as High Templars, Ultralisks, and Battlecruisers appear to test the players' adaptability. Certain segments introduce long-range siege units like Siege Tanks or Reavers that can strike the Pylon directly from a distance, making it insufficient to simply stack forces at the front line; instead, tactical decisions involving mobile interception units are required to block their attack paths quickly. Each player receives limited resources and a restricted building area, so the chosen build order and unit composition in the early game heavily influence mid-to-late game stability. The enjoyment of deploying race-specific core units such as Terran Siege Tanks and Vultures, Zerg Lurkers and Defilers, or Protoss Reavers and High Templars in the right positions is a major highlight. This map is highly recommended for players already familiar with the StarCraft defense genre. The satisfaction derived from memorizing wave patterns and constructing the optimal defensive line is substantial, and the necessity of five-player synchronization makes it shine in party play with friends. However, for beginners, the sheer volume of advanced enemy units in the later stages can feel overwhelming, so it is advisable to discuss backup strategies among team members beforehand to recover quickly from early defensive failures. A critical point to check before playing is that the Pylon's health is not shared; if one player's sector is breached and the Pylon is destroyed, the game ends instantly for everyone. This creates a strong pressure for all players to grow evenly, making a balanced cooperative approach where everyone strengthens together far more effective for clearing the map than funneling resources into a single player.
더 가디언즈 오브 스카이 5.0 (The Guardians of Sky 5.0)
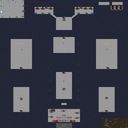
스타크래프트 브루드워 맵 'The Guardians of Sky 5.0'은 원본 파일명인 '락다운디펜스5.0.scx'에서 엿볼 수 있듯이 방어 전술을 중심으로 설계된 독특한 유즈맵이다. 플랫폼 타일셋을 기반으로 제작된 이 맵은 넓은 우주 공간 같은 배경 속에 독립된 플랫폼 구조의 지형들이 배치되어 있어, 플레이어에게 색다른 공간감을 선사한다. 전체적인 맵 구조를 살펴보면 플레이어들이 자리를 잡고 유닛을 운용할 수 있는 여러 개의 기지 구역과 중앙 통로, 그리고 적의 공세가 펼쳐질 것으로 짐작되는 적진 구역들이 유기적으로 연결되어 있다. 특히 하늘의 수호자라는 뜻을 가진 영문 타이틀에 걸맞게 공중 유닛이나 특정 방어 타워를 활용한 전술적 요충지 방어가 핵심 플레이가 될 것으로 추정된다. 6인의 플레이어 인원을 지원하는 만큼, 멀티플레이 시 팀원 간의 유기적인 방어선 구축과 역할 분담이 게임의 승패를 가르는 중요한 요인으로 작용한다. 각 플레이어별로 배정된 기지 공간에서 자원을 채취하고 유닛을 생산하여 밀려오는 적의 공격을 막아내는 전통적인 디펜스 유즈맵의 재미를 느낄 수 있다. 이 맵은 평소 타워 디펜스나 입구막기 같은 협동 방어 장르를 선호하는 유저들에게 안성맞춤이다. 친구들과 함께 호흡을 맞추며 몰려오는 적들을 막아내는 짜릿한 방어전의 재미를 즐길 수 있으며, 복잡한 밀리 맵에서 벗어나 색다른 전략을 구사하고 싶은 플레이어들에게 추천한다. 다만 본격적인 게임을 시작하기 앞서, 맵의 지형적 특징과 자원 수급 위치, 그리고 적의 진격 경로를 미리 파악하는 것이 원활한 플레이를 위한 필수 포인트다. 고유의 플랫포머 지형에서 펼쳐지는 공중전과 방어의 묘미를 온전히 느끼고 싶다면 지금 바로 이 맵을 통해 방어 전략의 극한을 경험해 보길 바란다. The StarCraft: Brood War map 'The Guardians of Sky 5.0' is a unique use map centered around defensive tactics, as hinted by its original file name 'Lockdown Defense 5.0.scx'. Built upon a platform tileset, this map features independent platform-style terrain layouts set against a vast space-like background, offering players a distinctive spatial sense. Looking at the overall map structure, several base areas where players can establish positions and operate units are organically connected with central pathways and enemy zones where waves of attacks are anticipated. True to its English title, which translates to 'The Guardians of Sky', strategic defense of choke points utilizing air units or specific defensive structures is presumed to be the core gameplay. Supporting up to six players, cohesive defense line construction and role delegation among teammates during multiplayer sessions serve as crucial factors determining victory or defeat. Players can experience the traditional fun of defense use maps by gathering resources in their assigned base spaces, producing units, and blocking incoming enemy assaults. This map is well-suited for users who generally enjoy cooperative defense genres like tower defense or entry blocking. You can enjoy the thrilling fun of defensive warfare while coordinating with friends to stop swarming enemies, making it recommended for players wanting to execute different strategies away from complex melee maps. However, before diving into a full game, checking the terrain characteristics, resource supply locations, and enemy advance paths in advance is an essential point for smooth gameplay. If you wish to fully experience the charm of aerial combat and defense unfolding across unique platformer terrain, we encourage you to experience the limits of defensive strategy through this map right now.
30분 디펜스 버전 F (30 Minutes Defence Ver F)
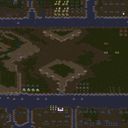
사막 한복판에 자리한 좁은 방어선에서 다섯 명의 플레이어가 몰려드는 적을 상대로 30분 동안 버티는 클래식한 유즈맵이다. 맵의 구조는 직관적이면서도 긴장감을 극대화하도록 설계되었다. 중앙 기지 주변은 사막 타일셋 특유의 탁 트인 시야와 제한된 지형지물로 이루어져 있어 초반부터 방어 라인을 어떻게 구축하느냐가 생존의 핵심으로 작용한다. 입구가 여러 방향으로 뚫려 있어 병력을 분산 배치해야 하며, 특정 지점에 지나치게 집중하면 반대편에서 밀려드는 공세에 쉽게 무너질 수 있다. 따라서 팀원 간의 역할 분담과 실시간 소통이 매우 중요하게 느껴진다. 초반에는 소수의 유닛으로 버티며 자원을 모으고, 중반 이후에는 강력한 광역 공격 유닛이나 방어 건물을 조합해 점점 거세지는 공격 파도를 상대하게 된다. 특히 후반으로 갈수록 적의 체력과 물량이 급격히 증가하기 때문에 지속적으로 진영을 보강하지 않으면 순식간에 전선이 붕괴되는 짜릿한 압박감을 경험할 수 있다. 이 맵은 단순한 버티기 이상의 재미를 제공한다. 제한된 자원과 공간 안에서 유닛 배치, 건물 시야 확보, 병력 회전 타이밍을 끊임없이 고민하게 만든다. 사막 타일셋의 황량한 분위기는 고립된 전장의 느낌을 잘 살렸으며, 시각적으로도 적의 움직임을 쉽게 구분할 수 있게 도와준다. 5인 플레이에 최적화되어 있어 한 명이라도 빨리 무너지면 주변 라인까지 연쇄적으로 위험해지기 때문에, 서로의 방어 구역을 커버해주는 플레이가 자연스럽게 요구된다. 난이도는 초보자가 혼자 도전하기에는 다소 가혹한 편이지만, 친구들이나 공개방에서 호흡을 맞추면 성취감이 크다. 플레이 전에는 반드시 팀원과 간단한 전략을 공유하고, 각자 맡을 방향과 유닛 조합을 미리 상의하는 것이 좋다. 또한 후반부로 갈수록 컴퓨터 사양에 따라 렉이 발생할 수 있으니, 그래픽 설정을 낮추거나 불필요한 이펙트를 최소화하는 것이 안정적인 플레이에 도움이 된다. 고전 유즈맵 특유의 거친 완성도가 느껴지지만, 30분이라는 명확한 목표와 끊임없이 몰려오는 적을 막아내는 손맛은 지금 다시 즐겨도 충분히 매력적이다. In the middle of a desert, five players hold a narrow defensive line against relentless enemy waves for thirty minutes in this classic use map setting. The layout is straightforward yet designed to maximize tension. The open sightlines and sparse terrain features of the desert tileset force you to think carefully about where to place your first defensive structures, making early line construction the key to survival. Because the base is exposed from multiple directions, you must spread your forces thinly. Focusing too heavily on one spot often leads to a quick collapse when the opposite side gets overwhelmed. This makes real-time coordination and clear role division among team members feel essential. In the early game you survive with a handful of units while gathering resources, and by the mid-game you gradually add powerful area-damage units or defensive buildings to handle the increasingly intense attack waves. As the timer ticks toward the later stages, enemy health and numbers spike dramatically, so if you neglect to constantly reinforce your position, the frontline crumbles within seconds, delivering a sharp sense of pressure. This map offers more than just a simple holdout experience. The limited space and time force you to constantly rethink unit positioning, building placement, and rotation timing. The barren desert tileset enhances the feeling of isolation and also makes enemy movements easy to track visually. Optimized for five players, the design ensures that if one person falls too early, the neighboring lanes become dangerously exposed, which naturally pushes the team to cover each other’s defensive zones. The difficulty can feel harsh for a solo beginner, but the sense of achievement is high when playing with friends or in a public lobby. Before starting, it is wise to share a rough strategy with teammates and agree on who covers which angle and what unit compositions to aim for. In the late game, performance may drop depending on your computer, so adjusting graphic settings or minimizing unnecessary effects helps maintain stability. While it carries the rough charm of an old-school Umez map, the clear thirty-minute goal and the satisfying feel of holding off endless enemies remain genuinely appealing even when revisited today.
맵 선택 가이드
태그는 맵의 핵심 특징을 빠르게 설명하지만 제작 버전마다 규칙이 다를 수 있습니다. 상세 설명에서 권장 인원, 난이도, 플레이 시간과 버전을 함께 확인한 뒤 다운로드하세요.