
밀리 대전 스타크래프트 맵 모음
'밀리 대전' 태그가 등록된 맵을 모았습니다. 장르 하나로 찾기 어려운 플레이 방식, 난이도와 특징을 중심으로 인기 맵과 최신 맵을 비교해 보세요.
- 등록 맵
- 3개
- 누적 다운로드
- 0
- 누적 조회
- 73
인기 맵
다운로드와 조회 반응이 높은 맵입니다.
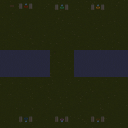
(3v3) 제로 클러터 퍼펙트 (Zero Clutter Perfect)
스타크래프트 브루드워의 (3v3) 제로 클러터 퍼펙트는 6인용 3v3 밀리 맵으로, 이름 그대로 깔끔한 맵 디자인과 효율적인 자원 분배가 특징이다. 맵은 사막 타일셋을 기반으로 하며, 4096x4096의 넓은 공간을 차지하고 있지만 각 플레이어의 시작 지역은 비교적 조밀하게 배치되어 초반 전투가 빠르게 발발한다. 중앙에 위치한 중립 멀티 지역은 전략적인 가치를 지니며, hereos, scm, Bigg_Gay_Ass, gods-angel, im_in_bga_mode가 제작한 이 맵은 순수 밀리 전용으로 설계되어 경기의 템포를 빠르게 끌어올린다. 특히 ‘제로 클러터’라는 이름처럼 불필요한 지형이나 장애물이 없어 전략적 선택지가 명확하고, 초보와 숙련자 모두에게 공정한 환경을 제공한다. 맵의 균형 잡힌 mineral과 gas 분포는 필드 싸움뿐만 아니라 멀티 테러와 방어전에서도 균형 잡힌 플레이를 유도한다. 다만, 시작 지역 간의 거리가 다소 가깝게 느껴질 수 있어 초반 러시나 테러가 빈번히 발생할 수 있으니, 빠른 판단과 대처가 요구된다. 이 맵은 팀플레이의 중요성을 극대화하며, 조율과 협력이 빛을 발하는 재미를 선사한다. 유즈맵으로의 활용보다는 순수 밀리 대전의 매력을 즐기고 싶은 플레이어들에게 강력히 추천한다. 특히 3v3 팀플레이를 즐기는 유저라면 필수적으로 한 번쯤 플레이해 볼 만한 맵이다. 시작 전에 각 팀의 전략적 배치와 멀티 관리 계획을 미리 세워두는 것이 좋다. 또한, 맵의 균형이 잘 잡혀 있어 공정한 승부를 기대할 수 있으며, 맵의 깔끔한 디자인은 시야 확보와 이동 경로 계산에도 유리하게 작용한다. 이 맵을 플레이할 때는 초반 자원 확보와 멀티 확보를 동시에 고려해야 하며, 상대 팀의 움직임을 끊임없이 주시하며 전략을 유연하게 전환할 준비를 해야 한다. 맵의 특성상 초반 전면전이 자주 발생할 수 있으니, 초반 병력 구성을 carefully 관리하는 것이 승리의 열쇠가 될 것이다. StarCraft: Brood War's (3v3) Zero Clutter Perfect is a 6-player 3v3 melee map with a clean design and efficient resource distribution, as its name suggests. The map is based on a desert tileset and spans a large 4096x4096 space, but the starting areas for each player are relatively compact, leading to quick early-game battles. The neutral multi-location in the center holds strategic value, and this map, created by hereos, scm, Bigg_Gay_Ass, gods-angel, and im_in_bga_mode, is designed purely for melee matches, accelerating the pace of the game. True to its name, "Zero Clutter," there are no unnecessary terrain obstacles, making strategic choices clear and providing a fair environment for both beginners and experienced players. The balanced distribution of minerals and gas not only encourages field battles but also balanced play in multi-harassment and defensive scenarios. However, the proximity of starting locations may feel tight, increasing the likelihood of early rushes or harassment, so quick decision-making and counterplay are essential. The map maximizes the importance of teamwork, offering a fun experience where coordination and cooperation shine. While it can be used as a custom map, it is highly recommended for players seeking the thrill of pure melee battles, especially those who enjoy 3v3 team play. It’s a must-play map for anyone who enjoys 3v3 team battles. Before starting, it’s wise to plan your team’s strategic positioning and multi-management. With its well-balanced design, fair matches are expected, and the clean layout also aids in vision control and pathfinding. When playing, you must balance early resource and multi expansion while constantly monitoring the enemy’s movements and remaining flexible with your strategy. Given the map’s nature, early full-scale battles are common, so carefully managing your initial army composition is key to victory.
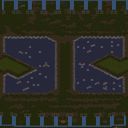
셰어드 베이스 2000 SE (ver 6.0)
‘셰어드 베이스 2000 SE (ver 6.0)’은 스타크래프트: 브루드워에서 3대 3으로 진행되는 밀리 대전 맵으로, 좁은 맵 중앙을 사이에 두고 symmetrical(대칭)한 기지 구조가 인상적인 맵입니다. 적 기지 간의 거리가 상당히 가까워 초반부터 치열한 전투가 벌어지며, 좁은 길목을 활용한 입구 막기 전략이나 비밀 통로의 존재로 인해 예상치 못한 기습도 가능합니다. 특히 맵 중앙의 좁은 통로가 주요 교전 지역으로 부각되며, 이곳에서 벌어지는 싸움은 게임의 승패를 좌우할 정도로 중요합니다. 또한, 맵 곳곳에 숨겨진 비밀 통로들이 배치되어 있어, 전략적 깊이를 더합니다. 이 맵은 3:3 밀리 대전 장르의 특성을 살리면서도, 좁은 공간과 비밀 통로라는 독특한 요소를 통해 기존의 밀리 맵과는 차별화된 플레이 경험을 제공합니다. 초심자보다는 어느 정도 실전 감각이 있는 플레이어들에게 더 적합하며, 좁은 공간에서 벌어지는 빠른 손빠르기와 타이밍 감각이 중요한 맵입니다. 비밀 통로의 존재는 게임 초반 전략 수립 시 반드시 고려해야 할 요소로, 이를 활용한 기습이나 역습이 승패를 가르는 결정적 요인이 될 수 있습니다. 이 맵의 가장 큰 특징은 바로 숨겨진 비밀 통로입니다. 맵 중앙의 좁은 길목뿐만 아니라, 기지 내외부 곳곳에 숨겨진 통로가 배치되어 있어, 상대방의 시선을 분산시키고 unexpected(예상치 못한) 공격을 펼칠 수 있습니다. 또한, symmetrical한 기지 구조는 양측의 전략적 균형을 맞추는 데 도움을 주며, 초반 자원 확보와 테크 트리 선택이 매우 중요합니다. 맵의 중앙 통로가 좁고 길어, 소규모 병력의 움직임이 제한되는 만큼, 컨트롤과 컨벤션의 중요성이 커집니다. 더불어, 맵의 규모가 4096x4096으로 상당히 큰 편이지만, 실질적인 전투 지역은 중앙과 기지 주변으로 한정되어 있어, 전투의 강도는 매우 높은 편입니다. 이 맵은 3:3 밀리 대전 장르의 매력을 그대로 담아내면서도, 숨겨진 요소와 좁은 공간의 활용이라는 새로운 전략적 깊이를 제공합니다. 초보 플레이어는Central passage(중앙 통로)에서 벌어지는 전투에 적응하는 데 시간이 필요할 수 있으며, 숙련된 플레이어는 비밀 통로를 적극 활용한 전략을 세워야 합니다. 또한, 맵의 symmetrical 구조상 양측의 균형이 비교적 잘 맞춰져 있어, 실력 차이가 크지 않다면 치열한 접전을 펼칠 수 있습니다. 따라서, 이 맵은 실력 있는 플레이어들 간의 대결에서 그 진가가 드러나는 맵이라 할 수 있습니다. ‘Shared Base 2000 SE (ver 6.0)’ is a three-versus-three melee battle map in *StarCraft: Brood War* featuring impressive symmetrical base layouts separated by a narrow central passage. The close proximity of enemy bases leads to intense early-game clashes, and the tight corridors allow for choke-point defenses or surprise assaults through hidden shortcuts. The cramped central corridor becomes a critical battleground where engagements often decide the match’s outcome, while scattered secret passages add strategic depth. Designed to highlight the 3v3 melee genre’s strengths, this map stands out with its claustrophobic spaces and concealed routes, offering a unique play experience. It suits players with solid practical experience more than absolute beginners, demanding quick reflexes and sharp timing in confined spaces. The hidden passages are pivotal during early strategy planning, as ambushes or counterattacks through them can swing the game’s result. The map’s defining feature is its hidden shortcuts, which appear not only along the narrow central corridor but also inside and outside the bases, enabling diversions and unexpected strikes. The symmetrical layout helps maintain strategic parity between both sides, making early resource control and tech choices vital. With the central passage narrow and elongated, small-scale troop movements are restricted, heightening the importance of micro-management and conventions. Despite the large 4096×4096 map size, combat intensity is concentrated around the center and base perimeters, creating high-pressure engagements. While preserving the charm of 3v3 melee battles, the map introduces fresh strategic layers through hidden routes and cramped terrain. Novices may need time to acclimate to the central corridor’s battles, whereas seasoned players should build strategies around the secret passages. The symmetrical design ensures balanced matchups, allowing for fierce contests when skill levels are close. Thus, this map truly shines in high-level player versus player matches.
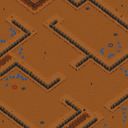
트렌치스 (Trenches)
스타크래프트 브루드워의 Trenches는 이름 그대로 깊은 참호와 좁은 통로로 가득한 전장 맵으로, 밀리 대전arus를 위해 설계되었다. 전체적인 지형은 중앙의 넓은 평지 주위로 양측에 참호 형태의 좁은 길과 언덕 지형이 배치되어 있어, 시야 확보와 기동성이 제한되는 특징을 보인다. 초반 자원 기지 위치는 상대적으로 평탄한 고지대와 인근 언덕에 위치해 있어, 초반 정찰과 견제가 용이하고, 반대로 후방으로 통하는 좁은 길은 적의 기습이나 진출을 막는 자연스러운 방어선이 된다. 맵의 구조상 중앙 평지는 전투의 주요 무대가 되지만, 좁은 통로와 참호는 유닛의 군집을 강제하며, 특히 테란의 경우 벙커나 마인 설치가 전략적으로 유리해진다. 저그와 프로토스의 경우에도 좁은 길목을 활용한 히드라리스크 덤불이나 질럿/드라군의 접근을 제어하는 플레이가 중요해진다. Trenches는 밀리 대전arus의 기본적인 전략과 전술을 그대로 요구하면서도, 지형의 제약을 통해 전투의 깊이를 더하는 맵으로 평가된다. 초보자에게는 좁은 길목과 참호가 익숙하지 않은 환경이 될 수 있지만, 좁은 공간에서 벌어지는 전투를 익히면 실력 향상에 도움이 된다. 반면 숙련자에게는 좁은 통로와 언덕의 시너지를 활용한 다양한 전략과 전술이 가능한, 깊이 있는 플레이가 가능한 맵으로 추천할 만하다. Trenches는 특히 테란과 저그 간의 대결에서 참호와 벙커를 활용한 전략이 빛을 발하며, 프로토스의 경우에도 가시적인 시야 확보와 좁은 길목에서의 빠른 진출이 승리의 열쇠가 된다. 이 맵을 플레이하기 전에는 좁은 통로에서의 기동성 제한과 시야 확보의 중요성을 반드시 숙지하고, 초반 자원 기지 주변의 언덕과 참호 지형을 미리 분석해 두는 것이 좋다. 또한, 좁은 공간에서 벌어지는 전투에서 유닛의 체력 관리와micro 컨트롤을 연습하는 데에도 유용한 맵이다. Trenches는 밀리 대전arus의 기본기와 전략적 깊이를 동시에 제공하는, 클래식한 yet 전략적인 맵으로, 브루드워의 매력을 다시 한 번 느낄 수 있는佳作 중 하나다. Trenches in StarCraft: Brood War is a battlefield map filled with deep trenches and narrow passages, as its name suggests, designed specifically for melee battles. The overall terrain features wide open central plains surrounded by narrow trench-like paths and elevated areas on both sides, creating a layout where visibility and mobility are heavily restricted. The starting resource bases are situated on relatively flat high ground near adjacent hills, making early scouting and harassment easier, while the narrow rear pathways serve as natural defensive lines to block enemy advances or ambushes. Due to the map's structure, the central plains become the primary battleground, but the confined corridors and trenches force units to cluster, giving Terran players a strategic advantage with bunkers and mine placements. For Zerg and Protoss, controlling choke points with Hydralisk runbys or managing Zealot/Dragoon approaches through tight passages becomes crucial. Trenches challenges players to apply fundamental melee strategies and tactics while adding depth through terrain constraints. While the narrow passages and trenches may feel unfamiliar to beginners, mastering combat in confined spaces can significantly improve their skills. For experienced players, the map offers rich strategic depth, allowing for diverse plays that leverage the synergy between narrow corridors and elevated terrain. Trenches shines particularly in Terran vs. Zerg matches, where trenches and bunkers become key strategic elements, while Protoss players must secure visible sightlines and make swift advances through narrow paths to secure victory. Before playing, it's essential to understand the limitations of mobility and visibility in tight spaces and analyze the terrain around the starting bases, including hills and trench layouts. The map is also great for practicing unit health management and micro-management in close-quarters combat. As a classic yet strategic map, Trenches delivers both fundamental mechanics and tactical depth, making it one of Brood War's finest works that truly captures the charm of the game.
최근 등록된 맵
새로 추가된 파일과 버전을 확인하세요.
트렌치스 (Trenches)
스타크래프트 브루드워의 Trenches는 이름 그대로 깊은 참호와 좁은 통로로 가득한 전장 맵으로, 밀리 대전arus를 위해 설계되었다. 전체적인 지형은 중앙의 넓은 평지 주위로 양측에 참호 형태의 좁은 길과 언덕 지형이 배치되어 있어, 시야 확보와 기동성이 제한되는 특징을 보인다. 초반 자원 기지 위치는 상대적으로 평탄한 고지대와 인근 언덕에 위치해 있어, 초반 정찰과 견제가 용이하고, 반대로 후방으로 통하는 좁은 길은 적의 기습이나 진출을 막는 자연스러운 방어선이 된다. 맵의 구조상 중앙 평지는 전투의 주요 무대가 되지만, 좁은 통로와 참호는 유닛의 군집을 강제하며, 특히 테란의 경우 벙커나 마인 설치가 전략적으로 유리해진다. 저그와 프로토스의 경우에도 좁은 길목을 활용한 히드라리스크 덤불이나 질럿/드라군의 접근을 제어하는 플레이가 중요해진다. Trenches는 밀리 대전arus의 기본적인 전략과 전술을 그대로 요구하면서도, 지형의 제약을 통해 전투의 깊이를 더하는 맵으로 평가된다. 초보자에게는 좁은 길목과 참호가 익숙하지 않은 환경이 될 수 있지만, 좁은 공간에서 벌어지는 전투를 익히면 실력 향상에 도움이 된다. 반면 숙련자에게는 좁은 통로와 언덕의 시너지를 활용한 다양한 전략과 전술이 가능한, 깊이 있는 플레이가 가능한 맵으로 추천할 만하다. Trenches는 특히 테란과 저그 간의 대결에서 참호와 벙커를 활용한 전략이 빛을 발하며, 프로토스의 경우에도 가시적인 시야 확보와 좁은 길목에서의 빠른 진출이 승리의 열쇠가 된다. 이 맵을 플레이하기 전에는 좁은 통로에서의 기동성 제한과 시야 확보의 중요성을 반드시 숙지하고, 초반 자원 기지 주변의 언덕과 참호 지형을 미리 분석해 두는 것이 좋다. 또한, 좁은 공간에서 벌어지는 전투에서 유닛의 체력 관리와micro 컨트롤을 연습하는 데에도 유용한 맵이다. Trenches는 밀리 대전arus의 기본기와 전략적 깊이를 동시에 제공하는, 클래식한 yet 전략적인 맵으로, 브루드워의 매력을 다시 한 번 느낄 수 있는佳作 중 하나다. Trenches in StarCraft: Brood War is a battlefield map filled with deep trenches and narrow passages, as its name suggests, designed specifically for melee battles. The overall terrain features wide open central plains surrounded by narrow trench-like paths and elevated areas on both sides, creating a layout where visibility and mobility are heavily restricted. The starting resource bases are situated on relatively flat high ground near adjacent hills, making early scouting and harassment easier, while the narrow rear pathways serve as natural defensive lines to block enemy advances or ambushes. Due to the map's structure, the central plains become the primary battleground, but the confined corridors and trenches force units to cluster, giving Terran players a strategic advantage with bunkers and mine placements. For Zerg and Protoss, controlling choke points with Hydralisk runbys or managing Zealot/Dragoon approaches through tight passages becomes crucial. Trenches challenges players to apply fundamental melee strategies and tactics while adding depth through terrain constraints. While the narrow passages and trenches may feel unfamiliar to beginners, mastering combat in confined spaces can significantly improve their skills. For experienced players, the map offers rich strategic depth, allowing for diverse plays that leverage the synergy between narrow corridors and elevated terrain. Trenches shines particularly in Terran vs. Zerg matches, where trenches and bunkers become key strategic elements, while Protoss players must secure visible sightlines and make swift advances through narrow paths to secure victory. Before playing, it's essential to understand the limitations of mobility and visibility in tight spaces and analyze the terrain around the starting bases, including hills and trench layouts. The map is also great for practicing unit health management and micro-management in close-quarters combat. As a classic yet strategic map, Trenches delivers both fundamental mechanics and tactical depth, making it one of Brood War's finest works that truly captures the charm of the game.
셰어드 베이스 2000 SE (ver 6.0)
‘셰어드 베이스 2000 SE (ver 6.0)’은 스타크래프트: 브루드워에서 3대 3으로 진행되는 밀리 대전 맵으로, 좁은 맵 중앙을 사이에 두고 symmetrical(대칭)한 기지 구조가 인상적인 맵입니다. 적 기지 간의 거리가 상당히 가까워 초반부터 치열한 전투가 벌어지며, 좁은 길목을 활용한 입구 막기 전략이나 비밀 통로의 존재로 인해 예상치 못한 기습도 가능합니다. 특히 맵 중앙의 좁은 통로가 주요 교전 지역으로 부각되며, 이곳에서 벌어지는 싸움은 게임의 승패를 좌우할 정도로 중요합니다. 또한, 맵 곳곳에 숨겨진 비밀 통로들이 배치되어 있어, 전략적 깊이를 더합니다. 이 맵은 3:3 밀리 대전 장르의 특성을 살리면서도, 좁은 공간과 비밀 통로라는 독특한 요소를 통해 기존의 밀리 맵과는 차별화된 플레이 경험을 제공합니다. 초심자보다는 어느 정도 실전 감각이 있는 플레이어들에게 더 적합하며, 좁은 공간에서 벌어지는 빠른 손빠르기와 타이밍 감각이 중요한 맵입니다. 비밀 통로의 존재는 게임 초반 전략 수립 시 반드시 고려해야 할 요소로, 이를 활용한 기습이나 역습이 승패를 가르는 결정적 요인이 될 수 있습니다. 이 맵의 가장 큰 특징은 바로 숨겨진 비밀 통로입니다. 맵 중앙의 좁은 길목뿐만 아니라, 기지 내외부 곳곳에 숨겨진 통로가 배치되어 있어, 상대방의 시선을 분산시키고 unexpected(예상치 못한) 공격을 펼칠 수 있습니다. 또한, symmetrical한 기지 구조는 양측의 전략적 균형을 맞추는 데 도움을 주며, 초반 자원 확보와 테크 트리 선택이 매우 중요합니다. 맵의 중앙 통로가 좁고 길어, 소규모 병력의 움직임이 제한되는 만큼, 컨트롤과 컨벤션의 중요성이 커집니다. 더불어, 맵의 규모가 4096x4096으로 상당히 큰 편이지만, 실질적인 전투 지역은 중앙과 기지 주변으로 한정되어 있어, 전투의 강도는 매우 높은 편입니다. 이 맵은 3:3 밀리 대전 장르의 매력을 그대로 담아내면서도, 숨겨진 요소와 좁은 공간의 활용이라는 새로운 전략적 깊이를 제공합니다. 초보 플레이어는Central passage(중앙 통로)에서 벌어지는 전투에 적응하는 데 시간이 필요할 수 있으며, 숙련된 플레이어는 비밀 통로를 적극 활용한 전략을 세워야 합니다. 또한, 맵의 symmetrical 구조상 양측의 균형이 비교적 잘 맞춰져 있어, 실력 차이가 크지 않다면 치열한 접전을 펼칠 수 있습니다. 따라서, 이 맵은 실력 있는 플레이어들 간의 대결에서 그 진가가 드러나는 맵이라 할 수 있습니다. ‘Shared Base 2000 SE (ver 6.0)’ is a three-versus-three melee battle map in *StarCraft: Brood War* featuring impressive symmetrical base layouts separated by a narrow central passage. The close proximity of enemy bases leads to intense early-game clashes, and the tight corridors allow for choke-point defenses or surprise assaults through hidden shortcuts. The cramped central corridor becomes a critical battleground where engagements often decide the match’s outcome, while scattered secret passages add strategic depth. Designed to highlight the 3v3 melee genre’s strengths, this map stands out with its claustrophobic spaces and concealed routes, offering a unique play experience. It suits players with solid practical experience more than absolute beginners, demanding quick reflexes and sharp timing in confined spaces. The hidden passages are pivotal during early strategy planning, as ambushes or counterattacks through them can swing the game’s result. The map’s defining feature is its hidden shortcuts, which appear not only along the narrow central corridor but also inside and outside the bases, enabling diversions and unexpected strikes. The symmetrical layout helps maintain strategic parity between both sides, making early resource control and tech choices vital. With the central passage narrow and elongated, small-scale troop movements are restricted, heightening the importance of micro-management and conventions. Despite the large 4096×4096 map size, combat intensity is concentrated around the center and base perimeters, creating high-pressure engagements. While preserving the charm of 3v3 melee battles, the map introduces fresh strategic layers through hidden routes and cramped terrain. Novices may need time to acclimate to the central corridor’s battles, whereas seasoned players should build strategies around the secret passages. The symmetrical design ensures balanced matchups, allowing for fierce contests when skill levels are close. Thus, this map truly shines in high-level player versus player matches.
(3v3) 제로 클러터 퍼펙트 (Zero Clutter Perfect)
스타크래프트 브루드워의 (3v3) 제로 클러터 퍼펙트는 6인용 3v3 밀리 맵으로, 이름 그대로 깔끔한 맵 디자인과 효율적인 자원 분배가 특징이다. 맵은 사막 타일셋을 기반으로 하며, 4096x4096의 넓은 공간을 차지하고 있지만 각 플레이어의 시작 지역은 비교적 조밀하게 배치되어 초반 전투가 빠르게 발발한다. 중앙에 위치한 중립 멀티 지역은 전략적인 가치를 지니며, hereos, scm, Bigg_Gay_Ass, gods-angel, im_in_bga_mode가 제작한 이 맵은 순수 밀리 전용으로 설계되어 경기의 템포를 빠르게 끌어올린다. 특히 ‘제로 클러터’라는 이름처럼 불필요한 지형이나 장애물이 없어 전략적 선택지가 명확하고, 초보와 숙련자 모두에게 공정한 환경을 제공한다. 맵의 균형 잡힌 mineral과 gas 분포는 필드 싸움뿐만 아니라 멀티 테러와 방어전에서도 균형 잡힌 플레이를 유도한다. 다만, 시작 지역 간의 거리가 다소 가깝게 느껴질 수 있어 초반 러시나 테러가 빈번히 발생할 수 있으니, 빠른 판단과 대처가 요구된다. 이 맵은 팀플레이의 중요성을 극대화하며, 조율과 협력이 빛을 발하는 재미를 선사한다. 유즈맵으로의 활용보다는 순수 밀리 대전의 매력을 즐기고 싶은 플레이어들에게 강력히 추천한다. 특히 3v3 팀플레이를 즐기는 유저라면 필수적으로 한 번쯤 플레이해 볼 만한 맵이다. 시작 전에 각 팀의 전략적 배치와 멀티 관리 계획을 미리 세워두는 것이 좋다. 또한, 맵의 균형이 잘 잡혀 있어 공정한 승부를 기대할 수 있으며, 맵의 깔끔한 디자인은 시야 확보와 이동 경로 계산에도 유리하게 작용한다. 이 맵을 플레이할 때는 초반 자원 확보와 멀티 확보를 동시에 고려해야 하며, 상대 팀의 움직임을 끊임없이 주시하며 전략을 유연하게 전환할 준비를 해야 한다. 맵의 특성상 초반 전면전이 자주 발생할 수 있으니, 초반 병력 구성을 carefully 관리하는 것이 승리의 열쇠가 될 것이다. StarCraft: Brood War's (3v3) Zero Clutter Perfect is a 6-player 3v3 melee map with a clean design and efficient resource distribution, as its name suggests. The map is based on a desert tileset and spans a large 4096x4096 space, but the starting areas for each player are relatively compact, leading to quick early-game battles. The neutral multi-location in the center holds strategic value, and this map, created by hereos, scm, Bigg_Gay_Ass, gods-angel, and im_in_bga_mode, is designed purely for melee matches, accelerating the pace of the game. True to its name, "Zero Clutter," there are no unnecessary terrain obstacles, making strategic choices clear and providing a fair environment for both beginners and experienced players. The balanced distribution of minerals and gas not only encourages field battles but also balanced play in multi-harassment and defensive scenarios. However, the proximity of starting locations may feel tight, increasing the likelihood of early rushes or harassment, so quick decision-making and counterplay are essential. The map maximizes the importance of teamwork, offering a fun experience where coordination and cooperation shine. While it can be used as a custom map, it is highly recommended for players seeking the thrill of pure melee battles, especially those who enjoy 3v3 team play. It’s a must-play map for anyone who enjoys 3v3 team battles. Before starting, it’s wise to plan your team’s strategic positioning and multi-management. With its well-balanced design, fair matches are expected, and the clean layout also aids in vision control and pathfinding. When playing, you must balance early resource and multi expansion while constantly monitoring the enemy’s movements and remaining flexible with your strategy. Given the map’s nature, early full-scale battles are common, so carefully managing your initial army composition is key to victory.
맵 선택 가이드
태그는 맵의 핵심 특징을 빠르게 설명하지만 제작 버전마다 규칙이 다를 수 있습니다. 상세 설명에서 권장 인원, 난이도, 플레이 시간과 버전을 함께 확인한 뒤 다운로드하세요.