
물량 공세 스타크래프트 맵 모음
'물량 공세' 태그가 등록된 맵을 모았습니다. 장르 하나로 찾기 어려운 플레이 방식, 난이도와 특징을 중심으로 인기 맵과 최신 맵을 비교해 보세요.
- 등록 맵
- 3개
- 누적 다운로드
- 0
- 누적 조회
- 122
인기 맵
다운로드와 조회 반응이 높은 맵입니다.
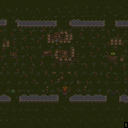
인펙션! (Infection!)
《인펙션!》은 스타크래프트 브루드워의 대표적인 유즈맵 중 하나로, 8명의 플레이어가 한 팀을 이루어 적을 섬멸하는 디펜스 장르의 맵이다. 맵의 배경은 사막으로 구성되어 있으며, 중앙에 위치한 거대한 몸체를 파괴하는 것이 주요 목표로 보인다. 플레이어는 몸체 주변에서 끊임없이 몰려드는 적 유닛을 방어해야 하며, 몸체의 체력이 낮아질수록 적의 공격력이 강화되는 방식으로 진행된다. 맵의 구조는 다소 협소한 공간이 많지만, 각 플레이어의 위치가 고정되어 있어 전략적인 배치와 협동이 중요하다. 적의 물량 공세가 치열하기 때문에 빠른 판단과 효율적인 자원 관리가 요구된다. 초보자는 적의 패턴을 익히기 어려울 수 있지만, 팀원과의 소통을 통해 점차 숙련도를 높일 수 있다. 맵의 난이도는 팀워크에 따라 크게 달라지며, 특히 몸체의 체력이 낮아지는 후반부로 갈수록 집중력이 필요하다. 플레이 전에는 맵의 구조와 적의 패턴을 미리 숙지하고, 각 플레이어의 역할 분담을 확실히 하는 것이 중요하다. 또한, 몸체의 체력과 적의 공격을 실시간으로 확인할 수 있는 UI가 있는지 여부를 확인하는 것이 좋다. 맵의 전체적인 분위기는 긴장감 넘치는 디펜스로, 팀워크와 전략이 빛을 발하는 장르이기 때문에 마치 한 편의 전쟁 영화와 같은 플레이 경험을 제공한다. 추천 대상은 디펜스 장르를 좋아하는 플레이어와 팀플레이를 즐기는 유저들이다. 맵의 난이도는 보통 수준이지만, 팀워크가 부족할 경우 어려움을 느낄 수 있다. 초보자도 꾸준한 연습을 통해 숙련도를 높일 수 있으며, 숙련된 플레이어는 보다 효율적인 전략을 구사할 수 있다. 맵의 특징으로는 몸체의 체력이 점차 감소하는 점과 적의 물량 공세가 지속적으로 이어지는 점이挙げられる。 《Infection!》 is one of the most iconic custom maps in *StarCraft: Brood War*, where eight players team up to eliminate their enemies in a defense-style game. The map is set in a desert environment, with the primary objective being to destroy a massive central structure. Players must defend this structure from waves of enemies that continuously spawn around it, and as its health decreases, the enemy's attacks grow stronger. While the map features many narrow spaces, the fixed positions of each player make strategic positioning and coordination crucial. The intense enemy waves demand quick decision-making and efficient resource management. Beginners may struggle to recognize enemy patterns, but communication with teammates can help improve proficiency over time. The difficulty varies greatly depending on teamwork, with the later stages—when the structure's health is low—requiring heightened focus. Before playing, it's important to familiarize yourself with the map layout and enemy patterns and clearly assign roles to each player. It's also wise to check if the UI provides real-time updates on the structure's health and enemy attacks. The overall atmosphere is tense and defensive, emphasizing teamwork and strategy in a way that feels like a war movie. This makes it ideal for fans of defense genres and those who enjoy team play. While the difficulty is moderate, poor teamwork can make the experience frustrating. Even beginners can improve with consistent practice, while experienced players can execute more efficient strategies. Key features include the structure's gradually decreasing health and the relentless waves of enemies.
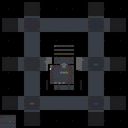
썬켄 10-웨이 100 드론즈 (Sunken 10-Way 100 Drones)
스타크래프트 브루드워의 유즈맵 '썬켄 10-웨이 100 드론즈(Sunken 10-Way 100 Drones)'는 한 명의 플레이어가 다수의 저글링 무리를 조종하는 컴까기(컴퓨터 상대 키우기) 장르의 디펜스 맵이다. 맵의 핵심은 중앙에 위치한 저글링 둥지에서 끊임없이 쏟아지는 적군 저글링을 방어하는 것으로, 플레이어는 둥지 주변의 방어 건물과 유닛을 배치해 공격을 막아내야 한다. 맵의 특징은 10방향으로 뻗어나가는 길목이 있으며, 각 길목마다 방어 지점을 구축할 수 있도록 구조가 설계되어 있다는 점이다. 특히 100마리의 저글링을 상대하는 만큼 방어의 중요성이 강조되며, 초반 방어 라인을 얼마나 잘 구축하느냐가 게임의 승패를 좌우할 가능성이 크다. 저글링의 물량 공세를 버티며 방어 건물을 효율적으로 배치하는 전략적 요소가 돋보이는 맵으로, 디펜스와 키우기 요소가 결합된 하이브리드형 유즈맵이라 할 수 있다. 맵의 난이도는 초반 방어 라인 구축 여부에 따라 크게 달라지며, 후반으로 갈수록 저글링의 수가 증가하므로 지속적인 관리가 필요하다. 초보자도 쉽게 접근할 수 있지만, 고수들은 방어 건물의 배치와 유닛의 효율적 사용으로 더 오랫동안 버텨내며 도전할 수 있는 구조다. 플레이 전에는 방어 건물의 위치와 각 길목의 간격을 미리 숙지하고, 저글링의 물량이 급격히 증가하는 시점을 대비하는 것이 중요하다. 맵의 분위기는 어둡고 칙칙한 색감을 바탕으로 조성되어 있으며, 저글링의 공격이 본격화되면 긴장감이 고조되는 연출이 특징적이다. 이 맵은 저글링의 물량 공세를 방어하는 재미와 전략적 배치의 묘미를 동시에 느낄 수 있어, 디펜스와 컴까기 장르를 좋아하는 플레이어들에게 strong 추천할 만한 작품이다. 특히 한 명의 플레이어가 다수의 적을 상대하는 구조는 스타크래프트의 기본 mechanics를 극대화한 형태로, 플레이어의 집중력과 전략적 사고를 요구한다. 맵의 구조상 방어 건물의 배치와 업그레이드, 그리고 자원의 관리도 중요한 포인트로 보인다. 저글링의 공격 패턴을 분석하고 방어 라인을 최적화하는 것이 관건이며, 이를 위해선 반복 플레이를 통한 경험 accumulation이 필수적이다. 맵의 디자인과 진행 방식은 단순해 보이지만, 실제 플레이에서는 많은 변수가 존재하므로 초보자와 고수 간의 실력 차이가 뚜렷이 드러난다. 이 맵을 즐기기 위해서는 저글링의 물량 공세를 버틸 수 있는 인내심과 전략적 사고가 필요하며, 이를 통해 플레이어는 자신만의 방어 전략을 개발할 수 있을 것이다. 맵의 몰입도는 상당히 높은 편으로, 초반의 긴장감에서 후반의 승부처까지 일관되게 흥미로운 경험을 제공한다. 특히 방어 건물 간의 시너지 효과를 고려한 배치나, 자원의 효율적 사용법 등은 플레이어의 창의성을 자극하는 요소로 작용할 것이다. 이 맵은 반복 플레이를 통해 점차 숙련도를 높일 수 있는 구조로, 디펜스와 컴까기 장르를 즐기는 플레이어들에게 strong한 추천 대상이다. This StarCraft: Brood War custom map, 'Sunken 10-Way 100 Drones,' falls under the UMS (Use Map Settings) category, specifically a hybrid defense and computer opponent growth (comp-kagi) genre. The core gameplay revolves around a single player controlling a nest of zerglings, defending against relentless waves of enemy zerglings emerging from 10 distinct paths. The map's design features a central nest with ten branching pathways, each requiring strategic placement of defensive structures to withstand the onslaught. The challenge lies in managing 100 zerglings simultaneously, where early defensive setups and efficient building placement are crucial for survival. The map's difficulty scales with the increasing zergling waves, demanding constant attention and resource management. While accessible to beginners, advanced players can optimize their strategies by fine-tuning building placements and upgrades to prolong the game. The dark and gritty aesthetic enhances the tension, especially during intense zergling waves. The gameplay emphasizes strategic depth, requiring players to analyze zergling attack patterns, optimize defense lines, and manage resources effectively. The repetitive yet engaging nature of the map encourages skill development, making it ideal for players who enjoy defense and comp-kagi mechanics. The hybrid structure blends defense and growth elements, offering a unique experience where players can experiment with creative defensive strategies. The map's replayability is high, as players refine their approaches through repeated plays, uncovering new tactics and synergies between defensive buildings. For fans of StarCraft's core mechanics and those seeking a challenging yet rewarding custom map experience, 'Sunken 10-Way 100 Drones' provides an immersive and strategically rich challenge.
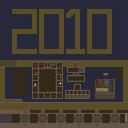
랜덤 저글링 막기 HARD 8 (Ling Def 8)
스타크래프트 브루드워의 유즈맵 'All랜덤저글링막기Hard8'은 이름 그대로 저글링을 상대로 방어전을 펼치는 디펜스 장르의 유즈맵이다. 맵의 전체적인 구조는 중앙의 본진 지역을 중심으로 사방으로 펼쳐진 길목을 방어하는 형태로 구성되어 있으며, 특히 8개의 랜덤한 입구에서 끊임없이 몰려오는 저글링 무리를 상대해야 한다. 맵의 이름에 'Hard'가 포함된 만큼 난이도가 상당히 높은 편으로, 초반부터 강력한 저글링 웨이브가 지속적으로 공격해오며 후반으로 갈수록 그 빈도와 수가 증가하는 구조를 보인다. 플레이어는 본진의 커맨드 센터를 중심으로 방어 건물을 배치하고, 유닛을 생산하여 입구를 틀어막아야 한다. 맵의 특징 중 하나는 '랜덤'이라는 요소로, 입구의 위치와 공격 패턴이 매번 달라지기 때문에 매 판마다 전략을 유동적으로 바꿔야 한다는 점이다. 또한, 맵의 배경은 황무지 타일셋을 사용해 황량한 분위기를 연출하며, 이는 맵의 긴장감을 한층 더 높이는 요소로 작용한다. 방어에 성공하면 다음 웨이브가 시작되고, 일정 횟수의 공격을 방어해내면 승리하는 것으로 추정된다. 이 맵은 디펜스 장르를 좋아하는 플레이어들에게는 흥미로운 도전 과제가 될 것이며, 특히 저글링의 물량 공세를 방어하는 재미와 긴장감을 즐기고자 하는 유저들에게 추천할 만하다. 다만, 초보자에게는 난이도가 다소 높을 수 있으니, 기본적인 방어 건물 배치와 유닛 관리 능력을 키운 후 도전하는 것이 좋다. 맵 플레이 전에는 입구 배치와 방어 건물의 효율적인 배치를 미리 계획해두는 것이 중요하다. 또한, 저글링의 공격 패턴을 빠르게 파악하고 대응하는 능력이 승리의 열쇠가 될 것이다. 맵의 전체적인 규모는 4096x4096의 대형 맵으로, 넓은 공간을 활용한 전략적 배치와 관리가 요구된다. 황무지 타일셋의 황량한 분위기와 함께, 끊임없이 몰려오는 저글링의 물량 공세는 플레이어에게 끊임없는 긴장감을 선사할 것이다. 이 맵은 디펜스 장르의 진수를 맛보게 해주는 동시에, 전략적 사고와 손속을 요하는 유즈맵으로 평가할 수 있다. StarCraft: Brood War’s custom map *"All Random Zergling Block Hard 8"* is a defense-style map where players must fend off waves of Zerglings, as the name suggests. The map is structured around a central main base, with eight randomized entrances that require constant defense. The difficulty, indicated by the "Hard" in its title, is notably high, featuring relentless early Zergling assaults that grow more frequent and intense as the game progresses. Players must strategically place defensive structures around the Command Center and deploy units to block each entrance. A key feature is the randomness—the positions of the entrances and attack patterns vary each game, forcing players to adapt their strategies dynamically. The map’s desolate wasteland tileset enhances the tense atmosphere, reinforcing the high-stakes nature of the defense. Success means surviving each wave, and victory is likely achieved after defending a set number of attacks. This map offers a thrilling challenge for defense enthusiasts, especially those who enjoy the excitement and tension of countering Zergling swarms. However, beginners may find the difficulty steep, so mastering basic defensive structures and unit management before attempting it is advisable. Planning entrance placements and efficient building layouts beforehand is crucial, and quickly recognizing Zergling attack patterns will be vital to success. Spanning a vast 4096x4096 grid, the map demands strategic placement and management of resources across its expansive terrain. The bleak wasteland aesthetic, paired with the relentless Zergling waves, keeps players on edge throughout. It’s a map that truly captures the essence of the defense genre while testing both strategic thinking and precise execution.
최근 등록된 맵
새로 추가된 파일과 버전을 확인하세요.
썬켄 10-웨이 100 드론즈 (Sunken 10-Way 100 Drones)
스타크래프트 브루드워의 유즈맵 '썬켄 10-웨이 100 드론즈(Sunken 10-Way 100 Drones)'는 한 명의 플레이어가 다수의 저글링 무리를 조종하는 컴까기(컴퓨터 상대 키우기) 장르의 디펜스 맵이다. 맵의 핵심은 중앙에 위치한 저글링 둥지에서 끊임없이 쏟아지는 적군 저글링을 방어하는 것으로, 플레이어는 둥지 주변의 방어 건물과 유닛을 배치해 공격을 막아내야 한다. 맵의 특징은 10방향으로 뻗어나가는 길목이 있으며, 각 길목마다 방어 지점을 구축할 수 있도록 구조가 설계되어 있다는 점이다. 특히 100마리의 저글링을 상대하는 만큼 방어의 중요성이 강조되며, 초반 방어 라인을 얼마나 잘 구축하느냐가 게임의 승패를 좌우할 가능성이 크다. 저글링의 물량 공세를 버티며 방어 건물을 효율적으로 배치하는 전략적 요소가 돋보이는 맵으로, 디펜스와 키우기 요소가 결합된 하이브리드형 유즈맵이라 할 수 있다. 맵의 난이도는 초반 방어 라인 구축 여부에 따라 크게 달라지며, 후반으로 갈수록 저글링의 수가 증가하므로 지속적인 관리가 필요하다. 초보자도 쉽게 접근할 수 있지만, 고수들은 방어 건물의 배치와 유닛의 효율적 사용으로 더 오랫동안 버텨내며 도전할 수 있는 구조다. 플레이 전에는 방어 건물의 위치와 각 길목의 간격을 미리 숙지하고, 저글링의 물량이 급격히 증가하는 시점을 대비하는 것이 중요하다. 맵의 분위기는 어둡고 칙칙한 색감을 바탕으로 조성되어 있으며, 저글링의 공격이 본격화되면 긴장감이 고조되는 연출이 특징적이다. 이 맵은 저글링의 물량 공세를 방어하는 재미와 전략적 배치의 묘미를 동시에 느낄 수 있어, 디펜스와 컴까기 장르를 좋아하는 플레이어들에게 strong 추천할 만한 작품이다. 특히 한 명의 플레이어가 다수의 적을 상대하는 구조는 스타크래프트의 기본 mechanics를 극대화한 형태로, 플레이어의 집중력과 전략적 사고를 요구한다. 맵의 구조상 방어 건물의 배치와 업그레이드, 그리고 자원의 관리도 중요한 포인트로 보인다. 저글링의 공격 패턴을 분석하고 방어 라인을 최적화하는 것이 관건이며, 이를 위해선 반복 플레이를 통한 경험 accumulation이 필수적이다. 맵의 디자인과 진행 방식은 단순해 보이지만, 실제 플레이에서는 많은 변수가 존재하므로 초보자와 고수 간의 실력 차이가 뚜렷이 드러난다. 이 맵을 즐기기 위해서는 저글링의 물량 공세를 버틸 수 있는 인내심과 전략적 사고가 필요하며, 이를 통해 플레이어는 자신만의 방어 전략을 개발할 수 있을 것이다. 맵의 몰입도는 상당히 높은 편으로, 초반의 긴장감에서 후반의 승부처까지 일관되게 흥미로운 경험을 제공한다. 특히 방어 건물 간의 시너지 효과를 고려한 배치나, 자원의 효율적 사용법 등은 플레이어의 창의성을 자극하는 요소로 작용할 것이다. 이 맵은 반복 플레이를 통해 점차 숙련도를 높일 수 있는 구조로, 디펜스와 컴까기 장르를 즐기는 플레이어들에게 strong한 추천 대상이다. This StarCraft: Brood War custom map, 'Sunken 10-Way 100 Drones,' falls under the UMS (Use Map Settings) category, specifically a hybrid defense and computer opponent growth (comp-kagi) genre. The core gameplay revolves around a single player controlling a nest of zerglings, defending against relentless waves of enemy zerglings emerging from 10 distinct paths. The map's design features a central nest with ten branching pathways, each requiring strategic placement of defensive structures to withstand the onslaught. The challenge lies in managing 100 zerglings simultaneously, where early defensive setups and efficient building placement are crucial for survival. The map's difficulty scales with the increasing zergling waves, demanding constant attention and resource management. While accessible to beginners, advanced players can optimize their strategies by fine-tuning building placements and upgrades to prolong the game. The dark and gritty aesthetic enhances the tension, especially during intense zergling waves. The gameplay emphasizes strategic depth, requiring players to analyze zergling attack patterns, optimize defense lines, and manage resources effectively. The repetitive yet engaging nature of the map encourages skill development, making it ideal for players who enjoy defense and comp-kagi mechanics. The hybrid structure blends defense and growth elements, offering a unique experience where players can experiment with creative defensive strategies. The map's replayability is high, as players refine their approaches through repeated plays, uncovering new tactics and synergies between defensive buildings. For fans of StarCraft's core mechanics and those seeking a challenging yet rewarding custom map experience, 'Sunken 10-Way 100 Drones' provides an immersive and strategically rich challenge.
랜덤 저글링 막기 HARD 8 (Ling Def 8)
스타크래프트 브루드워의 유즈맵 'All랜덤저글링막기Hard8'은 이름 그대로 저글링을 상대로 방어전을 펼치는 디펜스 장르의 유즈맵이다. 맵의 전체적인 구조는 중앙의 본진 지역을 중심으로 사방으로 펼쳐진 길목을 방어하는 형태로 구성되어 있으며, 특히 8개의 랜덤한 입구에서 끊임없이 몰려오는 저글링 무리를 상대해야 한다. 맵의 이름에 'Hard'가 포함된 만큼 난이도가 상당히 높은 편으로, 초반부터 강력한 저글링 웨이브가 지속적으로 공격해오며 후반으로 갈수록 그 빈도와 수가 증가하는 구조를 보인다. 플레이어는 본진의 커맨드 센터를 중심으로 방어 건물을 배치하고, 유닛을 생산하여 입구를 틀어막아야 한다. 맵의 특징 중 하나는 '랜덤'이라는 요소로, 입구의 위치와 공격 패턴이 매번 달라지기 때문에 매 판마다 전략을 유동적으로 바꿔야 한다는 점이다. 또한, 맵의 배경은 황무지 타일셋을 사용해 황량한 분위기를 연출하며, 이는 맵의 긴장감을 한층 더 높이는 요소로 작용한다. 방어에 성공하면 다음 웨이브가 시작되고, 일정 횟수의 공격을 방어해내면 승리하는 것으로 추정된다. 이 맵은 디펜스 장르를 좋아하는 플레이어들에게는 흥미로운 도전 과제가 될 것이며, 특히 저글링의 물량 공세를 방어하는 재미와 긴장감을 즐기고자 하는 유저들에게 추천할 만하다. 다만, 초보자에게는 난이도가 다소 높을 수 있으니, 기본적인 방어 건물 배치와 유닛 관리 능력을 키운 후 도전하는 것이 좋다. 맵 플레이 전에는 입구 배치와 방어 건물의 효율적인 배치를 미리 계획해두는 것이 중요하다. 또한, 저글링의 공격 패턴을 빠르게 파악하고 대응하는 능력이 승리의 열쇠가 될 것이다. 맵의 전체적인 규모는 4096x4096의 대형 맵으로, 넓은 공간을 활용한 전략적 배치와 관리가 요구된다. 황무지 타일셋의 황량한 분위기와 함께, 끊임없이 몰려오는 저글링의 물량 공세는 플레이어에게 끊임없는 긴장감을 선사할 것이다. 이 맵은 디펜스 장르의 진수를 맛보게 해주는 동시에, 전략적 사고와 손속을 요하는 유즈맵으로 평가할 수 있다. StarCraft: Brood War’s custom map *"All Random Zergling Block Hard 8"* is a defense-style map where players must fend off waves of Zerglings, as the name suggests. The map is structured around a central main base, with eight randomized entrances that require constant defense. The difficulty, indicated by the "Hard" in its title, is notably high, featuring relentless early Zergling assaults that grow more frequent and intense as the game progresses. Players must strategically place defensive structures around the Command Center and deploy units to block each entrance. A key feature is the randomness—the positions of the entrances and attack patterns vary each game, forcing players to adapt their strategies dynamically. The map’s desolate wasteland tileset enhances the tense atmosphere, reinforcing the high-stakes nature of the defense. Success means surviving each wave, and victory is likely achieved after defending a set number of attacks. This map offers a thrilling challenge for defense enthusiasts, especially those who enjoy the excitement and tension of countering Zergling swarms. However, beginners may find the difficulty steep, so mastering basic defensive structures and unit management before attempting it is advisable. Planning entrance placements and efficient building layouts beforehand is crucial, and quickly recognizing Zergling attack patterns will be vital to success. Spanning a vast 4096x4096 grid, the map demands strategic placement and management of resources across its expansive terrain. The bleak wasteland aesthetic, paired with the relentless Zergling waves, keeps players on edge throughout. It’s a map that truly captures the essence of the defense genre while testing both strategic thinking and precise execution.
인펙션! (Infection!)
《인펙션!》은 스타크래프트 브루드워의 대표적인 유즈맵 중 하나로, 8명의 플레이어가 한 팀을 이루어 적을 섬멸하는 디펜스 장르의 맵이다. 맵의 배경은 사막으로 구성되어 있으며, 중앙에 위치한 거대한 몸체를 파괴하는 것이 주요 목표로 보인다. 플레이어는 몸체 주변에서 끊임없이 몰려드는 적 유닛을 방어해야 하며, 몸체의 체력이 낮아질수록 적의 공격력이 강화되는 방식으로 진행된다. 맵의 구조는 다소 협소한 공간이 많지만, 각 플레이어의 위치가 고정되어 있어 전략적인 배치와 협동이 중요하다. 적의 물량 공세가 치열하기 때문에 빠른 판단과 효율적인 자원 관리가 요구된다. 초보자는 적의 패턴을 익히기 어려울 수 있지만, 팀원과의 소통을 통해 점차 숙련도를 높일 수 있다. 맵의 난이도는 팀워크에 따라 크게 달라지며, 특히 몸체의 체력이 낮아지는 후반부로 갈수록 집중력이 필요하다. 플레이 전에는 맵의 구조와 적의 패턴을 미리 숙지하고, 각 플레이어의 역할 분담을 확실히 하는 것이 중요하다. 또한, 몸체의 체력과 적의 공격을 실시간으로 확인할 수 있는 UI가 있는지 여부를 확인하는 것이 좋다. 맵의 전체적인 분위기는 긴장감 넘치는 디펜스로, 팀워크와 전략이 빛을 발하는 장르이기 때문에 마치 한 편의 전쟁 영화와 같은 플레이 경험을 제공한다. 추천 대상은 디펜스 장르를 좋아하는 플레이어와 팀플레이를 즐기는 유저들이다. 맵의 난이도는 보통 수준이지만, 팀워크가 부족할 경우 어려움을 느낄 수 있다. 초보자도 꾸준한 연습을 통해 숙련도를 높일 수 있으며, 숙련된 플레이어는 보다 효율적인 전략을 구사할 수 있다. 맵의 특징으로는 몸체의 체력이 점차 감소하는 점과 적의 물량 공세가 지속적으로 이어지는 점이挙げられる。 《Infection!》 is one of the most iconic custom maps in *StarCraft: Brood War*, where eight players team up to eliminate their enemies in a defense-style game. The map is set in a desert environment, with the primary objective being to destroy a massive central structure. Players must defend this structure from waves of enemies that continuously spawn around it, and as its health decreases, the enemy's attacks grow stronger. While the map features many narrow spaces, the fixed positions of each player make strategic positioning and coordination crucial. The intense enemy waves demand quick decision-making and efficient resource management. Beginners may struggle to recognize enemy patterns, but communication with teammates can help improve proficiency over time. The difficulty varies greatly depending on teamwork, with the later stages—when the structure's health is low—requiring heightened focus. Before playing, it's important to familiarize yourself with the map layout and enemy patterns and clearly assign roles to each player. It's also wise to check if the UI provides real-time updates on the structure's health and enemy attacks. The overall atmosphere is tense and defensive, emphasizing teamwork and strategy in a way that feels like a war movie. This makes it ideal for fans of defense genres and those who enjoy team play. While the difficulty is moderate, poor teamwork can make the experience frustrating. Even beginners can improve with consistent practice, while experienced players can execute more efficient strategies. Key features include the structure's gradually decreasing health and the relentless waves of enemies.
맵 선택 가이드
태그는 맵의 핵심 특징을 빠르게 설명하지만 제작 버전마다 규칙이 다를 수 있습니다. 상세 설명에서 권장 인원, 난이도, 플레이 시간과 버전을 함께 확인한 뒤 다운로드하세요.