
몬스터 웨이브 스타크래프트 맵 모음
'몬스터 웨이브' 태그가 등록된 맵을 모았습니다. 장르 하나로 찾기 어려운 플레이 방식, 난이도와 특징을 중심으로 인기 맵과 최신 맵을 비교해 보세요.
- 등록 맵
- 8개
- 누적 다운로드
- 0
- 누적 조회
- 276
인기 맵
다운로드와 조회 반응이 높은 맵입니다.
RPG
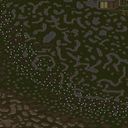
이 맵은 스타크래프트: 브루드워의 유즈맵으로, 사막 지형을 배경으로 펼쳐지는 RPG 장르의 생존형 맵이다. 7명의 플레이어가 각자의 영웅 유닛을 조종하며 광활한 맵을 탐험하고, 몬스터와 전투를 벌이며 생존을 위한 자원을 모으는 방식으로 진행된다. 맵 중앙에 위치한 거대한 구조물이 눈에 띄는데, 이곳이 presumably 핵심 목표 지점으로 추정된다. 주변에는 몬스터 웨이브가 끊임없이 생성되는 포인트가 배치되어 있어, 플레이어는 끊임없이 전투를 치르며 레벨 업과 아이템 수집을 반복해야 한다. 맵의 대부분은 사막 지형으로 이루어져 있으며, 오아시스나small 지형 변화가 일부 확인된다. 전투는 주로 근접 유닛과 원거리 유닛을 조합하여 진행되며, 몬스터의 난이도는 시간이 지날수록 점차 상승하는 것으로 보인다. 맵의 배경음악은 없거나 확인되지 않지만, 긴장감을 높이는 소리 효과가 사용되었을 가능성이 있다. 추천하는 플레이 방식은 팀을 이뤄서 협동 플레이를 하는 것이며, 각 플레이어의 역할 분배가 중요하다. 초보자는 난이도가 높을 수 있으니, 적어도 한두 명의 숙련된 플레이어가 팀에 포함되어 있어야 원활한 진행이 가능하다. 아이템과 경험치 관리가 승리의 열쇠이기 때문에, 초반 자원 확보는 최대한 빠르게 진행해야 한다. 또한, 맵의 구조상 특정 지역은 몬스터 밀집도가 높아져 있으니 주의가 필요하다. 이 맵은 RPG 장르의 특성을 살려서, 플레이어의 전략과 협동심이 중요하게 작용하는 만큼, 단순한 전투가 아닌 종합적인 판단력이 요구된다. 특히, 몬스터 웨이브가 지속적으로 발생하는 디자인 때문에 플레이어는 끊임없이 움직이며 자원을 관리해야 한다. 이러한 특징은 긴장감을 유지하게 만들며, RPG 유저들에게는 새로운 경험이 될 수 있을 것이다. 다만, 맵의 크기가 매우 크기 때문에, 이동 시간이 길어질 수 있으며, 이는 플레이어 간의 불균형을 초래할 수 있으니, 사전에 이동 속도 향상 아이템이나 스킬을 확보하는 것이 중요하다. 또한, 몬스터의 공격 패턴을 숙지하고 대처하는 것이 필수적이다. 이 맵은 초반과 후반의 밸런스가 중요하기 때문에, 레벨 업과 아이템 획득이 원활히 이루어질 수 있도록 맵 디자인이 구성되어 있다. 마지막으로, 이 맵은 생존형 RPG이기 때문에, 사망 시 페널티가 있을 가능성이 높으니, 신중한 플레이가 요구된다. This map is a user-made RPG survival game set in the *StarCraft: Brood War* universe, featuring a desert terrain. Seven players control their own hero units, exploring the vast map, battling monsters, and gathering resources to survive. A massive structure in the center of the map stands out, likely serving as the primary objective. Surrounding it are constant monster spawn points, forcing players to repeatedly fight, level up, and collect items. Most of the map is desert, with occasional oases or minor terrain variations. Combat typically involves a mix of melee and ranged units, and monster difficulty appears to increase over time. While no background music is confirmed, sound effects likely enhance the tension. Team play is recommended, with clear role distribution among players. Beginners may struggle, so having at least one or two experienced players is ideal for smooth progression. Efficient item and experience management are key to victory, so securing early resources quickly is crucial. Certain areas have high monster density, so caution is advised. Designed with RPG elements in mind, this map emphasizes strategy and teamwork over simple combat, requiring well-rounded decision-making. The continuous monster waves keep players constantly moving and managing resources, maintaining high tension—a fresh experience for RPG fans. However, the map’s vast size means long travel times, which could create imbalances between players. Preparing movement-speed boosts or skills beforehand is important. Understanding and countering monster attack patterns is also essential. Balancing early and late-game progression is critical, as the map’s design ensures smooth leveling and item acquisition. Finally, as a survival RPG, death likely carries penalties, so careful play is necessary.
글래디에이터 아레나 (Gladiator arena)
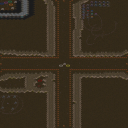
스타크래프트 브루드워 유즈맵 '글래디에이터 아레나'는 6인 협동 또는 개인 단위로 몰려오는 적 유닛을 30레벨까지 막아내는 아레나형 생존 맵이다. 황무지 타일셋 위에서 128×128 타일 크기의 원형 또는 직사각형 전장이 펼쳐지며, 중앙에 플레이어 시작 지점이 배치되고 사방에서 크리처 웨이브가 밀려오는 구조로 보인다. 내부 설명에 'Kill the Creatures that come at you. 30 Lvs'라고 명시된 것처럼, 각 레벨마다 점점 강력해지는 적 무리를 처치하며 생존하는 것이 핵심 목표다. 맵 크기가 4096×4096으로 넓은 편이지만 실제 플레이 영역은 중앙 아레나에 집중되어 있어, 기지 건설이나 자원 채취보다는 유닛 컨트롤과 스킬 활용, 팀원과의 연계가 승부를 가른다. 30단계 웨이브 구성은 초반 저글링·히드라리스크류에서 후반 울트라리스크·수호군주급 거대 유닛까지 점진적으로 난이도가 상승할 것으로 추정된다. 플레이 인원 6명 기준 솔로잉보다는 파티 플레이가 권장되며, 난이도 조절 트리거가 별도로 없다면 후반부 생존을 위해 딜러·탱커·힐러 역할 분담이 필수적일 것이다. 맵 파일명 'Gladiator Fight Arena.scm'과 내부 제목이 일치하므로 버전 표기 없이 최초 배포본일 가능성이 높다. 아레나 장르 입문자부터 웨이브 디펜스 마니아까지 부담 없이 즐길 수 있으며, 짧은 호흡으로 한 판을 마무리하고 싶을 때 적합하다. 플레이 전 동맹 설정과 난이도 투표 트리거 유무를 확인하고 시작하는 것이 좋다. Gladiator Arena is a StarCraft Brood War UMS map where up to six players survive 30 waves of incoming creatures in an arena setting. The Badlands tileset hosts a 128×128 tile battlefield, likely a circular or rectangular arena with player starts in the center and enemy spawns from all sides. As the internal description states, 'Kill the Creatures that come at you. 30 Lvs,' the core objective is to defeat progressively stronger waves, from early Zerglings and Hydralisks to late-game Ultralisks and Guardians. Although the map dimensions are 4096×4096, the playable area focuses on the central arena, emphasizing unit control, spell usage, and team coordination over base building. With six players, cooperative play is recommended; role division into damage dealers, tanks, and support becomes crucial in later waves if no difficulty voting trigger exists. The filename 'Gladiator Fight Arena.scm' matches the internal title, suggesting a first release without version numbering. This map suits both arena newcomers and wave defense fans looking for a quick session. Before starting, check ally settings and whether a difficulty vote trigger is present.
고렘 디펜스 V3 (Golem! Defense V3)
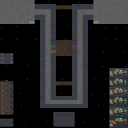
「고렘 디펜스 V3」는 스타크래프트 브루드워의 대표적인 디펜스 장르 유즈맵으로, 거대한 고렘 몬스터가 끊임없이 밀려오는 적들을 상대로 플레이어가 방어선을 구축하는 전략적 재미를 제공한다. 맵 중앙에 위치한 성채를 중심으로 6개의 플레이어가 각자 고유한 유닛과 업그레이드 시스템을 활용해 мон스터 웨이브를 막아내야 한다. 맵 구조는 입구와 통로, 고블린과 몬스터 웨이브가 오는 길목이 뚜렷하게 구분되어 있으며, 중앙 성채 주변으로 방어 건물과 자원 채취 지역이 배치되어 있다. 게임 시작 직후부터 강한 압박을 느끼게 되는 이 맵은 초반부터 적극적인 대처가 필요한데, 특히 입구막기용 유닛과 광역 공격 유닛의 조합이 필수적이다. 업그레이드 시스템이 존재하는데, 이를 통해 유닛의 체력, 공격력, 공격 속도 등을 강화할 수 있어 장기전에 대비한 전략적 깊이가 있다. 또한, 인공지능이 조종하는 몬스터는 단계별로 점점 강해지므로, 단순히 방어만으로는 버티기 어려운 구조로 설계되어 있다. 맵의 분위기는 어둡고 장대하며, 고렘 몬스터의 거대한 몸체가 맵 곳곳에 배치되어 있어 몰입감을 높인다. 특히 후반부에는 massive wave가 쏟아지므로, 플레이어 간의 협력이 중요해진다. 초보자는 업그레이드와 유닛 조합에 대한 이해가 부족할 수 있으므로, 난이도 조절을 위해 낮은 난이도 모드나 튜토리얼이 포함된 버전을 찾는 것이 좋다. 이 맵의 백미는 끊임없는 몰려오는 적을 상대로 자신의 방어선을 지키며 살아남는 성취감으로, 디펜스 유즈맵의 정수를 느낄 수 있다. 추천 대상은 디펜스 장르를 좋아하는 플레이어, 특히 전략적 사고와 팀웍을 중요시하는 유저들에게 적합하다. 또한, 팀 플레이를 선호하는 경우 2~3인 1팀으로 플레이하는 것도 재미있다. 플레이 전에는 자신의 유닛 조합과 업그레이드 우선순위를 미리 계획해두는 것이 좋다. 맵 특성상 입구 하나당 방어 건물을 집중 배치하는 것이 핵심이며, 자원 관리도 신중해야 한다. 이 맵은 디펜스 유즈맵의 고전으로, 오랜 기간 사랑받아 온 만큼 그 재미와 전략성이 입증된 작품이라 할 수 있다. 「Golem Defense V3」 is a representative defense genre custom map in *StarCraft: Brood War*, where players build defensive lines against waves of giant golem monsters. Six players must work together to protect the central fortress, each utilizing unique units and upgrade systems to withstand the relentless monster attacks. The map features clear pathways, goblin spawn points, and monster waves, with defensive structures and resource-gathering areas surrounding the central fortress. From the very start, the map exerts strong pressure, requiring immediate and strategic responses. Effective early-game unit combinations—especially for blocking entrances and dealing with area-of-effect attacks—are crucial. The upgrade system allows players to enhance unit health, attack power, and attack speed, adding depth for long-term survival. Since AI-controlled monsters grow stronger with each wave, relying solely on basic defenses won’t suffice. The map’s dark, grandiose atmosphere is heightened by the towering golem bodies scattered throughout, immersing players in the experience. Late-game waves become massive, making teamwork essential for survival. Beginners may struggle with unit combinations and upgrades, so those new to the genre should look for easier difficulty modes or versions with tutorials. The true highlight lies in the thrill of holding the line against endless waves and the satisfaction of outlasting them—a core appeal of defense custom maps. It’s especially recommended for players who enjoy strategic thinking and teamwork. For those who prefer cooperative play, teaming up with 2–3 others can make the experience even more enjoyable. Before playing, it’s wise to plan your unit composition and upgrade priorities. Since the map’s design revolves around concentrated defenses at each entrance, resource management must also be handled carefully. As a classic defense map with a proven track record of fun and strategy, *Golem Defense V3* remains a beloved title in the genre.
포켓몬 대난투 (POKEMON MASS MAP)
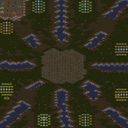
‘포켓몬 대난투’ 스타일로 즐기는 8인 디펜스 유즈맵, <포켓몬 대난투>는 스타크래프트 브루드워의 유즈맵으로, 플레이어들이 각각의 포켓몬을 조종하며 적 포켓몬 무리를 상대로 디펜스전을 펼치는 재미를 느낄 수 있는 맵이다. 맵은 넓은 초원 지형을 배경으로 하며, 중앙에 위치한 포켓몬 리젠 존에서 몬스터가 끊임없이 생성된다. 플레이어는 각자 선택한 포켓몬의 고유한 스킬을 활용해 몬스터 웨이브를 방어해야 하는데, 특히 맵의 가장자리에는 포켓몬의 시야를 가리는 나무 구조물이 일정 간격으로 배치되어 있어 전략적인 위치를 선점하는 것이 중요하다. 또한, 맵 곳곳에 흩어져 있는 회복 아이템과 버프 아이템을 활용해 체력을 유지하면서 적을 섬멸하는 것이 관건이다. 맵의 승리 조건은 주어진 시간 동안 버티는 것으로 보이며, 몬스터의 웨이브가 점점 강해지므로 초반에는 여유롭게 방어하더라도 후반으로 갈수록Resource Management와 Positioning이 핵심이다. 초보자도 쉽게 접근할 수 있지만, 후반부로 갈수록 몬스터의 공격력이 급격히 상승하므로 미묘한 컨트롤과 아이템 운용이 요구된다. 특히, 맵의 가장자리에서 벌어지는 전투는 시야 싸움으로 이어지므로, 나무 구조물을 활용한 우회 공격이나 중앙 방어선의 재배치 등이 승리의 열쇠가 될 것이다. 이 맵의 가장 큰 특징은 각 포켓몬의 개성이 살아있다는 점으로, 예를 들어 불타입 포켓몬은 불을 뿜으며 광역 공격을 펼칠 수 있고, 물타입은 주변 몬스터를 얼리는 기술로 전투를 보조할 수 있다. 따라서 플레이어는 자신의 포켓몬의 특성을 잘 이해하고, 적절한 타이밍에 스킬을 활용하는 것이 중요하다. 이 맵은 특히 포켓몬 팬들이나 디펜스 게임을 즐기는 유저들에게 강력히 추천할 만한 작품으로, 긴장감 넘치는 전투와 전략적 플레이가 어우러진佳作이다. 플레이 전에는 자신의 포켓몬의 스킬을 미리 숙지하고, 아이템의 위치를 파악하는 것이 좋다. 또한, 팀원과의 원활한 소통을 통해 중앙 방어선을 견고히 유지하는 것이 승리의 지름길이 될 것이다. Enjoy an 8-player defense custom map in the style of "Pokémon Smash Bros." with <Pokémon Smash Bros>, a StarCraft: Brood War custom map where players control individual Pokémon to defend against waves of enemy monsters. The map features a wide grassy terrain with a Pokémon respawn zone at the center where monsters continuously spawn. Players must use their Pokémon's unique skills to fend off the monster waves, and the placement of trees along the edges of the map obscures vision at intervals, making strategic positioning crucial. Scattered throughout the map are healing and buff items that help maintain health while defeating enemies. The victory condition appears to be surviving for a set duration, as the monster waves grow increasingly stronger over time, so while early defenses may feel relaxed, Resource Management and Positioning become key as the game progresses. The map is easy for beginners to pick up, but as the difficulty ramps up sharply in later stages, precise control and smart item usage become essential. Battles near the map's edges often turn into vision-based fights, so flanking maneuvers using the trees or repositioning the central defense line can be decisive. What makes this map stand out is the distinct personalities of each Pokémon—Fire-types can unleash wide-area attacks, Water-types can freeze surrounding monsters, and so on—meaning players must understand their Pokémon's traits and use their skills at the right moments. This map comes highly recommended for Pokémon fans and defense game enthusiasts alike, offering a thrilling blend of intense combat and strategic depth. Before playing, it's wise to memorize your Pokémon's skills and locate the item spots. Effective communication with teammates to solidify the central defense line is also a shortcut to victory.
디아블로 2: 파괴의 군주 Act 2 (Diablo II LoD: Act 2 V1.4)
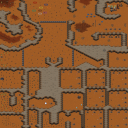
스타크래프트 브루드워의 유즈맵 《Diablo II LoD: Act 2 V1.4》는 디아블로 2: 파괴의 군주의 두 번째 Act를 모티브로 한 디펜스 장르의 유즈맵으로, 플레이어는 지옥의 군세와 맞서 싸워야 한다. 이 맵은 7인 멀티플레이를 기반으로 설계되었으며, 각 플레이어는 개별적으로 또는 팀을 이뤄 적의 공격을 방어하고 맵 곳곳에 등장하는 보스 몬스터를 물리치는 것이 주 목표로 보인다. 맵의 전체적인 분위기는 어두운 톤의 황혼 타일셋으로 연출되어 디아블로 시리즈의 분위기를 잘 살렸고, 맵 곳곳에 배치된 구조물과 지형은 전략적인 방어와 길막을 가능하게 한다. 플레이어는 시작 지점에서 출발해 맵의 주요 길목을 방어하거나, 적의 웨이브가 밀려오는 타이밍에 맞춰 병력을 배치하고 스킬을 활용해야 한다. 맵 내부에는 여러 개의 분기점이 존재하며, 이 중 일부는 숨겨진 길이나 보물 상자가 있는 곳도 있는 것으로 추정된다. 또한, 맵의 가장자리에는 방어塔가 배치되어 있으며, 이를 업그레이드하거나 재배치하는 것이 주요 전략 중 하나로 보인다. 보스 몬스터는 맵의 특정 구역에서 등장하며, 이를 물리치면 특별한 보상이 주어지는 것으로 추정된다. 이 맵은 디아블로 2의 분위기를 그대로 재현하려고 노력한 흔적이 보이며, 특히 몹의 종류와 배치, 맵 디자인에서 그 노력이 느껴진다. 또한, 7인의 플레이어가 각자의 역할을 담당할 수 있도록 맵이 설계되어 있어 협동 플레이가 중요할 것으로 보인다. 다만, 맵의 난이도나 승리 조건에 대한 정보는 제공되지 않아, 초보 플레이어의 경우 적응에 시간이 필요할 수 있다. 맵을 플레이하기 전에는 팀원 간의 역할 분배와 병력 구성을 미리 계획하는 것이 좋다. 추천 대상은 디아블로 시리즈의 팬이거나 디펜스 장르의 유즈맵을 즐기는 플레이어, 그리고 여러 명이 모여 협동 플레이를 즐기고 싶은 유저들이다. 맵의 복잡한 구조와 다양한 전략적 요소를 즐길 수 있으며, 특히 팀 플레이를 통해 시너지를 발휘할 수 있는 맵으로 보인다. 또한, 맵의 업데이트가 꾸준히 이루어지고 있는 것으로 보아, 향후 더 많은 콘텐츠가 추가될 가능성도 있다. StarCraft: Brood War’s custom map *Diablo II LoD: Act 2 V1.4* is a defense-style UMS inspired by Diablo 2: Lord of Destruction’s second act, where players battle against hordes from the Burning Hells. Designed for seven-player multiplayer, the primary objective is to defend against enemy waves and defeat boss monsters scattered across the map—either individually or as a team. The map’s overall aesthetic leans into a dark, twilight-themed tileset that perfectly captures the eerie atmosphere of the Diablo series. Strategic defense is key, as terrain and structures are placed to allow chokepoint control and tactical positioning. Players begin at a starting point, where they must man key routes, time their reinforcements to counter incoming enemy waves, and leverage abilities at critical moments. The map features multiple branching paths, some of which likely hide secret routes or treasure chests. Defensive towers line the map’s edges, and upgrading or repositioning them forms a core part of the strategy. Bosses spawn in designated zones, and defeating them appears to grant special rewards. The map clearly strives to recreate the essence of Diablo 2, from enemy variety and placement to the overall map design. With seven players each taking on distinct roles, teamwork is essential for success. However, difficulty and victory conditions aren’t specified, so newcomers may need time to adapt. Before jumping in, it’s wise to coordinate roles and army compositions with teammates. This map is ideal for fans of the Diablo series, defense-genre UMS enthusiasts, or anyone looking to enjoy cooperative multiplayer with friends. Its intricate layout and depth of strategic options make it a compelling choice, especially for those who thrive in team-based play. Given the active updates, there’s also potential for future content expansions.
![[NEW] 고양이 대 쥐: 광석 전쟁 V11 (Cat vs Mouse: Ore Wars V11) 맵 미리보기](https://cdn-star-data.huzy.net/thumbnail_a3e9e0d88afb4b829e685fdff244aed7.jpg)
[NEW] 고양이 대 쥐: 광석 전쟁 V11 (Cat vs Mouse: Ore Wars V11)
이 맵은 스타크래프트 브루드워의 유즈맵으로, ‘고양이 vs 쥐’ 컨셉의 디펜스 게임입니다. 플레이어는 쥐 무리를 조종해 광물을 채굴하고, 적대적인 고양이와 새끼 고양이, 독수리들을 처치하며 생존을 도모해야 합니다. 중앙에 위치한 광물 지대를 중심으로 맵이 구성되어 있으며, 광물을 채굴할수록 보상을 획득해 아이템을 구매하거나 전력을 강화할 수 있습니다. 적 몬스터들은 일정 주기로 스폰되어 플레이어 기지를 공격해 오며, 이를 효과적으로 방어하지 못하면 기지가 파괴되고 게임이 종료됩니다. 맵의 좌측과 우측에는 플레이어의 본진이 배치되어 있으며, 각 본진은 좁은 길로 연결되어 있어 전략적인 진형 구축이 중요합니다. 특히, 좁은 길목을 활용한 입구막기 전략이 핵심으로, 플레이어는 몬스터의 물량을 어떻게 막아내느냐에 따라 생존 여부가 결정됩니다. 아이템 시스템도 존재하는데, 맵 곳곳에 숨겨진 상자나 특정 조건을 만족하면 얻을 수 있는 아이템을 통해 전투력을 강화하거나 방어 수단을 확보할 수 있습니다. 다만, 아이템의 종류나 사용법에 대한 설명은 맵 내에서 명확히 제공되지 않기 때문에, 처음 플레이하는 유저는 방법을 익히는 데 다소 시간이 걸릴 수 있습니다. 맵의 분위기는 밝고 경쾌한 편이지만, 긴장감 있는 전투가 지속되는 만큼 집중력을 요합니다. 초보자의 경우 몬스터의 패턴을 파악하고, 본진 방어에 중점을 두는 것이 좋습니다. 반면, 숙련된 플레이어는 아이템을 적극 활용해 몬스터를 몰아내거나, 광물 채굴을 통해 경제력을 키우는 등 다양한 전략을 펼쳐볼 수 있습니다. 맵의 난이도는 몬스터의 스폰 속도와 강도에 따라 조절할 수 있도록 설계되어 있으며, 팀 플레이를 지원하지 않는 싱글 플레이 중심의 구조입니다. 전체적으로 ‘생존과Resource 관리’를 중시하는 디펜스 장르의 유즈맵으로, 끊임없는 전투와 전략적 판단이 요구되는 흥미로운 경험을 제공합니다. 광물 채굴과 몬스터 방어의 밸런스가 맵의 핵심으로, 이 두 요소를 어떻게 조율하느냐가 승부의 관건입니다. This map is a StarCraft: Brood War custom game with a "Cat vs. Mouse" defense concept. Players control a group of mice, mining minerals and fighting off hostile cats, kittens, and eagles to survive. The map centers around a mineral-rich area where players can harvest resources to purchase items or upgrade their forces. Enemies spawn periodically and attack the player's base; failing to defend effectively will result in the base being destroyed and the game ending. The player's main bases are located on the left and right sides of the map, connected by narrow paths that require strategic formation-building. Blocking enemy waves at these choke points is crucial, as survival depends on how well players manage incoming attacks. The map also features an item system, with hidden crates or special conditions granting power-ups to enhance combat or defense. However, the map does not clearly explain the types or uses of items, so new players may need time to figure them out. The overall atmosphere is bright and cheerful, but the constant, tense battles demand focus. Beginners should prioritize learning enemy patterns and defending their bases, while experienced players can experiment with item usage, economic expansion through mining, and other advanced strategies. The difficulty can be adjusted based on enemy spawn rates and strength, and the map is designed for single-player rather than team play. Overall, this is a survival and resource-management-focused defense custom map where continuous combat and strategic decisions determine victory. Balancing mineral gathering and enemy defense is key, as how players coordinate these elements decides the outcome.
골렘즈 매드니스 리포프 (Golems Madness RIPOFF)
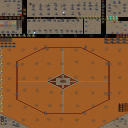
스타크래프트 브루드워 유즈맵 '골렘즈 매드니스 리포프(Golems Madness RIPOFF)'는 기존 '골렘 매드니스 스페셜 에디션'을 기반으로 워로드오브블러드2가 제작하고 노바디-엑스가 밸런스를 조정한 8인용 맵이다. 파일명에 'EDIT2'가 붙어 있어 수정판임을 알 수 있으며, 황혼 타일셋의 128x128 크기 전장에서 펼쳐진다. 원작 골렘 매드니스 시리즈 특성상 중앙 또는 특정 지역에서 지속적으로 소환되는 골렘류 유닛을 상대하며 생존하거나 처치 점수를 경쟁하는 서바이벌 형태의 진행이 예상된다. 맵 구조는 넓고 평탄한 지형 위주로 구성되어 다수의 플레이어가 동시에 교전하기 용이한 레이아웃으로 보인다. 8인 전원 개별 진영을 가지거나 팀 단위로 나뉘어 밀려오는 몬스터 웨이브를 막아내는 디펜스·서바이벌 혼합 양상일 가능성이 높다. 제작자 설명에 'Balanced BY Nobody-X-'가 명시된 점으로 보아 유닛 스탯, 웨이브 구성, 자원 수급 밸런스가 다듬어져 있어 무한 증원류 맵 특유의 지루함이나 난이도 붕괴를 완화하려 한 의도가 읽힌다. 플레이 경험 측면에서는 초반 빌드 오더와 유닛 조합 선택이 생존 시간을 가르는 핵심 변수가 된다. 골렘류는 체력과 방어력이 높아 화력 집중이 필수적이며, 중후반으로 갈수록 특수 능력 보유 보스급 유닛 등장 시 공략법 숙지 여부가 승패를 가른다. 8인 풀방 기준 30~40분 내외 플레이 타임이 예상되며, 솔로 생존 경쟁(FFA) 혹은 팀 단위 협동 모두 가능해 인원 수에 따른 전략 변화가 재미 요소다. 추천 대상은 고전 '골렘 매드니스' 시리즈를 즐겼거나 몬스터 웨이브 서바이벌 장르를 선호하는 유저다. 플레이 전 확인 포인트는 트리거상 승리 조건(최후 생존/점수/시간 제한)과 팀 설정 고정 여부, 관찰자 슬롯 유무다. 파일명 'EDIT2' 버전임을 감안해 최신 밸런스 패치본인지 호스트가 확인 후 시작하는 것이 좋다. StarCraft Brood War use map 'Golems Madness RIPOFF' is an 8-player map based on the existing 'Golem Madness Special Edition', created by WarlordofBlood2 and balanced by Nobody-X. The filename includes 'EDIT2', indicating a revised version, and it unfolds on a 128x128 Twilight tileset battlefield. True to the Golem Madness series, the expected progression is a survival format where players survive or compete for kill scores against continuously spawning Golem-type units from the center or specific regions. The map structure appears to consist of wide, flat terrain suitable for simultaneous engagement by many players. It likely features a hybrid defense/survival aspect where all 8 players have individual bases or form teams to fend off incoming monster waves. The note 'Balanced BY Nobody-X-' in the description suggests unit stats, wave composition, and resource balance have been refined, intending to mitigate the boredom or difficulty collapse typical of endless spawn maps. In terms of play experience, early build orders and unit composition choices are key variables determining survival time. Golem-types have high HP and armor, requiring focused firepower, and in the late game, knowledge of strategies against boss units with special abilities decides victory or defeat. Expected playtime is around 30-40 minutes for a full 8-player room, and both solo survival competition (FFA) and team-based cooperation are possible, making strategic shifts based on player count a fun factor. Recommended for users who enjoyed the classic 'Golem Madness' series or prefer the monster wave survival genre. Pre-play checkpoints include trigger victory conditions (last man standing/score/time limit), whether team settings are fixed, and observer slot availability. Given the filename 'EDIT2', it is advisable for the host to verify it is the latest balance patch version before starting.
루시퍼의 수면 밑 던전 (Lucifer's Sunken D)
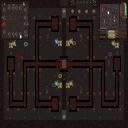
‘루시퍼의 수면 밑 던전(Lucifer's Sunken D)’은 스타크래프트 브루드워의 유즈맵으로, 6명의 플레이어가 한 팀을 이루어 수중 던전을 탐험하고 몬스터를 처치하며 보스를 상대하는 디펜스 기반의 게임입니다. 맵은 넓은 해저 지형을 배경으로 삼아, 중앙에 위치한 성채와 주변의 좁은 통로, 그리고 곳곳에 배치된 자원과 함정으로 구성되어 있습니다. 플레이어는 시작 지점에서 출발해 점차적으로 확장되는 구역을 확보하며, 몬스터 웨이브가 주기적으로 몰려오는 가운데 살아남아야 합니다. 특히, 맵의 상단과 하단에는 업그레이드 포인트가 배치되어 있어 플레이어의 유닛을 강화할 수 있으며, 16개의 생명(LIVES)으로 시작해 점차 줄어드는 체력을 관리하는 전략적 요소가 중요합니다. 맵의 분위기는 어두운 수중 세계를 연상시키며, 붉은 빛과 푸른 빛의 조명이 던전의 신비로운 분위기를 자아냅니다. 이 맵의 핵심은 ‘생존과 확장’입니다. 초반에는 자원을 확보하고 방어선을 구축하는 데 중점을 두어야 하며, 중반 이후에는 업그레이드를 통해 유닛의 мощ을 극대화하고, 후반에는 강력한 보스 몬스터를 상대해야 합니다. 또한, 맵 곳곳에 배치된 좁은 통로와 장애물은 몬스터의 진격을 늦추는 데 도움을 주지만, 반대로 플레이어의 이동을 방해할 수도 있어 신중한 길 찾기가 필요합니다. 맵의 디자인상, 플레이어 간의 협력이 필수적이며, 팀원 간의 원활한 소통 없이는 살아남기 어려운 구조입니다. 특히, 몬스터의 클로그(Clog) 현상을 방지하기 위한 대책이 맵 내에 반영되어 있어, 초보자는 물론 숙련자도 전략적 사고를 요구합니다. 추천 대상은 스타크래프트의 디펜스 장르를 즐기는 플레이어이며, 특히 팀플레이와 전략적 협동이 가능한 그룹에게 적합합니다. 맵의 난이도는 업그레이드와 몬스터의 강도에 따라 달라지므로, 초보자라면 ‘Anti-Clog’ 시스템을 잘 활용하는 방법을 익히는 것이 중요합니다. 또한, 맵의 넓이가 넓고 세부적인 길찾기가 필요한 만큼, 넓은 화면을 즐기는 플레이어나 팀원 간의 실시간 소통이 원활한 경우에 가장 큰 재미를 느낄 수 있을 것입니다. 마지막으로, 맵의 분위기와 연출이 호불호가 갈릴 수 있으니, 수중 던전의 어두운 분위기를 좋아하는 플레이어에게는 더욱 매력적으로 다가올 것입니다. 시작 전 확인해야 할 포인트는 다음과 같습니다. 첫째, 업그레이드 포인트의 위치를 숙지하고, 초반 자원 확보를 위한 최적의 루트를 파악할 것. 둘째, 좁은 통로와 장애물의 배치로 인한 이동 제한을 고려해, 몬스터의 진격 경로를 예측할 것. 셋째, 팀원 간의 역할 분담을 명확히 하고, 보스Monster를 상대할 때의 전략을 사전에 논의할 것. 이러한 준비를 바탕으로 한다면, ‘루시퍼의 수면 밑 던전’은 스타크래프트 유즈맵의 진수를 경험할 수 있는 훌륭한 선택이 될 것입니다. ‘Lucifer’s Sunken D’ is a *StarCraft: Brood War* custom map where six players team up to explore an underwater dungeon, defeat monsters, and battle bosses in a defense-based game. The map features a vast underwater terrain centered around a fortress, narrow corridors, scattered resources, and traps. Players start at a designated point, gradually securing expanding zones while surviving periodic monster waves. The top and bottom of the map include upgrade points to strengthen units, and players begin with 16 lives that gradually deplete—a key strategic element. The eerie underwater atmosphere, enhanced by red and blue lighting, adds to the dungeon’s mysterious ambiance. The core gameplay revolves around **survival and expansion**. Early on, players must focus on securing resources and building defenses, while mid-game emphasizes maximizing unit power through upgrades. Late-game requires facing powerful boss monsters. The map’s narrow corridors and obstacles slow enemy advances but can also hinder player movement, demanding careful pathfinding. Designed for teamwork, the map’s structure makes survival nearly impossible without smooth coordination among teammates. It also incorporates measures to prevent monster clogging, challenging both beginners and veterans to think strategically. This map is ideal for players who enjoy *StarCraft* defense games, especially those who thrive in team-based strategy. Difficulty varies with upgrades and monster strength, so beginners should learn to utilize the Anti-Clog system effectively. The map’s size and intricate navigation make it most enjoyable for players with wide screens or teams that communicate well in real time. Its dark, immersive underwater setting may not appeal to everyone, but fans of moody dungeon aesthetics will find it particularly compelling. Before starting, keep these key points in mind: first, memorize upgrade point locations and plan optimal early routes for resource gathering; second, account for movement restrictions from narrow corridors and obstacles to predict enemy paths; third, clearly assign team roles and strategize boss encounters in advance. With proper preparation, ‘Lucifer’s Sunken D’ offers an outstanding experience of *StarCraft* custom map gameplay at its finest.
최근 등록된 맵
새로 추가된 파일과 버전을 확인하세요.
RPG
이 맵은 스타크래프트: 브루드워의 유즈맵으로, 사막 지형을 배경으로 펼쳐지는 RPG 장르의 생존형 맵이다. 7명의 플레이어가 각자의 영웅 유닛을 조종하며 광활한 맵을 탐험하고, 몬스터와 전투를 벌이며 생존을 위한 자원을 모으는 방식으로 진행된다. 맵 중앙에 위치한 거대한 구조물이 눈에 띄는데, 이곳이 presumably 핵심 목표 지점으로 추정된다. 주변에는 몬스터 웨이브가 끊임없이 생성되는 포인트가 배치되어 있어, 플레이어는 끊임없이 전투를 치르며 레벨 업과 아이템 수집을 반복해야 한다. 맵의 대부분은 사막 지형으로 이루어져 있으며, 오아시스나small 지형 변화가 일부 확인된다. 전투는 주로 근접 유닛과 원거리 유닛을 조합하여 진행되며, 몬스터의 난이도는 시간이 지날수록 점차 상승하는 것으로 보인다. 맵의 배경음악은 없거나 확인되지 않지만, 긴장감을 높이는 소리 효과가 사용되었을 가능성이 있다. 추천하는 플레이 방식은 팀을 이뤄서 협동 플레이를 하는 것이며, 각 플레이어의 역할 분배가 중요하다. 초보자는 난이도가 높을 수 있으니, 적어도 한두 명의 숙련된 플레이어가 팀에 포함되어 있어야 원활한 진행이 가능하다. 아이템과 경험치 관리가 승리의 열쇠이기 때문에, 초반 자원 확보는 최대한 빠르게 진행해야 한다. 또한, 맵의 구조상 특정 지역은 몬스터 밀집도가 높아져 있으니 주의가 필요하다. 이 맵은 RPG 장르의 특성을 살려서, 플레이어의 전략과 협동심이 중요하게 작용하는 만큼, 단순한 전투가 아닌 종합적인 판단력이 요구된다. 특히, 몬스터 웨이브가 지속적으로 발생하는 디자인 때문에 플레이어는 끊임없이 움직이며 자원을 관리해야 한다. 이러한 특징은 긴장감을 유지하게 만들며, RPG 유저들에게는 새로운 경험이 될 수 있을 것이다. 다만, 맵의 크기가 매우 크기 때문에, 이동 시간이 길어질 수 있으며, 이는 플레이어 간의 불균형을 초래할 수 있으니, 사전에 이동 속도 향상 아이템이나 스킬을 확보하는 것이 중요하다. 또한, 몬스터의 공격 패턴을 숙지하고 대처하는 것이 필수적이다. 이 맵은 초반과 후반의 밸런스가 중요하기 때문에, 레벨 업과 아이템 획득이 원활히 이루어질 수 있도록 맵 디자인이 구성되어 있다. 마지막으로, 이 맵은 생존형 RPG이기 때문에, 사망 시 페널티가 있을 가능성이 높으니, 신중한 플레이가 요구된다. This map is a user-made RPG survival game set in the *StarCraft: Brood War* universe, featuring a desert terrain. Seven players control their own hero units, exploring the vast map, battling monsters, and gathering resources to survive. A massive structure in the center of the map stands out, likely serving as the primary objective. Surrounding it are constant monster spawn points, forcing players to repeatedly fight, level up, and collect items. Most of the map is desert, with occasional oases or minor terrain variations. Combat typically involves a mix of melee and ranged units, and monster difficulty appears to increase over time. While no background music is confirmed, sound effects likely enhance the tension. Team play is recommended, with clear role distribution among players. Beginners may struggle, so having at least one or two experienced players is ideal for smooth progression. Efficient item and experience management are key to victory, so securing early resources quickly is crucial. Certain areas have high monster density, so caution is advised. Designed with RPG elements in mind, this map emphasizes strategy and teamwork over simple combat, requiring well-rounded decision-making. The continuous monster waves keep players constantly moving and managing resources, maintaining high tension—a fresh experience for RPG fans. However, the map’s vast size means long travel times, which could create imbalances between players. Preparing movement-speed boosts or skills beforehand is important. Understanding and countering monster attack patterns is also essential. Balancing early and late-game progression is critical, as the map’s design ensures smooth leveling and item acquisition. Finally, as a survival RPG, death likely carries penalties, so careful play is necessary.
포켓몬 대난투 (POKEMON MASS MAP)
‘포켓몬 대난투’ 스타일로 즐기는 8인 디펜스 유즈맵, <포켓몬 대난투>는 스타크래프트 브루드워의 유즈맵으로, 플레이어들이 각각의 포켓몬을 조종하며 적 포켓몬 무리를 상대로 디펜스전을 펼치는 재미를 느낄 수 있는 맵이다. 맵은 넓은 초원 지형을 배경으로 하며, 중앙에 위치한 포켓몬 리젠 존에서 몬스터가 끊임없이 생성된다. 플레이어는 각자 선택한 포켓몬의 고유한 스킬을 활용해 몬스터 웨이브를 방어해야 하는데, 특히 맵의 가장자리에는 포켓몬의 시야를 가리는 나무 구조물이 일정 간격으로 배치되어 있어 전략적인 위치를 선점하는 것이 중요하다. 또한, 맵 곳곳에 흩어져 있는 회복 아이템과 버프 아이템을 활용해 체력을 유지하면서 적을 섬멸하는 것이 관건이다. 맵의 승리 조건은 주어진 시간 동안 버티는 것으로 보이며, 몬스터의 웨이브가 점점 강해지므로 초반에는 여유롭게 방어하더라도 후반으로 갈수록Resource Management와 Positioning이 핵심이다. 초보자도 쉽게 접근할 수 있지만, 후반부로 갈수록 몬스터의 공격력이 급격히 상승하므로 미묘한 컨트롤과 아이템 운용이 요구된다. 특히, 맵의 가장자리에서 벌어지는 전투는 시야 싸움으로 이어지므로, 나무 구조물을 활용한 우회 공격이나 중앙 방어선의 재배치 등이 승리의 열쇠가 될 것이다. 이 맵의 가장 큰 특징은 각 포켓몬의 개성이 살아있다는 점으로, 예를 들어 불타입 포켓몬은 불을 뿜으며 광역 공격을 펼칠 수 있고, 물타입은 주변 몬스터를 얼리는 기술로 전투를 보조할 수 있다. 따라서 플레이어는 자신의 포켓몬의 특성을 잘 이해하고, 적절한 타이밍에 스킬을 활용하는 것이 중요하다. 이 맵은 특히 포켓몬 팬들이나 디펜스 게임을 즐기는 유저들에게 강력히 추천할 만한 작품으로, 긴장감 넘치는 전투와 전략적 플레이가 어우러진佳作이다. 플레이 전에는 자신의 포켓몬의 스킬을 미리 숙지하고, 아이템의 위치를 파악하는 것이 좋다. 또한, 팀원과의 원활한 소통을 통해 중앙 방어선을 견고히 유지하는 것이 승리의 지름길이 될 것이다. Enjoy an 8-player defense custom map in the style of "Pokémon Smash Bros." with <Pokémon Smash Bros>, a StarCraft: Brood War custom map where players control individual Pokémon to defend against waves of enemy monsters. The map features a wide grassy terrain with a Pokémon respawn zone at the center where monsters continuously spawn. Players must use their Pokémon's unique skills to fend off the monster waves, and the placement of trees along the edges of the map obscures vision at intervals, making strategic positioning crucial. Scattered throughout the map are healing and buff items that help maintain health while defeating enemies. The victory condition appears to be surviving for a set duration, as the monster waves grow increasingly stronger over time, so while early defenses may feel relaxed, Resource Management and Positioning become key as the game progresses. The map is easy for beginners to pick up, but as the difficulty ramps up sharply in later stages, precise control and smart item usage become essential. Battles near the map's edges often turn into vision-based fights, so flanking maneuvers using the trees or repositioning the central defense line can be decisive. What makes this map stand out is the distinct personalities of each Pokémon—Fire-types can unleash wide-area attacks, Water-types can freeze surrounding monsters, and so on—meaning players must understand their Pokémon's traits and use their skills at the right moments. This map comes highly recommended for Pokémon fans and defense game enthusiasts alike, offering a thrilling blend of intense combat and strategic depth. Before playing, it's wise to memorize your Pokémon's skills and locate the item spots. Effective communication with teammates to solidify the central defense line is also a shortcut to victory.
루시퍼의 수면 밑 던전 (Lucifer's Sunken D)
‘루시퍼의 수면 밑 던전(Lucifer's Sunken D)’은 스타크래프트 브루드워의 유즈맵으로, 6명의 플레이어가 한 팀을 이루어 수중 던전을 탐험하고 몬스터를 처치하며 보스를 상대하는 디펜스 기반의 게임입니다. 맵은 넓은 해저 지형을 배경으로 삼아, 중앙에 위치한 성채와 주변의 좁은 통로, 그리고 곳곳에 배치된 자원과 함정으로 구성되어 있습니다. 플레이어는 시작 지점에서 출발해 점차적으로 확장되는 구역을 확보하며, 몬스터 웨이브가 주기적으로 몰려오는 가운데 살아남아야 합니다. 특히, 맵의 상단과 하단에는 업그레이드 포인트가 배치되어 있어 플레이어의 유닛을 강화할 수 있으며, 16개의 생명(LIVES)으로 시작해 점차 줄어드는 체력을 관리하는 전략적 요소가 중요합니다. 맵의 분위기는 어두운 수중 세계를 연상시키며, 붉은 빛과 푸른 빛의 조명이 던전의 신비로운 분위기를 자아냅니다. 이 맵의 핵심은 ‘생존과 확장’입니다. 초반에는 자원을 확보하고 방어선을 구축하는 데 중점을 두어야 하며, 중반 이후에는 업그레이드를 통해 유닛의 мощ을 극대화하고, 후반에는 강력한 보스 몬스터를 상대해야 합니다. 또한, 맵 곳곳에 배치된 좁은 통로와 장애물은 몬스터의 진격을 늦추는 데 도움을 주지만, 반대로 플레이어의 이동을 방해할 수도 있어 신중한 길 찾기가 필요합니다. 맵의 디자인상, 플레이어 간의 협력이 필수적이며, 팀원 간의 원활한 소통 없이는 살아남기 어려운 구조입니다. 특히, 몬스터의 클로그(Clog) 현상을 방지하기 위한 대책이 맵 내에 반영되어 있어, 초보자는 물론 숙련자도 전략적 사고를 요구합니다. 추천 대상은 스타크래프트의 디펜스 장르를 즐기는 플레이어이며, 특히 팀플레이와 전략적 협동이 가능한 그룹에게 적합합니다. 맵의 난이도는 업그레이드와 몬스터의 강도에 따라 달라지므로, 초보자라면 ‘Anti-Clog’ 시스템을 잘 활용하는 방법을 익히는 것이 중요합니다. 또한, 맵의 넓이가 넓고 세부적인 길찾기가 필요한 만큼, 넓은 화면을 즐기는 플레이어나 팀원 간의 실시간 소통이 원활한 경우에 가장 큰 재미를 느낄 수 있을 것입니다. 마지막으로, 맵의 분위기와 연출이 호불호가 갈릴 수 있으니, 수중 던전의 어두운 분위기를 좋아하는 플레이어에게는 더욱 매력적으로 다가올 것입니다. 시작 전 확인해야 할 포인트는 다음과 같습니다. 첫째, 업그레이드 포인트의 위치를 숙지하고, 초반 자원 확보를 위한 최적의 루트를 파악할 것. 둘째, 좁은 통로와 장애물의 배치로 인한 이동 제한을 고려해, 몬스터의 진격 경로를 예측할 것. 셋째, 팀원 간의 역할 분담을 명확히 하고, 보스Monster를 상대할 때의 전략을 사전에 논의할 것. 이러한 준비를 바탕으로 한다면, ‘루시퍼의 수면 밑 던전’은 스타크래프트 유즈맵의 진수를 경험할 수 있는 훌륭한 선택이 될 것입니다. ‘Lucifer’s Sunken D’ is a *StarCraft: Brood War* custom map where six players team up to explore an underwater dungeon, defeat monsters, and battle bosses in a defense-based game. The map features a vast underwater terrain centered around a fortress, narrow corridors, scattered resources, and traps. Players start at a designated point, gradually securing expanding zones while surviving periodic monster waves. The top and bottom of the map include upgrade points to strengthen units, and players begin with 16 lives that gradually deplete—a key strategic element. The eerie underwater atmosphere, enhanced by red and blue lighting, adds to the dungeon’s mysterious ambiance. The core gameplay revolves around **survival and expansion**. Early on, players must focus on securing resources and building defenses, while mid-game emphasizes maximizing unit power through upgrades. Late-game requires facing powerful boss monsters. The map’s narrow corridors and obstacles slow enemy advances but can also hinder player movement, demanding careful pathfinding. Designed for teamwork, the map’s structure makes survival nearly impossible without smooth coordination among teammates. It also incorporates measures to prevent monster clogging, challenging both beginners and veterans to think strategically. This map is ideal for players who enjoy *StarCraft* defense games, especially those who thrive in team-based strategy. Difficulty varies with upgrades and monster strength, so beginners should learn to utilize the Anti-Clog system effectively. The map’s size and intricate navigation make it most enjoyable for players with wide screens or teams that communicate well in real time. Its dark, immersive underwater setting may not appeal to everyone, but fans of moody dungeon aesthetics will find it particularly compelling. Before starting, keep these key points in mind: first, memorize upgrade point locations and plan optimal early routes for resource gathering; second, account for movement restrictions from narrow corridors and obstacles to predict enemy paths; third, clearly assign team roles and strategize boss encounters in advance. With proper preparation, ‘Lucifer’s Sunken D’ offers an outstanding experience of *StarCraft* custom map gameplay at its finest.
골렘즈 매드니스 리포프 (Golems Madness RIPOFF)
스타크래프트 브루드워 유즈맵 '골렘즈 매드니스 리포프(Golems Madness RIPOFF)'는 기존 '골렘 매드니스 스페셜 에디션'을 기반으로 워로드오브블러드2가 제작하고 노바디-엑스가 밸런스를 조정한 8인용 맵이다. 파일명에 'EDIT2'가 붙어 있어 수정판임을 알 수 있으며, 황혼 타일셋의 128x128 크기 전장에서 펼쳐진다. 원작 골렘 매드니스 시리즈 특성상 중앙 또는 특정 지역에서 지속적으로 소환되는 골렘류 유닛을 상대하며 생존하거나 처치 점수를 경쟁하는 서바이벌 형태의 진행이 예상된다. 맵 구조는 넓고 평탄한 지형 위주로 구성되어 다수의 플레이어가 동시에 교전하기 용이한 레이아웃으로 보인다. 8인 전원 개별 진영을 가지거나 팀 단위로 나뉘어 밀려오는 몬스터 웨이브를 막아내는 디펜스·서바이벌 혼합 양상일 가능성이 높다. 제작자 설명에 'Balanced BY Nobody-X-'가 명시된 점으로 보아 유닛 스탯, 웨이브 구성, 자원 수급 밸런스가 다듬어져 있어 무한 증원류 맵 특유의 지루함이나 난이도 붕괴를 완화하려 한 의도가 읽힌다. 플레이 경험 측면에서는 초반 빌드 오더와 유닛 조합 선택이 생존 시간을 가르는 핵심 변수가 된다. 골렘류는 체력과 방어력이 높아 화력 집중이 필수적이며, 중후반으로 갈수록 특수 능력 보유 보스급 유닛 등장 시 공략법 숙지 여부가 승패를 가른다. 8인 풀방 기준 30~40분 내외 플레이 타임이 예상되며, 솔로 생존 경쟁(FFA) 혹은 팀 단위 협동 모두 가능해 인원 수에 따른 전략 변화가 재미 요소다. 추천 대상은 고전 '골렘 매드니스' 시리즈를 즐겼거나 몬스터 웨이브 서바이벌 장르를 선호하는 유저다. 플레이 전 확인 포인트는 트리거상 승리 조건(최후 생존/점수/시간 제한)과 팀 설정 고정 여부, 관찰자 슬롯 유무다. 파일명 'EDIT2' 버전임을 감안해 최신 밸런스 패치본인지 호스트가 확인 후 시작하는 것이 좋다. StarCraft Brood War use map 'Golems Madness RIPOFF' is an 8-player map based on the existing 'Golem Madness Special Edition', created by WarlordofBlood2 and balanced by Nobody-X. The filename includes 'EDIT2', indicating a revised version, and it unfolds on a 128x128 Twilight tileset battlefield. True to the Golem Madness series, the expected progression is a survival format where players survive or compete for kill scores against continuously spawning Golem-type units from the center or specific regions. The map structure appears to consist of wide, flat terrain suitable for simultaneous engagement by many players. It likely features a hybrid defense/survival aspect where all 8 players have individual bases or form teams to fend off incoming monster waves. The note 'Balanced BY Nobody-X-' in the description suggests unit stats, wave composition, and resource balance have been refined, intending to mitigate the boredom or difficulty collapse typical of endless spawn maps. In terms of play experience, early build orders and unit composition choices are key variables determining survival time. Golem-types have high HP and armor, requiring focused firepower, and in the late game, knowledge of strategies against boss units with special abilities decides victory or defeat. Expected playtime is around 30-40 minutes for a full 8-player room, and both solo survival competition (FFA) and team-based cooperation are possible, making strategic shifts based on player count a fun factor. Recommended for users who enjoyed the classic 'Golem Madness' series or prefer the monster wave survival genre. Pre-play checkpoints include trigger victory conditions (last man standing/score/time limit), whether team settings are fixed, and observer slot availability. Given the filename 'EDIT2', it is advisable for the host to verify it is the latest balance patch version before starting.
고렘 디펜스 V3 (Golem! Defense V3)
「고렘 디펜스 V3」는 스타크래프트 브루드워의 대표적인 디펜스 장르 유즈맵으로, 거대한 고렘 몬스터가 끊임없이 밀려오는 적들을 상대로 플레이어가 방어선을 구축하는 전략적 재미를 제공한다. 맵 중앙에 위치한 성채를 중심으로 6개의 플레이어가 각자 고유한 유닛과 업그레이드 시스템을 활용해 мон스터 웨이브를 막아내야 한다. 맵 구조는 입구와 통로, 고블린과 몬스터 웨이브가 오는 길목이 뚜렷하게 구분되어 있으며, 중앙 성채 주변으로 방어 건물과 자원 채취 지역이 배치되어 있다. 게임 시작 직후부터 강한 압박을 느끼게 되는 이 맵은 초반부터 적극적인 대처가 필요한데, 특히 입구막기용 유닛과 광역 공격 유닛의 조합이 필수적이다. 업그레이드 시스템이 존재하는데, 이를 통해 유닛의 체력, 공격력, 공격 속도 등을 강화할 수 있어 장기전에 대비한 전략적 깊이가 있다. 또한, 인공지능이 조종하는 몬스터는 단계별로 점점 강해지므로, 단순히 방어만으로는 버티기 어려운 구조로 설계되어 있다. 맵의 분위기는 어둡고 장대하며, 고렘 몬스터의 거대한 몸체가 맵 곳곳에 배치되어 있어 몰입감을 높인다. 특히 후반부에는 massive wave가 쏟아지므로, 플레이어 간의 협력이 중요해진다. 초보자는 업그레이드와 유닛 조합에 대한 이해가 부족할 수 있으므로, 난이도 조절을 위해 낮은 난이도 모드나 튜토리얼이 포함된 버전을 찾는 것이 좋다. 이 맵의 백미는 끊임없는 몰려오는 적을 상대로 자신의 방어선을 지키며 살아남는 성취감으로, 디펜스 유즈맵의 정수를 느낄 수 있다. 추천 대상은 디펜스 장르를 좋아하는 플레이어, 특히 전략적 사고와 팀웍을 중요시하는 유저들에게 적합하다. 또한, 팀 플레이를 선호하는 경우 2~3인 1팀으로 플레이하는 것도 재미있다. 플레이 전에는 자신의 유닛 조합과 업그레이드 우선순위를 미리 계획해두는 것이 좋다. 맵 특성상 입구 하나당 방어 건물을 집중 배치하는 것이 핵심이며, 자원 관리도 신중해야 한다. 이 맵은 디펜스 유즈맵의 고전으로, 오랜 기간 사랑받아 온 만큼 그 재미와 전략성이 입증된 작품이라 할 수 있다. 「Golem Defense V3」 is a representative defense genre custom map in *StarCraft: Brood War*, where players build defensive lines against waves of giant golem monsters. Six players must work together to protect the central fortress, each utilizing unique units and upgrade systems to withstand the relentless monster attacks. The map features clear pathways, goblin spawn points, and monster waves, with defensive structures and resource-gathering areas surrounding the central fortress. From the very start, the map exerts strong pressure, requiring immediate and strategic responses. Effective early-game unit combinations—especially for blocking entrances and dealing with area-of-effect attacks—are crucial. The upgrade system allows players to enhance unit health, attack power, and attack speed, adding depth for long-term survival. Since AI-controlled monsters grow stronger with each wave, relying solely on basic defenses won’t suffice. The map’s dark, grandiose atmosphere is heightened by the towering golem bodies scattered throughout, immersing players in the experience. Late-game waves become massive, making teamwork essential for survival. Beginners may struggle with unit combinations and upgrades, so those new to the genre should look for easier difficulty modes or versions with tutorials. The true highlight lies in the thrill of holding the line against endless waves and the satisfaction of outlasting them—a core appeal of defense custom maps. It’s especially recommended for players who enjoy strategic thinking and teamwork. For those who prefer cooperative play, teaming up with 2–3 others can make the experience even more enjoyable. Before playing, it’s wise to plan your unit composition and upgrade priorities. Since the map’s design revolves around concentrated defenses at each entrance, resource management must also be handled carefully. As a classic defense map with a proven track record of fun and strategy, *Golem Defense V3* remains a beloved title in the genre.
글래디에이터 아레나 (Gladiator arena)
스타크래프트 브루드워 유즈맵 '글래디에이터 아레나'는 6인 협동 또는 개인 단위로 몰려오는 적 유닛을 30레벨까지 막아내는 아레나형 생존 맵이다. 황무지 타일셋 위에서 128×128 타일 크기의 원형 또는 직사각형 전장이 펼쳐지며, 중앙에 플레이어 시작 지점이 배치되고 사방에서 크리처 웨이브가 밀려오는 구조로 보인다. 내부 설명에 'Kill the Creatures that come at you. 30 Lvs'라고 명시된 것처럼, 각 레벨마다 점점 강력해지는 적 무리를 처치하며 생존하는 것이 핵심 목표다. 맵 크기가 4096×4096으로 넓은 편이지만 실제 플레이 영역은 중앙 아레나에 집중되어 있어, 기지 건설이나 자원 채취보다는 유닛 컨트롤과 스킬 활용, 팀원과의 연계가 승부를 가른다. 30단계 웨이브 구성은 초반 저글링·히드라리스크류에서 후반 울트라리스크·수호군주급 거대 유닛까지 점진적으로 난이도가 상승할 것으로 추정된다. 플레이 인원 6명 기준 솔로잉보다는 파티 플레이가 권장되며, 난이도 조절 트리거가 별도로 없다면 후반부 생존을 위해 딜러·탱커·힐러 역할 분담이 필수적일 것이다. 맵 파일명 'Gladiator Fight Arena.scm'과 내부 제목이 일치하므로 버전 표기 없이 최초 배포본일 가능성이 높다. 아레나 장르 입문자부터 웨이브 디펜스 마니아까지 부담 없이 즐길 수 있으며, 짧은 호흡으로 한 판을 마무리하고 싶을 때 적합하다. 플레이 전 동맹 설정과 난이도 투표 트리거 유무를 확인하고 시작하는 것이 좋다. Gladiator Arena is a StarCraft Brood War UMS map where up to six players survive 30 waves of incoming creatures in an arena setting. The Badlands tileset hosts a 128×128 tile battlefield, likely a circular or rectangular arena with player starts in the center and enemy spawns from all sides. As the internal description states, 'Kill the Creatures that come at you. 30 Lvs,' the core objective is to defeat progressively stronger waves, from early Zerglings and Hydralisks to late-game Ultralisks and Guardians. Although the map dimensions are 4096×4096, the playable area focuses on the central arena, emphasizing unit control, spell usage, and team coordination over base building. With six players, cooperative play is recommended; role division into damage dealers, tanks, and support becomes crucial in later waves if no difficulty voting trigger exists. The filename 'Gladiator Fight Arena.scm' matches the internal title, suggesting a first release without version numbering. This map suits both arena newcomers and wave defense fans looking for a quick session. Before starting, check ally settings and whether a difficulty vote trigger is present.
디아블로 2: 파괴의 군주 Act 2 (Diablo II LoD: Act 2 V1.4)
스타크래프트 브루드워의 유즈맵 《Diablo II LoD: Act 2 V1.4》는 디아블로 2: 파괴의 군주의 두 번째 Act를 모티브로 한 디펜스 장르의 유즈맵으로, 플레이어는 지옥의 군세와 맞서 싸워야 한다. 이 맵은 7인 멀티플레이를 기반으로 설계되었으며, 각 플레이어는 개별적으로 또는 팀을 이뤄 적의 공격을 방어하고 맵 곳곳에 등장하는 보스 몬스터를 물리치는 것이 주 목표로 보인다. 맵의 전체적인 분위기는 어두운 톤의 황혼 타일셋으로 연출되어 디아블로 시리즈의 분위기를 잘 살렸고, 맵 곳곳에 배치된 구조물과 지형은 전략적인 방어와 길막을 가능하게 한다. 플레이어는 시작 지점에서 출발해 맵의 주요 길목을 방어하거나, 적의 웨이브가 밀려오는 타이밍에 맞춰 병력을 배치하고 스킬을 활용해야 한다. 맵 내부에는 여러 개의 분기점이 존재하며, 이 중 일부는 숨겨진 길이나 보물 상자가 있는 곳도 있는 것으로 추정된다. 또한, 맵의 가장자리에는 방어塔가 배치되어 있으며, 이를 업그레이드하거나 재배치하는 것이 주요 전략 중 하나로 보인다. 보스 몬스터는 맵의 특정 구역에서 등장하며, 이를 물리치면 특별한 보상이 주어지는 것으로 추정된다. 이 맵은 디아블로 2의 분위기를 그대로 재현하려고 노력한 흔적이 보이며, 특히 몹의 종류와 배치, 맵 디자인에서 그 노력이 느껴진다. 또한, 7인의 플레이어가 각자의 역할을 담당할 수 있도록 맵이 설계되어 있어 협동 플레이가 중요할 것으로 보인다. 다만, 맵의 난이도나 승리 조건에 대한 정보는 제공되지 않아, 초보 플레이어의 경우 적응에 시간이 필요할 수 있다. 맵을 플레이하기 전에는 팀원 간의 역할 분배와 병력 구성을 미리 계획하는 것이 좋다. 추천 대상은 디아블로 시리즈의 팬이거나 디펜스 장르의 유즈맵을 즐기는 플레이어, 그리고 여러 명이 모여 협동 플레이를 즐기고 싶은 유저들이다. 맵의 복잡한 구조와 다양한 전략적 요소를 즐길 수 있으며, 특히 팀 플레이를 통해 시너지를 발휘할 수 있는 맵으로 보인다. 또한, 맵의 업데이트가 꾸준히 이루어지고 있는 것으로 보아, 향후 더 많은 콘텐츠가 추가될 가능성도 있다. StarCraft: Brood War’s custom map *Diablo II LoD: Act 2 V1.4* is a defense-style UMS inspired by Diablo 2: Lord of Destruction’s second act, where players battle against hordes from the Burning Hells. Designed for seven-player multiplayer, the primary objective is to defend against enemy waves and defeat boss monsters scattered across the map—either individually or as a team. The map’s overall aesthetic leans into a dark, twilight-themed tileset that perfectly captures the eerie atmosphere of the Diablo series. Strategic defense is key, as terrain and structures are placed to allow chokepoint control and tactical positioning. Players begin at a starting point, where they must man key routes, time their reinforcements to counter incoming enemy waves, and leverage abilities at critical moments. The map features multiple branching paths, some of which likely hide secret routes or treasure chests. Defensive towers line the map’s edges, and upgrading or repositioning them forms a core part of the strategy. Bosses spawn in designated zones, and defeating them appears to grant special rewards. The map clearly strives to recreate the essence of Diablo 2, from enemy variety and placement to the overall map design. With seven players each taking on distinct roles, teamwork is essential for success. However, difficulty and victory conditions aren’t specified, so newcomers may need time to adapt. Before jumping in, it’s wise to coordinate roles and army compositions with teammates. This map is ideal for fans of the Diablo series, defense-genre UMS enthusiasts, or anyone looking to enjoy cooperative multiplayer with friends. Its intricate layout and depth of strategic options make it a compelling choice, especially for those who thrive in team-based play. Given the active updates, there’s also potential for future content expansions.
[NEW] 고양이 대 쥐: 광석 전쟁 V11 (Cat vs Mouse: Ore Wars V11)
이 맵은 스타크래프트 브루드워의 유즈맵으로, ‘고양이 vs 쥐’ 컨셉의 디펜스 게임입니다. 플레이어는 쥐 무리를 조종해 광물을 채굴하고, 적대적인 고양이와 새끼 고양이, 독수리들을 처치하며 생존을 도모해야 합니다. 중앙에 위치한 광물 지대를 중심으로 맵이 구성되어 있으며, 광물을 채굴할수록 보상을 획득해 아이템을 구매하거나 전력을 강화할 수 있습니다. 적 몬스터들은 일정 주기로 스폰되어 플레이어 기지를 공격해 오며, 이를 효과적으로 방어하지 못하면 기지가 파괴되고 게임이 종료됩니다. 맵의 좌측과 우측에는 플레이어의 본진이 배치되어 있으며, 각 본진은 좁은 길로 연결되어 있어 전략적인 진형 구축이 중요합니다. 특히, 좁은 길목을 활용한 입구막기 전략이 핵심으로, 플레이어는 몬스터의 물량을 어떻게 막아내느냐에 따라 생존 여부가 결정됩니다. 아이템 시스템도 존재하는데, 맵 곳곳에 숨겨진 상자나 특정 조건을 만족하면 얻을 수 있는 아이템을 통해 전투력을 강화하거나 방어 수단을 확보할 수 있습니다. 다만, 아이템의 종류나 사용법에 대한 설명은 맵 내에서 명확히 제공되지 않기 때문에, 처음 플레이하는 유저는 방법을 익히는 데 다소 시간이 걸릴 수 있습니다. 맵의 분위기는 밝고 경쾌한 편이지만, 긴장감 있는 전투가 지속되는 만큼 집중력을 요합니다. 초보자의 경우 몬스터의 패턴을 파악하고, 본진 방어에 중점을 두는 것이 좋습니다. 반면, 숙련된 플레이어는 아이템을 적극 활용해 몬스터를 몰아내거나, 광물 채굴을 통해 경제력을 키우는 등 다양한 전략을 펼쳐볼 수 있습니다. 맵의 난이도는 몬스터의 스폰 속도와 강도에 따라 조절할 수 있도록 설계되어 있으며, 팀 플레이를 지원하지 않는 싱글 플레이 중심의 구조입니다. 전체적으로 ‘생존과Resource 관리’를 중시하는 디펜스 장르의 유즈맵으로, 끊임없는 전투와 전략적 판단이 요구되는 흥미로운 경험을 제공합니다. 광물 채굴과 몬스터 방어의 밸런스가 맵의 핵심으로, 이 두 요소를 어떻게 조율하느냐가 승부의 관건입니다. This map is a StarCraft: Brood War custom game with a "Cat vs. Mouse" defense concept. Players control a group of mice, mining minerals and fighting off hostile cats, kittens, and eagles to survive. The map centers around a mineral-rich area where players can harvest resources to purchase items or upgrade their forces. Enemies spawn periodically and attack the player's base; failing to defend effectively will result in the base being destroyed and the game ending. The player's main bases are located on the left and right sides of the map, connected by narrow paths that require strategic formation-building. Blocking enemy waves at these choke points is crucial, as survival depends on how well players manage incoming attacks. The map also features an item system, with hidden crates or special conditions granting power-ups to enhance combat or defense. However, the map does not clearly explain the types or uses of items, so new players may need time to figure them out. The overall atmosphere is bright and cheerful, but the constant, tense battles demand focus. Beginners should prioritize learning enemy patterns and defending their bases, while experienced players can experiment with item usage, economic expansion through mining, and other advanced strategies. The difficulty can be adjusted based on enemy spawn rates and strength, and the map is designed for single-player rather than team play. Overall, this is a survival and resource-management-focused defense custom map where continuous combat and strategic decisions determine victory. Balancing mineral gathering and enemy defense is key, as how players coordinate these elements decides the outcome.
맵 선택 가이드
태그는 맵의 핵심 특징을 빠르게 설명하지만 제작 버전마다 규칙이 다를 수 있습니다. 상세 설명에서 권장 인원, 난이도, 플레이 시간과 버전을 함께 확인한 뒤 다운로드하세요.