
메lee 스타크래프트 맵 모음
'메lee' 태그가 등록된 맵을 모았습니다. 장르 하나로 찾기 어려운 플레이 방식, 난이도와 특징을 중심으로 인기 맵과 최신 맵을 비교해 보세요.
- 등록 맵
- 14개
- 누적 다운로드
- 1
- 누적 조회
- 122
인기 맵
다운로드와 조회 반응이 높은 맵입니다.
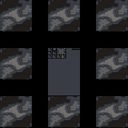
밀리 토너먼트 1.2 (Millie Tournament 1.2)
‘밀리 토너먼트 1.2’는 8192×8192 타일 크기의 우주 테마 맵으로, 8인까지 동시 플레이가 가능한 대규모 유저맵(MELEE)입니다. 맵 중앙에는 자원 포인트가 배치된 고지대와 저습지 지역이 교차하며, 자연스러운 언덕과 장애물로 전술적 포지션이 중요합니다. 플레이어는 blue 자원을 수집해 유닛을 훈련하고, 전투를 전개해 상대를 무찌르야 합니다. 경기 흐름은 초반 자원 확보와 중반 전투 전개가 원활히 진행되며, 타이머 기반 토너먼트 방식으로 경기 시간을 조절할 수 있습니다. 난이도는 보통 수준으로, 초보자와 중간 수준의 플레이어 모두 즐길 수 있지만, 고수 플레이어는 전술적 미세 조작이 요구됩니다. 추천 대상은 8인 팀전 또는 자유전 메lee를 선호하는 클랜 및 경쟁 플레이어이며, 맵 로딩 및 균형 조정이 잘 된 상태라면 플레이 경험이 매끄럽습니다. 게임 전 확인 포인트는 플레이어 인원(8명), 팀 구성(1팀), 예상 플레이 시간(30분), 난이도(보통)를 체크하는 것입니다. 'Millie Tournament 1.2' is a large 8192×8192 space-themed map supporting up to 8 players, classified as a MELEE user map. The map features high‑ground and low‑land resource zones with natural hills and obstacles, making tactical positioning crucial. Players gather crystal resources to train units and engage in combat to defeat opponents. Gameplay progresses from early resource gathering to mid‑game battles, with a timer‑based tournament mode allowing time control. Difficulty is moderate, suitable for beginners and intermediate players, while experts require fine tactical micro‑management. Recommended for clan and competitive players who enjoy 8‑player free‑for‑all or team melee, provided the map loads smoothly and balance is well‑adjusted. Pre‑play checks include player count (8), team count (1), estimated play time (30 minutes), and difficulty (moderate).
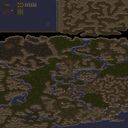
Lotr - Region of Chaos
Lotr - Region of Chaos는 8192×8192 타일 규모의 대규모 유저맵으로, 사막 타일셋을 바탕으로 복잡한 강과 산, 사막 지역이 혼합된 다양한 지형을 가지고 있다. 6인 멀티플레이를 지원하며, 각 플레이어는 개별 팀으로 참여해 실시간 전략 전투를 전개한다. 맵은 중앙에 강과 다리를 둔 핵심 전투 지역과 주변에 산악·사막·초원 지역을 배치해 전술적 다양성을 제공한다. 유저는 다양한 유닛과 건물들을 활용해 전장을 장악하고, 상대의 기지를 파괴하거나 자원을 점령하는 목표를 달성한다. 난이도는 보통 수준으로, 초보자는 기본적인 유닛 조작과 지형 활용법을 배울 수 있고, 숙련된 플레이어는 고급 전략과 빠른 반응을 요구한다. 플레이어는 30분 내외의 매치로 집중력과 전술적 판단력을 시험할 수 있으며, 팀플레이보다는 개인 기술과 전술이 주요 포인트이다. 추천 대상은 스타크래프트 브루드워 유저 중 6인 멀티플레이를 선호하는 플레이어이며, 특히 전술적 깊이와 빠른 템포를 즐기는 유저에게 적합하다. 맵을 시작하기 전에는 타일셋과 플레이어 수를 확인하고, 게임 설정에서 6인 멀티플레이 모드가 활성화되어 있는지 확인하는 것이 중요하다. 전체적인 진행 방식은 resource gathering, base expansion, and unit control을 중심으로 하며, 플레이어는 적의 이동 경로를 차단하고 전술적 포지션을 확보해야 승리할 수 있다. 이 맵은 보통 난이도로 설정되어 있어 초보자와 중급자 모두에게 적합하며, 평균 플레이 시간은 30분 정도로 예상된다. 따라서 짧은 전투를 즐기고 싶거나, 전략을 세밀히 세우는 플레이어 모두에게 매력적인 경험을 제공한다. Lotr - Region of Chaos is a large user map sized 8192×8192 tiles, built on a desert tileset that blends rivers, mountains, and desert areas into a varied terrain. It supports six‑player multiplayer, with each participant joining as a separate team to engage in real‑time strategic combat. The map places a central river and bridge area as the main battle zone, while surrounding it with mountainous, desert, and plains regions to provide tactical variety. Players use a wide range of units and structures to dominate the battlefield, aiming either to destroy the opponent’s base or to capture resources. The difficulty is moderate: beginners can learn basic unit control and terrain usage, while experienced players are challenged by advanced strategies and quick reactions. Matches last about 30 minutes, testing focus and tactical judgment, with individual skill and tactics taking precedence over team play. It is recommended for StarCraft: Brood War users who prefer six‑player multiplayer, especially those who enjoy deep tactics and fast‑paced games. Before starting, check the tileset and player count, and ensure the six‑player multiplayer mode is enabled in the game settings. The overall flow revolves around resource gathering, base expansion, and unit control; players must block enemy movement paths and secure advantageous positions to win. Because the map is set to a typical difficulty, it is suitable for both beginners and intermediate players, with an average playtime of roughly 30 minutes. Thus, it offers an appealing experience for anyone looking for short battles or for those who want to craft detailed strategies.
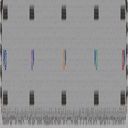
가장 빠른 256x12 (256x12 FASTEST)
$$$ 256x12 FASTEST $$$ 맵은 이름에서 알 수 있듯이 256×12 타일의 극도로 좁고 긴 맵 구조를 가지고 있어 일반적인 메lee 맵과는 달리 빠른 전투 전개가 특징이다. 가로 길이가 256 타일에 비해 세로는 단 12 타일밖에 되지 않아 유닛의 이동 경로가 거의 직선으로 제한되며, 이는 rush 전략이나 마이크로 컨트롤 연습에 적합한 환경을 제공한다. 플레이어는 출발 지점에서 곧바로 중앙 지역에 도달할 수 있고, 자원 광물과 가스는 맵 양 끝에 균등하게 배치되어 초반부터 치열한 자원 쟁탈전이 일어난다. 따라서 일반적인 빌드 순서보다도 더 빠른 타이밍에 압박을 넣을 수 있으며, 특히 저글링이나 zealot 같은 저비용 유닛을 활용한 선제 공격이 효과적이다. 이 맵은 5인 자유전 모드를 지원하며, 팀 구분이 없어 각자 살아남는 것이 목표가 되므로 생존전 같은 긴장감을 느낄 수 있다. 빠른 템포 때문에 평균 플레이 시간은 5~10분 내외로 예상되며, 초보자도 규칙을 금방 익힐 수 있지만 높은 APM과 정확한 타이밍이 요구되어 숙련자에게도 도전 요소가 된다. 플레이 전에는 맵의 극도로 좁은 지형 때문에 공중 유닛의 활용도가 낮고, 지상 유닛의 충돌이 빈번히 발생한다는 점을 염두에 두고, 단축키 설정과 군집 관리를 미리 점검하는 것이 좋다. 요약하면, $$$ 256x12 FASTEST $$$은 속도와 집중력을 테스트하기에 적합한 메lee 유즈맵으로, 빠른 전개를 좋아하는 플레이어에게 추천한다. The $$$ 256x12 FASTEST $$$ map, as its name suggests, features an extremely narrow and long layout of 256×12 tiles, which makes the gameplay unfold much faster than on a typical melee map. With a width of 256 tiles but only a height of 12 tiles, unit movement is almost confined to a straight line, creating an ideal environment for rush strategies and micro‑control practice. Players can reach the central area immediately from their starting positions, and mineral and gas resources are placed evenly at both ends of the map, so fierce resource competition begins from the very start. Consequently, players can apply pressure much earlier than in standard builds, and low‑cost units such as Zerglings or Zealots are especially effective for early aggression. The map supports a five‑player free‑for‑all mode with no team divisions, so the goal is simply to survive, giving a tense survival‑like atmosphere. Because of the fast pace, the expected play time is around five to ten minutes; beginners can grasp the basics quickly, yet high APM and precise timing are still required, offering a challenge even for experienced players. Before playing, keep in mind that the extremely narrow terrain limits the usefulness of air units and frequently causes ground unit collisions, so it is wise to check hotkey settings and unit group management in advance. In summary, $$$ 256x12 FASTEST $$$ is a melee UMS map that tests speed and focus, and is recommended for players who enjoy fast‑paced action.
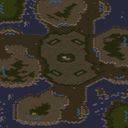
새로운 잃어버린 사원 (New Lost Temple)
New Lost Temple은 사막 타일셋을 기반으로 한 4인용 맵으로, 오리지널 Lost Temple의 레이아웃을 유지하면서 몇 가지 지형과 자원 배치를 미세하게 수정한 유즈맵이다. 각 플레이어 시작 지점은 사막 오아시스 주변에 위치해 있으며, 주변에 광물 8개와 가스 2개가 균등하게 분포되어 초기 자원 확보가 비교적 수월하다. 맵 중앙에는 높은 고도의 관문과 좁은 통로가 있어 초반 전투와 후방 교두보 확보 사이의 전략적 선택이 중요하다. 또한, 몇 개의 숨은 확장지와 높은 지형이 놓여 있어 후반 게임에서 타이밍 공격과 방어 라인 구축이 변수를 만든다. 전반적인 흐름은 표준 메lee와 동일하게 건물 건설, 유닛 생산, 업그레이드, 그리고 타이밍 공격을 반복하면서 승점을 노리는 형태다.このため, 마이크로 관리와 매크로 운영을 모두 원하는 중간 수준의 플레이어에게 적합하며, 초반 러시를 좋아하는 공격적인 유저나, 방어와 반격을 즐기는 전략적인 유저 모두에게 즐거운 전투를 제공한다. 플레이 전에는 맵 해상도(1024x1024)와 타일 크기(128x128)를 확인해 그래픽 설정이나 모드 호환성을 점검하고, 혹시 내장된 트리거가 없는 순수 맵인지 여부를 스크립트 편집기로 간단히 확인하는 것이 좋다. New Lost Temple is a 4‑player map built on the desert tileset that preserves the layout of the original Lost Temple while making minor tweaks to terrain and resource placement. Each player start is situated near a desert oasis, with eight mineral patches and two geysers evenly distributed around it, making early resource gathering relatively easy. The map’s central area features a high‑ground choke point and a narrow passage, so deciding between early aggression and securing a forward outpost is a key strategic choice. A few hidden expansions and elevated spots are also scattered across the map, giving the late game opportunities for timing attacks and shifting defensive lines. Overall play follows the standard melee cycle of building structures, producing units, upgrading, and launching timing attacks to vie for victory. Consequently, it suits intermediate players who want to balance micro and macro, as well as aggressive fans of early rushes and defensive players who enjoy counter‑attacks. Before playing, check the map resolution (1024×1024) and tile size (128×128) to ensure graphics settings or mod compatibility, and verify with a script editor that the map contains no hidden triggers if you expect a pure melee experience.

차지드 바운드 (Charged Bound)
차지드 바운드는 황무지 타일셋을 기반으로 한 6인용 메lee 스타일의 유즈맵이다. 맵 크기는 1024×1024 타일로, 넓은 전장에서 양측 기지를 중심으로 대칭적인 배치를 보여준다. 자원 광물과 가스는 각 기지 주변에 균등하게 배치되어 초기 수급이 빠르며, 중립 지역에서 발생하는 소규모 충돌이 자주 일어난다. 지형은 높은 구릉과 낮은 평야가 교차하여 시야 차단과 은신로를 동시에 제공하고, 특히 중앙의 높은 지대는 전략적 요충지로 작용한다. 플레이어는 초반에 빠른 병력 생산을 통해 상대 진영을 압박하거나, 중후반에 공중 유닛을 활용한 측면을 노리는 전술을 구사할 수 있다. 맵 내에 speciale 트리거나 스크립트는 존재하지 않아 순수하게 유닛 전투와 자원 관리에 집중하는 전형적인 mee 경험을 제공한다. 이로 인해 초보자도 규칙을 쉽게 익힐 수 있으며, 중급 이상의 플레이어는 미세한 타이밍과 맵 장악력을 시험할 수 있다. 플레이 전에는 시작 위치와 자원 분포를 확인하고, 초기 스카웃을 통해 상대 진형의 약점을 파악하는 것이 권장된다. 또한, 높은 지대를 선점하는 것이 승리에 큰 영향을 미치므로 초반 지점 통치가 중요하다. 전체적인 흐름은 빠르고 역동적이며, 20~30분 내에 승부가 결정되는 경우가 많아 짧은 시간 내에 전략적 감각을 sharpen하고 싶은 유저에게 적합하다. Charged Bound is a 6-player melee-style UMS map based on the badlands tile set. The map size is 1024×1024 tiles, offering a spacious battlefield with symmetrical base placements around the center. Minerals and gas are evenly distributed around each base, enabling quick early resource gathering, while frequent small-scale clashes occur in neutral areas. The terrain features alternating ridges and low plains, providing both line‑of‑sight blockers and hidden routes, and the high ground in the middle acts as a key strategic chokepoint. Players can pressure opponents with early aggressive unit production or, in the mid‑to‑late game, employ air units to flank the enemy. The map contains no special triggers or scripts, delivering a pure melee experience focused on unit combat and resource management. Beginners can easily grasp the basics, while intermediate and advanced players can test their timing and map control. Before playing, check the starting positions and resource distribution, and use early scouting to spot weaknesses in the opponent’s formation. Securing the high ground is crucial, so early map control is vital. Overall, the pace is fast and dynamic, with matches often decided within 20–30 minutes, making it suitable for players who want to sharpen their strategic sense in a short time.
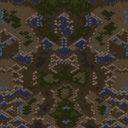
알 수 없는 정글랜드 (Unknown Jungland)
(2)Unknown Jungland은 사막 타일셋을 기반으로 제작된 2인용 메lee 맵이다. 기본 목표는 적의 모든 건물을 파괴하는 것이며, 자원 채취와 유닛 생산을 통해 상대 기지를 공략하는 전형적인 메lee 흐름을 따른다. 맵 크기는 1024×1024 타일로, 넓은 전장이 제공되어 초기 탐색과 확장 전략이 중요하다. 시작 지점은 대각선 배치로 설계되어 초반 충돌을 피하면서도 중간 지역에서 자연스럽게 교전이 일어날 수 있도록 공간이 확보됐다. 지형은 고요한 사막 평야에 몇 개의 높은 언덕과 협곡이 놓여 있어 고지점 점령이 시야 확보와 공격 각도에 큰 영향을 미친다. 자원 배치는 광물 8개와 가스 6개 정도가 각 진영 근처에 균등하게 분포돼 있어 자원 경쟁이 치열하지는 않지만, 후반에 가스 공급이 끊기면 기술 트리 진행에 변수가 생긴다. 승리 조건은 적 건물을 모두 없애는 것이므로, 방어보다는 공격적인 운영이 승리에 nearer하다. 초반에는 작업자 생산과 동시에 스카우팅을 통해 상대의 건물 배치를 파악하고, 적절한 시점에 러시 또는 테크 업을 선택해야 한다. 이 맵은 2인 대전뿐만 아니라 협동 모드로도 즐길 수 있는데, 두 플레이어가 같은 팀으로 적 AI를 상대로 플레이할 경우 목표는 동일하게 모든 적 건물을 없애는 것이며, 팀워크와 역할 분배가 승리의 관건이 된다. 추천 대상은 메lee 기본기를 익히고 싶은 초보자와, 다양한 전략을 시험해 보고 싶은 중급자까지 넓으며, 특히 건물 파괴 중심의 플레이를 선호하는 유저에게 적합하다. 플레이 전에는 시작 위치의 자원 분포와 지형 이용점을 확인하고, 초반 러시 가능성을 평가한 뒤 자신의 플레이 스타일에 맞는 빌드를 준비하는 것이 좋다. (2)Unknown Jungland is a 2‑player melee map built on a desert tileset. The core objective is to destroy every enemy building, which is achieved through standard resource gathering and unit production that drives the typical melee flow. At 1024×1024 tiles the map offers a spacious battlefield, making early scouting and expansion vital. The start positions are placed diagonally to avoid early clashes while still allowing natural encounters in the mid‑terrain. The terrain consists of a flat desert plain interspersed with a few high ridges and narrow chokepoints; holding high ground greatly influences sight lines and attack angles. Resources are laid out with roughly eight mineral patches and six gas vents evenly spaced near each base, so early resource competition is mild, but a late‑game gas shortage can alter tech progression. Because victory requires razing all enemy structures, an aggressive posture is favoured over a purely defensive one. In the opening phase players should train workers while scouting the opponent’s layout, then decide whether to rush or tech up at the appropriate moment. Besides 1v1 matches the map can be played cooperatively: two allies sharing a team face the same AI enemy, and the goal remains to wipe out all hostile buildings, making teamwork and role assignment the key to success. This map is suited for beginners wanting to practice melee fundamentals and intermediate players looking to experiment with different strategies, especially those who enjoy a building‑destruction focus. Before playing, check the starting resource distribution and terrain features, assess the likelihood of an early rush, and prepare a build that matches your personal style.
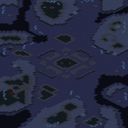
잃어버린 사당 - 리믹스 v1.0 (Lost Temple - Remix v1.0)
잃어버린 사당 - 리믹스 v1.0은 원작 Lost Temple의 핵심 레이아웃을 유지하면서 화산 타일셋을 적용하고 몇 가지 균형 조치를加한 맵이다. 1024x1024 크기의 지도에 광활한 중앙 평야와 주변의 광물·가스 지점이 대칭적으로 배치되어 4인 자유전 혹은 팀전에서도 공평한 자원 배분이 가능하다. 시작 위치는 각 코너에 고르게 놓여져 초반 전투 확산이 자연스럽고, 중후반에는 화산 지형의 높은 지대를 활용한 고지 공방이 두드러진다. 트리거는 특별히 추가되지 않아 순수한 melee 방식으로 진행되며, 유즈맵 특유의 스크립트나 목표 조건은 존재하지 않는다. 따라서 vittoria 조건은 상대 선수 모두를 제거하거나 동맹 vittoria 설정에 따른다. 플레이 느낌은 clásico 스타크래프트 melee와 유사하면서도 새롭게 입힌 화산 테라스가 시각적 변화를 주고, 일부 유닛 생산 건물의 배치가 약간 이동되어 빌드 순서에 미묘한 영향을 준다. 초보자에게는 익숙한 구조 덕분에 접근이 쉬우나, 지형의 높이 차이를 고려한 전략이 필요해 중급자 이상에게 더 만족스러운 전술을 요구한다. Twilight Theme이라 명명된 암석과 lava 효과는 시각적으로 어두운 분위기를 연출하며, 일부 유닛의 시야 범위가 ligeramente 변하게끔 지형 높이를 미세하게 조정하였다. 예상 플레이 시간은 대략 20~30분程度이며, 균형 조정된 유닛 생산 속도와 확장 가능성으로 인해 지루함 없이 꾸준한 긴장감을 유지한다. 추천 대상은 4인 전술을 즐기는 유저와, 맵 리메이크를 통해 새로운 시각적 경험을求하는 메lee 팬이다. 플레이 전에는 시작 위치의 자원 분포를 확인하고, 화산 지역의 높은 지대를 선점할 수 있는 루트를 파악하는 것이 좋으며, 동반자와의 협력 시 팀 전용 시작점이 있는지 확인해야 한다. Lost Temple - Remix v1.0 preserves the core layout of the original Lost Temple while applying a volcanic tileset and adding a few balance adjustments. The 1024x1024 map features a spacious central plateau with symmetrically placed mineral and gas locations, allowing fair resource distribution in both free‑for‑all and team play for four players. Starting positions are evenly spread across the corners, enabling natural early‑game skirmishes, and the mid‑to‑late game sees high‑ground battles using the volcanic terrain’s elevated areas. No special triggers have been added, so the map proceeds as a pure melee experience without the scripted objectives or win conditions typical of UMS maps. Victory is therefore achieved by eliminating all opponents or fulfilling any allied victory setting. The play feel resembles classic StarCraft melee, yet the newly applied volcanic terraces provide a visual refresh, and slight shifts in building placement subtly influence build orders. Beginners will find the familiar structure easy to approach, but the need to account for elevation differences makes the map more rewarding for intermediate and advanced players. The Twilight Theme—named for its dark rock and lava effects—creates a moody atmosphere and minutely tweaks terrain height to alter sight lines for certain units. Expected play time is around 20 to 30 minutes, with balanced unit production speeds and expansion options keeping the action engaging without becoming stale. This map is recommended for players who enjoy four‑player melee tactics and for melee fans seeking a fresh visual experience through a remix. Before playing, check the resource distribution at each start location, scout routes to seize the volcanic high ground, and verify whether any team‑specific starting spots exist when playing with allies.
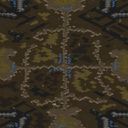
무제 시나리오 (Untitled Scenario)
이 맵은 황무지 타일셋을 바탕으로 한 1024×1024 크기의 표준 메lee 맵이다. 내부 설명에 따라 모든 적 건물을 파괴하면 승리하는 단순한 목표를 가지고 있으며, 이는 브루드워의 클래식 메lee 승리 조건과 동일하다. 플레이어는 최대 4인까지 참여할 수 있으며, 팀 설정은 기본적으로 개인전 형태여서 각자 독립적인 기지를 건설하고 유닛을 생산해 적을 압멸해야 한다. 지형은 넓고 평평한 평원이 majority를 차지하며, 몇 개의 높은 지대와 자원 구간이 전략적인 요충지를 형성한다. 초반에는 스카우트와 초기 건물을 통해 자원 확보에 집중하고, 미네랄과 가스를 균형 있게 채취하여 병력 생산 기반을 마련해야 한다. 중반 이후에는 테란, 프로토스, 저그 중 원하는 종족을 선택해 기술 트리를 올리고, 업그레이드와 함께 군대를 규모 있게 확장한다. 승리는 적의 모든 건물, 즉 기지 본건물과 부속 시설까지 완전 제거했을 때 달성되며, 이는 방어를 무시하고 공격적인 플레이를 유도한다. 이러한 구조는 메lee에 익숙한 플레이어에게는 직관적이면서도, 신규 유저에게는 기본적인 전략과 빌드 오더를 연습하기에 좋은 교재 역할을 한다. 따라서 전략적 사고를 기르고 싶은 초보부터 중간 수준의 플레이어까지 추천하며, 플레이 전에는 맵 크기와 자원 분포를 확인하고, 자신의 종족 특성에 맞는 초반 빌드를 준비하는 것이 좋다. This map is a standard melee map built on the wasteland tileset with a size of 1024×1024. According to its internal description, the objective is to destroy all enemy buildings, which matches the classic melee victory condition in StarCraft: Brood War. Up to four players can participate, and the team setting defaults to free‑for‑all, so each player constructs an independent base, produces units, and aims to overwhelm opponents. The terrain consists mainly of wide, flat plains with a few elevated areas and resource clusters that form key strategic points. In the early game, players focus on scouting and initial building to secure resources, balancing mineral and gas gathering to lay a foundation for unit production. In the mid‑ to late game, they choose Terran, Protoss, or Zerg, advance the tech tree, apply upgrades, and expand their forces. Victory is achieved when every enemy structure—including the main base and all附属 buildings—is completely eliminated, encouraging aggressive play over defensive turtling. This layout feels intuitive for veterans of melee maps while serving as a solid practice ground for newcomers to learn basic strategies and build orders. It is therefore recommended for beginners to intermediate players who wish to sharpen their strategic thinking; before playing, check the map size and resource distribution and prepare an opening build suited to your chosen race.
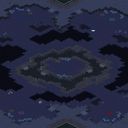
황혼의 영역 (The Twilight Zone)
황혼의 영역(The Twilight Zone)은 화산 타일셋을 배경으로 한 4인용 밀리 맵으로, 기본 목표는 적의 모든 건물을 파괴하는 것이다. 지형은 중앙에 넓은 평야와 주변에 용암 흐름이 섞인 불규칙한 지형을 제공하며, 각 진영은 대칭적으로 배치된 시작 위치에서 자원을 채취하고 건물을 올린다. 자원 배치는 표준적인 미네랄과 가스 분포를 따르며, ekspansion 지점은 주요 길목에 위치해 초반 충돌과 동시에 전략적 확장을 유도한다. 플레이어는 초기 단계에서 스카웃을 통해 적의 빌드 순서를 파악하고, 병력 생산과 업그레이드 시점을 조절해야 한다. 승리 조건이 단순히 건물 파괴이기 때문에, 방어보다는 공격적인 운영이 효과적이며, 특히 저글링이나 zealot 같은 빠른 유닛으로 초반 압박을 시도할 수 있다. 반면, 적의 건물이 넓게 퍼져 있을 경우 포위 및 지속적인 압박이 필요해 중반부터는 시즈 탱크나 디파일러 같은 범위 공격 유닛이 빛을 발한다. 이 맵은 4인 자유전으로 진행되므로 동맹 없이 개별 실력이 직접 승부에 영향을 주며, 초보자에게는 자원 관리와 기본 전투 감각을 익히기에 적당하고, 숙련자는 맵 지형을 활용한 타이밍 공격을 연습할 수 있다. 플레이 전에는 시작 위치의 자원 분포를 확인하고, 초반 건물 배치가 안전 경로를 막지 않는지 살펴볼 것을 권장한다. The Twilight Zone is a 4-player melee map set on a volcanic tileset, with the basic goal of destroying all enemy buildings. The terrain features a wide central plain mixed with irregular lava flows, and each faction starts from symmetrically placed locations to gather resources and erect structures. Resource placement follows the standard mineral and gas distribution, and expansion points sit on main chokepoints, encouraging early clashes while also prompting strategic expansion. In the early game players should scout to read the opponent’s build order and timing their unit production and upgrades accordingly. Because victory is achieved solely by destroying enemy structures, an aggressive approach works better than a passive defense; fast units such as Zerglings or Zealots can be used for early pressure. Conversely, when enemy structures are spread out, surrounding and maintaining pressure becomes necessary, so mid‑game units like Siege Tanks or Defilers with area damage become valuable. This map is a free‑for‑all for four players, so individual skill directly decides the outcome without alliances. Beginners can use it to practice resource management and basic combat fundamentals, while experienced players can rehearse timing attacks that exploit the map’s terrain. Before playing, check the resource distribution at the start positions and make sure early‑game building placement does not block safe retreat paths.
제목 없는 시나리오 (Untitled Scenario)
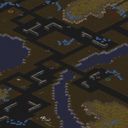
이 맵은 파일명 Great_LandBattles.scm 에서 확인할 수 있는 1024×1024 크기의 황무지 타일셋을 사용하는 전형적인 UMS 맵이다. 내부 제목은 'Untitled Scenario'이며 승리 조건은 적의 모든 건물을 파괴하는 것이다. speciale한 트리거나 자원 수정, 영웅 유닛, 스크립트 이벤트 없이 일반적인 스타크래프트 브루드워 메lee 룰을 그대로 따른다. 따라서 플레이어는 표준적인 자원 채집과 기지 건설, 유닛 생산을 통해 상대 건물을 차례대로 무너뜨려야 한다. 맵은 넓이가 충분해 초기 기지 배치를 자유롭게 할 수 있으며, 황무지 지형은 시야 확보와 병력 이동에 어느 정도 방해를 주어 전술적인 접근이 요구된다. 4인 플レイ를 기준으로 하며 팀 구분이 없어 각자 자유전투 형태의 자유경쟁이 펼쳐진다. 초반에는 저글링이나 마린 등으로 소규모 교전을 통해 상대방의 확장을 견제하고,中期에는 탱크나 히드라리스크 같은 중장비 병력을 투입해 공세를 펼칠 수 있다. 후반에는 전투순양함이나 캐리어 같은 고비용 유닛을 활용해 결정적인 타격을 줄 수도 있다. 특수한 규칙이 없어 맵 자체의 밸런스는 원래 종족 간 밸런스에 크게 의존하며, 따라서 각 종족의 특징을 잘 살리는 플레이가 승리로 이어진다. 이 맵은 메lee 감각을 그대로 느끼고 싶은 유저나, 간단히 건물 파괴 목표를 연습하고 싶은 초보자에게 적합하며, 복잡한 트리거나 스토리 없이 순수한 전략 대결을 원하는 플레이어에게 추천한다. 플레이 전에는 시작 위치와 자원 분포를 확인해 초기 건물 배치를 계획하고, 상대 종족의 특징을 고려해 적절한 대응 병력을 준비하는 것이 좋겠다. This map is a typical UMS map using a 1024×1024 wasteland tileset, as seen from the filename Great_LandBattles.scm. Its internal title is 'Untitled Scenario' and the victory condition is to destroy all enemy buildings. Without special triggers, resource modifications, hero units, or script events, it follows the standard StarCraft Brood War melee rules exactly. Therefore players must gather resources, build bases, and produce units to gradually demolish enemy structures. The map offers ample space for free initial base placement, and the wasteland terrain somewhat hinders vision and unit movement, demanding tactical approaches. Designed for four players with no team divisions, it unfolds as a free-for-all battle. Early on, Zerglings or Marines can be used for small skirmishes to curb enemy expansion; in the mid-game, tanks or hydralisks can be deployed as heavy units to press the offense. In the late-game, battlecruisers or carriers may be employed for decisive blows. With no special rules, the map’s balance relies heavily on the original faction balance, so playing to each race’s strengths leads to victory. This map is suited for users who want to feel pure melee gameplay or beginners who wish to practice the simple objective of destroying buildings, and it is recommended for players seeking a straightforward strategic duel without complex triggers or story. Before playing, check starting positions and resource distribution to plan initial building placement, and prepare appropriate counter units based on the opponent’s race characteristics.
제목 없는 시나리오 (Untitled Scenario)
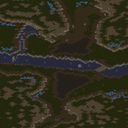
Untitled Scenario는 사막 타일셋을 기반으로 한 4인 밀리 맵으로, 내부 설명에 따르면 모든 적 건물을 파괴하는 것이 승리 조건이다. 맵 크기는 1024x1024 타일이며, 전체 해상도는 4096x4096 픽셀로, 일반적인 브루드워 맵보다 넓은 시야를 제공한다. 시작 위치들은 사막 지형에 고르게 배치되어 초기 자원 채취와 기지 건설에 균등한 기회를 준다. 자원 광물과 가스 매장은 표준 밀리 맵과 유사한 분포를 보여 초반 빌드 순서가 기존 맵과 크게 다르지 않으며, 후반에는 사막 특유의 좁은 통로와 높은 지형이 전투의 변수로 작용한다. 승리를 위해서는 적의 주요 생산 시설과 방어 건물을 우선적으로 파괴하면서 동시에 자신의 경제를 유지해야 하는데, 이는 기존 밀리 맵에서 요구하는 멀티태스킹 능력과 유사하다. 플레이어는 초반에 스카웃을 통해 적의 진형을 파악하고, 미사일 타워나 병영을 적절히 배치하여 방어를 갖춘 뒤, 중반에 유닛 생산을 확대해 압박을 가해야 한다. 이러한 흐름은 일반적인 4인 자유전과 비슷하지만, 사막 맵의 특성상 지형 이용이 승패에 큰 영향을 미친다. 따라서 맵을 선택하기 전에 사막 지형에 대한 이해와 빠른 건물 건설 능력, 그리고 유닛 이동 경로를 예측하는 감각이 필요하며, 초보자보다는 중간 이상의 실력을 가진 플레이어에게 적합하다. 플레이 전에는 시작 위치의 자원 분포를 확인하고, 초반 빌드 순서를 사전에 구상하는 것이 좋으며,多人전에서는 통신과 협상이胜负를 좌우할 수 있음을 기억해야 한다. Untitled Scenario is a 4‑player melee map built on the desert tileset, with the victory condition described as destroying all enemy buildings. The map size is 1024×1024 tiles and the full resolution is 4096×4096 pixels, providing a wider view than typical Brood War maps. Starting positions are evenly distributed across the desert terrain, giving equal opportunities for early resource gathering and base construction. Mineral and gas placements follow a standard melee distribution, so early build orders are similar to those on other melee maps; in the late game, the desert’s narrow chokepoints and high ground become tactical variables. To win, players must prioritize destroying the opponent’s key production and defensive structures while maintaining their own economy, which mirrors the multitasking demands of conventional melee maps. Early scouting reveals enemy formations, allowing proper placement of missile towers or barracks for defense, followed by mid‑game expansion of unit production to apply pressure. Although the flow resembles a typical 4‑player free‑for‑all, the desert map’s terrain heavily influences the outcome. Consequently, players should understand desert geography, have quick building skills, and be able to anticipate unit movement paths; the map suits intermediate‑to‑advanced players rather than beginners. Before playing, check the starting resource distribution and plan an early build order in advance, and remember that in multiplayer matches communication and negotiation can decide the outcome.
최후의 전투 (Die letzte Schlacht)
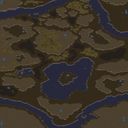
Die letzte Schlacht는 1024x1024 크기의 황무지 타일셋을 사용하는 4인 자유전투 맵이다. 내부 설명에 따라 모든 적 건물을 파괴해야 승리할 수 있으며, 이는 고전적인 annihilation 조건과 동일하다. 시작 위치는 맵 네 귀퉁이에 균등하게 배치되어 초반 자원 채집과 기반 시설 건설에 차이가 적게 발생한다. 자원 광물과 가스는 표준 배치로, 각 플레이어는 초기 500 광물과 500 가스를 보유하고 있어 빠른 테크 트리 진입이 가능하다. 중앙에는 중립 유닛이 존재하지 않아 전투는 주로 플레이어 간 직접 충돌로 이어지며, 지형은 높은 절벽과 좁은 통로가 적절히 섞여 있어 전략적인 요충지 선점이 승패를 좌우한다. 특히 황무지 타일셋 특유의 시야 제한을 활용한 은신 공격과 병력 이동이 중요한 변수가 된다. 플레이어는 저글링 러시, 질럿 pouss, 마린 마라콤 등 다양한 전략을 시도할 수 있으며, 게임 후반에는 캐리어 또는 배틀크루저와 같은 고급 유닛을 생산해 최종 승리를 노릴 수 있다. 지형이 비교적 개방적이기 때문에 스캔과 관측소 usage가 필수적이며, 이를 간과하면 기습에 취약해진다. 전체적인 플레이 시간은 평균 20~30분 정도로 추정되며, 초보자도 규칙을 쉽게 이해할 수 있어 입문용 맵으로 적합하다. 다만, 균형 잡힌 전투를 원하는 플레이어라면 팀 기반 변형을 시도해 보는 것도 좋으며, UMS 방식의 트리거나 스토리는 존재하지 않으니 순수한 메lee 경험에 집중할 수 있다. Die letzte Schlacht is a 4-player free-for-all map using the 1024x1024 wilderness tileset. According to its description, victory is achieved by destroying all enemy buildings, which is the classic annihilation condition. Starting positions are evenly placed at the four corners of the map, so early resource gathering and base construction differ little among players. Minerals and gas are placed in the standard layout, giving each player 500 minerals and 500 gas at the start, allowing quick tech tree progression. There are no neutral units in the center, so combat mainly consists of direct clashes between players. The terrain mixes high cliffs and narrow passages, making control of key chokepoints decisive for victory. Especially, the limited sight inherent to the wilderness tileset makes stealth attacks and troop movement important variables. Players can try various strategies such as Zergling rush, Zealot push, Marine-Marauder combos, and in the late game they can produce high-end units like carriers or battlecruisers to aim for final victory. Because the map is relatively open, scanning and observer usage are essential; neglecting them leaves one vulnerable to sneak attacks. Overall play time is estimated at around 20 to 30 minutes on average, making it suitable for beginners who can easily grasp the rules. If players seek more balanced combat, they may try team-based variants, but the map contains no UMS triggers or story, so the focus remains on a pure melee experience.
최근 등록된 맵
새로 추가된 파일과 버전을 확인하세요.
사냥꾼들 (The Hunters)
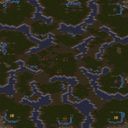
The Hunters는 사막 타일셋을 기반으로 한 2~8인 자유전투 맵이다. 내부 설명에 따라 8인 자유전투 형태를 취하며, 모든 플레이어가 별도의 팀 없이 개별적으로 싸우는 구조를 갖는다. 지형은 넓은 평야와 가끔 있는 언덕, 몇 개의 자원 지점이 균등하게 배치되어 초기 건물 건설과 유닛 생산에 공평한 기회를 제공한다. 플레이어는 시작 위치에서 기본 기지를 짓고, 병력을 양성하여 상대를 탐색하고 전투를 벌이는 전형적인 스타크래프트 브루드워 메플레이 방식을 따른다. 특정 스크립트나 트리거가 없어 승리는 마지막까지 남아 있는 플레이어가 결정되는 간단한 조건이며, 이는 맵의 복잡성을 낮추고 순수한 전략 대결에 집중하게 한다. 게임 진행은 초반 자원 확보와 건물 배치가 승부를 가르는 핵심이며, 중반에는 병력 조합과 타이밍 공격이 중요하고, 후반에는 대규모 전투와 자원 소모전이 펼쳐진다. 이와 같은 흐름은 신규 플레이어에게도 기본적인 빌드오더와 맵 이해를 연습하기에 적당하며, 숙련된 플레이어에게는 빠른 판단과 미세 조작 실력을 시험하는 무대가 된다. 추천 대상은 자유전투를 즐기는 유저와 메플레이 연습을 원하는 이들로, 2인 소규모 매치부터 8인 대규모 전투까지 다양한 인원 구성을 지원한다. 플레이 전에는 시작 위치의 자원 분포를 확인하고, 초기 건물 배치 시 방어나 생산 시설을 균형 있게 배치하는 것이 좋다. 또한 사막 지형 특성상 시야가 트인 지역이 많아 스카우트와 기습에 주의해야 한다. The Hunters is a 2‑8 player free‑for‑all map based on the desert tileset. As the description suggests, it takes the form of an eight‑player free‑for‑all where every player fights independently without fixed teams. The terrain consists of wide plains with occasional hills and several resource points evenly distributed, giving equal opportunity for early building and unit production. Players start at their locations, build a base, train units, scout opponents and engage in combat following the classic StarCraft: Brood War melee style. With no special scripts or triggers, victory is decided simply by the last player remaining, which keeps the map’s complexity low and focuses on pure strategic duels. The early game centers on resource gathering and base placement; the mid‑game hinges on army composition and timing attacks; the late game features large‑scale battles and resource attrition. This flow lets newcomers practice basic build orders and map awareness, while veterans can test quick decision‑making and micro‑control skills. It is recommended for anyone who enjoys free‑for‑all matches or wants to hone melee gameplay, supporting anything from a 2‑player skirmish to an 8‑player showdown. Before playing, check the resource distribution at the start and balance defensive and production structures when placing initial buildings. Because the desert map offers open sightlines, keep an eye out for scouting and surprise attacks.
새로운 잃어버린 사원 (New Lost Temple)
New Lost Temple은 사막 타일셋을 기반으로 한 4인용 맵으로, 오리지널 Lost Temple의 레이아웃을 유지하면서 몇 가지 지형과 자원 배치를 미세하게 수정한 유즈맵이다. 각 플레이어 시작 지점은 사막 오아시스 주변에 위치해 있으며, 주변에 광물 8개와 가스 2개가 균등하게 분포되어 초기 자원 확보가 비교적 수월하다. 맵 중앙에는 높은 고도의 관문과 좁은 통로가 있어 초반 전투와 후방 교두보 확보 사이의 전략적 선택이 중요하다. 또한, 몇 개의 숨은 확장지와 높은 지형이 놓여 있어 후반 게임에서 타이밍 공격과 방어 라인 구축이 변수를 만든다. 전반적인 흐름은 표준 메lee와 동일하게 건물 건설, 유닛 생산, 업그레이드, 그리고 타이밍 공격을 반복하면서 승점을 노리는 형태다.このため, 마이크로 관리와 매크로 운영을 모두 원하는 중간 수준의 플레이어에게 적합하며, 초반 러시를 좋아하는 공격적인 유저나, 방어와 반격을 즐기는 전략적인 유저 모두에게 즐거운 전투를 제공한다. 플레이 전에는 맵 해상도(1024x1024)와 타일 크기(128x128)를 확인해 그래픽 설정이나 모드 호환성을 점검하고, 혹시 내장된 트리거가 없는 순수 맵인지 여부를 스크립트 편집기로 간단히 확인하는 것이 좋다. New Lost Temple is a 4‑player map built on the desert tileset that preserves the layout of the original Lost Temple while making minor tweaks to terrain and resource placement. Each player start is situated near a desert oasis, with eight mineral patches and two geysers evenly distributed around it, making early resource gathering relatively easy. The map’s central area features a high‑ground choke point and a narrow passage, so deciding between early aggression and securing a forward outpost is a key strategic choice. A few hidden expansions and elevated spots are also scattered across the map, giving the late game opportunities for timing attacks and shifting defensive lines. Overall play follows the standard melee cycle of building structures, producing units, upgrading, and launching timing attacks to vie for victory. Consequently, it suits intermediate players who want to balance micro and macro, as well as aggressive fans of early rushes and defensive players who enjoy counter‑attacks. Before playing, check the map resolution (1024×1024) and tile size (128×128) to ensure graphics settings or mod compatibility, and verify with a script editor that the map contains no hidden triggers if you expect a pure melee experience.
1대1 3종족 (1vs1 (3 Races))
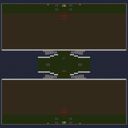
이 맵은 '(4) - 1vs1(3 Races)'라는 제목을 가진 스타크래프트 브루드워 유즈맵으로, 1대1 대전을 기본으로 하면서 각 종족을 선택할 수 있는 구조를 가지고 있다. 맵 크기는 1024x1024 타일이며 플랫폼 타일셋을 사용해 평평한 지형에 광물과 가스가 균등하게 배치되어 있다. 각 플레이어 시작 시 64 광물, 12 가스 및 15000의 초기 자원을 제공받으며, 3개의 다크 아콘과 3개의 드론 혹은 SCV가 미리 배치되어 있어 초기부터 유닛 생산과 테크 트리를 빠르게 진행할 수 있다. 이러한 높은 시작 자원은 일반적인 메lee 맵보다 훨씬 빠른 게임 전개를 가능하게 하며, 초반부터 대치와 소규모 교전이 자주 발생한다. 지형은 특별히 복잡한 장애물이나 높은 지형이 없어 전략은 주로 병력 구성과 타이밍에 집중하게 되며, 여기서는 프로토스, 테란, 저그 세 종족 중 하나를 선택해 상대를 압박하는 방식이 일반적이다. 승리는 상대 기지를 파괴하거나 모든 유닛을 제거하는 표준 조건을 따르며, 특별한 트리거나 스토리 요소가 없어 순수하게 실력에 의존하는 대전이 된다. 따라서 추천 대상은 메lee에 익숙한 중급 수준의 플레이어이며, 빠른 진행을 선호하거나 빌드 순서를 연습하고 싶은 유저에게 적합하다. 플레이 전에는 시작 자원이 비정상적으로 높다는 점을 인지하고, 이를 바탕으로 초기 테크 rush나 모든 인원을 올인하는 전략을 고려해야 한다. This map titled '(4) - 1vs1(3 Races)' is a StarCraft Brood War UMS map designed for 1v1 matches while allowing players to choose any of the three races. The map size is 1024x1024 tiles using the platform tileset, providing a flat terrain with minerals and gas evenly distributed. Each player starts with 64 minerals, 12 gas and a starting reserve of 15000 minerals/gas, and three dark archons along with three drones or SCVs are pre‑placed, enabling rapid unit production and tech progression from the outset. The high starting resources make the game progress much faster than a standard melee map, leading to frequent early standoffs and small‑scale skirmishes. The terrain lacks complex obstacles or high ground, so strategy focuses on army composition and timing; players typically pick Protoss, Terran or Zerg to pressure the opponent. Victory follows the standard condition of destroying the enemy base or eliminating all units, with no special triggers or story elements, making the match a pure test of skill. Accordingly, the map is recommended for intermediate players familiar with melee who prefer a fast pace or want to practice build orders. Before playing, note the unusually high starting resources and consider an early tech rush or an all‑in attack based on that advantage.
최후의 전투 (Die letzte Schlacht)
Die letzte Schlacht는 1024x1024 크기의 황무지 타일셋을 사용하는 4인 자유전투 맵이다. 내부 설명에 따라 모든 적 건물을 파괴해야 승리할 수 있으며, 이는 고전적인 annihilation 조건과 동일하다. 시작 위치는 맵 네 귀퉁이에 균등하게 배치되어 초반 자원 채집과 기반 시설 건설에 차이가 적게 발생한다. 자원 광물과 가스는 표준 배치로, 각 플레이어는 초기 500 광물과 500 가스를 보유하고 있어 빠른 테크 트리 진입이 가능하다. 중앙에는 중립 유닛이 존재하지 않아 전투는 주로 플레이어 간 직접 충돌로 이어지며, 지형은 높은 절벽과 좁은 통로가 적절히 섞여 있어 전략적인 요충지 선점이 승패를 좌우한다. 특히 황무지 타일셋 특유의 시야 제한을 활용한 은신 공격과 병력 이동이 중요한 변수가 된다. 플레이어는 저글링 러시, 질럿 pouss, 마린 마라콤 등 다양한 전략을 시도할 수 있으며, 게임 후반에는 캐리어 또는 배틀크루저와 같은 고급 유닛을 생산해 최종 승리를 노릴 수 있다. 지형이 비교적 개방적이기 때문에 스캔과 관측소 usage가 필수적이며, 이를 간과하면 기습에 취약해진다. 전체적인 플레이 시간은 평균 20~30분 정도로 추정되며, 초보자도 규칙을 쉽게 이해할 수 있어 입문용 맵으로 적합하다. 다만, 균형 잡힌 전투를 원하는 플레이어라면 팀 기반 변형을 시도해 보는 것도 좋으며, UMS 방식의 트리거나 스토리는 존재하지 않으니 순수한 메lee 경험에 집중할 수 있다. Die letzte Schlacht is a 4-player free-for-all map using the 1024x1024 wilderness tileset. According to its description, victory is achieved by destroying all enemy buildings, which is the classic annihilation condition. Starting positions are evenly placed at the four corners of the map, so early resource gathering and base construction differ little among players. Minerals and gas are placed in the standard layout, giving each player 500 minerals and 500 gas at the start, allowing quick tech tree progression. There are no neutral units in the center, so combat mainly consists of direct clashes between players. The terrain mixes high cliffs and narrow passages, making control of key chokepoints decisive for victory. Especially, the limited sight inherent to the wilderness tileset makes stealth attacks and troop movement important variables. Players can try various strategies such as Zergling rush, Zealot push, Marine-Marauder combos, and in the late game they can produce high-end units like carriers or battlecruisers to aim for final victory. Because the map is relatively open, scanning and observer usage are essential; neglecting them leaves one vulnerable to sneak attacks. Overall play time is estimated at around 20 to 30 minutes on average, making it suitable for beginners who can easily grasp the rules. If players seek more balanced combat, they may try team-based variants, but the map contains no UMS triggers or story, so the focus remains on a pure melee experience.
제목 없는 시나리오 (Untitled Scenario)
Untitled Scenario는 사막 타일셋을 기반으로 한 4인 밀리 맵으로, 내부 설명에 따르면 모든 적 건물을 파괴하는 것이 승리 조건이다. 맵 크기는 1024x1024 타일이며, 전체 해상도는 4096x4096 픽셀로, 일반적인 브루드워 맵보다 넓은 시야를 제공한다. 시작 위치들은 사막 지형에 고르게 배치되어 초기 자원 채취와 기지 건설에 균등한 기회를 준다. 자원 광물과 가스 매장은 표준 밀리 맵과 유사한 분포를 보여 초반 빌드 순서가 기존 맵과 크게 다르지 않으며, 후반에는 사막 특유의 좁은 통로와 높은 지형이 전투의 변수로 작용한다. 승리를 위해서는 적의 주요 생산 시설과 방어 건물을 우선적으로 파괴하면서 동시에 자신의 경제를 유지해야 하는데, 이는 기존 밀리 맵에서 요구하는 멀티태스킹 능력과 유사하다. 플레이어는 초반에 스카웃을 통해 적의 진형을 파악하고, 미사일 타워나 병영을 적절히 배치하여 방어를 갖춘 뒤, 중반에 유닛 생산을 확대해 압박을 가해야 한다. 이러한 흐름은 일반적인 4인 자유전과 비슷하지만, 사막 맵의 특성상 지형 이용이 승패에 큰 영향을 미친다. 따라서 맵을 선택하기 전에 사막 지형에 대한 이해와 빠른 건물 건설 능력, 그리고 유닛 이동 경로를 예측하는 감각이 필요하며, 초보자보다는 중간 이상의 실력을 가진 플레이어에게 적합하다. 플레이 전에는 시작 위치의 자원 분포를 확인하고, 초반 빌드 순서를 사전에 구상하는 것이 좋으며,多人전에서는 통신과 협상이胜负를 좌우할 수 있음을 기억해야 한다. Untitled Scenario is a 4‑player melee map built on the desert tileset, with the victory condition described as destroying all enemy buildings. The map size is 1024×1024 tiles and the full resolution is 4096×4096 pixels, providing a wider view than typical Brood War maps. Starting positions are evenly distributed across the desert terrain, giving equal opportunities for early resource gathering and base construction. Mineral and gas placements follow a standard melee distribution, so early build orders are similar to those on other melee maps; in the late game, the desert’s narrow chokepoints and high ground become tactical variables. To win, players must prioritize destroying the opponent’s key production and defensive structures while maintaining their own economy, which mirrors the multitasking demands of conventional melee maps. Early scouting reveals enemy formations, allowing proper placement of missile towers or barracks for defense, followed by mid‑game expansion of unit production to apply pressure. Although the flow resembles a typical 4‑player free‑for‑all, the desert map’s terrain heavily influences the outcome. Consequently, players should understand desert geography, have quick building skills, and be able to anticipate unit movement paths; the map suits intermediate‑to‑advanced players rather than beginners. Before playing, check the starting resource distribution and plan an early build order in advance, and remember that in multiplayer matches communication and negotiation can decide the outcome.
제목 없는 시나리오 (Untitled Scenario)
이 맵은 파일명 Great_LandBattles.scm 에서 확인할 수 있는 1024×1024 크기의 황무지 타일셋을 사용하는 전형적인 UMS 맵이다. 내부 제목은 'Untitled Scenario'이며 승리 조건은 적의 모든 건물을 파괴하는 것이다. speciale한 트리거나 자원 수정, 영웅 유닛, 스크립트 이벤트 없이 일반적인 스타크래프트 브루드워 메lee 룰을 그대로 따른다. 따라서 플레이어는 표준적인 자원 채집과 기지 건설, 유닛 생산을 통해 상대 건물을 차례대로 무너뜨려야 한다. 맵은 넓이가 충분해 초기 기지 배치를 자유롭게 할 수 있으며, 황무지 지형은 시야 확보와 병력 이동에 어느 정도 방해를 주어 전술적인 접근이 요구된다. 4인 플レイ를 기준으로 하며 팀 구분이 없어 각자 자유전투 형태의 자유경쟁이 펼쳐진다. 초반에는 저글링이나 마린 등으로 소규모 교전을 통해 상대방의 확장을 견제하고,中期에는 탱크나 히드라리스크 같은 중장비 병력을 투입해 공세를 펼칠 수 있다. 후반에는 전투순양함이나 캐리어 같은 고비용 유닛을 활용해 결정적인 타격을 줄 수도 있다. 특수한 규칙이 없어 맵 자체의 밸런스는 원래 종족 간 밸런스에 크게 의존하며, 따라서 각 종족의 특징을 잘 살리는 플레이가 승리로 이어진다. 이 맵은 메lee 감각을 그대로 느끼고 싶은 유저나, 간단히 건물 파괴 목표를 연습하고 싶은 초보자에게 적합하며, 복잡한 트리거나 스토리 없이 순수한 전략 대결을 원하는 플레이어에게 추천한다. 플레이 전에는 시작 위치와 자원 분포를 확인해 초기 건물 배치를 계획하고, 상대 종족의 특징을 고려해 적절한 대응 병력을 준비하는 것이 좋겠다. This map is a typical UMS map using a 1024×1024 wasteland tileset, as seen from the filename Great_LandBattles.scm. Its internal title is 'Untitled Scenario' and the victory condition is to destroy all enemy buildings. Without special triggers, resource modifications, hero units, or script events, it follows the standard StarCraft Brood War melee rules exactly. Therefore players must gather resources, build bases, and produce units to gradually demolish enemy structures. The map offers ample space for free initial base placement, and the wasteland terrain somewhat hinders vision and unit movement, demanding tactical approaches. Designed for four players with no team divisions, it unfolds as a free-for-all battle. Early on, Zerglings or Marines can be used for small skirmishes to curb enemy expansion; in the mid-game, tanks or hydralisks can be deployed as heavy units to press the offense. In the late-game, battlecruisers or carriers may be employed for decisive blows. With no special rules, the map’s balance relies heavily on the original faction balance, so playing to each race’s strengths leads to victory. This map is suited for users who want to feel pure melee gameplay or beginners who wish to practice the simple objective of destroying buildings, and it is recommended for players seeking a straightforward strategic duel without complex triggers or story. Before playing, check starting positions and resource distribution to plan initial building placement, and prepare appropriate counter units based on the opponent’s race characteristics.
황혼의 영역 (The Twilight Zone)
황혼의 영역(The Twilight Zone)은 화산 타일셋을 배경으로 한 4인용 밀리 맵으로, 기본 목표는 적의 모든 건물을 파괴하는 것이다. 지형은 중앙에 넓은 평야와 주변에 용암 흐름이 섞인 불규칙한 지형을 제공하며, 각 진영은 대칭적으로 배치된 시작 위치에서 자원을 채취하고 건물을 올린다. 자원 배치는 표준적인 미네랄과 가스 분포를 따르며, ekspansion 지점은 주요 길목에 위치해 초반 충돌과 동시에 전략적 확장을 유도한다. 플레이어는 초기 단계에서 스카웃을 통해 적의 빌드 순서를 파악하고, 병력 생산과 업그레이드 시점을 조절해야 한다. 승리 조건이 단순히 건물 파괴이기 때문에, 방어보다는 공격적인 운영이 효과적이며, 특히 저글링이나 zealot 같은 빠른 유닛으로 초반 압박을 시도할 수 있다. 반면, 적의 건물이 넓게 퍼져 있을 경우 포위 및 지속적인 압박이 필요해 중반부터는 시즈 탱크나 디파일러 같은 범위 공격 유닛이 빛을 발한다. 이 맵은 4인 자유전으로 진행되므로 동맹 없이 개별 실력이 직접 승부에 영향을 주며, 초보자에게는 자원 관리와 기본 전투 감각을 익히기에 적당하고, 숙련자는 맵 지형을 활용한 타이밍 공격을 연습할 수 있다. 플레이 전에는 시작 위치의 자원 분포를 확인하고, 초반 건물 배치가 안전 경로를 막지 않는지 살펴볼 것을 권장한다. The Twilight Zone is a 4-player melee map set on a volcanic tileset, with the basic goal of destroying all enemy buildings. The terrain features a wide central plain mixed with irregular lava flows, and each faction starts from symmetrically placed locations to gather resources and erect structures. Resource placement follows the standard mineral and gas distribution, and expansion points sit on main chokepoints, encouraging early clashes while also prompting strategic expansion. In the early game players should scout to read the opponent’s build order and timing their unit production and upgrades accordingly. Because victory is achieved solely by destroying enemy structures, an aggressive approach works better than a passive defense; fast units such as Zerglings or Zealots can be used for early pressure. Conversely, when enemy structures are spread out, surrounding and maintaining pressure becomes necessary, so mid‑game units like Siege Tanks or Defilers with area damage become valuable. This map is a free‑for‑all for four players, so individual skill directly decides the outcome without alliances. Beginners can use it to practice resource management and basic combat fundamentals, while experienced players can rehearse timing attacks that exploit the map’s terrain. Before playing, check the resource distribution at the start positions and make sure early‑game building placement does not block safe retreat paths.
무제 시나리오 (Untitled Scenario)
이 맵은 황무지 타일셋을 바탕으로 한 1024×1024 크기의 표준 메lee 맵이다. 내부 설명에 따라 모든 적 건물을 파괴하면 승리하는 단순한 목표를 가지고 있으며, 이는 브루드워의 클래식 메lee 승리 조건과 동일하다. 플레이어는 최대 4인까지 참여할 수 있으며, 팀 설정은 기본적으로 개인전 형태여서 각자 독립적인 기지를 건설하고 유닛을 생산해 적을 압멸해야 한다. 지형은 넓고 평평한 평원이 majority를 차지하며, 몇 개의 높은 지대와 자원 구간이 전략적인 요충지를 형성한다. 초반에는 스카우트와 초기 건물을 통해 자원 확보에 집중하고, 미네랄과 가스를 균형 있게 채취하여 병력 생산 기반을 마련해야 한다. 중반 이후에는 테란, 프로토스, 저그 중 원하는 종족을 선택해 기술 트리를 올리고, 업그레이드와 함께 군대를 규모 있게 확장한다. 승리는 적의 모든 건물, 즉 기지 본건물과 부속 시설까지 완전 제거했을 때 달성되며, 이는 방어를 무시하고 공격적인 플레이를 유도한다. 이러한 구조는 메lee에 익숙한 플레이어에게는 직관적이면서도, 신규 유저에게는 기본적인 전략과 빌드 오더를 연습하기에 좋은 교재 역할을 한다. 따라서 전략적 사고를 기르고 싶은 초보부터 중간 수준의 플레이어까지 추천하며, 플레이 전에는 맵 크기와 자원 분포를 확인하고, 자신의 종족 특성에 맞는 초반 빌드를 준비하는 것이 좋다. This map is a standard melee map built on the wasteland tileset with a size of 1024×1024. According to its internal description, the objective is to destroy all enemy buildings, which matches the classic melee victory condition in StarCraft: Brood War. Up to four players can participate, and the team setting defaults to free‑for‑all, so each player constructs an independent base, produces units, and aims to overwhelm opponents. The terrain consists mainly of wide, flat plains with a few elevated areas and resource clusters that form key strategic points. In the early game, players focus on scouting and initial building to secure resources, balancing mineral and gas gathering to lay a foundation for unit production. In the mid‑ to late game, they choose Terran, Protoss, or Zerg, advance the tech tree, apply upgrades, and expand their forces. Victory is achieved when every enemy structure—including the main base and all附属 buildings—is completely eliminated, encouraging aggressive play over defensive turtling. This layout feels intuitive for veterans of melee maps while serving as a solid practice ground for newcomers to learn basic strategies and build orders. It is therefore recommended for beginners to intermediate players who wish to sharpen their strategic thinking; before playing, check the map size and resource distribution and prepare an opening build suited to your chosen race.
맵 선택 가이드
태그는 맵의 핵심 특징을 빠르게 설명하지만 제작 버전마다 규칙이 다를 수 있습니다. 상세 설명에서 권장 인원, 난이도, 플레이 시간과 버전을 함께 확인한 뒤 다운로드하세요.