
메리 스타크래프트 맵 모음
'메리' 태그가 등록된 맵을 모았습니다. 장르 하나로 찾기 어려운 플레이 방식, 난이도와 특징을 중심으로 인기 맵과 최신 맵을 비교해 보세요.
- 등록 맵
- 21개
- 누적 다운로드
- 1
- 누적 조회
- 19
인기 맵
다운로드와 조회 반응이 높은 맵입니다.
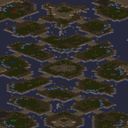
여섯 개의 다리 ( (6) Bridges )
(6) Bridges는 사막 타일셋을 바탕으로 한 5인용 메리 맵으로, 표준적인 스타크래프트 브루드워 전투 환경을 제공하면서도 독특한 지형 배치가 특징이다. 맵 중앙에 위치한 여러 개의 다리와 좁은 통로들은 전진 경로를 제한하고, 양측 기지 사이에 자연스러운 교전 구역을 형성한다. 이로 인해 초반에는 자원 채점과 병력 생산에 집중하게 되며, 중반 이후에는 다리 점령을 둘러싼 치열한 쟁탈전이 벌어진다. 자원 배치는 대칭적으로 설계되어 각 플레이어가 동일한 광물과 가스량을 확보할 수 있도록 했으며, 시작 위치 역시 균등하게 배치되어 공정한 경쟁이 가능하다. 지형 상의 높은 지대는 시야 확보와 포격 위치를 제공하여 전략적인 고지 활용이 중요한 승부처가 된다. 이러한 요소들은 초보자는 기본적인 빌드 오더와 유닛 컨트롤을 연습하기에 적당하고, 숙련된 플레이어는 다리 주변에서의 교전 타이밍과 병력 분배를 통해 높은 수준의 마이크로 컨트롤을 시도해볼 수 있다. 게임 진행은 일반적인 메리 흐름을 따르므로, 자원 채취 → 병력 생산 → 전투 순환이 자연스럽게 이루어지며, 특별한 트리거나 승리 조건은 없다. 따라서 순수한 실력 대결을 원하는 유저에게 적합하며, 맵을 선택하기 전에는 시작 위치의 자원 분포와 다리 폭을 확인하여 초반 전략을 구상하는 것이 좋다. (6) Bridges is a 5‑player melee map built on the desert tileset, offering a standard StarCraft: Brood War combat environment while featuring a distinctive terrain layout. Several bridges and narrow passages situated in the center limit forward routes and create natural engagement zones between the opposing bases. Consequently, early game focuses on resource gathering and unit production, while mid‑ to late‑game sees intense fighting over control of the bridges. Resources are symmetrically placed so each player receives equal minerals and gas, and starting positions are evenly distributed to ensure fair competition. Elevated terrain provides sight lines and artillery positions, making high‑ground utilization a key tactical element. These aspects make the map suitable for beginners to practice basic build orders and unit control, while experienced players can test higher‑level micro‑management by timing engagements around the bridges and allocating forces effectively. The game follows the usual melee flow: resource gathering → unit production → combat cycle, without any special triggers or victory conditions. It is therefore ideal for users seeking pure skill‑based matches, and before playing one should verify the resource distribution at the start locations and the width of the bridges to plan an opening strategy.
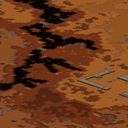
데드랜드 (The Deadlands)
The Deadlands는 황혼 타일셋을 활용한 1024x1024 크기의 사용자 정의 메리 맵으로, 내부 설명에 따르면 2~6명의 플레이어가 참여할 수 있다. 지도는 넓게 트인 평원과 불규칙한 절벽 지역이 섞여 있어 초기 자원 채집과 기지 확장이 자유롭지만, 중앙에 위치한 높은 지형과 좁은 협로들이 전술적 요충지를 만든다. 시작 위치마다 자원 분포가 약간씩 다르므로, 각 종족의 초기 빌드 순서와 확정 타이밍을 조정해야 하며, 특히 저글링 rush나 드롭 ship 기반의 빠른 확장이 가능한 지형이 곳곳에 존재한다. 게임 진행은 표준 메리와同様에 자원 채집, 기술 트리 업그레이드, 군대 생산을 반복하며, 상대방의 기지를 압박하거나 방어선을 구축하는 방식으로 승부를 가린다. 승리 조건은 적 전체를 제거하는 일반적인 메리 방식으로, 특별한 트리거나 스토리 이벤트는 존재하지 않는다. 따라서 이 맵은 순수한 전략적 대결을 즐기고자 하는 플레이어에게 적합하며, 맵마다異なる 지형 특성을 활용한 새로운 전술을試す 중급 이상의 유저에게 추천한다. 플레이 전에는 시작 지점의 자원 배열과 지형 돌출부를 확인해 초기 빌드 순서를 계획하고, 중앙의 높은 지점을 장악할 시점을 미리 생각해 두는 것이 좋으며, 2인전에서부터 6인전까지 인원 변동에 따라 확전 속도와 방어 준비를 유연하게 조정해야 한다. 이 맵은 상대의 전략을 읽고 대응하는 미묘한 심리전이 중요한 만큼, 상대의 빌드 순서를 scout하고 타이밍에 맞춘 반격을 준비하는 것이 승리의 열쇠가 되며, 장기전에서는 경제력 유지와 타이밍 공격의 조화가 zwycię를 결정한다. The Deadlands is a custom melee map sized 1024x1024 that utilizes the Twilight tileset, and its internal description notes that 2 to 6 players can participate. The map features wide-open plains mixed with irregular cliff areas, allowing free early resource gathering and base expansion, but the elevated terrain and narrow chokepoints located in the center create tactical hotspots. Because resource distribution varies slightly by starting position, each race must adjust its initial build order and timing timing; in particular, terrain that enables fast expansion via zergling rushes or drop ship-based strategies exists throughout the map. Gameplay proceeds like standard melee: repeatedly gathering resources, upgrading tech trees, and producing armies, with victory achieved by pressuring the opponent’s base or constructing defensive lines. The win condition is simply eliminating all enemy forces in the usual melee fashion, with no special triggers or story events. Thus, this map suits players who enjoy pure strategic competition and is recommended for intermediate‑to‑advanced users who wish to try new tactics exploiting the varying terrain of each map. Before playing, check the resource layout and terrain protrusions at the start to plan your opening build, consider when to seize the central high ground, and flexibly adjust expansion speed and defensive preparations according to the number of players ranging from 2 to 6. This map emphasizes reading and countering opponents’ strategies, making scouting the enemy’s build order and preparing timely counter‑attacks the key to victory; in longer games, the balance between economic maintenance and timing attacks determines the outcome.
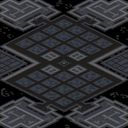
플랫폼 가리슨 (Platform Garrison)
Platform Garrison은 우주 타일셋을 배경으로 한 8인 자유전투 맵이다. 중앙에 배치된 여러 개의 garrison 건물이 맵의 핵심 전략 포인트로 작용하며, 해당 건물을 점령하면 자원 공급량 증가나 유닛 생산 보너스와 같은 전술적 이점을 얻을 수 있다. 초반에는 표준적인 자원 채취와 기지 건설이 이루어지며, garrison 건물 주변에 충돌이 자주 발생해 초기 교전이 활발하다. 중반 이후는 garrison을 둘러싼 쟁탈전이 이어지며, 점령 유지를 위해 방어 타워와 유닛 배치가 필수적이다. 맵 전체가 넓고 시야가 트여 있어 스카웃과 기동성이 중요한 역할을 하며, 특히 멀티플레이 환경에서 의사소통과 타이밍이 승패를 좌우한다. 승리 조건은 표준 메이스와 동일하게 적 전력의 완전 소멸 또는 항복이며, 특별한 트리거나 스토리 요소는 존재하지 않는다. 이와 같은 구조 덕분에 초보자도 기본 메이스 규칙을 쉽게 익힐 수 있고, 숙련 플레이어는 garrison 점유를 통한 자원 우위를 노릴 수 있다. 플레이 전에는 garrison 건물의 위치와 제공되는 보너스를 미리 확인하고, 초기 건물 배치 시 자원 채취 효율과 방어선을 동시에 고려하는 것이 좋다. 또한, 우주 타일셋 특유의 지형 높이를 활용한 은신 경로와 고지대 포인트를 파악하면 전투에서 유리한 위치를 선점할 수 있다. Platform Garrison is an 8-player free-for-all map set on a space tileset. Several garrison buildings placed in the center act as key strategic points; capturing them grants benefits such as increased resource income or unit production bonuses. In the early game, standard resource gathering and base construction take place, and frequent clashes around the garrison structures make early skirmishes lively. From the mid-game onward, battles over control of the garrison continue, and maintaining occupancy requires building defense towers and positioning units. The map is wide and open, making scouting and mobility crucial; in multiplayer, communication and timing often decide the outcome. Victory conditions follow standard melee rules: total destruction of enemy forces or their surrender, with no special triggers or story elements. This structure lets beginners easily learn basic melee mechanics while experienced players can aim for resource advantage by controlling garrisons. Before playing, check the locations and bonuses of the garrison buildings, and when placing initial structures consider both resource gathering efficiency and defensive lines. Additionally, by using the elevation features unique to the space tileset to find hidden routes and high-ground spots, you can secure a favorable position in combat.
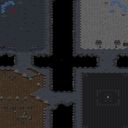
플랫폼 트레커 (Platform Trekker)
Platform Trekker는 우주 타일셋을 사용한 1024×1024 크기의 밀리 맵으로, 두 플레이어가 공정한 듀얼을 펼칠 수 있도록 설계되었다. 맵 설명에서 언급된 것처럼 '편안하게 즐길 수 있는 맵, 도전과 공정한 듀얼에 적합하며 적이 가까워도 도달까지 시간이 걸릴 수 있다'는 점에서, 단순히 바로 맞붙는 전투보다 약간의 거리와 지형 활용이 중요하다. 전체 구조는 대칭적인 출발 지점을 중심으로広활한 공간과 몇 개의 장애물, 높은 지형이 배치되어 있어 초기 자원 채집과 병력 생산 후 서로를 찾는 탐색 과정이 존재한다. 이로 인해 게임 초반에는 건물을 짓고 유닛을 양성하는 표준적인 RTS 흐름을 따르며, 중반 이후에는 지도 곳곳에散らば른 고지대나 통로를 이용해 기습하거나 후퇴하는 전략이 가능해진다. 이러한 흐름은 특히 스킬 대비와 유닛 조합을 연습하고 싶은 intermediate 플레이어에게 적합하며, 초보자도 부담 없이 기본 메커닉스를 익힐 수 있다. 플레이 전에는 시작 위치의 자원 분포와 초기 건물 배치를 확인하고, 상대방이 어느 방향으로 진출할지 예측하며 스카우트 계획을 세우는 것이 좋다. 또한 맵이 우주 타일셋이라서 배경 그래픽이 깔끔하여 시각적 피로가 적고, 장시간 플레이에도 집중하기 쉬운 점이 장점이다. 전반적으로 Platform Trekker는 공정한 1대1 경쟁을 원하는 유저에게 추천할 수 있는 완성도 높은 메리 맵이다. Platform Trekker is a melee map set on a space tileset with a size of 1024×1024, designed for two players to engage in a fair duel. As the description notes, it is an easy‑going map suitable for challenges and fair duels; even if the enemy is nearby, reaching them may take some time, suggesting that distance and terrain usage matter more than an immediate clash. The layout features symmetrical starting points surrounded by open space, a few obstacles, and elevated terrain, which encourages early resource gathering and army building before the search phase begins. Consequently, the early game follows the standard RTS flow of constructing buildings and producing units, while the mid‑ to late‑game allows players to use scattered high ground and passages for ambushes or retreats. This progression makes the map ideal for intermediate players who want to practice skill‑versus‑unit combinations, yet beginners can also learn the basic mechanics without pressure. Before playing, it is advisable to check the resource distribution and initial building placements at the start locations, predict the opponent’s likely expansion direction, and plan scouting accordingly. Moreover, because the map uses a clean space tileset, visual fatigue is low and concentration remains easy even during long sessions. Overall, Platform Trekker is a well‑crafted melee map that is recommended for users seeking balanced 1v1 competition.
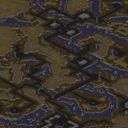
6인용 다코타 블랙 힐스 (Dakota Black Hills)
다코타 블랙 힐스는 황무지 타일셋을 기반으로 한 6인용 스타크래프트 브루드워 맵으로, 넓고 균형 잡힌 지형이 특징이다. 중앙에 넓게 펼쳐진 평야와 주변에 배치된 자원 지점은 초반 확장을 유도하며, 언덕과 좁은 협곡이 전략적인 요충지를 만든다. 플레이어는 각각의 시작 위치에서 기본 건물을 짓고, 스카웃을 통해 적의 움직임을 파악하며 빠르게 병력을 생산해야 한다. 맵 내에는 몇 가지 높은 고지점이 있어 사거리 확장이 가능한 유닛을 배치하기에 좋으며, 동시에 저지점에서는 은신과 기습이 가능하다. 자원 분배는 비교적均등하여, 자원 경쟁이 치열하지 않고 대신 전략과 운영이 승패를 좌우한다. 이는 일반적인 메lee 맵과 유사하지만, 지형의 변화가 적어 초반 빌드 순서에 큰 영향을 받지 않아 상대의 전략을 읽는 능력이 더 중요시된다. 추천 대상은 전략적 사고와 멀티태스킹에 익숙한 intermediate 이상의 플레이어이며, 초보자에게는 자원 관리와 빌드 순서 연습용으로도 적합하다. 플레이 전에는 시작 위치의 자원 배치를 확인하고, 초반 방어를 어떻게 구축할지 계획을 세우는 것이 좋다. 또한, 맵의 대칭 구조는 공정성을 보장하여 토너먼트 환경에서도 자주 사용되며, 다양한 종족 간 상성 테스트에 적합하다. 프로토스에서는 광역 광자 포 디펜스와 함께 드롭 ship 운영이 효과적이며, 테란은 바이오닉 돌진과 함께 탱크 라인을 활용한 압박이 강점이다. 저글링 중심의 저글링 럭시와 함정 드랍은 저글링에게도 좋은 기회를 제공한다. 전체적인 플레이 시간은 보통 20~30분 정도이며, 재플레이 가치가 높아 여러 번 플레이해도 새로운 전략을 시도해 볼 수 있다. Dakota Black Hills is a 6‑player StarCraft: Brood War map built on the wasteland tileset, featuring a wide and balanced terrain. A broad central plain surrounded by resource points encourages early expansion, while hills and narrow chokepoints create key tactical positions. Each player starts by constructing basic buildings, scouting enemy movements, and quickly producing units. The map contains several high‑ground spots ideal for placing units with extended range, while low‑ground areas allow for concealment and ambushes. Resources are fairly evenly distributed, so victory hinges more on strategy and execution than on fierce resource competition. Like a standard melee map, the terrain does not change dramatically, so early build order has less impact and reading the opponent’s strategy becomes more important. It is recommended for intermediate‑plus players comfortable with strategic thinking and multitasking; beginners can also use it to practice resource management and build orders. Before playing, check the starting resource layout and plan your early defense. The map’s symmetrical layout ensures fairness, making it a frequent choice in tournaments and a good testbed for race‑vs‑race matchups. Protoss players find effective photon cannon defenses combined with drop‑ship play, Terrans excel with bio‑aggressive pushes backed by tank lines, and Zerg can utilize zergling rushes and sneaky drops. Typical play time ranges from 20 to 30 minutes, and the map offers high replay value, inviting players to try new strategies each session.
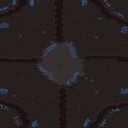
미치지 마세요 (Don't be Crazy)
Don't be Crazy는 정글 타일셋을 기반으로 한 4096×4096 크기의 광활한 맵으로, 표준적인 자원 배열과 대칭적인 시작 위치를 갖춘 전형적인 메리 맵 형태를 보인다. 플레이어는 5명이 자유전 방식으로 게임을 시작하며, 승리 조건은 적의 모든 건물을 완전히 파괴하는 것이다.このため 기본적인 자원 채취, 기지 건설, 유닛 생산 흐름이 그대로 유지되며, 맵이 거대하기 때문에 초반 탐색과 확장에 드는 시간이 상대적으로 길다. 정글 지형은 나무와 높은 지형이 시야를 partiellement 가려 주지만, 전체적으로는 트레인이 비교적 원활하여 대규모 유닛 이동이 가능하다. 간혹 등장하는 협곡과 높은 절벽은 방어 거점이나 기습 루트로 활용될 수 있어, 지형 활용이 승부의 중요한 변수가 된다. 초반에는 스카웃을 통해 상대의 위치를 파악하고, 초기 병력을 효율적으로 배분해 확장 속도를 높이는 것이 관건이다. 자원이 풍부하게 배치되어 있어 경제적 운영이 가능하나, 맵 크기 때문에 공급선 관리가 복잡해질 수 있으므로, 생산 시설과 방어 시설을 적절히 배치해 물류 라인을 유지해야 한다. 중반 이후에는 경제력을 바탕으로 한 거대 유닛 군집이나 교차 공세가 효과적이며, 특히 정글 지역의 시야 제한을 이용해 은밀히 접근한 기습이 큰 성과를 낼 수 있다. 반면, 넓은 공간 때문에 장거리 포격이나 항공 유닛의 역할이 더욱 부각되므로, 시야 확보와 대공 방어도 동시에 고려해야 한다. 이 맵은 기존 메리 맵의 감각을 유지하면서도 규모가 커서 장시간 플레이를 원하는 유저에게 적합하며, 5인 자유전 방식은 매 경기마다 변수가 많아 반복 플레이에도 신선함을 제공한다. 플레이 전에는 시작 위치 간 거리와 광물·가스 분포를 확인해 불리한 편차가 없는지 검토하고, 필요하면 맵 에디터로 시작 지점을 미세 조정하는 것이 좋다. 전반적으로는 중급 이상의 실력을 가진 유저가 전략적 깊이와 대규모 전투의 재미를 동시에 느낄 수 있는 맵으로 추천한다. Don't be Crazy is a sprawling map based on the jungle tileset, measuring 4096×4096, featuring a standard resource layout and symmetrical start positions typical of a classic melee map. Five players begin in a free-for-all format, with the victory condition being the complete destruction of all enemy buildings. Consequently, the fundamental flow of resource gathering, base construction, and unit production remains unchanged, but the map’s sheer size means that early exploration and expansion take considerably more time. The jungle terrain, with its trees and elevated areas, partially obscures vision, yet overall pathing remains relatively smooth, allowing large-scale unit movements. Occasional narrow passes and high cliffs can serve as defensive strongholds or ambush routes, making terrain exploitation a key variable in victory. Early on, scouting to locate opponents and efficiently allocating initial forces to speed up expansion is crucial. Although resources are plentiful, enabling solid economic play, the vastness of the map can complicate supply lines, so production and defensive facilities must be placed wisely to maintain logistics. In the mid‑ to late‑game, economic strength allows for massive unit clusters or cross‑attacks, and exploiting the jungle’s limited sight for stealthy ambushes can yield significant results. Conversely, the open expanse heightens the impact of long‑range artillery and air units, necessitating both vision control and anti‑air defenses. This map retains the feel of traditional melee while its large scale suits players seeking longer sessions; the five‑player free‑for‑all ensures plenty of variability, keeping repeat play fresh. Before playing, check the distances between start spots and the distribution of minerals and gas to ensure no side is unfairly disadvantaged, and if needed, use the map editor to fine‑tune start positions. Overall, it is recommended for intermediate‑to‑advanced players who want to enjoy strategic depth alongside the thrill of large‑scale combat.
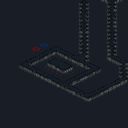
무제 시나리오 (Untitled Scenario)
이 맵은 설원/얼음 타일셋을 사용한 1024×1024 크기의 단일 플레이 시나리오로, 제목은 'Untitled Scenario'이며 내부 설명에 따라 적의 모든 건물을 파괴하는 것이 목표이다. 현재 분류는 MELEE(밀리)로 등록되어 있으나, 특정 승리 조건이 제시된 점과 스크립트 트리거가 likely 존재한다는 점을 고려하면 UMS(사용자 맵) 형태에 nearer하다. 지도는 넓은 눈밭 지형을 바탕으로 진입로와 자원 배치가 대칭적이지 않아, 플레이어는 처음에 주어지는 유닛과 건물을 활용하여 효율적인 자원 채취와 동시에 병력을 양성해야 한다. 적 기지는 맵 가장자리에 여러 군데 배치되어 있으며, 각각의 건물은 내구도와 방어 구조가 달라 순차적으로 공략 계획을 세워야 한다. 초반에는 스카우트를 통해 적의 위치를 파악하고, 미네랄과 가스를 빠르게 확보하여 생산 bâtiments를 업그레이드하는 것이 승리의 핵심이다. 중반 이후에는 압박 공성 유닛이나 항공 유닛을 투입하여 건물 파괴 속도를 높일 수 있으며, 맵 곳곳에 숨겨진 지형 장애물을 활용한 측면 기습도 효과적이다. 전체적인 난이도는 적의 AI가 표준 수준이므로 초보자는 자원 관리와 빌드 순서에 주의하면 충분히 클리어할 수 있으며, 숙련자는 시간 단축이나 최소 유닛으로의 도전을 통해 재플레이 가치를 찾을 수 있다. 플레이 전 확인해야 할 점은 맵이 단일 플레이 전용이라는 점과, 내부 트리거에 따라 승리 조건이 '모든 적 건물 파괴'로 고정되어 있어 다른 유즈맵처럼 부가 미션이나 숨은 요소는 거의 없다는 점이다. 따라서 순수한 전투와 전략 연습을 원하는 유저에게 적합하며, 특히 설원 지형의 미적 분위기를 즐기고 싶은 플레이어에게 추천한다. This map is a single‑player scenario set on a 1024×1024 snowy/ice tileset, titled 'Untitled Scenario'. Its internal description states the goal is to destroy all enemy buildings. Although it is currently listed under MELEE, the presence of a explicit victory condition and likely script triggers makes it closer to a UMS (user‑made map) than a standard melee map. The terrain features an uneven layout of chokepoints and resource placements, forcing the player to make the most of the starting units and structures to gather resources efficiently while building an army. Enemy bases are scattered around the map’s edges, each with different hit points and defensive layouts, requiring a staged assault plan. Early on, scouting reveals enemy positions; quickly securing minerals and gas and upgrading production facilities is key to victory. In the mid‑game, pressure‑type siege or air units can be deployed to speed up building destruction, and using hidden terrain obstacles for flank attacks can be effective. Overall difficulty is moderate because the enemy AI runs at a default level; beginners can clear the map by focusing on resource management and build order, while experts can aim for faster clear times or minimal unit challenges for replay value. Before playing, note that the map is strictly single‑player and the victory condition is fixed to 'destroy all enemy buildings' via internal triggers, so there are hardly any extra missions or hidden elements found in other UMS maps. It is therefore suited for users who want pure combat and strategy practice, and especially recommended for those who enjoy the aesthetic of a snowy battlefield.
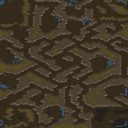
캐년 런 (4) (Canyon Run)
(4)Canyon Run은 황무지 타일셋을 바탕으로 한 1024×1024 크기의 스타크래프트 브루드워 메레맵으로, 네 명이 동시에 참여할 수 있는 자유 경쟁 형태입니다. 맵 설명에 따르면 플레이어는 협곡을 장악하기 위해 살육, 첩보, sabotage 등 다양한 수단을 동원할 수 있으며, 이는 일반적인 자원 채집과 건물 건설을 넘어서는 전술적 자유도를 암시합니다. 지형은 좁은 협곡과 넓은 평야가 교차해 이루어져 초반에는 지형 활용과 상대 진영 탐색이 승부를 가릅니다. 중후반에는 유닛 생산과 업그레이드 타이밍이 중요해지며, 맵 전체에 분포된 미네랄과 가스 자원은 균등하게 배치되어 어느 쪽도 일방적으로 유리하지 않습니다. 플레이 경험은 빠른 기동전과 예상치 못한 교전이 반복되는 긴장감 넘치는 상황으로, 특히 스카웃과 은폐 작전을 즐기는 유저에게 적합합니다. 초보자는 기본적인 건물 순서와 유닛 조합을 익힌 후, 지형 이점을 이용해 기습이나 후퇴를 시도해 보는 것이 좋으며, 숙련자는 타이밍 공격과 심리전을 통해 상대를 흔들 수 있습니다. 플레이 전 확인해야 할 점은 시작 위치가 무작위로 배정될 수 있다는 점과, 협곡 지형이 시야를 가릴 수 있어 스캔이나 감시 탑을 미리 준비하는 것이 유리하다는 것입니다. 전체적으로 (4)Canyon Run은 전통적인 메레의 틀을 유지하면서도 협곡이라는 독특한 지형을 통해 전략적 다양성을 제공하는 맵이라 할 수 있다. (4)Canyon Run is a StarCraft: Brood War melee map built on the wasteland tileset, measuring 1024×1024 and designed for four players in a free‑for‑all setting. The description states that players must seize control of the canyon by any means necessary—kill, spy, and sabotage—suggesting a tactical freedom that goes beyond standard resource gathering and building. The terrain mixes narrow canyons with open plains, so early game revolves around using the geography and scouting enemy positions. In the mid‑to‑late game, unit production timing and upgrade priorities become crucial, while minerals and gas are evenly scattered across the map, giving no side an inherent advantage. Gameplay feels like fast‑paced maneuver warfare with sudden, tense skirmishes, appealing especially to players who enjoy scouting and stealth tactics. Beginners should first master basic build orders and unit combos, then try using the terrain for ambushes or retreats; experienced players can employ timing attacks and psychological pressure to destabilize opponents. Before playing, note that starting positions may be randomized and the canyon’s walls can block sight, making advance detection or observer preparations useful. Overall, (4)Canyon Run preserves the classic melee framework while adding strategic variety through its distinctive canyon layout.
사냥꾼의 매트릭스 (The Hunters-Matrix)
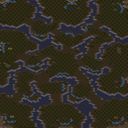
사냥꾼의 매트릭스는 사막 타일셋을 바탕으로 한 8인 자유 대전(컷스로트) 스타크래프트 브루드워 맵이다. 지도는 1024×1024 타일 크기에 사막 지형을 활용해 넓게 퍼진 자원 지역과 여러 개의 출발점을 제공한다. 각 플레이어는 서로 다른 지역에 시작하며, 미네랄과 가스가 균등하게 배치되어 초기 자원 경쟁이 활발하다. 중앙에는 높은 지형의 옥타곤 형태의 고지대가 있어 전략적인 점령 포인트가 되며, 이를 차지하면 시야 확보와 공격 루트 측면에서 유리해진다. 맵의 통로는 비교적 직선적이지만 여러 갈래의 side path가 존재해 측면 공격이나 후퇴 경로를 마련할 수 있다. 이러한 구조는 rush 전략과 동시에 장기적인 macro 플레이 양쪽을 모두 가능하게 해준다. 유즈맵이 아닌 순수 메이플 형식으로, 특별한 트리거나 스크립트 없이 기본 게임 규칙에 따라 진행된다. 따라서 초보자도 쉽게 규칙을 이해할 수 있지만, 고수 수준에서는 지형의 활용과 타이밍이 승패를 가른다. 추천 대상은 멀티플레이를 즐기는 2~8명의 유저이며, 특히 팀전보다는 개인전의 긴장감을 선호하는 플레이어에게 적합하다. 플레이 전에는 출발점 간 거리와 자원 분포를 확인하고, 초반 rush에 대비한 방어 건물 위치를 계획하는 것이 좋다. 또한 사막 특유의 시야 가림 효과를 고려해 관측소나 감시塔를 미리 배치하면 장기전에서도 우위를 점할 수 있다. The Hunters-Matrix is a StarCraft: Brood War map set on a desert tileset, designed for an eight‑player free‑for‑all (cutthroat) match. The map spans 1024×1024 tiles, using the desert terrain to spread resource fields widely and provide multiple starting locations. Each player begins in a separate area, with minerals and gas evenly distributed so early resource competition is fierce. In the center lies a raised octagonal high ground that serves as a strategic capture point; controlling it grants vision advantages and better attack routes. While the main corridors are relatively straight, several side paths branch out, allowing flank attacks or retreat routes. This layout supports both aggressive rush strategies and longer‑term macro play. As a pure melee map without custom triggers or scripts, it follows the base game rules, making it easy for newcomers to grasp yet rewarding for veterans who master terrain timing and positioning. The recommended audience is 2‑8 players who enjoy multiplayer, especially those who prefer the tension of solo combat over team play. Before a match, check the distance between start points and the distribution of resources, and plan defensive structures to counter early rushes. Additionally, because the desert’s limited visibility can hide units, placing observatories or scout towers in advance can provide an edge in prolonged engagements.
엘리트 맵 (The Elite Map)
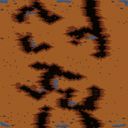
이 맵은 스타크래프트 브루드워의 황혼 타일셋을 활용한 1024×1024 크기의 일반전(밀리) 유즈맵이다. 파일명과 내부 제목에 나타낸 레트 speak ‘7h3 1337 m4p’는 ‘The elite map’을 의미하며, 맵 설명에서는 이것이 돈 맵이 아니며 sometime 동안 확장이 필요하다고 강조하고 있다. 지형은 대칭이 아닌 비대칭 배치를 기본으로 하며, 각 시작 위치마다 미네랄과 가스가 균등하게 배치되어 초반 자원 경쟁을 유도한다. 중심에는 중립 건물과 몇 개의 고지점이 자리 잡아 전투의 흐름에 변수를 제공하며, 확장로는 주기지와 연결된 자연 확장과 멀티 확장이 두세 군데 존재한다. 이러한 구조는 초반 라인전과 중후반 대립을 모두 경험할 수 있게 해주며, 특히 6인 자유전에서는 동맹 형성과 배신 가능성이 전략적 요소가 된다. 플레이어는 초기 스카우트와 건물을 통한 병력 생산 타이밍을 잘 맞추어야 하며, 후반에는 업그레이드와 팩토리 운영이 승패를 가른다. 권장 플레이 인원은 6인으로, 솔로 플레이나 팀 전투 모두 가능하지만 기본 설정은 자유전이다. 예상 플레이 시간은 20~30분程度이며, 난이도는 보통 수준으로 초보자도 규칙을 익힌 후 충분히 즐길 수 있다. 플레이 전 확인 포인트는 시작 위치의 자원 분포, 주요 통로의 지형 높이, 그리고 확장로의 방어 용이성이다. 이 맵은 klassischen 메카닉을 선호하는 유저와 함께 레트로 감성과 유머러스한 제목을 즐기고 싶은 유즈맵 애호가에게 적합하다. This map is a 1024×1024 melee (밀리) UMS using the Twilight tileset in StarCraft: Brood War. The file name and internal title show leetspeak “7h3 1337 m4p”, meaning “The elite map”. The description notes it is not a money map and that expansion will be needed at some point. The terrain features an asymmetrical layout by default, with each start location having balanced mineral and gas placements to encourage early resource competition. In the center lie a few neutral buildings and high ground spots that add variability to the flow of battle. Expansions consist of a natural expansion attached to the main base and a couple of additional multi‑expansions. This structure allows players to experience both early‑lane skirmishes and mid‑to‑late game clashes, and in a six‑player free‑for‑all the possibility of forming and breaking alliances adds a strategic layer. Proper early scouting and timing of building production are crucial, while late‑game upgrades and factory operation often decide the outcome. The recommended player count is six; the map can be played solo or in teams but defaults to a free‑for‑all. Expected play time is around 20‑30 minutes, with a medium difficulty that newcomers can enjoy after learning the basics. Before playing, check the resource distribution at each start, the elevation of main chokepoints, and how defensible the expansion routes are. This map suits players who favor classic mechanics as well as those who appreciate a retro feel and a humorous title in their UMS collection.
4대 4 E.Z. 워 (4 on 4 E.Z. War)
4 on 4 E.Z. War는 황무지 타일셋을 사용한 4인용 맞춤 맵으로, 내부 설명에 따라 적 건물 전멸을 목표로 한다. 이는 표준 메리 승리 조건과 동일하며, 팀 구분이 없는 자유 전투 방식으로 진행된다. 맵 크기는 1024×1024 타일이며, 넓은 평원에서 각 플레이어는 독립된 시작 지점을 갖는다. 자원 배치는 대칭적이라 광물과 가스 군집 간 거리가 유사해 공정한 경쟁을 보장한다. 초반에는 저글링이나 질럿 같은 저비용 유닛으로 스카우트와 방어를 동시에 하며, 미네랄과 가스를 빠르게 채취해 병력 생산 기반을 다진다. 중반부터는 테란은 마린과 탭, 프로토스는 질럿과 드라군, 저그는 히드라리스크와 뮤탈리스크를 주력으로 삼아 상대 건물을 압박한다. 건물 파괴에 중점을 두므로 공격적인 유닛 생산 타이밍이 승부를 가며, 방어 건물보다는 기동력과 공중 유닛이 중요하다. 지형은 대부분 평평한 황무지로 큰 언덕이나 좁은 통로가 없어 대규모 군집 충돌이 자주 일어난다. 이에 따라 마이크로 관리와 병종 조합이 승패를 좌우하며, 초보자는 기본 빌드 순서를 익히는 데 적합하고, 숙련자들은 빠른 러시나 장기적인 경제전을 시도해 볼 수 있다. 이 맵은 4인전을 원하는 유저에게 추천하며, 플레이 전에는 시작 위치가 균등한지 확인하고, 초기 스카우트 범위와 건물 배치를 계획하는 것이 좋다. 맵은 리소스가 풍부하여 장항전도 가능하며, 타이밍에 맞춘 테크 전환이 승부에 큰 영향을 준다. 테란은 초반에 배럭과 팩토리를 빠르게 올려 마린과 탭으로 압박하며, 중반에 베틀크루저나 과학선으로 전장을 통제할 수 있다. 프로토스는 게이트웨이와 사이버네틱스 코어를 지어서 질럿과 드라군으로 초기 병력을 운용하고, 이후 템플러 아카이브를 지어 고템플러와 archon으로 강력한 화력을 발휘한다. 저그는 스포닝 풀과 캐버른을 일찍 짓고 zergling과 hydralisk로 물량 공세를 펼치며, later에 울트럴리스크나 가디언으로 건물 파괴력을 높인다. 맵의 중심에 있는 중립 미네랄 필드는 선점 시 자원 우위를 가져올 수 있어 초반争夺이 중요하다. 후반에는 인구 한도 도달 시 생산 건물 추가와 업그레이드가 승부를 결정지으며, 지속적인 압박이 승리로 이어진다. 4 on 4 E.Z. War is a custom map for four players based on the wasteland tileset. According to the internal description, the goal is to destroy all enemy buildings, which is the same as the standard StarCraft melee victory condition. The map size is 1024×1024 tiles, providing a spacious area where each player has an independent starting location on the open plains. Resource placement is symmetrical, so the distances between mineral and gas patches are similar, ensuring fair competition. In the early game, players scout and defend simultaneously using inexpensive units such as zerglings or zealots, quickly gathering minerals and gas to build a production base. From the mid‑game onward, Terrans focus on marines and medics, Protoss on zealots and dragoons, and Zerg on hydralisks and mutalisks to pressure enemy structures. Because the objective is building destruction, offensive unit production timing decides the outcome, making mobility and air units more important than static defenses. The terrain is mostly flat wasteland without significant cliffs or narrow chokepoints, so large‑scale army clashes occur frequently. Consequently, micro‑management and unit composition are crucial; beginners can practice basic build orders, while experienced players may attempt early rushes or long‑term macro games. This map is recommended for users who want a four‑player match. Before playing, check that the starting positions are evenly placed and decide on an initial scouting range and building layout. The map’s abundant resources also allow late‑game macro play, and timely tech transitions have a major impact on the outcome. Terrans can quickly build barracks and factories to pressure with marines and medics, then transition to battlecruisers or science vessels for map control. Protoss construct gateways and cybernetics cores to field zealots and dragoons early, later adding the templar archives for high templars and archons to deliver powerful firepower. Zerg spawn pools and caverns are built early to produce zerglings and hydralisks for overwhelming numbers, later upgrading to ultralisks or guardians to increase building damage. The central neutral mineral patch at the map’s center offers a resource advantage to whoever claims it first, making early‑game control vital. In the late game, reaching the population limit makes additional production buildings and upgrades decisive, and sustained pressure leads to victory.
10싼 저그,쌘 플토,빠른 테란 (10 Cheap Zerg, Cheap Protoss, Fast Terran)
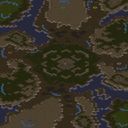
10싼 저그,쌘 플토,빠른 테란은Lost Temple 1.5 맵을 바탕으로 유닛 건설 비용을 대폭 낮추고 테란의 건물 생산 속도를 높인 변형 메리 맵이다. 기본 지형은 사막 타일셋의 전형적인 Lost Temple 레이아웃을 유지하며, 각 진영은 저그, 프로토스, 테란 세 종족이 동등하게 등장한다. 유닛 가격이 1/10 수준으로 떨어지자 초기 게임 흐름이 크게 빨라지고, 러시나 타이밍 공격이 쉬워지며, 특히 저그의 zergling과 프로토스의 zealot이 대량으로 쏟아져 나오는 광경을 자주 볼 수 있다. 테란은 건물 건설 속도가 빨라져 barracks나 factory를 빠르게 세울 수 있고, 이를 바탕으로 빠른 바이오닉 또는 기계적 압박을 시도할 수 있다. 이러한 설정 변화는 일반 메리 맵에서 볼 수 있는 장거리 전투와 경제 관리보다는 초반 전투와 유닛 생산 속도에 초점을 맞춘 플레이 스타일을 유도한다. 따라서 맵은 빠른 템포를 선호하고, 미세 컨트롤보다 대량 생산과 타이밍에 집중하는 플레이어에게 적합하며, 초보자도 부담 없이 다양한 전략을 실험해볼 수 있는 장점이 있다. 플레이 전에는 유닛 비용이 크게 낮아졌다는 점을 염두에 두고, 표준 메리 맵에서의 경제_build 순서를 그대로 적용하면 자원이 rapidement 넘쳐 흐를 수 있으니, 초기 병력 생산에 집중하고 subsequently 업그레이드나 확장 타이밍을 조절하는 것이 좋다. 또한, 맵이 사막 타일셋을 사용하므로 시야 확보와 고지대 활용이 중요한 요소이며, 특히 프로토스의 forge나 테란의 engineering bay를 고지에 위치시키면 시야와 방어력을 동시에 높일 수 있다. 10 Cheap Zerg, Cheap Protoss, Fast Terran is a modified melee map based on the Lost Temple 1.5 version, where unit construction costs are greatly reduced and Terran building production speed is increased. The basic terrain retains the classic Lost Temple layout using the desert tileset, and each faction features the three races—Zerg, Protoss, and Terran—on equal footing. With unit prices dropping to about one‑tenth of normal, the early game pace accelerates dramatically, rushes and timing attacks become easier, and it is common to see massive waves of Zerglings and Zealots flooding the battlefield. Terran structures such as Barracks and Factories can be erected quickly, enabling swift bio‑mechanical pressure. This shift in settings pushes the focus away from the long‑range battles and economy management typical of standard melee maps toward early‑game combat and unit production speed. Consequently, the map suits players who prefer a fast tempo, emphasizing mass production and timing over fine micro‑control, and it offers beginners a low‑pressure environment to experiment with various strategies. Before playing, keep in mind that unit costs are drastically lowered; if you follow the standard melee economic build order, resources will quickly overflow, so concentrate on early unit production and later adjust upgrade or expansion timing. Moreover, because the map uses the desert tileset, securing vision and exploiting high ground are important—placing a Protoss Forge or Terran Engineering Bay on high ground can simultaneously boost sight and defensive strength.
최근 등록된 맵
새로 추가된 파일과 버전을 확인하세요.
애티튜드 SE 1.90 (Attitude SE 1.90)
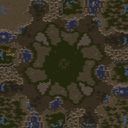
애티튜드 SE 1.90은 사막 타일셋을 기반으로 한 128×128 타일 규모의 넓은 맵으로, 최대 8명이 참가할 수 있는 클래식한 스타크래프트 브루드워 메리 맵이다. 지형은 넓은 평야와 몇 개의 높은 고지대가 교차하여 초기 병력 충돌과 후반 전략적 요충지 싸움이 모두 가능하도록 구성되어 있다. 자원 배치는 표준적인 광물과 가스 배치를 따르며, 각 시작 지점 주변에 균등하게 분포되어 있어 진영 간 초기 불리함이 적다. 이 맵은 특히 멀티플레이어 전에서 다양한 종족 간 균형을 고려한 설정이 돋보이며, 저글링 rush나 드랍 전략 등이 모두 viable한 선택지로 작용한다. 게임 진행은 초반 탐색과 병력 생산부터 시작해, 중반에는 지형 활용을 통한 병력 보강과 교전이 활발히 이루어지며, 후반에는 거점 확보와 업그레이드 경쟁이 승패를 가른다. 접근성은 높은 편으로, 초보자도 기본적인 메리 맵 플레이 방식을 금방 익힐 수 있지만, 숙련자들에게는 지형 변수를 활용한 심도 있는 전략 구사가 요구된다. 플레이 전에는 시작 위치의 자원 분포와 고지대 위치를 확인하고, 상대 종족에 맞는 초반 빌드를 준비하는 것이 좋다. 전체적으로 애티튜드 SE 1.90은 전통적인 메리 맵의 재미를 살리면서도 사막 특유의 개방감과 전략적 다양성을 제공하는 맵이다. 이 맵은 사막 특유의 시야 방해 요소가 적어 유닛의 이동과 공격을 명확히 예측할 수 있으며, 이로 인해 타이밍 기반의 공격과 방어가 중요한 역할을 한다. 특히 저글링과 zealot 같은 빠른 유닛은 열린 지형에서 기동성을 최대한 발휘할 수 있고, 시즈 탱크나 드래군 같은 원거리 유닛은 고지대를 활용하여 사거리 이점을 확보하기 쉽다. 또한, 맵 중앙에 위치한 자원 섬은 양측이 동시에 노릴 수 있는 중요한 거점으로, 여기서 벌어지는 교전은 게임의 흐름을 좌우하는 경우가 많다. 따라서 애티튜드 SE 1.90은 균형 잡힌 메리 경험을 원하는 플레이어뿐 아니라, 지형 활용과 타이밍 플레이를 연습하고자 하는 중간 수준 이상의 유저에게도 적합하다. 싱글 플레이에서는 AI 상대와의 연습용으로도 충분히 활용 가능하며, 맵 에디터를 통해 개인적인 변형을 시도해 보는 것도 즐거운 요소가 된다. Attitude SE 1.90 is a wide map based on the desert tileset, sized at 128×128 tiles, allowing up to 8 players to participate in a classic StarCraft Brood War melee map. The terrain features broad plains and several elevated high grounds that intersect, enabling both early-game unit clashes and late-game strategic battles over key chokepoints. Resource placement follows the standard mineral and gas distribution, with each starting location surrounded by evenly spaced resources, minimizing initial disadvantages between factions. This map stands out in multiplayer for its balanced design that considers fairness among races; zergling rushes and drop strategies are all viable options. Gameplay begins with early scouting and unit production, moves into mid-game where terrain utilization leads to force buildup and active engagements, and ends with late-game control of key locations and upgrade competition determining victory. Accessibility is high: beginners can quickly grasp basic melee map mechanics, while experienced players are challenged to employ deep strategies that leverage terrain variations. Before playing, check the resource distribution at start positions and the placement of high ground, and prepare an opening build suited to the opponent’s race. Overall, Attitude SE 1.90 preserves the fun of traditional melee maps while offering the openness and strategic diversity unique to desert terrain. This map features minimal vision-obstructing terrain typical of desert settings, allowing unit movement and attacks to be clearly predicted, making timing-based offense and defense crucial. Fast units such as Zerglings and Zealots can maximize their mobility on open ground, while ranged units like Siege Tanks and Dragoons can easily gain range advantage by exploiting high ground. Moreover, the resource island located at the map’s center serves as a vital contested point that both sides can vie for, and battles occurring there often dictate the flow of the game. Consequently, Attitude SE 1.90 suits players seeking a balanced melee experience as well as intermediate-level or higher users who wish to practice terrain utilization and timing play. In single-player, it serves as a solid practice map against AI opponents, and experimenting with personal variations using the map editor adds an enjoyable layer of replayability.
미치지 마세요 (Don't be Crazy)
Don't be Crazy는 정글 타일셋을 기반으로 한 4096×4096 크기의 광활한 맵으로, 표준적인 자원 배열과 대칭적인 시작 위치를 갖춘 전형적인 메리 맵 형태를 보인다. 플레이어는 5명이 자유전 방식으로 게임을 시작하며, 승리 조건은 적의 모든 건물을 완전히 파괴하는 것이다.このため 기본적인 자원 채취, 기지 건설, 유닛 생산 흐름이 그대로 유지되며, 맵이 거대하기 때문에 초반 탐색과 확장에 드는 시간이 상대적으로 길다. 정글 지형은 나무와 높은 지형이 시야를 partiellement 가려 주지만, 전체적으로는 트레인이 비교적 원활하여 대규모 유닛 이동이 가능하다. 간혹 등장하는 협곡과 높은 절벽은 방어 거점이나 기습 루트로 활용될 수 있어, 지형 활용이 승부의 중요한 변수가 된다. 초반에는 스카웃을 통해 상대의 위치를 파악하고, 초기 병력을 효율적으로 배분해 확장 속도를 높이는 것이 관건이다. 자원이 풍부하게 배치되어 있어 경제적 운영이 가능하나, 맵 크기 때문에 공급선 관리가 복잡해질 수 있으므로, 생산 시설과 방어 시설을 적절히 배치해 물류 라인을 유지해야 한다. 중반 이후에는 경제력을 바탕으로 한 거대 유닛 군집이나 교차 공세가 효과적이며, 특히 정글 지역의 시야 제한을 이용해 은밀히 접근한 기습이 큰 성과를 낼 수 있다. 반면, 넓은 공간 때문에 장거리 포격이나 항공 유닛의 역할이 더욱 부각되므로, 시야 확보와 대공 방어도 동시에 고려해야 한다. 이 맵은 기존 메리 맵의 감각을 유지하면서도 규모가 커서 장시간 플레이를 원하는 유저에게 적합하며, 5인 자유전 방식은 매 경기마다 변수가 많아 반복 플레이에도 신선함을 제공한다. 플레이 전에는 시작 위치 간 거리와 광물·가스 분포를 확인해 불리한 편차가 없는지 검토하고, 필요하면 맵 에디터로 시작 지점을 미세 조정하는 것이 좋다. 전반적으로는 중급 이상의 실력을 가진 유저가 전략적 깊이와 대규모 전투의 재미를 동시에 느낄 수 있는 맵으로 추천한다. Don't be Crazy is a sprawling map based on the jungle tileset, measuring 4096×4096, featuring a standard resource layout and symmetrical start positions typical of a classic melee map. Five players begin in a free-for-all format, with the victory condition being the complete destruction of all enemy buildings. Consequently, the fundamental flow of resource gathering, base construction, and unit production remains unchanged, but the map’s sheer size means that early exploration and expansion take considerably more time. The jungle terrain, with its trees and elevated areas, partially obscures vision, yet overall pathing remains relatively smooth, allowing large-scale unit movements. Occasional narrow passes and high cliffs can serve as defensive strongholds or ambush routes, making terrain exploitation a key variable in victory. Early on, scouting to locate opponents and efficiently allocating initial forces to speed up expansion is crucial. Although resources are plentiful, enabling solid economic play, the vastness of the map can complicate supply lines, so production and defensive facilities must be placed wisely to maintain logistics. In the mid‑ to late‑game, economic strength allows for massive unit clusters or cross‑attacks, and exploiting the jungle’s limited sight for stealthy ambushes can yield significant results. Conversely, the open expanse heightens the impact of long‑range artillery and air units, necessitating both vision control and anti‑air defenses. This map retains the feel of traditional melee while its large scale suits players seeking longer sessions; the five‑player free‑for‑all ensures plenty of variability, keeping repeat play fresh. Before playing, check the distances between start spots and the distribution of minerals and gas to ensure no side is unfairly disadvantaged, and if needed, use the map editor to fine‑tune start positions. Overall, it is recommended for intermediate‑to‑advanced players who want to enjoy strategic depth alongside the thrill of large‑scale combat.
10싼 저그,쌘 플토,빠른 테란 (10 Cheap Zerg, Cheap Protoss, Fast Terran)
10싼 저그,쌘 플토,빠른 테란은Lost Temple 1.5 맵을 바탕으로 유닛 건설 비용을 대폭 낮추고 테란의 건물 생산 속도를 높인 변형 메리 맵이다. 기본 지형은 사막 타일셋의 전형적인 Lost Temple 레이아웃을 유지하며, 각 진영은 저그, 프로토스, 테란 세 종족이 동등하게 등장한다. 유닛 가격이 1/10 수준으로 떨어지자 초기 게임 흐름이 크게 빨라지고, 러시나 타이밍 공격이 쉬워지며, 특히 저그의 zergling과 프로토스의 zealot이 대량으로 쏟아져 나오는 광경을 자주 볼 수 있다. 테란은 건물 건설 속도가 빨라져 barracks나 factory를 빠르게 세울 수 있고, 이를 바탕으로 빠른 바이오닉 또는 기계적 압박을 시도할 수 있다. 이러한 설정 변화는 일반 메리 맵에서 볼 수 있는 장거리 전투와 경제 관리보다는 초반 전투와 유닛 생산 속도에 초점을 맞춘 플레이 스타일을 유도한다. 따라서 맵은 빠른 템포를 선호하고, 미세 컨트롤보다 대량 생산과 타이밍에 집중하는 플레이어에게 적합하며, 초보자도 부담 없이 다양한 전략을 실험해볼 수 있는 장점이 있다. 플레이 전에는 유닛 비용이 크게 낮아졌다는 점을 염두에 두고, 표준 메리 맵에서의 경제_build 순서를 그대로 적용하면 자원이 rapidement 넘쳐 흐를 수 있으니, 초기 병력 생산에 집중하고 subsequently 업그레이드나 확장 타이밍을 조절하는 것이 좋다. 또한, 맵이 사막 타일셋을 사용하므로 시야 확보와 고지대 활용이 중요한 요소이며, 특히 프로토스의 forge나 테란의 engineering bay를 고지에 위치시키면 시야와 방어력을 동시에 높일 수 있다. 10 Cheap Zerg, Cheap Protoss, Fast Terran is a modified melee map based on the Lost Temple 1.5 version, where unit construction costs are greatly reduced and Terran building production speed is increased. The basic terrain retains the classic Lost Temple layout using the desert tileset, and each faction features the three races—Zerg, Protoss, and Terran—on equal footing. With unit prices dropping to about one‑tenth of normal, the early game pace accelerates dramatically, rushes and timing attacks become easier, and it is common to see massive waves of Zerglings and Zealots flooding the battlefield. Terran structures such as Barracks and Factories can be erected quickly, enabling swift bio‑mechanical pressure. This shift in settings pushes the focus away from the long‑range battles and economy management typical of standard melee maps toward early‑game combat and unit production speed. Consequently, the map suits players who prefer a fast tempo, emphasizing mass production and timing over fine micro‑control, and it offers beginners a low‑pressure environment to experiment with various strategies. Before playing, keep in mind that unit costs are drastically lowered; if you follow the standard melee economic build order, resources will quickly overflow, so concentrate on early unit production and later adjust upgrade or expansion timing. Moreover, because the map uses the desert tileset, securing vision and exploiting high ground are important—placing a Protoss Forge or Terran Engineering Bay on high ground can simultaneously boost sight and defensive strength.
6인용 다코타 블랙 힐스 (Dakota Black Hills)
다코타 블랙 힐스는 황무지 타일셋을 기반으로 한 6인용 스타크래프트 브루드워 맵으로, 넓고 균형 잡힌 지형이 특징이다. 중앙에 넓게 펼쳐진 평야와 주변에 배치된 자원 지점은 초반 확장을 유도하며, 언덕과 좁은 협곡이 전략적인 요충지를 만든다. 플레이어는 각각의 시작 위치에서 기본 건물을 짓고, 스카웃을 통해 적의 움직임을 파악하며 빠르게 병력을 생산해야 한다. 맵 내에는 몇 가지 높은 고지점이 있어 사거리 확장이 가능한 유닛을 배치하기에 좋으며, 동시에 저지점에서는 은신과 기습이 가능하다. 자원 분배는 비교적均등하여, 자원 경쟁이 치열하지 않고 대신 전략과 운영이 승패를 좌우한다. 이는 일반적인 메lee 맵과 유사하지만, 지형의 변화가 적어 초반 빌드 순서에 큰 영향을 받지 않아 상대의 전략을 읽는 능력이 더 중요시된다. 추천 대상은 전략적 사고와 멀티태스킹에 익숙한 intermediate 이상의 플레이어이며, 초보자에게는 자원 관리와 빌드 순서 연습용으로도 적합하다. 플레이 전에는 시작 위치의 자원 배치를 확인하고, 초반 방어를 어떻게 구축할지 계획을 세우는 것이 좋다. 또한, 맵의 대칭 구조는 공정성을 보장하여 토너먼트 환경에서도 자주 사용되며, 다양한 종족 간 상성 테스트에 적합하다. 프로토스에서는 광역 광자 포 디펜스와 함께 드롭 ship 운영이 효과적이며, 테란은 바이오닉 돌진과 함께 탱크 라인을 활용한 압박이 강점이다. 저글링 중심의 저글링 럭시와 함정 드랍은 저글링에게도 좋은 기회를 제공한다. 전체적인 플레이 시간은 보통 20~30분 정도이며, 재플레이 가치가 높아 여러 번 플레이해도 새로운 전략을 시도해 볼 수 있다. Dakota Black Hills is a 6‑player StarCraft: Brood War map built on the wasteland tileset, featuring a wide and balanced terrain. A broad central plain surrounded by resource points encourages early expansion, while hills and narrow chokepoints create key tactical positions. Each player starts by constructing basic buildings, scouting enemy movements, and quickly producing units. The map contains several high‑ground spots ideal for placing units with extended range, while low‑ground areas allow for concealment and ambushes. Resources are fairly evenly distributed, so victory hinges more on strategy and execution than on fierce resource competition. Like a standard melee map, the terrain does not change dramatically, so early build order has less impact and reading the opponent’s strategy becomes more important. It is recommended for intermediate‑plus players comfortable with strategic thinking and multitasking; beginners can also use it to practice resource management and build orders. Before playing, check the starting resource layout and plan your early defense. The map’s symmetrical layout ensures fairness, making it a frequent choice in tournaments and a good testbed for race‑vs‑race matchups. Protoss players find effective photon cannon defenses combined with drop‑ship play, Terrans excel with bio‑aggressive pushes backed by tank lines, and Zerg can utilize zergling rushes and sneaky drops. Typical play time ranges from 20 to 30 minutes, and the map offers high replay value, inviting players to try new strategies each session.
사쿠라스 사원 0.91 (Shakuras Temple0.91)
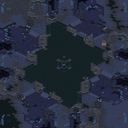
Shakuras Temple0.91은 화산 타일셋을 사용한 1024×1024 크기의 8인 자유 전투 맵이다. 지도는 중앙에 넓게 펼쳐진 용암 지역을 둘러싸고 네 방향에 균등하게 배치된 출발 지점을 가지고 있으며, 각 지점에는 광물 8개와 가스 2개가 표준적으로 자리잡고 있다. 이는 전형적인 메크와 바이오닉 전략을 모두 수용할 수 있는 자원 구조로, 초반 스카웃과 확장 타이밍이 승부에 큰 영향을 미친다. 맵 전체는 높은 곳을 중심으로 시야가 트여 있어 항공 유닛의 활용이 중요하며, 용암 지형은 지상 유닛의 이동에 제약을 주어 길이전을 유도한다. 이러한 특성 때문에 멀티태스킹과 맵 장악 능력이 시험되는 전형적인 메리에 어울리는 맵으로 평가받는다. 초보자에게는 광물과 가스의 배치가 직관적이어서 기본적인 경제 운용을 익히기에 좋고, 숙련 플레이어는 지형의 협소한 통로를 활용한 타이밍 공격이나 드롭 플레이로 변칙을 시도할 수 있다. 전반적인 플레이 시간은 20~30분 정도로 추정되며, 8인 자유전이라 변수가 많아 매 경기마다 다른 양상이 펼쳐진다. 따라서 전략적 사고와 mikro 컨트롤을 모두 원하는 유저에게 추천한다. 플레이 전에는 시작 위치의 자원량을 확인하고, 초반 스카웃을 통해 상대의 건물을 빠르게 파악하는 것이 승리의 열쇠이다. Shakuras Temple0.91 is an 8‑player free‑for‑all melee map built on a volcanic tileset with a size of 1024×1024. The map features a large lava area in the center surrounded by evenly spaced starting positions in the four compass directions. Each start contains the standard eight mineral patches and two geysers, providing a resource layout that accommodates both mech and bio‑heavy strategies. Early scouting and timing of expansions are crucial to gaining an advantage. The terrain offers high ground with good sight lines, making air units important, while the lava fields restrict ground movement and encourage longer, drawn‑out engagements. Because of these traits, the map tests multitasking and map control, fitting the classic melee playstyle. Beginners will find the intuitive mineral and gas placement helpful for learning basic economy, while experienced players can exploit the narrow chokepoints for timing attacks or drop‑based tricks. Expected play time is around 20‑30 minutes; with eight players the game is highly variable, so each match can unfold differently. It is recommended for users who enjoy both strategic planning and micro‑control. Before playing, check the resources at your starting spot and use early scouting to quickly identify opponent buildings—this is key to victory.
4대 4 E.Z. 워 (4 on 4 E.Z. War)
4 on 4 E.Z. War는 황무지 타일셋을 사용한 4인용 맞춤 맵으로, 내부 설명에 따라 적 건물 전멸을 목표로 한다. 이는 표준 메리 승리 조건과 동일하며, 팀 구분이 없는 자유 전투 방식으로 진행된다. 맵 크기는 1024×1024 타일이며, 넓은 평원에서 각 플레이어는 독립된 시작 지점을 갖는다. 자원 배치는 대칭적이라 광물과 가스 군집 간 거리가 유사해 공정한 경쟁을 보장한다. 초반에는 저글링이나 질럿 같은 저비용 유닛으로 스카우트와 방어를 동시에 하며, 미네랄과 가스를 빠르게 채취해 병력 생산 기반을 다진다. 중반부터는 테란은 마린과 탭, 프로토스는 질럿과 드라군, 저그는 히드라리스크와 뮤탈리스크를 주력으로 삼아 상대 건물을 압박한다. 건물 파괴에 중점을 두므로 공격적인 유닛 생산 타이밍이 승부를 가며, 방어 건물보다는 기동력과 공중 유닛이 중요하다. 지형은 대부분 평평한 황무지로 큰 언덕이나 좁은 통로가 없어 대규모 군집 충돌이 자주 일어난다. 이에 따라 마이크로 관리와 병종 조합이 승패를 좌우하며, 초보자는 기본 빌드 순서를 익히는 데 적합하고, 숙련자들은 빠른 러시나 장기적인 경제전을 시도해 볼 수 있다. 이 맵은 4인전을 원하는 유저에게 추천하며, 플레이 전에는 시작 위치가 균등한지 확인하고, 초기 스카우트 범위와 건물 배치를 계획하는 것이 좋다. 맵은 리소스가 풍부하여 장항전도 가능하며, 타이밍에 맞춘 테크 전환이 승부에 큰 영향을 준다. 테란은 초반에 배럭과 팩토리를 빠르게 올려 마린과 탭으로 압박하며, 중반에 베틀크루저나 과학선으로 전장을 통제할 수 있다. 프로토스는 게이트웨이와 사이버네틱스 코어를 지어서 질럿과 드라군으로 초기 병력을 운용하고, 이후 템플러 아카이브를 지어 고템플러와 archon으로 강력한 화력을 발휘한다. 저그는 스포닝 풀과 캐버른을 일찍 짓고 zergling과 hydralisk로 물량 공세를 펼치며, later에 울트럴리스크나 가디언으로 건물 파괴력을 높인다. 맵의 중심에 있는 중립 미네랄 필드는 선점 시 자원 우위를 가져올 수 있어 초반争夺이 중요하다. 후반에는 인구 한도 도달 시 생산 건물 추가와 업그레이드가 승부를 결정지으며, 지속적인 압박이 승리로 이어진다. 4 on 4 E.Z. War is a custom map for four players based on the wasteland tileset. According to the internal description, the goal is to destroy all enemy buildings, which is the same as the standard StarCraft melee victory condition. The map size is 1024×1024 tiles, providing a spacious area where each player has an independent starting location on the open plains. Resource placement is symmetrical, so the distances between mineral and gas patches are similar, ensuring fair competition. In the early game, players scout and defend simultaneously using inexpensive units such as zerglings or zealots, quickly gathering minerals and gas to build a production base. From the mid‑game onward, Terrans focus on marines and medics, Protoss on zealots and dragoons, and Zerg on hydralisks and mutalisks to pressure enemy structures. Because the objective is building destruction, offensive unit production timing decides the outcome, making mobility and air units more important than static defenses. The terrain is mostly flat wasteland without significant cliffs or narrow chokepoints, so large‑scale army clashes occur frequently. Consequently, micro‑management and unit composition are crucial; beginners can practice basic build orders, while experienced players may attempt early rushes or long‑term macro games. This map is recommended for users who want a four‑player match. Before playing, check that the starting positions are evenly placed and decide on an initial scouting range and building layout. The map’s abundant resources also allow late‑game macro play, and timely tech transitions have a major impact on the outcome. Terrans can quickly build barracks and factories to pressure with marines and medics, then transition to battlecruisers or science vessels for map control. Protoss construct gateways and cybernetics cores to field zealots and dragoons early, later adding the templar archives for high templars and archons to deliver powerful firepower. Zerg spawn pools and caverns are built early to produce zerglings and hydralisks for overwhelming numbers, later upgrading to ultralisks or guardians to increase building damage. The central neutral mineral patch at the map’s center offers a resource advantage to whoever claims it first, making early‑game control vital. In the late game, reaching the population limit makes additional production buildings and upgrades decisive, and sustained pressure leads to victory.
엘리트 맵 (The Elite Map)
이 맵은 스타크래프트 브루드워의 황혼 타일셋을 활용한 1024×1024 크기의 일반전(밀리) 유즈맵이다. 파일명과 내부 제목에 나타낸 레트 speak ‘7h3 1337 m4p’는 ‘The elite map’을 의미하며, 맵 설명에서는 이것이 돈 맵이 아니며 sometime 동안 확장이 필요하다고 강조하고 있다. 지형은 대칭이 아닌 비대칭 배치를 기본으로 하며, 각 시작 위치마다 미네랄과 가스가 균등하게 배치되어 초반 자원 경쟁을 유도한다. 중심에는 중립 건물과 몇 개의 고지점이 자리 잡아 전투의 흐름에 변수를 제공하며, 확장로는 주기지와 연결된 자연 확장과 멀티 확장이 두세 군데 존재한다. 이러한 구조는 초반 라인전과 중후반 대립을 모두 경험할 수 있게 해주며, 특히 6인 자유전에서는 동맹 형성과 배신 가능성이 전략적 요소가 된다. 플레이어는 초기 스카우트와 건물을 통한 병력 생산 타이밍을 잘 맞추어야 하며, 후반에는 업그레이드와 팩토리 운영이 승패를 가른다. 권장 플레이 인원은 6인으로, 솔로 플레이나 팀 전투 모두 가능하지만 기본 설정은 자유전이다. 예상 플레이 시간은 20~30분程度이며, 난이도는 보통 수준으로 초보자도 규칙을 익힌 후 충분히 즐길 수 있다. 플레이 전 확인 포인트는 시작 위치의 자원 분포, 주요 통로의 지형 높이, 그리고 확장로의 방어 용이성이다. 이 맵은 klassischen 메카닉을 선호하는 유저와 함께 레트로 감성과 유머러스한 제목을 즐기고 싶은 유즈맵 애호가에게 적합하다. This map is a 1024×1024 melee (밀리) UMS using the Twilight tileset in StarCraft: Brood War. The file name and internal title show leetspeak “7h3 1337 m4p”, meaning “The elite map”. The description notes it is not a money map and that expansion will be needed at some point. The terrain features an asymmetrical layout by default, with each start location having balanced mineral and gas placements to encourage early resource competition. In the center lie a few neutral buildings and high ground spots that add variability to the flow of battle. Expansions consist of a natural expansion attached to the main base and a couple of additional multi‑expansions. This structure allows players to experience both early‑lane skirmishes and mid‑to‑late game clashes, and in a six‑player free‑for‑all the possibility of forming and breaking alliances adds a strategic layer. Proper early scouting and timing of building production are crucial, while late‑game upgrades and factory operation often decide the outcome. The recommended player count is six; the map can be played solo or in teams but defaults to a free‑for‑all. Expected play time is around 20‑30 minutes, with a medium difficulty that newcomers can enjoy after learning the basics. Before playing, check the resource distribution at each start, the elevation of main chokepoints, and how defensible the expansion routes are. This map suits players who favor classic mechanics as well as those who appreciate a retro feel and a humorous title in their UMS collection.
헬름의 깊은 전장 (Untitled Scenario)
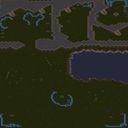
이 맵은 파일 이름에서 유추할 수 있듯이 헬름스 디프를 모티브로 한 4인용 메리 맵이다. 기본 지형은 사막 타일셋을 사용하며, 1024x1024 크기의 광활한 전장에서 플레이어는 각각의 기지를 건설하고 자원을 채집한다. 승리 조건은 내장된 설명에 따르면 "모든 적 건물 파괴"로, 일반적인 메리 맵에서의 적 플레이어 제거보다 건물 중심의 목표를 제시한다.このため, 초반에는 표준적인 자원 채집과 병력 생산을 이어가다가, 중반부터는 적의 주요 건물을 찾아내는 정찰과 집중 공세가 승부의 키가 된다. 맵 전체가 개방된 지형이라 시야 확보가 중요하며, 좁은 협곡이나 요충지가 없어 대규모 군집전이 자주 발생한다. 이는 전략적인 진형 구성과 타이밍 조절이 승패를 가르는 요소가 된다. 또한, 사막 타일셋 특유의 시야 제한과 낮은 지형 고도는 저글링이나 zealot 같은 근접 유닛의 기동성을 높여 주며, 원거리 유닛은 고지대를 활용한 사격을 통해 효율적인 압박을 가할 수 있다. 플레이 인원은 4인으로 설정되어 있어 자유전투 방식이 기본이며, 팀 구성이 없어 각 플레이어는 독립적으로 승리를 노린다. 이에 따라 diplomatic 요소는 없으며, 순수한 실력과 판단력이 결과에 직접적으로 반영된다. 이 맵은 메리 게임에 익숙한 유저에게는 새로운 목표 설정으로 색다른 긴장감을 제공하며, 초보자에게는 건물 파괴라는 명확한 승 condition을 통해 목표 지향적인 플레이를 연습하기에 적합하다. 플레이 전에는 자원 배분과 초기 건물 배치를 신중히 계획하고, 스카우트를 통해 적의 기술 트리와 건물 위치를 빠르게 파악하는 것이 승리를 위한 기본 전술이다. This map, as suggested by its filename, is a 4‑player melee map inspired by Helm’s Deep. It uses the desert tileset on a 1024×1024 board where each player builds a base and gathers resources. The victory condition, per the internal description, is “destroy all enemy buildings,” shifting the focus from outright opponent elimination to a building‑centric objective. Early game proceeds with standard resource gathering and unit production, while mid‑game hinges on scouting out the opponent’s key structures and launching concentrated assaults. Because the terrain is open, vision control is crucial; the lack of narrow chokepoints or high‑ground strongholds often leads to large‑scale clashes. Consequently, proper formation timing and timing become decisive factors. The desert tileset’s limited sight lines and low elevation boost the mobility of melee units such as Zerglings and Zealots, whereas ranged units can exploit any high ground for effective pressure. With four players set for free‑for‑all play and no teams, each competitor acts independently, making pure skill and judgment the direct determinants of outcome. Veterans of melee will find the altered win condition a fresh source of tension, while beginners can use the clear “destroy all buildings” goal to practice purposeful play. Before a match, players should carefully plan resource allocation and initial building placement, and use scouting to quickly discover the enemy’s tech tree and building locations—a fundamental tactic for victory.
맵 선택 가이드
태그는 맵의 핵심 특징을 빠르게 설명하지만 제작 버전마다 규칙이 다를 수 있습니다. 상세 설명에서 권장 인원, 난이도, 플레이 시간과 버전을 함께 확인한 뒤 다운로드하세요.