
메레 스타크래프트 맵 모음
'메레' 태그가 등록된 맵을 모았습니다. 장르 하나로 찾기 어려운 플레이 방식, 난이도와 특징을 중심으로 인기 맵과 최신 맵을 비교해 보세요.
- 등록 맵
- 15개
- 누적 다운로드
- 0
- 누적 조회
- 14
인기 맵
다운로드와 조회 반응이 높은 맵입니다.
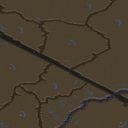
칼날의 끝 (The Razors Edge)
The Razors Edge는 8명이 동시에 참여할 수 있는 표준 밀리(Map) 유즈맵으로, 황무지 타일셋을 기반으로 한 넓고 개방된 전장을 제공한다. 맑은 지형 중앙에 넓게 뻗은 도로가 놓여 있으며, 이 도로를 벗어나면 즉시 사망한다는 독특한 규칙이 적용되어 플레이어는 항상 도로 위에 머무르며 전투를 벌여야 한다. 이러한 조건은 일반적인 밀리전과 달리 위치 선점과 이동 경로 관리가 승패를 좌우하게 하며, 초반에는 도로를 따라 안전하게 유닛을 생산하고 병력을 집결시키는 것이 중요하다. 중반에는 도로를 따라 교전 지점이 형성되며, 협소한 공간에서의 교전이 잦아져 근접전의 긴장감이 높아진다. 후반에는 도로를 기반으로 한 방어선 구축과 동시에 측면을 노리는 측방 공격이 중요해지며, 이는 일반적인 밀리 맵과는 다른 전략적 깊이를 만든다. 따라서 이 맵은 표준적인 밀리 플레이를 즐기는 동시에 독특한 지형 제약을 통해 새로운 전술적 고민을 원하는 중급 이상의 플레이어에게 적합하다. 플레이 전에는 도로의 폭과 연결된 자원 지점의 위치를 확인하고, 초반에 도로 근처에 기지를 설립하는 것이 필수적이며, 도로를 벗어나는 실수를 방지하기 위해 미니맵을 주의 깊게 살필 것을 권장한다. The Razors Edge is a standard melee map designed for up to eight players, featuring a wide open battlefield built on the wasteland tileset. A broad road runs across the center of the clean terrain, and stepping off this road results in instant death, a unique rule that forces players to stay on the road while fighting. This condition differs from typical melee matches, making position control and route management decisive for victory; in the early game it is crucial to safely produce units and gather troops along the road. In the mid‑game, combat hotspots form along the road, leading to frequent clashes in tight spaces that heighten the intensity of close‑quarters combat. In the late game, building defenses based on the road while launching flank attacks from the sides becomes important, giving this map a strategic depth unlike ordinary melee maps. Consequently, The Razors Edge suits intermediate and above players who enjoy standard melee gameplay but also seek fresh tactical challenges posed by its unique terrain constraints. Before playing, check the width of the road and the locations of resource nodes connected to it, establish your base near the road in the early stage as a necessity, and keep a close eye on the minimap to avoid accidentally stepping off the road.
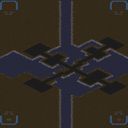
제목 없는 시나리오 (Untitled Scenario)
빅 게임 헌터즈-2는 전형적인 스타크래프트 브루드워 밀리 맵으로, 황무지 타일셋을 사용한 1024×1024 크기의 전장에서 최대 4인이 자유 진영으로 맞붙는다. 지도는 대칭되지 않은 불규칙한 지형과 광물·가스 배치를 통해 초반 러시부터 장기전까지 다양한 전략을 허용하며, 승리 조건은 단순히 모든 적 건물을 파괴하는 것이다. 이에 따라 플레이어는 초기 scout와 병력 생산 균형을 맞추고, 지형의 높은 곳과 좁은 협곡을 이용해 방어선을 구축하거나 측면을 침투하는 게이밍 루트를 찾아야 한다. 미네랄과 가스가 고르게 분포되어 있어 종족별 특성을 살린 테크 트리 전환이 비교적 자유롭고, 특히 저글링 rush나 goon·dragoon 압박이 효과적인 지점에서 순간적인 타이밍 공격이 승부를 가를 수 있다. 전반적인 흐름은 자원 확보 → 초반 압박 → 중반 테크 업그레이드 → 후반 대군 충돌로 이어지며, 맵 크기가 넓어 이동로 확보와 시야 장악이 승패에 큰 영향을 미친다. 이 맵은 기본적인 밀리 플레이를 연습하고 싶거나, 친구와의 1대1·2대2 맞대결에서 균형 잡힌 전투를 원하는 플레이어에게 적합하며, 맵 편집을 통해 자신만의 변형을 시도해 보는 유즈맵 제작 초보자에게도 좋은 기초 자료가 된다. 플레이 전에는 시작 위치의 자원 분포와 고지대 위치를 확인하고, 초반 방어 건물 배치를 놓치지 않도록 주의해야 한다. Big Game Hunters-2 is a typical StarCraft Brood War melee map that uses the wasteland tileset on a 1024×1024 battlefield, allowing up to four players to fight in free-for-all factions. The map features asymmetrical, irregular terrain and mineral/gas placements that permit a variety of strategies ranging from early rushes to long games, and the victory condition is simply destroying all enemy buildings. Consequently, players must balance early scouting and troop production, using high ground and narrow chokepoints to build defenses or find flanking routes to infiltrate. Minerals and gas are evenly distributed, allowing relatively free tech-tree transitions that suit each race’s strengths; especially effective zergling rushes or goon/dragoon pressure points enable timely timing attacks that can decide the match. The overall flow proceeds from resource acquisition → early pressure → mid‑game tech upgrades → late‑game army clashes, and because the map is large, securing routes and controlling vision heavily influence the outcome. This map is suitable for those who want to practice basic melee play or seek balanced combat in 1v1 or 2v2 matches with friends, and it also serves as a good foundation for novice UMS creators who wish to experiment with their own variations via map editing. Before playing, check the resource distribution and high‑ground locations of the start positions and make sure not to overlook the placement of early defensive structures.
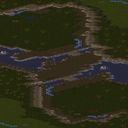
리디머 (Redeemer)
리디머는 사막 타일셋을 바탕으로 구성된 1대1 전용 메레 맵이다. 지도는 1024×1024 타일 크기로, 넓은 평야와 좁은 협곡이 교차하며 자원 배치는 대칭형을 이루지만 일부 지역에 높은 지형과 낮은 지형을 배치해 전략적 변수를 만든다. 시작 위치에서 각 플레이어는 서로 가까운 광물과 가스를 확보할 수 있으며, 초기 군비 확장은 빠른 러시보다는中期 운영과 타이밍 공격을 강조하는 구성을 보인다. 중앙에는 높은 고지대와 낮은 계곡이 교차해, 이곳을 장악하면 시야와 공격로를 동시에 유리하게 잡을 수 있지만, 동시에 노출 위험도 크므로 선제 통제보다는 점진적인 압박이 효과적이다. 플레이어는 자원 효율과 병력 구성 사이의 균형을 맞추어야 하며, 잘못된 타이밍에 과도한 투자는 쉽게 역전당할 수 있다. 이 맵은 마이크로 컨트롤 능력과 전략적 예견을 모두 요구하므로, 기본 메레에 익숙한 intermediate 이상의 플레이어에게 적합하다. 초보는 먼저 자원 채취와 기본 건물을 익힌 뒤, 지형의 높은 점지를 활용한 포위 전술을 연습해볼 것을 추천한다. 플레이 전에는 시작 지점의 자원 분포와 고지대 위치를 확인하고, 상대의 가능한 초반 러시 루트를 미리 예측하는 것이 승률을 높이는 핵심이다. 상대 진영에 따라 전략이 달라지는데, 저글링 rushes에 취약한 테란은 벙커와 머린을 앞마당에 배치해 초반 압박을 흡수하고, 이후 사이클론이나 헬리온으로 기계 유닛을 활용한 교전을 시도한다. 프로토스는 zealot과 드래군 조합으로 지형의 협곡을 막으며, 하이 templar의 스톰으로 집단을 제압하는 운영이 유리하다. 저글링 위주의 저글링은 지형의 높은 곳을 이용한 드롭과 함께 뮤탈리스크로 후방을 교란시키며, 타이밍에 맞춘 울트라리스크 돌진으로 결정적인 타격을 노린다. 전체적인 흐름은 자원 확보와 병력 업그레이드 타이밍이 맞물려 진행되며, 미세한 미스플레이가 큰 손실로 이어질 수 있어 집중력이 필수적이다. 이 맵은 1대1 메레의 기본기를 다듬기에 적합하며, 전략적인 맵 컨트롤과 타이밍 공격을 연습하고자 하는 중상급 플레이어에게 강력히 추천한다. Redeemer is a 1v1-exclusive melee map built on the desert tileset. The map is 1024×1024 tiles in size, featuring wide plains and narrow canyons that intersect; resource placement is mostly symmetrical, but some areas have high and low terrain placed to create strategic variables. At the start, each player can secure nearby minerals and gas, and the early army buildup emphasizes mid-game play and timing attacks rather than a fast rush. In the center, high ground and low valleys cross; controlling this area gives simultaneous vision and attack routes, but it also carries high exposure risk, so gradual pressure is more effective than preemptive control. Players must balance resource efficiency and army composition; overinvesting at the wrong timing can be easily reversed. This map demands both micro-control skill and strategic foresight, making it suitable for players familiar with basic melee at an intermediate level or higher. Beginners should first practice resource gathering and basic buildings, then try practicing siege tactics using the high ground. Before playing, check the starting point’s resource distribution and high‑ground positions, and predict the opponent’s possible early rush routes to improve win rate. Depending on the opponent’s race, strategies differ: Terran, vulnerable to zergling rushes, places bunkers and marines in the natural to absorb early pressure and later attempts engagements with mechanical units like cyclones or hellions. Protoss uses zealot‑dragoon combos to block the canyon paths and employs high templar storms to suppress groups, which is advantageous. Zerg, focusing on zerglings, uses drops from high ground together with mutalisks to harass the rear and looks for a decisive strike with well‑timed ultralisk charges. Overall, the flow hinges on matching resource gathering and army upgrade timing; even small mistakes can lead to large losses, so focus is essential. This map is ideal for refining basic 1v1 melee skills and is strongly recommended for intermediate‑to‑advanced players who want to practice map control and timing attacks.
![(4) K]o[L-홀리 그라운드 (K]o[L-Holy Ground) 맵 미리보기](https://cdn-star-data.huzy.net/thumbnail_cce07dab05c64c5ba469e07b487cd341.jpg)
(4) K]o[L-홀리 그라운드 (K]o[L-Holy Ground)
(4) K]o[L-Holy Ground는 사막 타일셋을 기반으로 한 4인 표준 맵으로, 내부 설명에 명시된 대로 적의 모든 건물을 파괴하면 승리하는 단순한 목표를 갖는다. 지형은 넓고 평탄한 사막 지역에 몇 개의 오아시스와 자원 광물이 배치되어 있어, 초기 건물 건설과 유닛 생산이 비교적 자유롭게 이루어진다. 시작 시 각 플레이어는 동일한 자원량을 받으며, 은닉된 특별 트리거나 스크립트는 존재하지 않아 순수한 실력 대결이 이루어진다. 이는 초보자에게는 기본적인 건물 배치와 군단 운용을 연습할 수 있는 좋은 무대이며, 숙련자들에게는 빠른 의사결정과 미세 조작 능력을 시험한다. 게임 진행은 자원 채취 → 기초 건물 건설 → 유닛 생산 → 적 진영 탐색 및 공격 순환으로 이어지며, 지형상의 협곡이나 높은 지형이 거의 없어 기동성이 높은 유닛이 상대적으로 유리하다. 승리 조건이 건물 전멸이라는 점 때문에 방어보다는 공격을 우선시하는 플레이 스타일이 자연스럽게 emerges 하며, 동맹이나 팀 플레이 요소가 없어 각자만의 전략을 자유롭게 펼칠 수 있다. 따라서 이 맵은 단순히 실력 측정 도구를 넘어, 새로운 전술을 실험하거나 친선 매치에서 빠른 라운드를 원하는 유저에게 적합하다. 플레이 전에는 맵 해상도와 타일 크기가 표준 1024x1024임을 확인하고, 사막 타일셋 특유의 시야 가림 요소가 거의 없으므로 스카우트 유닛의 배치를 먼저 계획하는 것이 좋다. (4) K]o[L-Holy Ground is a standard 4-player map based on a desert tileset, with the simple objective of destroying all enemy buildings as stated in its internal description. The terrain consists of wide, flat desert areas with a few oases and mineral patches, allowing relatively free early building construction and unit production. Each player starts with the same amount of resources, and there are no hidden triggers or scripts, making it a pure skill-based confrontation. This map serves as a good practice ground for beginners to learn basic building placement and army control, while testing the quick decision-making and micro‑management abilities of experienced players. Gameplay follows the cycle of resource gathering → basic building construction → unit production → scouting enemy territory and attacking, and because there are hardly any chokepoints or high ground, highly mobile units tend to have an advantage. Since the victory condition is the total destruction of buildings, offensive play naturally emerges over defensive play, and with no allied or team elements each player is free to pursue their own strategy. Therefore, this map is not merely a tool for measuring skill but also suitable for users who want to experiment with new tactics or enjoy quick rounds in friendly matches. Before playing, verify that the map resolution and tile size are the standard 1024×1024, and because the desert tileset offers almost no vision‑blocking elements, plan the placement of scout units first.
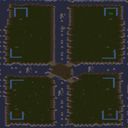
브라이스-도그의 4인 정글 롬프 (Bryce-Dogg's 4 Player Romp)
브라이스-도그의 4인 정글 롬프는 사막 타일셋을 사용한 4인용 밀리 맵으로, 정글을 주제로 한 간단한 탐험형 전투를 제공한다. 맵 중앙에 넓은 평야와 주변에 흩어진 자원 지점이 배치되어 있어 각 플레이어는 초기 건물 건설과 유닛 생산을 통해 세력을 확장해야 한다. 자원은 미네랄과 가스가 균형 있게 배치되어 초반 러시보다는中期 전투와 테크 트리 진행이 중요하다. 지형은 약간의 언덕과 협곡이 있어 은신과 기습이 가능하며, 사막 특유의 시야 제한이 전략적 변수를 만든다. 승리는 상대 모든 건물을 파괴하거나 상대를 항복시키는 일반적인 밀리 규칙을 따르며, 팀 구성이 없어 각 플레이어가 독자적으로 경쟁한다. 초보자에게는 자원 관리와 기본 전투 연습에 적합하고, 숙련된 플레이어는 맵의 좁은 통로를 활용한 측면을 찔러 넣는 전략이나 빠른 테크 트리를 시도해 볼 수 있다. 플레이 전에는 시작 위치가 균등하게 분포되어 있는지 확인하고, 초기 스카우트를 통해 상대의 건물 배치를 파악하는 것이 좋으며, 사막 타일 특성상 시야 확보를 위한 옵저버나 스캔 사용을 계획하는 것이 승리에 도움이 된다. 맵의 양쪽 끝에는 높은 지형이 있어 고지대 공격이 가능하며, 중심의 작은 오아시스 자원 지대는 초반 선점이 중요하다. 이러한 요소들은 지형 활용과 타이밍 공격이 승부를 가르는 깊이를 제공한다. 따라서 이 맵은 초보자에게 기초 다지기에 좋고, 중상급 플레이어에게는 지형 기반 전술을 연습하기에 적합하며, 4인 자유 대전에서의 균형 있는 자원과 전략을 경험하고 싶은 유저에게 추천한다. Bryce-Dogg's 4 Player Jungle Romp is a 4-player melee map using a desert tileset, offering simple jungle-themed exploration combat. The map features a wide plain at the center with scattered resource points around it, allowing each player to expand their forces through initial building construction and unit production. Minerals and gas are evenly distributed, making mid-game battles and tech tree progression more important than early rushes. The terrain includes slight hills and narrow passages, enabling ambushes and sneak attacks, while the desert’s limited vision adds a strategic variable. Victory follows standard melee rules: destroy all opponent buildings or force their surrender, with no teams—each player competes individually. Beginners can practice resource management and basic combat, while experienced players can try flank attacks using the narrow passages or fast tech trees. Before playing, check that starting positions are evenly distributed, scout early to learn enemy building placements, and plan for observers or scans to secure vision on the desert tiles, which helps secure victory. The map’s ends have elevated terrain, allowing high-ground attacks that increase unit range, and the central small oasis resource spot is a key early-game hotspot to seize for economic advantage later. These elements add depth beyond simple lane fighting, emphasizing terrain use and timing attacks. Thus, the map is suitable for beginners wanting to solidify melee basics and for intermediate to advanced players wishing to practice terrain-based tactics, and it is recommended to anyone who wants to experience balanced resources and strategic variety in a 4-player free-for-all setting.

빅 배틀 (Big Battle)
Big Battle은 6인이 동시에 경쟁하는 표준 밀리 맵으로, 게임 시작 시 각 플레이어는 황혼 타일셋이 적용된 1024×1024 전장에서 동일한 자원과 유닛을 받는다. Victory 조건은 적 건물을 모두 파괴하는 것으로, 클래식 스타크래프트 메레 방식과 같다. 지형은 대칭적으로 배치되어 특정 측면에 유리한 위치를 없애고, 넓게 펼쳐진 평지와 전략적인 고지대가 교전과 측면 공격을 가능하게 한다. 광물과 가스는 각 기지 근처에 균등히 놓여 초반 건물 건설과 유닛 생산이 순조롭고, 중반부터는 기지 확장을 통한 자원 우위나 공급선 차단이 승부를 가른다. 전투는 주로 지상 유닛이中心이 되며, 공중 유닛은 제한적이지만 시야 확보나急박한 상황에서는 유용하다. 팀 구분이 없는 6인 FFA 형태로, 동맹이나 비공식 휴전은 트리거에 의해 제한되지 않아 순수한 실력 대결이 강조된다. 예상 플레이 시간은 20~30분 정도로, 초보자도 규칙을 금방 익히고 바로 전투에 참여할 수 있으며, 숙련자는 개방된 맵에서 다양한 전략을試해 볼 수 있다. 이 맵은 메레 플레이를 좋아하는 유저, 빠른 대전을 원하는 캐주얼 게이머, 그리고 토너먼트 연습용으로 적합하다. 플레이 전에는 맵 해시 727d8f7a602b51c7을 확인해 최신 버전인지 검증하고, cp949 인코딩으로 실행해 한글 깨짐 없이 즐길 수 있다는 점만을 유의하면 된다. Big Battle is a standard melee map for six players competing simultaneously. At the start, each player receives the same resources and units on a 1024×1024 battlefield using the Twilight tileset. The victory condition is to destroy all enemy buildings, which matches the classic StarCraft melee style. The terrain is symmetrically laid out to eliminate any side‑advantage positions, featuring wide open plains and strategically placed high ground that enable frontal clashes and flanking maneuvers. Minerals and gas are evenly distributed near each base, allowing smooth early‑game construction and unit production; from mid‑game onward, expanding bases for economic advantage or cutting enemy supply lines become decisive. Combat mainly revolves around ground units, while air units are limited but useful for scouting or urgent situations. With no team divisions, the map is a six‑player free‑for‑all where alliances or informal truces are not restricted by triggers, emphasizing pure skill confrontation. Expected play time is around 20–30 minutes; beginners can quickly grasp the rules and jump into action, while experienced players can experiment with various strategies on the open map. This map suits fans of melee gameplay, casual gamers seeking fast battles, and those looking for a practice ground for tournament preparation. Before playing, verify the map’s hash 727d8f7a602b51c7 to ensure you have the latest version and run it with cp949 encoding to avoid any Korean text corruption.
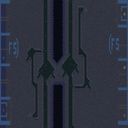
좌우 공유 기지 대결 (FS)LvsRSHAIREDBACES v1.0
(FS)LvsRSHAIREDBACES v1.0는 화산 타일셋을 사용한 1024x1024 크기의 맵으로, 왼쪽과 오른쪽 진영이 자원을 공유하는 형태의 밀리 맵이다. 8명이 동시에 참여할 수 있으며, 팀 구분이 없어 자유전투 형태로 진행된다. 시작 지점은 각 플레이어에게 균등하게 분배된 광물과 가스가 주어지며, 중앙에 위치한 공유 기지에서는 추가 자원과 유닛 생산 시설이 배치되어 있어 초반 전략이 중요하다. 지형은 좁은 통로와 넓어진 평야가 교차해 있어 진입로 차단과 측면 공격을 동시에 고려해야 한다. 일반적인 스타크래프트 브루드워 메레е 룰을 따르며, 승리 조건은 적 모든 유닛과 건물을 파괴하는 것이다. 이와 같은 구조는 초보자에게는 자원 관리와 병력 생산의 기본기를 익히기에 적합하고, 숙련자에게는 빠른 판단과 지형 활용을 요구하는 전술적인 재미를 제공한다. 플레이 전에는 맵의 공유 자원 위치를 확인하고, 초반 러시보다는 안정적인 경제 구축을 계획하는 것이 좋다. 또한 화산 타일셋 특유의 지형 높이를 활용한 높은 지점 방어도 고려해 볼 만하다. (FS)LvsRSHAIREDBACES v1.0 is a 1024x1024 map using the volcanic tileset, where the left and right sides share resources in a melee format. Up to eight players can participate simultaneously with no team divisions, resulting in a free‑for‑all battle. Each player starts with an equal share of minerals and gas, and the central shared base contains extra resources and production facilities, making early‑game strategy crucial. The terrain mixes narrow passages with open plains, so players must consider both blocking entry routes and launching flank attacks. It follows standard StarCraft: Brood War melee rules, and the victory condition is to destroy all enemy units and buildings. This layout is suitable for beginners to learn basic resource management and unit production, while experienced players are challenged to make quick decisions and exploit the terrain for tactical fun. Before playing, check the locations of shared resources and plan a solid economy rather than an early rush. Also, consider using the volcanic tileset’s elevation for high‑ground defense.
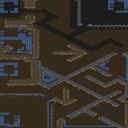
1v1 최고 맵 (Melee) (1v1 Be$t map (Melee))
이 맵은 스타크래프트 브루드워의 전형적인 1v1 메레 맵으로, 황무지 타일셋을 바탕으로 1024x1024 크기의 광활한 터전을 제공한다. 내부 설명에 따르면 Melee 버전으로 제작되었으며, 표준 유즈맵이 아닌 기본 메레 룰을 따른다. 따라서 각 플레이어는 자신만의 기지를 건설하고, 자원을 채취하며, 테란/저그/프로토스 중 원하는 종족을 선택해 상대와의 직접적인 전투를 벌인다. 맵 중앙에는 중립 광물과 가스가 배치되어 초반 교전 기회를 제공하며, 양측 기지 사이에는 적절한 거리의 언덕과 협곡이 있어 전술적인 측후공격과 리타이팅이 가능하다. 전체적인 레이아웃은 대칭적이지 않아 각 출발 위치마다 미세하게 다른 지형 이점을 갖게 되므로, 동일한 종족이라도 출발점에 따라 전략이 달라질 수 있다. 이와 같은 변수는 리플레이 가치를 높이고, 고수 수준의 미세 조종과 건물 배치 감각을 요구한다. 초보자에게는 기본적인 메레 감각을 익히기에 좋은 교재가 되며, 중상급 플레이어는 라인 컨트롤과 타이밍 어택을 연습할 수 있는 터전이 된다. 플레이 전에는 반드시 출발 위치의 자원 배치를 확인하고, 초반 스카웃을 통해 상대의 종족과 건물을 파악하는 습관을 들이는 것이 좋다. 또한, 맵 크기가 넓기 때문에 이동 거리가 길어질 수 있으니, 이른 타이밍에 과도한 확장을 자제하고, 병력 생산과 업그레이드에 집중하는 것이 승리에 가까워진다. 전반적으로 이 맵은 스타크래프트 브루드워의 순수한 메레 경험을 원하는 모든 유저에게 추천할 만하다. This map is a typical 1v1 melee map for StarCraft: Brood War, built on the wasteland tileset and providing a vast terrain of 1024x1024. According to its internal description, it is made as a Melee version and follows the basic melee rules rather than a specialized UMS. Consequently, each player constructs their own base, gathers resources, and chooses Terran, Zerg, or Protoss to engage in direct combat with the opponent. Neutral minerals and gas are placed at the map's center, offering early skirmish opportunities, while the distance between the two bases includes suitable hills and chokepoints that allow for tactical flank attacks and retreats. The overall layout is not perfectly symmetrical, so each starting position grants a slightly different terrain advantage, meaning that even with the same race, strategies can vary depending on the spawn point. This variability increases replay value and demands high‑level micro‑management and building‑placement skill from experienced players. Beginners can use it to learn fundamental melee mechanics, while intermediate‑to‑advanced players can practice line control and timing attacks. Before playing, you should always check the resource distribution at your starting location and develop the habit of scouting early to identify the opponent’s race and structures. Moreover, because the map is spacious, travel distances can become large; therefore, avoid over‑expanding too early and focus on unit production and upgrades to move closer to victory. In short, this map is recommended for anyone who wants a pure melee experience in StarCraft: Brood War.
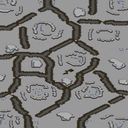
땅덩어리 (Land Mass)
Land Mass는 Ice_is_life.scx 파일명으로 배포된 스타크래프트 브루드워 맵으로, 플랫폼 타일셋을 활용한 얼음 지형이 특징적인 8인 메레 맵이다. 내부 설명에 따르면 'Ice is cool...'이라는 간단한 문구가 있지만, 실제 지도는 넓은 빙하 평원과 중간에 위치한 몇 개의 자원 지역으로 구성되어 있는 것으로 추정된다. 지형의 대부분은 평평한 빙판이라 유닛 이동이 비교적 자유롭지만, 특정 지역에서 미네랄과 가스가 집중되어 있어 자연스럽게 교전 지점이 형성된다. 맵 중앙에 위치한 높은 지형이나 좁은 협로는 추정되며, 이를 통해 초반 러시나 후반 타이밍 공격이 가능할 것으로 보인다. 팀 설정은 따로 없으므로 각 플레이어는 자유로우면서도 동맹을 형성할 수 있는 유즈맵 스타일로 즐길 수 있으며, 8인이 동시에 참여하면 대규모 전투와 함께 자원 경쟁이 intensiv하게 transpires. 플레이 전에는 시작 위치의 자원 분포와 지형의 높은 지점 위치를 확인하여 초기 건물을 어디에 세울지 계획하는 것이 중요하다. 또한, 얼음 지형 특성상 시야 확보가 다소 제한될 수 있으므로 스캔이나 관측소 배치를 통해 적의 움직임을 살피는 것이 승리에 큰 영향을 미친다. 전반적으로 전형적인 메레 방식으로 전략적 사고와 미크로 컨트롤을 동시에 요구하는 맵으로, 초보자부터 숙련자까지 넓은 층의 플레이어에게 추천한다. Land Mass is a StarCraft Brood War map distributed under the filename Ice_is_life.scx, featuring an icy terrain created with the platform tileset as an 8‑player melee map. Although the internal description only says 'Ice is cool...', the actual layout is estimated to consist of a vast icy plain with several resource clusters positioned near the center. Most of the terrain is flat ice, allowing relatively free unit movement, but mineral and gas deposits are concentrated in specific areas, naturally forming focal points for combat. Elevated ridges or narrow passages are presumed to exist around the map’s center, enabling early rushes or timed late‑game attacks. Because no preset teams are defined, each player can act freely or form temporary alliances, giving the map a UMS‑style feel when eight participants clash, leading to large‑scale battles and intense resource competition. Before playing, it is important to check the distribution of resources at the start locations and the height of the terrain to plan where to place initial buildings. Furthermore, the icy terrain can restrict visibility, so using scans or placing observer stations to monitor enemy movements greatly influences the outcome. Overall, Land Mass offers a classic melee experience that demands both strategic thinking and micro‑control, making it suitable for players ranging from beginners to experts.
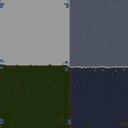
제목 없음 시나리오 (Untitled Scenario)
Untitled Scenario는 플랫폼 타일셋을 사용한 1024×1024 크기의 맵으로, 내부 설명에 따라 모든 적 건물을 파괴하는 것이 승리 조건이다. 현재 장르는 MELEE(밀리)로 분류되어 있으며, 최대 6명의 플레이어가 자유 대전을 펼칠 수 있도록 설계되었다. 팀 구분은 없으며, 각 플레이어는 독립적으로 기지를 건설하고 유닛을 생산하여 상대의 구조물을 제거해야 한다. 지형은 비교적 평탄한 플랫폼 타일로 이루어져 있어 초반 기지 배치가 자유롭고, 자원 위치는 표준적인 광물과 가스 배치 패턴을 따른다. 이로 인해 기존 스타크래프트 브루드워 멀티플레이어 경험과 유사한 흐름을 제공하면서도, 목표가 단순한 건물 파괴에 집중되어 있어 빠른 전개와 즉각적인 피드백을 기대할 수 있다. 플레이 초반에는 스카웃과 초기 병력 생산이 승패를 좌우하며, 중반에는 타이밍 공격이나 방어 건물 배치를 통해 상대의 약점을 노릴 수 있다. 승리 조건이 건물 파괴이므로, 후반에는 대규모 병력 집결과 함께 업그레이드 타이밍이 중요해진다. 이 맵은 건전한 실력 대결을 원하는 유저에게 적합하며, 특히 빠른 템포의 밀리전을 선호하는 플레이어에게 추천한다. 플레이 전에는 시작 위치의 자원 분포를 확인하고, 초기 건설 순서 및 병력 조합을 계획하는 것이 좋다. 또한, 맵 크기가 넓어 이동 거리가 길 수 있으므로, 스카웃과 미니맵 활용을 통해 적의 동향을 주시하는 것이 승리에 도움이 된다. Untitled Scenario is a 1024×1024 map using the platform tileset, with the victory condition described internally as destroying all enemy buildings. It is classified as MELEE (밀리) and designed for up to six players to engage in free-for‑all combat. There are no teams; each player builds a base, trains units, and must eliminate the opponent’s structures. The terrain is relatively flat platform tiles, allowing flexible early‑game base placement, and resource locations follow the standard mineral and gas layout. This gives a flow similar to typical StarCraft: Brood War multiplayer matches, but the focus on simple building destruction enables quick pacing and immediate feedback. Early game scouting and initial unit production are decisive; in the mid‑game, timing attacks or defensive building placement can exploit weaknesses. Because the goal is to destroy buildings, the late game emphasizes massing units and timing upgrades. The map suits users seeking a fair skill‑based duel, especially those who prefer fast‑paced melee action. Before playing, check the resource distribution at start locations, plan the initial build order and unit composition, and use scouting and the minimap to monitor enemy movements, as the large size can lead to longer travel distances.
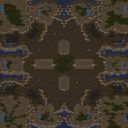
두더지 돌 1.3 (Toad Stone 1.3)
두더지 돌 1.3은 사막 타일셋을 기반으로 한 1024x1024 크기의 표준 대결(MELEE) 맵이다. 네 명의 플레이어가 각각 지도 네 구석에 위치한 시작 지점에서 게임을 시작하며, 각 진영은 광물 8개와 가스 2개를 초기 자원으로 갖추고 있다. 맵 중앙에는 넓게 트인 공간과 몇 가지 높은 지형이 놓여 있어 초반 교전과 후반 병력 이동에 전략적인 선택지를 제공한다. 지형은 전체적으로 평평하지만, 일부 언덕과 바위 formation이 시야를 차단하여 스카웃과 은신 플레이에 변수를 만든다. 게임 진행은 일반적인 스타크래프트 브루드워 메탈 흐름을 따르며, 초기에는 작업자 생산과 건물 건설에 집중하고, 중반에는 업그레이드와 병력 구성을 통해(map control)를 시도한다. 후반에는 강력한 유닛 조합과 타이밍 어택이 승부를 가르는 경향이 있다. 이 맵은 초반 러쉬에 취약한 편이 아니며, 균형 잡힌 시작 자원과 상대적으로 개방된 중앙 지형 때문에 빠른 팩과 느긋한 매크로 플레이 양쪽 모두를 수용한다. 따라서 처음 스타크래프트를 접하는 초보자부터 어느 정도 실력을 갖춘 중간 수준 플레이어까지幅広く 즐길 수 있다. 플레이 전에는 자신이 선택한 종족의 시작 건물 위치를 확인하고, 초반 스카웃을 위한 작업자 경로를 미리 계획하는 것이 좋으며, 중앙 고지대를 점령했을 때 얻을 수 있는 시야 이점을 놓치지 않도록 주의해야 한다. Toad Stone 1.3 is a standard melee (MELEE) map built on a desert tileset with a size of 1024×1024 tiles. Four players start from the four corners of the map, each beginning with eight mineral patches and two geysers as initial resources. The central area of the map is relatively open, featuring several high ground locations that offer strategic options for early skirmishes and later army movements. While the terrain is mostly flat, a few hills and rock formations block sight, adding variability to scouting and covert play. The gameplay follows the typical flow of StarCraft: Brood War melee matches; early on players focus on worker production and building construction, then in the mid‑game they pursue upgrades and army composition to gain map control, and in the late game powerful unit combinations and timing attacks often decide the outcome. The map is not particularly vulnerable to early rushes because the starting resources are balanced and the relatively open centre accommodates both fast aggression and slower macro‑oriented play. As a result, it can be enjoyed by everyone from newcomers to StarCraft to intermediate‑level players who have some experience. Before playing, it is advisable to verify the starting building locations for your chosen race, plan a worker route for early scouting, and remember to make the most of the vision advantage gained by holding the central high ground.
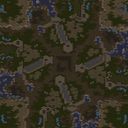
베르메르 SE 2.1 (Vermeer SE 2.1)
Vermeer SE 2.1은 사막 타일셋을 기반으로 한 4인용 유즈맵으로, 표준적인 자원 배치와 대칭적인 기지 위치를 통해 균형 잡힌 경기 흐름을 제공한다. 맵 중앙에广활한 평야와 주변에 광물장과 가스 지점이 교차 배치되어 초반 운영과 확장의 선택폭을 넓히며, 각 플레이어는 서로 다른 각도에서 접근 가능한 진입점을 갖는다. 이러한 구조는 초기 충돌을 유도하면서도 후반에는 야마토 캐논이나 시클론 같은 유닛을 활용한 전략적인 교전이 가능하게 만든다. 게임 진행은 자원 채취와 기술 트리 업그레이드를 병행하며, 미네랄과 가스의 비율이 일반적인 melee 맵과 비슷하여 테란, 저그, 프로토스 모두 무난하게 운영할 수 있다. 특히 사막 지형의 특성상 시야 확보가 중요한데, 높은 지형과 낮은 지형이 교차해 스캔이나 관측 유닛의 활용이 승부를 가른다. 이에 따라 초반에는 스카우트와 리콘을 중심으로 정보를 확보하고, 중반에는 타이밍 어택이나 방어 운영을 상황에 맞게 선택하는 것이 승리의 열쇠가 된다. 예상 플레이 시간은 약 20~30분 정도로, 빠른 승리를 노리는 라시전부터 장기전을 견딜 수 있는 매크로 중심 플레이까지 다양한 스타일이 가능하다. 이 맵은 초보자와 중급자 모두에게 적절하며, 기본적인 mekanics을 연습하고 싶은 유저에게 추천한다. 플레이 전에는 시작 위치의 자원 분포를 확인하고, 상대 진영의 진입로를 미리 파악해 두는 것이 좋으며, 빠른 확장을 원하는 경우 초기 병력 생산 속도를 조절하는 것이 필요하다. Vermeer SE 2.1 is a 4-player UMS map based on a desert tileset, offering balanced gameplay through standard resource placement and symmetrical base positions. The map features a wide-open central plain with mineral and gas patches interspersed around it, expanding early-game options and expansion choices while giving each player accessible entry points from different angles. This layout encourages early skirmishes yet allows late-game strategic engagements using units like Yamato Cannon or Cyclone. Progress involves simultaneous resource gathering and tech-tree upgrades, with mineral-to-gas ratios similar to typical melee maps, making Terran, Zerg, and Protoss all viable. Because desert terrain affects vision, high and low ground intermix, making scans and observer units crucial for victory. Consequently, early scouting and reconnaissance are vital, and mid-game timing attacks or defensive postures should be adapted to the situation. Expected playtime is roughly 20 to 30 minutes, accommodating anything from aggressive rush strategies to prolonged macro-focused games. The map suits both beginners and intermediate players, recommended for those wanting to practice core mechanics. Before playing, check the starting resource distribution, anticipate opponents' entry routes, and if fast expansion is desired, adjust initial unit production speed accordingly.
최근 등록된 맵
새로 추가된 파일과 버전을 확인하세요.
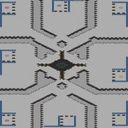
빅파이트 맵 (Big Fight Map)
이 맵은 플랫폼 타일셋을 사용한 128x128 타일 크기의 4096x4096 규모의 광활한 전장을 제공한다. 현재 분류는 MELEE(밀리)로, 표준 유즈맵 방식대로 각 플레이어는 자원을 채취하고 건물을 건설하여 유닛을 생산한다. 내부 설명에 따르면 2~8인까지 지원되며, 큰 전투를 지향하는 설계가 눈에 띈다. 지형은 주로 평탄한 플랫폼 타일로 이루어져 있어 병력의 이동이 원활하고, 전면에 넓은 오픈 공간이 있어 대규모 충돌이 자주 발생한다. 자원 배치는 맵 중앙과 가장자리에 고르게 분포되어 초기 확장이 용이하며, 멀티 플레이 시 팀전 혹은 자유대전 모두 가능하게 열어둔다. 플레이 초반에는 표준적인 건물 순서를 따르지만, 중반 이후에는 광활한 공간 덕분에 드롭Ship이나 슈퍼 유닛을 활용한 기습 전략이 효과적이다. 따라서 빠른 러시보다는 경제를 중시한 매크로 플레이가 승리 확률을 높이는 경향이 있다. 추천 대상은 미드레벨 이상의 플레이어로서, 대규모 전투를 즐기고 멀티태스킹 능력이 뛰어난 유저들이다. 초보자에게는 초기 운영이 어려울 수 있으므로, 먼저 표준 메레 맵에서 기본기를 다진 뒤 도전하는 것이 좋다. 플레이 전 확인 포인트는 allied victory 설정, 자원 유닛 제한 여부, 그리고 맵 특정 스크립트가 없는 순수 메레 환경인지 확인하는 것이다. This map provides a vast battlefield of 4096x4096 size using the platform tileset with 128x128 tile dimensions. Currently classified as MELEE (밀리), it follows the standard UMS style where each player gathers resources, builds structures, and produces units. According to the internal description, it supports 2 to 8 players and is designed for big fights. The terrain consists mainly of flat platform tiles, allowing smooth unit movement, and the wide open areas in the front frequently see large-scale clashes. Resources are evenly distributed across the center and edges, making early expansion easy, and multiplayer allows both team play and free-for-all. In the early game players follow a standard build order, but thanks to the expansive space, mid‑game strategies using dropships or super units for surprise attacks become effective. Therefore, a macro‑oriented economy tends to win over early rushes. The recommended audience is mid‑level or higher players who enjoy large‑scale battles and have strong multitasking abilities. Beginners may find the early game challenging, so it is advisable to first master the basics on standard melee maps before attempting this one. Points to check before playing are the allied victory setting, any resource unit limits, and whether the map contains any special scripts that would deviate from a pure melee environment. Additionally, the terrain is not monotonous while still offering good visibility, so scout and drop plays appear often, adding tension. As a result, the map stays fresh even after long play sessions and is suitable for clan matches or friendly games.
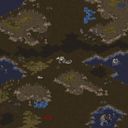
놀라운 (Incredible)
Incredible은 스타크래프트 브루드워의 2048x2048 크기 황무지 타일셋을 사용하는 맵이다. 파일명과 내부 제목이 Incredible로 같으며, 설명에 따라 목표는 적 건물 전부 파괴이다. 이는 일반적인 밀리(MELEE) 모드의 승리 조건과 동일하며, 별도 스크립트 없이 표준 자원 채집·건물 생산·유닛 전투로 승부를 겨룬다. 맵은 2인 플레이를 기준으로 설계됐으며, 팀 구분이 없어 각 플레이어가 독립 팀으로 간주된다. 따라서 1대1 대결을 원하는 유저에게 적합하며, 특별한 지형 변형이나 제한 요소가 없어 일반적인 전략과 전술이 적용된다. 자원은 맵 중앙과 가장자리에均等 배치돼 초반 확장이 쉽고, 황무지 특성상 시야 확보가 쉬워 초보자도 상대 움직임을 파악하기 쉽다. 다만 특별한 이벤트나 미션이 없어 반복 플레이 시 신선함이 떨어질 수 있으나, 이는 순수 실력 대결을 선호하는 유저에게 장점이 된다. 전반적으로 Incredible은 브루드워 기본 밀리 맵을 그대로 따른 전통적인 유즈맵으로, 복잡한 규칙 없이 바로 전투에 immersion 하고 싶은 플레이어에게 추천한다. 플레이 전에는 자원 배치를 확인하고 초반 빌드 순서를 계획하며, 상대 전략에 맞춰 유닛 구성을 유연하게 조정하는 것이 승리의 열쇠가 된다. 또한, 지형의 높은 곳은 시야 확보에 유리하여 스카웃과 후반 전투에서 중요한 역할을 할 수 있으며, 이는 맵에 깊이 있는 전략층을 추가한다. 초보자는 기본 메크로를 연습하기에 적합하고, 숙련자는 빌드 순서와 타이밍을 최적화하여 실력을 겨룰 수 있는 맵이다. 특히, 자원 점검이 중요한 초기 단계에서 신속한 스카웃과 적절한 건물 배치가 승패를 가르는 핵심 요소가 된다. Incredible is a map that uses the 2048x2048 size terrain tileset of wasteland in StarCraft: Brood War. The file name and internal title are both Incredible, and the description states that the goal is to destroy all enemy buildings. This matches the victory condition of a standard melee (MELEE) mode, with no special scripts or triggers; victory is achieved through standard resource gathering, building production, and unit combat. The map is designed for two players, with no team distinction, so each player is treated as an independent team. Thus it is suitable for users who want a 1v1 match, and because there are no special terrain modifications or restrictions, ordinary strategies and tactics apply directly. Resources are evenly placed at the center and edges, making early expansion easy, and the wasteland tileset provides good visibility, allowing even beginners to track enemy movements without difficulty. However, the lack of special events or missions can make repeated play feel less fresh, though this is an advantage for players who prefer pure skill-based competition. Overall, Incredible is a traditional UMS that faithfully follows the basic melee map of Brood War, recommended for players who want to jump straight into combat without complex rules. Before playing, check resource placement and plan an early build order, and flexibly adjust unit composition according to the opponent’s strategy, which is the key to victory. Additionally, the map’s overall layout is not perfectly symmetrical, providing subtle terrain differences from each starting point, which enables various strategic choices in the early game. Furthermore, higher terrain offers better visibility for scouting and plays an important role in late-game combat, adding a deeper strategic layer to the map. Beginners are suitable for practicing basic macro, while experienced players can refine build order and timing to test their skills. In particular, quick scouting and proper building placement in the crucial early resource-check phase become decisive factors that determine victory or defeat.
베르메르 SE 2.1 (Vermeer SE 2.1)
Vermeer SE 2.1은 사막 타일셋을 기반으로 한 4인용 유즈맵으로, 표준적인 자원 배치와 대칭적인 기지 위치를 통해 균형 잡힌 경기 흐름을 제공한다. 맵 중앙에广활한 평야와 주변에 광물장과 가스 지점이 교차 배치되어 초반 운영과 확장의 선택폭을 넓히며, 각 플레이어는 서로 다른 각도에서 접근 가능한 진입점을 갖는다. 이러한 구조는 초기 충돌을 유도하면서도 후반에는 야마토 캐논이나 시클론 같은 유닛을 활용한 전략적인 교전이 가능하게 만든다. 게임 진행은 자원 채취와 기술 트리 업그레이드를 병행하며, 미네랄과 가스의 비율이 일반적인 melee 맵과 비슷하여 테란, 저그, 프로토스 모두 무난하게 운영할 수 있다. 특히 사막 지형의 특성상 시야 확보가 중요한데, 높은 지형과 낮은 지형이 교차해 스캔이나 관측 유닛의 활용이 승부를 가른다. 이에 따라 초반에는 스카우트와 리콘을 중심으로 정보를 확보하고, 중반에는 타이밍 어택이나 방어 운영을 상황에 맞게 선택하는 것이 승리의 열쇠가 된다. 예상 플레이 시간은 약 20~30분 정도로, 빠른 승리를 노리는 라시전부터 장기전을 견딜 수 있는 매크로 중심 플레이까지 다양한 스타일이 가능하다. 이 맵은 초보자와 중급자 모두에게 적절하며, 기본적인 mekanics을 연습하고 싶은 유저에게 추천한다. 플레이 전에는 시작 위치의 자원 분포를 확인하고, 상대 진영의 진입로를 미리 파악해 두는 것이 좋으며, 빠른 확장을 원하는 경우 초기 병력 생산 속도를 조절하는 것이 필요하다. Vermeer SE 2.1 is a 4-player UMS map based on a desert tileset, offering balanced gameplay through standard resource placement and symmetrical base positions. The map features a wide-open central plain with mineral and gas patches interspersed around it, expanding early-game options and expansion choices while giving each player accessible entry points from different angles. This layout encourages early skirmishes yet allows late-game strategic engagements using units like Yamato Cannon or Cyclone. Progress involves simultaneous resource gathering and tech-tree upgrades, with mineral-to-gas ratios similar to typical melee maps, making Terran, Zerg, and Protoss all viable. Because desert terrain affects vision, high and low ground intermix, making scans and observer units crucial for victory. Consequently, early scouting and reconnaissance are vital, and mid-game timing attacks or defensive postures should be adapted to the situation. Expected playtime is roughly 20 to 30 minutes, accommodating anything from aggressive rush strategies to prolonged macro-focused games. The map suits both beginners and intermediate players, recommended for those wanting to practice core mechanics. Before playing, check the starting resource distribution, anticipate opponents' entry routes, and if fast expansion is desired, adjust initial unit production speed accordingly.
두더지 돌 1.3 (Toad Stone 1.3)
두더지 돌 1.3은 사막 타일셋을 기반으로 한 1024x1024 크기의 표준 대결(MELEE) 맵이다. 네 명의 플레이어가 각각 지도 네 구석에 위치한 시작 지점에서 게임을 시작하며, 각 진영은 광물 8개와 가스 2개를 초기 자원으로 갖추고 있다. 맵 중앙에는 넓게 트인 공간과 몇 가지 높은 지형이 놓여 있어 초반 교전과 후반 병력 이동에 전략적인 선택지를 제공한다. 지형은 전체적으로 평평하지만, 일부 언덕과 바위 formation이 시야를 차단하여 스카웃과 은신 플레이에 변수를 만든다. 게임 진행은 일반적인 스타크래프트 브루드워 메탈 흐름을 따르며, 초기에는 작업자 생산과 건물 건설에 집중하고, 중반에는 업그레이드와 병력 구성을 통해(map control)를 시도한다. 후반에는 강력한 유닛 조합과 타이밍 어택이 승부를 가르는 경향이 있다. 이 맵은 초반 러쉬에 취약한 편이 아니며, 균형 잡힌 시작 자원과 상대적으로 개방된 중앙 지형 때문에 빠른 팩과 느긋한 매크로 플레이 양쪽 모두를 수용한다. 따라서 처음 스타크래프트를 접하는 초보자부터 어느 정도 실력을 갖춘 중간 수준 플레이어까지幅広く 즐길 수 있다. 플레이 전에는 자신이 선택한 종족의 시작 건물 위치를 확인하고, 초반 스카웃을 위한 작업자 경로를 미리 계획하는 것이 좋으며, 중앙 고지대를 점령했을 때 얻을 수 있는 시야 이점을 놓치지 않도록 주의해야 한다. Toad Stone 1.3 is a standard melee (MELEE) map built on a desert tileset with a size of 1024×1024 tiles. Four players start from the four corners of the map, each beginning with eight mineral patches and two geysers as initial resources. The central area of the map is relatively open, featuring several high ground locations that offer strategic options for early skirmishes and later army movements. While the terrain is mostly flat, a few hills and rock formations block sight, adding variability to scouting and covert play. The gameplay follows the typical flow of StarCraft: Brood War melee matches; early on players focus on worker production and building construction, then in the mid‑game they pursue upgrades and army composition to gain map control, and in the late game powerful unit combinations and timing attacks often decide the outcome. The map is not particularly vulnerable to early rushes because the starting resources are balanced and the relatively open centre accommodates both fast aggression and slower macro‑oriented play. As a result, it can be enjoyed by everyone from newcomers to StarCraft to intermediate‑level players who have some experience. Before playing, it is advisable to verify the starting building locations for your chosen race, plan a worker route for early scouting, and remember to make the most of the vision advantage gained by holding the central high ground.
제목 없음 시나리오 (Untitled Scenario)
Untitled Scenario는 플랫폼 타일셋을 사용한 1024×1024 크기의 맵으로, 내부 설명에 따라 모든 적 건물을 파괴하는 것이 승리 조건이다. 현재 장르는 MELEE(밀리)로 분류되어 있으며, 최대 6명의 플레이어가 자유 대전을 펼칠 수 있도록 설계되었다. 팀 구분은 없으며, 각 플레이어는 독립적으로 기지를 건설하고 유닛을 생산하여 상대의 구조물을 제거해야 한다. 지형은 비교적 평탄한 플랫폼 타일로 이루어져 있어 초반 기지 배치가 자유롭고, 자원 위치는 표준적인 광물과 가스 배치 패턴을 따른다. 이로 인해 기존 스타크래프트 브루드워 멀티플레이어 경험과 유사한 흐름을 제공하면서도, 목표가 단순한 건물 파괴에 집중되어 있어 빠른 전개와 즉각적인 피드백을 기대할 수 있다. 플레이 초반에는 스카웃과 초기 병력 생산이 승패를 좌우하며, 중반에는 타이밍 공격이나 방어 건물 배치를 통해 상대의 약점을 노릴 수 있다. 승리 조건이 건물 파괴이므로, 후반에는 대규모 병력 집결과 함께 업그레이드 타이밍이 중요해진다. 이 맵은 건전한 실력 대결을 원하는 유저에게 적합하며, 특히 빠른 템포의 밀리전을 선호하는 플레이어에게 추천한다. 플레이 전에는 시작 위치의 자원 분포를 확인하고, 초기 건설 순서 및 병력 조합을 계획하는 것이 좋다. 또한, 맵 크기가 넓어 이동 거리가 길 수 있으므로, 스카웃과 미니맵 활용을 통해 적의 동향을 주시하는 것이 승리에 도움이 된다. Untitled Scenario is a 1024×1024 map using the platform tileset, with the victory condition described internally as destroying all enemy buildings. It is classified as MELEE (밀리) and designed for up to six players to engage in free-for‑all combat. There are no teams; each player builds a base, trains units, and must eliminate the opponent’s structures. The terrain is relatively flat platform tiles, allowing flexible early‑game base placement, and resource locations follow the standard mineral and gas layout. This gives a flow similar to typical StarCraft: Brood War multiplayer matches, but the focus on simple building destruction enables quick pacing and immediate feedback. Early game scouting and initial unit production are decisive; in the mid‑game, timing attacks or defensive building placement can exploit weaknesses. Because the goal is to destroy buildings, the late game emphasizes massing units and timing upgrades. The map suits users seeking a fair skill‑based duel, especially those who prefer fast‑paced melee action. Before playing, check the resource distribution at start locations, plan the initial build order and unit composition, and use scouting and the minimap to monitor enemy movements, as the large size can lead to longer travel distances.
땅덩어리 (Land Mass)
Land Mass는 Ice_is_life.scx 파일명으로 배포된 스타크래프트 브루드워 맵으로, 플랫폼 타일셋을 활용한 얼음 지형이 특징적인 8인 메레 맵이다. 내부 설명에 따르면 'Ice is cool...'이라는 간단한 문구가 있지만, 실제 지도는 넓은 빙하 평원과 중간에 위치한 몇 개의 자원 지역으로 구성되어 있는 것으로 추정된다. 지형의 대부분은 평평한 빙판이라 유닛 이동이 비교적 자유롭지만, 특정 지역에서 미네랄과 가스가 집중되어 있어 자연스럽게 교전 지점이 형성된다. 맵 중앙에 위치한 높은 지형이나 좁은 협로는 추정되며, 이를 통해 초반 러시나 후반 타이밍 공격이 가능할 것으로 보인다. 팀 설정은 따로 없으므로 각 플레이어는 자유로우면서도 동맹을 형성할 수 있는 유즈맵 스타일로 즐길 수 있으며, 8인이 동시에 참여하면 대규모 전투와 함께 자원 경쟁이 intensiv하게 transpires. 플레이 전에는 시작 위치의 자원 분포와 지형의 높은 지점 위치를 확인하여 초기 건물을 어디에 세울지 계획하는 것이 중요하다. 또한, 얼음 지형 특성상 시야 확보가 다소 제한될 수 있으므로 스캔이나 관측소 배치를 통해 적의 움직임을 살피는 것이 승리에 큰 영향을 미친다. 전반적으로 전형적인 메레 방식으로 전략적 사고와 미크로 컨트롤을 동시에 요구하는 맵으로, 초보자부터 숙련자까지 넓은 층의 플레이어에게 추천한다. Land Mass is a StarCraft Brood War map distributed under the filename Ice_is_life.scx, featuring an icy terrain created with the platform tileset as an 8‑player melee map. Although the internal description only says 'Ice is cool...', the actual layout is estimated to consist of a vast icy plain with several resource clusters positioned near the center. Most of the terrain is flat ice, allowing relatively free unit movement, but mineral and gas deposits are concentrated in specific areas, naturally forming focal points for combat. Elevated ridges or narrow passages are presumed to exist around the map’s center, enabling early rushes or timed late‑game attacks. Because no preset teams are defined, each player can act freely or form temporary alliances, giving the map a UMS‑style feel when eight participants clash, leading to large‑scale battles and intense resource competition. Before playing, it is important to check the distribution of resources at the start locations and the height of the terrain to plan where to place initial buildings. Furthermore, the icy terrain can restrict visibility, so using scans or placing observer stations to monitor enemy movements greatly influences the outcome. Overall, Land Mass offers a classic melee experience that demands both strategic thinking and micro‑control, making it suitable for players ranging from beginners to experts.
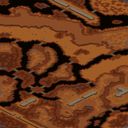
열렬한 전쟁 (Heated Warfare)
Heated Warfare은 Bobby Hurst(The_Yeti)가 만든 스타크래프트 브루드워용 커스텀 밀리 맵이다. 황혼 타일셋을 적용한 1024x1024 크기의 전장에서 최대 5명의 플레이어가 동시에 싸울 수 있는 구조를 가지고, 표준적인 자원 채집과 유닛 생산, 기지 건설 방식을 따른다. 각 플레이어는 서로 다른 시작 위치에 배치되어 초기 스카우트와 병력 확충이 승부의 관건이 되며, 맵 중앙에 위치한 광물과 가스 자원을 둘러싼 경쟁이 치열하게 전개된다. 특수한 트리거나 승리 조건은 존재하지 않으며, 일반적인 메레 승리 조건인 상대 파괴를 목표로 한다. 이와 같이 단순한 메레 형식임에도 불구하고 황혼 타일셋이 주는 독특한 분위기와 지형 변형은 전략적인 측면을 넓혀 주어, 전형적인 맵보다 조금 더 신중한 진영 배치와 타이밍 잡기가 요구된다. 지형은 높은 언덕과 좁은 통로가 섞여 있어 초반 러시를 억제하고 중후반에 견고한 방어진지를 구축할 수 있는 기회를 제공한다. 자원 배치는 메인 기지 근처에 풍부한 광물과 가스가 위치하며, 멀티 확장지는 약간 떨어진 곳에 있어 안전하게 확보하려면 적절한 방어 건물이 필요하다. 플레이 전에는 시작 위치의 자원 분포와 주요 choke point를 확인하고, 초반에 군축 건물을 효율적으로 배치하여 경제 기반을 다지는 것이 중요하다. 이런 점에서 초보자에게는 기본적인 메레 감각을 익히기에 적합하며, 중간 수준 이상의 플레이어에게는 색다른 환경에서 전술 연습의 기회를 제공한다. 추천 대상은 메레 맵에 익숙한 유저와 새로운 타일셋을 경험해보고 싶은 맞춤 맵 애호가이다. Heated Warfare is a custom melee map for StarCraft: Brood War created by Bobby Hurst(The_Yeti). Using the twilight tileset on a 1024x1024 battlefield, it allows up to five players to fight simultaneously, following the standard resource gathering, unit production, and base building mechanics. Each player starts at a different location, making early scouting and troop buildup key to victory, while the minerals and gas in the map’s center become fiercely contested. There are no special triggers or victory conditions; the goal is the usual melee condition of destroying opponents. Although it is a basic melee format, the unique atmosphere and terrain variation from the twilight tileset broaden strategic aspects, requiring more careful formation placement and timing than typical maps. The terrain mixes high cliffs and narrow chokepoints, suppressing early rushes and offering opportunities to build solid defenses in the mid‑late game. Resource placement features abundant minerals and gas near the main base, while expansion sites lie a bit farther out, necessitating appropriate defensive structures to secure them safely. Before playing, check the resource distribution at your start and the main choke points, and efficiently place production buildings early to establish a solid economy. This makes it suitable for beginners to learn basic melee sense, while intermediate and above players can practice tactics in a fresh environment. Recommended for users familiar with melee maps and custom map enthusiasts who want to try a new tileset.
제목 없는 시나리오 (Untitled Scenario)
빅 게임 헌터즈-2는 전형적인 스타크래프트 브루드워 밀리 맵으로, 황무지 타일셋을 사용한 1024×1024 크기의 전장에서 최대 4인이 자유 진영으로 맞붙는다. 지도는 대칭되지 않은 불규칙한 지형과 광물·가스 배치를 통해 초반 러시부터 장기전까지 다양한 전략을 허용하며, 승리 조건은 단순히 모든 적 건물을 파괴하는 것이다. 이에 따라 플레이어는 초기 scout와 병력 생산 균형을 맞추고, 지형의 높은 곳과 좁은 협곡을 이용해 방어선을 구축하거나 측면을 침투하는 게이밍 루트를 찾아야 한다. 미네랄과 가스가 고르게 분포되어 있어 종족별 특성을 살린 테크 트리 전환이 비교적 자유롭고, 특히 저글링 rush나 goon·dragoon 압박이 효과적인 지점에서 순간적인 타이밍 공격이 승부를 가를 수 있다. 전반적인 흐름은 자원 확보 → 초반 압박 → 중반 테크 업그레이드 → 후반 대군 충돌로 이어지며, 맵 크기가 넓어 이동로 확보와 시야 장악이 승패에 큰 영향을 미친다. 이 맵은 기본적인 밀리 플레이를 연습하고 싶거나, 친구와의 1대1·2대2 맞대결에서 균형 잡힌 전투를 원하는 플레이어에게 적합하며, 맵 편집을 통해 자신만의 변형을 시도해 보는 유즈맵 제작 초보자에게도 좋은 기초 자료가 된다. 플레이 전에는 시작 위치의 자원 분포와 고지대 위치를 확인하고, 초반 방어 건물 배치를 놓치지 않도록 주의해야 한다. Big Game Hunters-2 is a typical StarCraft Brood War melee map that uses the wasteland tileset on a 1024×1024 battlefield, allowing up to four players to fight in free-for-all factions. The map features asymmetrical, irregular terrain and mineral/gas placements that permit a variety of strategies ranging from early rushes to long games, and the victory condition is simply destroying all enemy buildings. Consequently, players must balance early scouting and troop production, using high ground and narrow chokepoints to build defenses or find flanking routes to infiltrate. Minerals and gas are evenly distributed, allowing relatively free tech-tree transitions that suit each race’s strengths; especially effective zergling rushes or goon/dragoon pressure points enable timely timing attacks that can decide the match. The overall flow proceeds from resource acquisition → early pressure → mid‑game tech upgrades → late‑game army clashes, and because the map is large, securing routes and controlling vision heavily influence the outcome. This map is suitable for those who want to practice basic melee play or seek balanced combat in 1v1 or 2v2 matches with friends, and it also serves as a good foundation for novice UMS creators who wish to experiment with their own variations via map editing. Before playing, check the resource distribution and high‑ground locations of the start positions and make sure not to overlook the placement of early defensive structures.
맵 선택 가이드
태그는 맵의 핵심 특징을 빠르게 설명하지만 제작 버전마다 규칙이 다를 수 있습니다. 상세 설명에서 권장 인원, 난이도, 플레이 시간과 버전을 함께 확인한 뒤 다운로드하세요.