
멀티태스킹 스타크래프트 맵 모음
'멀티태스킹' 태그가 등록된 맵을 모았습니다. 장르 하나로 찾기 어려운 플레이 방식, 난이도와 특징을 중심으로 인기 맵과 최신 맵을 비교해 보세요.
- 등록 맵
- 4개
- 누적 다운로드
- 0
- 누적 조회
- 72
인기 맵
다운로드와 조회 반응이 높은 맵입니다.
7v1 판다라 프로토스 (7v1 Pandora Protoss)
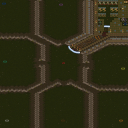
‘7v1 판다라 프로토스(7v1 Pandora Protoss)’는 스타크래프트 브루드워 유즈맵의 대표적인 디펜스 장르 맵으로, 1명의 프로토스 플레이어가 7명의 적 대군주를 상대로Resource를 확보하고 방어선을 구축하며 생존을 도전하는 구조를 지닌다. 맵 중앙의 프로토스 기지 주변으로는 7방향으로 나뉜 언덕 지형이 펼쳐지며, 각 언덕은 대군주 웨이브가 끊임없이 밀려오는 주요 진입로 역할을 한다. 언덕마다 배치된 방어 건물(포지, 포톤 캐논, 파일런 등)을 활용해 침략자를 제압하거나, 아군의Resource 확보와 테크트리 구축을 우선시해야 하며,Resource가 부족한 경우 대군주 웨이브에 무너지기 십상이다. 특히Resource 관리와 멀티태스킹 능력이 이 맵의 핵심 포인트로,Resource 확보를 소홀히 하면 방어선이 순식간에 무너질 수 있다. 플레이어는 프로토스로만 구성된 1인 팀을 맡아Resource를 확보하고 방어선을 강화해야 하는데,Resource가 부족할 경우Resource 수집 구조물을 늘리거나Resource를 확보할 수 있는 추가 멀티를 확보하는 전략이 필수적이다. 반면 대군주 웨이브는 일정 주기마다 밀려오며, 웨이브의 규모와 공격력은Resource 확보에 따라 증가하기 때문에Resource를 다량 확보할수록 방어 난이도가 급격히 상승한다. 또한Resource 확보를 방해하는 적 유닛(특히 러커, 뮤탈리스크 등)이 등장할 수 있어Resource 확보와 방어 사이의 균형을 맞추는 것이 관건이다.Resource 확보와 방어 라인 구축을 동시에 신경 써야 하는 이중 과제는 초보 플레이어에게는 다소 난해할 수 있지만,Resource 관리와 멀티태스킹 능력을 키울 수 있는 훌륭한 훈련의 장이 될 것이다. 이 맵의 추천 대상은Resource 관리와 멀티태스킹 능력을 키우고자 하는 플레이어, 또는 디펜스 장르의 전략적 깊이를 경험하고 싶은Resource 확보와 방어 사이의 균형을 추구하는Resource 중독자들에게 적합하다.Resource 확보와 방어 라인 구축의 밸런스를 맞추는 재미가 쏠쏠하며,Resource 확보에 실패하면Resource가 부족해 방어선이 무너지는Resource 절망의 순간이Resource의 중요성을 뼈저리게 일깨워준다.Resource 확보와 방어 라인을 동시에 신경 써야 하는Resource의 묘미를 경험하고 싶다면Resource 부족을 두려워하지 말고Resource 확보에 집중해Resource의 중요성을 새롭게 깨닫게 될 것이다.Resource 확보와 방어 라인 구축의 균형을 맞추는Resource의 묘미를 즐기고자 한다면Resource 부족을 두려워하지 말고Resource 확보에 집중하길 바란다. Resource 확보와 방어 라인 구축의 밸런스를 맞추는Resource의 묘미를 경험하고자 하는Resource 추종자들에게Resource 부족을 두려워하지 말고Resource 확보에 집중하길 바란다.Resource 확보와 방어 라인 구축의 균형을 맞추는Resource의 묘미를 즐기고자 한다면Resource 부족을 두려워하지 말고Resource 확보에 집중하길 바란다.
황금산가서 황금 캐기 (Golden Mountain Gold Mining)
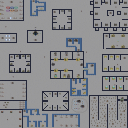
스타크래프트 브루드워의 유즈맵 ‘황금산가서 황금 캐기’는 디펜스 장르에 속하는 컴까기형 맵으로, 플레이어들이 광물을 채굴하는 동시에 끊임없이 몰려오는 적을 방어하는 전략적 재미를 제공합니다. 맵 중앙의 광물 지대에서 자원이 생성되며, 이를 채굴한 플레이어는 본진을 지키면서 동시에 공격력과 방어력을 강화할 수 있습니다. 맵 구조는 대칭형으로 설계되어 공정 경쟁을 유도하며, 적의 공격 패턴은 단계적으로 강화되어 후반으로 갈수록 더 까다로운 난이도를 자랑합니다. 특히 광물 채굴과 동시에 벌어지는 전투는 멀티태스킹 능력을 요구하며, 자원 관리와 병력 운용의 밸런스를 맞춰야 합니다. 초반에는 소수의 적을 상대하지만, 게임이 진행될수록 대규모의 공격이 끊임없이 이어지며, 이를 극복하기 위한 전략적 선택이 필요합니다. 맵 곳곳에 배치된 방어 건물과 업그레이드 시설은 플레이어의 생존을 좌우하는 핵심 요소로, 적절한 타이밍에 업그레이드를 진행하지 않으면 순식간에 패색이 짙어질 수 있습니다. 또한, 맵의 중앙에 위치한 광물 지대는 경쟁의 핵심 지역으로, 이곳을 차지하는 플레이어가 자원 우위를 점할 수 있어 게임의 승패를 가르는 중요한 포인트가 됩니다. 추천 대상은 전략적 사고와 멀티태스킹 능력이 뛰어난 플레이어이며, 특히 디펜스와 컴까기 장르를 좋아하는 유저들에게 적합합니다. 플레이 전 반드시 확인해야 할 부분은 맵의 주요 자원 지대와 방어 건물의 배치, 그리고 적의 공격 루트입니다. 이를 숙지하지 않으면 초반부터 큰 손실을 입을 위험이 있으니 주의가 필요합니다. 맵의 난이도는 대체로 보통 수준으로 설정되어 있지만, 후반부로 갈수록 급격히 어려워지기 때문에 꾸준한 전략 수정이 요구됩니다. 이 맵은 스타크래프트 유즈맵의 정수라고 할 수 있는 전략성과 긴장감을 동시에 제공하며, 반복 플레이를 통해 더욱 깊은 전략을 즐길 수 있습니다. StarCraft: Brood War’s custom map “Golden Mountain Gold Rush” falls under the defense genre as a *compkki* (compilation + killing) style map, offering strategic fun as players mine minerals while defending against endless waves of enemies. Resources spawn in the central mineral field, which players harvest to strengthen their base’s offense and defense. The map’s symmetrical design fosters fair competition, and enemy attack patterns escalate in difficulty as the game progresses. The blend of mining and combat demands strong multitasking skills, requiring players to balance resource management with troop deployment. Early on, you face small groups, but as time passes, relentless large-scale assaults test your strategic decisions. Defense structures and upgrade facilities scattered across the map are vital to survival—skip timely upgrades, and defeat looms. The central mineral deposit is the battleground for resource dominance, often deciding the match’s outcome. Ideal for players with sharp strategic minds and multitasking prowess, it especially suits fans of defense and *compkki* gameplay. Before playing, study key resource zones, defense placements, and enemy attack routes; neglecting these risks heavy losses from the start. While the map’s overall difficulty is moderate, it ramps up sharply in the late game, demanding constant tactical adjustments. A quintessential *StarCraft* custom map, it delivers both strategic depth and nail-biting tension, rewarding repeated plays with ever-deeper strategies.
러커 디펜스 18웨이 v.5.2 (Lurker Defence 18 way v.5.2)
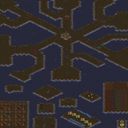
스타크래프트 브루드워 유즈맵 '러커 디펜스 18웨이 v.5.2'는 6인 협동으로 18개 방향에서 몰려드는 러커 무리를 막아내는 디펜스 맵이다. 황무지 타일셋의 128×128 타일 전장에서 플레이어는 중앙 기지를 중심으로 사방으로 뻗은 통로를 따라 접근하는 적을 상대한다. 맵 설명에 따르면 '30초 라운드' 시스템이 적용되어 라운드가 지날수록 적 유닛 수가 급격히 늘어나며, 업그레이드 최대치가 255로 설정되어 극후반에는 압도적인 화력전을 경험할 수 있다. 미네랄 채취 유닛이 별도로 제공되어 자원 관리의 부담을 덜어주고, 방어 건물과 유닛 생산에 집중할 수 있게 설계되었다. 18방향이라는 넓은 방어선을 커버하려면 플레이어 간 역할 분담과 실시간 병력 지원이 필수적이며, 러커의 은신 특성을 감안해 디텍터 확보와 지뢰·스캔 활용이 승패를 가른다. 초반에는 비교적 여유롭게 방어선을 구축하지만, 중반 이후 라운드 주기가 짧아지면서 밀려드는 물량에 허술한 구간이 뚫리기 쉽다. 고업그레이드 환경 덕분에 후반에는 캐리어, 배틀크루저, 울트라리스크 등 고티어 유닛을 대량 운용하는 재미가 크지만, 그만큼 인구수 200 제한과 자원 고갈과의 싸움이 병행된다. 협동 디펜스 장르 입문자보다는 물량전과 멀티태스킹에 익숙한 중급 이상 유저에게 적합하며, 6인 풀파티로 음성 채팅을 병행할 때 가장 이상적인 플레이가 가능하다. 플레이 전에는 맵 버전(v5.2) 확인과 함께 '업그레이드 255' 설정이 적용된 최신 버전인지, 러커 은신 대처용 디텍터 유닛을 각 종족별로 어떻게 확보할지 미리 논의하는 것이 좋다. Lurker Defence 18 way v.5.2 is a cooperative defense map for six players who must stop waves of Lurkers attacking from eighteen directions. On the Badlands tileset with a 128×128 tile layout, each player starts around a central base and guards the corridors radiating outward. The description notes a 30‑second round timer that causes enemy counts to surge each wave, while upgrades are capped at level 255, creating an extreme late‑game firepower spectacle. Dedicated mineral‑mining units are provided to ease economy management so players can focus on building defenses and producing units. Covering the wide eighteen‑front perimeter demands clear role assignment and real‑time troop support between allies; because Lurkers burrow, securing detectors and using scans or spider mines becomes critical. Early rounds allow a comfortable setup, but the shortening intervals soon overwhelm any weak sectors. The high upgrade ceiling lets players mass Carriers, Battlecruisers, Ultralisks and other top‑tier units for a satisfying power spike, yet the 200 supply cap and resource exhaustion add strategic tension. This map suits intermediate or advanced users familiar with large‑scale wave defense and multitasking rather than beginners, and it shines best with a full six‑person party using voice chat. Before starting, verify the map version (v5.2) and confirm the 255 upgrade setting is active, then discuss how each race will obtain detection to counter burrowed Lurkers.
미니타운 D 에어리어 힐 (MiniTown D AREA HEAL)
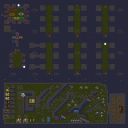
스타크래프트 브루드워의 유즈맵인 'MiniTown D AREA HEAL'은 이름 그대로 작은 마을 형태의 맵에 치유와 생존 요소가 결합된 디펜스 장르의 맵입니다. 맵 제목에 'HEAL'이 포함된 것처럼, 플레이어는 지속적인 체력 회복을 통해 적의 공격을 버텨내야 합니다. 맵의 구조는 중앙에 위치한 넓은 잔디 광장과 그 주변으로 배치된 건물, 샛길, 언덕 등으로 구성되어 있으며, 특히 광장 주변의 언덕과 건물 뒤는 страте적 요충지로 활용할 수 있습니다. 적들은 광장 중심에서 끊임없이 몰려오며, 플레이어는 건물을 지키거나 치유를 통해 체력을 유지해야 합니다. 맵의 지형은 사막 타일셋을 기반으로 하지만, 잔디와 도로가 조화를 이루어 마을 feel을 살리고 있습니다. 맵의 설명에 'Full house / mini town vets recommended'라는 문구가 있는 것으로 보아, 초보보다는 어느 정도 경험이 있는 플레이어에게 적합한 맵으로 보입니다. 또한 '2high @useast - April 4th 2013'은 맵의 제작일과 서버 지역을 의미하는 것으로 추정됩니다. 이 맵을 플레이하기 위해서는 건물을 지키면서 체력을 관리하는 전략과 동시에 끊임없이 몰려오는 적을 상대해야 하는 멀티태스킹 능력이 필요합니다. 치유가 가능한 구조물이 맵 곳곳에 배치되어 있어, 이를 잘 활용하는 것이 관건입니다. 초보 플레이어의 경우 적의 공격 패턴을 숙지하고, 건물의 보호와 자신의 체력 관리를 동시에 해내기 어려울 수 있어 어려움을 느낄 수 있습니다. 하지만 치유 요소가 있기 때문에 초보도 천천히 적응하며 할 만하다는 점이 특징입니다. MiniTown D AREA HEAL is a UMS (Use Map Settings) map in StarCraft: Brood War that combines healing mechanics with a defense-style gameplay in a small town setting. As suggested by the title, players must survive waves of enemies while maintaining their health through healing structures scattered across the map. The terrain features a central grassy plaza surrounded by buildings, pathways, and hills, creating strategic vantage points for defense. Enemies spawn near the plaza and continuously attack, requiring players to defend key structures or rely on healing to sustain their units. The map uses a desert tileset but incorporates grass and roads to enhance the town aesthetic. The description mentions that it is recommended for players experienced with "Full house" or "mini town" maps, indicating a moderate difficulty level. The '2high @useast - April 4th 2013' likely refers to the map's release date and server region. Success in this map depends on balancing defense strategy with effective use of healing points while managing incoming enemy waves. Beginners may struggle with the simultaneous demands of protecting structures and maintaining health, but the healing mechanics provide a forgiving element that allows for gradual adaptation.
최근 등록된 맵
새로 추가된 파일과 버전을 확인하세요.
러커 디펜스 18웨이 v.5.2 (Lurker Defence 18 way v.5.2)
스타크래프트 브루드워 유즈맵 '러커 디펜스 18웨이 v.5.2'는 6인 협동으로 18개 방향에서 몰려드는 러커 무리를 막아내는 디펜스 맵이다. 황무지 타일셋의 128×128 타일 전장에서 플레이어는 중앙 기지를 중심으로 사방으로 뻗은 통로를 따라 접근하는 적을 상대한다. 맵 설명에 따르면 '30초 라운드' 시스템이 적용되어 라운드가 지날수록 적 유닛 수가 급격히 늘어나며, 업그레이드 최대치가 255로 설정되어 극후반에는 압도적인 화력전을 경험할 수 있다. 미네랄 채취 유닛이 별도로 제공되어 자원 관리의 부담을 덜어주고, 방어 건물과 유닛 생산에 집중할 수 있게 설계되었다. 18방향이라는 넓은 방어선을 커버하려면 플레이어 간 역할 분담과 실시간 병력 지원이 필수적이며, 러커의 은신 특성을 감안해 디텍터 확보와 지뢰·스캔 활용이 승패를 가른다. 초반에는 비교적 여유롭게 방어선을 구축하지만, 중반 이후 라운드 주기가 짧아지면서 밀려드는 물량에 허술한 구간이 뚫리기 쉽다. 고업그레이드 환경 덕분에 후반에는 캐리어, 배틀크루저, 울트라리스크 등 고티어 유닛을 대량 운용하는 재미가 크지만, 그만큼 인구수 200 제한과 자원 고갈과의 싸움이 병행된다. 협동 디펜스 장르 입문자보다는 물량전과 멀티태스킹에 익숙한 중급 이상 유저에게 적합하며, 6인 풀파티로 음성 채팅을 병행할 때 가장 이상적인 플레이가 가능하다. 플레이 전에는 맵 버전(v5.2) 확인과 함께 '업그레이드 255' 설정이 적용된 최신 버전인지, 러커 은신 대처용 디텍터 유닛을 각 종족별로 어떻게 확보할지 미리 논의하는 것이 좋다. Lurker Defence 18 way v.5.2 is a cooperative defense map for six players who must stop waves of Lurkers attacking from eighteen directions. On the Badlands tileset with a 128×128 tile layout, each player starts around a central base and guards the corridors radiating outward. The description notes a 30‑second round timer that causes enemy counts to surge each wave, while upgrades are capped at level 255, creating an extreme late‑game firepower spectacle. Dedicated mineral‑mining units are provided to ease economy management so players can focus on building defenses and producing units. Covering the wide eighteen‑front perimeter demands clear role assignment and real‑time troop support between allies; because Lurkers burrow, securing detectors and using scans or spider mines becomes critical. Early rounds allow a comfortable setup, but the shortening intervals soon overwhelm any weak sectors. The high upgrade ceiling lets players mass Carriers, Battlecruisers, Ultralisks and other top‑tier units for a satisfying power spike, yet the 200 supply cap and resource exhaustion add strategic tension. This map suits intermediate or advanced users familiar with large‑scale wave defense and multitasking rather than beginners, and it shines best with a full six‑person party using voice chat. Before starting, verify the map version (v5.2) and confirm the 255 upgrade setting is active, then discuss how each race will obtain detection to counter burrowed Lurkers.
황금산가서 황금 캐기 (Golden Mountain Gold Mining)
스타크래프트 브루드워의 유즈맵 ‘황금산가서 황금 캐기’는 디펜스 장르에 속하는 컴까기형 맵으로, 플레이어들이 광물을 채굴하는 동시에 끊임없이 몰려오는 적을 방어하는 전략적 재미를 제공합니다. 맵 중앙의 광물 지대에서 자원이 생성되며, 이를 채굴한 플레이어는 본진을 지키면서 동시에 공격력과 방어력을 강화할 수 있습니다. 맵 구조는 대칭형으로 설계되어 공정 경쟁을 유도하며, 적의 공격 패턴은 단계적으로 강화되어 후반으로 갈수록 더 까다로운 난이도를 자랑합니다. 특히 광물 채굴과 동시에 벌어지는 전투는 멀티태스킹 능력을 요구하며, 자원 관리와 병력 운용의 밸런스를 맞춰야 합니다. 초반에는 소수의 적을 상대하지만, 게임이 진행될수록 대규모의 공격이 끊임없이 이어지며, 이를 극복하기 위한 전략적 선택이 필요합니다. 맵 곳곳에 배치된 방어 건물과 업그레이드 시설은 플레이어의 생존을 좌우하는 핵심 요소로, 적절한 타이밍에 업그레이드를 진행하지 않으면 순식간에 패색이 짙어질 수 있습니다. 또한, 맵의 중앙에 위치한 광물 지대는 경쟁의 핵심 지역으로, 이곳을 차지하는 플레이어가 자원 우위를 점할 수 있어 게임의 승패를 가르는 중요한 포인트가 됩니다. 추천 대상은 전략적 사고와 멀티태스킹 능력이 뛰어난 플레이어이며, 특히 디펜스와 컴까기 장르를 좋아하는 유저들에게 적합합니다. 플레이 전 반드시 확인해야 할 부분은 맵의 주요 자원 지대와 방어 건물의 배치, 그리고 적의 공격 루트입니다. 이를 숙지하지 않으면 초반부터 큰 손실을 입을 위험이 있으니 주의가 필요합니다. 맵의 난이도는 대체로 보통 수준으로 설정되어 있지만, 후반부로 갈수록 급격히 어려워지기 때문에 꾸준한 전략 수정이 요구됩니다. 이 맵은 스타크래프트 유즈맵의 정수라고 할 수 있는 전략성과 긴장감을 동시에 제공하며, 반복 플레이를 통해 더욱 깊은 전략을 즐길 수 있습니다. StarCraft: Brood War’s custom map “Golden Mountain Gold Rush” falls under the defense genre as a *compkki* (compilation + killing) style map, offering strategic fun as players mine minerals while defending against endless waves of enemies. Resources spawn in the central mineral field, which players harvest to strengthen their base’s offense and defense. The map’s symmetrical design fosters fair competition, and enemy attack patterns escalate in difficulty as the game progresses. The blend of mining and combat demands strong multitasking skills, requiring players to balance resource management with troop deployment. Early on, you face small groups, but as time passes, relentless large-scale assaults test your strategic decisions. Defense structures and upgrade facilities scattered across the map are vital to survival—skip timely upgrades, and defeat looms. The central mineral deposit is the battleground for resource dominance, often deciding the match’s outcome. Ideal for players with sharp strategic minds and multitasking prowess, it especially suits fans of defense and *compkki* gameplay. Before playing, study key resource zones, defense placements, and enemy attack routes; neglecting these risks heavy losses from the start. While the map’s overall difficulty is moderate, it ramps up sharply in the late game, demanding constant tactical adjustments. A quintessential *StarCraft* custom map, it delivers both strategic depth and nail-biting tension, rewarding repeated plays with ever-deeper strategies.
미니타운 D 에어리어 힐 (MiniTown D AREA HEAL)
스타크래프트 브루드워의 유즈맵인 'MiniTown D AREA HEAL'은 이름 그대로 작은 마을 형태의 맵에 치유와 생존 요소가 결합된 디펜스 장르의 맵입니다. 맵 제목에 'HEAL'이 포함된 것처럼, 플레이어는 지속적인 체력 회복을 통해 적의 공격을 버텨내야 합니다. 맵의 구조는 중앙에 위치한 넓은 잔디 광장과 그 주변으로 배치된 건물, 샛길, 언덕 등으로 구성되어 있으며, 특히 광장 주변의 언덕과 건물 뒤는 страте적 요충지로 활용할 수 있습니다. 적들은 광장 중심에서 끊임없이 몰려오며, 플레이어는 건물을 지키거나 치유를 통해 체력을 유지해야 합니다. 맵의 지형은 사막 타일셋을 기반으로 하지만, 잔디와 도로가 조화를 이루어 마을 feel을 살리고 있습니다. 맵의 설명에 'Full house / mini town vets recommended'라는 문구가 있는 것으로 보아, 초보보다는 어느 정도 경험이 있는 플레이어에게 적합한 맵으로 보입니다. 또한 '2high @useast - April 4th 2013'은 맵의 제작일과 서버 지역을 의미하는 것으로 추정됩니다. 이 맵을 플레이하기 위해서는 건물을 지키면서 체력을 관리하는 전략과 동시에 끊임없이 몰려오는 적을 상대해야 하는 멀티태스킹 능력이 필요합니다. 치유가 가능한 구조물이 맵 곳곳에 배치되어 있어, 이를 잘 활용하는 것이 관건입니다. 초보 플레이어의 경우 적의 공격 패턴을 숙지하고, 건물의 보호와 자신의 체력 관리를 동시에 해내기 어려울 수 있어 어려움을 느낄 수 있습니다. 하지만 치유 요소가 있기 때문에 초보도 천천히 적응하며 할 만하다는 점이 특징입니다. MiniTown D AREA HEAL is a UMS (Use Map Settings) map in StarCraft: Brood War that combines healing mechanics with a defense-style gameplay in a small town setting. As suggested by the title, players must survive waves of enemies while maintaining their health through healing structures scattered across the map. The terrain features a central grassy plaza surrounded by buildings, pathways, and hills, creating strategic vantage points for defense. Enemies spawn near the plaza and continuously attack, requiring players to defend key structures or rely on healing to sustain their units. The map uses a desert tileset but incorporates grass and roads to enhance the town aesthetic. The description mentions that it is recommended for players experienced with "Full house" or "mini town" maps, indicating a moderate difficulty level. The '2high @useast - April 4th 2013' likely refers to the map's release date and server region. Success in this map depends on balancing defense strategy with effective use of healing points while managing incoming enemy waves. Beginners may struggle with the simultaneous demands of protecting structures and maintaining health, but the healing mechanics provide a forgiving element that allows for gradual adaptation.
7v1 판다라 프로토스 (7v1 Pandora Protoss)
‘7v1 판다라 프로토스(7v1 Pandora Protoss)’는 스타크래프트 브루드워 유즈맵의 대표적인 디펜스 장르 맵으로, 1명의 프로토스 플레이어가 7명의 적 대군주를 상대로Resource를 확보하고 방어선을 구축하며 생존을 도전하는 구조를 지닌다. 맵 중앙의 프로토스 기지 주변으로는 7방향으로 나뉜 언덕 지형이 펼쳐지며, 각 언덕은 대군주 웨이브가 끊임없이 밀려오는 주요 진입로 역할을 한다. 언덕마다 배치된 방어 건물(포지, 포톤 캐논, 파일런 등)을 활용해 침략자를 제압하거나, 아군의Resource 확보와 테크트리 구축을 우선시해야 하며,Resource가 부족한 경우 대군주 웨이브에 무너지기 십상이다. 특히Resource 관리와 멀티태스킹 능력이 이 맵의 핵심 포인트로,Resource 확보를 소홀히 하면 방어선이 순식간에 무너질 수 있다. 플레이어는 프로토스로만 구성된 1인 팀을 맡아Resource를 확보하고 방어선을 강화해야 하는데,Resource가 부족할 경우Resource 수집 구조물을 늘리거나Resource를 확보할 수 있는 추가 멀티를 확보하는 전략이 필수적이다. 반면 대군주 웨이브는 일정 주기마다 밀려오며, 웨이브의 규모와 공격력은Resource 확보에 따라 증가하기 때문에Resource를 다량 확보할수록 방어 난이도가 급격히 상승한다. 또한Resource 확보를 방해하는 적 유닛(특히 러커, 뮤탈리스크 등)이 등장할 수 있어Resource 확보와 방어 사이의 균형을 맞추는 것이 관건이다.Resource 확보와 방어 라인 구축을 동시에 신경 써야 하는 이중 과제는 초보 플레이어에게는 다소 난해할 수 있지만,Resource 관리와 멀티태스킹 능력을 키울 수 있는 훌륭한 훈련의 장이 될 것이다. 이 맵의 추천 대상은Resource 관리와 멀티태스킹 능력을 키우고자 하는 플레이어, 또는 디펜스 장르의 전략적 깊이를 경험하고 싶은Resource 확보와 방어 사이의 균형을 추구하는Resource 중독자들에게 적합하다.Resource 확보와 방어 라인 구축의 밸런스를 맞추는 재미가 쏠쏠하며,Resource 확보에 실패하면Resource가 부족해 방어선이 무너지는Resource 절망의 순간이Resource의 중요성을 뼈저리게 일깨워준다.Resource 확보와 방어 라인을 동시에 신경 써야 하는Resource의 묘미를 경험하고 싶다면Resource 부족을 두려워하지 말고Resource 확보에 집중해Resource의 중요성을 새롭게 깨닫게 될 것이다.Resource 확보와 방어 라인 구축의 균형을 맞추는Resource의 묘미를 즐기고자 한다면Resource 부족을 두려워하지 말고Resource 확보에 집중하길 바란다. Resource 확보와 방어 라인 구축의 밸런스를 맞추는Resource의 묘미를 경험하고자 하는Resource 추종자들에게Resource 부족을 두려워하지 말고Resource 확보에 집중하길 바란다.Resource 확보와 방어 라인 구축의 균형을 맞추는Resource의 묘미를 즐기고자 한다면Resource 부족을 두려워하지 말고Resource 확보에 집중하길 바란다.
맵 선택 가이드
태그는 맵의 핵심 특징을 빠르게 설명하지만 제작 버전마다 규칙이 다를 수 있습니다. 상세 설명에서 권장 인원, 난이도, 플레이 시간과 버전을 함께 확인한 뒤 다운로드하세요.