
레이너 스타크래프트 맵 모음
'레이너' 태그가 등록된 맵을 모았습니다. 장르 하나로 찾기 어려운 플레이 방식, 난이도와 특징을 중심으로 인기 맵과 최신 맵을 비교해 보세요.
- 등록 맵
- 10개
- 누적 다운로드
- 10
- 누적 조회
- 567
인기 맵
다운로드와 조회 반응이 높은 맵입니다.
![[4]铤而走险 맵 미리보기](https://cdn-star-data.huzy.net/thumbnail_d8d5634c5fb34637862490d654e50035.jpg)
[4]铤而走险
스타크래프트 브루드워 유즈맵 '[4]铤而走险'은 중국어 제목 '铤而走险(단행, désespéré measures)'을 달고 있으며, 내부 설명에 케리건의 등장과 프로토스의 아이어 안전 문제, 레이너의 코랄 수도 철수 등 오리지널 스토리 라인을 잇는 시나리오가 담겨 있다. 맵 크기 4096×4096, 우주 타일셋으로 제작되어 넓은 전장에서 캠페인 미션 특유의 연출과 트리거 진행이 예상된다. 1인용으로 설계되어 싱글 플레이 전용이며, 플레이어는 저그, 프로토스, 테란 세 종족이 얽힌 내러티브를 따라 임무를 수행하게 된다. 설명에 등장하는 '이능 이상 현상', '케리건과의 연대', '코랄 재점령' 등은 브루드워 정식 캠페인 이후 시점을 다루거나 평행 세계를 그린 팬메이드 시나리오일 가능성이 높다. 트리거 연출, 대화문, 컷신 등 캠페인 요소 충실도에 따라 몰입감이 갈릴 수 있으나, 기본적으로 스토리 중심 진행을 선호하는 유저에게 적합하다. 플레이 전 맵 설정에서 난이도나 추가 옵션이 제공되는지 확인하고, 한글 패치 여부도 체크하면 좋다. 전체적으로 정식 캠페인 감성을 찾는 유저, 스토리 기반 싱글 미션을 즐기는 유저에게 추천한다. The StarCraft: Brood War UMS map '[4]铤而走险' bears the Chinese title '铤而走险' (meaning 'desperate measures'), and its internal description references a scenario continuing the original storyline: Kerrigan's arrival explaining anomalous psionic phenomena, the Protoss forced to ally with her for Aiur's safety, and Raynor withdrawing his main forces from Korhal after the capital falls to the Zerg once again. Built on a 4096×4096 space tileset, the vast battlefield suggests cinematic triggers and scripted sequences typical of campaign missions. Designed for a single player, it guides the user through a narrative intertwining Zerg, Protoss, and Terran factions. Mentions of 'psionic anomalies,' 'alliance with Kerrigan,' and 'Korhal's re-occupation' indicate a fan-made scenario set after or parallel to the official Brood War campaign. Immersion will depend on the quality of triggers, dialogue, and cutscenes, but it fundamentally suits players who prefer story-driven progression. Before playing, check the map settings for difficulty options and verify whether a Korean localization patch exists. Overall, recommended for users seeking official campaign atmosphere and story-based single missions.
![[5]逃离克哈 맵 미리보기](https://cdn-star-data.huzy.net/thumbnail_f224266f3afc4f75ba0c513daf92a822.jpg)
[5]逃离克哈
[5]탈출: 코랄은 스타크래프트 브루드워 세계관 속 코랄 행성을 배경으로 한 싱글 플레이 시나리오 맵이다. 맵 설명에 따르면 지구 집정 연합(UED)이 저그의 사이오닉 폭주를 방관하는 사이, 저그 군단이 코랄 본성으로 몰려들며 레이너 일행이 수도 외곽으로 후퇴해야 하는 긴박한 상황이 그려진다. 플랫폼 타일셋을 활용한 128x128 크기의 전장은 우주 정거장이나 행성 표면의 인공 구조물 느낌을 주며, 밀리 맵과는 달리 트리거 기반의 이벤트와 컷신, 목표 지점 이동 등 캠페인 특유의 연출이 중심이 된다. 진행 방식은 기지 건설보다는 주어진 유닛으로 방어선을 유지하거나 돌파구를 열어 아군을 안내하는 '탈출/호위' 형태일 것으로 보인다. 플레이어는 레이너 특공대나 자치령 잔존 병력을 조작해 끊임없이 몰려드는 저그 무리를 상대하며 정해진 경로로 이동해야 한다. 난이도는 초반 병력 구성과 트리거 타이밍에 따라 달라지겠지만, 스토리 몰입감을 중시하는 일반적인 캠페인 수준으로 추정된다. 이 맵은 오리지널 캠페인의 연장선상에서 '코랄 탈출'이라는 명장면을 직접 플레이하고 싶은 유저, 혹은 브루드워 스토리 기반의 커스텀 캠페인을 즐기는 유저에게 추천한다. 플레이 전 맵 설정에서 난이도나 트리거 옵션을 확인하고 시작하는 것이 좋다. 중국어 제목 '[5]逃离克哈'는 시리즈 5번째 에피소드임을 암시하므로, 앞선 에피소드들과 연계해 즐기면 더욱 몰입감이 높을 것이다. Escape from Korhal [5] is a single-player scenario map set on the planet Korhal in the StarCraft: Brood War universe. According to the map description, the United Earth Directorate (UED) turns a blind eye to the Zerg's psionic disruption, allowing the Swarm to descend upon Korhal Prime, forcing Raynor and his allies to retreat to the capital's outskirts. The 128x128 map utilizes the Platform tileset, evoking an orbital station or planetary installation atmosphere. Unlike melee maps, it focuses on campaign-style production: trigger-based events, cutscenes, and objective-driven movement. Gameplay likely revolves around an 'escape/escort' format rather than base building. The player presumably controls Raynor's Raiders or Dominion remnants, holding defensive lines or breaking through endless Zerg waves to guide allies to a designated extraction point. Difficulty is estimated to be standard for story-focused custom campaigns, varying with initial unit composition and trigger timing. This map is recommended for users wanting to experience the iconic 'Escape from Korhal' moment as a playable extension of the original campaign, or fans of story-driven custom campaigns. It is advisable to check map settings for difficulty or trigger options before starting. The Chinese title '[5]逃离克哈' suggests a fifth episode in a series; playing previous episodes sequentially would enhance immersion.
![[6] 최후의 반격 ([6] Final Counterattack) 맵 미리보기](https://cdn-star-data.huzy.net/thumbnail_7cdcc8de20da4929b028d9f9b016c78b.jpg)
[6] 최후의 반격 ([6] Final Counterattack)
스타크래프트 브루드워 유즈맵 '[6]최종 반격([6]最终反攻)'은 파일명과 내부 제목이 동일하게 '[6]最终反攻'으로 기록된 싱글플레이 캠페인 시나리오 맵이다. 사막 타일셋을 기반으로 192x192 타일, 6144x6144 크기의 넓은 전장에서 진행되며, 현재 사이트 장르는 UMS(유즈맵)로 분류되어 있으나 스토리 중심의 단일 미션 구성과 캐릭터 대사 트리거를 고려할 때 캠페인(CAMPAIGN) 장르에 더 부합하는 것으로 보인다. 내부 설명에 따르면 오레가(듀란)가 군사 기지를 미끼로 레이너와 멩스크 일행을 유인한 뒤 본대를 이끌고 아이어를 공격하는 '조호이산(调虎离山)' 전술을 펼치며, 이 전투가 성패를 가르는 결전임을 암시한다. 플레이어는 1인용으로 임무를 수행하며, 트리거를 통해 전개되는 대사와 이벤트 연출, 조건부 승리 조건 등이 핵심 재미 요소로 보인다. 맵 크기가 큰 만큼 다수의 유닛과 기지 운영, 다단계 목표 달성이 요구될 것으로 추정되며, 난이도와 클리어 시간은 미정이지만 캠페인 특성상 30분에서 40분 내외의 플레이 타임이 예상된다. 중국어 텍스트 기반이라 한글 패치나 번역 없이 스토리 이해에 제약이 있을 수 있으나, 스타크래프트 오리지널 캐릭터들이 등장하는 대체 역사 시나리오를 즐기는 유저에게 추천할 만하다. 플레이 전 맵 설정 안내문('[请使用地图设置]')에 따라 옵션 확인 후 시작하는 것이 좋으며, 트리거 밀도가 높아 최신 패치 버전 호환성 여부도 체크해 볼 필요가 있다. StarCraft Brood War UMS map '[6] Final Counterattack ([6]最终反攻)' is a single-player campaign scenario map where the filename and internal title are identically recorded as '[6]最终反攻'. Based on the Desert tileset, it unfolds on a vast 192x192 tile, 6144x6144 battlefield. Although currently categorized as UMS on the site, its story-driven single mission structure and character dialogue triggers suggest it fits the CAMPAIGN genre more accurately. According to the internal description, Duran (Orega) uses a military base as bait to lure Raynor and Mengsk's group, then leads his main force to attack Aiur in a 'lure the tiger from the mountain' stratagem, implying this battle decides victory or defeat. The player undertakes the mission solo, with trigger-driven dialogues, event staging, and conditional victory conditions appearing to be the core gameplay elements. Given the large map scale, management of numerous units and bases along with multi-stage objectives is estimated to be required. Difficulty and clear time are unknown, but a playtime of 30 to 40 minutes is expected for a typical campaign mission. As the text is in Chinese, understanding the story may be limited without a Korean patch or translation, yet it is recommended for users who enjoy alternate history scenarios featuring original StarCraft characters. It is advisable to check the map settings as per the instruction '[请使用地图设置]' before starting, and to verify compatibility with the latest patch version due to high trigger density.
![[5]紧急支援 맵 미리보기](https://cdn-star-data.huzy.net/thumbnail_9fd8919eda684999929cdc2b77f613b4.jpg)
[5]紧急支援
스타크래프트 브루드워 유즈맵 '[5]긴급 지원'은 레이너와 제라툴이 등장하는 싱글 플레이 시나리오 미션이다. 사막 타일셋 위에 구축된 192x128 크기의 맵에서 플레이어는 수도 방어진 뒤편에서 오레가의 기지를 발견하고, 진실을 규명하기 위해 적 군사 기지로 진격하는 임무를 수행한다. 일반적인 밀리 대전이 아닌 트리거 기반의 진행 방식으로, 스토리 컷신과 목표 안내가 포함되어 있어 캠페인 모드와 유사한 몰입감을 제공한다. 난이도는 초반 기지 확보와 병력 운용에 따라 달라지며, 영웅 유닛의 생존이 핵심 변수로 작용한다. 맵 구조는 선형적인 경로 위주로 구성되어 있어 길을 잃을 염려가 적고, 전투 구간마다 적절한 병력 지원이 주어져 흐름이 끊기지 않는다. 브루드워 오리지널 스토리 연장선상의 팬메이드 미션을 즐기고 싶은 유저, 혹은 짧은 시간 안에 완성도 높은 싱글 플레이를 경험하고 싶은 입문자에게 추천한다. 플레이 전 맵 설정에서 난이도나 트리거 옵션이 제공되는지 확인하면 더욱 쾌적하게 즐길 수 있다. StarCraft Brood War UMS map '[5] Emergency Support' is a single-player scenario mission featuring Raynor and Zeratul. On a 192x128 desert tileset, the player discovers Orega's base behind the capital defense line and advances into the enemy military base to uncover the truth. Unlike standard melee, it follows a trigger-based progression with story cutscenes and objective guides, delivering immersion similar to official campaigns. Difficulty varies with early base securing and unit control, while hero unit survival is a key factor. The map layout follows a linear path, minimizing navigation confusion, and timely reinforcements keep the pacing smooth. Recommended for users seeking fan-made missions extending the original Brood War story, or beginners wanting a polished single-player experience in a short session. Before playing, check the map settings for difficulty or trigger options to ensure a comfortable experience.
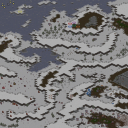
한랭지 (Cold Region)
스타크래프트 브루드워 유즈맵 '한랭지'는 넥소(Nexo)가 제작하고 스트라이크(Strike)가 한국어로 번역한 싱글 플레이 전용 캠페인 시나리오 맵이다. 플랫폼(Platform) 타일셋을 활용한 128x128 표준 규격의 전장에서 펼쳐지며, 내부 설명에 따르면 집행관의 함대가 아이어의 혹한 지대에서 파손된 노라드 II를 수색하던 중 이터니티 프로토스, 테란 자치령, 저그 세 세력이 구축한 기지들을 조우하게 된다. 플레이어는 짐 레이너의 안내를 받아 미지의 영역 '이터널'을 탐색하고 핵심 시설을 파괴하는 임무를 수행하게 되는데, 이는 일반적인 밀리 대전이나 디펜스류 유즈맵과 달리 트리거 기반의 연출과 고정된 목표 달성이 핵심인 캠페인 형식을 띤다. 맵 곳곳에 배치된 적 진영은 각각 종족별 특성을 살린 배치로 보이며, 순차적인 기지 공략과 병력 보존, 자원 관리가 요구될 것으로 예상된다. 단일 플레이어 1인용으로 팀 설정 없이 진행되며, 별도의 난이도 선택 옵션이 보이지 않아 제작자 의도 그대로의 도전을 감수해야 한다. 파일명 'Defensores07.scx'가 암시하듯 '데펜소레스(Defensores)' 시리즈의 일곱 번째 에피소드일 가능성이 높아, 앞선 에피소드들을 플레이한 유저라면 스토리 몰입도가 더욱 높을 것이다. 브리핑 대사와 승리 조건을 꼼꼼히 확인하고, 세이브/로드 기능을 활용해 전략적으로 접근하길 권장한다. 캠페인 감성의 싱글 미션을 찾는 유저에게 좋은 선택지가 될 것이다. StarCraft: Brood War UMS map 'Hanraengji (Cold Region)' is a single-player campaign scenario created by Nexo and Korean-translated by Strike. It unfolds on a standard 128x128 map using the Platform tileset. According to the internal description, the Executor's fleet discovers the damaged Norad II in the frozen wastes of Aiur, only to encounter bases established by three factions: the Eternity Protoss, Terran Dominion, and Zerg. Guided by Jim Raynor, the player must explore the mysterious 'Eternal' region and destroy key facilities. Unlike typical melee or defense-type UMS maps, this follows a classic campaign format driven by triggers and fixed objectives. Enemy bases placed across the map appear to leverage each race's characteristics, likely requiring sequential base assaults, unit preservation, and resource management. Designed for a single player with no team settings, and no visible difficulty options, the challenge is presented as the author intended. The filename 'Defensores07.scx' suggests this is the seventh episode of a 'Defensores' series; players familiar with previous episodes will find deeper narrative immersion. It is recommended to read the briefing text and victory conditions carefully, and to utilize save/load functions for strategic progression. This map serves as a solid choice for users seeking a campaign-style single mission experience.
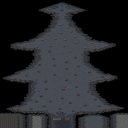
크리스마스 러시 (Christmas Rush)
크리스마스 러시(Christmas Rush)는 스타크래프트 브루드워 유즈맵(UMS) 장르로, 2~4인 플레이를 권장하는 축제 분위기의 미니게임형 맵이다. 우주 타일셋을 배경으로 레이너가 산타 복장을 하고 등장하는 연출이 눈에 띄며, 맵 크기 128×192 타일(4096×6144 픽셀) 안에서 비교적 좁은 전장이 펼쳐진다. 시작 지점은 각 플레이어별로 분리되어 있고, 중앙에는 크리스마스 트리와 선물 상자 등 장식 오브젝트가 배치되어 있어 시각적 재미를 더한다. 진행 방식은 정해진 시간 내에 적 유닛을 처치하거나 특정 오브젝트를 점령하는 간단한 미션 목표로 구성되어 있으며, 트리거를 통해 웨이브가 순차적으로 생성된다. 난이도는 초보자도 부담 없이 즐길 수 있는 보통 수준으로 보이며, 협동 또는 경쟁 모드 모두 가능하다. 추천 대상은 짧은 시간 안에 가볍게 즐기고 싶은 캐주얼 유저나 연말 이벤트용 맵을 찾는 클랜원이다. 플레이 전에는 맵 설정에서 'Use Map Settings'가 활성화되어 있는지 확인하고, 인원 수에 맞춰 팀 구성을 조정하는 것이 좋다. Christmas Rush is a StarCraft Brood War UMS (Use Map Settings) map designed for 2‑4 players, featuring a festive mini‑game style. The space tileset serves as the backdrop, and Raynor appears in a Santa outfit, adding a holiday flavor. The map spans 128×192 tiles (4096×6144 pixels), offering a relatively compact battlefield. Each player starts at a separate location, while the center holds a Christmas tree, gift boxes, and other decorative objects that enhance visual appeal. Gameplay consists of simple mission objectives such as eliminating enemy waves or capturing specific objects within a time limit, with triggers spawning successive waves. The difficulty appears moderate, accessible to newcomers, and both cooperative and competitive modes are viable. It is recommended for casual players seeking a quick, light session or clans looking for a year‑end event map. Before playing, verify that 'Use Map Settings' is enabled and adjust team composition according to the player count.
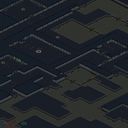
정보를 찾아서 (Buscando informaciòn)
이 맵은 스타크래프트: 브루드워의 유즈맵으로, ‘Buscando informaciòn’이라는 제목이 인상적이다. 스페인어와 영어가 혼합된 제목은 맵의 배경 스토리를 암시하며, 플레이어는 레이너와 타사다르로 등장하는 캐릭터를 조종해 임무를 수행한다. 내부 맵 설명에 따르면 ‘Nivel Fàcil’이라는 난이도 표시가 있으며, Mengsk의 음모를 밝히는 기록을 획득해야 하는 스토리텔링형 디펜스가 중심이다. 맵의 배경은 설원/얼음 타일셋으로 구성되어 있으며, 광활한 눈-covered 지형이 펼쳐진다. 플레이어는 한 명의 인원으로 게임을 진행하며, 맵의 구조는 넓은 평지 위에 흩어진 자원과 건물을 배치한 형태로 보인다. 맵의 크기가 3072x3072로 상당히 크며, 타일셋의 특징상 시야가 제한될 수 있어 strategic positioning이 중요할 것으로 추정된다. 맵의 진행 방식은 방어와 자원 수집, 목표 달성을 병행하는 UMS 스타일로 보이며, ‘Nivel Fàcil’이란 설명으로 보아 난이도는 비교적 낮은 편으로 예상된다. 추천 대상은 스타크래프트 브루드워에 익숙한 플레이어 중, 스토리텔링이 포함된 디펜스 유즈맵을 즐기는 유저들에게 적합할 것이다. 플레이 전, 맵의 넓은 공간을 활용한 strategic positioning과 자원 관리 능력을 키우는 것이 중요할 것으로 보인다. 또한, 맵의 배경이 설원이므로 눈보라나 시야 제한 효과가 포함될 가능성도 염두에 두어야 한다.UI 요소가 많지 않거나,Spanish/English 혼용 설명이 포함되어 있어 이해를 위해 간단한 번역이나 문맥 파악이 필요할 수도 있다. This map is a *StarCraft: Brood War* custom map titled "Buscando informaciòn," a title that stands out with its blend of Spanish and English, hinting at the map’s background story. Players control characters like Raynor and Tassadar to complete missions, with the main objective being a story-driven defense mission where you uncover Mengsk’s conspiracy. The map features a snowy/ice tileset, with vast, snow-covered terrain stretching out. Played as a single player, the map’s layout consists of scattered resources and buildings across wide open plains. At 3072x3072 in size, the map is quite large, and due to its tileset, visibility may be limited, making strategic positioning crucial. The gameplay combines defense, resource gathering, and objective completion in a UMS-style format, and with the "Nivel Fàcil" difficulty label, it’s expected to be relatively easy. Recommended for players familiar with *Brood War* who enjoy story-driven defense custom maps, it’s important to prepare for strategic positioning and resource management across the map’s expansive space. Since the setting is a snowy landscape, players should also anticipate potential effects like blizzards or limited visibility. The UI is minimal, and some descriptions mix Spanish and English, so a bit of translation or context may be needed for full understanding.
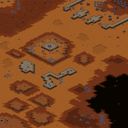
오퍼레이션: 부랴 в пустыне (Operation: Bury v Pustyne)
‘오퍼레이션: 부랴 в пустыне’는 스타크래프트: 브루드워의 유즈맵으로, 한 명의 플레이어가 광활한 사막 지형을 배경으로 펼쳐지는 전투에 도전하는 스타일이 인상적인 작품이다. 맵은 사막 지형과 산악 지대, 그리고 곳곳에 흩어져 있는 잔해와 오아시스가 특징적으로 배치되어 있어, 건물을 짓고 자원을 모으는 동시에 적의 공격을 방어하거나 선제공격을 펼치는 전략적 선택이 강제된다. 내부 설명에 따르면 ‘레이너가 코랄의 사막 지역을 점령하기 위해 특수 부대를 파견한다’는 스토리 설정 하에, 플레이어는 맵 중앙에 위치한 본진을 지키며 주변의 적 건물을 제압하거나, 반대로 적의 핵심 건물을 공격하는 두 가지 방향의 전략을 구사할 수 있는 것으로 보인다. 맵의 구조는 비교적 넓고 개방되어 있어, 유닛의 이동과 시야 확보가 중요해진다. 특히 사막 지형의 경우 시야가 제한되는 경우가 많아, 정찰 유닛이나 센서가 필수적이며, 오아시스 지역은 자원 수집과 방어 거점으로 활용할 수 있는 전략적 요충지다. 맵 곳곳에 배치된 잔해는 자연스러운 장애물 역할을 하면서도, 일부는 건물 배치나 방어선 구축에 활용할 수 있는 유연성을 제공한다. 또한 맵의 중앙과 가장자리에 위치한 고지대는 시야 확보와 포격 유닛의 배치에 유리한 지점으로, 전투의 승패를 좌우할 수 있는 핵심 지역으로 작용한다. 플레이어는 초반 자원 수집과 건물을 건설하는 동시에, 적의 공격 패턴을 분석하여 방어선을 구축하거나, 반대로 빠른 타이밍에 적 본진을 노리는 агре시브한 전략을 펼칠 수 있다. 맵의 난이도는 주로 적의 공격 빈도와 강도에 따라 결정되며, 일부 구간에서는 적의 대규모 병력이 몰려오는 경우 방어가 필요할 수 있다. 또한 맵의 광활한 크기와 개방적인 구조상, 유닛의 컨트롤과 멀티태스킹 능력이 요구되는 경우가 많아, 초보 플레이어보다는 중급 이상의 숙련자를 대상으로 하는 것이 이상적이다. 맵의 진행은 주로 적 건물을 모두 파괴하거나, 모든 적 유닛을 섬멸하는 방식으로 마무리되는 것으로 추정되며, 승리 조건은 내부 설명이나 맵의 구조상 ‘코랄의 사막 지역을 점령’하는 데 성공하는 것으로 보인다. 이 맵을 즐기기 위해서는 사막 지형과 산악 지대의 특성을 충분히 이해하고, 자원 관리와 유닛 컨트롤에 대한 기본적인 숙련이 필요하다. 또한 맵의 광활한 크기상, 빠른 시야 확보와 정찰이 게임의 승패를 가르는 핵심 요소로 작용할 수 있으므로, 초반 정찰을 소홀히 하지 않도록 주의해야 한다. 맵의 분위기는 전쟁과 사막의 황량한 beauty가 어우러져 있어, 전략적인 전투와 함께 몰입감 있는 플레이 경험을 제공한다. 특히 건물을 짓고 방어선을 구축하는 디펜스 요소와, 적 본진을 공격하는 오프ensive 요소가 균형 있게 배치되어 있어, 다양한 전략적 선택을 즐길 수 있는 것이 이 맵의 큰 장점이다. ‘Operation: Burrow in the Desert’ is a custom map for *StarCraft: Brood War* where a single player faces off against a vast desert battlefield, offering a style of play that stands out. The map features a desert terrain interspersed with mountainous regions, scattered debris, and oases, forcing players to balance building structures, gathering resources, and either defending against or launching preemptive strikes. According to its internal lore, the map is set in a scenario where "Raynor dispatches a special forces unit to secure the desert region of Korhal," and players must either protect their central base or push outward to destroy enemy structures—or even assault the enemy’s core buildings. The map’s layout is relatively open and expansive, making unit mobility and vision control critical. The desert terrain often restricts visibility, making scouting units or sensor-based detection essential. Oases serve as key strategic points for resource collection and defensive outposts, while the debris scattered across the map acts as natural obstacles that can also be leveraged for building placement or fortifying defenses. High ground near the center and edges of the map provides superior sightlines and ideal positioning for artillery units, making these areas pivotal to the outcome of battles. Players must gather initial resources and construct buildings while analyzing enemy attack patterns to either fortify their defenses or adopt an aggressive strategy by striking the enemy base early. The difficulty is largely determined by the frequency and intensity of enemy assaults, with some sections requiring preparedness for large-scale enemy advances. Given the map’s vast scale and open design, strong unit control and multitasking skills are essential—making it better suited for intermediate to advanced players rather than beginners. The match concludes when all enemy structures are destroyed or every enemy unit is eliminated, with victory ultimately hinging on "securing the desert region of Korhal," as implied by the map’s lore and structure. To fully enjoy this map, players should grasp the unique characteristics of the desert and mountainous terrain, along with solid resource management and unit control. The map’s sheer size means that early scouting and vision control can decide the game’s outcome, so neglecting reconnaissance in the opening stages is a risk. The atmosphere blends the harsh beauty of war and the desert, delivering an immersive experience where strategic combat and deep engagement go hand in hand. The map strikes a balance between defensive elements—building and fortifying—and offensive pressure, allowing players to experiment with a variety of tactics and enjoy diverse strategic choices.
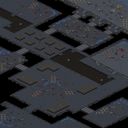
포라보티텔리 3.5B (Enslavers 3.5B)
이 맵은 스타크래프트: 브루드워의 유즈맵으로, 우주 배경의 디펜스 장르에 속한다. 내부 제목과 설명을 보면 레이너와 몬태그가 우주에서 마지막 찰스 잔당을 소탕하는 임무를 수행한다는 설정으로, 원본이 러시아어 기반의 맵임을 감안할 때 다국적 유저들에게도 접근성을 제공한다. 맵은 넓은 우주 공간을 배경으로 하며, 중앙에 위치한 적 기지를 progressively 파괴해 나가는 구조로 보인다. 맵의 주요 특징은 적의 끊임없는 웨이브와 방어 시설 간의 상호작용으로, 플레이어는 전략적 자원 관리와 타워 배치, 유닛 컨트롤을 동시에 요구받을 것으로 추정된다. 플레이 방식은 싱글 플레이어 중심의 서바이벌 디펜스이며, 초반에는 비교적 약한 적군을 상대하지만 후반으로 갈수록 강력한 적 유닛과 웨이브가 등장하는 구조가 예상된다. 맵의 크기가 4096x4096으로 상당히 넓고, 우주 타일셋을 활용하여 광활한 우주 공간과 적절한 시야 확인이 가능한 디자인으로 보인다. 또한, 맵의 이름 'Enslavers'는 노예라는 의미를 담고 있어, possibly 적 세력을 종속시키는 테마와 연관된 것으로 보이며, 3.5B 버전은 시리즈 중 최신 버전으로 추정된다. 추천 대상은 우주 디펜스와 서바이벌 게임을 선호하는 유저, 특히 스타크래프트의 유즈맵에 익숙한 플레이어들에게 적합할 것으로 보인다. 디펜스 장르의 특성상 전략적 사고와 긴장감이 요구되며, 넓은 맵과 다양한 웨이브 패턴을 즐기고 싶은 유저들에게 추천할 만하다. 다만, 초보자의 경우 난이도가 높을 수 있어, 적절한 커스터마이징이나 연습 모드를 활용하는 것이 바람직할 것이다. 플레이 전 확인해야 할 포인트는 맵의 초기 자원 분배, 방어 타워의 배치 가능 구역, 그리고 적 웨이브의 패턴과 타이밍이다. 또한, 맵의 내부 설명이 러시아어와 영어가 혼용되어 있어, 번역이나 설명서를 참고하는 것이 도움이 될 수 있다. 맵의 버전이 3.5B로 최신 버전인 만큼, 기존 시리즈와 비교해 밸런스나 새로운 요소 추가 여부를 확인해 보는 것도 좋다. This map is a *StarCraft: Brood War* custom map in the defense genre with a space-themed setting. Based on the internal title and description, players take on the mission of clearing out the last remnants of the Charles faction in space, with Raynor and Montag as the protagonists—an accessible premise even for international players, considering the original Russian-based design. The map features a vast cosmic battlefield where players progressively destroy the enemy base at its center. A key feature of the map is the constant enemy waves and the interaction between defensive structures, requiring players to manage resources, position towers, and control units simultaneously. The gameplay revolves around a single-player survival defense mode, starting with weaker enemy forces but escalating to stronger units and waves in later stages. With a large 4096x4096 grid, the map utilizes a space-themed tileset to create an expansive battlefield with clear visibility. The name "Enslavers" suggests a theme tied to subjugating enemy forces, and version 3.5B appears to be the latest in the series. This map is best suited for players who enjoy space-themed defense and survival games, particularly those familiar with *StarCraft* custom maps. The genre demands strategic thinking and sustained tension, making it ideal for those who appreciate wide maps and varied wave patterns. However, beginners may find the difficulty high, so using customization or practice modes is advisable. Before playing, check the initial resource distribution, available tower placement zones, and enemy wave patterns and timings. Since the internal descriptions mix Russian and English, referring to translations or guides can be helpful. As version 3.5B is the latest, it’s worth comparing its balance and new features against previous versions.
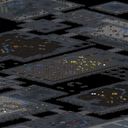
레이너를 따라잡아라 (In Pursuit of Raynor)
이 맵은 스타크래프트: 브루드워의 유즈맵으로, 플레이어가 레이너를 조종하며 적들을 피해 도망치는 디펜스와 서바이벌 요소가 혼합된 진행형 맵이다. 맵의 제목은 러시아어로 '레이너를 따라잡아라'라는 의미를 담고 있으며, 내부 설명에서도 레이너가 동료들과 함께 도망치며 Mengsk가 추격하는 스토리 라인이 묘사된다. 전체적으로 넓은 맵에서 도망치는 플레이가 주를 이루지만, 중간중간 적 기지나 터렛, 미네랄 등이 배치되어 있어 적의 공격을 방어하거나 피해야 하는 요소가 포함된다. 플레이 방식은 싱글 플레이에 최적화되어 있으며, 레이너의 생존과 도망을 성공적으로 마무리하는 것이 목표로 보인다. 맵의 구조는 중앙 통로와 주변 지역으로 나뉘어져 있어 도망칠 루트를 다양하게 선택할 수 있으며, 적의 시야나 공격 패턴을 읽고 회피하는 전략적 요소가 강하다. 난이도는 맵의 배치와 적의 공격 빈도에 따라 달라질 수 있지만, 일반적으로는 도망과 생존에 중점을 둔 맵이기 때문에 플레이어의 반응 속도와 판단력이 중요하다. 초보자는 적의 공격을 피하는 데 어려움을 느낄 수 있으나, 맵의 구조를 숙지하고 적절한 루트를 선택하면 비교적 쉽게 클리어할 수 있을 것이다. 반면 숙련된 플레이어는 적의 패턴을 예측하고 더 빠른 루트를 선택하여 더 높은 점수를 노릴 수 있다. 맵을 플레이하기 전에는 맵의 전체 구조와 주요 도망 루트를 미리 파악하는 것이 중요하며, 특히 적의 공격이 집중되는 지역을 우선적으로 피하는 전략을 세우는 것이 좋다. 또한, 맵의 해상도가 크기 때문에 미니맵을 적극 활용하여 주변의 적 움직임을 실시간으로 확인하는 것이 필수적이다. This map is a StarCraft: Brood War custom map where players control Raynor, blending defense and survival elements as they flee from enemies in a progressive format. The title, in Russian, translates to "Catch Raynor," and the in-game description depicts Raynor escaping with his allies while Mengsk pursues them. While the primary focus is on evasion across a large map, sections include enemy bases, turrets, and mineral deposits that require defensive maneuvers or avoidance. Designed for single-player, the goal is to successfully survive and escape as Raynor. The layout splits into a central corridor and surrounding areas, offering multiple escape routes. Strategic elements like reading enemy vision and attack patterns are key. Difficulty varies based on enemy placement and aggression, but the map emphasizes evasion and survival, demanding quick reflexes and decision-making. Beginners may struggle with dodging attacks, but mastering the layout and choosing efficient paths can make clearing easier. Skilled players can anticipate enemy patterns, select faster routes, and aim for higher scores. Before playing, it's crucial to study the map's structure and key escape paths, prioritizing avoidance of high-threat zones. Due to its large scale, actively using the minimap to track enemy movements in real time is essential.
최근 등록된 맵
새로 추가된 파일과 버전을 확인하세요.
오퍼레이션: 부랴 в пустыне (Operation: Bury v Pustyne)
‘오퍼레이션: 부랴 в пустыне’는 스타크래프트: 브루드워의 유즈맵으로, 한 명의 플레이어가 광활한 사막 지형을 배경으로 펼쳐지는 전투에 도전하는 스타일이 인상적인 작품이다. 맵은 사막 지형과 산악 지대, 그리고 곳곳에 흩어져 있는 잔해와 오아시스가 특징적으로 배치되어 있어, 건물을 짓고 자원을 모으는 동시에 적의 공격을 방어하거나 선제공격을 펼치는 전략적 선택이 강제된다. 내부 설명에 따르면 ‘레이너가 코랄의 사막 지역을 점령하기 위해 특수 부대를 파견한다’는 스토리 설정 하에, 플레이어는 맵 중앙에 위치한 본진을 지키며 주변의 적 건물을 제압하거나, 반대로 적의 핵심 건물을 공격하는 두 가지 방향의 전략을 구사할 수 있는 것으로 보인다. 맵의 구조는 비교적 넓고 개방되어 있어, 유닛의 이동과 시야 확보가 중요해진다. 특히 사막 지형의 경우 시야가 제한되는 경우가 많아, 정찰 유닛이나 센서가 필수적이며, 오아시스 지역은 자원 수집과 방어 거점으로 활용할 수 있는 전략적 요충지다. 맵 곳곳에 배치된 잔해는 자연스러운 장애물 역할을 하면서도, 일부는 건물 배치나 방어선 구축에 활용할 수 있는 유연성을 제공한다. 또한 맵의 중앙과 가장자리에 위치한 고지대는 시야 확보와 포격 유닛의 배치에 유리한 지점으로, 전투의 승패를 좌우할 수 있는 핵심 지역으로 작용한다. 플레이어는 초반 자원 수집과 건물을 건설하는 동시에, 적의 공격 패턴을 분석하여 방어선을 구축하거나, 반대로 빠른 타이밍에 적 본진을 노리는 агре시브한 전략을 펼칠 수 있다. 맵의 난이도는 주로 적의 공격 빈도와 강도에 따라 결정되며, 일부 구간에서는 적의 대규모 병력이 몰려오는 경우 방어가 필요할 수 있다. 또한 맵의 광활한 크기와 개방적인 구조상, 유닛의 컨트롤과 멀티태스킹 능력이 요구되는 경우가 많아, 초보 플레이어보다는 중급 이상의 숙련자를 대상으로 하는 것이 이상적이다. 맵의 진행은 주로 적 건물을 모두 파괴하거나, 모든 적 유닛을 섬멸하는 방식으로 마무리되는 것으로 추정되며, 승리 조건은 내부 설명이나 맵의 구조상 ‘코랄의 사막 지역을 점령’하는 데 성공하는 것으로 보인다. 이 맵을 즐기기 위해서는 사막 지형과 산악 지대의 특성을 충분히 이해하고, 자원 관리와 유닛 컨트롤에 대한 기본적인 숙련이 필요하다. 또한 맵의 광활한 크기상, 빠른 시야 확보와 정찰이 게임의 승패를 가르는 핵심 요소로 작용할 수 있으므로, 초반 정찰을 소홀히 하지 않도록 주의해야 한다. 맵의 분위기는 전쟁과 사막의 황량한 beauty가 어우러져 있어, 전략적인 전투와 함께 몰입감 있는 플레이 경험을 제공한다. 특히 건물을 짓고 방어선을 구축하는 디펜스 요소와, 적 본진을 공격하는 오프ensive 요소가 균형 있게 배치되어 있어, 다양한 전략적 선택을 즐길 수 있는 것이 이 맵의 큰 장점이다. ‘Operation: Burrow in the Desert’ is a custom map for *StarCraft: Brood War* where a single player faces off against a vast desert battlefield, offering a style of play that stands out. The map features a desert terrain interspersed with mountainous regions, scattered debris, and oases, forcing players to balance building structures, gathering resources, and either defending against or launching preemptive strikes. According to its internal lore, the map is set in a scenario where "Raynor dispatches a special forces unit to secure the desert region of Korhal," and players must either protect their central base or push outward to destroy enemy structures—or even assault the enemy’s core buildings. The map’s layout is relatively open and expansive, making unit mobility and vision control critical. The desert terrain often restricts visibility, making scouting units or sensor-based detection essential. Oases serve as key strategic points for resource collection and defensive outposts, while the debris scattered across the map acts as natural obstacles that can also be leveraged for building placement or fortifying defenses. High ground near the center and edges of the map provides superior sightlines and ideal positioning for artillery units, making these areas pivotal to the outcome of battles. Players must gather initial resources and construct buildings while analyzing enemy attack patterns to either fortify their defenses or adopt an aggressive strategy by striking the enemy base early. The difficulty is largely determined by the frequency and intensity of enemy assaults, with some sections requiring preparedness for large-scale enemy advances. Given the map’s vast scale and open design, strong unit control and multitasking skills are essential—making it better suited for intermediate to advanced players rather than beginners. The match concludes when all enemy structures are destroyed or every enemy unit is eliminated, with victory ultimately hinging on "securing the desert region of Korhal," as implied by the map’s lore and structure. To fully enjoy this map, players should grasp the unique characteristics of the desert and mountainous terrain, along with solid resource management and unit control. The map’s sheer size means that early scouting and vision control can decide the game’s outcome, so neglecting reconnaissance in the opening stages is a risk. The atmosphere blends the harsh beauty of war and the desert, delivering an immersive experience where strategic combat and deep engagement go hand in hand. The map strikes a balance between defensive elements—building and fortifying—and offensive pressure, allowing players to experiment with a variety of tactics and enjoy diverse strategic choices.
포라보티텔리 3.5B (Enslavers 3.5B)
이 맵은 스타크래프트: 브루드워의 유즈맵으로, 우주 배경의 디펜스 장르에 속한다. 내부 제목과 설명을 보면 레이너와 몬태그가 우주에서 마지막 찰스 잔당을 소탕하는 임무를 수행한다는 설정으로, 원본이 러시아어 기반의 맵임을 감안할 때 다국적 유저들에게도 접근성을 제공한다. 맵은 넓은 우주 공간을 배경으로 하며, 중앙에 위치한 적 기지를 progressively 파괴해 나가는 구조로 보인다. 맵의 주요 특징은 적의 끊임없는 웨이브와 방어 시설 간의 상호작용으로, 플레이어는 전략적 자원 관리와 타워 배치, 유닛 컨트롤을 동시에 요구받을 것으로 추정된다. 플레이 방식은 싱글 플레이어 중심의 서바이벌 디펜스이며, 초반에는 비교적 약한 적군을 상대하지만 후반으로 갈수록 강력한 적 유닛과 웨이브가 등장하는 구조가 예상된다. 맵의 크기가 4096x4096으로 상당히 넓고, 우주 타일셋을 활용하여 광활한 우주 공간과 적절한 시야 확인이 가능한 디자인으로 보인다. 또한, 맵의 이름 'Enslavers'는 노예라는 의미를 담고 있어, possibly 적 세력을 종속시키는 테마와 연관된 것으로 보이며, 3.5B 버전은 시리즈 중 최신 버전으로 추정된다. 추천 대상은 우주 디펜스와 서바이벌 게임을 선호하는 유저, 특히 스타크래프트의 유즈맵에 익숙한 플레이어들에게 적합할 것으로 보인다. 디펜스 장르의 특성상 전략적 사고와 긴장감이 요구되며, 넓은 맵과 다양한 웨이브 패턴을 즐기고 싶은 유저들에게 추천할 만하다. 다만, 초보자의 경우 난이도가 높을 수 있어, 적절한 커스터마이징이나 연습 모드를 활용하는 것이 바람직할 것이다. 플레이 전 확인해야 할 포인트는 맵의 초기 자원 분배, 방어 타워의 배치 가능 구역, 그리고 적 웨이브의 패턴과 타이밍이다. 또한, 맵의 내부 설명이 러시아어와 영어가 혼용되어 있어, 번역이나 설명서를 참고하는 것이 도움이 될 수 있다. 맵의 버전이 3.5B로 최신 버전인 만큼, 기존 시리즈와 비교해 밸런스나 새로운 요소 추가 여부를 확인해 보는 것도 좋다. This map is a *StarCraft: Brood War* custom map in the defense genre with a space-themed setting. Based on the internal title and description, players take on the mission of clearing out the last remnants of the Charles faction in space, with Raynor and Montag as the protagonists—an accessible premise even for international players, considering the original Russian-based design. The map features a vast cosmic battlefield where players progressively destroy the enemy base at its center. A key feature of the map is the constant enemy waves and the interaction between defensive structures, requiring players to manage resources, position towers, and control units simultaneously. The gameplay revolves around a single-player survival defense mode, starting with weaker enemy forces but escalating to stronger units and waves in later stages. With a large 4096x4096 grid, the map utilizes a space-themed tileset to create an expansive battlefield with clear visibility. The name "Enslavers" suggests a theme tied to subjugating enemy forces, and version 3.5B appears to be the latest in the series. This map is best suited for players who enjoy space-themed defense and survival games, particularly those familiar with *StarCraft* custom maps. The genre demands strategic thinking and sustained tension, making it ideal for those who appreciate wide maps and varied wave patterns. However, beginners may find the difficulty high, so using customization or practice modes is advisable. Before playing, check the initial resource distribution, available tower placement zones, and enemy wave patterns and timings. Since the internal descriptions mix Russian and English, referring to translations or guides can be helpful. As version 3.5B is the latest, it’s worth comparing its balance and new features against previous versions.
레이너를 따라잡아라 (In Pursuit of Raynor)
이 맵은 스타크래프트: 브루드워의 유즈맵으로, 플레이어가 레이너를 조종하며 적들을 피해 도망치는 디펜스와 서바이벌 요소가 혼합된 진행형 맵이다. 맵의 제목은 러시아어로 '레이너를 따라잡아라'라는 의미를 담고 있으며, 내부 설명에서도 레이너가 동료들과 함께 도망치며 Mengsk가 추격하는 스토리 라인이 묘사된다. 전체적으로 넓은 맵에서 도망치는 플레이가 주를 이루지만, 중간중간 적 기지나 터렛, 미네랄 등이 배치되어 있어 적의 공격을 방어하거나 피해야 하는 요소가 포함된다. 플레이 방식은 싱글 플레이에 최적화되어 있으며, 레이너의 생존과 도망을 성공적으로 마무리하는 것이 목표로 보인다. 맵의 구조는 중앙 통로와 주변 지역으로 나뉘어져 있어 도망칠 루트를 다양하게 선택할 수 있으며, 적의 시야나 공격 패턴을 읽고 회피하는 전략적 요소가 강하다. 난이도는 맵의 배치와 적의 공격 빈도에 따라 달라질 수 있지만, 일반적으로는 도망과 생존에 중점을 둔 맵이기 때문에 플레이어의 반응 속도와 판단력이 중요하다. 초보자는 적의 공격을 피하는 데 어려움을 느낄 수 있으나, 맵의 구조를 숙지하고 적절한 루트를 선택하면 비교적 쉽게 클리어할 수 있을 것이다. 반면 숙련된 플레이어는 적의 패턴을 예측하고 더 빠른 루트를 선택하여 더 높은 점수를 노릴 수 있다. 맵을 플레이하기 전에는 맵의 전체 구조와 주요 도망 루트를 미리 파악하는 것이 중요하며, 특히 적의 공격이 집중되는 지역을 우선적으로 피하는 전략을 세우는 것이 좋다. 또한, 맵의 해상도가 크기 때문에 미니맵을 적극 활용하여 주변의 적 움직임을 실시간으로 확인하는 것이 필수적이다. This map is a StarCraft: Brood War custom map where players control Raynor, blending defense and survival elements as they flee from enemies in a progressive format. The title, in Russian, translates to "Catch Raynor," and the in-game description depicts Raynor escaping with his allies while Mengsk pursues them. While the primary focus is on evasion across a large map, sections include enemy bases, turrets, and mineral deposits that require defensive maneuvers or avoidance. Designed for single-player, the goal is to successfully survive and escape as Raynor. The layout splits into a central corridor and surrounding areas, offering multiple escape routes. Strategic elements like reading enemy vision and attack patterns are key. Difficulty varies based on enemy placement and aggression, but the map emphasizes evasion and survival, demanding quick reflexes and decision-making. Beginners may struggle with dodging attacks, but mastering the layout and choosing efficient paths can make clearing easier. Skilled players can anticipate enemy patterns, select faster routes, and aim for higher scores. Before playing, it's crucial to study the map's structure and key escape paths, prioritizing avoidance of high-threat zones. Due to its large scale, actively using the minimap to track enemy movements in real time is essential.
정보를 찾아서 (Buscando informaciòn)
이 맵은 스타크래프트: 브루드워의 유즈맵으로, ‘Buscando informaciòn’이라는 제목이 인상적이다. 스페인어와 영어가 혼합된 제목은 맵의 배경 스토리를 암시하며, 플레이어는 레이너와 타사다르로 등장하는 캐릭터를 조종해 임무를 수행한다. 내부 맵 설명에 따르면 ‘Nivel Fàcil’이라는 난이도 표시가 있으며, Mengsk의 음모를 밝히는 기록을 획득해야 하는 스토리텔링형 디펜스가 중심이다. 맵의 배경은 설원/얼음 타일셋으로 구성되어 있으며, 광활한 눈-covered 지형이 펼쳐진다. 플레이어는 한 명의 인원으로 게임을 진행하며, 맵의 구조는 넓은 평지 위에 흩어진 자원과 건물을 배치한 형태로 보인다. 맵의 크기가 3072x3072로 상당히 크며, 타일셋의 특징상 시야가 제한될 수 있어 strategic positioning이 중요할 것으로 추정된다. 맵의 진행 방식은 방어와 자원 수집, 목표 달성을 병행하는 UMS 스타일로 보이며, ‘Nivel Fàcil’이란 설명으로 보아 난이도는 비교적 낮은 편으로 예상된다. 추천 대상은 스타크래프트 브루드워에 익숙한 플레이어 중, 스토리텔링이 포함된 디펜스 유즈맵을 즐기는 유저들에게 적합할 것이다. 플레이 전, 맵의 넓은 공간을 활용한 strategic positioning과 자원 관리 능력을 키우는 것이 중요할 것으로 보인다. 또한, 맵의 배경이 설원이므로 눈보라나 시야 제한 효과가 포함될 가능성도 염두에 두어야 한다.UI 요소가 많지 않거나,Spanish/English 혼용 설명이 포함되어 있어 이해를 위해 간단한 번역이나 문맥 파악이 필요할 수도 있다. This map is a *StarCraft: Brood War* custom map titled "Buscando informaciòn," a title that stands out with its blend of Spanish and English, hinting at the map’s background story. Players control characters like Raynor and Tassadar to complete missions, with the main objective being a story-driven defense mission where you uncover Mengsk’s conspiracy. The map features a snowy/ice tileset, with vast, snow-covered terrain stretching out. Played as a single player, the map’s layout consists of scattered resources and buildings across wide open plains. At 3072x3072 in size, the map is quite large, and due to its tileset, visibility may be limited, making strategic positioning crucial. The gameplay combines defense, resource gathering, and objective completion in a UMS-style format, and with the "Nivel Fàcil" difficulty label, it’s expected to be relatively easy. Recommended for players familiar with *Brood War* who enjoy story-driven defense custom maps, it’s important to prepare for strategic positioning and resource management across the map’s expansive space. Since the setting is a snowy landscape, players should also anticipate potential effects like blizzards or limited visibility. The UI is minimal, and some descriptions mix Spanish and English, so a bit of translation or context may be needed for full understanding.
크리스마스 러시 (Christmas Rush)
크리스마스 러시(Christmas Rush)는 스타크래프트 브루드워 유즈맵(UMS) 장르로, 2~4인 플레이를 권장하는 축제 분위기의 미니게임형 맵이다. 우주 타일셋을 배경으로 레이너가 산타 복장을 하고 등장하는 연출이 눈에 띄며, 맵 크기 128×192 타일(4096×6144 픽셀) 안에서 비교적 좁은 전장이 펼쳐진다. 시작 지점은 각 플레이어별로 분리되어 있고, 중앙에는 크리스마스 트리와 선물 상자 등 장식 오브젝트가 배치되어 있어 시각적 재미를 더한다. 진행 방식은 정해진 시간 내에 적 유닛을 처치하거나 특정 오브젝트를 점령하는 간단한 미션 목표로 구성되어 있으며, 트리거를 통해 웨이브가 순차적으로 생성된다. 난이도는 초보자도 부담 없이 즐길 수 있는 보통 수준으로 보이며, 협동 또는 경쟁 모드 모두 가능하다. 추천 대상은 짧은 시간 안에 가볍게 즐기고 싶은 캐주얼 유저나 연말 이벤트용 맵을 찾는 클랜원이다. 플레이 전에는 맵 설정에서 'Use Map Settings'가 활성화되어 있는지 확인하고, 인원 수에 맞춰 팀 구성을 조정하는 것이 좋다. Christmas Rush is a StarCraft Brood War UMS (Use Map Settings) map designed for 2‑4 players, featuring a festive mini‑game style. The space tileset serves as the backdrop, and Raynor appears in a Santa outfit, adding a holiday flavor. The map spans 128×192 tiles (4096×6144 pixels), offering a relatively compact battlefield. Each player starts at a separate location, while the center holds a Christmas tree, gift boxes, and other decorative objects that enhance visual appeal. Gameplay consists of simple mission objectives such as eliminating enemy waves or capturing specific objects within a time limit, with triggers spawning successive waves. The difficulty appears moderate, accessible to newcomers, and both cooperative and competitive modes are viable. It is recommended for casual players seeking a quick, light session or clans looking for a year‑end event map. Before playing, verify that 'Use Map Settings' is enabled and adjust team composition according to the player count.
[6] 최후의 반격 ([6] Final Counterattack)
스타크래프트 브루드워 유즈맵 '[6]최종 반격([6]最终反攻)'은 파일명과 내부 제목이 동일하게 '[6]最终反攻'으로 기록된 싱글플레이 캠페인 시나리오 맵이다. 사막 타일셋을 기반으로 192x192 타일, 6144x6144 크기의 넓은 전장에서 진행되며, 현재 사이트 장르는 UMS(유즈맵)로 분류되어 있으나 스토리 중심의 단일 미션 구성과 캐릭터 대사 트리거를 고려할 때 캠페인(CAMPAIGN) 장르에 더 부합하는 것으로 보인다. 내부 설명에 따르면 오레가(듀란)가 군사 기지를 미끼로 레이너와 멩스크 일행을 유인한 뒤 본대를 이끌고 아이어를 공격하는 '조호이산(调虎离山)' 전술을 펼치며, 이 전투가 성패를 가르는 결전임을 암시한다. 플레이어는 1인용으로 임무를 수행하며, 트리거를 통해 전개되는 대사와 이벤트 연출, 조건부 승리 조건 등이 핵심 재미 요소로 보인다. 맵 크기가 큰 만큼 다수의 유닛과 기지 운영, 다단계 목표 달성이 요구될 것으로 추정되며, 난이도와 클리어 시간은 미정이지만 캠페인 특성상 30분에서 40분 내외의 플레이 타임이 예상된다. 중국어 텍스트 기반이라 한글 패치나 번역 없이 스토리 이해에 제약이 있을 수 있으나, 스타크래프트 오리지널 캐릭터들이 등장하는 대체 역사 시나리오를 즐기는 유저에게 추천할 만하다. 플레이 전 맵 설정 안내문('[请使用地图设置]')에 따라 옵션 확인 후 시작하는 것이 좋으며, 트리거 밀도가 높아 최신 패치 버전 호환성 여부도 체크해 볼 필요가 있다. StarCraft Brood War UMS map '[6] Final Counterattack ([6]最终反攻)' is a single-player campaign scenario map where the filename and internal title are identically recorded as '[6]最终反攻'. Based on the Desert tileset, it unfolds on a vast 192x192 tile, 6144x6144 battlefield. Although currently categorized as UMS on the site, its story-driven single mission structure and character dialogue triggers suggest it fits the CAMPAIGN genre more accurately. According to the internal description, Duran (Orega) uses a military base as bait to lure Raynor and Mengsk's group, then leads his main force to attack Aiur in a 'lure the tiger from the mountain' stratagem, implying this battle decides victory or defeat. The player undertakes the mission solo, with trigger-driven dialogues, event staging, and conditional victory conditions appearing to be the core gameplay elements. Given the large map scale, management of numerous units and bases along with multi-stage objectives is estimated to be required. Difficulty and clear time are unknown, but a playtime of 30 to 40 minutes is expected for a typical campaign mission. As the text is in Chinese, understanding the story may be limited without a Korean patch or translation, yet it is recommended for users who enjoy alternate history scenarios featuring original StarCraft characters. It is advisable to check the map settings as per the instruction '[请使用地图设置]' before starting, and to verify compatibility with the latest patch version due to high trigger density.
[5]紧急支援
스타크래프트 브루드워 유즈맵 '[5]긴급 지원'은 레이너와 제라툴이 등장하는 싱글 플레이 시나리오 미션이다. 사막 타일셋 위에 구축된 192x128 크기의 맵에서 플레이어는 수도 방어진 뒤편에서 오레가의 기지를 발견하고, 진실을 규명하기 위해 적 군사 기지로 진격하는 임무를 수행한다. 일반적인 밀리 대전이 아닌 트리거 기반의 진행 방식으로, 스토리 컷신과 목표 안내가 포함되어 있어 캠페인 모드와 유사한 몰입감을 제공한다. 난이도는 초반 기지 확보와 병력 운용에 따라 달라지며, 영웅 유닛의 생존이 핵심 변수로 작용한다. 맵 구조는 선형적인 경로 위주로 구성되어 있어 길을 잃을 염려가 적고, 전투 구간마다 적절한 병력 지원이 주어져 흐름이 끊기지 않는다. 브루드워 오리지널 스토리 연장선상의 팬메이드 미션을 즐기고 싶은 유저, 혹은 짧은 시간 안에 완성도 높은 싱글 플레이를 경험하고 싶은 입문자에게 추천한다. 플레이 전 맵 설정에서 난이도나 트리거 옵션이 제공되는지 확인하면 더욱 쾌적하게 즐길 수 있다. StarCraft Brood War UMS map '[5] Emergency Support' is a single-player scenario mission featuring Raynor and Zeratul. On a 192x128 desert tileset, the player discovers Orega's base behind the capital defense line and advances into the enemy military base to uncover the truth. Unlike standard melee, it follows a trigger-based progression with story cutscenes and objective guides, delivering immersion similar to official campaigns. Difficulty varies with early base securing and unit control, while hero unit survival is a key factor. The map layout follows a linear path, minimizing navigation confusion, and timely reinforcements keep the pacing smooth. Recommended for users seeking fan-made missions extending the original Brood War story, or beginners wanting a polished single-player experience in a short session. Before playing, check the map settings for difficulty or trigger options to ensure a comfortable experience.
[5]逃离克哈
[5]탈출: 코랄은 스타크래프트 브루드워 세계관 속 코랄 행성을 배경으로 한 싱글 플레이 시나리오 맵이다. 맵 설명에 따르면 지구 집정 연합(UED)이 저그의 사이오닉 폭주를 방관하는 사이, 저그 군단이 코랄 본성으로 몰려들며 레이너 일행이 수도 외곽으로 후퇴해야 하는 긴박한 상황이 그려진다. 플랫폼 타일셋을 활용한 128x128 크기의 전장은 우주 정거장이나 행성 표면의 인공 구조물 느낌을 주며, 밀리 맵과는 달리 트리거 기반의 이벤트와 컷신, 목표 지점 이동 등 캠페인 특유의 연출이 중심이 된다. 진행 방식은 기지 건설보다는 주어진 유닛으로 방어선을 유지하거나 돌파구를 열어 아군을 안내하는 '탈출/호위' 형태일 것으로 보인다. 플레이어는 레이너 특공대나 자치령 잔존 병력을 조작해 끊임없이 몰려드는 저그 무리를 상대하며 정해진 경로로 이동해야 한다. 난이도는 초반 병력 구성과 트리거 타이밍에 따라 달라지겠지만, 스토리 몰입감을 중시하는 일반적인 캠페인 수준으로 추정된다. 이 맵은 오리지널 캠페인의 연장선상에서 '코랄 탈출'이라는 명장면을 직접 플레이하고 싶은 유저, 혹은 브루드워 스토리 기반의 커스텀 캠페인을 즐기는 유저에게 추천한다. 플레이 전 맵 설정에서 난이도나 트리거 옵션을 확인하고 시작하는 것이 좋다. 중국어 제목 '[5]逃离克哈'는 시리즈 5번째 에피소드임을 암시하므로, 앞선 에피소드들과 연계해 즐기면 더욱 몰입감이 높을 것이다. Escape from Korhal [5] is a single-player scenario map set on the planet Korhal in the StarCraft: Brood War universe. According to the map description, the United Earth Directorate (UED) turns a blind eye to the Zerg's psionic disruption, allowing the Swarm to descend upon Korhal Prime, forcing Raynor and his allies to retreat to the capital's outskirts. The 128x128 map utilizes the Platform tileset, evoking an orbital station or planetary installation atmosphere. Unlike melee maps, it focuses on campaign-style production: trigger-based events, cutscenes, and objective-driven movement. Gameplay likely revolves around an 'escape/escort' format rather than base building. The player presumably controls Raynor's Raiders or Dominion remnants, holding defensive lines or breaking through endless Zerg waves to guide allies to a designated extraction point. Difficulty is estimated to be standard for story-focused custom campaigns, varying with initial unit composition and trigger timing. This map is recommended for users wanting to experience the iconic 'Escape from Korhal' moment as a playable extension of the original campaign, or fans of story-driven custom campaigns. It is advisable to check map settings for difficulty or trigger options before starting. The Chinese title '[5]逃离克哈' suggests a fifth episode in a series; playing previous episodes sequentially would enhance immersion.
맵 선택 가이드
태그는 맵의 핵심 특징을 빠르게 설명하지만 제작 버전마다 규칙이 다를 수 있습니다. 상세 설명에서 권장 인원, 난이도, 플레이 시간과 버전을 함께 확인한 뒤 다운로드하세요.