
럴커 스타크래프트 맵 모음
'럴커' 태그가 등록된 맵을 모았습니다. 장르 하나로 찾기 어려운 플레이 방식, 난이도와 특징을 중심으로 인기 맵과 최신 맵을 비교해 보세요.
- 등록 맵
- 11개
- 누적 다운로드
- 0
- 누적 조회
- 413
인기 맵
다운로드와 조회 반응이 높은 맵입니다.
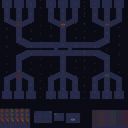
럴커스 다크웨이 디펜스 (Lurkers l)arkWay D!!)
를 통해 살펴볼 'Lurkers l)arkWay D!!'는 수많은 럴커 침입자들을 막아내는 독특한 콘셉트의 스타크래프트 맵 유즈맵이다. 내부 맵 설명에 따르면 플레이어들은 18개의 길목으로 몰려오는 새로운 럴커 침입자들을 처치해야 하며, 신들린 방어선을 구축해 적이 빠져나가지 못하도록 막는 것이 핵심 목표다. 전체적인 맵 구조를 살펴보면 화산 타일셋 배경 위에 복잡하게 갈라지는 다중 길목 형태가 눈에 띄며, 다수의 플레이어가 협력하여 각자의 구역을 방어하거나 유기적으로 전선을 형성하는 플레이 방식을 유추할 수 있다. 특히 6인의 플레이어 인원을 지원하는 만큼, 멀티플레이 환경에서 각자의 위치를 조율하고 방어 타워나 유닛 배치를 최적화하는 전략적 재미가 돋보인다. 일반적인 밀리 전투와는 전혀 다른 방어 위주의 진행 방식을 제공하므로, 디펜스 장르를 좋아하는 유저들에게 색다른 도전 의식을 불러일으킨다. 플레이 전에는 18갈래로 나뉘는 공격 경로를 미리 파악하고, 아군과의 협력 포인트를 점검하는 것이 유리하다. 진영 간 유기적인 방어 공조와 빠른 유닛 배치가 승패를 가르는 중요한 요소가 될 것이다. Lurkers l)arkWay D!! is a custom Starcraft Brood War map that presents a defensive challenge centered around holding off waves of lurking intruders. Based on the internal map description, players must eliminate new lurker intruders attempting to breach through eighteen distinct pathways, requiring them to establish an impenetrable defense and prevent any enemies from slipping past. The layout features a volcanic tileset background with complex, branching multi-path structures, suggesting a cooperative gameplay style where multiple participants must defend specific sectors or dynamically coordinate their frontlines. Supporting up to six players, it offers strategic depth in optimizing unit placement, defensive structures, and role division within a multiplayer setting. Unlike standard melee matches, this defense-oriented scenario delivers a distinct tactical experience that appeals to fans of tower defense and survival custom maps. Before diving into the game, players should carefully analyze the multi-directional enemy routes and coordinate defensive responsibilities with teammates to ensure maximum survival efficiency and secure a successful defense.
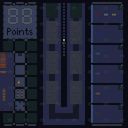
러커 디펜스 XYZ 4 패스트 (Lurker Defense XYZ 4 Fast)
스타크래프트 브루드워 맵을 즐기는 유저들에게 디펜스 장르는 언제나 큰 인기를 끌어온 클래식한 분야입니다. 이번에 살펴볼 맵은 '러커 디펜스 XYZ 4 패스트(Lurker Defense XYZ 4 Fast)'로, 파일명과 내부 설명에서 유추할 수 있듯 전통적인 유즈맵 디펜스의 문법을 따르면서도 빠른 진행 속도를 강조한 작품입니다. 스타크래프트 맵 커뮤니티에서 색다른 방어 플레이를 원하는 이들에게 꾸준히 호기심을 불러일으키는 요소들을 담고 있습니다. 전체적인 맵 구조를 살펴보면, 플레이어들이 각자의 구역에서 자리를 잡고 밀려오는 적들을 막아내는 전형적인 배치를 보여줍니다. 화면 좌측에는 점수를 나타내는 대형 텍스트 영역과 각종 유닛 및 건물이 배치된 구역이 마련되어 있어 현재 게임의 진행 상황과 자원 상태를 직관적으로 파악할 수 있도록 돕습니다. 중앙에는 유닛들이 이동하거나 교전할 것으로 보이는 세로형 길목과 구조물이 길게 늘어서 있고, 우측에는 여러 개의 독립된 플레이어 기지 공간이 세로로 나란히 배치되어 있어 최대 인원이 각자의 자리를 맡아 방어에 집중하기 좋은 구조입니다. 화산 타일셋 특유의 어두운 분위기 속에서 럴커라는 특정 유닛을 활용한 방어전이 펼쳐질 것으로 추정되며, 패스트 빌드라는 이름에 걸맞게 지루할 틈 없이 몰아치는 공세를 경험할 수 있습니다. 이 유즈맵은 다인원이 함께 협력하여 몰려오는 적의 공세를 버텨내는 것을 목표로 하는 유저들에게 적합하며, 특히 럴커 특유의 스플래시 공격이나 잠복 메커니즘을 활용한 방어 전술을 선호하는 플레이어라면 한 번쯤 도전해볼 만합니다. 플레이하기 전에는 함께 참여하는 인원들과 각 기지의 역할을 분담하고, 빠른 속도로 전개되는 웨이브에 대비해 초반 빌드를 미리 구상해두는 것이 원활한 클리어에 도움이 됩니다. For users who enjoy StarCraft: Brood War maps, the defense genre has always been a classic and immensely popular category. The map we are examining this time is 'Lurker Defense XYZ 4 Fast', which, as inferred from its filename and internal description, follows the conventions of traditional custom defense maps while emphasizing a fast-paced progression. It contains elements that consistently spark curiosity among those looking for unique defensive gameplay within the StarCraft map community. Looking at the overall map structure, it displays a typical layout where players take positions in their respective zones and fend off incoming enemies. On the left side of the screen, a large text area indicating scores and sections populated with various units and buildings are provided, helping players intuitively grasp the current game progress and resource status. In the center, vertical pathways and structures where units appear to move or engage stretch out, while on the right, multiple independent player base spaces are arranged vertically, creating a structure where the maximum number of players can take their spots and focus on defense. Within the dark atmosphere unique to the volcanic tileset, a defensive battle utilizing a specific unit, the lurker, is presumed to unfold, and true to the fast build name, players can experience a relentless offensive without a dull moment. This custom map is suitable for users whose goal is to cooperate with multiple players to withstand incoming enemy offensives, and is especially worth a try for players who prefer defensive tactics utilizing the lurker's splash attack or burrow mechanics. Before playing, it is helpful to coordinate roles for each base with participating members and plan out early builds in advance to prepare for the fast-paced waves for a smooth clear.
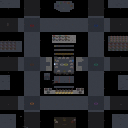
초즈 어 디 나우 위드 럴크스! (Choose ur D now w/ Lurks!)
스타크래프트 브루드워 유즈맵 'Choose ur D now w/ Lurks!'는 제목과 맵 구조에서 유추할 수 있듯이, 럴커(Lurker)와 다양한 디펜스 요소를 결합한 독특한 형태의 UMS 맵이다. 이 맵은 우주 타일셋을 배경으로 넓은 맵 크기를 활용하여 플레이어들이 각자의 진형에서 유닛을 배치하고 몰려오는 적의 공세에 대응하는 방식을 취하고 있는 것으로 보인다. 맵 이미지 분석 결과, 중앙 구역과 사방으로 뻗어 나가는 통로, 그리고 특정 유닛들이 밀집해 배치된 대기실 및 유닛 선택 구역 등이 체계적으로 배치되어 있어 플레이어 간의 역할 분담과 협력이 중요하게 작용할 가능성이 높다. 특히 럴커를 활용한 방어적 전술이나 입구 통제 능력이 게임의 승패를 가르는 핵심 요소가 될 것으로 추정된다. 방어형 유즈맵이나 디펜스 장르를 좋아하는 플레이어라면 친구들과 함께 모여 서로의 포지션을 조율하며 색다른 방어 전략을 구사하는 재미를 느낄 수 있다. 복잡한 컨트롤보다는 유닛 조합과 위치 선정이 중요해 보여서 방어 게임을 선호하는 유저들에게 적합하며, 멀티플레이 시 팀원과의 호흡을 맞추는 것이 핵심인 플레이 포인트다. 스타크래프트 브루드워에서 색다른 규칙의 디펜스 유즈맵을 찾고 있는 유저들에게 흥미로운 선택지가 될 것이다. The Starcraft Brood War UMS map 'Choose ur D now w/ Lurks!', as inferred from its title and map layout, is a unique custom map that combines Lurkers with various defense elements. Set against a space tileset utilizing a large map size, it appears to feature a gameplay style where players deploy units in their respective formations and respond to incoming enemy waves. Analysis of the map image shows a central area, pathways extending in multiple directions, and structured waiting or unit selection zones densely populated with specific units, suggesting that role division and cooperation among players play a crucial role. In particular, defensive tactics utilizing Lurkers and entrance control abilities are estimated to be key factors determining victory or defeat. Players who enjoy defensive custom maps or the defense genre can experience the fun of gathering with friends, coordinating positions, and executing unique defensive strategies. Since unit composition and positioning seem more important than complex control, it is suitable for users who prefer defense games, and synchronizing with teammates during multiplayer is a core gameplay point. It will serve as an interesting option for users looking for a defense custom map with different rules in Starcraft Brood War.
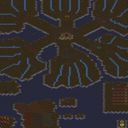
룩커 디펜스 30 웨이 (Lurker Defence 30 way v 1.01)
스타크래프트 브루드워 맵을 즐기는 유저들에게 디펜스 장르는 언제나 큰 인기를 끌어온 스테디셀러입니다. 그중에서도 특정 유닛의 특성을 활용해 몰려오는 적을 막아내는 방식은 플레이어의 전략적 배치와 효율적인 자원 운용 능력을 시험하는 핵심 요소로 작용합니다. 이번에 살펴볼 룩커 디펜스 30 웨이 (Lurker Defence 30 way v 1.01)는 이러한 디펜스 유즈맵의 재미를 고스란히 담아낸 작품으로, 제한된 공간 속에서 럴커의 강력한 화력을 극대화하는 재미를 선사하는 스타크래프트 맵입니다. 이 맵은 다수의 플레이어가 협력하여 몰려오는 적의 공세를 막아내는 구조를 취하고 있으며, 제목에서 유추할 수 있듯 총 서른 번의 웨이브를 버텨내는 것을 목표로 합니다. 맵의 전반적인 구조를 살펴보면, 플레이어들은 지정된 위치에 럴커를 배치하여 효율적인 방어선을 구축해야 합니다. 저그 종족의 대표적인 방어 유닛인 럴커는 잠복 상태에서 범위 공격을 가하기 때문에, 적들이 이동하는 경로와 사거리를 고려한 자리 배치가 무엇보다 중요합니다. 맵의 미니맵과 지형 디자인은 다방면에서 적이 접근하거나 중앙의 거점을 압박하는 형태로 구성되어 있어, 아군과의 유기적인 소통과 방어선 분담이 필수적입니다. 단순히 유닛을 많이 모으는 것만으로는 후반으로 갈수록 거세지는 공세를 버티기 어렵기 때문에, 각 웨이브마다 등장하는 적의 특성에 맞춰 럴커의 위치를 조정하거나 업그레이드를 병행하는 세밀한 컨트롤이 요구됩니다. 특히 협동 플레이가 중요한 만큼, 팀원 간의 호흡이 승패를 가르는 결정적인 요인으로 작용하며, 플레이어들 사이의 협력이 원활하지 않을 경우 방어선이 쉽게 무너질 수 있는 긴장감을 제공합니다. 이 맵은 평소 타워 디펜스나 럴커를 활용한 유즈맵을 선호하는 유저들에게 색다른 재미와 도전 의식을 불러일으키며, 친구들과 함께 전략을 짜가며 즐기기에 적합한 플레이 경험을 제공합니다. 다만, 플레이를 시작하기 앞서 팀원들과의 역할 분담을 사전에 조율하고, 웨이브마다 다가오는 위협에 대비해 방어 위치를 점검하는 것이 좋습니다. 다수의 적을 한 번에 쓸어버리는 럴커 특유의 시원한 타격감과 몰려오는 적을 막아내는 방어의 재미를 동시에 느끼고 싶다면, 이번 주말에는 동료들과 함께 이 맵에 도전하여 전략적인 방어선을 완성해 보는 것을 추천합니다. For users who enjoy StarCraft: Brood War maps, the defense genre has always been a steady seller that commands enduring popularity. Among them, the style of fending off swarms of incoming enemies by utilizing the specific characteristics of certain units acts as a core element that tests a player's tactical placement and efficient resource management skills. Lurker Defence 30 way v 1.01, which we will examine here, is a work that perfectly captures the fun of such custom defense maps, offering the joy of maximizing the powerful firepower of lurkers within a restricted space. This map adopts a structure where multiple players cooperate to block the offensive of incoming enemies, and as can be inferred from the title, the goal is to survive a total of thirty waves. Looking at the overall structure of the map, players must place lurkers in designated positions to build an efficient defensive line. Since the lurker, a representative defensive unit of the Zerg race, inflicts area-of-effect damage while burrowed, strategic placement considering the path and range of enemies is paramount. The minimap and terrain design are structured in a way that enemies approach from multiple directions or pressure the central stronghold, making organic communication and the division of defense lines with allies essential. Simply gathering many units is not enough to withstand the increasingly fierce offensives in the later stages, so delicate control is required, such as adjusting lurker positions or pursuing upgrades tailored to the characteristics of the enemies appearing in each wave. Especially since cooperative play is important, teamwork acts as a decisive factor determining victory or defeat, and if cooperation among players is not smooth, it provides the tension of the defense line easily collapsing. This map brings a unique sense of fun and a challenge to users who usually prefer tower defense or custom maps utilizing lurkers, and it provides a play experience suitable for enjoying while scheming strategies with friends. However, before starting the game, it is recommended to coordinate roles with teammates in advance and check defense positions in preparation for the threats approaching each wave. If you want to simultaneously feel the refreshing impact characteristic of lurkers wiping out multiple enemies at once and the fun of defense in blocking approaching enemies, it is recommended to challenge this map with your colleagues this weekend and complete a strategic defensive line.
럴커 다크웨이 디펜스 (Lurkers DarkWay D!!)
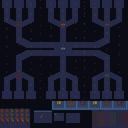
화산 타일셋의 이글거리는 지형 위에서 펼쳐지는 이 디펜스 맵은 단순한 제목 이상의 혼란스러운 재미를 선사한다. 제목에서 암시하듯, 플레이어는 18갈래에 달하는 적의 진입로를 틀어막아야 하는 막중한 임무를 짊어진다. 일반적인 선형 디펜스와 달리, 이 맵은 다방향에서 밀려드는 럴커 웨이브를 상대해야 하므로 긴장의 끈을 단 한순간도 놓을 수 없다. 지형은 화산 타일셋 특유의 좁은 협곡과 불규칙한 언덕으로 이루어져 있어, 유닛 배치와 시야 확보가 까다롭다. 시작과 동시에 주어지는 자원과 시간은 제한적이며, 적의 공세는 예측하기 어려운 패턴으로 거세진다. 따라서 초반 빌드오더를 얼마나 효율적으로 가져가느냐에 따라 중반 이후의 생존 여부가 극명하게 갈린다. 플레이 경험은 그야말로 숨 막히는 공성전의 연속이다. 18개의 진입로라는 표현에서 느껴지듯, 적들은 단순히 몰려오는 것이 아니라 맵 곳곳에 뚫어놓은 통로를 통해 파고든다. 이는 플레이어로 하여금 일점 방어가 아닌 전방위적인 수비 전략을 강제한다. 특정 지점을 과도하게 보강하면 다른 통로가 순식간에 뚫리기 일쑤이며, 병력의 기동성과 시야 확보를 위한 관측선 운용이 생명줄과도 같다. 지형을 활용한 시즈 탱크의 포격 진지 구축, 혹은 좁은 입구를 틀어막는 벌처의 마인 살포 등 전형적인 테란 디펜스 전술이 유효하지만, 맵 구조상 완벽한 티어 형성은 불가능에 가깝다. 끊임없이 재배치하고 빈틈을 메우는 과정에서 극도의 몰입감을 느끼게 된다. 이 맵은 디펜스 장르에 능숙한 베테랑보다는, 협동을 통해 혼돈을 극복하는 재미를 선호하는 플레이어에게 추천한다. 최대 6인이 함께 플레이할 수 있지만, 다수의 인원이 참여할수록 병력 배치와 자원 분배에 대한 명확한 소통이 필수적이다. 각자 구역을 나누어 방어하는 것이 기본이지만, 맵의 구조상 특정 지역으로 적이 쏠리는 현상이 잦아 유기적인 지원이 요구된다. 플레이 전 반드시 확인해야 할 사항은, 이 맵이 전통적인 밸런스보다는 압도적인 물량과 예측 불가능성에 초점을 맞추고 있다는 점이다. 따라서 완벽한 클리어를 목표로 하기보다는, 끊임없이 밀려오는 적을 상대로 아군과 함께 버티는 과정 자체에서 쾌감을 찾는 것이 올바른 접근법이다. 인내심을 시험하는 수많은 웨이브 속에서, 당신의 방어선은 과연 신과 같은 방어력을 보여줄 수 있을까. This defense map, set upon the smoldering ground of a volcanic tileset, delivers a chaotic experience that goes far beyond its straightforward title. As the name suggests, players are tasked with the overwhelming duty of blocking eighteen distinct enemy pathways. Unlike standard linear defense maps, this one forces you to contend with waves of Lurkers pouring in from multiple directions simultaneously, ensuring the tension never lets up for a single moment. The terrain is characterized by the narrow canyons and irregular cliffs typical of the volcanic setting, making unit placement and vision control particularly tricky. The resources and time provided at the start are extremely limited, and the enemy offensive intensifies in unpredictable patterns. Consequently, your survival in the later stages hinges entirely on how efficiently you manage your initial build order. The gameplay experience is essentially a series of breathless siege battles. As the eighteen pathways imply, the enemies do not simply rush forward; they infiltrate through gaps spread all across the map. This forces players to adopt an omnidirectional defensive strategy rather than relying on a single chokepoint. Over-reinforcing one area often leads to the immediate collapse of another, making troop mobility and the use of overlords for vision absolutely critical. While classic Terran defense tactics, such as establishing siege tank firing lines using the high ground or spreading vulture spider mines at narrow entrances, are viable, the map structure makes it nearly impossible to form a perfect defensive tier. The extreme sense of immersion comes from the frantic process of constantly repositioning and plugging the gaps. This map is recommended not for defense purists seeking meticulous balance, but for players who enjoy overcoming chaos through cooperation. Up to six players can join, but a larger group makes clear communication regarding troop placement and resource distribution essential. While dividing the defense zones is the basic approach, the map’s design causes enemy forces to occasionally swarm specific areas, requiring flexible support from teammates. A crucial point to check before playing is that this map focuses on overwhelming numbers and unpredictability rather than traditional balance. Therefore, the correct mindset is not to dream of a perfect, flawless clear, but to find pleasure in the sheer act of holding the line with your allies against the relentless tide. Amid countless waves that test your patience, can your defensive line truly prove to be godlike?
도라에몽 의 Sunken II
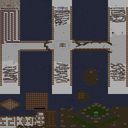
도라에몽 의 Sunken II(도라에몽의 성큰 투)는 스타크래프트 브루드워 UMS(유즈맵) 장르 중에서도 독특한 방어 및 전투 메커니즘을 경험할 수 있도록 제작된 유저 커스텀 맵이다. 이번 작품은 과거 많은 유저들에게 사랑받았던 고전 맵의 계보를 이어받아, 특유의 향수와 함께 몰입감 넘치는 플레이 환경을 제공한다. 게임이 시작되면 플레이어는 주어진 지형과 유닛 배치에 따라 각자의 위치에서 몰려오는 적의 공세를 막아내거나 정해진 목표를 달성하기 위한 전략을 펼쳐야 한다. 특히 내부 설명에 언급된 바와 같이 특정 플레이어 진영인 빨강 유저의 건물이 자동으로 건설되는 등 독특한 트리거 시스템이 포함되어 있어 일반적인 밀리 게임과는 완전히 다른 양상으로 전개된다. 또한 구석 지역에는 개인 럴커 유닛들이 뭉쳐져 배치되어 있어 이를 어떻게 활용하고 방어선 구축에 녹여내느냐가 승패를 가르는 중요한 요인으로 작용한다. 맵의 전반적인 난이도는 하드(HARD) 수준으로 설정되어 있어 초보자부터 숙련된 유저까지 모두 긴장감을 놓을 수 없는 플레이 경험을 선사한다. 사방으로 펼쳐진 플랫폼 타일셋 기반의 독특한 지형 구조는 플레이어가 효율적인 방어 거점을 구축하고 아군과의 협력을 유도하는 핵심 요소로 작용한다. 친구들과 함께 멀티플레이로 즐기기에 적합하며, 색다른 방어전과 유즈맵 특유의 재미를 느끼고 싶은 모든 스타크래프트 브루드워 팬들에게 추천할 만한 작품이다. 플레이를 시작하기 전에 내부 설명에 적힌 자동 건설 요소와 럴커 유닛의 배치 위치를 미리 파악해 두면 더욱 원활하게 게임을 풀어나갈 수 있을 것이다. Doraemon's Sunken II is a user-custom map created within the StarCraft: Brood War UMS (Use Map Settings) genre, designed to let players experience unique defensive and combat mechanisms. This map inherits the legacy of classic maps that have been loved by many players in the past, providing an immersive gameplay environment filled with nostalgia. When the game begins, players must deploy strategies based on the given terrain and unit placements to fend off incoming enemy waves or achieve designated objectives from their respective positions. Notably, as mentioned in the internal description, a unique trigger system is included—such as the buildings of the red player slot being automatically constructed—which unfolds the match in a completely different direction from standard melee games. In addition, personal lurker units are gathered and positioned in the corner areas, making how one utilizes them and integrates them into the defensive line a crucial factor determining victory or defeat. The overall difficulty of the map is set to a hard level, delivering a tense gameplay experience for everyone from beginners to experienced users. The unique terrain structure based on the platform tileset spreading across all directions serves as a core element that encourages players to establish efficient defensive strongholds and cooperate with allies. It is well-suited for multiplayer sessions with friends and is a recommended work for all StarCraft: Brood War fans who want to experience unconventional defense battles and the distinct fun of UMS maps. Before starting the game, grasping the automatic construction features and the placement locations of the lurker units noted in the internal description in advance will help you navigate the match much more smoothly.
럴커 36웨이 돈캐기 (Lucker Defense 36 Way-noney)
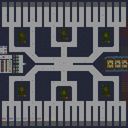
를 찾고 계신다면, 독특한 구조와 자원 채취 요소를 결합한 디펜스 장르의 유즈맵인 럴커 36웨이 돈캐기 (Lucker Defense 36 Way-noney)를 주목해 볼 필요가 있습니다. 이 맵은 스타크래프트 유즈맵 중에서 플레이어들이 협력하여 몰려오는 적의 공세를 막아내는 전형적인 디펜스 진행 방식을 따르고 있으면서도, 일반적인 디펜스 맵들과는 차별화된 독특한 지형적 특징을 보여줍니다. 맵 전체를 살펴보면 사방으로 복잡하게 뻗어 나가는 다수의 길목과 진영 구조가 눈에 띄며, 다채로운 유닛 배치를 통해 방어 전략을 세울 수 있도록 설계되어 있습니다. 플레이어는 주어진 공간에서 유닛을 효과적으로 배치하고 업그레이드를 진행하며 다수의 웨이브를 버텨내야 합니다. 특히 파일명과 내부 설명에서 짐작할 수 있듯 돈캐기 요소가 가미되어 있어, 단순한 타일 방어뿐만 아니라 자원 관리와 경제력 확보가 승패를 가르는 중요한 변수로 작용할 것으로 보입니다. 각 플레이어의 진영은 독립적이면서도 유기적으로 연결되어 있어 멀티플레이 시 팀원 간의 소통과 역할 분담이 매우 중요하며, 웨이브가 진행될수록 점점 강력해지는 적들을 상대하기 위해 치밀한 자원 운영과 방어선 구축이 요구됩니다. 스타크래프트 브루드워에서 색다른 디펜스 스타일의 유즈맵을 즐기고 싶어 하는 유저들이나, 친구들과 함께 머리를 맞대고 거센 공세를 막아내는 협동 플레이를 선호하는 유저들에게 추천할 만한 맵입니다. 플레이를 시작하기 전에 각 진영의 자원 채취 동선과 방어 라인의 취약 구간을 미리 파악해 두는 것이 원활한 클리어에 도움이 될 것입니다. If you are looking for a StarCraft: Brood War map review, Lucker Defense 36 Way-noney is a custom defense map that deserves attention for combining a unique structure with resource-gathering elements. This map follows the typical defense gameplay where players cooperate to block incoming enemy waves, while also showing distinctive terrain features that differentiate it from general defense maps. Looking at the overall map, multiple paths and camp structures stretching out in all directions stand out, designed so that players can establish defensive strategies through diverse unit placement. Players must effectively position units in the given space, conduct upgrades, and endure numerous waves. In particular, as can be guessed from the file name and internal description, money-digging elements are added, so resource management and securing economic power, as well as simple tile defense, are expected to act as important variables determining victory or defeat. Each player's base is independent yet organically connected, making communication and role division among team members very important during multiplayer, and meticulous resource operation and defense line construction are required to deal with enemies that become increasingly powerful as the waves progress. It is a recommended map for users who want to enjoy a unique defense-style custom map in StarCraft: Brood War, or those who prefer cooperative play where they put their heads together with friends to block fierce offensives. Before starting the game, it will be helpful for a smooth clear to grasp the resource gathering routes and vulnerable sections of the defense line for each base in advance.
럴커 18 웨이 다크웨이 디펜스 (Lurkers 18 Darkway Defense)
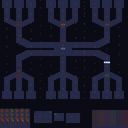
18갈래로 몰려오는 적을 막아내는 독특한 컨셉의 스타크래프트 유즈맵, 'Lurkers l)arkWay D!!'는 화산 타일셋 위에서 펼쳐지는 고전적인 킬 디펜스 장르의 재미를 극대화한 작품이다. 맵 파일명 '[럴커18웨]_렁커뎀쥐_짱.scx'에서도 알 수 있듯, 주인공 유닛은 럴커로 추정되며, 제목의 '18 Way'가 암시하듯 총 18개의 통로에서 쏟아져 나오는 침입자들을 막는 것이 핵심 목표다. 내부 설명의 'godlike defense'라는 표현처럼, 플레이어는 점점 강해지는 적의 물결을 다양한 스킬과 전략을 활용해 저지하며 강력한 방어선을 구축하는 재미를 느낄 수 있다. 맵은 6인 플레이를 지원하며, 각 플레이어가 특정 구역을 담당하는 협동 방식으로 진행될 가능성이 높다. 화산을 배경으로 한 128x128 타일의 좁지 않은 공간은 유닛을 배치하고 진형을 짜기에 충분한 여유를 제공한다. 초반에는 단순한 공격 패턴이 반복되지만, 후반으로 갈수록 다양한 유형의 적과 보스급 유닛이 등장해 긴장감을 놓을 수 없게 만든다. 스타크래프트 유즈맵 특유의 직관적인 조작과 빠른 템포는 디펜스 장르 마니아뿐 아니라 가볍게 즐기려는 플레이어에게도 추천할 만하다. 다만, 18개의 길을 동시에 방어해야 하는 부담감이 있어 초보자보다는 어느 정도 게임에 익숙한 유저에게 적합하다. 플레이 전에는 각 웨이브별 적의 특성과 러커의 스킬 트리를 파악하는 것이 중요하며, 팀원 간의 소통이 생존에 결정적인 역할을 한다. A unique defense map for StarCraft, 'Lurkers l)arkWay D!!' maximizes the classic kill defense genre on a volcanic tileset. As hinted by the original filename and the internal title, the Lurker is the main unit, and the goal is to stop waves of intruders pouring through 18 distinct pathways. The map's description challenges players to build a 'godlike defense' against increasingly powerful enemies. Designed for 6 players, it likely features cooperative gameplay where each player holds a designated choke point. The 128x128 tile map provides ample space for unit placement and tactical formations. While early waves may feel repetitive, the later stages introduce varied enemy types and formidable bosses, sustaining tension throughout. The intuitive controls and fast pace typical of StarCraft Use Map Settings make it appealing to both defense enthusiasts and casual players. However, managing 18 lanes simultaneously can be overwhelming, making it more suitable for experienced players than complete beginners. Before starting, understanding the unique skills of the Lurkers and coordinating closely with teammates are essential for survival.
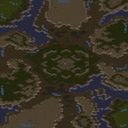
마린 대 럴커 (Marine Vs Lurker)
스타크래프트 브루드워 유즈맵 '마린 대 럴커 (Marine Vs Lurker)'는 단 한 기의 마린으로 럴커를 처치해야 하는 극한의 컨트롤 미션을 담고 있다. 맵 크기는 128x128 타일의 소규모 전장으로, 사막 타일셋 위에 간결하게 구성되어 있으며 불필요한 지형 장식이나 트리거 연출을 배제해 순수한 대결 구도에 집중하게 만든다. 플레이어는 1인용으로 진입하며, 별도의 기지 건설이나 자원 채취 과정 없이 즉시 전투 상황에 돌입한다. 내부 설명인 '1 Marine can Kill 1 Lurker? I can!'이 암시하듯, 핵심은 럴커의 땅굴 찌르기 공격을 회피하며 근접 거리까지 접근해 마린의 사정거리를 확보하는 마이크로 컨트롤에 집중된다. 럴커는 은폐 상태에서 강력한 범위 공격을 퍼붓기 때문에, 마린의 이동 경로 예측과 정지-사격 타이밍, 그리고 럴커의 공격 쿨타임을 이용한 치고 빠지기 운영이 승패를 가른다. 화면 구성은 불필요한 요소를 배제해 긴장감을 유지하며, 클리어까지 소요 시간은 숙련도에 따라 수 분에서 십여 분 내외로 추정된다. 멀티태스킹이나 빌드 오더보다는 순수한 유닛 제어 능력과 반응 속도, 심리전을 시험하고 싶은 유저에게 적합하다. 플레이 전 마린의 사거리(4)와 럴커의 사거리(6) 차이, 럴커 공격 딜레이(약 1.5초)와 투사체 속도, 마린의 이동 속도 등을 숙지하면 공략에 도움이 된다. 반복 도전을 통해 근성 컨트롤을 연마하거나 워밍업용으로 활용하기 좋으며, 짧은 호흡으로 강렬한 긴장감을 느끼고 싶다면 도전해 볼 만한 맵이다. Marine Vs Lurker is a StarCraft Brood War UMS map that presents an extreme control mission where a single Marine must kill a Lurker. The map is a compact 128x128 tile battlefield built on the Desert tileset, stripped of unnecessary terrain decorations or trigger sequences to focus purely on the duel. The player enters solo, skipping base building or resource gathering to jump straight into combat. As the internal description "1 Marine can Kill 1 Lurker? I can!" implies, the core gameplay revolves around micro-controlling the Marine to dodge the Lurker's subterranean spines, close the distance, and secure firing range. Since the Lurker attacks from a cloaked state with powerful splash damage, predicting its attack pattern, timing stop-and-shoot maneuvers, and exploiting the Lurker's cooldown are critical for victory. The minimal UI maintains tension, and clear time ranges from a few minutes to over ten minutes depending on skill. It suits players wanting to test pure unit control, reflexes, and mind games rather than macro or build orders. Knowing the Marine's range (4) versus the Lurker's range (6), the Lurker's attack delay (~1.5s), projectile speed, and Marine movement speed helps significantly. It serves well for control practice or a quick warm-up, offering intense tension in a short session.
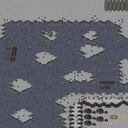
마린vs럴커! (Marine vs Lurker!)
스타크래프트 브루드워 유즈맵 '마린vs럴커!'는 제목 그대로 마린과 럴커라는 고정된 유닛 구성을 바탕으로 펼쳐지는 컴까기(컴퓨터 상대) 성향의 UMS 맵이다. 현재 사이트 분류는 밀리(MELEE)로 되어 있으나, 플랫폼(Platform) 타일셋과 특정 유닛 대결을 명시한 제목, 8인용 구성 등을 종합하면 일반적인 밀리 대전이 아닌 유즈맵 시나리오로 보는 것이 타당하다. 제작자는 'made in chul yang'으로 표기되어 있으며, 파일명에 'Fix-II'가 붙어 있어 버그 수정이나 밸런스 조정이 거듭된 버전으로 추정된다. 맵 크기는 2048x2048(64x64 타일)로 표준적인 8인용 맵 규모를 갖추고 있다. 플랫폼 타일셋 특유의 기계적인 분위기 속에서 플레이어들은 마린을, 컴퓨터는 럴커를 운용하며 대치하게 된다. 마린은 자극제와 업그레이드 여부에 따라 럴커를 상대할 수 있는 대표적인 생체 유닛이지만, 럴커의 은신과 스플래시 피해 앞에서 무빙 샷과 집중 사격, 메딕 지원 여부가 승부를 가르는 핵심 변수가 된다. 8인 전원이 한 팀이 되어 몰려드는 럴커 웨이브를 막아내거나, 진영별로 나뉘어 생존 경쟁을 벌이는 방식일 가능성이 높다. 플레이 경험은 유닛 컨트롤 숙련도 테스트에 가깝다. 럴커의 잠복 공격 타이밍에 맞춰 마린을 산개시키고, 자극제 사용으로 사거리를 벌리며 피해를 최소화하는 마이크로 운영이 반복된다. 맵 구조가 복잡하지 않은 플랫폼 타일셋인 만큼 지형 변수보다는 순수한 유닛 상성 이해와 손놀림이 승패를 좌우한다. 협동 플레이를 즐기는 유저나 마린 컨트롤 연습이 필요한 초중급자에게 적합하며, 짧은 시간 안에 승부가 나는 속도전 특성도 엿보인다. 플레이 전 확인할 점은 버전 표기인 'Fix-II'가 최신인지, 트리거로 인한 승리 조건(전멸, 시간 생존, 특정 건물 파괴 등)이 무엇인지 로비에서 확인하는 것이다. 별도 난이도 설정이나 추가 유닛 해금 요소가 있는지도 살펴보면 좋다. 밀리 맵으로 오분류되어 검색에서 누락되기 쉬운 숨은 유즈맵인 만큼, 컴까기나 고정 유닛 대전 장르를 찾는다면 직접 다운로드해 플레이해보길 권한다. StarCraft Brood War UMS map 'Marine vs Lurker!' is, as the title suggests, a comp-stomp style UMS map based on fixed unit compositions of Marines and Lurkers. Although the site classifies it as Melee (MELEE), the Platform tileset, the title specifying a specific unit matchup, and the 8-player setup indicate it is a UMS scenario rather than a standard melee match. The creator is listed as 'made in chul yang', and the filename includes 'Fix-II', suggesting a version with bug fixes or balance adjustments. The map size is 2048x2048 (64x64 tiles), a standard scale for 8-player maps. Within the mechanical atmosphere unique to the Platform tileset, players control Marines while the computer controls Lurkers. Marines, with Stim Pack and upgrades, are a representative biological unit capable of countering Lurkers, but micro management—splitting Marines against the Lurker's burrow attacks, using Stim to maintain range, and focus firing—becomes the key variable determining victory, especially with potential Medic support. It is highly likely that all 8 players cooperate on one team to fend off waves of Lurkers, or compete in survival by base. The gameplay experience resembles a test of unit control proficiency. Players repeatedly micro Marines to split against Lurker attack timings, use Stim Pack to kite, and minimize splash damage. Since the map structure is not complex on the Platform tileset, pure unit matchup understanding and APM decide the outcome rather than terrain variables. It is suitable for users who enjoy cooperative play or beginners/intermediates needing Marine control practice, and it appears to feature fast-paced gameplay where matches conclude quickly. Points to check before playing include verifying if the version 'Fix-II' is the latest, and confirming the victory conditions set by triggers (annihilation, time survival, specific building destruction, etc.) in the lobby. It is also worth checking for separate difficulty settings or additional unit unlock elements. As a hidden UMS map easily missed in searches due to misclassification as a Melee map, it is recommended to download and play directly if you are looking for the comp-stomp or fixed unit battle genre.
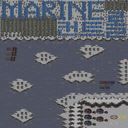
마린vs럴커!
스타크래프트 브루드워 유즈맵 '마린 vs 럴커'는 마린 부대로 럴커의 공격을 피하며 생존하거나 섬멸하는 컨트롤 연습형 미니게임으로 보인다. 플랫폼 타일셋 위에 64×64 타일 크기의 비교적 좁은 전장이 펼쳐지며, 8인 플레이어가 동시에 입장할 수 있는 구조로 확인된다. 제목과 파일명(MarineVsLurker.scx)만 봐도 핵심 대결 구도가 마린 대 럴커로 고정되어 있음을 알 수 있으며, 내부 설명에 'by made in chul yang'이라는 제작자 표기가 남아 있다. 일반적인 밀리 대전 맵으로 분류되어 있으나, 실제 플레이는 정해진 유닛만으로 진행되는 유즈맵 특성을 강하게 띤다. 마린의 자극제 사용, 럴커의 땅굴 찌르기 타이밍 읽기, 분산 이동과 집중 사격 같은 미세 컨트롤이 승패를 가르는 전형적인 '피하기·서바이벌' 계열 맵으로 추정된다. 플레이 타임은 한 판당 5~15분 내외로 짧고, 난이도는 럴커 수와 업그레이드 여부에 따라 '쉬움'에서 '어려움'까지 폭넓게 조절 가능해 보인다. 혼자서 컨트롤 연습용으로 즐기거나, 여럿이 내기 대결용으로 가볍게 돌리기에 적합하다. 실행 전 버전 표기가 없으므로 v1.0 기준으로 가정하고, 최신 패치 버전과의 호환성을 확인한 뒤 플레이하는 것이 좋다. 마린 컨트롤 감각을 익히고 싶은 초보자부터 럴커 상대 요령을 다듬고 싶은 중급자까지 부담 없이 도전해 볼 만한 맵이다. StarCraft Brood War UMS map 'Marine vs Lurker' appears to be a control-practice mini-game where a Marine force must dodge or eliminate Lurker attacks. The battlefield unfolds on a Platform tileset with a relatively compact 64×64 tile layout, and the structure supports up to eight simultaneous players. The title and filename (MarineVsLurker.scx) alone reveal a fixed matchup of Marines versus Lurkers, while the internal description retains the creator credit 'by made in chul yang.' Although categorized as a standard melee map, actual gameplay exhibits strong UMS characteristics with predetermined units. Micro-management such as Marine stimpack timing, reading Lurker burrow-strike patterns, splitting movement, and focus-fire likely decides the outcome, placing this in the classic 'avoidance/survival' family. A single round runs roughly 5–15 minutes, and difficulty can scale from 'Easy' to 'Hard' depending on Lurker count and upgrades. It suits solo control practice or casual competitive matches among friends. Since no version string is present, assume v1.0 and verify compatibility with the latest patch before playing. From beginners learning Marine micro to intermediates refining anti-Lurker tactics, this map offers a low-pressure training ground.
최근 등록된 맵
새로 추가된 파일과 버전을 확인하세요.
럴커 다크웨이 디펜스 (Lurkers DarkWay D!!)
화산 타일셋의 이글거리는 지형 위에서 펼쳐지는 이 디펜스 맵은 단순한 제목 이상의 혼란스러운 재미를 선사한다. 제목에서 암시하듯, 플레이어는 18갈래에 달하는 적의 진입로를 틀어막아야 하는 막중한 임무를 짊어진다. 일반적인 선형 디펜스와 달리, 이 맵은 다방향에서 밀려드는 럴커 웨이브를 상대해야 하므로 긴장의 끈을 단 한순간도 놓을 수 없다. 지형은 화산 타일셋 특유의 좁은 협곡과 불규칙한 언덕으로 이루어져 있어, 유닛 배치와 시야 확보가 까다롭다. 시작과 동시에 주어지는 자원과 시간은 제한적이며, 적의 공세는 예측하기 어려운 패턴으로 거세진다. 따라서 초반 빌드오더를 얼마나 효율적으로 가져가느냐에 따라 중반 이후의 생존 여부가 극명하게 갈린다. 플레이 경험은 그야말로 숨 막히는 공성전의 연속이다. 18개의 진입로라는 표현에서 느껴지듯, 적들은 단순히 몰려오는 것이 아니라 맵 곳곳에 뚫어놓은 통로를 통해 파고든다. 이는 플레이어로 하여금 일점 방어가 아닌 전방위적인 수비 전략을 강제한다. 특정 지점을 과도하게 보강하면 다른 통로가 순식간에 뚫리기 일쑤이며, 병력의 기동성과 시야 확보를 위한 관측선 운용이 생명줄과도 같다. 지형을 활용한 시즈 탱크의 포격 진지 구축, 혹은 좁은 입구를 틀어막는 벌처의 마인 살포 등 전형적인 테란 디펜스 전술이 유효하지만, 맵 구조상 완벽한 티어 형성은 불가능에 가깝다. 끊임없이 재배치하고 빈틈을 메우는 과정에서 극도의 몰입감을 느끼게 된다. 이 맵은 디펜스 장르에 능숙한 베테랑보다는, 협동을 통해 혼돈을 극복하는 재미를 선호하는 플레이어에게 추천한다. 최대 6인이 함께 플레이할 수 있지만, 다수의 인원이 참여할수록 병력 배치와 자원 분배에 대한 명확한 소통이 필수적이다. 각자 구역을 나누어 방어하는 것이 기본이지만, 맵의 구조상 특정 지역으로 적이 쏠리는 현상이 잦아 유기적인 지원이 요구된다. 플레이 전 반드시 확인해야 할 사항은, 이 맵이 전통적인 밸런스보다는 압도적인 물량과 예측 불가능성에 초점을 맞추고 있다는 점이다. 따라서 완벽한 클리어를 목표로 하기보다는, 끊임없이 밀려오는 적을 상대로 아군과 함께 버티는 과정 자체에서 쾌감을 찾는 것이 올바른 접근법이다. 인내심을 시험하는 수많은 웨이브 속에서, 당신의 방어선은 과연 신과 같은 방어력을 보여줄 수 있을까. This defense map, set upon the smoldering ground of a volcanic tileset, delivers a chaotic experience that goes far beyond its straightforward title. As the name suggests, players are tasked with the overwhelming duty of blocking eighteen distinct enemy pathways. Unlike standard linear defense maps, this one forces you to contend with waves of Lurkers pouring in from multiple directions simultaneously, ensuring the tension never lets up for a single moment. The terrain is characterized by the narrow canyons and irregular cliffs typical of the volcanic setting, making unit placement and vision control particularly tricky. The resources and time provided at the start are extremely limited, and the enemy offensive intensifies in unpredictable patterns. Consequently, your survival in the later stages hinges entirely on how efficiently you manage your initial build order. The gameplay experience is essentially a series of breathless siege battles. As the eighteen pathways imply, the enemies do not simply rush forward; they infiltrate through gaps spread all across the map. This forces players to adopt an omnidirectional defensive strategy rather than relying on a single chokepoint. Over-reinforcing one area often leads to the immediate collapse of another, making troop mobility and the use of overlords for vision absolutely critical. While classic Terran defense tactics, such as establishing siege tank firing lines using the high ground or spreading vulture spider mines at narrow entrances, are viable, the map structure makes it nearly impossible to form a perfect defensive tier. The extreme sense of immersion comes from the frantic process of constantly repositioning and plugging the gaps. This map is recommended not for defense purists seeking meticulous balance, but for players who enjoy overcoming chaos through cooperation. Up to six players can join, but a larger group makes clear communication regarding troop placement and resource distribution essential. While dividing the defense zones is the basic approach, the map’s design causes enemy forces to occasionally swarm specific areas, requiring flexible support from teammates. A crucial point to check before playing is that this map focuses on overwhelming numbers and unpredictability rather than traditional balance. Therefore, the correct mindset is not to dream of a perfect, flawless clear, but to find pleasure in the sheer act of holding the line with your allies against the relentless tide. Amid countless waves that test your patience, can your defensive line truly prove to be godlike?
럴커 18 웨이 다크웨이 디펜스 (Lurkers 18 Darkway Defense)
18갈래로 몰려오는 적을 막아내는 독특한 컨셉의 스타크래프트 유즈맵, 'Lurkers l)arkWay D!!'는 화산 타일셋 위에서 펼쳐지는 고전적인 킬 디펜스 장르의 재미를 극대화한 작품이다. 맵 파일명 '[럴커18웨]_렁커뎀쥐_짱.scx'에서도 알 수 있듯, 주인공 유닛은 럴커로 추정되며, 제목의 '18 Way'가 암시하듯 총 18개의 통로에서 쏟아져 나오는 침입자들을 막는 것이 핵심 목표다. 내부 설명의 'godlike defense'라는 표현처럼, 플레이어는 점점 강해지는 적의 물결을 다양한 스킬과 전략을 활용해 저지하며 강력한 방어선을 구축하는 재미를 느낄 수 있다. 맵은 6인 플레이를 지원하며, 각 플레이어가 특정 구역을 담당하는 협동 방식으로 진행될 가능성이 높다. 화산을 배경으로 한 128x128 타일의 좁지 않은 공간은 유닛을 배치하고 진형을 짜기에 충분한 여유를 제공한다. 초반에는 단순한 공격 패턴이 반복되지만, 후반으로 갈수록 다양한 유형의 적과 보스급 유닛이 등장해 긴장감을 놓을 수 없게 만든다. 스타크래프트 유즈맵 특유의 직관적인 조작과 빠른 템포는 디펜스 장르 마니아뿐 아니라 가볍게 즐기려는 플레이어에게도 추천할 만하다. 다만, 18개의 길을 동시에 방어해야 하는 부담감이 있어 초보자보다는 어느 정도 게임에 익숙한 유저에게 적합하다. 플레이 전에는 각 웨이브별 적의 특성과 러커의 스킬 트리를 파악하는 것이 중요하며, 팀원 간의 소통이 생존에 결정적인 역할을 한다. A unique defense map for StarCraft, 'Lurkers l)arkWay D!!' maximizes the classic kill defense genre on a volcanic tileset. As hinted by the original filename and the internal title, the Lurker is the main unit, and the goal is to stop waves of intruders pouring through 18 distinct pathways. The map's description challenges players to build a 'godlike defense' against increasingly powerful enemies. Designed for 6 players, it likely features cooperative gameplay where each player holds a designated choke point. The 128x128 tile map provides ample space for unit placement and tactical formations. While early waves may feel repetitive, the later stages introduce varied enemy types and formidable bosses, sustaining tension throughout. The intuitive controls and fast pace typical of StarCraft Use Map Settings make it appealing to both defense enthusiasts and casual players. However, managing 18 lanes simultaneously can be overwhelming, making it more suitable for experienced players than complete beginners. Before starting, understanding the unique skills of the Lurkers and coordinating closely with teammates are essential for survival.
럴커 36웨이 돈캐기 (Lucker Defense 36 Way-noney)
를 찾고 계신다면, 독특한 구조와 자원 채취 요소를 결합한 디펜스 장르의 유즈맵인 럴커 36웨이 돈캐기 (Lucker Defense 36 Way-noney)를 주목해 볼 필요가 있습니다. 이 맵은 스타크래프트 유즈맵 중에서 플레이어들이 협력하여 몰려오는 적의 공세를 막아내는 전형적인 디펜스 진행 방식을 따르고 있으면서도, 일반적인 디펜스 맵들과는 차별화된 독특한 지형적 특징을 보여줍니다. 맵 전체를 살펴보면 사방으로 복잡하게 뻗어 나가는 다수의 길목과 진영 구조가 눈에 띄며, 다채로운 유닛 배치를 통해 방어 전략을 세울 수 있도록 설계되어 있습니다. 플레이어는 주어진 공간에서 유닛을 효과적으로 배치하고 업그레이드를 진행하며 다수의 웨이브를 버텨내야 합니다. 특히 파일명과 내부 설명에서 짐작할 수 있듯 돈캐기 요소가 가미되어 있어, 단순한 타일 방어뿐만 아니라 자원 관리와 경제력 확보가 승패를 가르는 중요한 변수로 작용할 것으로 보입니다. 각 플레이어의 진영은 독립적이면서도 유기적으로 연결되어 있어 멀티플레이 시 팀원 간의 소통과 역할 분담이 매우 중요하며, 웨이브가 진행될수록 점점 강력해지는 적들을 상대하기 위해 치밀한 자원 운영과 방어선 구축이 요구됩니다. 스타크래프트 브루드워에서 색다른 디펜스 스타일의 유즈맵을 즐기고 싶어 하는 유저들이나, 친구들과 함께 머리를 맞대고 거센 공세를 막아내는 협동 플레이를 선호하는 유저들에게 추천할 만한 맵입니다. 플레이를 시작하기 전에 각 진영의 자원 채취 동선과 방어 라인의 취약 구간을 미리 파악해 두는 것이 원활한 클리어에 도움이 될 것입니다. If you are looking for a StarCraft: Brood War map review, Lucker Defense 36 Way-noney is a custom defense map that deserves attention for combining a unique structure with resource-gathering elements. This map follows the typical defense gameplay where players cooperate to block incoming enemy waves, while also showing distinctive terrain features that differentiate it from general defense maps. Looking at the overall map, multiple paths and camp structures stretching out in all directions stand out, designed so that players can establish defensive strategies through diverse unit placement. Players must effectively position units in the given space, conduct upgrades, and endure numerous waves. In particular, as can be guessed from the file name and internal description, money-digging elements are added, so resource management and securing economic power, as well as simple tile defense, are expected to act as important variables determining victory or defeat. Each player's base is independent yet organically connected, making communication and role division among team members very important during multiplayer, and meticulous resource operation and defense line construction are required to deal with enemies that become increasingly powerful as the waves progress. It is a recommended map for users who want to enjoy a unique defense-style custom map in StarCraft: Brood War, or those who prefer cooperative play where they put their heads together with friends to block fierce offensives. Before starting the game, it will be helpful for a smooth clear to grasp the resource gathering routes and vulnerable sections of the defense line for each base in advance.
도라에몽 의 Sunken II
도라에몽 의 Sunken II(도라에몽의 성큰 투)는 스타크래프트 브루드워 UMS(유즈맵) 장르 중에서도 독특한 방어 및 전투 메커니즘을 경험할 수 있도록 제작된 유저 커스텀 맵이다. 이번 작품은 과거 많은 유저들에게 사랑받았던 고전 맵의 계보를 이어받아, 특유의 향수와 함께 몰입감 넘치는 플레이 환경을 제공한다. 게임이 시작되면 플레이어는 주어진 지형과 유닛 배치에 따라 각자의 위치에서 몰려오는 적의 공세를 막아내거나 정해진 목표를 달성하기 위한 전략을 펼쳐야 한다. 특히 내부 설명에 언급된 바와 같이 특정 플레이어 진영인 빨강 유저의 건물이 자동으로 건설되는 등 독특한 트리거 시스템이 포함되어 있어 일반적인 밀리 게임과는 완전히 다른 양상으로 전개된다. 또한 구석 지역에는 개인 럴커 유닛들이 뭉쳐져 배치되어 있어 이를 어떻게 활용하고 방어선 구축에 녹여내느냐가 승패를 가르는 중요한 요인으로 작용한다. 맵의 전반적인 난이도는 하드(HARD) 수준으로 설정되어 있어 초보자부터 숙련된 유저까지 모두 긴장감을 놓을 수 없는 플레이 경험을 선사한다. 사방으로 펼쳐진 플랫폼 타일셋 기반의 독특한 지형 구조는 플레이어가 효율적인 방어 거점을 구축하고 아군과의 협력을 유도하는 핵심 요소로 작용한다. 친구들과 함께 멀티플레이로 즐기기에 적합하며, 색다른 방어전과 유즈맵 특유의 재미를 느끼고 싶은 모든 스타크래프트 브루드워 팬들에게 추천할 만한 작품이다. 플레이를 시작하기 전에 내부 설명에 적힌 자동 건설 요소와 럴커 유닛의 배치 위치를 미리 파악해 두면 더욱 원활하게 게임을 풀어나갈 수 있을 것이다. Doraemon's Sunken II is a user-custom map created within the StarCraft: Brood War UMS (Use Map Settings) genre, designed to let players experience unique defensive and combat mechanisms. This map inherits the legacy of classic maps that have been loved by many players in the past, providing an immersive gameplay environment filled with nostalgia. When the game begins, players must deploy strategies based on the given terrain and unit placements to fend off incoming enemy waves or achieve designated objectives from their respective positions. Notably, as mentioned in the internal description, a unique trigger system is included—such as the buildings of the red player slot being automatically constructed—which unfolds the match in a completely different direction from standard melee games. In addition, personal lurker units are gathered and positioned in the corner areas, making how one utilizes them and integrates them into the defensive line a crucial factor determining victory or defeat. The overall difficulty of the map is set to a hard level, delivering a tense gameplay experience for everyone from beginners to experienced users. The unique terrain structure based on the platform tileset spreading across all directions serves as a core element that encourages players to establish efficient defensive strongholds and cooperate with allies. It is well-suited for multiplayer sessions with friends and is a recommended work for all StarCraft: Brood War fans who want to experience unconventional defense battles and the distinct fun of UMS maps. Before starting the game, grasping the automatic construction features and the placement locations of the lurker units noted in the internal description in advance will help you navigate the match much more smoothly.
마린vs럴커!
스타크래프트 브루드워 유즈맵 '마린 vs 럴커'는 마린 부대로 럴커의 공격을 피하며 생존하거나 섬멸하는 컨트롤 연습형 미니게임으로 보인다. 플랫폼 타일셋 위에 64×64 타일 크기의 비교적 좁은 전장이 펼쳐지며, 8인 플레이어가 동시에 입장할 수 있는 구조로 확인된다. 제목과 파일명(MarineVsLurker.scx)만 봐도 핵심 대결 구도가 마린 대 럴커로 고정되어 있음을 알 수 있으며, 내부 설명에 'by made in chul yang'이라는 제작자 표기가 남아 있다. 일반적인 밀리 대전 맵으로 분류되어 있으나, 실제 플레이는 정해진 유닛만으로 진행되는 유즈맵 특성을 강하게 띤다. 마린의 자극제 사용, 럴커의 땅굴 찌르기 타이밍 읽기, 분산 이동과 집중 사격 같은 미세 컨트롤이 승패를 가르는 전형적인 '피하기·서바이벌' 계열 맵으로 추정된다. 플레이 타임은 한 판당 5~15분 내외로 짧고, 난이도는 럴커 수와 업그레이드 여부에 따라 '쉬움'에서 '어려움'까지 폭넓게 조절 가능해 보인다. 혼자서 컨트롤 연습용으로 즐기거나, 여럿이 내기 대결용으로 가볍게 돌리기에 적합하다. 실행 전 버전 표기가 없으므로 v1.0 기준으로 가정하고, 최신 패치 버전과의 호환성을 확인한 뒤 플레이하는 것이 좋다. 마린 컨트롤 감각을 익히고 싶은 초보자부터 럴커 상대 요령을 다듬고 싶은 중급자까지 부담 없이 도전해 볼 만한 맵이다. StarCraft Brood War UMS map 'Marine vs Lurker' appears to be a control-practice mini-game where a Marine force must dodge or eliminate Lurker attacks. The battlefield unfolds on a Platform tileset with a relatively compact 64×64 tile layout, and the structure supports up to eight simultaneous players. The title and filename (MarineVsLurker.scx) alone reveal a fixed matchup of Marines versus Lurkers, while the internal description retains the creator credit 'by made in chul yang.' Although categorized as a standard melee map, actual gameplay exhibits strong UMS characteristics with predetermined units. Micro-management such as Marine stimpack timing, reading Lurker burrow-strike patterns, splitting movement, and focus-fire likely decides the outcome, placing this in the classic 'avoidance/survival' family. A single round runs roughly 5–15 minutes, and difficulty can scale from 'Easy' to 'Hard' depending on Lurker count and upgrades. It suits solo control practice or casual competitive matches among friends. Since no version string is present, assume v1.0 and verify compatibility with the latest patch before playing. From beginners learning Marine micro to intermediates refining anti-Lurker tactics, this map offers a low-pressure training ground.
마린 대 럴커 (Marine Vs Lurker)
스타크래프트 브루드워 유즈맵 '마린 대 럴커 (Marine Vs Lurker)'는 단 한 기의 마린으로 럴커를 처치해야 하는 극한의 컨트롤 미션을 담고 있다. 맵 크기는 128x128 타일의 소규모 전장으로, 사막 타일셋 위에 간결하게 구성되어 있으며 불필요한 지형 장식이나 트리거 연출을 배제해 순수한 대결 구도에 집중하게 만든다. 플레이어는 1인용으로 진입하며, 별도의 기지 건설이나 자원 채취 과정 없이 즉시 전투 상황에 돌입한다. 내부 설명인 '1 Marine can Kill 1 Lurker? I can!'이 암시하듯, 핵심은 럴커의 땅굴 찌르기 공격을 회피하며 근접 거리까지 접근해 마린의 사정거리를 확보하는 마이크로 컨트롤에 집중된다. 럴커는 은폐 상태에서 강력한 범위 공격을 퍼붓기 때문에, 마린의 이동 경로 예측과 정지-사격 타이밍, 그리고 럴커의 공격 쿨타임을 이용한 치고 빠지기 운영이 승패를 가른다. 화면 구성은 불필요한 요소를 배제해 긴장감을 유지하며, 클리어까지 소요 시간은 숙련도에 따라 수 분에서 십여 분 내외로 추정된다. 멀티태스킹이나 빌드 오더보다는 순수한 유닛 제어 능력과 반응 속도, 심리전을 시험하고 싶은 유저에게 적합하다. 플레이 전 마린의 사거리(4)와 럴커의 사거리(6) 차이, 럴커 공격 딜레이(약 1.5초)와 투사체 속도, 마린의 이동 속도 등을 숙지하면 공략에 도움이 된다. 반복 도전을 통해 근성 컨트롤을 연마하거나 워밍업용으로 활용하기 좋으며, 짧은 호흡으로 강렬한 긴장감을 느끼고 싶다면 도전해 볼 만한 맵이다. Marine Vs Lurker is a StarCraft Brood War UMS map that presents an extreme control mission where a single Marine must kill a Lurker. The map is a compact 128x128 tile battlefield built on the Desert tileset, stripped of unnecessary terrain decorations or trigger sequences to focus purely on the duel. The player enters solo, skipping base building or resource gathering to jump straight into combat. As the internal description "1 Marine can Kill 1 Lurker? I can!" implies, the core gameplay revolves around micro-controlling the Marine to dodge the Lurker's subterranean spines, close the distance, and secure firing range. Since the Lurker attacks from a cloaked state with powerful splash damage, predicting its attack pattern, timing stop-and-shoot maneuvers, and exploiting the Lurker's cooldown are critical for victory. The minimal UI maintains tension, and clear time ranges from a few minutes to over ten minutes depending on skill. It suits players wanting to test pure unit control, reflexes, and mind games rather than macro or build orders. Knowing the Marine's range (4) versus the Lurker's range (6), the Lurker's attack delay (~1.5s), projectile speed, and Marine movement speed helps significantly. It serves well for control practice or a quick warm-up, offering intense tension in a short session.
럴커스 다크웨이 디펜스 (Lurkers l)arkWay D!!)
를 통해 살펴볼 'Lurkers l)arkWay D!!'는 수많은 럴커 침입자들을 막아내는 독특한 콘셉트의 스타크래프트 맵 유즈맵이다. 내부 맵 설명에 따르면 플레이어들은 18개의 길목으로 몰려오는 새로운 럴커 침입자들을 처치해야 하며, 신들린 방어선을 구축해 적이 빠져나가지 못하도록 막는 것이 핵심 목표다. 전체적인 맵 구조를 살펴보면 화산 타일셋 배경 위에 복잡하게 갈라지는 다중 길목 형태가 눈에 띄며, 다수의 플레이어가 협력하여 각자의 구역을 방어하거나 유기적으로 전선을 형성하는 플레이 방식을 유추할 수 있다. 특히 6인의 플레이어 인원을 지원하는 만큼, 멀티플레이 환경에서 각자의 위치를 조율하고 방어 타워나 유닛 배치를 최적화하는 전략적 재미가 돋보인다. 일반적인 밀리 전투와는 전혀 다른 방어 위주의 진행 방식을 제공하므로, 디펜스 장르를 좋아하는 유저들에게 색다른 도전 의식을 불러일으킨다. 플레이 전에는 18갈래로 나뉘는 공격 경로를 미리 파악하고, 아군과의 협력 포인트를 점검하는 것이 유리하다. 진영 간 유기적인 방어 공조와 빠른 유닛 배치가 승패를 가르는 중요한 요소가 될 것이다. Lurkers l)arkWay D!! is a custom Starcraft Brood War map that presents a defensive challenge centered around holding off waves of lurking intruders. Based on the internal map description, players must eliminate new lurker intruders attempting to breach through eighteen distinct pathways, requiring them to establish an impenetrable defense and prevent any enemies from slipping past. The layout features a volcanic tileset background with complex, branching multi-path structures, suggesting a cooperative gameplay style where multiple participants must defend specific sectors or dynamically coordinate their frontlines. Supporting up to six players, it offers strategic depth in optimizing unit placement, defensive structures, and role division within a multiplayer setting. Unlike standard melee matches, this defense-oriented scenario delivers a distinct tactical experience that appeals to fans of tower defense and survival custom maps. Before diving into the game, players should carefully analyze the multi-directional enemy routes and coordinate defensive responsibilities with teammates to ensure maximum survival efficiency and secure a successful defense.
러커 디펜스 XYZ 4 패스트 (Lurker Defense XYZ 4 Fast)
스타크래프트 브루드워 맵을 즐기는 유저들에게 디펜스 장르는 언제나 큰 인기를 끌어온 클래식한 분야입니다. 이번에 살펴볼 맵은 '러커 디펜스 XYZ 4 패스트(Lurker Defense XYZ 4 Fast)'로, 파일명과 내부 설명에서 유추할 수 있듯 전통적인 유즈맵 디펜스의 문법을 따르면서도 빠른 진행 속도를 강조한 작품입니다. 스타크래프트 맵 커뮤니티에서 색다른 방어 플레이를 원하는 이들에게 꾸준히 호기심을 불러일으키는 요소들을 담고 있습니다. 전체적인 맵 구조를 살펴보면, 플레이어들이 각자의 구역에서 자리를 잡고 밀려오는 적들을 막아내는 전형적인 배치를 보여줍니다. 화면 좌측에는 점수를 나타내는 대형 텍스트 영역과 각종 유닛 및 건물이 배치된 구역이 마련되어 있어 현재 게임의 진행 상황과 자원 상태를 직관적으로 파악할 수 있도록 돕습니다. 중앙에는 유닛들이 이동하거나 교전할 것으로 보이는 세로형 길목과 구조물이 길게 늘어서 있고, 우측에는 여러 개의 독립된 플레이어 기지 공간이 세로로 나란히 배치되어 있어 최대 인원이 각자의 자리를 맡아 방어에 집중하기 좋은 구조입니다. 화산 타일셋 특유의 어두운 분위기 속에서 럴커라는 특정 유닛을 활용한 방어전이 펼쳐질 것으로 추정되며, 패스트 빌드라는 이름에 걸맞게 지루할 틈 없이 몰아치는 공세를 경험할 수 있습니다. 이 유즈맵은 다인원이 함께 협력하여 몰려오는 적의 공세를 버텨내는 것을 목표로 하는 유저들에게 적합하며, 특히 럴커 특유의 스플래시 공격이나 잠복 메커니즘을 활용한 방어 전술을 선호하는 플레이어라면 한 번쯤 도전해볼 만합니다. 플레이하기 전에는 함께 참여하는 인원들과 각 기지의 역할을 분담하고, 빠른 속도로 전개되는 웨이브에 대비해 초반 빌드를 미리 구상해두는 것이 원활한 클리어에 도움이 됩니다. For users who enjoy StarCraft: Brood War maps, the defense genre has always been a classic and immensely popular category. The map we are examining this time is 'Lurker Defense XYZ 4 Fast', which, as inferred from its filename and internal description, follows the conventions of traditional custom defense maps while emphasizing a fast-paced progression. It contains elements that consistently spark curiosity among those looking for unique defensive gameplay within the StarCraft map community. Looking at the overall map structure, it displays a typical layout where players take positions in their respective zones and fend off incoming enemies. On the left side of the screen, a large text area indicating scores and sections populated with various units and buildings are provided, helping players intuitively grasp the current game progress and resource status. In the center, vertical pathways and structures where units appear to move or engage stretch out, while on the right, multiple independent player base spaces are arranged vertically, creating a structure where the maximum number of players can take their spots and focus on defense. Within the dark atmosphere unique to the volcanic tileset, a defensive battle utilizing a specific unit, the lurker, is presumed to unfold, and true to the fast build name, players can experience a relentless offensive without a dull moment. This custom map is suitable for users whose goal is to cooperate with multiple players to withstand incoming enemy offensives, and is especially worth a try for players who prefer defensive tactics utilizing the lurker's splash attack or burrow mechanics. Before playing, it is helpful to coordinate roles for each base with participating members and plan out early builds in advance to prepare for the fast-paced waves for a smooth clear.
맵 선택 가이드
태그는 맵의 핵심 특징을 빠르게 설명하지만 제작 버전마다 규칙이 다를 수 있습니다. 상세 설명에서 권장 인원, 난이도, 플레이 시간과 버전을 함께 확인한 뒤 다운로드하세요.