
러커 디펜스 스타크래프트 맵 모음
'러커 디펜스' 태그가 등록된 맵을 모았습니다. 장르 하나로 찾기 어려운 플레이 방식, 난이도와 특징을 중심으로 인기 맵과 최신 맵을 비교해 보세요.
- 등록 맵
- 8개
- 누적 다운로드
- 0
- 누적 조회
- 247
인기 맵
다운로드와 조회 반응이 높은 맵입니다.
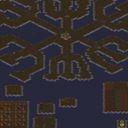
러커 디펜스 18웨이 V2.00 (Lurker Defence 18wayV2.00)
스타크래프트 브루드워 유즈맵 '러커 디펜스 18웨이 V2.00'은 6인 협동 디펜스 장르의 대표적인 맵으로, 18개 방향에서 몰려드는 러커 무리를 막아내는 것이 핵심 목표다. 황무지 타일셋의 128×128 타일 전장에서 플레이어는 시작 지점 주변에 벙커, 터렛, 유닛을 배치해 18갈래 진입로를 봉쇄해야 한다. 제작자 Fireb@t1099가 수정한 V2.00 버전은 유닛과 업그레이드 비용을 낮춰 초반 빌드 부담을 줄였고, 이로 인해 초보자도 비교적 쉽게 진입할 수 있는 난이도를 보인다. 게임 초반에는 미네랄 관리가 중요하며, 중반 이후로는 공중 유닛과 탐지기가 없는 러커 특성을 이용해 사이언스 베슬이나 옵저버로 시야를 확보한 뒤 탱크·고템·드라군 등 원거리 화력으로 제압하는 것이 정석이다. 18방향 모두를 동시에 커버하기 어렵기 때문에 팀원 간 역할 분담(입구 막기, 수리, 추가 자원 확보)이 승패를 가른다. 맵 크기가 넓지 않아 이동 시간이 짧고, 웨이브 간격이 일정해 반복 학습으로 최적 빌드를 익히기 좋다. 협동 디펜스 입문용으로 추천하며, 고정 팀으로 클리어 타임을 단축하는 재미도 있다. 플레이 전에는 버전 차이로 인한 밸런스 변경 사항을 확인하고, 6인 풀파티 구성이 어려울 경우 컴퓨터 플레이어를 추가해 인원을 채우는 것이 좋다. 러커 디펜스 특유의 긴장감과 협동의 재미를 동시에 느끼고 싶은 유저에게 적합한 맵이다. StarCraft Brood War use map 'Lurker Defence 18way V2.00' is a representative 6-player cooperative defense map where the core objective is to stop lurker swarms rushing from 18 directions. On the 128×128 tile Badlands tileset battlefield, players must deploy bunkers, turrets, and units around their starting positions to block 18 entry routes. The V2.00 version modified by creator Fireb@t1099 reduces unit and upgrade costs, easing early build burdens and making the difficulty relatively accessible for beginners. Mineral management is crucial in the early game, while mid-to-late game standard play involves securing vision with Science Vessels or Observers—exploiting the lurkers' lack of air units and detectors—then eliminating them with long-range firepower like Siege Tanks, High Templars, or Dragoons. Since covering all 18 directions simultaneously is difficult, role division among teammates (blocking entrances, repairing, securing extra resources) determines victory. The compact map size shortens travel time, and consistent wave intervals allow players to learn optimal builds through repetition. Recommended for cooperative defense beginners, it also offers the fun of reducing clear times with a fixed team. Before playing, check for balance changes due to version differences, and if a full 6-player party is hard to form, adding computer players to fill slots is advisable. This map suits users wanting to experience both the tension unique to lurker defense and the joy of cooperation.
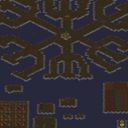
러커 디펜스 18 웨이 v.4.2 (Lurker Defence 18 way v.4.2)
스타크래프트 브루드워 유즈맵 '러커 디펜스 18 웨이 v.4.2'는 6인 협동 디펜스 장르로, 황무지 타일셋의 128x128 크기 맵에서 진행된다. 제목 그대로 18방향(18 way)에서 몰려오는 적 웨이브를 러커로 막아내는 것이 핵심 목표다. 각 플레이어는 시작 구역에 배치된 해처리에서 드론과 러커를 생산해 18갈래 진입로에 잠복시키고, 업그레이드와 추가 유닛으로 방어선을 구축한다. 초반에는 전 라인을 커버하기 어려워 팀원 간 역할 분담이 필수적이며, 중반 이후 합류 지점에서 병력을 집중해 대형 웨이브를 처리하는 운영이 일반적이다. 레벨이 오를수록 적의 체력·이동속도·특수 능력이 강화돼 러커의 사거리·공격속도·체력 업그레이드 순서와 잠복 타이밍이 클리어 여부를 가른다. 맵 설명에 명시된 '레드' 플레이어는 호스트 권한으로 아군 유닛 탈취와 강퇴 기능을 보유해 방장 신뢰도가 게임 품질에 큰 영향을 미친다. 4.2 버전에서는 '드론 홀더 단독 승리' 버그가 수정돼 공정성 문제가 해소됐다. 파일명 'Lurker Defence 18 way V4-2.scx'와 내부 제목이 일치하며 cp949 인코딩으로 한글 채팅 환경에서도 안정적이다. 협동 디펜스 입문자부터 고정 멤버로 호흡 맞추는 팀까지 두루 즐길 수 있으나, 초반 라인 분산 난도와 호스트 권한 변수를 고려해 신뢰 가능한 방장과 함께하거나 솔로 연습 후 합류를 권장한다. 러커 컨트롤과 자원 관리, 팀워크를 동시에 연마하고 싶은 유저에게 적합한 맵이다. StarCraft Brood War UMS map 'Lurker Defence 18 way v.4.2' is a 6-player cooperative defense set on a 128x128 Badlands tileset. As the title suggests, the core objective is to stop enemy waves attacking from 18 directions using Lurkers. Each player starts with a Hatchery to produce Drones and Lurkers, burrowing them across the 18 entry paths and upgrading to hold the line. Early game demands role assignment because covering all lanes alone is impossible; mid-to-late game focuses on converging forces at choke points to crush large waves. As levels rise, enemies gain health, speed, and special abilities, making upgrade order—range, attack speed, health—and burrow timing decisive. The map description notes that the Red player holds host privileges, able to steal allied units and kick players, so host reliability heavily influences match quality. Version 4.2 fixed a 'drone holder solo win' bug, improving fairness. The file name 'Lurker Defence 18 way V4-2.scx' matches the internal title, and cp949 encoding ensures stable Korean chat. Suitable for both newcomers to co-op defense and veteran teams, though the early lane-splitting difficulty and host-power variable mean joining with a trusted host or practicing solo first is advised. This map sharpens Lurker micro, resource management, and teamwork simultaneously.
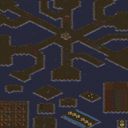
러커 D 18웨이 v6.3 Final (Lurker D 18way v6.3 FiNaL)
스타크래프트 브루드워의 유즈맵 중에서도 독특한 형식의 디펜스 게임으로 주목받는 〈Lurker D 18way v6.3 FiNaL〉은 다수의 러커가 동시 공격하는 이색적인 전투를 경험할 수 있는 맵이다. 맵의 이름은 러커(Lurker)를 중심으로 18방향의 공격을 펼치는 구조를 의미하며, v6.3 FiNaL 버전은 Vi3tboi818에 의해 최종 개선된 버전임을 시사한다. 내부 설명에 따르면 30초 간격으로 적이 지속적으로 생산되어 난이도가 급격히 상승하는 특징이 있으며, 255단계까지 업그레이드 가능한 시스템을 갖추고 있어 플레이어의 전략적 선택과 적응력이 중요한 포인트로 작용한다. 광물 채취를 위한 미네랄 채굴 유닛도 포함되어 있어 자원 관리와 방어 전략이 혼합된 플레이가 요구된다. 이 맵의 핵심은 러커의 다방향 공격 패턴에 대응하는 것이다. 러커는 지상 유닛을 공격할 수 있지만 공중 유닛에는 무력하다는 한계가 있어, 방어 라인을 구축할 때는 공중 유닛의 비중을 높이는 전략이 효과적이다. 또한 30초 간격으로 쏟아지는 적의 물량은 초반에는 상대적으로 여유롭게 느껴지지만, 후반부로 갈수록 플레이어의 방어선을 압박하는 요소로 변모한다. 255단계까지의 업그레이드는 공격력과 방어력을 극대화할 수 있지만, 너무 일찍 투자하기보다는 자원과 시간을 효율적으로 배분하는 것이 승리의 열쇠가 된다. 맵의 배경은 황무지 타일셋으로 구성되어 있으며, 넓은 시야와 평평한 지형이 러커의 공격 범위를 명확히 확인할 수 있도록 도와준다. 이 맵은 초보자보다는 중급 이상의 플레이어에게 적합하며, 특히 다양한 전략을 시도해보고 싶거나 러커의 특성을 활용한 전투를 즐기고 싶은 유저들에게 추천된다. 방어와 자원 관리의 밸런스를 맞추는 것이 관건이므로, 여러 번의 플레이를 통해 최적의 전략을 찾아가는 것이 좋다. 또한 6인용 맵으로 설계되어 있어 팀 플레이도 가능하다는 점에서, 동료와 협력하여 적의 공격을 버텨내는 재미도 느낄 수 있다. The StarCraft: Brood War custom map 〈Lurker D 18way v6.3 FiNaL〉 stands out as a unique defense game where players face relentless waves of enemies, primarily focusing on Lurkers that attack from 18 different directions. Developed by Vi3tboi818, this version (v6.3 FiNaL) introduces a challenging mechanic where enemy units spawn every 30 seconds, escalating difficulty as the game progresses. The map includes a mineral-mining unit system and allows upgrades up to 255 levels, adding depth to resource management and strategic planning. At its core, the map revolves around countering Lurkers, which excel in ground combat but are ineffective against air units. Players must balance their forces between ground and air defenses, adapting their strategy as the enemy's aggression intensifies. The map’s flat, open terrain, rendered in a barren tileset, provides clear visibility for positioning and attack patterns. While the first few waves may seem manageable, the pressure mounts significantly in later stages, demanding precision and foresight. This map is best suited for intermediate to advanced players who enjoy strategic depth and the challenge of optimizing both defense and resource allocation. The 6-player format also allows for team-based play, making it ideal for those who prefer cooperative strategies over solo challenges. Mastery requires experimentation, so players are encouraged to refine their tactics through repeated attempts to find the most effective approach against the relentless enemy assaults.
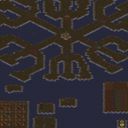
Lurker Defence 18wayv.1.13
스타크래프트 브루드워의 유즈맵 중에서도 독특한 개성을 지닌 〈Lurker Defence 18way v1.13〉는 이름에서도 알 수 있듯 18방향으로 배치된 러커를 중심으로 한 디펜스 장르의 맵이다. 맵의 중앙에는 광물이 풍부한 기지가 있으며, 이를 중심으로 18방향으로 러커가 배치되어 있다. 플레이어는 이 러커를 컨트롤하거나, 기지를 지켜내며 적의 공격을 방어하는 것이 주요 목표로 보인다. 맵의 구조는 대칭형으로 설계되어 있으며, 각 방향마다 러커가 배치되어 있어 방어 라인을 구축하거나, 러커를 적극 활용해 공격을 페이즈로 전환할 수 있는 기회를 제공한다. 러커의 특성상 근접 공격과 사정거리, 방어력 강화가 필수적으로 느껴지며, 이를 바탕으로 한 전략적 플레이가 요구된다. 맵의 전체적인 분위기는 황무지 타일셋을 사용해 황량한 전장 feel을 연출하며, 러커의 기습적 공격과 방어의 긴장감이 조화를 이룬다. 특히 18방향이라는 특징 덕분에 단순한 디펜스가 아니라 다방향에서 오는 위협을 효과적으로 대응해야 하는 전략적 깊이가 느껴진다. 초보 플레이어는 러커의 특성을 이해하지 못해 쉽게 무너질 수 있지만, 숙련자라면 러커의 장점을 살려 능동적인 플레이가 가능할 것이다. 맵의 난이도는 러커의 배치와 적의 공격 패턴에 따라 크게 달라지며, 방어 라인을 구축하는 동시에 러커를 효율적으로 활용하는 것이 관건이다. 플레이 전 반드시 러커의 특성과 배치 위치를 숙지하고, 각 방향의 취약점을 파악하는 것이 중요하다. 또한, 러커의 업그레이드와 유닛의 배치에 따라 전략이 달라질 수 있으므로, 다양한 시도를 해보며 최적의 전략을 찾는 것이 좋다. 이 맵은 러커를 좋아하는 유저들에게는 새로운 재미를 제공할 것이며, 디펜스 장르의 새로운 가능성을 보여주는 작품으로 평가된다. 특히 다방향에서 오는 위협을 동시에 처리해야 한다는 점에서 전략적 깊이가 깊고, 러커의 특성을 살린 플레이가 요구된다. 초보자는 러커의 특성을 충분히 이해한 후 시도하는 것이 좋으며, 숙련자라면 더욱 전략적인 플레이가 가능할 것이다. 맵의 난이도와 플레이 시간은 개인의 전략과 숙련도에 따라 크게 달라질 수 있으므로, 반복 플레이를 통해 자신만의 스타일을 개발하는 것이 중요하다. 맵의 구조와 러커의 특성을 잘 이해한다면, 단순히 방어만 하는 것이 아니라 공격과 방어의 균형을 맞춰 더 높은 점수를 노릴 수 있을 것이다. 이 맵은 러커를 중심으로 한 디펜스 장르의 새로운 장르를 개척했다는 점에서 주목받을 만한 작품으로, 스타크래프트 유즈맵의 다양성을 넓혀주는 데 큰 역할을 했다고 볼 수 있다. Lurker Defence 18way v1.13 is a unique user-made defense map in StarCraft: Brood War, featuring 18-directional lurkers as its core gameplay element. The map centers around a mineral-rich base with lurkers positioned in all 18 directions, requiring players to either control these lurkers or defend the base from enemy attacks. The symmetrical design ensures balanced gameplay, while the lurkers' placement allows for strategic defense lines or aggressive phase transitions. Given the lurkers' characteristics—melee attacks, range, and defensive upgrades—the map demands a blend of tactical awareness and adaptability. The wasteland tileset enhances the map's desolate battlefield atmosphere, where lurker ambushes and defensive maneuvers create a tense, dynamic experience. The 18-directional setup transforms a simple defense map into a multi-faceted challenge, where players must address threats from all sides. Beginners may struggle without a solid understanding of lurker mechanics, but experienced players can leverage lurkers' strengths for proactive play. Difficulty varies based on lurker placement and enemy attack patterns, emphasizing the need to fortify defense lines while utilizing lurkers effectively. Before playing, it's crucial to study lurker behaviors, assess directional weaknesses, and experiment with upgrades and unit placements to refine strategies. This map offers lurker enthusiasts a fresh challenge and showcases the depth of defense genre in StarCraft custom maps. The multi-directional threat system and lurker-centric mechanics provide strategic complexity, making it ideal for players seeking a deeper, more dynamic defense experience. Novices should first master lurker mechanics, while veterans can explore advanced strategies to balance offense and defense. The difficulty and playtime are highly subjective, depending on individual skill and approach, so repeated playthroughs are encouraged to develop a personalized style. Understanding the map's structure and lurker dynamics allows players to not only defend but also score higher by striking a balance between aggression and protection. As a pioneer in lurker-focused defense maps, this title expands the genre's possibilities within StarCraft custom maps.
개인러커디펜Ver 1.8
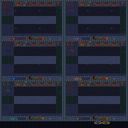
‘개인러커디펜Ver 1.8’이라는 제목에서 느껴지듯, 이 맵은 스타크래프트 브루드워의 개인 유즈맵으로, 러커를 중심으로 한 디펜스 형식을 채택하고 있다. 맵의 전체적인 구조는 가로로 긴 2048×3072 해상도의 가로형 디자인으로, 중앙에 위치한 방어 지점을 중심으로 러커와 저글링이 끊임없이 몰려오는 적군을 상대한다. 맵 상단과 하단에는 각 플레이어의 본진이 배치되어 있으며, 러커와 저글링이 spawn되는 지점이 맵 외곽에 배치되어 있는 것으로 보인다. 맵의 타일셋은 화산 지형을 사용해 독특한 분위기를 연출하며, 플레이어는 중앙 방어선을 지키며 자원을 모아 업그레이드와 병력 생산을 병행해야 한다. 러커의 사정거리와 스플래시 대미지가 주요 전략 포인트로 작용할 것으로 추정되며, 방어 건물의 배치와 러커의 위치 선정이 승패를 좌우할 가능성이 크다. 초보자도 쉽게 접근할 수 있는 구조이지만, 러커의 특성을 제대로 이해하지 못하면 방어선이 쉽게 무너질 수 있어 난이도는 보통 수준으로 예상된다. 또한, 맵의 가로형 디자인 덕분에 플레이어 간 간섭이 적고 각자의 플레이 스타일에 따라 전략을 펼칠 수 있는 공간이 넓다는 장점이 있다. 개인전인 만큼 1대1 또는 2~3인 정도의 소규모 전투가 주가 될 것으로 보이며, 러커와 저글링의 물량 공세에 대응하며 자원을 효율적으로 관리하는 것이 핵심이다. 특히, 러커의 스플래시가 건물에 미치는 영향을 고려한 방어 건물의 배치와 업그레이드 타이밍이 승리의 열쇠가 될 것이다. 이 맵을 즐기기 위해서는 러커의 특성과 스플래시 대미지에 대한 이해가 필수적이며, 자원 관리와 병력 생산의 균형이 무엇보다 중요하다. 또한, 맵의 가로형 디자인 덕분에 시야가 넓어 적의 움직임을 미리 예측할 수 있는 장점이 있지만, 그만큼 넓은 공간을 효율적으로 활용해야 한다는 점도 염두에 두어야 한다. 개인 러커 디펜스라는 장르의 특성상, 러커의 물량 공세에 대처하는 재미와 긴장감이 주된 매력 포인트로 작용할 것이며, 특히 러커의 스플래시 대미지를 활용한 전략적 플레이가 가능하다는 점이 이 맵의 특징이다. 플레이 전에는 러커의 특성과 스플래시 대미지에 대한 기본적인 이해를 갖추는 것이 좋으며, 방어 건물의 배치와 업그레이드 타이밍을 carefully 계획해야 한다. 또한, 자원의 효율적인 관리와 병력 생산의 균형을 맞추는 연습을 통해 보다 안정적인 방어선을 구축할 수 있을 것이다. 이 맵은 러커와 저글링의 물량 공세를 방어하는 재미와 전략적 깊이를 동시에 제공하는 excellent한 개인 디펜스 유즈맵으로, 스타크래프트의 classic한 유즈맵 장르를 좋아하는 플레이어라면 반드시 한번 시도해볼 만한 맵이다. This map, titled ‘개인러커디펜Ver 1.8’, is a personal UMS (user-made scenario) in StarCraft: Brood War, designed around a defense-focused gameplay centered on the Zerg Lurker. The map features a horizontally elongated 2048×3072 resolution with a volcanic tileset, creating a unique atmosphere. Players defend a central point from waves of incoming Lurkers and Zerglings spawned from outer edges of the map. The horizontal layout minimizes player interference, allowing for personalized strategies while maintaining focus on core mechanics like resource management, unit production, and defense tower positioning. The key challenge lies in understanding the Lurker’s splash damage and timing upgrades to maximize efficiency. The map’s broad sightlines aid in early threat detection, but players must strategically place defenses to counter persistent waves. The personal nature of the map suggests 1v1 or small-scale battles (2-3 players), emphasizing balanced resource allocation and strategic Lurker utilization. Before playing, it’s recommended to familiarize oneself with the Lurker’s splash mechanics and plan defense layouts carefully. The map’s appeal lies in its blend of strategic depth and the classic appeal of defending against overwhelming Zerg forces, making it a must-try for fans of StarCraft defense UMS maps.
러커 디펜스 XYZ 4 패스트 (Lurker Defense XYZ 4 Fast)
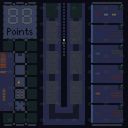
스타크래프트 브루드워 유즈맵 '러커 디펜스 XYZ 4 패스트'는 화산 타일셋을 배경으로 한 128x128 타일(4096x4096 픽셀) 크기의 디펜스 장르 맵으로, 최대 7인이 동시에 참여할 수 있다. 내부 설명에 따르면 제작자 Shy_One이 기획하고 derekeom이 'Fast Build'를 담당해 기존 시리즈보다 한층 빠른 게임 템포를 제공한다. 맵의 핵심 구조는 전형적인 입구막기(초크 포인트 방어) 형태로, 플레이어들은 제한된 진입로를 통해 몰려드는 러커 무리를 막아내야 한다. 7인 인원 구성상 통상 6명이 수비 팀을 이루고 1명이 러커 측을 조종하거나, 전원이 협력해 AI가 생성하는 웨이브를 상대하는 방식일 것으로 보인다. 'Fast' 표기대로 자원 채취 속도와 유닛 생산 시간이 단축되어 초반부터 병력 확보가 용이하며, 러커의 땅굴 이동(버로우 무브)과 강력한 근접 공격을 활용한 돌파 시도를 실시간으로 차단하는 컨트롤 싸움이 주를 이룬다. 화산 지형 특유의 고저차와 용암 지대는 시야 제한과 이동 경로 제약으로 작용해 수비 측의 배치 전략에 깊이를 더한다. 추천 대상은 디펜스 입문자부터 숙련자까지 아우르되, 특히 20~30분 내외의 짧은 호흡으로 긴장감 넘치는 수비전을 즐기고 싶은 유저에게 적합하다. 플레이 전에는 팀별 역할 분담(수비/공격 또는 웨이브 담당), 업그레이드 우선순위(공격/방어/시야), 초반 빌드 오더 공유가 필수적이며, 빠른 템포에 맞춘 자원 운영과 러커 버로우 타이밍 예측 연습이 승률을 높이는 열쇠가 된다. StarCraft: Brood War use map 'Lurker Defense XYZ 4 Fast' is a defense genre map set on a volcanic tileset, sized at 128x128 tiles (4096x4096 pixels), supporting up to 7 players simultaneously. According to the internal description, creator Shy_One designed the map while derekeom handled the 'Fast Build,' delivering a noticeably faster pace than previous entries in the series. The core layout follows a classic choke-point defense structure where players must hold a narrow entrance against waves of Lurkers. With 7 player slots, the typical arrangement is likely 6 defenders versus 1 player controlling the Lurker swarm, or all 7 cooperating against AI-generated waves. True to the 'Fast' label, resource gathering and unit production times are accelerated, enabling early army deployment; the gameplay revolves around real-time micro to block Lurker burrow-move advances and devastating melee attacks. The volcanic terrain's elevation changes and lava zones restrict vision and movement paths, adding strategic depth to defensive positioning. The map suits a wide range from defense newcomers to veterans, especially those seeking intense, short-session defensive battles lasting around 20–30 minutes. Before starting, teams should agree on role assignments (defense/offense or wave control), upgrade priorities (attack/defense/vision), and early build orders; mastering resource management tuned to the fast tempo and predicting Lurker burrow timings are key to improving win rates.
러커 디펜스 ABC 4 (Lurker Defense ABC 4)
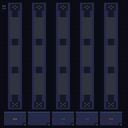
스타크래프트의 유즈맵 장르 중에서도 독보적인 개성을 지닌 ‘러커 디펜스 ABC 4’는 개별 플레이어의 실력을 극한까지 시험하는 디펜스형 맵이다. 6명의 플레이어가 각자 독립된 라인으로 구성된 맵에서 적의 공격을 막아내야 하며, 맵 중앙의 좁은 통로를 통과하는 적들을 러커로 제압하는 것이 핵심 전략이다. 맵은 화산 타일셋으로 이루어져 있으며, 지형이 복잡하고 시야가 제한적인 부분이 많아 플레이어는 항상 예측 불가능한 상황에 대비해야 한다. 각 라인은 서로 연결되어 있지 않지만, 중앙 통로의 길목에서 일어나는 교전이 전체 승패를 좌우하는 경우가 많다. 러커의 특성상 스플래시 데미지가 강력하고, 적의 진형이 밀집되어 있을수록 그 위력이 배가되기 때문에 플레이어는 끊임없이 라인을 관리하고 러커의 위치를 최적화해야 한다. 또한, 맵 곳곳에 배치된 자원이나 업그레이드 포인트는 선택적으로 활용할 수 있어, 개인의 플레이 스타일에 따라 전략이 달라질 수 있다. 초보자는 러커의 스플래시 범위를 제대로 이해하지 못해 쉽게 무너질 수 있으며, 숙련자일수록 중앙 통로의 흐름을 읽고 적절한 타이밍에 러커를 배치하는 플레이가 요구된다. 맵의 난이도는 전체적으로 높은 편으로, 개인의 실력뿐만 아니라 팀원 간의 호흡도 승리를 좌우할 수 있다. 개별 라인에서 혼자 싸워야 한다는 점에서 스트레스가 크지만, 그만큼 성취감을 느낄 수 있는 맵이다. 플레이 전에는 러커의 스킬 사용 방법과 맵의 주요 길목을 숙지하는 것이 필수적이며, 특히 중앙 통로의 넓이와 러커의 사정거리를 정확히 파악하고 있어야 한다. 맵의 구조상 한 라인이 무너지면 전체적인 방어선이 흔들릴 수 있으므로, 각 플레이어는 자신의 라인에만 집중하는 것이 아니라 전장의 흐름을 읽는 안목도 필요하다. 이 맵은 디펜스 매니아뿐만 아니라 개인의 실력을 테스트하고 싶은 유저들에게 강력히 추천할 만하다. 각 라인의 독립성과 중앙 통로의 중요성 때문에, 단순한 디펜스 맵이 아니라 전략과 집중력을 동시에 요구하는 고난이도 맵으로 자리매김하고 있다. 특히 러커의 스플래시 데미지를 효과적으로 활용하는 플레이어는 승리의 열쇠를 쥘 수 있을 것이다. StarCraft's custom map genre boasts a unique identity with *Lurker Defense ABC 4*, a defense-focused map that pushes individual player skill to its limits. Six players must defend separate lanes while suppressing enemies passing through the narrow central corridor with lurkers—a core strategic element. The map features a volcanic tileset with intricate terrain and limited visibility, forcing players to prepare for unpredictable situations. Though the lanes are isolated, battles at the central corridor often determine the outcome of the entire match. Given lurkers' powerful splash damage—especially effective against clustered enemies—players must constantly manage their lanes and optimize lurker positioning. Scattered resources and upgrade points can be selectively used, allowing strategies to vary based on personal playstyle. Beginners may struggle without a proper grasp of lurker splash range, while advanced players must read the central corridor's flow and deploy lurkers at the right moments. The map's overall difficulty demands not just individual skill but also strong team coordination. The stress of solo combat in each lane is high, but the sense of achievement is equally rewarding. Before playing, mastering lurker mechanics and key pathways is essential, particularly understanding the central corridor's width and lurker range. Since one lane's collapse can destabilize the entire defense, players must balance focus on their own lane with awareness of the broader battlefield. This map isn't just for defense enthusiasts—it's a high-level challenge for anyone looking to test their skills. Its blend of lane independence and central corridor importance elevates it beyond a simple defense map, requiring both strategy and concentration. Players who leverage lurker splash damage effectively will hold the key to victory.
러커 디펜스 18웨이 v1.131 (Lurker Defence 18way v1.131)
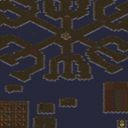
이 맵은 6인용 UMS 디펜스 형태로, 18방향에서 몰려오는 러커 무리를 막아내는 것이 핵심이다. 제작자 Fireb@t1099가 유닛과 업그레이드 비용을 낮춰 초반부터 강력한 병력을 뽑을 수 있게 했고, 그 덕분에 게임 초반부터 치열한 교전이 이어진다. 타일셋은 황무지를 사용하여 시야가 넓고 지형 장애물이 적어 러커의 이동 경로가 비교적 직관적이다. 플레이어는 각자 자원을 모아 업그레이드를 선택하고, 팀원과 역할을 분담해 전방, 측면, 후방을 동시에 커버해야 한다. 웨이브가 진행될수록 러커의 수와 속도가 증가하므로, 업그레이드 타이밍과 병력 배치가 승패를 가른다. 협동 플레이를 즐기는 유저나 디펜스 장르 입문자에게 적합하며, 혼자서도 연습용으로 돌리기 좋다. 시작 전에는 모든 참가자가 같은 버전 파일을 사용 중인지 확인하고, 저렴해진 업그레이드 비용이 자원 운용에 미치는 영향을 미리 숙지하는 것이 좋다. This map is a six‑player UMS defense where the core objective is to stop lurker swarms arriving from eighteen directions. Creator Fireb@t1099 reduced unit and upgrade costs, allowing strong forces early on and producing intense combat from the start. The Badlands tileset gives a wide view with few terrain obstacles, making lurker paths relatively straightforward. Each player gathers resources, chooses upgrades, and must coordinate roles to cover front, flanks, and rear simultaneously. As waves progress, lurker numbers and speed increase, so upgrade timing and unit placement decide victory. It suits players who enjoy cooperative defense or newcomers to the genre, and it also works well for solo practice. Before starting, verify that all participants use the same version file and understand how the cheaper upgrades affect resource management.
최근 등록된 맵
새로 추가된 파일과 버전을 확인하세요.
개인러커디펜Ver 1.8
‘개인러커디펜Ver 1.8’이라는 제목에서 느껴지듯, 이 맵은 스타크래프트 브루드워의 개인 유즈맵으로, 러커를 중심으로 한 디펜스 형식을 채택하고 있다. 맵의 전체적인 구조는 가로로 긴 2048×3072 해상도의 가로형 디자인으로, 중앙에 위치한 방어 지점을 중심으로 러커와 저글링이 끊임없이 몰려오는 적군을 상대한다. 맵 상단과 하단에는 각 플레이어의 본진이 배치되어 있으며, 러커와 저글링이 spawn되는 지점이 맵 외곽에 배치되어 있는 것으로 보인다. 맵의 타일셋은 화산 지형을 사용해 독특한 분위기를 연출하며, 플레이어는 중앙 방어선을 지키며 자원을 모아 업그레이드와 병력 생산을 병행해야 한다. 러커의 사정거리와 스플래시 대미지가 주요 전략 포인트로 작용할 것으로 추정되며, 방어 건물의 배치와 러커의 위치 선정이 승패를 좌우할 가능성이 크다. 초보자도 쉽게 접근할 수 있는 구조이지만, 러커의 특성을 제대로 이해하지 못하면 방어선이 쉽게 무너질 수 있어 난이도는 보통 수준으로 예상된다. 또한, 맵의 가로형 디자인 덕분에 플레이어 간 간섭이 적고 각자의 플레이 스타일에 따라 전략을 펼칠 수 있는 공간이 넓다는 장점이 있다. 개인전인 만큼 1대1 또는 2~3인 정도의 소규모 전투가 주가 될 것으로 보이며, 러커와 저글링의 물량 공세에 대응하며 자원을 효율적으로 관리하는 것이 핵심이다. 특히, 러커의 스플래시가 건물에 미치는 영향을 고려한 방어 건물의 배치와 업그레이드 타이밍이 승리의 열쇠가 될 것이다. 이 맵을 즐기기 위해서는 러커의 특성과 스플래시 대미지에 대한 이해가 필수적이며, 자원 관리와 병력 생산의 균형이 무엇보다 중요하다. 또한, 맵의 가로형 디자인 덕분에 시야가 넓어 적의 움직임을 미리 예측할 수 있는 장점이 있지만, 그만큼 넓은 공간을 효율적으로 활용해야 한다는 점도 염두에 두어야 한다. 개인 러커 디펜스라는 장르의 특성상, 러커의 물량 공세에 대처하는 재미와 긴장감이 주된 매력 포인트로 작용할 것이며, 특히 러커의 스플래시 대미지를 활용한 전략적 플레이가 가능하다는 점이 이 맵의 특징이다. 플레이 전에는 러커의 특성과 스플래시 대미지에 대한 기본적인 이해를 갖추는 것이 좋으며, 방어 건물의 배치와 업그레이드 타이밍을 carefully 계획해야 한다. 또한, 자원의 효율적인 관리와 병력 생산의 균형을 맞추는 연습을 통해 보다 안정적인 방어선을 구축할 수 있을 것이다. 이 맵은 러커와 저글링의 물량 공세를 방어하는 재미와 전략적 깊이를 동시에 제공하는 excellent한 개인 디펜스 유즈맵으로, 스타크래프트의 classic한 유즈맵 장르를 좋아하는 플레이어라면 반드시 한번 시도해볼 만한 맵이다. This map, titled ‘개인러커디펜Ver 1.8’, is a personal UMS (user-made scenario) in StarCraft: Brood War, designed around a defense-focused gameplay centered on the Zerg Lurker. The map features a horizontally elongated 2048×3072 resolution with a volcanic tileset, creating a unique atmosphere. Players defend a central point from waves of incoming Lurkers and Zerglings spawned from outer edges of the map. The horizontal layout minimizes player interference, allowing for personalized strategies while maintaining focus on core mechanics like resource management, unit production, and defense tower positioning. The key challenge lies in understanding the Lurker’s splash damage and timing upgrades to maximize efficiency. The map’s broad sightlines aid in early threat detection, but players must strategically place defenses to counter persistent waves. The personal nature of the map suggests 1v1 or small-scale battles (2-3 players), emphasizing balanced resource allocation and strategic Lurker utilization. Before playing, it’s recommended to familiarize oneself with the Lurker’s splash mechanics and plan defense layouts carefully. The map’s appeal lies in its blend of strategic depth and the classic appeal of defending against overwhelming Zerg forces, making it a must-try for fans of StarCraft defense UMS maps.
러커 디펜스 XYZ 4 패스트 (Lurker Defense XYZ 4 Fast)
스타크래프트 브루드워 유즈맵 '러커 디펜스 XYZ 4 패스트'는 화산 타일셋을 배경으로 한 128x128 타일(4096x4096 픽셀) 크기의 디펜스 장르 맵으로, 최대 7인이 동시에 참여할 수 있다. 내부 설명에 따르면 제작자 Shy_One이 기획하고 derekeom이 'Fast Build'를 담당해 기존 시리즈보다 한층 빠른 게임 템포를 제공한다. 맵의 핵심 구조는 전형적인 입구막기(초크 포인트 방어) 형태로, 플레이어들은 제한된 진입로를 통해 몰려드는 러커 무리를 막아내야 한다. 7인 인원 구성상 통상 6명이 수비 팀을 이루고 1명이 러커 측을 조종하거나, 전원이 협력해 AI가 생성하는 웨이브를 상대하는 방식일 것으로 보인다. 'Fast' 표기대로 자원 채취 속도와 유닛 생산 시간이 단축되어 초반부터 병력 확보가 용이하며, 러커의 땅굴 이동(버로우 무브)과 강력한 근접 공격을 활용한 돌파 시도를 실시간으로 차단하는 컨트롤 싸움이 주를 이룬다. 화산 지형 특유의 고저차와 용암 지대는 시야 제한과 이동 경로 제약으로 작용해 수비 측의 배치 전략에 깊이를 더한다. 추천 대상은 디펜스 입문자부터 숙련자까지 아우르되, 특히 20~30분 내외의 짧은 호흡으로 긴장감 넘치는 수비전을 즐기고 싶은 유저에게 적합하다. 플레이 전에는 팀별 역할 분담(수비/공격 또는 웨이브 담당), 업그레이드 우선순위(공격/방어/시야), 초반 빌드 오더 공유가 필수적이며, 빠른 템포에 맞춘 자원 운영과 러커 버로우 타이밍 예측 연습이 승률을 높이는 열쇠가 된다. StarCraft: Brood War use map 'Lurker Defense XYZ 4 Fast' is a defense genre map set on a volcanic tileset, sized at 128x128 tiles (4096x4096 pixels), supporting up to 7 players simultaneously. According to the internal description, creator Shy_One designed the map while derekeom handled the 'Fast Build,' delivering a noticeably faster pace than previous entries in the series. The core layout follows a classic choke-point defense structure where players must hold a narrow entrance against waves of Lurkers. With 7 player slots, the typical arrangement is likely 6 defenders versus 1 player controlling the Lurker swarm, or all 7 cooperating against AI-generated waves. True to the 'Fast' label, resource gathering and unit production times are accelerated, enabling early army deployment; the gameplay revolves around real-time micro to block Lurker burrow-move advances and devastating melee attacks. The volcanic terrain's elevation changes and lava zones restrict vision and movement paths, adding strategic depth to defensive positioning. The map suits a wide range from defense newcomers to veterans, especially those seeking intense, short-session defensive battles lasting around 20–30 minutes. Before starting, teams should agree on role assignments (defense/offense or wave control), upgrade priorities (attack/defense/vision), and early build orders; mastering resource management tuned to the fast tempo and predicting Lurker burrow timings are key to improving win rates.
러커 디펜스 ABC 4 (Lurker Defense ABC 4)
스타크래프트의 유즈맵 장르 중에서도 독보적인 개성을 지닌 ‘러커 디펜스 ABC 4’는 개별 플레이어의 실력을 극한까지 시험하는 디펜스형 맵이다. 6명의 플레이어가 각자 독립된 라인으로 구성된 맵에서 적의 공격을 막아내야 하며, 맵 중앙의 좁은 통로를 통과하는 적들을 러커로 제압하는 것이 핵심 전략이다. 맵은 화산 타일셋으로 이루어져 있으며, 지형이 복잡하고 시야가 제한적인 부분이 많아 플레이어는 항상 예측 불가능한 상황에 대비해야 한다. 각 라인은 서로 연결되어 있지 않지만, 중앙 통로의 길목에서 일어나는 교전이 전체 승패를 좌우하는 경우가 많다. 러커의 특성상 스플래시 데미지가 강력하고, 적의 진형이 밀집되어 있을수록 그 위력이 배가되기 때문에 플레이어는 끊임없이 라인을 관리하고 러커의 위치를 최적화해야 한다. 또한, 맵 곳곳에 배치된 자원이나 업그레이드 포인트는 선택적으로 활용할 수 있어, 개인의 플레이 스타일에 따라 전략이 달라질 수 있다. 초보자는 러커의 스플래시 범위를 제대로 이해하지 못해 쉽게 무너질 수 있으며, 숙련자일수록 중앙 통로의 흐름을 읽고 적절한 타이밍에 러커를 배치하는 플레이가 요구된다. 맵의 난이도는 전체적으로 높은 편으로, 개인의 실력뿐만 아니라 팀원 간의 호흡도 승리를 좌우할 수 있다. 개별 라인에서 혼자 싸워야 한다는 점에서 스트레스가 크지만, 그만큼 성취감을 느낄 수 있는 맵이다. 플레이 전에는 러커의 스킬 사용 방법과 맵의 주요 길목을 숙지하는 것이 필수적이며, 특히 중앙 통로의 넓이와 러커의 사정거리를 정확히 파악하고 있어야 한다. 맵의 구조상 한 라인이 무너지면 전체적인 방어선이 흔들릴 수 있으므로, 각 플레이어는 자신의 라인에만 집중하는 것이 아니라 전장의 흐름을 읽는 안목도 필요하다. 이 맵은 디펜스 매니아뿐만 아니라 개인의 실력을 테스트하고 싶은 유저들에게 강력히 추천할 만하다. 각 라인의 독립성과 중앙 통로의 중요성 때문에, 단순한 디펜스 맵이 아니라 전략과 집중력을 동시에 요구하는 고난이도 맵으로 자리매김하고 있다. 특히 러커의 스플래시 데미지를 효과적으로 활용하는 플레이어는 승리의 열쇠를 쥘 수 있을 것이다. StarCraft's custom map genre boasts a unique identity with *Lurker Defense ABC 4*, a defense-focused map that pushes individual player skill to its limits. Six players must defend separate lanes while suppressing enemies passing through the narrow central corridor with lurkers—a core strategic element. The map features a volcanic tileset with intricate terrain and limited visibility, forcing players to prepare for unpredictable situations. Though the lanes are isolated, battles at the central corridor often determine the outcome of the entire match. Given lurkers' powerful splash damage—especially effective against clustered enemies—players must constantly manage their lanes and optimize lurker positioning. Scattered resources and upgrade points can be selectively used, allowing strategies to vary based on personal playstyle. Beginners may struggle without a proper grasp of lurker splash range, while advanced players must read the central corridor's flow and deploy lurkers at the right moments. The map's overall difficulty demands not just individual skill but also strong team coordination. The stress of solo combat in each lane is high, but the sense of achievement is equally rewarding. Before playing, mastering lurker mechanics and key pathways is essential, particularly understanding the central corridor's width and lurker range. Since one lane's collapse can destabilize the entire defense, players must balance focus on their own lane with awareness of the broader battlefield. This map isn't just for defense enthusiasts—it's a high-level challenge for anyone looking to test their skills. Its blend of lane independence and central corridor importance elevates it beyond a simple defense map, requiring both strategy and concentration. Players who leverage lurker splash damage effectively will hold the key to victory.
러커 디펜스 18웨이 V2.00 (Lurker Defence 18wayV2.00)
스타크래프트 브루드워 유즈맵 '러커 디펜스 18웨이 V2.00'은 6인 협동 디펜스 장르의 대표적인 맵으로, 18개 방향에서 몰려드는 러커 무리를 막아내는 것이 핵심 목표다. 황무지 타일셋의 128×128 타일 전장에서 플레이어는 시작 지점 주변에 벙커, 터렛, 유닛을 배치해 18갈래 진입로를 봉쇄해야 한다. 제작자 Fireb@t1099가 수정한 V2.00 버전은 유닛과 업그레이드 비용을 낮춰 초반 빌드 부담을 줄였고, 이로 인해 초보자도 비교적 쉽게 진입할 수 있는 난이도를 보인다. 게임 초반에는 미네랄 관리가 중요하며, 중반 이후로는 공중 유닛과 탐지기가 없는 러커 특성을 이용해 사이언스 베슬이나 옵저버로 시야를 확보한 뒤 탱크·고템·드라군 등 원거리 화력으로 제압하는 것이 정석이다. 18방향 모두를 동시에 커버하기 어렵기 때문에 팀원 간 역할 분담(입구 막기, 수리, 추가 자원 확보)이 승패를 가른다. 맵 크기가 넓지 않아 이동 시간이 짧고, 웨이브 간격이 일정해 반복 학습으로 최적 빌드를 익히기 좋다. 협동 디펜스 입문용으로 추천하며, 고정 팀으로 클리어 타임을 단축하는 재미도 있다. 플레이 전에는 버전 차이로 인한 밸런스 변경 사항을 확인하고, 6인 풀파티 구성이 어려울 경우 컴퓨터 플레이어를 추가해 인원을 채우는 것이 좋다. 러커 디펜스 특유의 긴장감과 협동의 재미를 동시에 느끼고 싶은 유저에게 적합한 맵이다. StarCraft Brood War use map 'Lurker Defence 18way V2.00' is a representative 6-player cooperative defense map where the core objective is to stop lurker swarms rushing from 18 directions. On the 128×128 tile Badlands tileset battlefield, players must deploy bunkers, turrets, and units around their starting positions to block 18 entry routes. The V2.00 version modified by creator Fireb@t1099 reduces unit and upgrade costs, easing early build burdens and making the difficulty relatively accessible for beginners. Mineral management is crucial in the early game, while mid-to-late game standard play involves securing vision with Science Vessels or Observers—exploiting the lurkers' lack of air units and detectors—then eliminating them with long-range firepower like Siege Tanks, High Templars, or Dragoons. Since covering all 18 directions simultaneously is difficult, role division among teammates (blocking entrances, repairing, securing extra resources) determines victory. The compact map size shortens travel time, and consistent wave intervals allow players to learn optimal builds through repetition. Recommended for cooperative defense beginners, it also offers the fun of reducing clear times with a fixed team. Before playing, check for balance changes due to version differences, and if a full 6-player party is hard to form, adding computer players to fill slots is advisable. This map suits users wanting to experience both the tension unique to lurker defense and the joy of cooperation.
러커 디펜스 18웨이 v1.131 (Lurker Defence 18way v1.131)
이 맵은 6인용 UMS 디펜스 형태로, 18방향에서 몰려오는 러커 무리를 막아내는 것이 핵심이다. 제작자 Fireb@t1099가 유닛과 업그레이드 비용을 낮춰 초반부터 강력한 병력을 뽑을 수 있게 했고, 그 덕분에 게임 초반부터 치열한 교전이 이어진다. 타일셋은 황무지를 사용하여 시야가 넓고 지형 장애물이 적어 러커의 이동 경로가 비교적 직관적이다. 플레이어는 각자 자원을 모아 업그레이드를 선택하고, 팀원과 역할을 분담해 전방, 측면, 후방을 동시에 커버해야 한다. 웨이브가 진행될수록 러커의 수와 속도가 증가하므로, 업그레이드 타이밍과 병력 배치가 승패를 가른다. 협동 플레이를 즐기는 유저나 디펜스 장르 입문자에게 적합하며, 혼자서도 연습용으로 돌리기 좋다. 시작 전에는 모든 참가자가 같은 버전 파일을 사용 중인지 확인하고, 저렴해진 업그레이드 비용이 자원 운용에 미치는 영향을 미리 숙지하는 것이 좋다. This map is a six‑player UMS defense where the core objective is to stop lurker swarms arriving from eighteen directions. Creator Fireb@t1099 reduced unit and upgrade costs, allowing strong forces early on and producing intense combat from the start. The Badlands tileset gives a wide view with few terrain obstacles, making lurker paths relatively straightforward. Each player gathers resources, chooses upgrades, and must coordinate roles to cover front, flanks, and rear simultaneously. As waves progress, lurker numbers and speed increase, so upgrade timing and unit placement decide victory. It suits players who enjoy cooperative defense or newcomers to the genre, and it also works well for solo practice. Before starting, verify that all participants use the same version file and understand how the cheaper upgrades affect resource management.
Lurker Defence 18wayv.1.13
스타크래프트 브루드워의 유즈맵 중에서도 독특한 개성을 지닌 〈Lurker Defence 18way v1.13〉는 이름에서도 알 수 있듯 18방향으로 배치된 러커를 중심으로 한 디펜스 장르의 맵이다. 맵의 중앙에는 광물이 풍부한 기지가 있으며, 이를 중심으로 18방향으로 러커가 배치되어 있다. 플레이어는 이 러커를 컨트롤하거나, 기지를 지켜내며 적의 공격을 방어하는 것이 주요 목표로 보인다. 맵의 구조는 대칭형으로 설계되어 있으며, 각 방향마다 러커가 배치되어 있어 방어 라인을 구축하거나, 러커를 적극 활용해 공격을 페이즈로 전환할 수 있는 기회를 제공한다. 러커의 특성상 근접 공격과 사정거리, 방어력 강화가 필수적으로 느껴지며, 이를 바탕으로 한 전략적 플레이가 요구된다. 맵의 전체적인 분위기는 황무지 타일셋을 사용해 황량한 전장 feel을 연출하며, 러커의 기습적 공격과 방어의 긴장감이 조화를 이룬다. 특히 18방향이라는 특징 덕분에 단순한 디펜스가 아니라 다방향에서 오는 위협을 효과적으로 대응해야 하는 전략적 깊이가 느껴진다. 초보 플레이어는 러커의 특성을 이해하지 못해 쉽게 무너질 수 있지만, 숙련자라면 러커의 장점을 살려 능동적인 플레이가 가능할 것이다. 맵의 난이도는 러커의 배치와 적의 공격 패턴에 따라 크게 달라지며, 방어 라인을 구축하는 동시에 러커를 효율적으로 활용하는 것이 관건이다. 플레이 전 반드시 러커의 특성과 배치 위치를 숙지하고, 각 방향의 취약점을 파악하는 것이 중요하다. 또한, 러커의 업그레이드와 유닛의 배치에 따라 전략이 달라질 수 있으므로, 다양한 시도를 해보며 최적의 전략을 찾는 것이 좋다. 이 맵은 러커를 좋아하는 유저들에게는 새로운 재미를 제공할 것이며, 디펜스 장르의 새로운 가능성을 보여주는 작품으로 평가된다. 특히 다방향에서 오는 위협을 동시에 처리해야 한다는 점에서 전략적 깊이가 깊고, 러커의 특성을 살린 플레이가 요구된다. 초보자는 러커의 특성을 충분히 이해한 후 시도하는 것이 좋으며, 숙련자라면 더욱 전략적인 플레이가 가능할 것이다. 맵의 난이도와 플레이 시간은 개인의 전략과 숙련도에 따라 크게 달라질 수 있으므로, 반복 플레이를 통해 자신만의 스타일을 개발하는 것이 중요하다. 맵의 구조와 러커의 특성을 잘 이해한다면, 단순히 방어만 하는 것이 아니라 공격과 방어의 균형을 맞춰 더 높은 점수를 노릴 수 있을 것이다. 이 맵은 러커를 중심으로 한 디펜스 장르의 새로운 장르를 개척했다는 점에서 주목받을 만한 작품으로, 스타크래프트 유즈맵의 다양성을 넓혀주는 데 큰 역할을 했다고 볼 수 있다. Lurker Defence 18way v1.13 is a unique user-made defense map in StarCraft: Brood War, featuring 18-directional lurkers as its core gameplay element. The map centers around a mineral-rich base with lurkers positioned in all 18 directions, requiring players to either control these lurkers or defend the base from enemy attacks. The symmetrical design ensures balanced gameplay, while the lurkers' placement allows for strategic defense lines or aggressive phase transitions. Given the lurkers' characteristics—melee attacks, range, and defensive upgrades—the map demands a blend of tactical awareness and adaptability. The wasteland tileset enhances the map's desolate battlefield atmosphere, where lurker ambushes and defensive maneuvers create a tense, dynamic experience. The 18-directional setup transforms a simple defense map into a multi-faceted challenge, where players must address threats from all sides. Beginners may struggle without a solid understanding of lurker mechanics, but experienced players can leverage lurkers' strengths for proactive play. Difficulty varies based on lurker placement and enemy attack patterns, emphasizing the need to fortify defense lines while utilizing lurkers effectively. Before playing, it's crucial to study lurker behaviors, assess directional weaknesses, and experiment with upgrades and unit placements to refine strategies. This map offers lurker enthusiasts a fresh challenge and showcases the depth of defense genre in StarCraft custom maps. The multi-directional threat system and lurker-centric mechanics provide strategic complexity, making it ideal for players seeking a deeper, more dynamic defense experience. Novices should first master lurker mechanics, while veterans can explore advanced strategies to balance offense and defense. The difficulty and playtime are highly subjective, depending on individual skill and approach, so repeated playthroughs are encouraged to develop a personalized style. Understanding the map's structure and lurker dynamics allows players to not only defend but also score higher by striking a balance between aggression and protection. As a pioneer in lurker-focused defense maps, this title expands the genre's possibilities within StarCraft custom maps.
러커 디펜스 18 웨이 v.4.2 (Lurker Defence 18 way v.4.2)
스타크래프트 브루드워 유즈맵 '러커 디펜스 18 웨이 v.4.2'는 6인 협동 디펜스 장르로, 황무지 타일셋의 128x128 크기 맵에서 진행된다. 제목 그대로 18방향(18 way)에서 몰려오는 적 웨이브를 러커로 막아내는 것이 핵심 목표다. 각 플레이어는 시작 구역에 배치된 해처리에서 드론과 러커를 생산해 18갈래 진입로에 잠복시키고, 업그레이드와 추가 유닛으로 방어선을 구축한다. 초반에는 전 라인을 커버하기 어려워 팀원 간 역할 분담이 필수적이며, 중반 이후 합류 지점에서 병력을 집중해 대형 웨이브를 처리하는 운영이 일반적이다. 레벨이 오를수록 적의 체력·이동속도·특수 능력이 강화돼 러커의 사거리·공격속도·체력 업그레이드 순서와 잠복 타이밍이 클리어 여부를 가른다. 맵 설명에 명시된 '레드' 플레이어는 호스트 권한으로 아군 유닛 탈취와 강퇴 기능을 보유해 방장 신뢰도가 게임 품질에 큰 영향을 미친다. 4.2 버전에서는 '드론 홀더 단독 승리' 버그가 수정돼 공정성 문제가 해소됐다. 파일명 'Lurker Defence 18 way V4-2.scx'와 내부 제목이 일치하며 cp949 인코딩으로 한글 채팅 환경에서도 안정적이다. 협동 디펜스 입문자부터 고정 멤버로 호흡 맞추는 팀까지 두루 즐길 수 있으나, 초반 라인 분산 난도와 호스트 권한 변수를 고려해 신뢰 가능한 방장과 함께하거나 솔로 연습 후 합류를 권장한다. 러커 컨트롤과 자원 관리, 팀워크를 동시에 연마하고 싶은 유저에게 적합한 맵이다. StarCraft Brood War UMS map 'Lurker Defence 18 way v.4.2' is a 6-player cooperative defense set on a 128x128 Badlands tileset. As the title suggests, the core objective is to stop enemy waves attacking from 18 directions using Lurkers. Each player starts with a Hatchery to produce Drones and Lurkers, burrowing them across the 18 entry paths and upgrading to hold the line. Early game demands role assignment because covering all lanes alone is impossible; mid-to-late game focuses on converging forces at choke points to crush large waves. As levels rise, enemies gain health, speed, and special abilities, making upgrade order—range, attack speed, health—and burrow timing decisive. The map description notes that the Red player holds host privileges, able to steal allied units and kick players, so host reliability heavily influences match quality. Version 4.2 fixed a 'drone holder solo win' bug, improving fairness. The file name 'Lurker Defence 18 way V4-2.scx' matches the internal title, and cp949 encoding ensures stable Korean chat. Suitable for both newcomers to co-op defense and veteran teams, though the early lane-splitting difficulty and host-power variable mean joining with a trusted host or practicing solo first is advised. This map sharpens Lurker micro, resource management, and teamwork simultaneously.
러커 D 18웨이 v6.3 Final (Lurker D 18way v6.3 FiNaL)
스타크래프트 브루드워의 유즈맵 중에서도 독특한 형식의 디펜스 게임으로 주목받는 〈Lurker D 18way v6.3 FiNaL〉은 다수의 러커가 동시 공격하는 이색적인 전투를 경험할 수 있는 맵이다. 맵의 이름은 러커(Lurker)를 중심으로 18방향의 공격을 펼치는 구조를 의미하며, v6.3 FiNaL 버전은 Vi3tboi818에 의해 최종 개선된 버전임을 시사한다. 내부 설명에 따르면 30초 간격으로 적이 지속적으로 생산되어 난이도가 급격히 상승하는 특징이 있으며, 255단계까지 업그레이드 가능한 시스템을 갖추고 있어 플레이어의 전략적 선택과 적응력이 중요한 포인트로 작용한다. 광물 채취를 위한 미네랄 채굴 유닛도 포함되어 있어 자원 관리와 방어 전략이 혼합된 플레이가 요구된다. 이 맵의 핵심은 러커의 다방향 공격 패턴에 대응하는 것이다. 러커는 지상 유닛을 공격할 수 있지만 공중 유닛에는 무력하다는 한계가 있어, 방어 라인을 구축할 때는 공중 유닛의 비중을 높이는 전략이 효과적이다. 또한 30초 간격으로 쏟아지는 적의 물량은 초반에는 상대적으로 여유롭게 느껴지지만, 후반부로 갈수록 플레이어의 방어선을 압박하는 요소로 변모한다. 255단계까지의 업그레이드는 공격력과 방어력을 극대화할 수 있지만, 너무 일찍 투자하기보다는 자원과 시간을 효율적으로 배분하는 것이 승리의 열쇠가 된다. 맵의 배경은 황무지 타일셋으로 구성되어 있으며, 넓은 시야와 평평한 지형이 러커의 공격 범위를 명확히 확인할 수 있도록 도와준다. 이 맵은 초보자보다는 중급 이상의 플레이어에게 적합하며, 특히 다양한 전략을 시도해보고 싶거나 러커의 특성을 활용한 전투를 즐기고 싶은 유저들에게 추천된다. 방어와 자원 관리의 밸런스를 맞추는 것이 관건이므로, 여러 번의 플레이를 통해 최적의 전략을 찾아가는 것이 좋다. 또한 6인용 맵으로 설계되어 있어 팀 플레이도 가능하다는 점에서, 동료와 협력하여 적의 공격을 버텨내는 재미도 느낄 수 있다. The StarCraft: Brood War custom map 〈Lurker D 18way v6.3 FiNaL〉 stands out as a unique defense game where players face relentless waves of enemies, primarily focusing on Lurkers that attack from 18 different directions. Developed by Vi3tboi818, this version (v6.3 FiNaL) introduces a challenging mechanic where enemy units spawn every 30 seconds, escalating difficulty as the game progresses. The map includes a mineral-mining unit system and allows upgrades up to 255 levels, adding depth to resource management and strategic planning. At its core, the map revolves around countering Lurkers, which excel in ground combat but are ineffective against air units. Players must balance their forces between ground and air defenses, adapting their strategy as the enemy's aggression intensifies. The map’s flat, open terrain, rendered in a barren tileset, provides clear visibility for positioning and attack patterns. While the first few waves may seem manageable, the pressure mounts significantly in later stages, demanding precision and foresight. This map is best suited for intermediate to advanced players who enjoy strategic depth and the challenge of optimizing both defense and resource allocation. The 6-player format also allows for team-based play, making it ideal for those who prefer cooperative strategies over solo challenges. Mastery requires experimentation, so players are encouraged to refine their tactics through repeated attempts to find the most effective approach against the relentless enemy assaults.
맵 선택 가이드
태그는 맵의 핵심 특징을 빠르게 설명하지만 제작 버전마다 규칙이 다를 수 있습니다. 상세 설명에서 권장 인원, 난이도, 플레이 시간과 버전을 함께 확인한 뒤 다운로드하세요.