
러커 스타크래프트 맵 모음
'러커' 태그가 등록된 맵을 모았습니다. 장르 하나로 찾기 어려운 플레이 방식, 난이도와 특징을 중심으로 인기 맵과 최신 맵을 비교해 보세요.
- 등록 맵
- 56개
- 누적 다운로드
- 1
- 누적 조회
- 2,130
인기 맵
다운로드와 조회 반응이 높은 맵입니다.
개인 Lurker Defense
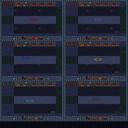
화산 타일셋의 이글거리는 배경이 압박감을 더하는 이 맵은 전형적인 개인 디펜스 장르로 설계되었다. 여섯 명의 플레이어가 각자 독립된 구역에서 러커 웨이브를 막아내는 구조이며, 자원이 무한으로 제공되기 때문에 초반부터 부담 없이 유닛을 생산하고 방어선을 구축할 수 있다. 맵의 핵심은 단순히 많은 병력을 모으는 것이 아니라, 러커의 강력한 스플래시 공격을 어떻게 분산시키고 무력화하느냐에 달려 있다. 지형은 좁은 통로와 넓은 교전 공간이 혼합되어 있어 유닛 배치에 신중함을 요구한다. 초반에는 소수의 러커가 간격을 두고 등장해 아군 진영을 시험하지만, 웨이브가 거듭될수록 그 밀도와 속도가 급격히 증가한다. 특히 후반부에는 지속적으로 쏟아지는 러커의 가시가 방어선을 순식간에 무너뜨릴 수 있기 때문에, 지속적인 유닛 보충과 함께 시즈 탱크나 사이오닉 스톰 같은 범위 제압 능력을 적절히 배치하는 것이 생존의 관건이다. 플레이어는 각자 고립된 공간에서 싸우지만, 다른 플레이어의 방어 상황을 간접적으로 확인할 수 있어 심리적인 경쟁이 자연스럽게 유발된다. 누군가 무너지는 순간 긴장감이 극대화되며, 끝까지 버티는 플레이어에게 승리의 희열이 집중된다. 무한 자원이라는 설정 때문에 초보자도 진입 장벽 없이 시작할 수 있지만, 웨이브가 거듭될수록 단순한 물량만으로는 한계가 명확해져 상급자들도 전술을 고민하게 만든다. 이 맵은 스타크래프트의 기본 유닛 조작과 병력 배치 감각을 익히려는 유저에게 훌륭한 연습장이 되며, 친구들과 함께 가볍게 즐기기에도 부담이 없다. 다만, 게임이 길어질수록 반복적인 패턴에 익숙해질 수 있으므로 적당한 난이도 조절이 아쉬운 점이다. 또한 무한 자원 맵 특성상 후반부에 유닛이 과도하게 쌓여 렉이 발생할 가능성이 있으니, 사양이 낮은 컴퓨터에서는 미리 그래픽 설정을 낮추는 것이 바람직하다. 이 맵은 정교한 전략보다는 직관적인 방어와 지속적인 컨트롤에 초점을 맞춘, 묵직하고 직선적인 재미를 제공한다. The smoldering backdrop of the volcanic tileset amplifies the tension in this map, which is designed as a classic defense scenario. Six players each hold their own isolated zone against relentless waves of Lurkers, and the infinite resource setting allows everyone to build their defenses and produce units without early economic pressure. The core challenge of the map is not simply amassing a large army, but learning how to mitigate and neutralize the devastating splash damage of the Lurker attacks. The terrain mixes narrow choke points with wider open areas, demanding careful unit placement and tactical foresight. Early waves test the defenses with a manageable trickle of Lurkers, but the density and speed of the assault escalate rapidly as time passes. In the later stages, the ceaseless shower of subterranean spines can shred through defensive lines in seconds, making it essential to constantly replenish forces and deploy area control units like Siege Tanks or Psionic Storms to survive. Although each player fights in an isolated pocket, the indirect awareness of others' struggles creates a natural psychological competition. When one ally collapses, the tension peaks, and the hope of victory concentrates on the last remaining survivors. The infinite resource system removes entry barriers for beginners, yet the increasingly brutal waves expose the limits of simple mass production, forcing even experienced players to refine their tactical approach. This map serves as an excellent training ground for mastering basic unit control and army positioning in StarCraft, while also providing a casual and enjoyable experience with friends. However, the repetitive pattern of later waves can become predictable, so a lack of adjustable difficulty might be felt. Due to the infinite resource nature, excessive unit accumulation in the late game may cause performance drops, so players on lower-end systems should optimize their graphic settings beforehand. Ultimately, this map delivers a heavy, instinctive fun that emphasizes sustained attention and reactive control over intricate strategic planning.
러커 디펜스 ABC 3 (Lurker Defense ABC 3)
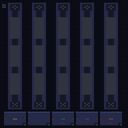
스타크래프트 브루드워 유즈맵 'Lurker Defense ABC 3'은 화산 타일셋을 배경으로 한 6인용 디펜스 맵이다. 파일명에 v3.004 표기가 있고 내부 설명에 'XYZ Defense, Individual Style'이라는 문구가 있어, 각 플레이어가 독립된 구역에서 러커 무리를 막아내는 개인전 형태의 디펜스임을 알 수 있다. 맵 크기는 128×192 타일로 가로가 긴 직사각형 구조이며, 6명의 플레이어가 상하 또는 좌우로 나뉘어 각자의 진입로를 방어하는 방식으로 진행된다. 진행 방식은 일반적인 디펜스와 유사하다. 게임이 시작되면 일정 주기로 러커가 생성되어 플레이어의 본진 또는 지정된 목표 지점으로 진격해 온다. 플레이어는 초반 자원과 유닛을 활용해 방어선을 구축하고, 웨이브가 거듭될수록 강화되는 적 공세에 맞춰 업그레이드와 추가 병력 생산으로 대응해야 한다. 'Individual Style' 표기대로 각 라인이 독립되어 있어 타인의 실수가 직접적인 연쇄 패배로 이어지지 않으나, 전체 웨이브 난이도는 인원 수에 맞춰 조정된 것으로 보인다. 화산 지형의 고저차와 용암 지대가 시야와 이동 경로에 영향을 주어 방어 타워 배치와 유닛 포지셔닝에 전략적 고려가 필요하다. 플레이 경험은 러커라는 단일 유닛 타입을 상대로 반복적인 웨이브를 막아내는 데 집중된다. 러커의 땅굴 이동과 원거리 공격 특성상 단순 막기만으로는 한계가 있어, 탐지기와 공중 유닛, 스플래시 대미지 보유 유닛을 적절히 조합해야 안정적인 방어가 가능하다. 중반 이후에는 러커의 체력과 공격력이 크게 상승하므로 업그레이드 타이밍과 자원 관리가 승패를 가른다. 6인 풀방 기준 30~40분 내외로 마무리되는 편이며, 솔로 플레이 시 난이도가 급격히 오르므로 협력 플레이를 권장한다. 추천 대상은 디펜스 장르 입문자부터 중급자까지 폭넓다. 룰이 직관적이고 개인 라인 구조라 부담 없이 즐길 수 있으나, 후반부 웨이브 대응을 위해 유닛 상성과 업그레이드 트리에 대한 기본 이해가 필요하다. 플레이 전 확인할 점은 버전 표기(v3.004)가 최신인지, 같은 시리즈의 'Lurker Defense ABC 4'가 별도로 존재하는지 여부다. 맵 해시(2213ce97f7aede2f)로 파일을 식별할 수 있으며, cp949 인코딩으로 저장되어 한국어 환경에서 설명 텍스트가 정상 표시된다. StarCraft Brood War UMS map 'Lurker Defense ABC 3' is a 6-player defense map set on the volcanic tileset. The filename shows v3.004 and the internal description reads 'XYZ Defense, Individual Style,' indicating a defense format where each player independently holds off lurker swarms in their own zone. The map measures 128×192 tiles in a horizontally elongated rectangle, with six players split top/bottom or left/right to defend their own entry routes. Gameplay follows standard defense patterns. Once the game starts, lurkers spawn at regular intervals and advance toward each player's main base or designated objective. Players build initial defenses with starting resources and units, then respond to increasingly strengthened enemy waves through upgrades and additional unit production. True to the 'Individual Style' label, each lane operates independently so another player's mistake does not directly cause a chain defeat, though overall wave difficulty appears scaled for the full player count. The volcanic terrain's elevation changes and lava zones affect vision and movement paths, requiring strategic consideration for turret placement and unit positioning. The play experience focuses on repeatedly stopping waves of a single unit type—the lurker. Because lurkers burrow and attack from range, simple blocking reaches its limits; detectors, air units, and splash-damage units must be combined appropriately for stable defense. In the mid-to-late game, lurker health and damage rise sharply, making upgrade timing and resource management the decisive factors. A full 6-player game typically concludes in 30–40 minutes, and solo play spikes in difficulty, so cooperative play is recommended. The map suits a wide range from defense genre beginners to intermediate players. Rules are intuitive and the individual lane structure lowers pressure, yet basic knowledge of unit counters and upgrade trees is needed for late-wave response. Pre-play checks include confirming whether v3.004 is the latest version and whether the series entry 'Lurker Defense ABC 4' exists separately. The map hash (2213ce97f7aede2f) identifies the file, and it is saved in cp949 encoding so Korean description text displays correctly in Korean environments.
개인러커디펜스 (Lurker Defense)
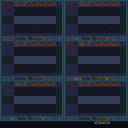
개인러커디펜스 (Lurker Defense)는 스타크래프트 브루드워 맵 유즈맵으로, 저그 종족의 대표적인 유닛인 러커를 활용하여 몰려오는 적의 공세를 막아내는 독특한 장르의 디펜스 게임이다. 게임의 전체적인 구조를 살펴보면, 플레이어는 화산 지형을 배경으로 한 독립된 구역에서 각자 진지를 구축하고 방어 라인을 형성하게 된다. 맵 이미지에서 확인할 수 있듯이 여러 개의 독립된 플레이어 진형이 대칭적이거나 유사한 형태로 배치되어 있어, 다수 플레이어가 동시에 참여하여 각자의 진지를 책임지는 방식을 취하고 있는 것으로 보인다. 각 구역에는 유닛 생산과 방어에 필요한 건물 및 자원 유닛들이 배치되어 있으며, 러커의 특유의 잠복 공격과 광역 스플래시 데미지를 활용해 밀려오는 적들을 효율적으로 제압하는 것이 이 게임의 핵심 진행 방식이다. 플레이어들은 제한된 공간 속에서 자원을 관리하고 최적의 러커 배치 위치를 선정해야 하며, 웨이브가 거듭될수록 강해지는 적의 공격에 맞춰 방어선을 보강해야 한다. 이 과정에서 단순한 유닛 배치뿐만 아니라 유닛의 사거리와 지형지물을 활용한 전략적 판단이 요구되므로, 클래식한 디펜스 유즈맵을 선호하는 이들에게 색다른 몰입감을 제공한다. 스타크래프트 브루드워 맵 탐색을 즐기는 유저들이나 독특한 유닛 중심의 디펜스 장르를 좋아하는 플레이어에게 추천할 만하며, 특히 친구들과 함께 각자의 방어 라인을 점검하며 협동하거나 경쟁하는 재미를 느낄 수 있다. 플레이하기 전에는 각 진영의 자원 수급 구조와 유닛 배치 가능한 공간의 제약을 미리 파악해 두는 것이 원활한 방어에 도움이 될 것이다. Lurker Defense is a custom use map for StarCraft: Brood War that offers a unique defense game genre where players utilize lurkers, iconic units of the Zerg race, to fend off waves of incoming enemies. Examining the overall structure of the game, players establish their own bases and form defensive lines within isolated zones set against a volcanic terrain background. As observed in the map image, multiple independent player positions are arranged in symmetrical or similar patterns, suggesting a gameplay style where several participants join simultaneously and take responsibility for their respective sectors. Each area features buildings and resource units necessary for unit production and defense, and the core gameplay revolves around efficiently subduing encroaching enemies using the lurker's signature burrowed attack and area-of-effect splash damage. Players must manage resources within limited spaces, select optimal lurker placement locations, and reinforce their defense lines to match increasingly powerful enemy attacks across successive waves. This process requires not only simple unit placement but also strategic judgment utilizing unit ranges and terrain features, providing a distinct sense of immersion for enthusiasts of classic defense use maps. It is recommended for users who enjoy exploring StarCraft: Brood War maps or those who like unit-centric defense genres, offering an opportunity to experience the fun of cooperating or competing while inspecting each other's defensive lines with friends. Before playing, understanding the resource supply structure of each faction and the spatial constraints for unit placement will be helpful for smooth defense.
러커 8웨이 매서커 (Lurker 8 Way Massacre)
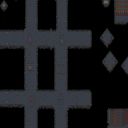
스타크래프트 브루드워의 유즈맵 《러커 8웨이 매서커(Lurker 8 way massacre)》는 8개의 입구에서 끊임없이 몰려드는 적을 상대로 러커를 중심으로 한 방어전을 펼치는 디펜스 장르의 맵이다. 맵 중앙에는 4개의 고스트가 배치된 벡터(beacon boots)가 있으며, 이 고스트가 플레이어의 유닛을 수송하는 역할을 맡고 있다. 맵의 가장 큰 특징은 8방향에서 동시에 적이 등장한다는 점으로, 각 방향에서 쏟아지는 저글링, 히드라리스크, 뮤탈리스크 등으로 구성된 일정 패턴의 웨이브를 방어해야 한다. 러커의 스플래시 데미지가 핵심인 만큼, 러커를 효율적으로 배치하고 적의 진형을 무너뜨리는 전략이 중요하다. 또한, ‘red’를 건드리는 것은 매우 위험하다는 설명이 있는 것으로 보아, 특정 조건이나 함정 요소가 존재할 가능성이 있어 주의가 필요하다. 맵의 분위기는 어두운 우주 테마로 구성되어 있으며, 제한된 자원으로 어떻게 적의 공세를 버텨내고 승리를 이끌어낼지가 관건이다. 초보자의 경우 러커의 특성을 충분히 숙지하지 못해 어려움을 느낄 수 있으며, 중간 이상의 난이도를 추천한다. 플레이 전 러커의 스킬 활용법과 적의 패턴을 숙지하는 것이 중요하다. 8개의 입구가 동시에 공격을 퍼붓기 때문에, 한 곳을 집중 방어하다가 다른 곳에서 뚫릴 위험이 있어 전체적인 균형이 요구된다. 또한, 고스트의 수송 능력을 활용해 러커를 적시에 배치하는 타이밍도 승패를 좌우할 수 있다. 이 맵은 디펜스 장르를 любителей страте지 게임과 러커의 전략적 활용에 익숙한 플레이어에게 추천한다. 특히, 러커의 스플래시 데미지를 극대화할 수 있는 맵 구조와 패턴을 분석하는 재미가 있는 작품이다. 긴장감 넘치는 전투와 지속적인 전략적 선택이 필요한 만큼, 집중력이 요구되는 맵으로 평가할 수 있다. StarCraft: Brood War's custom map *Lurker 8-Way Massacre* is a defense genre map where players defend against relentless waves of enemies pouring in from eight different entrances, centered around the use of Lurkers. At the center of the map are four Ghosts positioned on vector beacons, which serve as the means to transport the player's units. The map's defining feature is that enemies spawn simultaneously from all eight directions, requiring players to defend against waves composed of Zerglings, Hydralisks, Mutalisks, and other units in a set pattern. Since Lurkers' splash damage is key, efficiently positioning them and breaking enemy formations are critical strategies. The warning that touching 'red' is extremely dangerous suggests the presence of hidden conditions or traps, so caution is advised. The map adopts a dark, space-themed atmosphere, and the challenge lies in enduring the onslaught with limited resources to secure victory. Beginners may struggle without a solid grasp of Lurker mechanics, making this map more suitable for intermediate or advanced players. Before playing, it's essential to understand Lurker abilities and enemy patterns. With attacks coming from all eight entrances at once, focusing defense on one area risks breaches elsewhere, demanding a balanced approach. Timing the placement of Lurkers using the Ghosts' transport ability can also determine victory or defeat. This map is recommended for defense genre enthusiasts and players familiar with strategic games and Lurker tactics. Its structure and patterns offer an enjoyable challenge for maximizing Lurker splash damage, making it a tense, strategically demanding experience that tests concentration throughout.
러커 디펜스 2010! (LURKER D!!! 2010!)
스타크래프트 브루드워 유즈맵 LURKER D!!! 2010!은 제목에서 강렬한 인상을 주는 것처럼, 럴커의 매복 공격을 핵심으로 하는 아케이드형 대전 맵이다. 맵 에디터로 열어본 내부 정보에 따르면 플랫폼 타일셋을 배경으로 하고 있으며, 맵 크기는 64x64 타일로 구성된 소규모 전장이다. 게임의 중심에는 럴커 유닛의 버로우와 스파인 공격 메커니즘을 활용한 예측 샷과 심리전이 자리잡고 있다. 좁은 통로와 시야 차단 요소가 배치된 것으로 보여, 기습적인 공격과 은신 감지 싸움이 빈번하게 발생할 것으로 추정된다. 플레이어는 럴커를 제어하며 상대의 움직임을 읽고, 완벽한 타이밍에 버로우를 해제해 치명적인 척추 공격을 가하는 재미를 느낄 수 있다. 이 맵은 전형적인 자원 채취나 건설 중심의 밀리와는 완전히 다른, 유닛 하나에 집중된 스킬 기반의 미니게임에 가깝다. 맵의 제목과 내부 설명에서 반복되는 'LURKER D!!!'라는 표현은, 럴커의 방어적 매력을 강조하는 동시에 유닛의 영문 이름을 딴 기념비적인 성격을 드러낸다. 2010년이라는 연도가 붙어 있어 당시 유즈맵 커뮤니티에서 인기를 끌었던 일종의 기념작이나 리메이크 버전일 가능성도 있다. 플레이 경험은 빠른 판단력과 정교한 컨트롤을 요구하며, 한 방의 쾌감을 중시하는 유저들에게 특히 추천할 만하다. 다만, 일반적인 밀리 맵과는 목표와 진행 방식이 전혀 다르므로, 플레이 전에 게임의 규칙을 숙지하는 것이 중요하다. 럴커의 독특한 공격 방식을 좋아하고, 심리전과 순간적인 기량을 겨루는 대전을 원하는 플레이어라면 이 맵에서 색다른 재미를 발견할 수 있을 것이다. 이 맵은 스타크래프트의 다양한 유즈맵 문화를 보여주는 좋은 예시로, 단일 유닛을 소재로 한 창의적인 설계가 돋보인다.\n\nThis StarCraft Brood War custom map, LURKER D!!! 2010!, delivers an arcade-style duel centered entirely on the iconic Zerg Lurker. The map’s internal data reveals a 64x64 tile battlefield using the Platform tileset, designed not for resource gathering but for pure, skill-based combat. Players take control of Lurkers, engaging in tense prediction battles where the core mechanic involves burrowing and unleashing devastating spine attacks at the perfect moment. The narrow corridors and limited vision, typical of the Platform set, likely amplify the mind games and require sharp detection tactics. Rather than traditional melee, this is a micro-intensive mini-game that tests reflexes and strategic foresight. The repeated phrase 'LURKER D!!!' in the title and description underscores a cult-like celebration of this specific unit's defensive and ambush capabilities. The '2010!' suffix hints at a popular or commemorative version from that era's custom map scene. The experience is fast-paced and demands precise control, offering immense satisfaction from a well-timed kill. It is highly recommended for players who enjoy unit-specific micro challenges and quick, decisive duels. The map stands out as a creative example of how a single unit's mechanics can be isolated to forge a completely unique gameplay experience within the StarCraft engine. Before playing, it's crucial to understand that this is a dedicated custom mode, far removed from standard RTS conventions, and success relies entirely on mastering the Lurker's ambush timing.
러커 디펜스 아크로스틱스 v4.01 (Lurker Defense Accrostix v4.01)
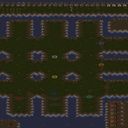
러커 디펜스 아크로스틱스 v4.01(Lurker Defense Accrostix v4.01)은 스타크래프트 브루드워 유즈맵 중에서도 전통적인 방어 전투의 재미를 살린 대표적인 디펜스 장르의 맵이다. 이 맵의 핵심 목표는 내부 설명에서도 드러나듯 밀려오는 적들이 반대편으로 건너가지 못하도록 막아내는 것이다. 플레이어는 정해진 위치에서 아군의 기지를 수호하고, 몰려오는 적의 공세를 효과적으로 차단해야 한다. 맵 전체의 구조는 사막 타일셋을 기반으로 독특한 지형적 특징을 보여주며, 적의 이동 경로와 아방방어선이 교차하는 복잡한 라인업을 형성하고 있다. 각 플레이어의 진영은 유기적으로 배치되어 있어 협동 플레이가 매우 중요한 비중을 차지한다. 단독으로 모든 라인을 커버하기보다는 아군과의 긴밀한 소통과 유닛 배치 조율이 승패를 가르는 열쇠가 된다. 적들의 물량 공세가 거세질수록 효율적인 화력 집중과 전략적인 타워 및 유닛 배치가 요구되며, 이를 통해 디펜스 맵 특유의 긴장감 넘치는 전투를 경험할 수 있다. 특히 다양한 버전으로 개량되어 온 시리즈 중 하나인 만큼, 다듬어진 밸런스와 안정적인 진행 방식을 통해 완성도 높은 플레이 환경을 제공한다. 난이도는 협동하는 팀원들의 호흡과 방어선 구축 능력에 따라 체감 차이가 날 수 있으며, 초보자부터 숙련자까지 함께 즐기기에 적합하다. 디펜스 유즈맵을 선호하는 유저들이나 친구들과 함께 협력하여 몰려오는 적을 막아내는 쾌감을 느끼고 싶어 하는 플레이어들에게 강력히 추천할 만한 맵이다. 플레이를 시작하기 전, 각자 맡은 방어 구역의 지형적 특성과 적의 진격 경로를 미리 파악하고, 아군과의 유닛 조합을 조율하는 것이 성공적인 방어를 위한 중요한 포인트가 된다. Lurker Defense Accrostix v4.01 is a representative defense genre map in StarCraft: Brood War custom maps that embodies the traditional fun of defensive combat. As revealed in the internal description, the core objective of this map is to prevent incoming enemies from crossing over to the other side. Players must guard their bases at designated positions and effectively block the advancing enemy offensive. The overall structure of the map shows unique topographical features based on the desert tileset, forming a complex lineup where enemy movement routes and defense lines intersect. Each player's faction is organically positioned, so cooperative play takes on a very significant proportion. Rather than covering all lines alone, close communication with allies and coordination of unit placement become the keys to determining victory or defeat. As the enemy's mass offensive intensifies, efficient firepower concentration and strategic tower and unit placement are required, through which players can experience the tense combat unique to defense maps. Especially since it is one of the series that has been improved into various versions, it provides a high-quality play environment through refined balance and stable progression methods. The difficulty can vary depending on the teamwork and defense line establishment ability of cooperating teammates, making it suitable for everyone from beginners to veterans. It is strongly recommended for users who prefer defense custom maps or players who want to feel the pleasure of cooperating with friends to block incoming enemies. Before starting the game, it is an important point for successful defense to understand in advance the topographical characteristics of the defense zone assigned to each person and the enemy's advance path, and to coordinate unit combinations with allies.
![마린메딕 vs 러커[v.Final] 맵 미리보기](https://cdn-star-data.huzy.net/thumbnail_6d80ab6102e24785a0537511bbf18fb2.jpg)
마린메딕 vs 러커[v.Final]
마린메딕 vs 러커[v.Final]는 스타크래프트 브루드워 맵 유즈맵 장르 중에서도 클래식한 대전 및 섬멸 방식을 채택한 독특한 작품입니다. 맵 전반은 설원 타일셋을 배경으로 구성되어 있으며, 화면을 살펴보면 각 플레이어 진영마다 마린과 메딕 부대가 배치되어 있고 맞은편에는 대규모 러커 무리가 포진해 있는 구조를 확인할 수 있습니다. 내부 맵 설명에 적힌 대로 모든 적의 유닛을 처치하는 것이 목표인 난이도 높은 섬멸전 성격을 띠고 있어, 플레이어 간 혹은 주어진 유닛 조합을 활용한 치열한 전투가 전개될 것으로 추정됩니다. 각 진영의 유닛 배치와 지형적 특성을 고려할 때, 마린의 화력 집중과 메딕의 치료 타이밍, 그리고 러커의 스플래시 공격을 어떻게 극복하느냐가 승패를 가르는 핵심 요쇼로 작용합니다. 대규모 유닛들이 격돌하는 빠른 전개와 긴장감 넘치는 전투를 선호하는 유저들에게 적합하며, 특히 컨트롤의 재미를 즐기는 이들에게 추천할 만합니다. 플레이 전 각 진영의 초기 유닛 배치 위치와 중앙 교전 지역의 지형을 미리 파악해 두면 유리한 전투를 이끌어 나갈 수 있습니다. Marine Medic vs Lurker [v.Final] is a unique custom map in StarCraft: Brood War that adopts a classic combat and annihilation style within the UMS genre. The entire map is set against a snow tileset background, and examining the layout reveals that marine and medic squads are positioned in each player's base, while large groups of lurkers are deployed opposite them. As indicated by the internal map description where the goal is to kill every enemy unit, it features a challenging annihilation combat nature, suggesting intense battles utilizing given unit combinations. Considering the unit placement and terrain characteristics of each faction, concentrating marine firepower, timing medic heals, and overcoming lurker splash attacks serve as key elements determining victory or defeat. This map is well-suited for users who prefer fast-paced action and tense combat involving large-scale unit clashes, and it is especially recommended for those who enjoy micro-control gameplay. Understanding the initial unit placement and the terrain of the central engagement area in advance before playing will help lead you to a more advantageous battle.
러커 디펜스 서티 웨이 (Lurker Defence 30 way v 1.01)
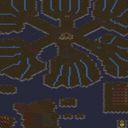
러커 디펜스 서티 웨이 (Lurker Defence 30 way v 1.01)는 스타크래프트 브루드워 UMS 유즈맵 장르에서 독특한 위치를 차지하는 디펜스 맵이다. 이 맵은 제목에서 알 수 있듯 저그 종족의 유닛인 러커를 주력으로 활용하여 사방에서 몰려오는 적의 공세를 막아내는 방어 중심의 플레이를 제공한다. 플레이어는 제한된 공간 속에서 러커의 특성을 극대화할 수 있는 최적의 위치를 고민하고 병력을 배치해야 하므로, 단순한 화력 싸움보다는 정교한 전략적 구상과 자리 잡기가 핵심으로 작용한다. 맵 전체의 구조는 중앙의 핵심 구역을 중심으로 여러 갈래의 길이 뻗어 나가는 형태를 띠고 있으며, 각 방향에서 다채로운 경로로 접근하는 적들을 효율적으로 저지하는 것이 승패를 가르는 중요한 관건이 된다. 내부 설명에 따르면 Dandin이 원작을 제작한 이후 여러 제작자의 손을 거쳐 다듬어진 역사를 지니고 있으며, 전통적인 디펜스 유즈맵이 주는 몰입감과 협동의 재미를 고스란히 담아내고 있다. 여러 플레이어가 힘을 합쳐 밀려오는 웨이브를 견뎌내야 하므로 동료와의 호흡이 매우 중요하며, 각자의 위치에서 사각지대를 최소화하고 화력을 집중하는 전술적 판단이 요구된다. 디펜스 장르를 선호하거나 러커를 활용한 독창적인 방어 전술을 즐기는 유저들에게 알맞은 작품이며, 클래식한 스타크래프트 브루드워 유즈맵의 매력을 느끼고 싶은 이들에게 적합하다. 플레이를 시작하기 앞서 각 진입로의 특성과 아군 간의 방어 구역 분담을 미리 확인하는 것이 생존 확률을 높이는 지름길이 된다. Lurker Defence 30 way v 1.01 is a defense map that occupies a unique position in the StarCraft Brood War UMS use map genre. As the title suggests, this map provides a defense-oriented gameplay experience where players utilize the Zerg unit, the Lurker, as their main force to fend off enemy waves attacking from multiple directions. Players must carefully consider optimal positioning to maximize the unique characteristics of Lurkers within limited spaces and deploy their forces strategically, making precise tactical planning and placement the core of the gameplay rather than simple firepower clashes. The overall structure of the map features multiple paths extending outward from a central core area, and efficiently stopping enemies approaching through diverse routes from various directions becomes a crucial factor in determining victory or defeat. According to the internal description, the map has a history of being refined by multiple creators after its original creation by Dandin, faithfully capturing the immersion and cooperative fun provided by traditional defense use maps. Since multiple players must join forces to withstand the incoming waves, teamwork is essential, and tactical judgments such as minimizing blind spots and concentrating firepower in respective positions are required. This map is well-suited for users who prefer the defense genre or enjoy original defensive tactics utilizing Lurkers, and it is recommended for those who want to feel the charm of classic StarCraft Brood War use maps. Before starting the game, checking the characteristics of each approach route and coordinating defense zone divisions among allies in advance serve as the quickest ways to increase survival rates.
러커 디펜스 아크로스티릭스 (Lurker Defense Accrostix)
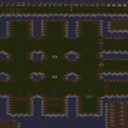
러커 디펜스 아크로스티릭스(Lurker Defense Accrostix) v4.01은 스타크래프트 브루드워 유즈맵 중에서도 독특한 방어 규칙과 긴장감 넘치는 진행으로 잘 알려진 디펜스 장르의 클래식한 작품이다. 이 맵은 플레이어가 힘을 합쳐 적들의 공세를 저지하고 정해진 목표 지점을 사수하는 것을 핵심 목표로 삼는다. 내부 설명에서 볼 수 있듯 적들이 반대편으로 건너가지 못하도록 막아내는 것이 승패를 가르는 가장 중요한 요소이며, 다양한 방어선과 유닛 배치 전략이 어우러져 깊이 있는 플레이를 유도한다. 전체적인 맵 구조를 살펴보면, 각 플레이어는 지정된 진형에서 시작하여 몰려오는 적의 경로를 예측하고 효율적으로 화력을 집중해야 한다. 중앙과 측면을 가로지르는 지형적 특징 덕분에 아군 간의 유기적인 협동과 역할 분담이 필수적으로 요구되며, 혼자서 모든 라인을 막기보다는 팀원과의 소통을 통해 틈새를 메워나가는 재미가 크다. 러커라는 유닛의 특성과 지형지물을 활용한 배치 감각이 중요하게 작용하며, 웨이브가 거듭될수록 강력해지는 적들을 상대하기 위해 끊임없는 업그레이드와 자원 관리가 동반되어야 한다. 이 맵은 친구들과 함께 협동 플레이를 즐기거나 고전적인 디펜스 유즈맵의 감성을 느끼고 싶은 유저들에게 알맞은 선택지가 된다. 특히 정통적인 틀 안에서 촘촘한 방어망을 구축하는 과정과 몰려오는 적들을 한 번에 쓸어버리는 짜릿한 타격감을 선호하는 이들이라면 플레이 내내 흥미진진한 몰입감을 경험할 수 있다. 다만, 적의 이동 경로와 웨이브 타이밍에 대한 이해도가 낮다면 초반 공세에 무너질 수 있으므로, 처음 접하는 플레이어라면 다른 팀원의 배치나 기존의 방어 정석을 참고하여 안전하게 시작하는 것을 권장한다. Lurker Defense Accrostix v4.01 is a classic defense genre map well known among StarCraft: Brood War custom maps for its unique defensive rules and tense progression. The core objective of this map is for players to join forces to block enemy offensives and defend designated target areas. As seen in the internal description, stopping enemies from crossing to the other side is the most crucial factor determining victory or defeat, and various defensive lines and unit placement strategies come together to induce deep gameplay. Looking at the overall map structure, each player starts from a designated formation to predict incoming enemy paths and efficiently concentrate firepower. Thanks to the terrain features crossing the center and sides, organic cooperation and role distribution among allies are essential, and the fun of filling gaps through communication with teammates is significant rather than trying to hold every line alone. The characteristics of the lurker unit and placement sense utilizing terrain features play an important role, and continuous upgrades and resource management must accompany to face increasingly powerful enemies as waves repeat. This map is a suitable choice for users who want to enjoy cooperative play with friends or feel the sentiment of classic defense custom maps. Especially those who prefer the process of building a tight defense network within a traditional framework and the thrilling impact of wiping out gathering enemies at once can experience immersive excitement throughout the play. However, since understanding of enemy movement paths and wave timing is low, it can collapse in the early offense, so players encountering it for the first time are recommended to start safely by referring to other teammates' placements or existing defensive standards.
러커 디펜스 4 (Lurker Defence 4)
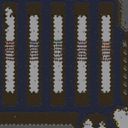
스타크래프트 브루드워 맵 중에서도 저그 종족의 특수한 유닛인 러커를 활용한 독창적인 플레이를 즐길 수 있는 맵이 바로 러커 디펜스 4(Lurker Defence 4)이다. 본 스타크래프트 맵 유즈맵은 플레이어가 저그의 핵심 방어 유닛인 러커를 적절한 위치에 배치하여 몰려오는 적들을 막아내는 방식으로 진행된다. 전체적인 맵 구조를 살펴보면, 각 플레이어마다 독립된 방어 구역이 나누어져 있으며, 주어진 공간에서 러커의 공격 범위를 극대화할 수 있도록 전략적인 배치가 무엇보다 중요하다. 단순한 유닛 생산을 넘어 효율적인 진형 구축과 업그레이드 타이밍을 고민하게 만드는 플레이 특징을 지니고 있다. 내부 설명에 따르면 더 많은 러커 활용과 업그레이드 지원, 추가적인 썬켄 콜로니 배치 등으로 이전 시리즈에 비해 더욱 다채롭고 흥미진진한 디펜스 경험을 선사한다. 정해진 공간 속에서 최대의 화력을 이끌어내는 재미가 있어 디펜스 장르나 저그 유닛 조작을 선호하는 유저들에게 적합한 플레이 경험을 제공한다. 특히 친구들과 함께 각자의 구역을 방어하며 협동하거나 각자의 배치 효율을 비교해 보는 재미도 느낄 수 있다. 러커의 잠복 타이밍과 위치 선정에 따라 방어 성과가 크게 달라지므로, 반복 플레이를 통해 최적의 효율을 찾아가는 과정을 즐기는 이들에게 추천할 만하다. 정교한 유닛 배치를 통해 몰려오는 적을 섬멸하는 쾌감을 느끼고 싶다면 이번 주말에 이 독특한 디펜스 유즈맵을 직접 플레이해 보기를 권장한다. Lurker Defence 4 is a custom map that allows players to enjoy unique gameplay utilizing the Lurker, a special unit of the Zerg race, among StarCraft Brood War maps. This StarCraft map UMS proceeds in a way that players place Lurkers, the core defensive units of Zerg, in appropriate positions to block incoming enemies. Looking at the overall map structure, independent defense zones are divided for each player, and strategic placement is paramount to maximize the attack range of Lurkers in the given space. It has gameplay characteristics that make players ponder efficient formation building and upgrade timing beyond simple unit production. According to the internal description, it delivers a more colorful and exciting defense experience compared to previous series through more Lurker utilization, upgrade support, and the addition of extra sunken colonies. It provides a suitable play experience for users who prefer the defense genre or Zerg unit control, as there is fun in drawing out maximum firepower within a designated space. In particular, you can also feel the fun of cooperating by defending your respective zones with friends or comparing the placement efficiency of each other. Since defense performance varies greatly depending on the burrowing timing and location selection of Lurkers, it is recommended for those who enjoy the process of finding optimal efficiency through repeated play. If you want to feel the pleasure of annihilating swarming enemies through elaborate unit placement, we recommend playing this unique defense custom map directly this weekend.
18웨이 러커 디펜스 익스트림 (18 way Lurker Defence X-treme)
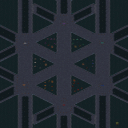
스타크래프트 브루드워의 유즈맵 ‘18 way Lurker Defence X-treme(18웨이 러커 디펜스 익스트림)’은 이름 그대로 18방향에서 끊임없이 몰려드는 적들을 상대로 러커를 주력으로 삼아 방어를 펼치는 디펜스 장르의 유즈맵이다. 맵 중앙에 위치한 플레이어 기지 주변으로는 18개의 입구가 radial(방사형)으로 배치되어 있으며, 각 입구마다 일정 주기로 적 유닛이 출현한다. 러커가 주력 유닛이지만, 입구마다 배치된 방어 건물이나 터렛, 그리고 플레이어의 전략적 선택에 따라 스포어 콜로니, 성큰 콜로니, 발키리 등으로 구성된 방어 라인을 구축할 수 있다. 특히 ‘Walling is Gay’이라는 내부 설명의 한마디가 시사하듯, 초반 벽을 치는 전통적인 디펜스 전략보다는 러커를 적극 활용한 능동적인 방어와 업그레이드를 통한 효율적인 대처가 핵심이다. 맵의 특징은 30단계로 나뉜 웨이브가 진행되면서 점점 더 강력한 적 유닛이 등장한다는 점으로, 초반에는 저글링과 히드라리스크가 주를 이루지만 후반으로 갈수록 울트라리스크, 브루탈리스크, 심지어 캐리어까지 등장한다. 플레이어는 각 웨이브를 통과할 때마다 자원을 획득할 수 있으며, 이를 바탕으로 입구마다 러커를 배치하거나 방어 건물의 업그레이드를 우선시해야 한다. 맵의 난이도는 매우 높아 초보자는 빠른 클리어에 어려움을 느낄 수 있지만, 러커의 사정거리와 업그레이드 효율, 그리고 빠른 입구별 대처가 요구되는 만큼 숙련자라면 전략의 깊이를 즐길 수 있다. 추천 대상은 디펜스 장르를 좋아하는 플레이어, 러커를 주력으로 삼는 전략을 선호하는 유저, 그리고 긴장감 넘치는 웨이브 디펜스를 즐기고자 하는 이들에게 적합하다. 플레이 전 반드시 확인해야 할 포인트는 입구별로 러커를 배치할 수 있는 공간이 제한적이라는 점과, 업그레이드와 자원 관리priority를 미리 계획해야 한다는 점이다. 맵의 구조상 6인 플레이가 권장되며, 팀 플레이보다는 각자의 방어 라인을 구축하는 индивидуаль 전략이 중요하다는 특징을 염두에 두고 플레이에 임해야 한다. 30단계의 긴 여정은 플레이어의 집중력과 적응력을 동시에 요구하기 때문에, 부담 없이 즐기기 위해서는 초반 웨이브부터 꾸준한 플레이가 필요하다. StarCraft: Brood War's custom map *18 Way Lurker Defence X-treme* is a defense-style game where players must defend against endless waves of enemies from 18 directions, primarily using Lurkers. The player's base is surrounded by 18 radial entrances, each spawning enemies at regular intervals. While Lurkers are the main unit, players can also build defensive structures like Spore Colonies, Sunken Colonies, and missile turrets at each entrance, or customize their defense with units like Valkyries. The map emphasizes active defense and upgrades over traditional walling strategies, as hinted by the internal description *"Walling is Gay."* The challenge escalates through 30 waves, starting with basic units like Zerglings and Hydralisks but eventually introducing Ultralisks, Brutalisks, and even Carriers in later stages. Players earn resources after each wave, allowing them to place Lurkers or upgrade defenses strategically. The high difficulty may overwhelm beginners, but experienced players will appreciate the depth of Lurker range management, upgrades, and quick entrance-specific responses. This map is ideal for fans of defense games, Lurker-focused strategies, and intense wave-based challenges. Before playing, note that Lurker placement space is limited per entrance and that careful planning of upgrades and resource allocation is crucial. The map is best enjoyed with six players, each building their own defense line rather than relying on teamwork. The 30-wave journey demands focus and adaptability, so consistent play from the early waves is recommended for an enjoyable experience.
러커 디펜스 30 웨이 (Lurker Defence 30 way v 1.01)
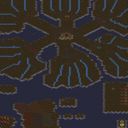
를 통해 살펴볼 '러커 디펜스 30 웨이 (Lurker Defence 30 way v 1.01)'는 고유한 유닛 배치와 방어 전략을 중심으로 전개되는 대표적인 유즈맵 디펜스 장르의 작품이다. 내부 맵 설명에 따르면 플레이어는 최대 효율을 낼 수 있도록 러커 유닛을 알맞은 위치에 배치해야 하며, 끊임없이 몰려오는 적의 공세를 막아내며 생존하는 것이 핵심 목표다. 황무지 타일셋을 바탕으로 구성된 넓은 맵 구조는 사방에서 밀려오는 적들을 상대하기에 적합하며, 플레이어 간의 협동과 전략적인 자리 배치가 승패를 가르는 중요한 요소로 작용한다. 총 30웨이에 달하는 단계별 공세는 긴장감을 높이며, 각 웨이마다 적의 공격 패턴에 맞춘 방어선 구축이 필수적이다. 이 유즈맵은 정형화된 밀리 진행 방식에서 벗어나 특수 유닛을 활용한 방어의 재미를 느끼고 싶은 플레이어에게 적합하다. 특히 다수의 인원이 함께 힘을 합쳐 웨이를 방어하는 협동 플레이를 선호하거나, 유닛의 사거리와 위치 선정을 고민하는 디펜스 장르 팬들이라면 한 번쯤 도전해 볼 만한 가치가 있다. 플레이를 시작하기 전, 맵 전역의 지형적 특징과 적의 진격 경로를 미리 파악하고 아군과의 방어 구역을 조율하는 것이 효율적인 생존을 위한 포인트라고 볼 수 있다. Lurker Defence 30 way v 1.01 is a custom defense map in StarCraft: Brood War that revolves around unit placement and defensive strategy. According to the internal map description, players must carefully position their lurkers to maximize killing efficiency while surviving relentless enemy waves. Built on a badlands tileset, the spacious map layout is well-suited for handling enemies approaching from multiple directions, making cooperation and tactical positioning essential for success. The progression consists of up to thirty distinct waves, which maintains high tension and requires players to adapt their defensive lines to changing enemy attack patterns. This usemap is ideal for players who want to experience the fun of defending with specialized units rather than standard melee gameplay. It is especially recommended for fans of the defense genre who enjoy cooperative multiplayer sessions and strategizing over unit ranges and terrain choke points. Before jumping into the game, checking the overall terrain features and coordinating defensive zones with allies are key points for effective survival.
최근 등록된 맵
새로 추가된 파일과 버전을 확인하세요.
러커를 뽑아라 (Rucker Must Be Produced)
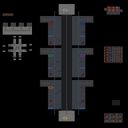
스타크래프트 브루드워의 유즈맵 중 하나로, 제목 그대로 ‘러커’를 집중적으로 생산하고 이를 활용해 적을 상대하는 것이 핵심인 맵이다. 맵 이름은 ‘러커를 뽑아라’로 간결하면서도 플레이의 핵심을 담고 있으며, 내부에서는 ‘럭커만뽑아라!!!!.scx’라는 파일명으로 확인된다. 맵은 우주 타일셋을 기반으로 1024x1024 크기의 공간에 펼쳐져 있으며, 96x96 타일 단위로 구성되어 있어 넓은 전장감을 느낄 수 있다. 인코딩은 cp949로 한국어 환경에서 문제없이 구동된다. 플레이 방식은 1시 방향에서 히드라리스크를 생산하고, 5시 방향에서 러커를 집중적으로 뽑아 전투를 벌이는 구조로 되어 있다. 히드라리스크는 보초 업그레이드를 통해 성능을 강화할 수 있으며, 테란 시민은 10원짜리 1마리, 40원짜리 3마리, 80원짜리 6마리 등 단계별로 생산할 수 있는 것으로 보인다. 맵의 목표는 러커의 강력함을 최대한 활용해 적을 제압하는 것이며, 이를 위해 플레이어는 자원 관리와 병력 생산 타이밍을 carefully하게 조절해야 한다. 맵의 분위기는 디펜스와 공격형 유즈맵의 특징을 동시에 갖추고 있지만, 러커를 중심으로 한 전투가 주를 이루므로 ‘컴까기’ 스타일의 맵으로 분류된다. 이 맵은 초보 플레이어에게는 러커의 생산과 관리에 대한 이해가 필요하며, 러커의 특성을 잘 활용하지 못하면 쉽게 무너질 수 있다. 반면 숙련된 플레이어는 러커를 효율적으로 생산하고 배치해 일방적인 승리를 노릴 수 있는 구조다. 맵의 난이도는 보통 정도로 설정되어 있으며, 플레이 시간은 맵의 규모와 전투 intensity에 따라 20분에서 40분 정도로 예상된다. 추천 대상은 스타크래프트의 유즈맵을 즐기며, 러커와 히드라리스크의 조합을 활용한 전략적 플레이를 선호하는 유저들이다. 특히 ‘컴까기’ 스타일을 좋아하는 플레이어에게 적합하며, 러커의 강력함을 체감하고 싶다면 한번 도전해볼 만한 맵이다. 플레이 전 확인해야 할 점은 러커의 생산 비용과 히드라리스크의 업그레이드 타이밍, 그리고 테란 시민의 자원 활용 방법이다. 자원의 부족으로 인해 러커를 충분히 생산하지 못하면 전투에서 불리해질 수 있으므로, 초반 자원 관리에 신경을 써야 한다. 또한 러커의 공격 범위와 이동 속도를 숙지해 적절한 배치로 전장을 장악하는 것이 중요하다. 맵의 구조상 5시와 1시 방향의 생산 라인을 조율하지 않으면 효율적인 전투가 어려워질 수 있으므로, 초반 전략 수립이 승패를 가를 가능성이 높다. This is a custom map from StarCraft: Brood War where the core strategy revolves around mass-producing and utilizing Lurkers to dominate opponents. The map's title, "Rip Out Lurkers," is concise yet perfectly captures its essence, and its internal file name is "럭커만뽑아라!!!!.scx." Built on a space-themed tileset, the 1024x1024 map is divided into 96x96 tiles, offering a vast battlefield feel. It runs smoothly in Korean environments using the cp949 encoding. The gameplay involves producing Hydralisks from the 1 o'clock direction and massing Lurkers from the 5 o'clock direction to engage in combat. Hydralisks can be upgraded with sentinel enhancements to boost performance, while Terran civilians can be produced in tiers: one 10-gold unit, three 40-gold units, or six 80-gold units. The primary objective is to overwhelm enemies by maximizing the power of Lurkers, requiring careful resource management and precise troop production timing. The map blends defensive and aggressive custom-map elements but centers on Lurker-focused combat, fitting the "comp stomp" style. For beginners, mastering Lurker production and management is essential, as poor handling can lead to quick defeats. Skilled players, however, can efficiently produce and deploy Lurkers to secure dominant victories. The map is rated at a moderate difficulty level, with playtime ranging from 20 to 40 minutes depending on the battlefield scale and combat intensity. It’s recommended for players who enjoy StarCraft custom maps and favor strategic play involving Lurker-Hydralisk combinations. Especially suited for fans of "comp stomp" styles, it’s a great choice if you want to experience the raw power of Lurkers firsthand. Before playing, you should understand Lurker production costs, Hydralisk upgrade timing, and how to efficiently use Terran civilians for resources. Failing to generate enough Lurkers due to resource shortages can put you at a disadvantage, so managing early resources is critical. It’s also important to familiarize yourself with Lurker attack range and movement speed to optimize their placement and control the battlefield. Since the map requires balancing production lines at 1 o'clock and 5 o'clock, early strategic planning can heavily influence the outcome of the match.
9999의 카카루 잡기 (9999 Kakaru Catch)
스타크래프트 브루드워 유즈맵 '9999의 카카루 잡기'는 최대 8인이 참여해 강력한 영웅 유닛 카카루를 사냥하는 협동 미니게임 형식의 맵이다. 플랫폼 타일셋 기반의 128x128 타일 크기 전장에서 진행되며, 맵 제목과 파일명에 드러난 '9999'와 '러커' 키워드에서 보듯 체력 9999 수준의 카카루(히어로 러커)를 상대로 플레이어들이 합심해 처치하는 것이 핵심 목표로 보인다. 카카루는 저그 캠페인에 등장하는 영웅 러커로, 일반 러커보다 강력한 스플래시 대미지와 체력을 보유한 보스급 유닛이다. 내부 설명은 비어 있으나 파일명에 '[[+러커+]' 표기가 있어 플레이어가 러커 계열 유닛을 조작하거나, 카카루가 러커 특유의 잠복과 스플래시 공격을 구사하며 저항할 가능성이 높다. 8인 풀 인원이 모일 경우 화력 집중과 어그로 분산이 중요한 협동 플레이가 펼쳐질 것으로 추정되며, 인원이 적을수록 생존 난이도가 급격히 상승할 수 있다. 잠복 탐지 수단 확보와 집중 포화 타이밍, 카카루의 이동 경로 차단 여부가 클리어의 관건이 될 전망이다. 플랫폼 맵 특유의 좁은 통로와 고저차 없는 지형이 잠복 유닛과의 심리전을 더욱 치열하게 만들 것으로 보인다. 가벼운 파티용 콘텐츠로 즐기기 적합하며, 브루드워 특유의 유닛 제어 감각과 팀워크를 짧은 시간 안에 시험해보고 싶은 유저에게 추천한다. 플레이 전 맵 버전과 트리거 세부 사항, 승리 조건 텍스트를 로비에서 확인하고 시작하는 것이 좋다. StarCraft Brood War UMS map '9999's Kakaru Catch' is a cooperative mini-game style map where up to 8 players hunt the powerful hero unit Kakaru. Played on a 128x128 tile battlefield based on the Platform tileset, the core objective appears to be joining forces to defeat a Kakaru (Hero Lurker) with around 9999 HP, as suggested by the '9999' and 'Lurker' keywords in the map title and filename. Kakaru is a hero Lurker appearing in the Zerg campaign, a boss-grade unit possessing stronger splash damage and health than a regular Lurker. Although the internal description is empty, the '[[+Lurker+]' notation in the filename suggests players may control Lurker-type units, or that Kakaru resists using the Lurker's signature burrow and splash attacks. With a full 8-player roster, cooperative play focusing firepower and distributing aggro is estimated to unfold, while survival difficulty may spike sharply with fewer players. Securing detection for burrowed units, timing concentrated fire, and blocking Kakaru's movement paths are likely the keys to clearing. The narrow corridors and flat terrain typical of Platform maps are expected to intensify the mind game with burrowed units. It is suitable as light party content and recommended for users wanting to test Brood War's unique unit control and teamwork in a short time. It is advised to check the map version, trigger details, and victory condition text in the lobby before starting.
러커를 뽑아라 (Lurker Produce)
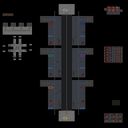
스타크래프트 브루드워 맵 '러커를 뽑아라 (Lurker Produce)'는 독특한 저그 유닛 운용 방식과 전략적 재미를 강조한 클래식 UMS 유즈맵입니다. 이 맵은 기본적인 밀리 대전이나 일반적인 디펜스 장르와는 차별화된 진행 방식을 보여줍니다. 내부 설명에 따르면 5시 방향 쪽에서 히드라를 생산한 후 전투를 벌이도록 설계되어 있으며, 1시 방향 쪽에서는 히드라와 관련된 보조 업그레이드를 진행할 수 있습니다. 또한 테란 시민 유닛을 활용한 자원 수급 시스템이 마련되어 있어, 10원에 1마리, 40원에 3마리, 80원에 6마리 비율로 시민을 확보하며 자원을 늘려가는 독특한 경제 구조를 지니고 있습니다. 플레이어는 정해진 위치에서 유닛을 생산하고 자원을 효율적으로 관리하며, 럴커를 활용한 강력한 공격과 방어 전략을 구사해야 합니다. 맵 전체의 공간 배치는 중앙의 전장과 각 진영의 생산 및 업그레이드 구역이 명확하게 구분되어 있어, 정형화된 전투 속에서도 자원 관리와 타이밍 조절의 묘미를 느낄 수 있습니다. 클래식 스타크래프트 유즈맵 특유의 아기자기한 규칙과 독창적인 유닛 활용법을 선호하는 유저들에게 적합하며, 친구들과 함께 모여 가볍게 즐기면서도 색다른 승리 전략을 고민해 보는 재미를 제공합니다. 플레이하기 전에는 내부 설명에 언급된 5시 방향의 히드라 생산 위치와 1시 방향의 업그레이드 구역을 미리 파악해 두는 것이 원활한 게임 진행을 위한 중요한 포인트가 됩니다. The StarCraft: Brood War map '러커를 뽑아라 (Lurker Produce)' is a classic UMS Use Map that emphasizes a unique Zerg unit operation method and strategic fun. This map presents a gameplay style distinct from standard Melee matches or typical defense genres. According to the internal description, it is designed so that players produce Hydralisks near the 5 o'clock position to engage in combat, while auxiliary upgrades related to Hydralisks can be carried out near the 1 o'clock position. In addition, a resource supply system utilizing Terran Civilian units is provided, featuring a unique economic structure where players secure civilians at rates of 1 unit for 10 minerals, 3 units for 40 minerals, and 6 units for 80 minerals to expand their economy. Players must produce units at designated locations, manage resources efficiently, and deploy powerful attack and defense strategies using Lurkers. The spatial arrangement of the map clearly separates the central battlefield from the production and upgrade areas for each faction, allowing players to experience the subtlety of resource management and timing control even within structured battles. It is suitable for users who prefer the charming rules and original unit utilization methods characteristic of classic StarCraft Use Maps, offering the fun of gathering with friends to enjoy a lighthearted yet strategically varied gameplay experience. Before playing, understanding the Hydralisk production location at the 5 o'clock position and the upgrade area at the 1 o'clock position mentioned in the internal description is an important point for smooth game progression.
개인 Lurker Defense
화산 타일셋의 이글거리는 배경이 압박감을 더하는 이 맵은 전형적인 개인 디펜스 장르로 설계되었다. 여섯 명의 플레이어가 각자 독립된 구역에서 러커 웨이브를 막아내는 구조이며, 자원이 무한으로 제공되기 때문에 초반부터 부담 없이 유닛을 생산하고 방어선을 구축할 수 있다. 맵의 핵심은 단순히 많은 병력을 모으는 것이 아니라, 러커의 강력한 스플래시 공격을 어떻게 분산시키고 무력화하느냐에 달려 있다. 지형은 좁은 통로와 넓은 교전 공간이 혼합되어 있어 유닛 배치에 신중함을 요구한다. 초반에는 소수의 러커가 간격을 두고 등장해 아군 진영을 시험하지만, 웨이브가 거듭될수록 그 밀도와 속도가 급격히 증가한다. 특히 후반부에는 지속적으로 쏟아지는 러커의 가시가 방어선을 순식간에 무너뜨릴 수 있기 때문에, 지속적인 유닛 보충과 함께 시즈 탱크나 사이오닉 스톰 같은 범위 제압 능력을 적절히 배치하는 것이 생존의 관건이다. 플레이어는 각자 고립된 공간에서 싸우지만, 다른 플레이어의 방어 상황을 간접적으로 확인할 수 있어 심리적인 경쟁이 자연스럽게 유발된다. 누군가 무너지는 순간 긴장감이 극대화되며, 끝까지 버티는 플레이어에게 승리의 희열이 집중된다. 무한 자원이라는 설정 때문에 초보자도 진입 장벽 없이 시작할 수 있지만, 웨이브가 거듭될수록 단순한 물량만으로는 한계가 명확해져 상급자들도 전술을 고민하게 만든다. 이 맵은 스타크래프트의 기본 유닛 조작과 병력 배치 감각을 익히려는 유저에게 훌륭한 연습장이 되며, 친구들과 함께 가볍게 즐기기에도 부담이 없다. 다만, 게임이 길어질수록 반복적인 패턴에 익숙해질 수 있으므로 적당한 난이도 조절이 아쉬운 점이다. 또한 무한 자원 맵 특성상 후반부에 유닛이 과도하게 쌓여 렉이 발생할 가능성이 있으니, 사양이 낮은 컴퓨터에서는 미리 그래픽 설정을 낮추는 것이 바람직하다. 이 맵은 정교한 전략보다는 직관적인 방어와 지속적인 컨트롤에 초점을 맞춘, 묵직하고 직선적인 재미를 제공한다. The smoldering backdrop of the volcanic tileset amplifies the tension in this map, which is designed as a classic defense scenario. Six players each hold their own isolated zone against relentless waves of Lurkers, and the infinite resource setting allows everyone to build their defenses and produce units without early economic pressure. The core challenge of the map is not simply amassing a large army, but learning how to mitigate and neutralize the devastating splash damage of the Lurker attacks. The terrain mixes narrow choke points with wider open areas, demanding careful unit placement and tactical foresight. Early waves test the defenses with a manageable trickle of Lurkers, but the density and speed of the assault escalate rapidly as time passes. In the later stages, the ceaseless shower of subterranean spines can shred through defensive lines in seconds, making it essential to constantly replenish forces and deploy area control units like Siege Tanks or Psionic Storms to survive. Although each player fights in an isolated pocket, the indirect awareness of others' struggles creates a natural psychological competition. When one ally collapses, the tension peaks, and the hope of victory concentrates on the last remaining survivors. The infinite resource system removes entry barriers for beginners, yet the increasingly brutal waves expose the limits of simple mass production, forcing even experienced players to refine their tactical approach. This map serves as an excellent training ground for mastering basic unit control and army positioning in StarCraft, while also providing a casual and enjoyable experience with friends. However, the repetitive pattern of later waves can become predictable, so a lack of adjustable difficulty might be felt. Due to the infinite resource nature, excessive unit accumulation in the late game may cause performance drops, so players on lower-end systems should optimize their graphic settings beforehand. Ultimately, this map delivers a heavy, instinctive fun that emphasizes sustained attention and reactive control over intricate strategic planning.
개인 Lurker Defense (Personal Lurker Defense)
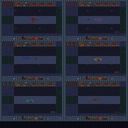
개인 Lurker Defense는 화산 타일셋을 기반으로 한 6인용 디펜스 맵으로, 플레이어가 직접 러커 유닛을 배치해 적의 물결을 막아내는 구조를 가지고 있다. 맵 전체가 2048×3072 해상도에 64×96 타일 단위로 구성되어 있어 넓은 전장을 제공하며, 주요 경로는 중앙에 위치한 고지대를 중심으로 여러 갈래로 나뉜다. 시작 시 플레이어는 제한된 자원으로 러커를 생산하고, 적 유닛이 접근하면 자동으로 사거리 내에 있는 적을 감지해 독을 퍼뜨린다. 러커의 특성상 일정 거리 안에서만 공격이 가능하므로, 적의 진입 경로를 예측해 적절한 위치에 배치하는 것이 핵심 전략이다. 맵에는 자연스럽게 화산 지형의 높낮이가 존재해 시야 확보와 방어 라인 설정에 영향을 주며, 일부 구역에서는 높은 지형이 방어를 유리하게 만든다. 플레이 중에는 적 유닛의 종류와 파동이 점차 강해지므로, 초반에는 러커를 집중 배치해 방어 라인을 구축하고, 중후반에는 추가 자원을 확보해 러커를 보강하거나 보조 유닛을 활용하는 것이 좋다. 또한, 러커의 독 효과는 지속 시간이 길어 적을 서서히 약화시키므로, 적의 이동 경로를 길게 만들 수 있는 지형을 활용하면 효율이 높아진다. 이 맵은 디펜스 장르를 좋아하고 러커 유닛의 특성을 이해한 플레이어에게 특히 추천한다. 초보자는 러커 배치와 자원 관리에 익숙해지는 데 시간이 걸릴 수 있으니, 처음 플레이 시에는 적 파동을 천천히 진행하도록 설정해 연습하는 것이 도움이 된다. Personal Lurker Defense is a 6-player defense map built on a volcanic tileset, where players directly place Lurker units to block waves of enemies. The map spans 2048×3072 resolution with a 64×96 tile grid, offering a large battlefield and multiple branching paths centered around a central high ground. At the start, players produce Lurkers with limited resources, and once enemies approach, the Lurkers detect and release poison within their range. Because Lurkers can only attack within a certain distance, predicting enemy routes and positioning them strategically is essential. The volcanic terrain’s elevation naturally affects line‑of‑sight and defensive line placement, with higher areas providing advantageous positions. As the match progresses, enemy types and waves become stronger; early game focuses on concentrating Lurkers to establish a solid defense, while mid‑to‑late game benefits from securing additional resources to reinforce Lurkers or add support units. Lurker’s poison has a long duration, gradually weakening foes, so utilizing terrain that forces enemies to travel longer paths enhances efficiency. This map is especially recommended for players who enjoy defense gameplay and understand Lurker mechanics. Beginners may need time to master Lurker placement and resource management, so starting with slower enemy waves for practice is advisable.
팀 러커 디펜스 (Team Lurker Defense)
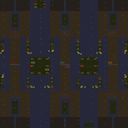
스타크래프트 브루드워 유즈맵 '팀 러커 디펜스(Team Lurker Defense)'는 최대 6명의 플레이어가 두 팀으로 나뉘어 협력하며 30개의 웨이브를 돌파하는 독특한 방식의 디펜스 맵이다. 사막 타일셋의 128x128 규모로 제작되어 넓은 전장을 활용하며, 일반적인 타워 디펜스와 달리 러커의 지하 공격 메커니즘을 핵심으로 삼은 점이 이채롭다. 플레이어는 제한된 자원과 유닛을 배치해 몰려오는 적 유닛들의 공세를 막아내야 하며, 상대 팀보다 먼저 30단계를 모두 완료하는 것이 승리 조건이다. 내부 설명에 따르면 제작자는 KiLLeR2001이며, 웨이브가 진행될수록 적의 규모와 강도가 점차 증가하는 전형적인 디펜스 장르의 흐름을 따른다. 이 맵의 가장 큰 특징은 러커라는 특정 유닛의 활용에 초점을 맞춘 독특한 디자인으로, 버로우 상태에서 지면을 따라 직선형 공격을 가하는 러커의 특성을 이해하고 전략적으로 배치하는 것이 승패를 가른다. 단순히 많은 유닛을 생산하는 것이 아니라, 좁은 통로나 적의 이동 경로를 예측해 효율적인 화력 밀집도를 만드는 것이 중요해 보인다. 팀원 간의 역할 분담과 공격 라인 겹침을 조율하는 협동 요소도 두드러지며, 혼자서는 감당하기 어려운 후반 웨이브를 함께 돌파하는 재미가 있다. 스타크래프트 유즈맵 특유의 단순한 조작과 직관적인 규칙 덕분에 초보자도 쉽게 입문할 수 있지만, 30단계까지의 긴 호흡을 버티려면 상당한 집중력과 팀워크가 요구된다. 초반에는 여유롭게 진형을 갖추다가도 중반 이후 쏟아지는 고급 유닛 러시에 당황하기 쉬우므로, 팀원과의 지속적인 소통과 사전 전략 공유가 승리의 열쇠가 된다. 특히 러커의 공격 범위와 지형을 활용한 배치 센스가 뛰어난 플레이어에게 추천할 만한 맵이며, 친구들과 함께 짜릿한 경쟁과 협동을 동시에 즐기고 싶은 유저에게 잘 어울린다. 다만 맵의 규모가 크고 게임 시간이 다소 길어질 수 있어, 빠른 템포의 캐주얼한 플레이를 선호하는 사람이라면 부담을 느낄 수도 있겠다. 전반적으로 독특한 유닛 제한과 팀 대전 방식의 조합이 인상적인 수작이다. 맵 파일명은 'Team Lurker Defense 2.scx'로, 이전 버전에서 개선된 버전으로 추정된다. Team Lurker Defense is a StarCraft: Brood War use map setting (UMS) where up to six players split into two teams and cooperate to clear 30 waves of enemy attacks. Set on a spacious 128x128 desert terrain, the map revolves around the burrowed attack mechanic of Lurkers, making it a unique twist on the defense genre. The objective is simple: your team must survive and defeat all 30 levels before the opposing team does. As waves progress, the enemy forces grow stronger and more numerous, demanding careful unit positioning and resource management. The key to victory lies in understanding how Lurkers deal area damage in straight lines when burrowed, so placing them along narrow choke points or predicted enemy paths is essential. Teamwork plays a huge role, as players need to coordinate their defensive lines and share the burden of increasingly intense rushes. While the controls are intuitive and easy to grasp, the later waves require serious concentration and communication. This map is highly recommended for players who enjoy strategic cooperation and the specific niche of Lurker-based defense, though the longer playtime may not suit those looking for a quick match. The file name 'Team Lurker Defense 2.scx' suggests it is an improved version of an earlier map.
썬큰D 10웨이 14.8 임파서블 (SunkenD 10Way 14.8 Impossible)
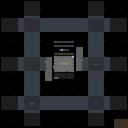
스타크래프트 브루드워의 유즈맵으로 유명한 '썬큰D 10웨이 14.8 임파서블(SunkenD 10Way 14.8 Impossible)'은 디펜스 장르의 고난이도 맵으로, 총 25개의 레벨로 구성되어 있는 것이 특징이다. 이 맵은 특히 'Mid' 레벨에서도 클리어하기 어려운 '임파서블' 난이도를 자랑하며, 저그 유닛인 러커(Lurker)가 추가되어 더 어려운 전투를 요구한다. 맵 제목에 포함된 '10Way'는 10방향의 웨이브(웨이브 공격)가 발생한다는 의미로, 플레이어는 끊임없이 밀려오는 적군을 상대해야 한다. 맵 테마는 우주 타일셋을 기반으로 하며, 전체 맵 크기는 4096 x 4096의 대형 맵으로 구성되어 있다. 플레이 방식은 기본적으로 디펜스에 속하지만, 10방향에서 동시에 공격이 오기 때문에 아군의 배치와 방어 전략이 매우 중요하다. 레벨이 진행될수록 적의 조합과 수가 증가하며, 후반부로 갈수록 러커의 비중이 높아지므로 러커의 사정거리와 공격 패턴을 숙지해야 한다. 또한 'Backwash(배큐시)'라는 특수 효과가 적용되어 있어, 일부 공격이 플레이어에게 역으로 피해를 입히지 않도록 주의해야 한다. 맵의 난이도가 'MidImpossible'로 명시된 만큼 초보자는 클리어하기 어려우며, 팀 플레이보다는 개인 플레이에 초점을 맞추고 있는 맵이다. 맵의 내부 설명에서 'BW Version'이라는 표기가 포함된 점으로 보아, 브루드워 버전으로 제작된 맵임을 확인할 수 있다. 이 맵을 플레이하기 전에는 러커의 특성과 공격 패턴을 충분히 이해하고, 아군의 배치와 리소스 관리(미네랄, 가스)의 균형을 맞추는 연습이 필요하다. 또한 10방향의 웨이브를 동시에 처리해야 하므로, 멀티태스킹 능력이 요구된다. 맵의 난이도가 높아질수록 전략의 유연성과 즉각적인 대응이 승패를 좌우하므로, 꾸준한 연습과 경험이 필수적이다. '썬큰D 10웨이 14.8 임파서블'은 디펜스 장르의 끝판왕이라 불릴 만큼 도전적인 요소와 전략적 깊이를 제공하는 맵으로, 디펜스 마니아들에게는 필수적으로 도전해볼 만한 작품이다. Famous as a StarCraft: Brood War custom map, "SunkenD 10Way 14.8 Impossible" is a high-difficulty defense-style map featuring 25 levels. The map is particularly known for its "Impossible" difficulty even on the 'Mid' level, requiring tougher battles with the addition of Zerg units like the Lurker. The "10Way" in the title indicates that waves of enemies attack from 10 different directions, forcing players to constantly fend off relentless assaults. The map uses a space-themed tileset and spans a large 4096 x 4096 grid. While fundamentally a defense map, its core challenge lies in handling simultaneous attacks from all 10 directions, making unit positioning and defensive strategies crucial. As levels progress, enemy compositions and numbers grow, with Lurkers becoming more prominent in later stages—players must learn their attack range and patterns. A special mechanic called "Backwash" is also in play, so be careful not to take friendly fire from certain attacks. Labeled as "MidImpossible," this map is extremely tough for beginners and is designed more for solo play than team-based strategies. The "BW Version" marking in the map’s internal description confirms it was made for Brood War. Before playing, thoroughly understand Lurker behavior and attack patterns, and practice balancing unit placement with resource management (minerals and gas). Handling 10 simultaneous waves demands strong multitasking skills. As difficulty rises, adaptability and quick decision-making determine success, so consistent practice is essential. "SunkenD 10Way 14.8 Impossible" stands as the ultimate challenge in the defense genre, offering deep strategy and tough obstacles—making it a must-try for hardcore defense map fans.
썬크 디펜스 XY -=2=- (Sunken Defense XY -=2=-)
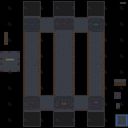
‘썬크 디펜스 XY -=2=-’는 스타크래프트 브루드워의 디펜스 장르 유즈맵으로, 수중 기지 방어전을 테마로 삼은 맵이다. 맵 중앙에 위치한 기지 주변으로 적의 공격이 끊임없이 밀려오며, 플레이어는 제한된 자원을 활용해 방어 시설과 병력을 구축해야 한다. 맵 구조는 중앙 기지를 보호하는 concentric ring 형태의 방어선을 중심으로 설계되어 있으며, 각 라인마다 터렛, 포토캐논, 미사일 터렛 등이 배치되어 있다. 맵 우측 하단과 좌측 상단에 위치한 미네랄 멀티는 자원 확보를 위한 필수 포인트로, 초반 자원 수급이 승패를 가르는 핵심 요소로 보인다. 방어선의 틈새를 노리는 적의 드랍십이나 러커 공격에 대비하기 위해 플레이어는 시야 확보와 병력 배치에 신중한 전략을 세워야 한다. 맵 곳곳에 배치된 오브젝트(해저 지형, 암초 등)는 시야 방해 요소로 작용하기도 하며, 이를 역이용해 적의 접근을 차단할 수도 있다. 맵의 난이도는 방어선의 밀도와 적의 공격 패턴에 따라 좌우되며, 일부 구간에서는 적의 공세가 매우 치열해져 초보 플레이어에게는 난해한 경험을 제공할 수 있다. 추천 대상은 디펜스 장르에 익숙한 플레이어로,Resource Management와 Strategic Positioning 능력을 요구하는 맵이다. 플레이 전 반드시 확인해야 할 요소는 방어선의 빈틈, 자원 멀티의 위치, 그리고 적의 주요 공격 루트다. 방어선을 적절히 보강하지 않으면 중후반부에 적의 공세가 밀려올 때 무너지기 쉽다. Sunken Defense XY -=2=- is a defense genre custom map for StarCraft: Brood War, set around an underwater base defense battle. The map features a central base surrounded by concentric rings of defensive lines that players must fortify using limited resources. Enemy attacks continuously surge from multiple directions, requiring players to strategically place turrets, photon cannons, and missile turrets to hold the line. The bottom-right and top-left corners house mineral multi-bases, critical for early-game resource gathering that can determine victory. Gaps in the defensive lines are vulnerable to enemy dropships or lurker attacks, making vision control and troop positioning essential. Scattered underwater terrain and obstacles serve as both obstacles and tactical tools to block enemy movements. The difficulty escalates as enemy attack patterns intensify, potentially overwhelming casual players. This map is best suited for those familiar with defense mechanics, demanding strong resource management and strategic foresight. Before playing, check for weak points in the defensive lines, mineral multi locations, and enemy attack routes to avoid mid-game collapses under pressure.
맵 선택 가이드
태그는 맵의 핵심 특징을 빠르게 설명하지만 제작 버전마다 규칙이 다를 수 있습니다. 상세 설명에서 권장 인원, 난이도, 플레이 시간과 버전을 함께 확인한 뒤 다운로드하세요.