
러시 방어 스타크래프트 맵 모음
'러시 방어' 태그가 등록된 맵을 모았습니다. 장르 하나로 찾기 어려운 플레이 방식, 난이도와 특징을 중심으로 인기 맵과 최신 맵을 비교해 보세요.
- 등록 맵
- 8개
- 누적 다운로드
- 0
- 누적 조회
- 288
인기 맵
다운로드와 조회 반응이 높은 맵입니다.
7vs1 하드 컴퓨터 (7vs1 Hard Computer)
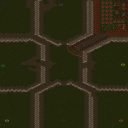
스타크래프트 브루드워의 7vs1 디펜스 유즈맵인 〈7vs1 Hard Computer〉는 7명의 플레이어가 단 한 명의 '매우 어려운' 컴퓨터를 상대로 방어전을 펼치는 것이 핵심이다. 내부 맵 설명에서도 강조하듯, 컴퓨터는 '러시'를 감행할 것이므로 방어 시설을 신속하게 건설하지 않으면 순식간에 전멸당할 위험이 있다. 맵은 사막 타일셋으로 구성되어 있으며, 중앙에 위치한 플레이어 기지 주변으로는 넓은 개활지가 펼쳐져 있다. 이 공간은 컴퓨터의 공격 루트로 예상되며, 플레이어들은 초기 자원만으로 빠르게 방어 건물을 세워야 한다. 맵의 특징은 바로 '1 vs 7'의 극한 대결 구조로, 컴퓨터의 공격 패턴이 무작위성이 강하다는 점이다. 따라서 플레이어들은 방어 전략을 유연하게 변경해야 하며, 자원 관리와 테크 트리 최적화도 중요하다. 초보자에게는 다소 난이도가 높을 수 있지만, 협동이 필수적인 만큼 팀워크가 빛을 발하는 맵이기도 하다. 방어에 성공한 후에는 컴퓨터의 본진 공격으로 승리를 노릴 수 있지만, 그 전에 컴퓨터의 러시 시도를 저지하는 것이 관건이다. 이 맵은 '컴퓨터 상대 디펜스' 장르의 정수를 느낄 수 있게 해주며, 특히 방어형 플레이어에게는 흥미로운 도전 과제가 될 것이다. 다만, 컴퓨터의 공격 패턴이 예측 불가능하다는 점과 초기 방어 시설 건설의 중요성이 매우 크기 때문에, 미리 게임에 익숙해질 필요가 있다. 추천 대상은 방어 전략을 즐기는 유저나 팀플레이를 선호하는 스크래프트 유저들이다. 플레이 전에는 맵의 주요 공격 루트를 미리 확인하고, 초반 자원 배분을 신중히 계획해야 한다. 또한, 컴퓨터의 공격 타이밍을 예측하기 위해 여러 번 플레이해보는 것도 좋다. 7vs1 Hard Computer is a 7vs1 defense custom map in StarCraft: Brood War where seven players must defend against a single, 'very hard' AI opponent. As the internal description warns, the AI will aggressively rush, making rapid base expansion and defensive structures essential to survival. The map features a desert tileset with a central player base surrounded by open terrain, likely the primary path for AI attacks. The core challenge lies in the asymmetrical 1 vs 7 setup, where the AI's random attack patterns demand flexible defensive strategies, resource management, and efficient tech progression. While the learning curve may be steep for beginners, the map shines in cooperative play, rewarding teamwork and adaptability. Victory is secured by repelling AI waves and ultimately assaulting its main base, but the key lies in surviving the early-game rush. This map encapsulates the essence of 'computer vs player defense' gameplay, appealing to those who enjoy strategic planning and team-based challenges. Players should familiarize themselves with the map's attack routes, optimize early resource allocation, and practice predicting AI rush timings to improve their chances of success. Recommended for defense-focused players or teams who thrive on collaborative strategy sessions.
7vs1 하드 컴퓨터 (7vs1 Hard Computer)
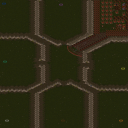
스타크래프트 브루드워 유즈맵 ‘7vs1 hard computer’는 한 명의 플레이어가 매우 강력한 컴퓨터와 맞서는 디펜스 장르의 재미있는 게임입니다. 맵 제목 그대로 7명의 플레이어가 한 팀을 이루어 극악의 난이도를 자랑하는 AI를 상대해야 하는데, 컴퓨터는 무지막지한 러시력으로 공격해오기 때문에 방어 건물과 병력을 신속히 건설하고 배치하는 전략이 무엇보다 중요합니다. 맵은 사막 타일셋을 기반으로 구성되어 있으며, 넓은 평야와 구릉 지형이 펼쳐져 있어 시야 확보와 병력 이동의 효율성이 관건이 됩니다. 특히 컴퓨터의 공격을 방어하기 위한 건물을 어디에, 어떻게 배치할지가 승부의 갈림길이 될 것입니다. 이 맵의 핵심은 방어와 자원 관리에 있습니다. 플레이어들은 초반부터 재빨리 미네랄과 가스를 확보한 뒤, 방어 건물인 벙커, 터렛, 포톤 캐논 등을 배치하여 컴퓨터의 공격을 막아내야 합니다. 또한, 공격과 방어 양면을 고려한 병력 조합과 업그레이드도 필수적입니다. 컴퓨터는 초반부터 강력한 유닛들을 끊임없이 보내기 때문에, 방심하거나 자원 관리가 미숙하면 순식간에 밀리게 됩니다. 맵의 난이도가 ‘하드(hard)’로 표기되어 있듯이, 초보자들은 경험이 쌓이기 전까지는 어려움을 느낄 수 있으며, 보통 이상의 실력을 지닌 플레이어들에게 적합한 맵입니다. 7명이서 팀을 이루어 협동하는 재미도 considerable하며, 한 명의 실수가 팀 전체의 패배로 이어질 수 있어 긴장감과 전략적 깊이가 돋보입니다. 이 맵을 플레이하기 전에는 팀원 간의 원활한 소통과 역할 분배가 무엇보다 중요하다는 점을 꼭 염두에 두어야 합니다. 각 플레이어가 맡은 구역의 방어와 자원 채취를 책임지는 동시에, 필요 시에는 전장 합류를 위한 이동 경로도 신중히 계획해야 합니다. 또한, 컴퓨터의 공격 패턴을 예측하고 대응하는 연습을 꾸준히 해야 실력이 향상될 수 있습니다. 이 맵은 단순히 방어만을 목표로 하는 것이 아니라, 팀워크와 전략적 사고를 동시에 요구하는 점이 매력적으로 다가옵니다. 만약 디펜스 장르를 좋아하는 플레이어라면, 이 맵이 제공하는 긴장감과 성취감을 충분히 느낄 수 있을 것입니다. StarCraft: Brood War custom map "7vs1 Hard Computer" is a fun defense-style game where one player faces off against an extremely powerful AI. As the title suggests, seven players team up to battle an AI with brutal difficulty, as the computer launches relentless rushes, making quick construction and strategic placement of defensive buildings and forces essential. The map is set on a desert tileset, featuring vast plains and hilly terrain, where securing vision and efficient troop movement are key. Deciding where and how to place defensive structures to counter the AI’s attacks often determines victory or defeat. The core of this map lies in defense and resource management. Players must secure minerals and gas early, then deploy defensive structures like bunkers, turrets, and photon cannons to fend off the AI’s assaults. Balancing offensive and defensive unit compositions and upgrades is also crucial. Since the AI continuously sends powerful units from the start, carelessness or poor resource management can lead to a swift defeat. Labeled as "hard," this map can be challenging for beginners until they gain experience, making it best suited for players with above-average skill. The cooperative aspect of teaming up with six others adds considerable depth, and a single mistake can doom the entire team, heightening tension and strategic complexity. Before playing, prioritize clear communication and role distribution among teammates. Each player must defend their assigned zone, gather resources, and plan efficient paths to reinforce other areas when needed. Regular practice in predicting and countering the AI’s attack patterns is vital for improvement. This map isn’t just about defense—it demands teamwork and strategic thinking, which makes it appealing. If you enjoy defense-style games, this map delivers the thrill and satisfaction that fans of the genre crave.
7vs1 hard ME
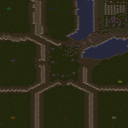
‘7vs1 하드 ME’는 7명의 플레이어가 하나의 강력한 컴퓨터를 상대로 방어전을 벌이는 전형적인 컴까기 맵입니다. 사막 타일셋의 128×128 타일 맵에서 7명의 플레이어는 초반부터 몰아치는 컴퓨터의 러시를 막기 위해 입구 막기와 타워 건설, 유닛 생산을 병행해야 합니다. 설명에 ‘I will rush so build a defence quick or you will die’라는 문구가 있듯, 컴퓨터는 게임 초반부터 강력하고 지속적인 러시를 감행하므로 초반 빌드 오더와 입구 막기 타이밍이 승패를 가릅니다. 8인용 맵이지만 7:1 팀 구성이므로 팀원은 7명, 컴퓨터는 단독으로 운영되며 난이도는 ‘매우 어려움’에 가깝습니다. 자원이 풍부한 ME(머니 익스팬드) 타입으로 추정되어 자원 걱정보다는 병력 컨트롤과 방어 라인 유지가 핵심입니다. 추천 인원은 8명(7인+컴 1), 팀 수는 2팀(7:1), 예상 플레이는 30분 내외, 난이도는 ‘매우 어려움’입니다. 입구 막기 타이밍, 타워 배치, 병력 컨트롤이 핵심이며, 협동심이 중요한 맵입니다. 입문자보다는 숙련자 협동 플레이에 적합합니다. ‘7vs1 Hard ME’ is a classic comp stomp map where seven players defend against a single powerful computer. On a 128×128 desert tileset, the seven players must block the entrance, build towers, and produce units from the early game to stop the computer's relentless rush. As the description warns, ‘I will rush so build a defence quick or you will die,’ the computer launches a strong, continuous rush from the early game, making early build order and entrance blocking timing decisive. Although it is an 8‑player map, the 7‑vs‑1 team setup means seven humans share one team while the computer plays alone, and the difficulty is close to ‘Very Hard.’ The map appears to be a Money Expand (ME) type with abundant resources, so the focus is on unit control and maintaining the defense line rather than resource management. Recommended for 8 players (7 humans + 1 computer), two teams (7:1), about 30 minutes playtime, and ‘Very Hard’ difficulty. Key elements are entrance blocking timing, tower placement, and unit control; teamwork is essential. This map is suited for experienced players who enjoy cooperative defense rather than beginners.
7vs1 하드 컴퓨터 (7vs1 Hard Computer)
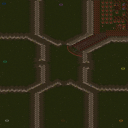
스타크래프트 브루드워의 <7vs1 hard computer>는 7명의 플레이어가 한 명의 매우 강력한 컴퓨터를 상대하는 디펜스형 유즈맵으로, 방어 건물을 빠르게 구축하지 않으면 순식간에 전멸할 수 있는 긴장감 넘치는 구조가 특징이다. 사막 타일셋의 넓은 맵에서 시작하는 플레이어들은 중앙 지역을 중심으로 병력을 생산해Computer의 끊임없는 러시를 방어해야 한다. 컴퓨터는 초반부터 강력한 유닛들을 끊임없이 보내며, 이를 막기 위해 플레이어는 입구에 요새를 건설하거나, 방어 건물을 배치하는 등 전략적인 대비를 요구받는다. 맵의 핵심은 '빠르고 튼튼한 방어'에 있으며, 개개인의 반응 속도와 조합 정비가 승부를 가르는 요소로 보인다. 초보자에게는 다소 어려운 난이도를 자랑하지만, 팀원과의 Effective한 협력이 성공의 열쇠가 될 것으로 추정된다. 방어에 성공한 후에는 반격의 기회를 노릴 수도 있지만, 기본적으로는Computer의 공격을 버텨내는 '생존'에 중점을 둔 디자인이다. 맵의 분위기는 사막의 황량한 배경과 어우러져 긴장감을 한층 더해주며, 플레이어는 끊임없이 밀려오는 적의 물량을 상대해야 하는 짜릿함을 느낄 수 있다. 특히Computer의 공격 패턴이 예측 가능한 부분도 있지만, 초반 세팅을 잘못하면 순식간에 무너질 수 있어 신중한 플레이가 요구된다. 7인의 플레이어가 모두 살아남기 위해선 개개인의 판단력이 무엇보다 중요하며, 이는 마치 '7명이 한 명의 보스를 상대하는 보스 러시'와 같은 재미를 선사한다. 방어에 성공한다면 큰 성취감을 느낄 수 있지만, 한번 무너지면 그대로 게임이 끝나는 만큼 긴장감과 몰입도가 높은 편이다. StarCraft: Brood War’s *7 vs. 1 Hard Computer* is a defense-focused custom map where seven players face off against a single, overwhelmingly powerful AI opponent. The map’s structure is tense and unforgiving—if players fail to quickly establish defenses, they risk being wiped out in no time. Set on a vast desert tileset, the match begins with players positioned around the central area, where they must produce units and fend off the AI’s relentless waves of assaults. From the very start, the AI sends out strong units in rapid succession, forcing players to strategize—building fortresses at key entrances or positioning defensive structures—to hold the line. The core of the map lies in *fast, sturdy defense*, with individual reaction speed and unit coordination often determining the outcome. While the difficulty may be steep for newcomers, effective teamwork appears to be the key to success. After surviving the initial onslaught, players may find opportunities to counterattack, but the map’s design fundamentally prioritizes *survival* against the AI’s relentless pressure. The atmosphere, enhanced by the barren desert backdrop, amplifies the tension, immersing players in the thrill of constantly battling overwhelming enemy numbers. Though the AI’s attack patterns are somewhat predictable, a poor early setup can lead to an instant collapse, demanding careful, strategic play. For all seven players to survive, individual decision-making is crucial—making the experience akin to a "boss rush" where seven players take on a single, formidable foe. While victory brings a strong sense of accomplishment, the map’s high stakes mean that a single mistake can end the game abruptly, ensuring a gripping, high-intensity experience.
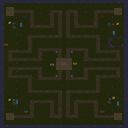
미로 디펜스 2.1 (Maze Defense 2.1)
스타크래프트 브루드워의 디펜스 장르 유즈맵인 〈Maze Defense 2.1〉은 적의 끊임없는 러시로부터 중앙 기지나 핵심 건물을 보호하는 것이 목표인 맵입니다. 사막 타일셋을 활용한 넓은 맵 공간에서 플레이어는 미로와 같은 길목에 방어 건물을 배치하고 전략적으로 적을 상대해야 합니다. 맵 중앙에 위치한 목표 지점을 중심으로 사방에서 몰려오는 적 유닛들을 efficiently 막아내야 하며, 특히 좁은 통로와 우회로를 활용한 방어 라인을 구축하는 것이 관건입니다. 맵의 구조상 길목이 복잡하게 구성되어 있어 초보 플레이어는 적의 공격을 효과적으로 차단하기 어려울 수 있지만, 방어 건물의 배치와 업그레이드 타이밍을 잘 조절하면 충분히 극복할 수 있습니다. 또한, 적의 러시 루트가 예측 가능한 패턴을 띄고 있어 반복 플레이를 통해 방어 전략을 다듬을 수 있습니다. 추천 대상은 디펜스 장르를 좋아하는 플레이어이며, 특히 중앙 기지 방어에 중점을 둔 전략적 플레이를 즐기는 유저들에게 적합합니다. 플레이 전 맵의 주요 통로와 우회로, 그리고 적 러시 루트를 미리 파악해 두는 것이 중요합니다. 또한, 방어 건물의 종류와 업그레이드 우선순위를 숙지하여 효율적인 방어 라인을 구축할 수 있도록 준비하세요. 맵의 난이도는 보통 수준으로, 초반 방어 라인을 잘 구축하면 후반부에서도 안정적으로 게임을 끌고 나갈 수 있습니다. 다양한 방어 건물과 업그레이드 옵션을 활용해 자신에게 맞는 전략을 세워보세요. 이 맵은 디펜스 장르의 기본기와 전략적 사고력을 키우는 데 좋은 연습이 될 것입니다. 특히, 미로와 같은 맵 구조는 공간 인식 능력을 키우는 데 도움이 되며, 적의 패턴을 읽는 데에도 도움이 됩니다. 반복 플레이를 통해 점차 맵에 익숙해지고, 자신의 방어 전략을 다듬어 나가보세요. 이 맵은 디펜스 장르의 매력을 느낄 수 있는 좋은 기회가 될 것입니다. Enjoy the game! Maze Defense 2.1 is a defense-style custom map for StarCraft: Brood War, where the objective is to protect a central base or key structure from relentless enemy rushes. Set against a desert tileset, the map features a wide play area with maze-like pathways where players must strategically place defensive structures to fend off incoming enemy units. The core challenge lies in constructing an effective defense line around the central target area, leveraging narrow choke points and side routes to maximize efficiency. While the complex layout may pose difficulties for beginners, experienced players can refine their strategies by mastering building placement and upgrade timing. The enemy rush patterns appear predictable, allowing players to adapt and improve with repeated gameplay. This map is ideal for fans of the defense genre, particularly those who enjoy strategic base defense mechanics. Before playing, it's crucial to familiarize yourself with the map's key pathways, side routes, and enemy rush approaches. Understanding the types of defensive structures available and their upgrade priorities will help you build a robust defense line. With a moderate difficulty level, a well-constructed early defense can carry you through to the later stages of the game. Experiment with different defensive buildings and upgrade paths to develop a strategy that suits your playstyle. This map serves as excellent practice for refining spatial awareness and pattern recognition—key skills in the defense genre. Repeated play will help you grow accustomed to the layout, allowing you to fine-tune your defensive tactics over time. Maze Defense 2.1 offers a compelling way to experience the depth and strategy of defense maps in StarCraft: Brood War.
7vs1 하드 컴퓨터 (7vs1 Hard Computer)
스타크래프트 브루드워의 classic 디펜스 유즈맵으로, 7명의 플레이어가 한 명의 컴퓨터를 상대하는 ‘7vs1 하드 컴퓨터’ 맵은 시작부터 긴장감을 조성합니다. 맵은 사막 타일셋으로 구성되어 있으며, 중앙에 위치한 플레이어 기지 주위에 7명의 플레이어가 각각의 출발 지점에서 시작합니다. 컴퓨터는 ‘매우 어려움’ 난이도로 설정되어 있으며, 초반부터 강력한 러시를 감행합니다. 방어塔를 빠르게 건설하지 못한다면 순식간에 기지가 무너질 수 있어, 플레이어들은 전략적인 타워 배치와 자원 관리를 동시에 신경 써야 합니다. 맵의 특징은 컴퓨터의 공격 패턴이 예측 불가능하다는 점으로, 플레이어들은 끊임없이 변하는 상황에 대응하며 방어선을 구축해야 합니다. 또한, 맵의 중앙 지형이 비교적 평탄한 편이지만, 곳곳에 언덕과 협곡이 있어 시야 확보와 공격 루트를 제한하는 요소로 작용합니다. 초보자보다는 경험이 있는 플레이어에게 적합한 맵으로, 타워를 효율적으로 배치하고 자원을 절약하는 능력이 요구됩니다. 맵의 난이도 때문에 한 번의 실수로도 패배로 이어질 수 있어, 플레이어들은 신중한 판단과 빠른 대처가 중요합니다. 이 맵은 디펜스 장르의 классик한 재미와 긴장감을 동시에 제공하며, 특히 여럿이서 즐기는 협동 플레이에서 큰 재미를 느낄 수 있습니다. 다만, 컴퓨터의 공격력이 워낙 강해 방어塔의 종류와 배치에 따라 난이도가 크게 달라질 수 있으니, 사전에 다양한 전략을 준비하는 것이 좋습니다. 또한, 맵의 중앙에 위치한 자원 지대 주변은 치열한 전투가 벌어지는 핵심 지역으로, 이곳을 확보하지 못하면 자원 부족으로 인해 타워를 충분히 건설하지 못할 가능성이 높습니다. 플레이어들은 각자의 출발지에서 자원을 채취하며, 중앙 자원 지역으로 진출하는 타이밍을 잘 조절해야 합니다. 이 맵의 가장 큰 매력은 바로 ‘불확실성’입니다. 컴퓨터의 공격 패턴이 랜덤에 가깝기 때문에, 플레이어들은 매 게임마다 새로운 전략을 고민해야 하며, 이는 게임의 재-playability를 크게 높입니다. 또한, 7명의 플레이어가 협동하여 방어선을 구축하는 과정에서 자연스럽게 팀워크가 형성되며, 이는 이 맵의 또 다른 즐거움 중 하나입니다. 마지막으로, 맵의 밸런스는 컴퓨터의 공격력이 강할수록 플레이어들의 방어 능력도 그만큼 중요해지며, 이는 디펜스 장르의 핵심을 잘 담아내고 있습니다. 이 맵을 플레이하기 전에는 반드시 타워의 종류와 배치에 대한 기본적인 이해가 필요하며, 컴퓨터의 공격 패턴에 대한 사전 조사를 통해 전략을 수립하는 것이 좋습니다. 또한, 자원 관리를 소홀히 하지 않으면서도, 중앙 자원 지역을 차지하기 위한 경쟁에서 우위를 점하는 것이 승리의 열쇠가 될 수 있습니다. A classic StarCraft: Brood War defense custom map where seven players face off against a single AI in a "7 vs 1 Hard AI" battle, the tension starts the moment the game begins. The map features a desert tileset, with each of the seven players starting at their own spawn points surrounding the central player base. The AI is set to "Very Hard" difficulty and launches aggressive rushes from the outset, meaning any delay in building defensive towers could lead to your base crumbling in an instant. Players must balance strategic tower placement with resource management to survive. One of the map’s defining traits is the AI’s unpredictable attack patterns, forcing players to constantly adapt and reinforce their defenses in response to ever-changing threats. While the central terrain is relatively flat, scattered hills and ravines restrict visibility and limit attack routes, adding another layer of challenge. This map is better suited for experienced players rather than beginners, as it demands efficient tower placement and economical use of resources. A single mistake can spell defeat due to the map’s punishing difficulty, so careful decision-making and quick reactions are essential. The map delivers classic defense-style fun and tension, especially when played cooperatively with a group, as teamwork becomes a key factor in holding the line. However, the AI’s overwhelming strength means the choice of towers and their placement drastically alters the difficulty, so preparing multiple strategies in advance is highly recommended. The area around the central resource zone is a hotly contested battleground, and failing to secure it risks resource shortages that could prevent you from building enough towers. Players gather resources from their starting positions and must time their expansion into the central zone carefully. What truly sets this map apart is its unpredictability—the AI’s attack patterns are nearly random, forcing players to rethink their strategies every match and greatly enhancing replayability. As the seven players collaborate to fortify their defenses, teamwork naturally develops, adding another layer of enjoyment. Ultimately, the map excels at capturing the essence of the defense genre by making the AI’s overwhelming power the very reason why strong defensive play becomes so crucial. Before jumping in, make sure you understand the different tower types and how to place them effectively, and study the AI’s attack patterns to build a solid strategy. Managing resources wisely while competing for control of the central zone could very well be the key to victory.
7vs1 HARD COMP TC
스타크래프트 브루드워의 대표적인 유즈맵 장르 중 하나로 자리잡은 ‘7vs1 HARD COMP TC’는 총 8명의 플레이어가 한 명의 강력한 컴퓨터를 상대로 방어전을 펼치는 디펜스 형식의 맵이다. 7명의 플레이어는 각각의 기지에 터렛이나 방어 건물, 유닛을 배치해 컴퓨터의 끊임없는 러시 공격을 막아내야 하며, 방어망을 구축하지 못하고 허술한 부분이 있다면 곧바로 게임이 끝날 정도로 난이도가 높다. 내부 설명에서 언급된 ‘Total Control’이 뜻하듯, 컴퓨터는 무작위가 아닌 특정 전략을 따라 플레이하기 때문에 예측 가능한 패턴을 분석하는 능력이 중요하다. 또한, 맵의 배경은 사막 타일셋으로 구성되어 있으며, 넓은 평지에 기지나 방어 건물을 배치할 수 있는 공간이 확보되어 있다. 플레이어들은 초반부터 신속한 자원 수급과 방어 건물 설치가 필수적이며, 컴퓨터의 다양한 유닛 조합에 대응하기 위해 유연한 전략을 수립해야 한다. 초보 플레이어의 경우 컴퓨터의 패턴을 익히는 데 시간이 걸릴 수 있지만, 7명의 협동 플레이를 통해 점차 안정적인 방어망을 구축할 수 있다. 이 맵은 특히 팀워크와 전략적 사고가 요구되는 만큼, 단체 활동이나 친목 모임에서 즐기기에 알맞은 선택이다. 플레이 전에는 방어 건물의 위치와 자원 분배에 대한 충분한 논의가 필요하며, 컴퓨터의 공격 타이밍과 유닛 구성을 미리 확인하는 것이 성공의 열쇠가 된다. This user-made map, ‘7vs1 HARD COMP TC’, falls under the popular defense genre in StarCraft: Brood War, where eight players—seven human opponents and one AI—engage in a high-stakes battle against a relentless computer opponent. The seven players must collaborate to build and fortify their bases with turrets, defensive structures, and combat units to withstand the AI's aggressive rush tactics. Failure to establish a solid defense early on will result in swift defeat, as the AI’s strategy is anything but random. The ‘Total Control’ mentioned in the map’s internal description suggests that the AI follows a predetermined yet challenging set of tactics, making pattern recognition and strategic adaptation crucial for survival. Set against a desert-themed tile layout, the map offers ample space for base expansion and defensive positioning, though resource management and quick decision-making remain critical. Newer players may struggle initially to counter the AI’s diverse unit compositions, but teamwork and shared learning significantly improve their chances. The map is ideal for group sessions or casual gatherings where coordination and tactical planning are valued. Prior to starting, players should discuss optimal base placement, resource allocation, and defensive priorities to ensure a balanced and resilient strategy against the AI’s onslaught.
7vs1 하드 컴퓨터 (7vs1 hard computer)
스타크래프트: 브루드워의 유즈맵 중에서도 손꼽히는 난이도와 긴장감을 자랑하는 <7vs1 hard computer>는 7명의 플레이어가 한 명의 적 컴퓨터를 상대로 방어전을 펼치는 디펜스 장르의 클래식 맵이다. 맵의 특징은 무엇보다도 '하드' 난이도로 설정된 컴퓨터의 공격성으로, 플레이어들은 초반부터 끊임없이 밀려오는 적 공세를 efficiently 방어해야 한다. 맵은 사막 타일셋으로 구성되어 있으며, 넓은 개활지가 펼쳐져 있어 자원 확보와 방어선 구축이 필수적이다. 내부 설명에서도 강조하듯, '빌드 디펜스를 빠르게 구축하지 않으면 순식간에 무너진다'는 점에서 플레이어의 판단력과 손속이 가장 중요하다. 주요 전략 포인트는 중앙 멀티 지역을 확보하고 입구 방어선을 튼튼히 구축하는 것이며, 컴퓨터는 끊임없이 러시와 대규모 공격을 시도하므로 자원 관리와 유닛 생산 타이밍이 승부를 가른다. 초보 플레이어보다는 중급 이상의 테란, 프로토스, 저그 유저들에게 추천되며, 특히 빠른 판단력과 팀워크가 요구되는 맵으로, 한 명의 실수로도 전세가 뒤집힐 수 있는 긴박한 전투가 특징이다. 방어선이 약해지는 순간을 노려 컴퓨터가 대규모 공격을 펼치므로, 항상 자원 여유를 유지하고 방어 건물을 보강하는 것이 관건이다. 또한, 7명의 플레이어가 하나의 목표를 공유하는 만큼, 각 플레이어의 역할 분담이 명확해야 한다. 예를 들어, 일부는 방어선 유지에 집중하고, 일부는 자원 수집과 유닛 생산을 담당하는 등 역할 분담이 중요하다. 맵의 긴장감과 난이도는 브루드워 유즈맵의 정점을 찍는 수준으로, 한 번의 실수가 모든 것을 좌우할 수 있는 짜릿한 경험을 제공한다. 이 맵을 공략하기 위해서는 컴퓨터의 공격 패턴을 숙지하고, 방어 건물과 유닛 조합을 최적화하는 것이 필수다. 특히, 컴퓨터의 러시 타이밍을 예측하고 사전에 대비하는 것이 관건으로, 이를 위해서는 반복적인 플레이와 전략 수정이 요구된다. 맵의 난이도와 긴장감 덕분에 숙련자들 사이에서 인기가 높으며, 브루드워 유즈맵의 대표적인 디펜스 장르로 자리매김하고 있다. 플레이 전에는 자신의 종족에 맞는 방어 빌드를 숙지하고, 팀원과의 협력 플레이를 연습하는 것이 중요하다. 또한, 컴퓨터의 공격 패턴을 분석하여 방어선을 보강하는 것이 승리의 열쇠가 될 것이다. Among the many user-made maps in StarCraft: Brood War, <7vs1 Hard Computer> stands out for its intense difficulty and high tension. In this classic defense-style map, seven players must work together to fend off a single enemy AI in a challenging battle. What sets this map apart is the AI's aggressive difficulty setting—players must efficiently defend against relentless enemy assaults from the very beginning. The map features a desert tileset with vast open areas, making resource gathering and establishing a strong defensive line essential. As emphasized in the map's description, failing to quickly build a defensive build order can lead to a swift defeat, making quick decision-making and precise execution critical. Key strategic points include securing the central expansion area and reinforcing the main entrance with a sturdy defensive line. Since the AI constantly launches rushes and large-scale attacks, resource management and timely unit production are crucial to victory. This map is recommended for intermediate to advanced players of Terran, Protoss, and Zerg, requiring sharp judgment and teamwork. A single mistake can shift the tide of battle, so the tension remains high throughout. The AI exploits any weakness in the defense by launching massive attacks, so maintaining resource reserves and reinforcing defensive structures is vital. With seven players sharing one objective, clear role distribution is essential—some must focus on holding the line while others gather resources and produce units. The map's difficulty and tension reach the pinnacle of Brood War custom maps, offering an exhilarating experience where one mistake can decide everything. To master this map, players must study the AI's attack patterns, optimize their defensive structures and unit compositions, and predict rush timings to prepare in advance. This requires repeated play and strategic adjustments. Due to its high difficulty and thrilling gameplay, it remains a favorite among experienced players and is considered a quintessential defense-style map in Brood War custom games. Before playing, it's important to familiarize yourself with your race's defensive build, practice team coordination, and analyze the AI's attack patterns to reinforce your defenses—these elements are the key to victory.
최근 등록된 맵
새로 추가된 파일과 버전을 확인하세요.
미로 디펜스 2.1 (Maze Defense 2.1)
스타크래프트 브루드워의 디펜스 장르 유즈맵인 〈Maze Defense 2.1〉은 적의 끊임없는 러시로부터 중앙 기지나 핵심 건물을 보호하는 것이 목표인 맵입니다. 사막 타일셋을 활용한 넓은 맵 공간에서 플레이어는 미로와 같은 길목에 방어 건물을 배치하고 전략적으로 적을 상대해야 합니다. 맵 중앙에 위치한 목표 지점을 중심으로 사방에서 몰려오는 적 유닛들을 efficiently 막아내야 하며, 특히 좁은 통로와 우회로를 활용한 방어 라인을 구축하는 것이 관건입니다. 맵의 구조상 길목이 복잡하게 구성되어 있어 초보 플레이어는 적의 공격을 효과적으로 차단하기 어려울 수 있지만, 방어 건물의 배치와 업그레이드 타이밍을 잘 조절하면 충분히 극복할 수 있습니다. 또한, 적의 러시 루트가 예측 가능한 패턴을 띄고 있어 반복 플레이를 통해 방어 전략을 다듬을 수 있습니다. 추천 대상은 디펜스 장르를 좋아하는 플레이어이며, 특히 중앙 기지 방어에 중점을 둔 전략적 플레이를 즐기는 유저들에게 적합합니다. 플레이 전 맵의 주요 통로와 우회로, 그리고 적 러시 루트를 미리 파악해 두는 것이 중요합니다. 또한, 방어 건물의 종류와 업그레이드 우선순위를 숙지하여 효율적인 방어 라인을 구축할 수 있도록 준비하세요. 맵의 난이도는 보통 수준으로, 초반 방어 라인을 잘 구축하면 후반부에서도 안정적으로 게임을 끌고 나갈 수 있습니다. 다양한 방어 건물과 업그레이드 옵션을 활용해 자신에게 맞는 전략을 세워보세요. 이 맵은 디펜스 장르의 기본기와 전략적 사고력을 키우는 데 좋은 연습이 될 것입니다. 특히, 미로와 같은 맵 구조는 공간 인식 능력을 키우는 데 도움이 되며, 적의 패턴을 읽는 데에도 도움이 됩니다. 반복 플레이를 통해 점차 맵에 익숙해지고, 자신의 방어 전략을 다듬어 나가보세요. 이 맵은 디펜스 장르의 매력을 느낄 수 있는 좋은 기회가 될 것입니다. Enjoy the game! Maze Defense 2.1 is a defense-style custom map for StarCraft: Brood War, where the objective is to protect a central base or key structure from relentless enemy rushes. Set against a desert tileset, the map features a wide play area with maze-like pathways where players must strategically place defensive structures to fend off incoming enemy units. The core challenge lies in constructing an effective defense line around the central target area, leveraging narrow choke points and side routes to maximize efficiency. While the complex layout may pose difficulties for beginners, experienced players can refine their strategies by mastering building placement and upgrade timing. The enemy rush patterns appear predictable, allowing players to adapt and improve with repeated gameplay. This map is ideal for fans of the defense genre, particularly those who enjoy strategic base defense mechanics. Before playing, it's crucial to familiarize yourself with the map's key pathways, side routes, and enemy rush approaches. Understanding the types of defensive structures available and their upgrade priorities will help you build a robust defense line. With a moderate difficulty level, a well-constructed early defense can carry you through to the later stages of the game. Experiment with different defensive buildings and upgrade paths to develop a strategy that suits your playstyle. This map serves as excellent practice for refining spatial awareness and pattern recognition—key skills in the defense genre. Repeated play will help you grow accustomed to the layout, allowing you to fine-tune your defensive tactics over time. Maze Defense 2.1 offers a compelling way to experience the depth and strategy of defense maps in StarCraft: Brood War.
7vs1 하드 컴퓨터 (7vs1 Hard Computer)
스타크래프트 브루드워의 7vs1 디펜스 유즈맵인 〈7vs1 Hard Computer〉는 7명의 플레이어가 단 한 명의 '매우 어려운' 컴퓨터를 상대로 방어전을 펼치는 것이 핵심이다. 내부 맵 설명에서도 강조하듯, 컴퓨터는 '러시'를 감행할 것이므로 방어 시설을 신속하게 건설하지 않으면 순식간에 전멸당할 위험이 있다. 맵은 사막 타일셋으로 구성되어 있으며, 중앙에 위치한 플레이어 기지 주변으로는 넓은 개활지가 펼쳐져 있다. 이 공간은 컴퓨터의 공격 루트로 예상되며, 플레이어들은 초기 자원만으로 빠르게 방어 건물을 세워야 한다. 맵의 특징은 바로 '1 vs 7'의 극한 대결 구조로, 컴퓨터의 공격 패턴이 무작위성이 강하다는 점이다. 따라서 플레이어들은 방어 전략을 유연하게 변경해야 하며, 자원 관리와 테크 트리 최적화도 중요하다. 초보자에게는 다소 난이도가 높을 수 있지만, 협동이 필수적인 만큼 팀워크가 빛을 발하는 맵이기도 하다. 방어에 성공한 후에는 컴퓨터의 본진 공격으로 승리를 노릴 수 있지만, 그 전에 컴퓨터의 러시 시도를 저지하는 것이 관건이다. 이 맵은 '컴퓨터 상대 디펜스' 장르의 정수를 느낄 수 있게 해주며, 특히 방어형 플레이어에게는 흥미로운 도전 과제가 될 것이다. 다만, 컴퓨터의 공격 패턴이 예측 불가능하다는 점과 초기 방어 시설 건설의 중요성이 매우 크기 때문에, 미리 게임에 익숙해질 필요가 있다. 추천 대상은 방어 전략을 즐기는 유저나 팀플레이를 선호하는 스크래프트 유저들이다. 플레이 전에는 맵의 주요 공격 루트를 미리 확인하고, 초반 자원 배분을 신중히 계획해야 한다. 또한, 컴퓨터의 공격 타이밍을 예측하기 위해 여러 번 플레이해보는 것도 좋다. 7vs1 Hard Computer is a 7vs1 defense custom map in StarCraft: Brood War where seven players must defend against a single, 'very hard' AI opponent. As the internal description warns, the AI will aggressively rush, making rapid base expansion and defensive structures essential to survival. The map features a desert tileset with a central player base surrounded by open terrain, likely the primary path for AI attacks. The core challenge lies in the asymmetrical 1 vs 7 setup, where the AI's random attack patterns demand flexible defensive strategies, resource management, and efficient tech progression. While the learning curve may be steep for beginners, the map shines in cooperative play, rewarding teamwork and adaptability. Victory is secured by repelling AI waves and ultimately assaulting its main base, but the key lies in surviving the early-game rush. This map encapsulates the essence of 'computer vs player defense' gameplay, appealing to those who enjoy strategic planning and team-based challenges. Players should familiarize themselves with the map's attack routes, optimize early resource allocation, and practice predicting AI rush timings to improve their chances of success. Recommended for defense-focused players or teams who thrive on collaborative strategy sessions.
7vs1 HARD COMP TC
스타크래프트 브루드워의 대표적인 유즈맵 장르 중 하나로 자리잡은 ‘7vs1 HARD COMP TC’는 총 8명의 플레이어가 한 명의 강력한 컴퓨터를 상대로 방어전을 펼치는 디펜스 형식의 맵이다. 7명의 플레이어는 각각의 기지에 터렛이나 방어 건물, 유닛을 배치해 컴퓨터의 끊임없는 러시 공격을 막아내야 하며, 방어망을 구축하지 못하고 허술한 부분이 있다면 곧바로 게임이 끝날 정도로 난이도가 높다. 내부 설명에서 언급된 ‘Total Control’이 뜻하듯, 컴퓨터는 무작위가 아닌 특정 전략을 따라 플레이하기 때문에 예측 가능한 패턴을 분석하는 능력이 중요하다. 또한, 맵의 배경은 사막 타일셋으로 구성되어 있으며, 넓은 평지에 기지나 방어 건물을 배치할 수 있는 공간이 확보되어 있다. 플레이어들은 초반부터 신속한 자원 수급과 방어 건물 설치가 필수적이며, 컴퓨터의 다양한 유닛 조합에 대응하기 위해 유연한 전략을 수립해야 한다. 초보 플레이어의 경우 컴퓨터의 패턴을 익히는 데 시간이 걸릴 수 있지만, 7명의 협동 플레이를 통해 점차 안정적인 방어망을 구축할 수 있다. 이 맵은 특히 팀워크와 전략적 사고가 요구되는 만큼, 단체 활동이나 친목 모임에서 즐기기에 알맞은 선택이다. 플레이 전에는 방어 건물의 위치와 자원 분배에 대한 충분한 논의가 필요하며, 컴퓨터의 공격 타이밍과 유닛 구성을 미리 확인하는 것이 성공의 열쇠가 된다. This user-made map, ‘7vs1 HARD COMP TC’, falls under the popular defense genre in StarCraft: Brood War, where eight players—seven human opponents and one AI—engage in a high-stakes battle against a relentless computer opponent. The seven players must collaborate to build and fortify their bases with turrets, defensive structures, and combat units to withstand the AI's aggressive rush tactics. Failure to establish a solid defense early on will result in swift defeat, as the AI’s strategy is anything but random. The ‘Total Control’ mentioned in the map’s internal description suggests that the AI follows a predetermined yet challenging set of tactics, making pattern recognition and strategic adaptation crucial for survival. Set against a desert-themed tile layout, the map offers ample space for base expansion and defensive positioning, though resource management and quick decision-making remain critical. Newer players may struggle initially to counter the AI’s diverse unit compositions, but teamwork and shared learning significantly improve their chances. The map is ideal for group sessions or casual gatherings where coordination and tactical planning are valued. Prior to starting, players should discuss optimal base placement, resource allocation, and defensive priorities to ensure a balanced and resilient strategy against the AI’s onslaught.
7vs1 하드 컴퓨터 (7vs1 Hard Computer)
스타크래프트 브루드워의 <7vs1 hard computer>는 7명의 플레이어가 한 명의 매우 강력한 컴퓨터를 상대하는 디펜스형 유즈맵으로, 방어 건물을 빠르게 구축하지 않으면 순식간에 전멸할 수 있는 긴장감 넘치는 구조가 특징이다. 사막 타일셋의 넓은 맵에서 시작하는 플레이어들은 중앙 지역을 중심으로 병력을 생산해Computer의 끊임없는 러시를 방어해야 한다. 컴퓨터는 초반부터 강력한 유닛들을 끊임없이 보내며, 이를 막기 위해 플레이어는 입구에 요새를 건설하거나, 방어 건물을 배치하는 등 전략적인 대비를 요구받는다. 맵의 핵심은 '빠르고 튼튼한 방어'에 있으며, 개개인의 반응 속도와 조합 정비가 승부를 가르는 요소로 보인다. 초보자에게는 다소 어려운 난이도를 자랑하지만, 팀원과의 Effective한 협력이 성공의 열쇠가 될 것으로 추정된다. 방어에 성공한 후에는 반격의 기회를 노릴 수도 있지만, 기본적으로는Computer의 공격을 버텨내는 '생존'에 중점을 둔 디자인이다. 맵의 분위기는 사막의 황량한 배경과 어우러져 긴장감을 한층 더해주며, 플레이어는 끊임없이 밀려오는 적의 물량을 상대해야 하는 짜릿함을 느낄 수 있다. 특히Computer의 공격 패턴이 예측 가능한 부분도 있지만, 초반 세팅을 잘못하면 순식간에 무너질 수 있어 신중한 플레이가 요구된다. 7인의 플레이어가 모두 살아남기 위해선 개개인의 판단력이 무엇보다 중요하며, 이는 마치 '7명이 한 명의 보스를 상대하는 보스 러시'와 같은 재미를 선사한다. 방어에 성공한다면 큰 성취감을 느낄 수 있지만, 한번 무너지면 그대로 게임이 끝나는 만큼 긴장감과 몰입도가 높은 편이다. StarCraft: Brood War’s *7 vs. 1 Hard Computer* is a defense-focused custom map where seven players face off against a single, overwhelmingly powerful AI opponent. The map’s structure is tense and unforgiving—if players fail to quickly establish defenses, they risk being wiped out in no time. Set on a vast desert tileset, the match begins with players positioned around the central area, where they must produce units and fend off the AI’s relentless waves of assaults. From the very start, the AI sends out strong units in rapid succession, forcing players to strategize—building fortresses at key entrances or positioning defensive structures—to hold the line. The core of the map lies in *fast, sturdy defense*, with individual reaction speed and unit coordination often determining the outcome. While the difficulty may be steep for newcomers, effective teamwork appears to be the key to success. After surviving the initial onslaught, players may find opportunities to counterattack, but the map’s design fundamentally prioritizes *survival* against the AI’s relentless pressure. The atmosphere, enhanced by the barren desert backdrop, amplifies the tension, immersing players in the thrill of constantly battling overwhelming enemy numbers. Though the AI’s attack patterns are somewhat predictable, a poor early setup can lead to an instant collapse, demanding careful, strategic play. For all seven players to survive, individual decision-making is crucial—making the experience akin to a "boss rush" where seven players take on a single, formidable foe. While victory brings a strong sense of accomplishment, the map’s high stakes mean that a single mistake can end the game abruptly, ensuring a gripping, high-intensity experience.
7vs1 hard ME
‘7vs1 하드 ME’는 7명의 플레이어가 하나의 강력한 컴퓨터를 상대로 방어전을 벌이는 전형적인 컴까기 맵입니다. 사막 타일셋의 128×128 타일 맵에서 7명의 플레이어는 초반부터 몰아치는 컴퓨터의 러시를 막기 위해 입구 막기와 타워 건설, 유닛 생산을 병행해야 합니다. 설명에 ‘I will rush so build a defence quick or you will die’라는 문구가 있듯, 컴퓨터는 게임 초반부터 강력하고 지속적인 러시를 감행하므로 초반 빌드 오더와 입구 막기 타이밍이 승패를 가릅니다. 8인용 맵이지만 7:1 팀 구성이므로 팀원은 7명, 컴퓨터는 단독으로 운영되며 난이도는 ‘매우 어려움’에 가깝습니다. 자원이 풍부한 ME(머니 익스팬드) 타입으로 추정되어 자원 걱정보다는 병력 컨트롤과 방어 라인 유지가 핵심입니다. 추천 인원은 8명(7인+컴 1), 팀 수는 2팀(7:1), 예상 플레이는 30분 내외, 난이도는 ‘매우 어려움’입니다. 입구 막기 타이밍, 타워 배치, 병력 컨트롤이 핵심이며, 협동심이 중요한 맵입니다. 입문자보다는 숙련자 협동 플레이에 적합합니다. ‘7vs1 Hard ME’ is a classic comp stomp map where seven players defend against a single powerful computer. On a 128×128 desert tileset, the seven players must block the entrance, build towers, and produce units from the early game to stop the computer's relentless rush. As the description warns, ‘I will rush so build a defence quick or you will die,’ the computer launches a strong, continuous rush from the early game, making early build order and entrance blocking timing decisive. Although it is an 8‑player map, the 7‑vs‑1 team setup means seven humans share one team while the computer plays alone, and the difficulty is close to ‘Very Hard.’ The map appears to be a Money Expand (ME) type with abundant resources, so the focus is on unit control and maintaining the defense line rather than resource management. Recommended for 8 players (7 humans + 1 computer), two teams (7:1), about 30 minutes playtime, and ‘Very Hard’ difficulty. Key elements are entrance blocking timing, tower placement, and unit control; teamwork is essential. This map is suited for experienced players who enjoy cooperative defense rather than beginners.
7vs1 하드 컴퓨터 (7vs1 Hard Computer)
스타크래프트 브루드워 유즈맵 ‘7vs1 hard computer’는 한 명의 플레이어가 매우 강력한 컴퓨터와 맞서는 디펜스 장르의 재미있는 게임입니다. 맵 제목 그대로 7명의 플레이어가 한 팀을 이루어 극악의 난이도를 자랑하는 AI를 상대해야 하는데, 컴퓨터는 무지막지한 러시력으로 공격해오기 때문에 방어 건물과 병력을 신속히 건설하고 배치하는 전략이 무엇보다 중요합니다. 맵은 사막 타일셋을 기반으로 구성되어 있으며, 넓은 평야와 구릉 지형이 펼쳐져 있어 시야 확보와 병력 이동의 효율성이 관건이 됩니다. 특히 컴퓨터의 공격을 방어하기 위한 건물을 어디에, 어떻게 배치할지가 승부의 갈림길이 될 것입니다. 이 맵의 핵심은 방어와 자원 관리에 있습니다. 플레이어들은 초반부터 재빨리 미네랄과 가스를 확보한 뒤, 방어 건물인 벙커, 터렛, 포톤 캐논 등을 배치하여 컴퓨터의 공격을 막아내야 합니다. 또한, 공격과 방어 양면을 고려한 병력 조합과 업그레이드도 필수적입니다. 컴퓨터는 초반부터 강력한 유닛들을 끊임없이 보내기 때문에, 방심하거나 자원 관리가 미숙하면 순식간에 밀리게 됩니다. 맵의 난이도가 ‘하드(hard)’로 표기되어 있듯이, 초보자들은 경험이 쌓이기 전까지는 어려움을 느낄 수 있으며, 보통 이상의 실력을 지닌 플레이어들에게 적합한 맵입니다. 7명이서 팀을 이루어 협동하는 재미도 considerable하며, 한 명의 실수가 팀 전체의 패배로 이어질 수 있어 긴장감과 전략적 깊이가 돋보입니다. 이 맵을 플레이하기 전에는 팀원 간의 원활한 소통과 역할 분배가 무엇보다 중요하다는 점을 꼭 염두에 두어야 합니다. 각 플레이어가 맡은 구역의 방어와 자원 채취를 책임지는 동시에, 필요 시에는 전장 합류를 위한 이동 경로도 신중히 계획해야 합니다. 또한, 컴퓨터의 공격 패턴을 예측하고 대응하는 연습을 꾸준히 해야 실력이 향상될 수 있습니다. 이 맵은 단순히 방어만을 목표로 하는 것이 아니라, 팀워크와 전략적 사고를 동시에 요구하는 점이 매력적으로 다가옵니다. 만약 디펜스 장르를 좋아하는 플레이어라면, 이 맵이 제공하는 긴장감과 성취감을 충분히 느낄 수 있을 것입니다. StarCraft: Brood War custom map "7vs1 Hard Computer" is a fun defense-style game where one player faces off against an extremely powerful AI. As the title suggests, seven players team up to battle an AI with brutal difficulty, as the computer launches relentless rushes, making quick construction and strategic placement of defensive buildings and forces essential. The map is set on a desert tileset, featuring vast plains and hilly terrain, where securing vision and efficient troop movement are key. Deciding where and how to place defensive structures to counter the AI’s attacks often determines victory or defeat. The core of this map lies in defense and resource management. Players must secure minerals and gas early, then deploy defensive structures like bunkers, turrets, and photon cannons to fend off the AI’s assaults. Balancing offensive and defensive unit compositions and upgrades is also crucial. Since the AI continuously sends powerful units from the start, carelessness or poor resource management can lead to a swift defeat. Labeled as "hard," this map can be challenging for beginners until they gain experience, making it best suited for players with above-average skill. The cooperative aspect of teaming up with six others adds considerable depth, and a single mistake can doom the entire team, heightening tension and strategic complexity. Before playing, prioritize clear communication and role distribution among teammates. Each player must defend their assigned zone, gather resources, and plan efficient paths to reinforce other areas when needed. Regular practice in predicting and countering the AI’s attack patterns is vital for improvement. This map isn’t just about defense—it demands teamwork and strategic thinking, which makes it appealing. If you enjoy defense-style games, this map delivers the thrill and satisfaction that fans of the genre crave.
7vs1 하드 컴퓨터 (7vs1 Hard Computer)
스타크래프트 브루드워의 classic 디펜스 유즈맵으로, 7명의 플레이어가 한 명의 컴퓨터를 상대하는 ‘7vs1 하드 컴퓨터’ 맵은 시작부터 긴장감을 조성합니다. 맵은 사막 타일셋으로 구성되어 있으며, 중앙에 위치한 플레이어 기지 주위에 7명의 플레이어가 각각의 출발 지점에서 시작합니다. 컴퓨터는 ‘매우 어려움’ 난이도로 설정되어 있으며, 초반부터 강력한 러시를 감행합니다. 방어塔를 빠르게 건설하지 못한다면 순식간에 기지가 무너질 수 있어, 플레이어들은 전략적인 타워 배치와 자원 관리를 동시에 신경 써야 합니다. 맵의 특징은 컴퓨터의 공격 패턴이 예측 불가능하다는 점으로, 플레이어들은 끊임없이 변하는 상황에 대응하며 방어선을 구축해야 합니다. 또한, 맵의 중앙 지형이 비교적 평탄한 편이지만, 곳곳에 언덕과 협곡이 있어 시야 확보와 공격 루트를 제한하는 요소로 작용합니다. 초보자보다는 경험이 있는 플레이어에게 적합한 맵으로, 타워를 효율적으로 배치하고 자원을 절약하는 능력이 요구됩니다. 맵의 난이도 때문에 한 번의 실수로도 패배로 이어질 수 있어, 플레이어들은 신중한 판단과 빠른 대처가 중요합니다. 이 맵은 디펜스 장르의 классик한 재미와 긴장감을 동시에 제공하며, 특히 여럿이서 즐기는 협동 플레이에서 큰 재미를 느낄 수 있습니다. 다만, 컴퓨터의 공격력이 워낙 강해 방어塔의 종류와 배치에 따라 난이도가 크게 달라질 수 있으니, 사전에 다양한 전략을 준비하는 것이 좋습니다. 또한, 맵의 중앙에 위치한 자원 지대 주변은 치열한 전투가 벌어지는 핵심 지역으로, 이곳을 확보하지 못하면 자원 부족으로 인해 타워를 충분히 건설하지 못할 가능성이 높습니다. 플레이어들은 각자의 출발지에서 자원을 채취하며, 중앙 자원 지역으로 진출하는 타이밍을 잘 조절해야 합니다. 이 맵의 가장 큰 매력은 바로 ‘불확실성’입니다. 컴퓨터의 공격 패턴이 랜덤에 가깝기 때문에, 플레이어들은 매 게임마다 새로운 전략을 고민해야 하며, 이는 게임의 재-playability를 크게 높입니다. 또한, 7명의 플레이어가 협동하여 방어선을 구축하는 과정에서 자연스럽게 팀워크가 형성되며, 이는 이 맵의 또 다른 즐거움 중 하나입니다. 마지막으로, 맵의 밸런스는 컴퓨터의 공격력이 강할수록 플레이어들의 방어 능력도 그만큼 중요해지며, 이는 디펜스 장르의 핵심을 잘 담아내고 있습니다. 이 맵을 플레이하기 전에는 반드시 타워의 종류와 배치에 대한 기본적인 이해가 필요하며, 컴퓨터의 공격 패턴에 대한 사전 조사를 통해 전략을 수립하는 것이 좋습니다. 또한, 자원 관리를 소홀히 하지 않으면서도, 중앙 자원 지역을 차지하기 위한 경쟁에서 우위를 점하는 것이 승리의 열쇠가 될 수 있습니다. A classic StarCraft: Brood War defense custom map where seven players face off against a single AI in a "7 vs 1 Hard AI" battle, the tension starts the moment the game begins. The map features a desert tileset, with each of the seven players starting at their own spawn points surrounding the central player base. The AI is set to "Very Hard" difficulty and launches aggressive rushes from the outset, meaning any delay in building defensive towers could lead to your base crumbling in an instant. Players must balance strategic tower placement with resource management to survive. One of the map’s defining traits is the AI’s unpredictable attack patterns, forcing players to constantly adapt and reinforce their defenses in response to ever-changing threats. While the central terrain is relatively flat, scattered hills and ravines restrict visibility and limit attack routes, adding another layer of challenge. This map is better suited for experienced players rather than beginners, as it demands efficient tower placement and economical use of resources. A single mistake can spell defeat due to the map’s punishing difficulty, so careful decision-making and quick reactions are essential. The map delivers classic defense-style fun and tension, especially when played cooperatively with a group, as teamwork becomes a key factor in holding the line. However, the AI’s overwhelming strength means the choice of towers and their placement drastically alters the difficulty, so preparing multiple strategies in advance is highly recommended. The area around the central resource zone is a hotly contested battleground, and failing to secure it risks resource shortages that could prevent you from building enough towers. Players gather resources from their starting positions and must time their expansion into the central zone carefully. What truly sets this map apart is its unpredictability—the AI’s attack patterns are nearly random, forcing players to rethink their strategies every match and greatly enhancing replayability. As the seven players collaborate to fortify their defenses, teamwork naturally develops, adding another layer of enjoyment. Ultimately, the map excels at capturing the essence of the defense genre by making the AI’s overwhelming power the very reason why strong defensive play becomes so crucial. Before jumping in, make sure you understand the different tower types and how to place them effectively, and study the AI’s attack patterns to build a solid strategy. Managing resources wisely while competing for control of the central zone could very well be the key to victory.
7vs1 하드 컴퓨터 (7vs1 hard computer)
스타크래프트: 브루드워의 유즈맵 중에서도 손꼽히는 난이도와 긴장감을 자랑하는 <7vs1 hard computer>는 7명의 플레이어가 한 명의 적 컴퓨터를 상대로 방어전을 펼치는 디펜스 장르의 클래식 맵이다. 맵의 특징은 무엇보다도 '하드' 난이도로 설정된 컴퓨터의 공격성으로, 플레이어들은 초반부터 끊임없이 밀려오는 적 공세를 efficiently 방어해야 한다. 맵은 사막 타일셋으로 구성되어 있으며, 넓은 개활지가 펼쳐져 있어 자원 확보와 방어선 구축이 필수적이다. 내부 설명에서도 강조하듯, '빌드 디펜스를 빠르게 구축하지 않으면 순식간에 무너진다'는 점에서 플레이어의 판단력과 손속이 가장 중요하다. 주요 전략 포인트는 중앙 멀티 지역을 확보하고 입구 방어선을 튼튼히 구축하는 것이며, 컴퓨터는 끊임없이 러시와 대규모 공격을 시도하므로 자원 관리와 유닛 생산 타이밍이 승부를 가른다. 초보 플레이어보다는 중급 이상의 테란, 프로토스, 저그 유저들에게 추천되며, 특히 빠른 판단력과 팀워크가 요구되는 맵으로, 한 명의 실수로도 전세가 뒤집힐 수 있는 긴박한 전투가 특징이다. 방어선이 약해지는 순간을 노려 컴퓨터가 대규모 공격을 펼치므로, 항상 자원 여유를 유지하고 방어 건물을 보강하는 것이 관건이다. 또한, 7명의 플레이어가 하나의 목표를 공유하는 만큼, 각 플레이어의 역할 분담이 명확해야 한다. 예를 들어, 일부는 방어선 유지에 집중하고, 일부는 자원 수집과 유닛 생산을 담당하는 등 역할 분담이 중요하다. 맵의 긴장감과 난이도는 브루드워 유즈맵의 정점을 찍는 수준으로, 한 번의 실수가 모든 것을 좌우할 수 있는 짜릿한 경험을 제공한다. 이 맵을 공략하기 위해서는 컴퓨터의 공격 패턴을 숙지하고, 방어 건물과 유닛 조합을 최적화하는 것이 필수다. 특히, 컴퓨터의 러시 타이밍을 예측하고 사전에 대비하는 것이 관건으로, 이를 위해서는 반복적인 플레이와 전략 수정이 요구된다. 맵의 난이도와 긴장감 덕분에 숙련자들 사이에서 인기가 높으며, 브루드워 유즈맵의 대표적인 디펜스 장르로 자리매김하고 있다. 플레이 전에는 자신의 종족에 맞는 방어 빌드를 숙지하고, 팀원과의 협력 플레이를 연습하는 것이 중요하다. 또한, 컴퓨터의 공격 패턴을 분석하여 방어선을 보강하는 것이 승리의 열쇠가 될 것이다. Among the many user-made maps in StarCraft: Brood War, <7vs1 Hard Computer> stands out for its intense difficulty and high tension. In this classic defense-style map, seven players must work together to fend off a single enemy AI in a challenging battle. What sets this map apart is the AI's aggressive difficulty setting—players must efficiently defend against relentless enemy assaults from the very beginning. The map features a desert tileset with vast open areas, making resource gathering and establishing a strong defensive line essential. As emphasized in the map's description, failing to quickly build a defensive build order can lead to a swift defeat, making quick decision-making and precise execution critical. Key strategic points include securing the central expansion area and reinforcing the main entrance with a sturdy defensive line. Since the AI constantly launches rushes and large-scale attacks, resource management and timely unit production are crucial to victory. This map is recommended for intermediate to advanced players of Terran, Protoss, and Zerg, requiring sharp judgment and teamwork. A single mistake can shift the tide of battle, so the tension remains high throughout. The AI exploits any weakness in the defense by launching massive attacks, so maintaining resource reserves and reinforcing defensive structures is vital. With seven players sharing one objective, clear role distribution is essential—some must focus on holding the line while others gather resources and produce units. The map's difficulty and tension reach the pinnacle of Brood War custom maps, offering an exhilarating experience where one mistake can decide everything. To master this map, players must study the AI's attack patterns, optimize their defensive structures and unit compositions, and predict rush timings to prepare in advance. This requires repeated play and strategic adjustments. Due to its high difficulty and thrilling gameplay, it remains a favorite among experienced players and is considered a quintessential defense-style map in Brood War custom games. Before playing, it's important to familiarize yourself with your race's defensive build, practice team coordination, and analyze the AI's attack patterns to reinforce your defenses—these elements are the key to victory.
맵 선택 가이드
태그는 맵의 핵심 특징을 빠르게 설명하지만 제작 버전마다 규칙이 다를 수 있습니다. 상세 설명에서 권장 인원, 난이도, 플레이 시간과 버전을 함께 확인한 뒤 다운로드하세요.