
러시 스타크래프트 맵 모음
'러시' 태그가 등록된 맵을 모았습니다. 장르 하나로 찾기 어려운 플레이 방식, 난이도와 특징을 중심으로 인기 맵과 최신 맵을 비교해 보세요.
- 등록 맵
- 13개
- 누적 다운로드
- 0
- 누적 조회
- 431
인기 맵
다운로드와 조회 반응이 높은 맵입니다.
7vs1 HARD PROTOSS MASS
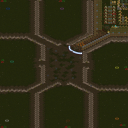
7vs1 HARD PROTOSS MASS는 스타크래프트 브루드워 유즈맵으로, 7명의 플레이어가 단일 컴퓨터 상대를 방어하는 디펜스 기반의 맵입니다. 고난도 컴퓨터의 러쉬 공격을 막기 위해 빠른 방어 전략과 자원 관리가 핵심이며, 맵 중앙 부근에 복잡한 경로와 방어 포인트가 구성되어 있습니다. 플레이어는 컴퓨터의 공격을 지속적으로 방어하며 자원을 축적하고 유닛을 배치하는 전략적 플레이가 필요합니다. 특히, 컴퓨터의 유닛이 밀리(밀려오는) 공격을 자주 가하므로, 밀리 방지 전략이 중요합니다. 맵 구조는 4096x4096 해상도, 사막 타일셋을 사용하며, 복잡한 방어 경로와 유닛 배치 공간이 제공됩니다. 추천 플레이 인원은 7명으로, 혼자서는 어려움이 크지만 팀플레이를 통한 협력 전략이 강조됩니다. 맵은 고난도 컴퓨터 상대와의 전투를 중심으로 구성되어 있어, 방어 전략과 빠른 대응력을 요구하는 경험을 제공합니다. 초보자보다는 어느 정도 전략적 사고가 필요한 맵으로, 디펜스 장르에 속하며 밀리 방지 요소가 돋보입니다. 7vs1 HARD PROTOSS MASS is a StarCraft Brood War custom map where seven players defend against a single computer opponent. To withstand the high-difficulty computer's rush attacks, rapid defense strategies and resource management are crucial. The map features complex pathways and defensive positions near the center. Players must continuously defend against attacks while accumulating resources and strategically deploying units. Since the computer frequently launches melee (swarm) attacks, countering these is essential. The map uses a 4096x4096 resolution with a desert tileset, offering intricate defensive routes and space for unit placement. Recommended for seven players, solo play is challenging, emphasizing teamwork and cooperative strategies. Focused on battles against a high-difficulty computer, the map demands strong defensive tactics and quick reaction times, making it suitable for players with strategic thinking rather than beginners, particularly in the defense genre where melee attack prevention is a key highlight.
5vs3 컴까기 FAST 50ups (Human5 vs Comp3 FAST 50ups)
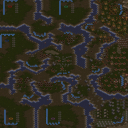
스타크래프트 브루드워의 대표적인 인간 대 컴퓨터 디펜스 맵인 <Human5 vs Comp3 FAST 50ups>는 5명의 플레이어가 3대의 컴퓨터를 상대로 초고속 맵에서 벌이는 치열한 전투를 그린다. 빠른 업그레이드와 끊임없는 공중/지상 러시가 특징으로, 초보부터 숙련자까지 모두 즐길 수 있는 밸런스와 긴장감이 살아 있는 맵이다. 맵의 핵심은 빠른 속도와 예측 불가능한 컴퓨터의 공격 패턴을 어떻게 방어하느냐에 있으며, 초반 전략 수립이 승패를 좌우한다. 특히 50ups라는 빠른 게임 속도 덕분에 전략의 실시간 판단과 빠른 반응이 필수적이다. 맵의 구조는 사막 타일셋을 기반으로 펼쳐지며, 중앙과 양측의 러시 거리가 적절히 배치돼 있어 플레이어는 끊임없이 위협에 직면하게 된다. 컴퓨터의 공격은 공중 유닛과 지상 유닛을 조합해 오기 때문에 방어-line을 구축할 때는 다방면의 대비를 갖춰야 한다. 또한 빠른 업그레이드를 통해 유닛의 효율성을 극대화해야 하며, 자원 관리와 유닛 컨트롤이 게임의 핵심 요소로 작용한다. 이 맵은 특히 팀플레이보다는 개인 플레이어의 실력과 판단력이 요구되는 구조로, 혼자서도 충분히 재미를 느낄 수 있는 디펜스 유즈맵이다. 초보자의 경우 컴퓨터의 공격 패턴을 익히는 데 시간이 걸리겠지만, 익숙해지면 난이도 조절 없이도 끊임없는 재미를 느낄 수 있다. 숙련자라면 더욱 빠른 판단을 요구하는 고난이도 플레이를 즐길 수 있으며, 다양한 전략을 시도해보며 맵의 깊이를 즐길 수 있다.Human5 vs Comp3 FAST 50ups is a quintessential Defense-style custom map in StarCraft: Brood War, where players control 5 humans against 3 computer opponents. Known for its lightning-fast gameplay and relentless air and ground assaults, this map offers a balanced and intense experience suitable for both beginners and advanced players. The core of the gameplay revolves around quick upgrades and real-time decision-making to counter unpredictable computer aggression. The map's desert-themed layout features a well-balanced rush distance, forcing players into constant defensive preparations. Computer attacks combine air and ground units, requiring players to build versatile defenses. Fast upgrades are essential for maximizing unit efficiency, while resource management and unit control become critical factors in securing victory. This map demands individual skill and judgment more than teamwork, making it ideal for solo play. Beginners may need time to adapt to the computer's attack patterns, but once familiar, the map provides continuous enjoyment without difficulty adjustments. Advanced players will appreciate the high-speed decision-making and strategic variety, allowing them to explore the map's depth through different approaches.
노 러시 20 5.3 스페이스 (No Rush 20 5.3 Space)
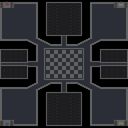
스타크래프트 브루드워의 대표적인 유즈맵 가운데 하나인 〈No Rush 20 5.3 Space〉는Official No Rush 20 Simulation Map〉이라는 설명처럼 ‘노 러시’ 계열의 시뮬레이션 디펜스 장르에 속합니다. 이 맵은 이름에서 알 수 있듯이 20개의 러시 웨이브를 버텨내야 하는 서바이벌 형식의 디펜스를 기본 뼈대로 삼고 있습니다. 우주 테마의 타일셋을 사용하여 배경이 어두운 우주 공간으로 꾸며져 있으며, 맵의 각 모서리 부분에 위치한 베이스 구역은 기존 노 러시 맵들과 달리 약간의 변형이 가해진 채 배치되어 있습니다. 플레이어는 ‘use map settings’를 활성화한 상태에서 모든 업그레이드와 45 스택의 자원을 즉시 확보한 채 시작하며, 맵 중앙에 위치한 타이머가 전체 게임의 흐름을 조절합니다. 맵의 구조는 비교적 평평한 가운데 지대와 각 모서리 베이스 사이의 간격이 넓게 펼쳐져 있어 러시 유닛들이 접근하는 경로가 뚜렷하다는 특징이 있습니다. 특히 우주 테마답게 맵 곳곳에 행성과 소행성 같은 지형물이 배치되어 시야를 일부 가리거나 전략적 요충지를 형성하기도 합니다. 러시가 시작되면 20단계에 걸쳐 다양한 테란, 저그, 프로토스 유닛들이 끊임없이 밀려오며, 플레이어는 이들을 효율적으로 방어하고 자원을 관리해야 합니다. 맵의 특성상 초반 자원과 업그레이드가 동일하게 제공되므로 개개인의 전략과 컨트롤이 승패를 좌우하는 경우가 많습니다. 또한, 맵의 타이머가 충분한 시간을 제공한다고는 하지만, 후반부로 갈수록 러시의 강도가 급격히 상승하므로 집중력을 잃지 않는 것이 중요합니다. 초보 플레이어의 경우 방어선 구축과 유닛 컨트롤에 익숙해지는 데 시간이 다소 걸릴 수 있지만, 익숙해지면 긴장감 넘치는 디펜스 경험을 즐길 수 있습니다. 추천 대상은 디펜스와 시뮬레이션 장르를 좋아하며, 꾸준한 플레이를 통해 실력을 쌓고 싶은 스타크래프트 유즈맵 팬들입니다. 특히 ‘노 러시’ 시리즈의 팬이라면 이 맵의 변형된 베이스 구조와 우주 테마가 주는 새로운 분위기를 경험할 수 있을 것입니다. 플레이 전에는 맵의 베이스 위치와 러시 루트를 미리 숙지하고, 각 단계별로 요구되는 방어 전략을 연습해 두는 것이 좋습니다. 또한, 유닛의 업그레이드와 스펙 변화를 꼼꼼히 확인하여 러시가 올 때 대응할 준비를 갖추는 것이 중요합니다. 마지막으로, 맵의 중앙 타이머를 주시하며 남은 시간을 체크하는 습관을 들이면 게임의 흐름을 놓치지 않고 플레이할 수 있습니다. No Rush 20 5.3 Space is one of the most iconic custom maps in StarCraft: Brood War, belonging to the simulation defense genre represented by the "No Rush" series. As indicated by its description "Official No Rush 20 Simulation Map," the core gameplay revolves around surviving 20 waves of relentless enemy rushes. The map employs a space-themed tileset, setting the stage in a dark cosmic environment, with bases positioned at each corner that feature slight variations compared to traditional No Rush maps. Players begin with instant access to all upgrades and a massive 45-stack of resources when the "use map settings" option is enabled, while a timer in the center of the map regulates the overall flow of the game. The layout is characterized by a relatively flat central area with wide gaps between the corner bases, making the paths of incoming rush units clearly visible. The space theme is enhanced by scattered planets and asteroids that occasionally block vision or create strategic choke points. As the rush progresses through 20 stages, players face an escalating tide of Terran, Zerg, and Protoss units, requiring efficient defense strategies and resource management. Since all players start with identical resources and upgrades, individual skill and unit control become critical factors in determining victory. While the timer provides ample time, the intensity of the rushes sharply increases in the later stages, demanding unwavering focus. Beginners may find the early stages challenging as they adapt to base construction and unit micro-management, but once mastered, the map delivers an exhilarating defense experience. This map is recommended for fans of defense and simulation genres who enjoy honing their skills through repeated play. For those familiar with the No Rush series, the altered corner bases and space-themed aesthetic offer a fresh yet nostalgic twist. Before playing, it's advisable to study the base locations and rush routes, practice stage-specific defense strategies, and familiarize yourself with unit upgrades and specifications. Keeping an eye on the central timer and managing remaining time effectively will help maintain control over the game's pace and prevent critical oversights.
STF - Opposition
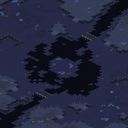
STF - Opposition는 스타크래프트 브루드워의 밸런스형 1:1 밀리 맵으로, symmetrical(대칭) 구조를 기반으로 한 symmetrical 디자인(대칭 구조)이 특징입니다. 맵 중앙을 기준으로 양측이 거의 동일한 지형을 공유하고 있지만, 세부적인 언덕과 언덕 사이의 통로 배치, 미네랄과 가스 위치가 미묘하게 달라 각 플레이어의 전략적 선택지를 제한하고 있습니다. 이런 구조는 양측의 공격과 수비 위치를 자연스럽게 결정짓게 하며, 맵의 이름 'Opposition'이 보여주듯 상대방과 대립하는 입장 차이를 극대화합니다. 특히 양쪽의 언덕 지형이 서로를 바라보는 형태로 배치되어 있어, 초반 러시 타이밍과 기지 방어 라인을 플레이어의 선호도에 따라 유연하게 선택할 수 있도록 설계되었습니다. 미네랄과 가스의 균형도 적절히 맞춰져 있어, 자원 관리와 멀티 태스킹을 중시하는 플레이어에게는 전략적 깊이를 더해줍니다. 다만, symmetrical 구조임에도 불구하고 일부 통로의 폭이 좁아 테란의 배럭 러시나 저그의 러커 전략 등 특정 종족의 강세가 두드러질 가능성이 있으며, 이는 맵의 밸런스를 맞추기 위한 의도된 디자인으로 보입니다. 초보 플레이어는 이러한 구조적 특징을 잘 이해하지 못해 일방적인 공격을 당하기 쉬우며, 고수 층에서는 symmetrical 맵의 특성을 활용한 심리전과 타이밍 러시가 빈번히 등장할 것으로 예상됩니다. 전반적으로 symmetrical 밸런스형 1:1 맵을 선호하는 유저들에게 강력히 추천할 만한 작품입니다. 플레이 전에는 자신의 선호하는 종족과 전략 스타일을 고려해, 맵의 양측 언덕 지형과 통로 폭을 미리 분석해 두는 것이 좋습니다. 또한 symmetrical 맵의 특성상, 상대방의 전략을 빠르게 읽고 대응하는 능력이 중요하므로, 다양한 빌드 오더를 연습해 둔 상태라면 더 큰 재미를 느낄 수 있을 것입니다. STF - Opposition is a balanced 1:1 melee map for StarCraft: Brood War, built around a symmetrical design that ensures both players share nearly identical terrain. The subtle differences in mineral and gas placement, as well as the arrangement of hills and pathways, subtly restrict strategic choices, forcing players to adapt their attack and defense positions naturally. The map's title 'Opposition' reflects this dynamic, highlighting the contrasting roles each player must adopt. The hill placements are strategically angled to face each other, allowing flexibility in early rush timing and base defense lines depending on player preference. The balance of resources is also well-tuned, adding depth to resource management and multitasking gameplay. However, despite its symmetry, certain pathways are narrow enough to favor specific strategies like Terran's Barracks rush or Zerg's Lurker tactics, which may influence the map's balance. This appears to be an intentional design choice to create a dynamic playing field. Beginner players may struggle due to the structural nuances, while advanced players will likely engage in psychological warfare and timing rushes common in symmetrical maps. Overall, this is a highly recommended map for players who enjoy balanced 1:1 symmetrical melee maps. Before playing, it's advisable to analyze the map's hills, pathways, and resource layouts to align with your preferred race and strategy. Given the nature of symmetrical maps, the ability to quickly read and counter your opponent's strategy is crucial—practicing diverse build orders will enhance your experience.
이지 머니 (Easy Money)
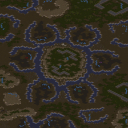
스타크래프트 브루드워의 ‘이지 머니(Easy Money)’는 2~6인 대전이 가능한 밀리 맵으로, 기본 자원인 미네랄과 가스가 풍부한 사막 지형에 배치되어 있다. 맵의 중앙에는 넓은 개활지가 펼쳐져 있어 초반 러시가 용이하며, 양쪽 끝에는 멀티 지역이 밀집되어 있어 자원 수급이 안정적이다. 사막 타일셋의 황량한 배경은 넓은 시야와 긴 사정거리를 활용한 포위 전략을 장려한다. 맵의 특징은 자원 밀집도와 넓은 개활지로, 초반부터 플레이어 간의 충돌이 발생할 가능성이 높다. 특히 mineral line이 가깝게 배치되어 있어 테란의 초반 벙커링이나 프로토스의 질드라쉬 러시가 효과적일 수 있다. 저그의 경우에도 저글링이나 뮤탈리스크로 빠른 견제가 가능해, 맵의 개방성과 자원 배치가 다양한 전략을 구사할 수 있도록 한다. 초보와 숙련자 모두에게 접근성 높은 맵으로, 빠른 게임 진행과 전략적 다양성을 제공한다. 플레이 전에는 자원 밸런스와 멀티 지역 접근성을 확인하는 것이 중요하며, 특히 초반 러시 타이밍을 잡기 위한 맵리딩이 관건이다. 초심자라면 자원 수급과 기본 유닛 생산에 집중하는 플레이가 필요하며, 숙련자는 빠른 테크와 다중 전략을 활용해 게임을 지배할 수 있다. 맵의 개방성과 자원 밀집도는 스타크래프트의 기본 메카닉을 잘 살린 설계로, 밀리 플레이어라면 누구나 즐길 수 있는 좋은 대전용 맵이다. Easy Money is a Brood War melee map designed for 2 to 6 players, set in a desert terrain with abundant minerals and vespene gas. The central open space allows for early rushes, while the concentrated mineral lines near multi bases ensure stable resource gathering. The vast desert tileset provides long sightlines and firing ranges, encouraging strategic encirclement tactics. The map's resource layout and open terrain make early-game clashes highly likely, with advantages for Terran bunkering, Protoss Zealot rushes, or Zerg Zergling/Mutalisk harassment. Its accessibility suits both beginners and veterans, offering fast-paced gameplay with diverse strategic options. Players should prioritize resource balance checks and multi base accessibility before starting. Beginners may focus on basic unit production and resource management, while advanced players can exploit early rushes or multi-pronged strategies. The map’s open design and resource density perfectly showcase Brood War’s core mechanics, making it an excellent choice for competitive melee matches.
언덕의 왕 (KING OF THE HILL)
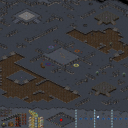
KING OF THE HILL 맵은 UMS(유즈맵) 기반의 8인 전용 언덕 점령형 전투 맵이다. 전체 맵 크기는 3072×3072 타일 96×96으로, 우주 타일셋을 사용해 넓은 평야와 고지대가 자연스럽게 배치되어 있다. 플레이 시작 시 각 플레이어는 랜덤한 위치에 기지를 세우고, 중앙에 위치한 언덕을 차지하기 위해 빠른 러시와 방어를 반복한다. 언덕을 점령하면 일정 시간 유지 시 승리 조건이 충족되므로, 초반 공격력과 이동 속도, 그리고 적의 방어 타워를 어떻게 무력화하느냐가 핵심 전략이다. 맵 구조는 대칭적이지만, 중앙 고지대 주변에 몇 차례의 작은 고지와 협곡이 있어 우회로를 이용한 측면 공격도 가능하다. 따라서 공격형 플레이어와 방어형 플레이어 모두에게 균형 잡힌 경험을 제공한다. 추천 대상은 빠른 전투와 지속적인 압박을 즐기는 유저이며, 특히 초중급 수준의 플레이어가 전략을 시험하기에 적합하다. 플레이 전 확인해야 할 포인트는 초기 자원 배치와 언덕 주변에 배치된 중립 유닛·타워의 존재 여부이다. 이 요소들은 초반 러시 성공 여부에 큰 영향을 미치므로, 미리 파악하고 대응 전략을 준비하는 것이 좋다. KING OF THE HILL is an 8‑player UMS (use‑map) hill‑control map for StarCraft: Brood War. The map spans 3072×3072 tiles (96×96 per tile) and uses the Space tileset, featuring a large open plain with a central elevated hill. At the start each player builds a base at a random location and rushes toward the central hill, aiming to hold it for a set duration to meet the victory condition. The core strategy revolves around early aggression, unit speed, and disabling enemy defensive structures. While the overall layout is symmetric, several smaller elevations and valleys around the hill provide flanking routes, allowing both offensive and defensive playstyles to thrive. This balance makes the map suitable for players who enjoy fast‑paced combat and continuous pressure, especially those at beginner to intermediate skill levels. Before playing, check the initial resource distribution and the presence of neutral units or turrets near the hill, as these significantly affect the success of early rushes and should be accounted for in your opening plan.
7vs1 하드 컴퓨터 (7vs1 Hard Computer)
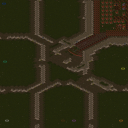
스타크래프트 브루드워의 유즈맵 중 하나로, 7명의 플레이어가 한 명의Very Hard(최상급) 컴퓨터를 상대하는 디펜스 형식의 맵이다. 내부 맵 설명에 따르면 컴퓨터는 빠르게 러시를 감행하므로, 플레이어들은 신속한 방어 시설 건설과 전략적 배치로 대응해야 한다. 사막 타일셋으로 구성된 넓은 필드에서 펼쳐지는 전투는 치밀한Resource Management와 조율된 공격 타이밍이 핵심이며, 각 플레이어는 개별적으로 Mineral과 Gas를 확보해 방어 건물과 유닛을 생산해야 한다. 맵 중앙을 가로지르는 좁은 통로와 분산된 MineralField는 초반 방어선의 중요성을 강조하는데, 이곳을 효과적으로 방어하지 못하면 컴퓨터의 러시에 의해 전멸할 가능성이 크다. 컴퓨터의 Very Hard 난이도 특성상 초중반 러시뿐 아니라 후반까지 끊임없는 압박을 가해 오므로, 플레이어들은 균형 잡힌 유닛 조합과 지속적인Resource 확보가 필수적이다. 초보자보다는 중수 이상의 플레이어에게 적합하며, 특히 팀워크와 전략적 협력이 요구되는 맵으로 평가된다. 플레이 전에는 MineralField의 분포와 MineralField 사이의 통로 위치를 숙지하고, 초반 방어 건물의 건설 위치를 신중히 결정해야 한다. 또한 컴퓨터의 러시 타이밍과 패턴을 익히면 안정적인 방어가 가능해진다. 7명의 플레이어가 각자 역할 분담을 명확히 하고, Resource를 효율적으로 관리하는 것이 승리의 열쇠가 될 것이다. This is a defense-style custom map from *StarCraft: Brood War* where seven players face off against a single Very Hard (highest difficulty) AI opponent. According to the in-map description, the AI aggressively rushes early, forcing players to quickly build defenses and deploy units strategically. The battle unfolds on a vast desert tileset, where tight resource management and well-timed attacks are crucial—each player must gather minerals and vespene gas individually to construct defensive structures and produce units. The narrow central corridor and scattered mineral fields highlight the importance of early defense; failing to secure this area often leads to being overwhelmed by the AI’s rush. Due to the AI’s Very Hard difficulty, players face relentless pressure not just in the early and mid-game but even late into the match, making balanced unit compositions and continuous resource collection essential. This map is better suited for intermediate to advanced players, particularly those who excel in teamwork and strategic coordination. Before playing, it’s important to study the mineral field layouts and the chokepoints between them, as well as carefully plan where to place initial defensive structures. Familiarizing yourself with the AI’s rush timing and attack patterns will also help stabilize your defenses. With seven players sharing distinct roles and efficiently managing resources, teamwork and smart allocation of minerals and gas will be the key to victory.
빠른 승리 (the fast win)
스타크래프트 브루드워의 얼음 타일셋을 기반으로 한 정제되지 않은 밀리 맵, 'Untitled Scenario'는 파일명 'the fast win.scx'에서 느껴지듯 극단적인 초반 교전과 일방적인 승리를 위한 구조로 설계되었습니다. 4096x4096의 넓은 필드 중앙에는 자원 멀티와 건물이 거의 배치되지 않아, 시작하자마자 바로 본진 인근에서 전투가 벌어질 수밖에 없습니다. 이 맵의 특징은 '빠른 승리'라는 이름처럼 테란의 벙커 러시, 프로토스의 광전사 러시, 저그의 러커 드랍 등 초반 전략이 매우 강력하게 작용한다는 점입니다. 특히 설원 타일셋의 어두운 배경은 시야를 제한하여 초반 정찰의 중요성을 높이고, 맵의 균형이 무너지기 쉬운 구조를 부여합니다. 플레이어는 시작 직후 자신의 스타팅Area를 벗어나지 않고도 적의 기지를 바로 공격할 수 있는 위치에 있으며, 이는 맵의 긴장감을 극대화합니다. 다만, 중앙 멀티와 같은 자원 분배 구역이 없어서 후반 자원 전쟁이 발생하지 않으며, 오로지 초반 교전과 빠른 건물 파괴에 모든 것이 집중됩니다. 이러한 구조는 초보 플레이어에게는 학습 효과가 크지만, 숙련자들에게는 전략의 깊이가 부족하게 느껴질 수 있습니다. 맵의 승리 조건은 단순하게 모든 적 건물을 파괴하는 것으로, 이를 위해 플레이어는 자신이 가진 모든 유닛을 즉시 전선에 투입하는 극한의 공격적 플레이가 요구됩니다. 초반 빌드오더와 테크 선택의 차이가 승패를 좌우하는 이 맵은, 말 그대로 '빠른 승리'를 목표로 하는 밀리 맵의 정석을 보여줍니다. 다만, 맵의 밸런스가 오로지 초반 교전에만 치중되어 있어, 다양한 전략과 테크트리를 시도해 보고 싶은 플레이어들에게는 다소 아쉬운 부분으로 남습니다. 이 맵을 즐기기 위해서는 초반 유닛 생산과 진출 타이밍을 철저히 계산해야 하며, 가능한 한 빠른 시간 내에 적 기지를 파괴하는 것이 핵심입니다. 또한, 설원 타일셋의 어두운 조명과 제한된 시야를 고려하여, 유닛 컨트롤과 정찰을 동시에 수행할 수 있는 능력이 필요합니다. 초보자와 숙련자 모두에게 흥미로운 경험을 제공하지만, 특히 초보자에게는 스타크래프트의 기본적인 전투와 빌드 개념을 빠르게 습득할 수 있는 좋은 연습용 맵으로 활용될 수 있을 것입니다. 다만, 이 맵이 제공하는 전략의 다양성은 제한적이므로, 다양한 맵을 접하고자 하는 플레이어에게는 추천하기 어려운 점도 있습니다. 이 맵을 플레이하기 전에, 자신의 스타일과 전략이 초반 교전에 특화되어 있는지, 그리고 빠른 승리를 목표로 할 수 있는 준비가 되어 있는지를 먼저 생각해 보는 것이 좋습니다. 또한, 맵의dark한 조명과 제한된 시야를 극복하기 위해, 가능한 한 빠른 정찰과 맵 리딩 능력을 키우는 연습을 병행하는 것이 좋습니다. 이 맵은 단순히 '승리'만을 목표로 하기보다는, 스타크래프트의 기본기와 전투 감각을 다듬는 데에 중점을 두는 것이 바람직합니다. 초보자와 숙련자 모두에게 유용한 맵이지만, 그 활용 방법은 분명히 구분되어야 합니다. 초보자는 이 맵을 통해 빠른 전투와 빌드오더의 중요성을 배울 수 있으며, 숙련자는 자신의 초반 전략과 테크 선택 능력을 검증할 수 있는 좋은 기회로 삼을 수 있습니다. 다만, 이 맵이 제공하는 전략적 깊이의 한계는 반드시 염두에 두어야 합니다. 이 맵을 즐기면서도, 동시에 다른 전략적 깊이를 가진 맵들도 함께 플레이하여 스타크래프트의 다양한 재미를 경험하는 것이 좋습니다. This untitled melee map, set on the frozen tundra tileset of StarCraft: Brood War, is a raw and unrefined design that prioritizes instant early-game aggression under the filename 'the fast win.scx'. The 4096x4096 expansive field deliberately omits mid-game resources and expansions, forcing immediate confrontation near starting positions regardless of race. The dark, snow-covered environment restricts visibility, amplifying the role of scouting in the opening minutes. The map’s balance hinges entirely on rapid base destruction through early rushes — Terran bunkers, Protoss zealot charges, or Zerg lurker drops all thrive in this compressed battlefield. Central resource nodes are nonexistent, eliminating late-game macro play and reducing the match to a swift, decisive clash. While the simplicity aids new players in grasping core combat dynamics, it offers limited strategic depth for veterans seeking extended build orders or multi-stage strategies. Victory requires destroying all enemy structures, compelling players to commit every unit to the frontline immediately. The map’s balance revolves around optimizing initial unit production and timing, but its narrow focus on early aggression may feel repetitive for those seeking diverse tactical play. The dim lighting and obscured vision demand sharp micro-management and constant map awareness. Beginners will find this map useful for practicing fundamental combat and build orders, but its lack of variety makes it less ideal for players seeking broader strategic experiences. Before playing, assess whether your strategy aligns with early-game dominance and prepare for quick victories. The map’s constraints also serve as an exercise in efficient scouting and unit control under limited visibility. While it serves as a practical tool for refining basic mechanics, its limited depth means supplementing play with more complex maps is advisable for sustained enjoyment. Both beginners and experts can benefit, but their engagement with the map should differ — novices to learn pace, veterans to test rush strategies — always mindful of its strategic limitations.
불가능한 러시 아워 (Impossible Rush Hour)
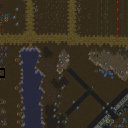
Impossible Rush Hour는 5인용 PvE 유즈맵으로, 플레이어가 제한된 시간 안에 끊임없이 쏟아지는 적을 막아내는 형태의 고난이도 러시 맵이다. 맵은 황무지 타일셋을 기반으로 4096×2048 해상도에 128×64 타일 단위로 구성되어 있어 넓은 전장을 제공한다. 시작 지점에서 여러 경로가 분기되며, 각 경로마다 적이 순차적으로 등장해 플레이어에게 지속적인 압박을 가한다. 적의 스폰 간격이 점점 짧아지면서 반응 속도와 유닛 배치 능력이 시험대에 오른다. 방어 건물은 제한적으로 배치할 수 있어, 유닛 조합과 위치 선정이 핵심 전략이다. 특히, 적이 몰려오는 구역에서는 이동형 유닛을 활용해 빠르게 전선을 전환하거나, 스킬을 적절히 사용해 일시적인 방어선을 구축해야 한다. 맵 전반에 걸쳐 시야가 제한된 지역이 존재해, 정찰 유닛을 적절히 배치해 정보 확보가 중요하다. 플레이 전에는 적 스폰 패턴과 맵의 주요 지형을 미리 파악하고, 방어 포인트를 미리 정해두는 것이 좋다. 초반에 과도한 유닛 생산을 피하고, 중후반에 대비해 자원을 아끼는 것이 승리 확률을 높인다. 이 맵은 빠른 판단과 정확한 마이크로 컨트롤을 요구하므로, 고난이도 도전을 즐기는 숙련 플레이어에게 특히 추천한다. Impossible Rush Hour is a 5‑player PvE use map that challenges players to survive relentless waves of enemies within a tight time limit. Built on the Desert tileset with a 4096×2048 resolution and 128×64 tile grid, the map offers a spacious battlefield where multiple paths branch out from the starting area. Enemies spawn sequentially along these routes, gradually decreasing the interval between spawns, which puts a premium on reaction speed and unit placement. Defensive structures are limited, making unit composition and positioning the core of the strategy. In high‑pressure zones, mobile units must be used to shift the front line quickly, while timely use of abilities can create temporary bulwarks. Fog‑of‑war areas scattered across the map demand early scouting units to maintain map awareness. Before a match, players should study the enemy spawn patterns and key terrain features, pre‑designating defensive points. Avoid over‑producing units early and conserve resources for the mid‑to‑late game to improve win chances. The map’s emphasis on rapid decision‑making and precise micro‑control makes it especially suitable for seasoned players seeking a tough challenge.
Expedition (원정)
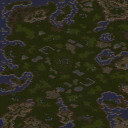
스타크래프트 브루드워의 ‘Expedition’은 8인용 밀리 맵으로, 사막 타일셋을 기반으로 한 넓은 평야가 특징이다. 맵의 중앙에는 거대한 X자형 분기점이 있으며, 각 플레이어가 시작하는 위치가 대각선으로 배치되어 있다. 이를 통해 각 플레이어는 서로의 본진으로 가는 길이 한 곳으로 통하는 구조를 가지고 있어, 초반 러시나 동맹 플레이 시 전략적 선택이 강제된다. 특히 ‘FOR ALLY PLAY USE MAP SETTINGS’이라는 설명에서 알 수 있듯이, 동맹 플레이를 고려한 맵 설계가 돋보인다. 플레이어 간 교전은 맵의 중앙 교차로에서 자주 발생하며, 광물과 가스 지대가 비교적 균등하게 배치되어 있어 초반 자원 확보가 용이하다. 하지만 넓은 평야와Sand 타일셋의 특성상 시야 확보가 다소 제한적일 수 있어, 정찰 유닛의 중요성이 높아진다. 특히 프로토스와 테란의 경우, 중앙 교차로에서 벌이는 전투가 승패를 가를 가능성이 크며, 저그의 경우 빠른 멀티태스킹을 통해 자원 우위를 점해야 한다. 이 맵은 4~8인용으로 설정되어 있지만, 8인용으로 플레이할 경우 동맹 시스템을 적극 활용하지 않으면 초반 러시에 취약해질 수 있다. 또한, 넓은 맵 특성상 자원 재분배가 쉽지 않으므로, 플레이어 간 동맹이 필수적이다. 초보자의 경우 동맹 플레이에 익숙하지 않다면 다소 난해할 수 있지만, 숙련자라면 전략적 깊이를 느낄 수 있는 맵으로 평가된다. 특히 동맹 플레이 시에는 맵 설정을 반드시 변경해야 하며, 이를 고려하지 않으면 밸런스가 무너질 위험이 있다. Expedition은 넓은 평야와 중앙 교차로 구조를 통해 전략적 깊이를 제공하는 맵으로, 동맹 플레이와 러시 전략이 핵심이다. 넓은 맵 특성상 자원 관리가 중요하며, 초보자의 경우 동맹 시스템에 익숙해지는 것이 중요하다. 또한, 프로토스와 테란의 경우 중앙 교차로에서 벌어지는 전투가 승패를 좌우할 가능성이 크므로, 신중한 플레이가 요구된다. Expedition in StarCraft: Brood War is an 8-player melee map featuring a desert tileset with expansive plains. The map's center includes a large X-shaped intersection, with each player's starting positions arranged diagonally. This design forces players to share a single path to each other's bases, making early rushes or allied play require strategic decisions. The map’s design, as indicated by the note “FOR ALLY PLAY USE MAP SETTINGS,” clearly prioritizes cooperative gameplay. Battles between players frequently occur at the central crossroads, and mineral and gas deposits are relatively evenly distributed, making early resource gathering straightforward. However, the vast open terrain and sandy tileset can limit visibility, increasing the importance of scouting units. For Protoss and Terran players, central crossroad battles often determine the outcome, while Zerg players must secure resource advantages through rapid multitasking. While the map supports 4 to 8 players, playing with 8 requires careful use of the ally system, as early rushes can easily overwhelm unprepared players. The map’s size also makes resource redistribution difficult, making alliances essential. Beginners may find the map challenging without prior experience in cooperative play, but skilled players will appreciate its strategic depth. When playing with allies, adjusting the map settings is mandatory to maintain balance, as failing to do so risks disrupting fairness. Expedition offers strategic depth through its open plains and central crossroad design, with allied play and rush strategies as key elements. Resource management is crucial due to the map’s size, and beginners should focus on adapting to the ally system. For Protoss and Terran players, victory often hinges on battles at the central intersection, demanding careful and deliberate play.
7v1c 러시 맵 (황혼) v1.D (7v1c Rush Map (Twilight) v1.D)
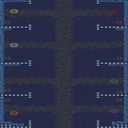
이 맵은 화산 타일셋을 기반으로 한 1024×1024 크기의 사용자 제작 시나리오로, 제목에 보이는 대로 7명의 인간 플레이어가 한 대의 컴퓨터를 상대로 rushes(러시)만을 목표로 설계되었다. 전체 레이아웃은 대칭적으로 배치된 출발 기지와 중앙에 위치한 컴퓨터 기지를 중심으로, 좁은 통로와 제한된 자원 지역이 플레이어를 빠르게 전진하도록 유도한다. 자원은 일반적인 미네랄과 가스가 제한적으로 배치돼 early game에만 집중할 수 있게 하며, 후반전에는 추가 자원이 거의 없어 장기전보다는 초반 폭풍 같은 공격이 승부를 가른다. 따라서 플레이어는 초반에 병력을 최대한 빠르게 생산해 상대 기지를 압박해야 하며, 컴퓨터 측은 사전에 설정된 트리거에 따라 일정 수의 유닛을 생성해 방어를 시도한다. 이러한 구조는 표준 밀리(MELEE) 맵과 달리 승패가 초반 5분 내에 결정되는 경향이 강해, 빠른 판단과 미세 조작이 중요한 플레이 경험을 제공한다. 추천 대상은 러시 전략을 즐기는 중급 이상의 플레이어이며, 팀 플레이 시에는 소통과 역할 분배가 승리의 핵심이다. 플레이 전에는 맵이 rush 전용이라는 점을 확인하고, 과도한 경제 운영보다 초반 병력 생산에 집중할 필요가 있다. 맵의 지형은 용암 흐름을 따라 자연스러운 병목 현상을 만들어, 공격로가 한두 곳으로 집중된다. 이로 인해 양측 모두 진입로에서의 교전이 빈번하게 발생하며, 방어측은 벽과 포톤 캐논을 활용한 선제 방어를 시도한다. 또한, 시작 지점 근처에 위치한 제한된 광물 필드는 초반에만 충분한 자원을 제공해, 빠른 시유닛 생산을 가능하게 한다. 이러한 설계는 러시 전용 맵으로서의 정체성을 분명히 하며, 일반적인 메lee 맵과 비교했을 때 전략적 깊이보다 순간적인 판단력과 반응 속도가 더 크게 작용한다. This map is a user‑made scenario built on a volcanic tileset with a size of 1024×1024, designed exactly as the title shows: seven human players face a single computer with the sole goal of rushing. The layout is symmetrical, with the players’ bases placed around a central computer base; narrow passages and limited resource zones push the units forward quickly. Minerals and gas are sparsely placed, enough only for early‑game production, while late‑game offers almost no extra resources, making the match hinge on an early surge rather than a prolonged battle. Consequently, players must push out units as fast as possible to pressure the enemy base, while the computer follows preset triggers to generate a set number of defensive units. Because victory is often decided within the first five minutes—unlike standard MELEE maps—quick decision‑making and precise micro become the core of the experience. The map is recommended for intermediate‑to‑advanced players who enjoy rush strategies; in team play, communication and role allocation become the key to victory. Before playing, confirm that the map is rush‑only and focus on early unit production rather than over‑expanding the economy. The terrain follows lava flows, creating natural chokepoints that concentrate the attack routes into one or two avenues. This leads to frequent clashes at the entrances, where the defending side can attempt pre‑emptive defenses with walls and photon cannons. Additionally, the limited mineral patch near the start provides just enough resources for early unit production, enabling a fast tech‑rush. These design choices clearly establish the map as a rush‑only scenario, shifting emphasis from deep strategy to split‑second judgment and reaction speed compared with ordinary MELEE maps.
7v1c 러시 맵 (황혼) v1.E (7v1c Rush Map (Twilight) v1.E)
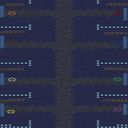
이 맵은 화산 타일셋을 사용한 1024x1024 크기의 밀리형 러시 맵으로, 제목에 보이는 7v1c 구성을 바탕으로 최대 8명의 플레이어가 동시에 참여할 수 있다. 내부 설명에 따르면 이 맵은 순수한 러시 전용으로 설계되었으며, 별도의 트리거나 스토리 요소 없이 기본 게임 룰에 따라 자원 채취와 유닛 생산을 즉시 시작하게 된다. 따라서 게임 시작 직후부터 앞마당에 방어진지를 구축하기보다는 초반 공격에 집중하는 플레이가 강요되며, 상대의 건물을 빠르게 파괴하거나 방어선을 뚫는 것이 승리의 관건이 된다. 맵 중앙에는 넓게 뚫린 공간과 여러 자원 지점이 배치되어 있어, 빠른 타이밍에 멀티를 점령하거나 상대의 진출로를 차단하는 전략이 중요하다. 화산 지형 특유의 높은 지형과 lava 타일이 일부 지역에 배치되어 시야 차단과 협로 형성에 영향을 주며, 이를 활용한 측후 공격이나 허점을 노리는 반복 공략이 가능하다. 전체적인 흐름은 표준 밀리와 유사하지만, 러시 전용이라는 점에서 게임 길이가 짧고, 초반 결정적인 교전이 승패를 가른다. 이에 따라 마이크로 관리 능력이 뛰어나고 빠른 판단이 가능한 플레이어에게 적합하며, 처음 스타크래프트를 접하는 초보자보다는 일정 수준의 운영과 빌드 순서를 숙지한 intermediate 이상의 유저에게 추천한다. 플레이 전에는 맵이 rush 전용임을 확인하고, 초반에 지나치게 수비적인 빌드를 지양하며, 가능한 한 빠르게 병력을 생산해 상대의 약점을 공략하는 mindset을 갖는 것이 좋다. This map is a melee-type rush map built on a volcanic tileset with a size of 1024x1024, allowing up to eight players to join simultaneously based on the 7v1c configuration shown in the title. According to its internal description, the map is designed purely for rush play, with no extra triggers or story elements, so players immediately begin resource gathering and unit production following the basic game rules. Consequently, from the very start of the match the focus is forced onto early aggression rather than building a defensive front; victory hinges on quickly destroying enemy structures or breaking through their defenses. The central area features open space and several resource points, making it vital to secure expansions quickly or cut off opponent routes with timely tactics. The volcanic terrain’s elevated cliffs and scattered lava tiles block sight and create chokepoints, which can be exploited for flanking maneuvers or repeated strikes on weak spots. Overall the flow resembles standard melee, but because it is rush‑only the match length is short and the outcome is often decided by the first decisive engagement. Thus it suits players with strong micro‑management and quick decision‑making, rather than absolute beginners; those who have grasped basic builds and intermediate‑level mechanics will benefit most. Before playing, confirm that the map is rush‑only, avoid overly defensive early builds, and adopt a mindset of rapidly producing units to exploit the opponent’s weaknesses.
최근 등록된 맵
새로 추가된 파일과 버전을 확인하세요.
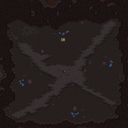
돌진하거나 죽거나! (Rush or (and) Die!)
러시 오어 (앤드) 다이는 정글 타일셋을 기반으로 한 4인용 밀리 맵으로, 표준적인 자원 채집과 건물 건설을 유지하면서도 독특한 타이머 트리거를 도입해 게임 흐름을 크게 바꾼다. 맵 시작 시점부터 자원은 보통 수준으로 분포되어 있으며, 각 선수는 기지를 건설하고 유닛을 양성해 combat을 준비한다. 하지만 내부 설명에 명시된 것처럼 10분이 지나면 자동으로 강제 러시 이벤트가 발동되어, 모든 플레이어는 즉시 적 진영을 향해 대규모 공격을 감행해야 한다. 이 타이머는 단순히 시간 제한을 넘어서 전략적 결정을 강제한다: 초반에 지나치게 방어에 집중하면 시간을 놓쳐 불리해지고, 지나치게 agresive하게 확장하면 자원 고갈로 후반에 버틸 수 없게 된다. 따라서 플레이어는 초기 8분 내에 경제와 군력을 균형 있게育て야 하며, 타이머가 울리기 직전에 최적의 공격 타이밍을 계산해야 한다. 지형은 정글 특유의 좁은 통로와 시야 차단 오브젝트가 많아, 은밀한 이동과 기습이 가능하며, 이로 인해 맵 중앙에서의 교전이 자주 발생한다. 승리 조건은 표준적이며, 마지막까지 남은 플레이어 또는 팀이 승리를 차지하는데, 타이머 발동 후에는 생존보다는 파괴력이 승부의 핵심으로 바뀐다. 이 맵은 빠른 판단과 미크로 관리가 중시되는 플레이어에게 적합하며, 초반 러시를 좋아하는 유저나 타이머 기반 변형을 경험해보고 싶은 밀리 애호가에게 추천한다. 플레이 전에는 타이머가 정확히 10분으로 설정되었는지, 맵이 정상적으로 로드되었는지 확인하고, 가능한 경우 동반자와 함께 팀 플레이를 시도해 보는 것도 좋은 방법이다. Rush or (and) Die! is a jungle‑tileset based four‑player melee map that retains standard resource gathering and building construction while introducing a unique timer trigger that drastically alters the flow of the game. From the start, resources are distributed at an average level, and each player constructs a base and trains units in preparation for combat. However, as the map description states, after ten minutes an automatic forced‑rush event is triggered, requiring all players to immediately launch a large‑scale assault on enemy positions. This timer does more than merely limit time; it forces strategic decisions: focusing too heavily on defense in the early game risks running out of time and falling behind, while overly aggressive expansion can exhaust resources, leaving a player unable to sustain the late game. Consequently, players must balance economy and military strength within the first eight minutes and calculate the optimal attack timing just before the timer sounds. The map’s jungle terrain features narrow corridors and sight‑blocking objects that enable stealthy movement and ambushes, making frequent clashes in the center. Victory conditions remain standard: the last surviving player or team wins, but once the timer activates survivability gives way to destructive power as the decisive factor. The map suits players who value quick decision‑making and micro‑management, and is recommended for fans of early rushes or melee enthusiasts wanting to try a timer‑based variant. Before playing, verify that the timer is indeed set to ten minutes, that the map loads correctly, and consider trying a team match with a partner if possible.
7v1c 러시 맵 (황혼) v1.E (7v1c Rush Map (Twilight) v1.E)
이 맵은 화산 타일셋을 사용한 1024x1024 크기의 밀리형 러시 맵으로, 제목에 보이는 7v1c 구성을 바탕으로 최대 8명의 플레이어가 동시에 참여할 수 있다. 내부 설명에 따르면 이 맵은 순수한 러시 전용으로 설계되었으며, 별도의 트리거나 스토리 요소 없이 기본 게임 룰에 따라 자원 채취와 유닛 생산을 즉시 시작하게 된다. 따라서 게임 시작 직후부터 앞마당에 방어진지를 구축하기보다는 초반 공격에 집중하는 플레이가 강요되며, 상대의 건물을 빠르게 파괴하거나 방어선을 뚫는 것이 승리의 관건이 된다. 맵 중앙에는 넓게 뚫린 공간과 여러 자원 지점이 배치되어 있어, 빠른 타이밍에 멀티를 점령하거나 상대의 진출로를 차단하는 전략이 중요하다. 화산 지형 특유의 높은 지형과 lava 타일이 일부 지역에 배치되어 시야 차단과 협로 형성에 영향을 주며, 이를 활용한 측후 공격이나 허점을 노리는 반복 공략이 가능하다. 전체적인 흐름은 표준 밀리와 유사하지만, 러시 전용이라는 점에서 게임 길이가 짧고, 초반 결정적인 교전이 승패를 가른다. 이에 따라 마이크로 관리 능력이 뛰어나고 빠른 판단이 가능한 플레이어에게 적합하며, 처음 스타크래프트를 접하는 초보자보다는 일정 수준의 운영과 빌드 순서를 숙지한 intermediate 이상의 유저에게 추천한다. 플레이 전에는 맵이 rush 전용임을 확인하고, 초반에 지나치게 수비적인 빌드를 지양하며, 가능한 한 빠르게 병력을 생산해 상대의 약점을 공략하는 mindset을 갖는 것이 좋다. This map is a melee-type rush map built on a volcanic tileset with a size of 1024x1024, allowing up to eight players to join simultaneously based on the 7v1c configuration shown in the title. According to its internal description, the map is designed purely for rush play, with no extra triggers or story elements, so players immediately begin resource gathering and unit production following the basic game rules. Consequently, from the very start of the match the focus is forced onto early aggression rather than building a defensive front; victory hinges on quickly destroying enemy structures or breaking through their defenses. The central area features open space and several resource points, making it vital to secure expansions quickly or cut off opponent routes with timely tactics. The volcanic terrain’s elevated cliffs and scattered lava tiles block sight and create chokepoints, which can be exploited for flanking maneuvers or repeated strikes on weak spots. Overall the flow resembles standard melee, but because it is rush‑only the match length is short and the outcome is often decided by the first decisive engagement. Thus it suits players with strong micro‑management and quick decision‑making, rather than absolute beginners; those who have grasped basic builds and intermediate‑level mechanics will benefit most. Before playing, confirm that the map is rush‑only, avoid overly defensive early builds, and adopt a mindset of rapidly producing units to exploit the opponent’s weaknesses.
7v1c 러시 맵 (황혼) v1.D (7v1c Rush Map (Twilight) v1.D)
이 맵은 화산 타일셋을 기반으로 한 1024×1024 크기의 사용자 제작 시나리오로, 제목에 보이는 대로 7명의 인간 플레이어가 한 대의 컴퓨터를 상대로 rushes(러시)만을 목표로 설계되었다. 전체 레이아웃은 대칭적으로 배치된 출발 기지와 중앙에 위치한 컴퓨터 기지를 중심으로, 좁은 통로와 제한된 자원 지역이 플레이어를 빠르게 전진하도록 유도한다. 자원은 일반적인 미네랄과 가스가 제한적으로 배치돼 early game에만 집중할 수 있게 하며, 후반전에는 추가 자원이 거의 없어 장기전보다는 초반 폭풍 같은 공격이 승부를 가른다. 따라서 플레이어는 초반에 병력을 최대한 빠르게 생산해 상대 기지를 압박해야 하며, 컴퓨터 측은 사전에 설정된 트리거에 따라 일정 수의 유닛을 생성해 방어를 시도한다. 이러한 구조는 표준 밀리(MELEE) 맵과 달리 승패가 초반 5분 내에 결정되는 경향이 강해, 빠른 판단과 미세 조작이 중요한 플레이 경험을 제공한다. 추천 대상은 러시 전략을 즐기는 중급 이상의 플레이어이며, 팀 플레이 시에는 소통과 역할 분배가 승리의 핵심이다. 플레이 전에는 맵이 rush 전용이라는 점을 확인하고, 과도한 경제 운영보다 초반 병력 생산에 집중할 필요가 있다. 맵의 지형은 용암 흐름을 따라 자연스러운 병목 현상을 만들어, 공격로가 한두 곳으로 집중된다. 이로 인해 양측 모두 진입로에서의 교전이 빈번하게 발생하며, 방어측은 벽과 포톤 캐논을 활용한 선제 방어를 시도한다. 또한, 시작 지점 근처에 위치한 제한된 광물 필드는 초반에만 충분한 자원을 제공해, 빠른 시유닛 생산을 가능하게 한다. 이러한 설계는 러시 전용 맵으로서의 정체성을 분명히 하며, 일반적인 메lee 맵과 비교했을 때 전략적 깊이보다 순간적인 판단력과 반응 속도가 더 크게 작용한다. This map is a user‑made scenario built on a volcanic tileset with a size of 1024×1024, designed exactly as the title shows: seven human players face a single computer with the sole goal of rushing. The layout is symmetrical, with the players’ bases placed around a central computer base; narrow passages and limited resource zones push the units forward quickly. Minerals and gas are sparsely placed, enough only for early‑game production, while late‑game offers almost no extra resources, making the match hinge on an early surge rather than a prolonged battle. Consequently, players must push out units as fast as possible to pressure the enemy base, while the computer follows preset triggers to generate a set number of defensive units. Because victory is often decided within the first five minutes—unlike standard MELEE maps—quick decision‑making and precise micro become the core of the experience. The map is recommended for intermediate‑to‑advanced players who enjoy rush strategies; in team play, communication and role allocation become the key to victory. Before playing, confirm that the map is rush‑only and focus on early unit production rather than over‑expanding the economy. The terrain follows lava flows, creating natural chokepoints that concentrate the attack routes into one or two avenues. This leads to frequent clashes at the entrances, where the defending side can attempt pre‑emptive defenses with walls and photon cannons. Additionally, the limited mineral patch near the start provides just enough resources for early unit production, enabling a fast tech‑rush. These design choices clearly establish the map as a rush‑only scenario, shifting emphasis from deep strategy to split‑second judgment and reaction speed compared with ordinary MELEE maps.
빠른 승리 (the fast win)
스타크래프트 브루드워의 얼음 타일셋을 기반으로 한 정제되지 않은 밀리 맵, 'Untitled Scenario'는 파일명 'the fast win.scx'에서 느껴지듯 극단적인 초반 교전과 일방적인 승리를 위한 구조로 설계되었습니다. 4096x4096의 넓은 필드 중앙에는 자원 멀티와 건물이 거의 배치되지 않아, 시작하자마자 바로 본진 인근에서 전투가 벌어질 수밖에 없습니다. 이 맵의 특징은 '빠른 승리'라는 이름처럼 테란의 벙커 러시, 프로토스의 광전사 러시, 저그의 러커 드랍 등 초반 전략이 매우 강력하게 작용한다는 점입니다. 특히 설원 타일셋의 어두운 배경은 시야를 제한하여 초반 정찰의 중요성을 높이고, 맵의 균형이 무너지기 쉬운 구조를 부여합니다. 플레이어는 시작 직후 자신의 스타팅Area를 벗어나지 않고도 적의 기지를 바로 공격할 수 있는 위치에 있으며, 이는 맵의 긴장감을 극대화합니다. 다만, 중앙 멀티와 같은 자원 분배 구역이 없어서 후반 자원 전쟁이 발생하지 않으며, 오로지 초반 교전과 빠른 건물 파괴에 모든 것이 집중됩니다. 이러한 구조는 초보 플레이어에게는 학습 효과가 크지만, 숙련자들에게는 전략의 깊이가 부족하게 느껴질 수 있습니다. 맵의 승리 조건은 단순하게 모든 적 건물을 파괴하는 것으로, 이를 위해 플레이어는 자신이 가진 모든 유닛을 즉시 전선에 투입하는 극한의 공격적 플레이가 요구됩니다. 초반 빌드오더와 테크 선택의 차이가 승패를 좌우하는 이 맵은, 말 그대로 '빠른 승리'를 목표로 하는 밀리 맵의 정석을 보여줍니다. 다만, 맵의 밸런스가 오로지 초반 교전에만 치중되어 있어, 다양한 전략과 테크트리를 시도해 보고 싶은 플레이어들에게는 다소 아쉬운 부분으로 남습니다. 이 맵을 즐기기 위해서는 초반 유닛 생산과 진출 타이밍을 철저히 계산해야 하며, 가능한 한 빠른 시간 내에 적 기지를 파괴하는 것이 핵심입니다. 또한, 설원 타일셋의 어두운 조명과 제한된 시야를 고려하여, 유닛 컨트롤과 정찰을 동시에 수행할 수 있는 능력이 필요합니다. 초보자와 숙련자 모두에게 흥미로운 경험을 제공하지만, 특히 초보자에게는 스타크래프트의 기본적인 전투와 빌드 개념을 빠르게 습득할 수 있는 좋은 연습용 맵으로 활용될 수 있을 것입니다. 다만, 이 맵이 제공하는 전략의 다양성은 제한적이므로, 다양한 맵을 접하고자 하는 플레이어에게는 추천하기 어려운 점도 있습니다. 이 맵을 플레이하기 전에, 자신의 스타일과 전략이 초반 교전에 특화되어 있는지, 그리고 빠른 승리를 목표로 할 수 있는 준비가 되어 있는지를 먼저 생각해 보는 것이 좋습니다. 또한, 맵의dark한 조명과 제한된 시야를 극복하기 위해, 가능한 한 빠른 정찰과 맵 리딩 능력을 키우는 연습을 병행하는 것이 좋습니다. 이 맵은 단순히 '승리'만을 목표로 하기보다는, 스타크래프트의 기본기와 전투 감각을 다듬는 데에 중점을 두는 것이 바람직합니다. 초보자와 숙련자 모두에게 유용한 맵이지만, 그 활용 방법은 분명히 구분되어야 합니다. 초보자는 이 맵을 통해 빠른 전투와 빌드오더의 중요성을 배울 수 있으며, 숙련자는 자신의 초반 전략과 테크 선택 능력을 검증할 수 있는 좋은 기회로 삼을 수 있습니다. 다만, 이 맵이 제공하는 전략적 깊이의 한계는 반드시 염두에 두어야 합니다. 이 맵을 즐기면서도, 동시에 다른 전략적 깊이를 가진 맵들도 함께 플레이하여 스타크래프트의 다양한 재미를 경험하는 것이 좋습니다. This untitled melee map, set on the frozen tundra tileset of StarCraft: Brood War, is a raw and unrefined design that prioritizes instant early-game aggression under the filename 'the fast win.scx'. The 4096x4096 expansive field deliberately omits mid-game resources and expansions, forcing immediate confrontation near starting positions regardless of race. The dark, snow-covered environment restricts visibility, amplifying the role of scouting in the opening minutes. The map’s balance hinges entirely on rapid base destruction through early rushes — Terran bunkers, Protoss zealot charges, or Zerg lurker drops all thrive in this compressed battlefield. Central resource nodes are nonexistent, eliminating late-game macro play and reducing the match to a swift, decisive clash. While the simplicity aids new players in grasping core combat dynamics, it offers limited strategic depth for veterans seeking extended build orders or multi-stage strategies. Victory requires destroying all enemy structures, compelling players to commit every unit to the frontline immediately. The map’s balance revolves around optimizing initial unit production and timing, but its narrow focus on early aggression may feel repetitive for those seeking diverse tactical play. The dim lighting and obscured vision demand sharp micro-management and constant map awareness. Beginners will find this map useful for practicing fundamental combat and build orders, but its lack of variety makes it less ideal for players seeking broader strategic experiences. Before playing, assess whether your strategy aligns with early-game dominance and prepare for quick victories. The map’s constraints also serve as an exercise in efficient scouting and unit control under limited visibility. While it serves as a practical tool for refining basic mechanics, its limited depth means supplementing play with more complex maps is advisable for sustained enjoyment. Both beginners and experts can benefit, but their engagement with the map should differ — novices to learn pace, veterans to test rush strategies — always mindful of its strategic limitations.
STF - Opposition
STF - Opposition는 스타크래프트 브루드워의 밸런스형 1:1 밀리 맵으로, symmetrical(대칭) 구조를 기반으로 한 symmetrical 디자인(대칭 구조)이 특징입니다. 맵 중앙을 기준으로 양측이 거의 동일한 지형을 공유하고 있지만, 세부적인 언덕과 언덕 사이의 통로 배치, 미네랄과 가스 위치가 미묘하게 달라 각 플레이어의 전략적 선택지를 제한하고 있습니다. 이런 구조는 양측의 공격과 수비 위치를 자연스럽게 결정짓게 하며, 맵의 이름 'Opposition'이 보여주듯 상대방과 대립하는 입장 차이를 극대화합니다. 특히 양쪽의 언덕 지형이 서로를 바라보는 형태로 배치되어 있어, 초반 러시 타이밍과 기지 방어 라인을 플레이어의 선호도에 따라 유연하게 선택할 수 있도록 설계되었습니다. 미네랄과 가스의 균형도 적절히 맞춰져 있어, 자원 관리와 멀티 태스킹을 중시하는 플레이어에게는 전략적 깊이를 더해줍니다. 다만, symmetrical 구조임에도 불구하고 일부 통로의 폭이 좁아 테란의 배럭 러시나 저그의 러커 전략 등 특정 종족의 강세가 두드러질 가능성이 있으며, 이는 맵의 밸런스를 맞추기 위한 의도된 디자인으로 보입니다. 초보 플레이어는 이러한 구조적 특징을 잘 이해하지 못해 일방적인 공격을 당하기 쉬우며, 고수 층에서는 symmetrical 맵의 특성을 활용한 심리전과 타이밍 러시가 빈번히 등장할 것으로 예상됩니다. 전반적으로 symmetrical 밸런스형 1:1 맵을 선호하는 유저들에게 강력히 추천할 만한 작품입니다. 플레이 전에는 자신의 선호하는 종족과 전략 스타일을 고려해, 맵의 양측 언덕 지형과 통로 폭을 미리 분석해 두는 것이 좋습니다. 또한 symmetrical 맵의 특성상, 상대방의 전략을 빠르게 읽고 대응하는 능력이 중요하므로, 다양한 빌드 오더를 연습해 둔 상태라면 더 큰 재미를 느낄 수 있을 것입니다. STF - Opposition is a balanced 1:1 melee map for StarCraft: Brood War, built around a symmetrical design that ensures both players share nearly identical terrain. The subtle differences in mineral and gas placement, as well as the arrangement of hills and pathways, subtly restrict strategic choices, forcing players to adapt their attack and defense positions naturally. The map's title 'Opposition' reflects this dynamic, highlighting the contrasting roles each player must adopt. The hill placements are strategically angled to face each other, allowing flexibility in early rush timing and base defense lines depending on player preference. The balance of resources is also well-tuned, adding depth to resource management and multitasking gameplay. However, despite its symmetry, certain pathways are narrow enough to favor specific strategies like Terran's Barracks rush or Zerg's Lurker tactics, which may influence the map's balance. This appears to be an intentional design choice to create a dynamic playing field. Beginner players may struggle due to the structural nuances, while advanced players will likely engage in psychological warfare and timing rushes common in symmetrical maps. Overall, this is a highly recommended map for players who enjoy balanced 1:1 symmetrical melee maps. Before playing, it's advisable to analyze the map's hills, pathways, and resource layouts to align with your preferred race and strategy. Given the nature of symmetrical maps, the ability to quickly read and counter your opponent's strategy is crucial—practicing diverse build orders will enhance your experience.
노 러시 20 5.3 스페이스 (No Rush 20 5.3 Space)
스타크래프트 브루드워의 대표적인 유즈맵 가운데 하나인 〈No Rush 20 5.3 Space〉는Official No Rush 20 Simulation Map〉이라는 설명처럼 ‘노 러시’ 계열의 시뮬레이션 디펜스 장르에 속합니다. 이 맵은 이름에서 알 수 있듯이 20개의 러시 웨이브를 버텨내야 하는 서바이벌 형식의 디펜스를 기본 뼈대로 삼고 있습니다. 우주 테마의 타일셋을 사용하여 배경이 어두운 우주 공간으로 꾸며져 있으며, 맵의 각 모서리 부분에 위치한 베이스 구역은 기존 노 러시 맵들과 달리 약간의 변형이 가해진 채 배치되어 있습니다. 플레이어는 ‘use map settings’를 활성화한 상태에서 모든 업그레이드와 45 스택의 자원을 즉시 확보한 채 시작하며, 맵 중앙에 위치한 타이머가 전체 게임의 흐름을 조절합니다. 맵의 구조는 비교적 평평한 가운데 지대와 각 모서리 베이스 사이의 간격이 넓게 펼쳐져 있어 러시 유닛들이 접근하는 경로가 뚜렷하다는 특징이 있습니다. 특히 우주 테마답게 맵 곳곳에 행성과 소행성 같은 지형물이 배치되어 시야를 일부 가리거나 전략적 요충지를 형성하기도 합니다. 러시가 시작되면 20단계에 걸쳐 다양한 테란, 저그, 프로토스 유닛들이 끊임없이 밀려오며, 플레이어는 이들을 효율적으로 방어하고 자원을 관리해야 합니다. 맵의 특성상 초반 자원과 업그레이드가 동일하게 제공되므로 개개인의 전략과 컨트롤이 승패를 좌우하는 경우가 많습니다. 또한, 맵의 타이머가 충분한 시간을 제공한다고는 하지만, 후반부로 갈수록 러시의 강도가 급격히 상승하므로 집중력을 잃지 않는 것이 중요합니다. 초보 플레이어의 경우 방어선 구축과 유닛 컨트롤에 익숙해지는 데 시간이 다소 걸릴 수 있지만, 익숙해지면 긴장감 넘치는 디펜스 경험을 즐길 수 있습니다. 추천 대상은 디펜스와 시뮬레이션 장르를 좋아하며, 꾸준한 플레이를 통해 실력을 쌓고 싶은 스타크래프트 유즈맵 팬들입니다. 특히 ‘노 러시’ 시리즈의 팬이라면 이 맵의 변형된 베이스 구조와 우주 테마가 주는 새로운 분위기를 경험할 수 있을 것입니다. 플레이 전에는 맵의 베이스 위치와 러시 루트를 미리 숙지하고, 각 단계별로 요구되는 방어 전략을 연습해 두는 것이 좋습니다. 또한, 유닛의 업그레이드와 스펙 변화를 꼼꼼히 확인하여 러시가 올 때 대응할 준비를 갖추는 것이 중요합니다. 마지막으로, 맵의 중앙 타이머를 주시하며 남은 시간을 체크하는 습관을 들이면 게임의 흐름을 놓치지 않고 플레이할 수 있습니다. No Rush 20 5.3 Space is one of the most iconic custom maps in StarCraft: Brood War, belonging to the simulation defense genre represented by the "No Rush" series. As indicated by its description "Official No Rush 20 Simulation Map," the core gameplay revolves around surviving 20 waves of relentless enemy rushes. The map employs a space-themed tileset, setting the stage in a dark cosmic environment, with bases positioned at each corner that feature slight variations compared to traditional No Rush maps. Players begin with instant access to all upgrades and a massive 45-stack of resources when the "use map settings" option is enabled, while a timer in the center of the map regulates the overall flow of the game. The layout is characterized by a relatively flat central area with wide gaps between the corner bases, making the paths of incoming rush units clearly visible. The space theme is enhanced by scattered planets and asteroids that occasionally block vision or create strategic choke points. As the rush progresses through 20 stages, players face an escalating tide of Terran, Zerg, and Protoss units, requiring efficient defense strategies and resource management. Since all players start with identical resources and upgrades, individual skill and unit control become critical factors in determining victory. While the timer provides ample time, the intensity of the rushes sharply increases in the later stages, demanding unwavering focus. Beginners may find the early stages challenging as they adapt to base construction and unit micro-management, but once mastered, the map delivers an exhilarating defense experience. This map is recommended for fans of defense and simulation genres who enjoy honing their skills through repeated play. For those familiar with the No Rush series, the altered corner bases and space-themed aesthetic offer a fresh yet nostalgic twist. Before playing, it's advisable to study the base locations and rush routes, practice stage-specific defense strategies, and familiarize yourself with unit upgrades and specifications. Keeping an eye on the central timer and managing remaining time effectively will help maintain control over the game's pace and prevent critical oversights.
언덕의 왕 (KING OF THE HILL)
KING OF THE HILL 맵은 UMS(유즈맵) 기반의 8인 전용 언덕 점령형 전투 맵이다. 전체 맵 크기는 3072×3072 타일 96×96으로, 우주 타일셋을 사용해 넓은 평야와 고지대가 자연스럽게 배치되어 있다. 플레이 시작 시 각 플레이어는 랜덤한 위치에 기지를 세우고, 중앙에 위치한 언덕을 차지하기 위해 빠른 러시와 방어를 반복한다. 언덕을 점령하면 일정 시간 유지 시 승리 조건이 충족되므로, 초반 공격력과 이동 속도, 그리고 적의 방어 타워를 어떻게 무력화하느냐가 핵심 전략이다. 맵 구조는 대칭적이지만, 중앙 고지대 주변에 몇 차례의 작은 고지와 협곡이 있어 우회로를 이용한 측면 공격도 가능하다. 따라서 공격형 플레이어와 방어형 플레이어 모두에게 균형 잡힌 경험을 제공한다. 추천 대상은 빠른 전투와 지속적인 압박을 즐기는 유저이며, 특히 초중급 수준의 플레이어가 전략을 시험하기에 적합하다. 플레이 전 확인해야 할 포인트는 초기 자원 배치와 언덕 주변에 배치된 중립 유닛·타워의 존재 여부이다. 이 요소들은 초반 러시 성공 여부에 큰 영향을 미치므로, 미리 파악하고 대응 전략을 준비하는 것이 좋다. KING OF THE HILL is an 8‑player UMS (use‑map) hill‑control map for StarCraft: Brood War. The map spans 3072×3072 tiles (96×96 per tile) and uses the Space tileset, featuring a large open plain with a central elevated hill. At the start each player builds a base at a random location and rushes toward the central hill, aiming to hold it for a set duration to meet the victory condition. The core strategy revolves around early aggression, unit speed, and disabling enemy defensive structures. While the overall layout is symmetric, several smaller elevations and valleys around the hill provide flanking routes, allowing both offensive and defensive playstyles to thrive. This balance makes the map suitable for players who enjoy fast‑paced combat and continuous pressure, especially those at beginner to intermediate skill levels. Before playing, check the initial resource distribution and the presence of neutral units or turrets near the hill, as these significantly affect the success of early rushes and should be accounted for in your opening plan.
불가능한 러시 아워 (Impossible Rush Hour)
Impossible Rush Hour는 5인용 PvE 유즈맵으로, 플레이어가 제한된 시간 안에 끊임없이 쏟아지는 적을 막아내는 형태의 고난이도 러시 맵이다. 맵은 황무지 타일셋을 기반으로 4096×2048 해상도에 128×64 타일 단위로 구성되어 있어 넓은 전장을 제공한다. 시작 지점에서 여러 경로가 분기되며, 각 경로마다 적이 순차적으로 등장해 플레이어에게 지속적인 압박을 가한다. 적의 스폰 간격이 점점 짧아지면서 반응 속도와 유닛 배치 능력이 시험대에 오른다. 방어 건물은 제한적으로 배치할 수 있어, 유닛 조합과 위치 선정이 핵심 전략이다. 특히, 적이 몰려오는 구역에서는 이동형 유닛을 활용해 빠르게 전선을 전환하거나, 스킬을 적절히 사용해 일시적인 방어선을 구축해야 한다. 맵 전반에 걸쳐 시야가 제한된 지역이 존재해, 정찰 유닛을 적절히 배치해 정보 확보가 중요하다. 플레이 전에는 적 스폰 패턴과 맵의 주요 지형을 미리 파악하고, 방어 포인트를 미리 정해두는 것이 좋다. 초반에 과도한 유닛 생산을 피하고, 중후반에 대비해 자원을 아끼는 것이 승리 확률을 높인다. 이 맵은 빠른 판단과 정확한 마이크로 컨트롤을 요구하므로, 고난이도 도전을 즐기는 숙련 플레이어에게 특히 추천한다. Impossible Rush Hour is a 5‑player PvE use map that challenges players to survive relentless waves of enemies within a tight time limit. Built on the Desert tileset with a 4096×2048 resolution and 128×64 tile grid, the map offers a spacious battlefield where multiple paths branch out from the starting area. Enemies spawn sequentially along these routes, gradually decreasing the interval between spawns, which puts a premium on reaction speed and unit placement. Defensive structures are limited, making unit composition and positioning the core of the strategy. In high‑pressure zones, mobile units must be used to shift the front line quickly, while timely use of abilities can create temporary bulwarks. Fog‑of‑war areas scattered across the map demand early scouting units to maintain map awareness. Before a match, players should study the enemy spawn patterns and key terrain features, pre‑designating defensive points. Avoid over‑producing units early and conserve resources for the mid‑to‑late game to improve win chances. The map’s emphasis on rapid decision‑making and precise micro‑control makes it especially suitable for seasoned players seeking a tough challenge.
맵 선택 가이드
태그는 맵의 핵심 특징을 빠르게 설명하지만 제작 버전마다 규칙이 다를 수 있습니다. 상세 설명에서 권장 인원, 난이도, 플레이 시간과 버전을 함께 확인한 뒤 다운로드하세요.