
랜덤 공격 스타크래프트 맵 모음
'랜덤 공격' 태그가 등록된 맵을 모았습니다. 장르 하나로 찾기 어려운 플레이 방식, 난이도와 특징을 중심으로 인기 맵과 최신 맵을 비교해 보세요.
- 등록 맵
- 3개
- 누적 다운로드
- 0
- 누적 조회
- 86
인기 맵
다운로드와 조회 반응이 높은 맵입니다.
네덱스 디스트로이 Z 3.8 (Nexus Destroy Z 3.8)
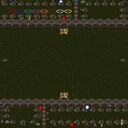
스타크래프트 브루드워의 유즈맵 <네덱스 디스트로이 Z 3.8(Nexus Destroy Z 3.8)>은 네트워크 파괴를 주제로 한 디펜스 장르의 유즈맵으로, 플레이어는 적의 넥서스를 파괴하는 동시에 자신의 기지를 방어해야 하는 전략적 긴장감을 느낄 수 있다. 맵은 사막 타일셋으로 구성되어 있으며, 중앙에 위치한 주요 전투 지역을 중심으로 네 개의 플레이어 기지가 배치되어 있다. 각 기지 주변에는 방어 시설이 상주하며, 적의 공격 패턴에 따라 유동적으로 대응해야 한다. 게임은 크게 두 가지 목표로 나뉘는데, 하나는 적 넥서스의 체력을 0으로 만드는 것이고, 다른 하나는 자신의 넥서스가 파괴되지 않도록 보호하는 것이다. 맵 곳곳에 배치된 미네랄과 가스는Resource Management를 요구하며, 초반에는 자원 확보가 중요하지만 중반 이후에는 방어와 공격의 균형을 맞추는 것이 핵심이다. 특히 적의 대규모 공격 타이밍을 예측하고, 유닛을 효율적으로 배치하는 것이 승리 열쇠가 된다. 맵의 난이도는 중상급으로, 적의 공격 패턴이 랜덤하게 변화하기 때문에 플레이어의 전략적 사고와 적응력이 요구된다. 이 맵은 초보 플레이어보다는 중급 이상의 유저들에게 적합하며, 디펜스와 공격의 밸런스를 맞추는 재미가 있는 한편, 다수의 유닛을 동시에 조종해야 하는 복잡성도 갖추고 있다. 또한, 맵의 구조상 방어선이 무너지면 순식간에 역전이 가능하다는 점에서 긴장감 있는 플레이가 특징이다. 추천하는 플레이 방식은 방어塔와 유닛의 조합을 미리 준비하고, 적의 공격 루트를 차단하는 것이다. 자원 관리와 병력 생산 타이밍을 잘 조절하면 보다 수월하게 진행할 수 있다. 이 맵을 플레이하기 전에는 자신의 기지 주변의 방어 시설과 자원 분포를 미리 확인하는 것이 좋다. 또한, 적 넥서스의 위치와 접근 루트를 파악하여 효율적인 공격 루트를 설정하는 것이 중요하다. 맵의 디자인상 특정 위치에서만 공격을 집중하는 전략이 유효할 수 있으므로, 게임을 시작하기 전에 맵을 충분히 분석해 두는 것이 좋다. StarCraft: Brood War's custom map *Nexus Destroy Z 3.8* is a defense-style map centered around the theme of network destruction, where players must destroy the enemy's Nexus while simultaneously defending their own base, creating a strategic and tense experience. The map features a desert tileset with four player bases positioned around a central combat zone. Each base is equipped with defensive structures, requiring players to adapt dynamically to the enemy's attack patterns. The game has two main objectives: reducing the enemy Nexus's health to zero and preventing your own Nexus from being destroyed. Scattered throughout the map, minerals and gas demand effective resource management. While securing resources early is crucial, balancing defense and offense becomes key in the mid-game. Predicting large-scale enemy attacks and deploying units efficiently are vital to victory. With a difficulty rating of medium-high, the map challenges players with randomized enemy attack patterns, demanding strong strategic thinking and adaptability. This map is best suited for intermediate to advanced players, offering a satisfying balance between defense and offense while also requiring the management of multiple units simultaneously. Its structure allows for dramatic comebacks if defensive lines collapse, adding to the excitement. Recommended strategies include preparing defensive towers and unit compositions in advance and blocking enemy attack routes. Proper resource management and timely troop production can make the game significantly smoother. Before playing, it’s wise to scout your base’s defensive structures and resource distribution. Identifying the enemy Nexus’s location and access routes helps in planning efficient attack strategies. Since certain positions on the map may lend themselves to focused attacks, thoroughly analyzing the map beforehand is essential.
타워 디펜스 v2.9c plus (Tower Defence v2.9c plus)
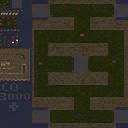
스타크래프트 브루드워의 대표적인 디펜스형 유즈맵인 〈타워 디펜스 v2.9c plus〉는 적의 끊임없는 공세를 막아내며 성장을 도모하는 긴장감 넘치는 플레이가 특징입니다. 맵 중앙을 가로지르는 좁은 길목에 강력한 방어 타워들을 배치하고, 플레이어는 자원과 유닛을 효율적으로 관리하며 침공을 방어해야 합니다. 맵 곳곳에 배치된 자원 수집 지역과 미네랄, 가스 광산을 활용해 자원을 확보하고, 업그레이드 가능한 방어 구조물을 꾸준히 확장하는 전략이 필요합니다. 적의 공격 패턴은 랜덤으로 변화하며, 초반에는 약한 유닛들이 몰려오지만 후반부로 갈수록 강력한 조합의 유닛들이 등장해 플레이어를 압박합니다. 특히 맵 상단과 하단에 위치한 입구는 좁고 보호받기 어려운 구조여서, 초반 방어 라인을 어떻게 구축하느냐가 승패를 좌우합니다. 또한, 맵 우측 하단에 위치한 보급 기지는 방어 타워의 재건축과 유닛 생산을 동시에 지원하는 핵심 포인트로, 이 곳을 사수하는 것이 안정적인 플레이의 열쇠가 됩니다. 맵의 배경은 사막 타일셋으로 구성되어 있어 건조한 사막 지형이 주는 분위기와는 달리 치열한 전투가 펼쳐지는 대조적인 장면을 연출합니다. 초보 플레이어는 기본적인 타워 배치와 자원 관리만으로도 어느 정도 진행이 가능하지만, 숙련된 플레이어는 업그레이드 타이밍과 유닛 조합, 심지어는 적의 공격 패턴을 예측하는 심화 전략까지 요구됩니다. 이 맵은 혼자서도 충분히 즐길 수 있지만, 팀 플레이를 지원하는 구조로도 설계되어 있어 여럿이서 협력하며 방어전을 펼칠 수도 있습니다. 긴장감과 성취감을 동시에 느낄 수 있는 〈타워 디펜스 v2.9c plus〉는 스타크래프트 유즈맵의Classic 중 하나로, 디펜스 장르를 좋아하는 플레이어라면 반드시 체험해볼 가치가 있습니다. 플레이 전에는 자원 분배와 타워 배치 위치, 그리고 입구 방어 라인의 중요성을 숙지하는 것이 좋습니다. 또한, 업그레이드와 유닛 생산 타이밍을 잘 조절하지 않으면 중반 이후 sudden death에 직면할 수 있으니 주의가 필요합니다.—¡(Tower Defence v2.9c plus)—는 단순한 방어가 아니라 전략과 집중력이 요구되는 몰입도 높은 유즈맵입니다.—,—,—,—Tower Defence v2.9c plus—,—,— StarCraft: Brood War's classic defense-style custom map, *Tower Defense v2.9c plus*, features tense gameplay where players must fend off relentless enemy waves while steadily growing stronger. The map centers around a narrow choke point lined with powerful defensive towers, forcing players to manage resources and units efficiently to hold the line. Strategic use of scattered resource points, mineral fields, and vespene geysers is crucial for securing income, while continuously expanding and upgrading defensive structures keeps the defenses evolving. Enemy attacks shift unpredictably—starting with weaker units before escalating to devastating late-game compositions that pressure the player. The top and bottom entrances, narrow and exposed, demand careful early-game fortification, as their defense often determines victory or defeat. The supply depot in the bottom-right corner serves as a critical hub, supporting both tower reconstruction and unit production, making its defense essential for stability. Set against a desert tile theme, the otherwise barren landscape contrasts sharply with the intense, chaotic battles unfolding within. Beginners can manage with basic tower placement and resource handling, but advanced players must master upgrade timing, unit synergies, and even predict enemy patterns to excel. While fully playable solo, the map’s design also accommodates team play, allowing groups to collaborate in holding off the assault. Offering both suspense and a strong sense of accomplishment, *Tower Defense v2.9c plus* stands as a quintessential custom map in the genre, a must-try for any defense-map enthusiast. Before diving in, familiarize yourself with resource allocation, optimal tower placements, and the importance of securing entrance choke points. Neglecting upgrades or production timing risks sudden death in the mid-to-late game, so careful planning is essential. Far from a simple tower rush, *Tower Defense v2.9c plus* demands sharp strategy and unwavering focus to master.
최후의 요새 (Final Fortress)
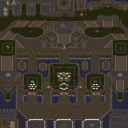
스타크래프트 브루드워의 대표적인 유즈맵 중 하나로 손꼽히는 <Final Fortress v6.6G>는 대규모 디펜스 성격을 띤 전략형 맵입니다. 7명의 플레이어가 각자의 요새를 지키며 적의 공격을 방어하는 방식으로 진행되며, 맵 곳곳에 배치된 방어 시설과 병력을 효율적으로 배치하고 관리하는 능력이 승리의 열쇠가 됩니다. 중앙에 위치한 넓은 평원은 전투가 벌어지는 주요 전장이며, 각 플레이어의 본진은 맵의 가장자리에 배치되어 있어 본진 방어와 전선 지원의 균형을 carefully 고려해야 합니다. 맵의 전체적인 분위기는 사막 테마로 조성되어 있으며, 건물과 지형이 조화롭게 배치되어 있어 시각적으로도 흥미로운 구성을 자랑합니다. 방어 시설로는 터렛, 포톤 캐논, 스포어 콜로니 등 다양한 방어 건물이 제공되며, 이를 활용한 전략적 배치와 업그레이드가 게임의 재미를 한층 더 높입니다. 또한, 맵의 특징 중 하나는 실시간으로 변화하는 전장 상황인데, 적의 공격 패턴이 랜덤하게 정해지기 때문에 플레이어는 매 전투마다 새로운 전략을 짜야 합니다. 이 맵은 단순히 방어만 하는 것이 아니라, 때로는 적극적인 공격이나 기습전을 펼쳐야 하는 순간도 찾아옵니다. 예를 들어, 적의 방어선을 무너뜨리기 위해 본진에서 병력을 이끌고 출격하거나, 상대방의 자원을 빼앗아 오는 등 다양한 전술을 구사할 수 있습니다. 이러한 다채로운 플레이 스타일은 초보자와 숙련자 모두에게 매력적으로 다가오며, 특히 스타크래프트의 기본 전략을 익히기에 좋은 연습용 맵으로도 손색이 없습니다. 플레이 전에는 맵의 구조와 방어 시설의 위치를 숙지하는 것이 중요합니다. 또한, 팀원과의 원활한 소통과 역할 분담이 승패를 좌우할 수 있기 때문에, 팀플레이를 고려한 전략 수립이 필요합니다. 맵의 난이도는 대체로 보통 수준으로 설정되어 있지만, 적의 공격 패턴이 랜덤하게 정해지기 때문에 운적인 요소도 강하다고 볼 수 있습니다. 따라서, 맵의 기본 메커니즘을 익히고자 한다면 먼저 혼자서 플레이해 보는 것도 좋은 방법입니다. 이 맵은 스타크래프트 유즈맵의 classic으로 자리매김하고 있으며, 오랜 시간 동안 많은 플레이어들에게 사랑받아 온 작품입니다. 특히, 대규모 디펜스와 전략적 플레이가 결합된 이 맵은 스타크래프트의 재미를 한층 더 끌어올려 주는 요소로 작용합니다. 만약 당신이 스타크래프트의 전략적 측면을 깊게 즐기고 싶다면, <Final Fortress v6.6G>는 반드시 한번쯤 플레이해 볼 가치가 있는 맵입니다. Final Fortress v6.6G is a classic user-made map in StarCraft: Brood War, renowned for its large-scale defense-focused gameplay. The map accommodates up to 7 players, each defending their own fortress against waves of enemy attacks. The central open area serves as the primary battlefield, while each player's base is strategically positioned at the map's edges, requiring careful balance between defense and offensive support. The map features a desert theme, with terrain and structures designed to create both functional and visually appealing layouts. Defensive buildings such as turrets, photon cannons, and spore colonies are available, and their strategic placement and upgrades play a crucial role in gameplay. One of the map's standout features is its dynamic battle system, where enemy attack patterns are randomized, forcing players to adapt their strategies in real time. Beyond passive defense, players can execute aggressive tactics like leading sorties from their bases or raiding enemy resources to disrupt their economy. This variety in playstyles makes the map appealing to both beginners and experienced players. It also serves as an excellent training ground for mastering StarCraft's core strategic concepts. Before playing, it's essential to familiarize yourself with the map layout and the positions of defensive structures. Effective team communication and role assignment are critical, as teamwork often determines victory. While the difficulty is generally moderate, the randomized enemy attacks introduce an element of unpredictability, making the map engaging for those seeking both strategy and excitement. Final Fortress v6.6G stands as a timeless classic in the StarCraft user-map community, beloved for blending large-scale defense mechanics with deep strategic gameplay. Its combination of challenge and replayability ensures it remains a favorite among fans of StarCraft's tactical depth. If you're looking to experience the strategic side of StarCraft in a fresh and immersive way, this map is a must-play.
최근 등록된 맵
새로 추가된 파일과 버전을 확인하세요.
타워 디펜스 v2.9c plus (Tower Defence v2.9c plus)
스타크래프트 브루드워의 대표적인 디펜스형 유즈맵인 〈타워 디펜스 v2.9c plus〉는 적의 끊임없는 공세를 막아내며 성장을 도모하는 긴장감 넘치는 플레이가 특징입니다. 맵 중앙을 가로지르는 좁은 길목에 강력한 방어 타워들을 배치하고, 플레이어는 자원과 유닛을 효율적으로 관리하며 침공을 방어해야 합니다. 맵 곳곳에 배치된 자원 수집 지역과 미네랄, 가스 광산을 활용해 자원을 확보하고, 업그레이드 가능한 방어 구조물을 꾸준히 확장하는 전략이 필요합니다. 적의 공격 패턴은 랜덤으로 변화하며, 초반에는 약한 유닛들이 몰려오지만 후반부로 갈수록 강력한 조합의 유닛들이 등장해 플레이어를 압박합니다. 특히 맵 상단과 하단에 위치한 입구는 좁고 보호받기 어려운 구조여서, 초반 방어 라인을 어떻게 구축하느냐가 승패를 좌우합니다. 또한, 맵 우측 하단에 위치한 보급 기지는 방어 타워의 재건축과 유닛 생산을 동시에 지원하는 핵심 포인트로, 이 곳을 사수하는 것이 안정적인 플레이의 열쇠가 됩니다. 맵의 배경은 사막 타일셋으로 구성되어 있어 건조한 사막 지형이 주는 분위기와는 달리 치열한 전투가 펼쳐지는 대조적인 장면을 연출합니다. 초보 플레이어는 기본적인 타워 배치와 자원 관리만으로도 어느 정도 진행이 가능하지만, 숙련된 플레이어는 업그레이드 타이밍과 유닛 조합, 심지어는 적의 공격 패턴을 예측하는 심화 전략까지 요구됩니다. 이 맵은 혼자서도 충분히 즐길 수 있지만, 팀 플레이를 지원하는 구조로도 설계되어 있어 여럿이서 협력하며 방어전을 펼칠 수도 있습니다. 긴장감과 성취감을 동시에 느낄 수 있는 〈타워 디펜스 v2.9c plus〉는 스타크래프트 유즈맵의Classic 중 하나로, 디펜스 장르를 좋아하는 플레이어라면 반드시 체험해볼 가치가 있습니다. 플레이 전에는 자원 분배와 타워 배치 위치, 그리고 입구 방어 라인의 중요성을 숙지하는 것이 좋습니다. 또한, 업그레이드와 유닛 생산 타이밍을 잘 조절하지 않으면 중반 이후 sudden death에 직면할 수 있으니 주의가 필요합니다.—¡(Tower Defence v2.9c plus)—는 단순한 방어가 아니라 전략과 집중력이 요구되는 몰입도 높은 유즈맵입니다.—,—,—,—Tower Defence v2.9c plus—,—,— StarCraft: Brood War's classic defense-style custom map, *Tower Defense v2.9c plus*, features tense gameplay where players must fend off relentless enemy waves while steadily growing stronger. The map centers around a narrow choke point lined with powerful defensive towers, forcing players to manage resources and units efficiently to hold the line. Strategic use of scattered resource points, mineral fields, and vespene geysers is crucial for securing income, while continuously expanding and upgrading defensive structures keeps the defenses evolving. Enemy attacks shift unpredictably—starting with weaker units before escalating to devastating late-game compositions that pressure the player. The top and bottom entrances, narrow and exposed, demand careful early-game fortification, as their defense often determines victory or defeat. The supply depot in the bottom-right corner serves as a critical hub, supporting both tower reconstruction and unit production, making its defense essential for stability. Set against a desert tile theme, the otherwise barren landscape contrasts sharply with the intense, chaotic battles unfolding within. Beginners can manage with basic tower placement and resource handling, but advanced players must master upgrade timing, unit synergies, and even predict enemy patterns to excel. While fully playable solo, the map’s design also accommodates team play, allowing groups to collaborate in holding off the assault. Offering both suspense and a strong sense of accomplishment, *Tower Defense v2.9c plus* stands as a quintessential custom map in the genre, a must-try for any defense-map enthusiast. Before diving in, familiarize yourself with resource allocation, optimal tower placements, and the importance of securing entrance choke points. Neglecting upgrades or production timing risks sudden death in the mid-to-late game, so careful planning is essential. Far from a simple tower rush, *Tower Defense v2.9c plus* demands sharp strategy and unwavering focus to master.
네덱스 디스트로이 Z 3.8 (Nexus Destroy Z 3.8)
스타크래프트 브루드워의 유즈맵 <네덱스 디스트로이 Z 3.8(Nexus Destroy Z 3.8)>은 네트워크 파괴를 주제로 한 디펜스 장르의 유즈맵으로, 플레이어는 적의 넥서스를 파괴하는 동시에 자신의 기지를 방어해야 하는 전략적 긴장감을 느낄 수 있다. 맵은 사막 타일셋으로 구성되어 있으며, 중앙에 위치한 주요 전투 지역을 중심으로 네 개의 플레이어 기지가 배치되어 있다. 각 기지 주변에는 방어 시설이 상주하며, 적의 공격 패턴에 따라 유동적으로 대응해야 한다. 게임은 크게 두 가지 목표로 나뉘는데, 하나는 적 넥서스의 체력을 0으로 만드는 것이고, 다른 하나는 자신의 넥서스가 파괴되지 않도록 보호하는 것이다. 맵 곳곳에 배치된 미네랄과 가스는Resource Management를 요구하며, 초반에는 자원 확보가 중요하지만 중반 이후에는 방어와 공격의 균형을 맞추는 것이 핵심이다. 특히 적의 대규모 공격 타이밍을 예측하고, 유닛을 효율적으로 배치하는 것이 승리 열쇠가 된다. 맵의 난이도는 중상급으로, 적의 공격 패턴이 랜덤하게 변화하기 때문에 플레이어의 전략적 사고와 적응력이 요구된다. 이 맵은 초보 플레이어보다는 중급 이상의 유저들에게 적합하며, 디펜스와 공격의 밸런스를 맞추는 재미가 있는 한편, 다수의 유닛을 동시에 조종해야 하는 복잡성도 갖추고 있다. 또한, 맵의 구조상 방어선이 무너지면 순식간에 역전이 가능하다는 점에서 긴장감 있는 플레이가 특징이다. 추천하는 플레이 방식은 방어塔와 유닛의 조합을 미리 준비하고, 적의 공격 루트를 차단하는 것이다. 자원 관리와 병력 생산 타이밍을 잘 조절하면 보다 수월하게 진행할 수 있다. 이 맵을 플레이하기 전에는 자신의 기지 주변의 방어 시설과 자원 분포를 미리 확인하는 것이 좋다. 또한, 적 넥서스의 위치와 접근 루트를 파악하여 효율적인 공격 루트를 설정하는 것이 중요하다. 맵의 디자인상 특정 위치에서만 공격을 집중하는 전략이 유효할 수 있으므로, 게임을 시작하기 전에 맵을 충분히 분석해 두는 것이 좋다. StarCraft: Brood War's custom map *Nexus Destroy Z 3.8* is a defense-style map centered around the theme of network destruction, where players must destroy the enemy's Nexus while simultaneously defending their own base, creating a strategic and tense experience. The map features a desert tileset with four player bases positioned around a central combat zone. Each base is equipped with defensive structures, requiring players to adapt dynamically to the enemy's attack patterns. The game has two main objectives: reducing the enemy Nexus's health to zero and preventing your own Nexus from being destroyed. Scattered throughout the map, minerals and gas demand effective resource management. While securing resources early is crucial, balancing defense and offense becomes key in the mid-game. Predicting large-scale enemy attacks and deploying units efficiently are vital to victory. With a difficulty rating of medium-high, the map challenges players with randomized enemy attack patterns, demanding strong strategic thinking and adaptability. This map is best suited for intermediate to advanced players, offering a satisfying balance between defense and offense while also requiring the management of multiple units simultaneously. Its structure allows for dramatic comebacks if defensive lines collapse, adding to the excitement. Recommended strategies include preparing defensive towers and unit compositions in advance and blocking enemy attack routes. Proper resource management and timely troop production can make the game significantly smoother. Before playing, it’s wise to scout your base’s defensive structures and resource distribution. Identifying the enemy Nexus’s location and access routes helps in planning efficient attack strategies. Since certain positions on the map may lend themselves to focused attacks, thoroughly analyzing the map beforehand is essential.
최후의 요새 (Final Fortress)
스타크래프트 브루드워의 대표적인 유즈맵 중 하나로 손꼽히는 <Final Fortress v6.6G>는 대규모 디펜스 성격을 띤 전략형 맵입니다. 7명의 플레이어가 각자의 요새를 지키며 적의 공격을 방어하는 방식으로 진행되며, 맵 곳곳에 배치된 방어 시설과 병력을 효율적으로 배치하고 관리하는 능력이 승리의 열쇠가 됩니다. 중앙에 위치한 넓은 평원은 전투가 벌어지는 주요 전장이며, 각 플레이어의 본진은 맵의 가장자리에 배치되어 있어 본진 방어와 전선 지원의 균형을 carefully 고려해야 합니다. 맵의 전체적인 분위기는 사막 테마로 조성되어 있으며, 건물과 지형이 조화롭게 배치되어 있어 시각적으로도 흥미로운 구성을 자랑합니다. 방어 시설로는 터렛, 포톤 캐논, 스포어 콜로니 등 다양한 방어 건물이 제공되며, 이를 활용한 전략적 배치와 업그레이드가 게임의 재미를 한층 더 높입니다. 또한, 맵의 특징 중 하나는 실시간으로 변화하는 전장 상황인데, 적의 공격 패턴이 랜덤하게 정해지기 때문에 플레이어는 매 전투마다 새로운 전략을 짜야 합니다. 이 맵은 단순히 방어만 하는 것이 아니라, 때로는 적극적인 공격이나 기습전을 펼쳐야 하는 순간도 찾아옵니다. 예를 들어, 적의 방어선을 무너뜨리기 위해 본진에서 병력을 이끌고 출격하거나, 상대방의 자원을 빼앗아 오는 등 다양한 전술을 구사할 수 있습니다. 이러한 다채로운 플레이 스타일은 초보자와 숙련자 모두에게 매력적으로 다가오며, 특히 스타크래프트의 기본 전략을 익히기에 좋은 연습용 맵으로도 손색이 없습니다. 플레이 전에는 맵의 구조와 방어 시설의 위치를 숙지하는 것이 중요합니다. 또한, 팀원과의 원활한 소통과 역할 분담이 승패를 좌우할 수 있기 때문에, 팀플레이를 고려한 전략 수립이 필요합니다. 맵의 난이도는 대체로 보통 수준으로 설정되어 있지만, 적의 공격 패턴이 랜덤하게 정해지기 때문에 운적인 요소도 강하다고 볼 수 있습니다. 따라서, 맵의 기본 메커니즘을 익히고자 한다면 먼저 혼자서 플레이해 보는 것도 좋은 방법입니다. 이 맵은 스타크래프트 유즈맵의 classic으로 자리매김하고 있으며, 오랜 시간 동안 많은 플레이어들에게 사랑받아 온 작품입니다. 특히, 대규모 디펜스와 전략적 플레이가 결합된 이 맵은 스타크래프트의 재미를 한층 더 끌어올려 주는 요소로 작용합니다. 만약 당신이 스타크래프트의 전략적 측면을 깊게 즐기고 싶다면, <Final Fortress v6.6G>는 반드시 한번쯤 플레이해 볼 가치가 있는 맵입니다. Final Fortress v6.6G is a classic user-made map in StarCraft: Brood War, renowned for its large-scale defense-focused gameplay. The map accommodates up to 7 players, each defending their own fortress against waves of enemy attacks. The central open area serves as the primary battlefield, while each player's base is strategically positioned at the map's edges, requiring careful balance between defense and offensive support. The map features a desert theme, with terrain and structures designed to create both functional and visually appealing layouts. Defensive buildings such as turrets, photon cannons, and spore colonies are available, and their strategic placement and upgrades play a crucial role in gameplay. One of the map's standout features is its dynamic battle system, where enemy attack patterns are randomized, forcing players to adapt their strategies in real time. Beyond passive defense, players can execute aggressive tactics like leading sorties from their bases or raiding enemy resources to disrupt their economy. This variety in playstyles makes the map appealing to both beginners and experienced players. It also serves as an excellent training ground for mastering StarCraft's core strategic concepts. Before playing, it's essential to familiarize yourself with the map layout and the positions of defensive structures. Effective team communication and role assignment are critical, as teamwork often determines victory. While the difficulty is generally moderate, the randomized enemy attacks introduce an element of unpredictability, making the map engaging for those seeking both strategy and excitement. Final Fortress v6.6G stands as a timeless classic in the StarCraft user-map community, beloved for blending large-scale defense mechanics with deep strategic gameplay. Its combination of challenge and replayability ensures it remains a favorite among fans of StarCraft's tactical depth. If you're looking to experience the strategic side of StarCraft in a fresh and immersive way, this map is a must-play.
맵 선택 가이드
태그는 맵의 핵심 특징을 빠르게 설명하지만 제작 버전마다 규칙이 다를 수 있습니다. 상세 설명에서 권장 인원, 난이도, 플레이 시간과 버전을 함께 확인한 뒤 다운로드하세요.