
라커 스타크래프트 맵 모음
'라커' 태그가 등록된 맵을 모았습니다. 장르 하나로 찾기 어려운 플레이 방식, 난이도와 특징을 중심으로 인기 맵과 최신 맵을 비교해 보세요.
- 등록 맵
- 7개
- 누적 다운로드
- 0
- 누적 조회
- 250
인기 맵
다운로드와 조회 반응이 높은 맵입니다.
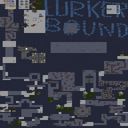
라커바운드 (Lurkerbound) Ver 1.5
스타크래프트: 브루드워의 특수 유즈맵 ‘라커바운드(Lurkerbound) Ver 1.5’는 다수의 플레이어가 한 팀을 이루어 적의 공격을 방어하고 목표를 달성하는 디펜스 장르의 맵이다. 맵은 좌우로 넓은 평야와 중앙에 위치한 거대 건물이 특징적이며, 건물을 중심으로 다수의 방어 시설과 진입로가 배치되어 있다. 플레이어는 각자 정해진 시작 지점에서 시작하여 적의 공세를 막아내며, 일정 조건을 만족시키면 승리할 수 있는 구조로 보인다. 맵의 분위기는 침착하고 전략적인 플레이가 요구되며, 특히 라커( lurker) 유닛의 특성을 살린 플레이가 가능할 것으로 추정된다. 커스텀 맵답게 밸런스와 디자인 면에서 다소 실험적인 요소가 느껴지지만, 넓은 시야와 다양한 진입로 덕분에 플레이어 간의 협력이 중요한 요소로 작용할 것이다. 초보 플레이어에게는 다소 난해할 수 있지만, 디펜스와 협력 플레이에 익숙한 유저라면 충분히 즐길 수 있는 콘텐츠다. 플레이 전에는 맵의 시작 지점과 주요 방어 포인트를 미리 확인한 뒤, 팀원과의 역할 분담을 명확히 하는 것이 성공의 핵심이다. 또한, 맵의 넓고 복잡한 구조상 미니맵 사용이 필수적이며, 적의 공격 패턴을 빠르게 읽고 대응하는 능력이 요구된다. 전체적으로는 전략적 깊이가 있는 디펜스 맵으로, 팀워크와 빠른 판단력이 빛을 발할 수 있는 작품이다. Lurkerbound Ver 1.5 is a special user-made defense map within StarCraft: Brood War, where multiple players form a team to defend against enemy attacks and achieve objectives. The map features a wide plain on both sides and a massive central building, surrounded by various defensive structures and entry points. Players start from designated positions and must fend off enemy assaults; victory is likely achieved by fulfilling certain conditions. The atmosphere is calm yet strategic, requiring careful planning. Given its custom nature, the balance and design might have experimental elements, but the wide field of view and multiple entry points make teamwork essential. While the map may be challenging for beginners, it offers an enjoyable experience for those familiar with defense and cooperative gameplay. Before playing, it’s important to check starting positions and key defense points and clearly divide roles among teammates. Due to the map’s vast and complex structure, using the minimap is crucial, and the ability to quickly read and respond to enemy attack patterns is vital. Overall, it is a strategically deep defense map where teamwork and quick decision-making shine.
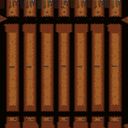
라커 디펜스 온 유어 오운! 5.0 (Lurker Defense On Your Own! 5.0)
스타크래프트 브루드워의 ‘라커 디펜스 온 유어 오운!(Lurker Defense On Your Own!)’은 이름 그대로 라커 유닛을 중심으로 한 디펜스형 유즈맵으로, 총 30레벨을 클리어해야 하는 구조를 갖고 있다. 게임은 화면 하단에서 적 유닛이 끊임없이 몰려오는 것을 라커로 저지하는 것이 주 목표이며, 각 레벨마다 정해진 수의 적을 막아내면 다음 단계로 넘어갈 수 있다. 라커의 특성상 지상 유닛에만 효과가 있으므로 공중 유닛이나 특수 유닛이 등장할 때는 추가 대응이 필요하다는 점이 특징이다. 맵의 전체적인 디자인은 황혼 테마의 타일셋을 기반으로 깔끔하게 구성되어 있으며, 하단 중앙에서 적들이 쏟아져 나오는 구조는 전형적인 디펜스 게임의 흐름을 따르고 있다. 플레이어는 제한된 자원으로 라커를 배치하고, 때로는 보조 유닛을 활용해 적의 진격을 늦추거나 제거해야 한다. 레벨이 진행될수록 적의 종류와 수가 늘어나며, 일부 레벨에서는 특정 조건(예: 특정 유닛만 통과시키지 않기, 특정 유닛만 제거하기)이 추가되어 전략의 다양성을 요구한다. 초보 플레이어는 라커의 사정거리와 공격 타이밍을 익히는 데 시간이 걸릴 수 있지만, 난이도가 점차 상승하면서 자연스럽게 숙련도를 높일 수 있는 구조로 설계되어 있다. 이 맵은 1인 플레이에 최적화되어 있으며, 특히 라커의 활용법과 적의 패턴을 익히는 데 초점을 맞추고 있는 만큼, 디펜스 장르에 익숙한 플레이어뿐만 아니라 새로운 유즈맵을 찾는 이들에게도 추천할 만한 작품이다. 다만, 라커의 특성상 공중 유닛에 대한 대처가 필수적이므로, 공중 유닛이 등장하는 레벨에서는 보조 유닛이나 스킬을 적극 활용하는 것이 중요하다. 전체적으로는 긴 플레이타임을 요구하지 않지만, 각 레벨을 클리어할 때마다 느끼는 성취감이 큰 맵으로, 꾸준한 도전欲을 자극하는 디자인이다. Lurker Defense On Your Own!5.0 is a classic defense-style custom map in StarCraft: Brood War, where players must survive 30 increasingly challenging levels by preventing enemy units from reaching the bottom of the screen. The core mechanic revolves around strategically placing Lurkers—ground-based units with area-of-effect attacks—to block and eliminate waves of incoming enemies. While Lurkers excel against ground units, players must adapt their strategies when facing air units or special enemy types, often requiring auxiliary units or quick reactions. The map’s design utilizes a twilight-themed tileset, creating a clean and immersive aesthetic that enhances the gameplay experience. Each level introduces new enemy compositions and mechanics, such as conditional objectives like preventing specific units from passing or eliminating certain enemies. Early levels serve as a gentle introduction to Lurker positioning and timing, but the difficulty ramps up significantly, demanding sharper decision-making and adaptability. This single-player experience is ideal for both seasoned defense-map enthusiasts and newcomers looking to explore StarCraft’s custom content. The challenge lies in mastering Lurker mechanics while balancing resource management, especially when air units become prominent. With a rewarding progression system and a satisfying sense of accomplishment after each level, the map offers a compelling and engaging experience that keeps players motivated.
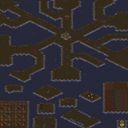
라커 디펜스 18웨이 v5.2 (Lurker Defence 18 Way v5.2)
스타크래프트 브루드워의 유즈맵 장인들에게 오랫동안 사랑받아 온 ‘라커 디펜스 18웨이 v5.2’는, 이름에서 알 수 있듯이 라커 유닛을 중심으로 한 디펜스형 유즈맵이다. 화면 가득 펼쳐진 황무지 타일셋과 4096x4096의 넓은 맵 크기는 한눈에 보는 것만으로도 긴장감을 조성한다. 특히 18개의 입구에서 끊임없이 몰려드는 적 유닛을 상대해야 하는 구조는, 디펜스 게임의 정석을 다시 한 번 각인시켜 준다. 내부 설명에 따르면 30초마다 적의 수가 크게 증가하는 시스템이 적용되어 있으며, 미네랄을 채취하는 유닛이 포함되어 있다는 점에서 단순히 방어만 하는 것이 아니라 자원 관리와 업그레이드도 필수 요소로 자리 잡고 있다. 255단계까지 업그레이드가 가능하다는 설명은 플레이어에게 끊임없는 도전과 성취감을 제공할 것이다. 이 맵의 핵심은 ‘방어’ 그 자체지만, 단순히 적을 막는 것만이 목표가 아니다. 맵 곳곳에 배치된 자원 지대와 미네랄 채취 유닛을 통해 자원을 확보하고, 이를 바탕으로 방어 건물이나 유닛을 강화해야 한다. 업그레이드 시스템은 라커의 효율성을 극대화하는 데 초점을 맞추고 있으며, 적의 공격 패턴과 입구의 수를 고려할 때 전략적 판단력이 요구된다. 또한, 30초마다 적의 수가 폭발적으로 증가하는 특징은 초반에는 여유롭게 느껴지지만, 후반으로 갈수록 긴장감이 고조되어 플레이어의 집중력을 시험한다. 맵의 구조상 입구가 18개로 분산되어 있어, 한곳에만 집중할 경우 다른 곳을 뚫리게 되는 경우가 빈번하므로, 전체적인 시야와 균형 잡힌 방어가 무엇보다 중요하다. 이 맵은 초보 플레이어보다는 중급 이상의 유저들에게 더 적합할 것으로 보인다. 방어의 기본 개념을 숙지하고 있더라도, 끊임없이 변화하는 적의 공격 패턴과 다수의 입구를 관리하는 것은 결코 쉽지 않다. 또한, 자원 관리와 업그레이드 타이밍을 잘 맞추는 것이 승패를 좌우할 수 있으므로, 이러한 요소에 익숙하지 않은 플레이어는 어려움을 느낄 수 있다. 반면, 디펜스 게임의 매력을 제대로 느낄 수 있는 맵이기도 하다. 특히 라커라는 유닛의 특성을 살려 방어선을 구축하는 재미와, 끊임없이 몰려오는 적을 상대하는 긴장감은 디펜스 장르의 핵심을 잘 담아내고 있다. 만약 당신이 디펜스 유즈맵의 팬이라면, 이 맵은 반드시 한 번쯤 플레이해 볼 가치가 있다. Before diving into the gameplay, it's essential to understand the core mechanics of 'Lurker Defence 18 Way v5.2'. This Brood War custom map challenges players to defend against relentless waves of enemies emerging from 18 distinct entry points spread across a vast 4096x4096 wasteland map. Unlike traditional tower defense games, this map incorporates resource management, as players must deploy units to mine minerals while simultaneously upgrading their defenses up to 255 levels. The 30-second interval between enemy waves significantly intensifies the difficulty as the game progresses, requiring players to balance defense, resource gathering, and strategic upgrades. The map's design emphasizes adaptability and foresight. With enemies spawning from multiple directions, players cannot afford to focus solely on one area, as neglecting even a single entry point can lead to a breach. The inclusion of the Lurker unit adds a unique layer of strategy, as its burrowing ability can be leveraged to create unexpected defensive formations or ambush enemy units. The mineral mining mechanic not only provides the necessary resources for upgrades but also adds a layer of micro-management that separates casual players from those seeking a deeper challenge. While the map is accessible to players of all skill levels, its true depth is revealed to those who invest time in mastering its mechanics. Beginners may find the sheer number of entry points overwhelming, but with practice, they can develop the reflexes and strategy needed to hold the line. Intermediate and advanced players, on the other hand, will appreciate the map's scalability in difficulty, as the relentless pace and need for constant upgrades ensure that no two games feel the same. Whether you're a fan of defense-oriented custom maps or simply looking for a fresh challenge in StarCraft: Brood War, 'Lurker Defence 18 Way v5.2' delivers an experience that is as rewarding as it is demanding.
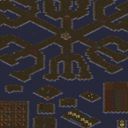
라커 디펜스 18웨이 v5.01 (Lurker Defence 18way v.5.01)
브루드워 유즈맵의 정석으로 꼽히는 〈Lurker Defence 18way v.5.01〉은 최대 6인의 플레이어가 동시에 방어전을 펼치는 디펜스 장르의 대표작이다. 맵 이름은 ‘라커 방어’라는 영어 그대로, 라커 유닛을 중심으로 한 밀집된 적 웨이브를 막아내는 전략이 핵심이다. 내부 설명에 ‘Minerals Included’라는 문구가 포함된 것처럼 자원 채취가 가능한 구조가 특징으로, 공격과 동시에 자원 관리가 필요한 다층적인 플레이가 요구된다. 황무지 타일셋을 기반으로 한 어두운 분위기는 긴장감을 더하며, 4096×4096의 넓은 맵 크기는 18개의 서로 다른 방어 경로를 제공한다. 각 경로마다 라커가 배치되어 있어 플레이어는 자신의 병력과 자원을 효율적으로 배분해야만 웨이브를 버틸 수 있다. 특히 라커의 공격 범위와 이동 패턴을 숙지하지 않으면 순식간에 밀릴 수 있어, 초보자는 물론 숙련자도 끊임없는 전략 수정이 필요한 몰입감 높은 경험을 제공한다. 플레이 중에는 자원 채집을 위한 멀티 태스킹과 라커의 적절한 배치, 그리고 팀원 간의 실시간 커뮤니케이션이 필수다. 개인의 실력뿐 아니라 협동심이 빛을 발하는 이 맵은 디펜스 유즈맵의 진수를 느낄 수 있는 작품으로, 브루드워 유즈맵을 любить하게 만드는 결정적인 요소 중 하나다. 플레이 전에는 라커의 공격 패턴과 맵의 주요 경로를 미리 숙지하고, 자원 채집을 위한 멀티 태스킹 능력을 키워두는 것이 좋다. 또한 팀 플레이 시에는 각자의 역할 분담을 명확히 하고, 지속적인 피드백을 통해 전략을 갱신하는 것이 중요하다. 이 맵을 처음 접하는 플레이어는 난이도가 다소 높게 느껴질 수 있지만, 반복 플레이를 통해 점차 적응할 수 있는 구조로 설계되어 있다. 초보도 쉽게 즐길 수 있는 시스템이지만, 숙련자들에게는 끊임없는 도전 과제가 되는 매력이 이 맵의 가장 큰 장점이다. The quintessential Brood War custom map, *Lurker Defence 18way v.5.01*, is a standout defense genre title where up to six players engage in simultaneous defensive battles. True to its name, "Lurker Defense," the core strategy revolves around protecting against dense enemy waves centered around Lurker units. As hinted by the in-game phrase "Minerals Included," the map features resource-gathering structures, requiring players to balance offense and economy in a multi-layered challenge. Its dark, desolate tile set heightens tension, while the expansive 4096×4096 map size offers 18 distinct defensive routes. Each path is lined with Lurkers, forcing players to allocate their forces and resources efficiently to withstand the waves. Without a solid grasp of Lurker attack ranges and movement patterns, players—whether beginners or veterans—will struggle, as continuous strategic adjustments are essential for survival. Success hinges on multitasking for resource collection, optimal Lurker placement, and real-time team communication. More than just a test of individual skill, this map shines in cooperative play, making it a definitive defense custom map experience and a key reason why Brood War custom maps are beloved. Before playing, familiarize yourself with Lurker attack patterns and key map routes, and hone your multitasking abilities for resource gathering. In team play, clearly define roles and refine strategies through constant feedback. While newcomers may find the difficulty steep at first, the map’s design allows gradual adaptation through repeated play. Though accessible to beginners, its depth ensures a relentless challenge for seasoned players, cementing its appeal as a must-play title.
썬켄 D 6웨이 V8 뉴 (Sunken D 6way V8 New)
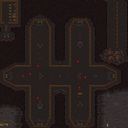
스타크래프트 브루드워의 유즈맵 '썬켄 D 6웨이 V8 뉴(Sunken D 6way V8 New)'는 기존의 썬켄 디펜스 시리즈를 한 단계 발전시킨 컴까기 스타일의 디펜스 맵이다. 맵은 정글 타일셋으로 구성되어 있으며, 맵 중앙에 위치한 본진을 surrounded(둘러싸인) 상태로 방어하는 것이 주 목표로 보인다. 내부 설명에서 'Auto Evolving Sunkens'라는 문구가 등장하는 것으로 미루어 보아, 적의 공세가 시간에 따라 점점 강해지거나 새로운 유닛이 추가되는 시스템이 포함된 것으로 추정된다. 또한 'New Heroes added Lurker & Firebat'이라는 설명으로 보아, 플레이어는 기존의 드론 외에 라커와 파이어뱃을 조합하여 전투를 펼치는 구조로 보인다. 플레이어는 시작 시점에서 15마리의 드론을 보유하고 있으며, 각 드론은 50의 데미지를 갖는 것으로 보인다. 맵은 6개의 주요 길(6way)이 본진으로 converging(수렴)하는 구조로, 각 길에서 지속적으로 적의 웨이브가 밀려오며, 플레이어는 이들을 효과적으로 방어해야 한다. 내부 설명에 'SECRETS NEW / New ones to uncover!!!'라는 문구가 포함되어 있는 것으로 보아, 숨겨진 요소나 특수한 조건, 보너스 유닛 등이 맵 곳곳에 숨겨져 있을 가능성이 높다. 이러한 요소들은 플레이어의 전략적 선택과 전투 능력을 한층 더 깊게 요구할 수 있다. 이 맵의 핵심적인 매력은 바로 'Auto Evolving' 시스템으로, 시간이 지남에 따라 적의 공세가 점점 어려워지거나 새로운 유닛이 추가되는 등 지속적인 변화가 이루어진다. 이는 단순히 방어만 하는 것이 아니라,随着时间的推移, 전략을 끊임없이 조정하고 업그레이드를 진행해야 하는 전략적 깊이를 제공한다. 또한, 새로운 영웅 유닛인 라커와 파이어뱃을 사용할 수 있어, 다양한 조합을 통해 방어 라인을 구축할 수 있다. 이러한 요소들은 맵의 긴장감을 높이며, 플레이어에게 지속적인 재미와 도전을 제공할 것으로 예상된다. 이 맵은 초보 플레이어보다는 어느 정도의 전략적 사고와 게임 이해도가 필요한 유저들에게 특히 추천된다. 또한, 컴까기 맵으로서의 특성상 다인 플레이가 가능한 구조로, 팀원들과의 협력이 중요할 것으로 보인다. 다만, 숨겨진 요소나 특수한 조건을 발견하기 위해 맵을 여러 번 플레이해 보는 것이 필요할 수 있으며, 이를 통해 새로운 전략을 익히거나 보너스를 획득할 수 있을 것이다. 맵의 난이도는 내부 설명에서 명확히 제시되지 않지만, 'Auto Evolving' 시스템과 새로운 유닛의 추가로 인해 점차 어려워지는 구조를 고려할 때, '보통' 또는 '어려움' 정도의 난이도를 가질 것으로 추정된다. This StarCraft: Brood War custom map, 'Sunken D 6way V8 New,' represents an evolved iteration of the popular Sunken Defense series, transforming it into a strategic team-based defense (compkagi) challenge. The map employs a jungle tileset and centers around protecting your main base from relentless enemy waves converging from six distinct pathways. A standout feature is the 'Auto Evolving Sunkens' system, which dynamically increases the difficulty of enemy waves over time or introduces new units, ensuring that players must continuously adapt their strategies. Starting with 15 drones, each dealing 50 damage, players must strategically deploy these units alongside the newly added heroes—Lurkers and Firebats—to form an effective defense line. The map's internal description hints at hidden secrets and new elements to uncover, adding an exploratory dimension to the gameplay. These hidden features could include bonus units, special conditions, or unique upgrades that enhance the player's tactical options. The core appeal of 'Sunken D 6way V8 New' lies in its depth and replayability. The evolving enemy waves demand constant adjustments to defense strategies, making each playthrough a fresh challenge. The inclusion of Lurkers and Firebats introduces new tactical possibilities, allowing players to experiment with different unit combinations to counter the increasingly difficult enemy assaults. This makes the map particularly engaging for those who enjoy strategic depth and dynamic gameplay. While accessible to players with a basic understanding of StarCraft's mechanics, the map’s evolving difficulty and hidden elements make it more suited for intermediate to advanced players. The six-way design also suggests that team coordination and communication are key to success, making it an excellent choice for group play. For those willing to explore and adapt, 'Sunken D 6way V8 New' offers a rewarding and challenging experience that extends well beyond a simple defense mission.
라커 D 18웨이 골드 (Lurker D 18 Way Gold)
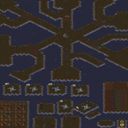
스타크래프트 브루드워의 유즈맵 《Lurker D 18 Way Gold》는 레이저 디펜스를 기반으로 한 대규모 컴까기 디펜스 맵이다. 맵의 전체 구조는 18개의 분리된 섬으로 나뉘어 있으며, 각 섬에는 미네랄과 베스핀 가스가 배치되어 있다. 플레이어는 이 섬들에서 자원을 채취하며, 중앙에 위치한 본진 기지에서 라커(Lurker)와 기타 유닛을 생산해 외부에서 끊임없이 몰려드는 적들을 방어해야 한다. 맵의 특징 중 하나는 기존 레이저 디펜스와 달리 'No more pylon building'이라는 설명에서 알 수 있듯, 플레이어는 프로브를 생산해 파일런을 짓는 대신, 본진 기지에서 직접 유닛을 생산하는 방식으로 진행된다는 점이다. 또한, 'upgrade time for lurks'라는 설명은 라커의 업그레이드 시간이 조정되었음을 시사한다. 맵의 디자인 측면에서 4096x4096의 거대한 크기와 황무지 타일셋을 활용한 황량한 분위기가 특징적이며, 18개의 분리된 섬 구조는 전략적 배치와 자원 관리 능력을 요구한다. 플레이어는 각 섬의 자원을 효율적으로 활용하면서도 방어선을 굳건히 유지해야 하며, 특히 라커의 사정거리와 업그레이드 효율성이 승패를 좌우할 핵심 요소로 보인다. 초보자의 경우 섬 간의 연결성과 라커의 위치 선정이 어렵게 느껴질 수 있지만, 익숙해지면 섬 간의 자원 분배와 방어 전략을 조율하는 재미가 있는 맵이다. 추천 대상은 대규모 디펜스 맵을 선호하는 플레이어이며, 특히 레이저 디펜스의 변형 버전을 경험해보고 싶은 유저들에게 적합하다. 플레이 전에는 섬 간의 연결 경로와 라커의 배치 가능 위치를 사전에 숙지하는 것이 중요하다. Lurker D 18 Way Gold is a large-scale UMS defense map based on the Laser Defense genre in StarCraft: Brood War. The map features 18 separate islands, each equipped with mineral patches and vespene gas, where players gather resources while defending their main base against relentless enemy waves. Unlike traditional Laser Defense maps, this version omits the need to construct Pylons—instead, players produce units directly from their main base. The description mentions adjusted upgrade times for Lurkers, suggesting strategic depth in unit progression. The map's expansive 4096x4096 terrain, set in a barren wasteland tile, creates an immersive challenge, while the island layout demands careful resource management and defensive planning. Players must balance resource distribution across islands while maintaining a strong defense line, with Lurker range and upgrade efficiency serving as key factors in success. Beginners may find the island connections and Lurker placement challenging, but mastering the map offers deep strategic gameplay. This map is ideal for fans of large-scale defense UMS maps, particularly those looking to experience a variation of Laser Defense. Before playing, it's crucial to study the island connections and potential Lurker deployment spots for optimal strategy.
라커 개체 방어 3 (Lurker Individual Defense3)
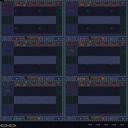
스타크래프트 브루드워의 유즈맵 ‘라커 개체 방어 3(Lurker Individual Defense3)’는 디펜스 장르의 유닛 중심형 맵으로, 특히 저그 종족의 라커(Lurker) 유닛을 활용한 입구막기 플레이에 초점을 맞춘 작품이다. 맵의 전체적인 구조는 중앙 광장과 그 주변을 감싸는 방어선으로 구성되어 있으며, 광장 입구에 위치한 저그의 방어 건물들(크립 콜로니, 센서리) 주변으로 라커가 배치되어 있다. 플레이어는 이 라커를 조종해 끊임없이 밀려드는 적의 유닛들을 저지해야 한다. 맵의 특징은 라커의 특수 능력인 지하 상태로의 전환과 원거리 공격 능력을 살린 전략적 플레이가 요구된다는 점이다. 방어선의 너비가 넓고 입구가 여러 개로 나뉘어 있어 유닛의 배치와 기습 공격을 신경 써야 한다. 또한, 맵의 하단과 상단에 위치한 확장 지역은 보조 방어선을 구축할 수 있는 공간으로, 자원과 방어 건물의 배치 여부가 승패를 좌우할 수 있다. 초보자의 경우 라커의 특성을 충분히 숙지하지 못해 방어선이 뚫리기 쉬우며, 숙련자는 라커의 위치를 능동적으로 변경해 다방면의 공격을 차단하는 플레이가 가능하다. 맵의 분위기는 화산 타일셋을 사용해 어둡고 긴장感 있는 분위기로 연출되어 있으며, 특히 라커의 붉은 색상이 맵의 어두운 색감과 어우러져 시야를 가리는 듯한 효과를 준다. 추천 대상은 저그 종족의 라커 유닛에 익숙한 플레이어나 디펜스 장르를 즐기는 유저이며, 플레이 전 라커의 특성을 숙지하고 방어 건물의 위치를 전략적으로 배치하는 연습이 필요하다. 또한, 팀 플레이가 가능한 맵이므로 팀원과의 호흡도 중요한 포인트다. 게임의 재미는 끊임없이 몰려오는 적의 공격을 막아내는 성취감과 함께, 라커의 특성을 살린 창의적인 방어 전략을 구상할 수 있다는 점에서 comes from the balance between simplicity and depth in mechanics. Lurker Individual Defense3 is a defense-style custom map in StarCraft: Brood War that focuses on utilizing the Zerg Lurker unit for entrance-blocking gameplay. The map features a central plaza surrounded by defensive structures, with Lurkers positioned around the entrance to fend off waves of enemy units. The core mechanics revolve around the Lurker's ability to burrow and attack from a distance, requiring strategic placement and repositioning to counter enemy advances. The map's layout includes multiple entry points and wider defensive fronts, making unit positioning and awareness of flanking attacks crucial. The lower and upper expansion areas offer additional space for building auxiliary defenses, where resource management and building placement can influence the outcome. Beginners may struggle with the Lurker's mechanics, leading to breached defenses, while experienced players can dynamically adjust Lurker positions to block attacks from multiple directions. The volcanic tileset creates a dark and tense atmosphere, enhanced by the Lurker's red color scheme, which may obscure vision slightly. This map is recommended for players familiar with Zerg units or those who enjoy defense-style games. Prior knowledge of the Lurker's abilities and strategic placement of defensive structures are essential for success. Team coordination is also beneficial, as the map allows for team play. The fun factor lies in the satisfaction of repelling endless waves of enemies and devising creative defensive strategies tailored to the Lurker's unique mechanics.
최근 등록된 맵
새로 추가된 파일과 버전을 확인하세요.
썬켄 D 6웨이 V8 뉴 (Sunken D 6way V8 New)
스타크래프트 브루드워의 유즈맵 '썬켄 D 6웨이 V8 뉴(Sunken D 6way V8 New)'는 기존의 썬켄 디펜스 시리즈를 한 단계 발전시킨 컴까기 스타일의 디펜스 맵이다. 맵은 정글 타일셋으로 구성되어 있으며, 맵 중앙에 위치한 본진을 surrounded(둘러싸인) 상태로 방어하는 것이 주 목표로 보인다. 내부 설명에서 'Auto Evolving Sunkens'라는 문구가 등장하는 것으로 미루어 보아, 적의 공세가 시간에 따라 점점 강해지거나 새로운 유닛이 추가되는 시스템이 포함된 것으로 추정된다. 또한 'New Heroes added Lurker & Firebat'이라는 설명으로 보아, 플레이어는 기존의 드론 외에 라커와 파이어뱃을 조합하여 전투를 펼치는 구조로 보인다. 플레이어는 시작 시점에서 15마리의 드론을 보유하고 있으며, 각 드론은 50의 데미지를 갖는 것으로 보인다. 맵은 6개의 주요 길(6way)이 본진으로 converging(수렴)하는 구조로, 각 길에서 지속적으로 적의 웨이브가 밀려오며, 플레이어는 이들을 효과적으로 방어해야 한다. 내부 설명에 'SECRETS NEW / New ones to uncover!!!'라는 문구가 포함되어 있는 것으로 보아, 숨겨진 요소나 특수한 조건, 보너스 유닛 등이 맵 곳곳에 숨겨져 있을 가능성이 높다. 이러한 요소들은 플레이어의 전략적 선택과 전투 능력을 한층 더 깊게 요구할 수 있다. 이 맵의 핵심적인 매력은 바로 'Auto Evolving' 시스템으로, 시간이 지남에 따라 적의 공세가 점점 어려워지거나 새로운 유닛이 추가되는 등 지속적인 변화가 이루어진다. 이는 단순히 방어만 하는 것이 아니라,随着时间的推移, 전략을 끊임없이 조정하고 업그레이드를 진행해야 하는 전략적 깊이를 제공한다. 또한, 새로운 영웅 유닛인 라커와 파이어뱃을 사용할 수 있어, 다양한 조합을 통해 방어 라인을 구축할 수 있다. 이러한 요소들은 맵의 긴장감을 높이며, 플레이어에게 지속적인 재미와 도전을 제공할 것으로 예상된다. 이 맵은 초보 플레이어보다는 어느 정도의 전략적 사고와 게임 이해도가 필요한 유저들에게 특히 추천된다. 또한, 컴까기 맵으로서의 특성상 다인 플레이가 가능한 구조로, 팀원들과의 협력이 중요할 것으로 보인다. 다만, 숨겨진 요소나 특수한 조건을 발견하기 위해 맵을 여러 번 플레이해 보는 것이 필요할 수 있으며, 이를 통해 새로운 전략을 익히거나 보너스를 획득할 수 있을 것이다. 맵의 난이도는 내부 설명에서 명확히 제시되지 않지만, 'Auto Evolving' 시스템과 새로운 유닛의 추가로 인해 점차 어려워지는 구조를 고려할 때, '보통' 또는 '어려움' 정도의 난이도를 가질 것으로 추정된다. This StarCraft: Brood War custom map, 'Sunken D 6way V8 New,' represents an evolved iteration of the popular Sunken Defense series, transforming it into a strategic team-based defense (compkagi) challenge. The map employs a jungle tileset and centers around protecting your main base from relentless enemy waves converging from six distinct pathways. A standout feature is the 'Auto Evolving Sunkens' system, which dynamically increases the difficulty of enemy waves over time or introduces new units, ensuring that players must continuously adapt their strategies. Starting with 15 drones, each dealing 50 damage, players must strategically deploy these units alongside the newly added heroes—Lurkers and Firebats—to form an effective defense line. The map's internal description hints at hidden secrets and new elements to uncover, adding an exploratory dimension to the gameplay. These hidden features could include bonus units, special conditions, or unique upgrades that enhance the player's tactical options. The core appeal of 'Sunken D 6way V8 New' lies in its depth and replayability. The evolving enemy waves demand constant adjustments to defense strategies, making each playthrough a fresh challenge. The inclusion of Lurkers and Firebats introduces new tactical possibilities, allowing players to experiment with different unit combinations to counter the increasingly difficult enemy assaults. This makes the map particularly engaging for those who enjoy strategic depth and dynamic gameplay. While accessible to players with a basic understanding of StarCraft's mechanics, the map’s evolving difficulty and hidden elements make it more suited for intermediate to advanced players. The six-way design also suggests that team coordination and communication are key to success, making it an excellent choice for group play. For those willing to explore and adapt, 'Sunken D 6way V8 New' offers a rewarding and challenging experience that extends well beyond a simple defense mission.
라커 개체 방어 3 (Lurker Individual Defense3)
스타크래프트 브루드워의 유즈맵 ‘라커 개체 방어 3(Lurker Individual Defense3)’는 디펜스 장르의 유닛 중심형 맵으로, 특히 저그 종족의 라커(Lurker) 유닛을 활용한 입구막기 플레이에 초점을 맞춘 작품이다. 맵의 전체적인 구조는 중앙 광장과 그 주변을 감싸는 방어선으로 구성되어 있으며, 광장 입구에 위치한 저그의 방어 건물들(크립 콜로니, 센서리) 주변으로 라커가 배치되어 있다. 플레이어는 이 라커를 조종해 끊임없이 밀려드는 적의 유닛들을 저지해야 한다. 맵의 특징은 라커의 특수 능력인 지하 상태로의 전환과 원거리 공격 능력을 살린 전략적 플레이가 요구된다는 점이다. 방어선의 너비가 넓고 입구가 여러 개로 나뉘어 있어 유닛의 배치와 기습 공격을 신경 써야 한다. 또한, 맵의 하단과 상단에 위치한 확장 지역은 보조 방어선을 구축할 수 있는 공간으로, 자원과 방어 건물의 배치 여부가 승패를 좌우할 수 있다. 초보자의 경우 라커의 특성을 충분히 숙지하지 못해 방어선이 뚫리기 쉬우며, 숙련자는 라커의 위치를 능동적으로 변경해 다방면의 공격을 차단하는 플레이가 가능하다. 맵의 분위기는 화산 타일셋을 사용해 어둡고 긴장感 있는 분위기로 연출되어 있으며, 특히 라커의 붉은 색상이 맵의 어두운 색감과 어우러져 시야를 가리는 듯한 효과를 준다. 추천 대상은 저그 종족의 라커 유닛에 익숙한 플레이어나 디펜스 장르를 즐기는 유저이며, 플레이 전 라커의 특성을 숙지하고 방어 건물의 위치를 전략적으로 배치하는 연습이 필요하다. 또한, 팀 플레이가 가능한 맵이므로 팀원과의 호흡도 중요한 포인트다. 게임의 재미는 끊임없이 몰려오는 적의 공격을 막아내는 성취감과 함께, 라커의 특성을 살린 창의적인 방어 전략을 구상할 수 있다는 점에서 comes from the balance between simplicity and depth in mechanics. Lurker Individual Defense3 is a defense-style custom map in StarCraft: Brood War that focuses on utilizing the Zerg Lurker unit for entrance-blocking gameplay. The map features a central plaza surrounded by defensive structures, with Lurkers positioned around the entrance to fend off waves of enemy units. The core mechanics revolve around the Lurker's ability to burrow and attack from a distance, requiring strategic placement and repositioning to counter enemy advances. The map's layout includes multiple entry points and wider defensive fronts, making unit positioning and awareness of flanking attacks crucial. The lower and upper expansion areas offer additional space for building auxiliary defenses, where resource management and building placement can influence the outcome. Beginners may struggle with the Lurker's mechanics, leading to breached defenses, while experienced players can dynamically adjust Lurker positions to block attacks from multiple directions. The volcanic tileset creates a dark and tense atmosphere, enhanced by the Lurker's red color scheme, which may obscure vision slightly. This map is recommended for players familiar with Zerg units or those who enjoy defense-style games. Prior knowledge of the Lurker's abilities and strategic placement of defensive structures are essential for success. Team coordination is also beneficial, as the map allows for team play. The fun factor lies in the satisfaction of repelling endless waves of enemies and devising creative defensive strategies tailored to the Lurker's unique mechanics.
라커 디펜스 18웨이 v5.2 (Lurker Defence 18 Way v5.2)
스타크래프트 브루드워의 유즈맵 장인들에게 오랫동안 사랑받아 온 ‘라커 디펜스 18웨이 v5.2’는, 이름에서 알 수 있듯이 라커 유닛을 중심으로 한 디펜스형 유즈맵이다. 화면 가득 펼쳐진 황무지 타일셋과 4096x4096의 넓은 맵 크기는 한눈에 보는 것만으로도 긴장감을 조성한다. 특히 18개의 입구에서 끊임없이 몰려드는 적 유닛을 상대해야 하는 구조는, 디펜스 게임의 정석을 다시 한 번 각인시켜 준다. 내부 설명에 따르면 30초마다 적의 수가 크게 증가하는 시스템이 적용되어 있으며, 미네랄을 채취하는 유닛이 포함되어 있다는 점에서 단순히 방어만 하는 것이 아니라 자원 관리와 업그레이드도 필수 요소로 자리 잡고 있다. 255단계까지 업그레이드가 가능하다는 설명은 플레이어에게 끊임없는 도전과 성취감을 제공할 것이다. 이 맵의 핵심은 ‘방어’ 그 자체지만, 단순히 적을 막는 것만이 목표가 아니다. 맵 곳곳에 배치된 자원 지대와 미네랄 채취 유닛을 통해 자원을 확보하고, 이를 바탕으로 방어 건물이나 유닛을 강화해야 한다. 업그레이드 시스템은 라커의 효율성을 극대화하는 데 초점을 맞추고 있으며, 적의 공격 패턴과 입구의 수를 고려할 때 전략적 판단력이 요구된다. 또한, 30초마다 적의 수가 폭발적으로 증가하는 특징은 초반에는 여유롭게 느껴지지만, 후반으로 갈수록 긴장감이 고조되어 플레이어의 집중력을 시험한다. 맵의 구조상 입구가 18개로 분산되어 있어, 한곳에만 집중할 경우 다른 곳을 뚫리게 되는 경우가 빈번하므로, 전체적인 시야와 균형 잡힌 방어가 무엇보다 중요하다. 이 맵은 초보 플레이어보다는 중급 이상의 유저들에게 더 적합할 것으로 보인다. 방어의 기본 개념을 숙지하고 있더라도, 끊임없이 변화하는 적의 공격 패턴과 다수의 입구를 관리하는 것은 결코 쉽지 않다. 또한, 자원 관리와 업그레이드 타이밍을 잘 맞추는 것이 승패를 좌우할 수 있으므로, 이러한 요소에 익숙하지 않은 플레이어는 어려움을 느낄 수 있다. 반면, 디펜스 게임의 매력을 제대로 느낄 수 있는 맵이기도 하다. 특히 라커라는 유닛의 특성을 살려 방어선을 구축하는 재미와, 끊임없이 몰려오는 적을 상대하는 긴장감은 디펜스 장르의 핵심을 잘 담아내고 있다. 만약 당신이 디펜스 유즈맵의 팬이라면, 이 맵은 반드시 한 번쯤 플레이해 볼 가치가 있다. Before diving into the gameplay, it's essential to understand the core mechanics of 'Lurker Defence 18 Way v5.2'. This Brood War custom map challenges players to defend against relentless waves of enemies emerging from 18 distinct entry points spread across a vast 4096x4096 wasteland map. Unlike traditional tower defense games, this map incorporates resource management, as players must deploy units to mine minerals while simultaneously upgrading their defenses up to 255 levels. The 30-second interval between enemy waves significantly intensifies the difficulty as the game progresses, requiring players to balance defense, resource gathering, and strategic upgrades. The map's design emphasizes adaptability and foresight. With enemies spawning from multiple directions, players cannot afford to focus solely on one area, as neglecting even a single entry point can lead to a breach. The inclusion of the Lurker unit adds a unique layer of strategy, as its burrowing ability can be leveraged to create unexpected defensive formations or ambush enemy units. The mineral mining mechanic not only provides the necessary resources for upgrades but also adds a layer of micro-management that separates casual players from those seeking a deeper challenge. While the map is accessible to players of all skill levels, its true depth is revealed to those who invest time in mastering its mechanics. Beginners may find the sheer number of entry points overwhelming, but with practice, they can develop the reflexes and strategy needed to hold the line. Intermediate and advanced players, on the other hand, will appreciate the map's scalability in difficulty, as the relentless pace and need for constant upgrades ensure that no two games feel the same. Whether you're a fan of defense-oriented custom maps or simply looking for a fresh challenge in StarCraft: Brood War, 'Lurker Defence 18 Way v5.2' delivers an experience that is as rewarding as it is demanding.
라커 디펜스 18웨이 v5.01 (Lurker Defence 18way v.5.01)
브루드워 유즈맵의 정석으로 꼽히는 〈Lurker Defence 18way v.5.01〉은 최대 6인의 플레이어가 동시에 방어전을 펼치는 디펜스 장르의 대표작이다. 맵 이름은 ‘라커 방어’라는 영어 그대로, 라커 유닛을 중심으로 한 밀집된 적 웨이브를 막아내는 전략이 핵심이다. 내부 설명에 ‘Minerals Included’라는 문구가 포함된 것처럼 자원 채취가 가능한 구조가 특징으로, 공격과 동시에 자원 관리가 필요한 다층적인 플레이가 요구된다. 황무지 타일셋을 기반으로 한 어두운 분위기는 긴장감을 더하며, 4096×4096의 넓은 맵 크기는 18개의 서로 다른 방어 경로를 제공한다. 각 경로마다 라커가 배치되어 있어 플레이어는 자신의 병력과 자원을 효율적으로 배분해야만 웨이브를 버틸 수 있다. 특히 라커의 공격 범위와 이동 패턴을 숙지하지 않으면 순식간에 밀릴 수 있어, 초보자는 물론 숙련자도 끊임없는 전략 수정이 필요한 몰입감 높은 경험을 제공한다. 플레이 중에는 자원 채집을 위한 멀티 태스킹과 라커의 적절한 배치, 그리고 팀원 간의 실시간 커뮤니케이션이 필수다. 개인의 실력뿐 아니라 협동심이 빛을 발하는 이 맵은 디펜스 유즈맵의 진수를 느낄 수 있는 작품으로, 브루드워 유즈맵을 любить하게 만드는 결정적인 요소 중 하나다. 플레이 전에는 라커의 공격 패턴과 맵의 주요 경로를 미리 숙지하고, 자원 채집을 위한 멀티 태스킹 능력을 키워두는 것이 좋다. 또한 팀 플레이 시에는 각자의 역할 분담을 명확히 하고, 지속적인 피드백을 통해 전략을 갱신하는 것이 중요하다. 이 맵을 처음 접하는 플레이어는 난이도가 다소 높게 느껴질 수 있지만, 반복 플레이를 통해 점차 적응할 수 있는 구조로 설계되어 있다. 초보도 쉽게 즐길 수 있는 시스템이지만, 숙련자들에게는 끊임없는 도전 과제가 되는 매력이 이 맵의 가장 큰 장점이다. The quintessential Brood War custom map, *Lurker Defence 18way v.5.01*, is a standout defense genre title where up to six players engage in simultaneous defensive battles. True to its name, "Lurker Defense," the core strategy revolves around protecting against dense enemy waves centered around Lurker units. As hinted by the in-game phrase "Minerals Included," the map features resource-gathering structures, requiring players to balance offense and economy in a multi-layered challenge. Its dark, desolate tile set heightens tension, while the expansive 4096×4096 map size offers 18 distinct defensive routes. Each path is lined with Lurkers, forcing players to allocate their forces and resources efficiently to withstand the waves. Without a solid grasp of Lurker attack ranges and movement patterns, players—whether beginners or veterans—will struggle, as continuous strategic adjustments are essential for survival. Success hinges on multitasking for resource collection, optimal Lurker placement, and real-time team communication. More than just a test of individual skill, this map shines in cooperative play, making it a definitive defense custom map experience and a key reason why Brood War custom maps are beloved. Before playing, familiarize yourself with Lurker attack patterns and key map routes, and hone your multitasking abilities for resource gathering. In team play, clearly define roles and refine strategies through constant feedback. While newcomers may find the difficulty steep at first, the map’s design allows gradual adaptation through repeated play. Though accessible to beginners, its depth ensures a relentless challenge for seasoned players, cementing its appeal as a must-play title.
라커 D 18웨이 골드 (Lurker D 18 Way Gold)
스타크래프트 브루드워의 유즈맵 《Lurker D 18 Way Gold》는 레이저 디펜스를 기반으로 한 대규모 컴까기 디펜스 맵이다. 맵의 전체 구조는 18개의 분리된 섬으로 나뉘어 있으며, 각 섬에는 미네랄과 베스핀 가스가 배치되어 있다. 플레이어는 이 섬들에서 자원을 채취하며, 중앙에 위치한 본진 기지에서 라커(Lurker)와 기타 유닛을 생산해 외부에서 끊임없이 몰려드는 적들을 방어해야 한다. 맵의 특징 중 하나는 기존 레이저 디펜스와 달리 'No more pylon building'이라는 설명에서 알 수 있듯, 플레이어는 프로브를 생산해 파일런을 짓는 대신, 본진 기지에서 직접 유닛을 생산하는 방식으로 진행된다는 점이다. 또한, 'upgrade time for lurks'라는 설명은 라커의 업그레이드 시간이 조정되었음을 시사한다. 맵의 디자인 측면에서 4096x4096의 거대한 크기와 황무지 타일셋을 활용한 황량한 분위기가 특징적이며, 18개의 분리된 섬 구조는 전략적 배치와 자원 관리 능력을 요구한다. 플레이어는 각 섬의 자원을 효율적으로 활용하면서도 방어선을 굳건히 유지해야 하며, 특히 라커의 사정거리와 업그레이드 효율성이 승패를 좌우할 핵심 요소로 보인다. 초보자의 경우 섬 간의 연결성과 라커의 위치 선정이 어렵게 느껴질 수 있지만, 익숙해지면 섬 간의 자원 분배와 방어 전략을 조율하는 재미가 있는 맵이다. 추천 대상은 대규모 디펜스 맵을 선호하는 플레이어이며, 특히 레이저 디펜스의 변형 버전을 경험해보고 싶은 유저들에게 적합하다. 플레이 전에는 섬 간의 연결 경로와 라커의 배치 가능 위치를 사전에 숙지하는 것이 중요하다. Lurker D 18 Way Gold is a large-scale UMS defense map based on the Laser Defense genre in StarCraft: Brood War. The map features 18 separate islands, each equipped with mineral patches and vespene gas, where players gather resources while defending their main base against relentless enemy waves. Unlike traditional Laser Defense maps, this version omits the need to construct Pylons—instead, players produce units directly from their main base. The description mentions adjusted upgrade times for Lurkers, suggesting strategic depth in unit progression. The map's expansive 4096x4096 terrain, set in a barren wasteland tile, creates an immersive challenge, while the island layout demands careful resource management and defensive planning. Players must balance resource distribution across islands while maintaining a strong defense line, with Lurker range and upgrade efficiency serving as key factors in success. Beginners may find the island connections and Lurker placement challenging, but mastering the map offers deep strategic gameplay. This map is ideal for fans of large-scale defense UMS maps, particularly those looking to experience a variation of Laser Defense. Before playing, it's crucial to study the island connections and potential Lurker deployment spots for optimal strategy.
라커 디펜스 온 유어 오운! 5.0 (Lurker Defense On Your Own! 5.0)
스타크래프트 브루드워의 ‘라커 디펜스 온 유어 오운!(Lurker Defense On Your Own!)’은 이름 그대로 라커 유닛을 중심으로 한 디펜스형 유즈맵으로, 총 30레벨을 클리어해야 하는 구조를 갖고 있다. 게임은 화면 하단에서 적 유닛이 끊임없이 몰려오는 것을 라커로 저지하는 것이 주 목표이며, 각 레벨마다 정해진 수의 적을 막아내면 다음 단계로 넘어갈 수 있다. 라커의 특성상 지상 유닛에만 효과가 있으므로 공중 유닛이나 특수 유닛이 등장할 때는 추가 대응이 필요하다는 점이 특징이다. 맵의 전체적인 디자인은 황혼 테마의 타일셋을 기반으로 깔끔하게 구성되어 있으며, 하단 중앙에서 적들이 쏟아져 나오는 구조는 전형적인 디펜스 게임의 흐름을 따르고 있다. 플레이어는 제한된 자원으로 라커를 배치하고, 때로는 보조 유닛을 활용해 적의 진격을 늦추거나 제거해야 한다. 레벨이 진행될수록 적의 종류와 수가 늘어나며, 일부 레벨에서는 특정 조건(예: 특정 유닛만 통과시키지 않기, 특정 유닛만 제거하기)이 추가되어 전략의 다양성을 요구한다. 초보 플레이어는 라커의 사정거리와 공격 타이밍을 익히는 데 시간이 걸릴 수 있지만, 난이도가 점차 상승하면서 자연스럽게 숙련도를 높일 수 있는 구조로 설계되어 있다. 이 맵은 1인 플레이에 최적화되어 있으며, 특히 라커의 활용법과 적의 패턴을 익히는 데 초점을 맞추고 있는 만큼, 디펜스 장르에 익숙한 플레이어뿐만 아니라 새로운 유즈맵을 찾는 이들에게도 추천할 만한 작품이다. 다만, 라커의 특성상 공중 유닛에 대한 대처가 필수적이므로, 공중 유닛이 등장하는 레벨에서는 보조 유닛이나 스킬을 적극 활용하는 것이 중요하다. 전체적으로는 긴 플레이타임을 요구하지 않지만, 각 레벨을 클리어할 때마다 느끼는 성취감이 큰 맵으로, 꾸준한 도전欲을 자극하는 디자인이다. Lurker Defense On Your Own!5.0 is a classic defense-style custom map in StarCraft: Brood War, where players must survive 30 increasingly challenging levels by preventing enemy units from reaching the bottom of the screen. The core mechanic revolves around strategically placing Lurkers—ground-based units with area-of-effect attacks—to block and eliminate waves of incoming enemies. While Lurkers excel against ground units, players must adapt their strategies when facing air units or special enemy types, often requiring auxiliary units or quick reactions. The map’s design utilizes a twilight-themed tileset, creating a clean and immersive aesthetic that enhances the gameplay experience. Each level introduces new enemy compositions and mechanics, such as conditional objectives like preventing specific units from passing or eliminating certain enemies. Early levels serve as a gentle introduction to Lurker positioning and timing, but the difficulty ramps up significantly, demanding sharper decision-making and adaptability. This single-player experience is ideal for both seasoned defense-map enthusiasts and newcomers looking to explore StarCraft’s custom content. The challenge lies in mastering Lurker mechanics while balancing resource management, especially when air units become prominent. With a rewarding progression system and a satisfying sense of accomplishment after each level, the map offers a compelling and engaging experience that keeps players motivated.
라커바운드 (Lurkerbound) Ver 1.5
스타크래프트: 브루드워의 특수 유즈맵 ‘라커바운드(Lurkerbound) Ver 1.5’는 다수의 플레이어가 한 팀을 이루어 적의 공격을 방어하고 목표를 달성하는 디펜스 장르의 맵이다. 맵은 좌우로 넓은 평야와 중앙에 위치한 거대 건물이 특징적이며, 건물을 중심으로 다수의 방어 시설과 진입로가 배치되어 있다. 플레이어는 각자 정해진 시작 지점에서 시작하여 적의 공세를 막아내며, 일정 조건을 만족시키면 승리할 수 있는 구조로 보인다. 맵의 분위기는 침착하고 전략적인 플레이가 요구되며, 특히 라커( lurker) 유닛의 특성을 살린 플레이가 가능할 것으로 추정된다. 커스텀 맵답게 밸런스와 디자인 면에서 다소 실험적인 요소가 느껴지지만, 넓은 시야와 다양한 진입로 덕분에 플레이어 간의 협력이 중요한 요소로 작용할 것이다. 초보 플레이어에게는 다소 난해할 수 있지만, 디펜스와 협력 플레이에 익숙한 유저라면 충분히 즐길 수 있는 콘텐츠다. 플레이 전에는 맵의 시작 지점과 주요 방어 포인트를 미리 확인한 뒤, 팀원과의 역할 분담을 명확히 하는 것이 성공의 핵심이다. 또한, 맵의 넓고 복잡한 구조상 미니맵 사용이 필수적이며, 적의 공격 패턴을 빠르게 읽고 대응하는 능력이 요구된다. 전체적으로는 전략적 깊이가 있는 디펜스 맵으로, 팀워크와 빠른 판단력이 빛을 발할 수 있는 작품이다. Lurkerbound Ver 1.5 is a special user-made defense map within StarCraft: Brood War, where multiple players form a team to defend against enemy attacks and achieve objectives. The map features a wide plain on both sides and a massive central building, surrounded by various defensive structures and entry points. Players start from designated positions and must fend off enemy assaults; victory is likely achieved by fulfilling certain conditions. The atmosphere is calm yet strategic, requiring careful planning. Given its custom nature, the balance and design might have experimental elements, but the wide field of view and multiple entry points make teamwork essential. While the map may be challenging for beginners, it offers an enjoyable experience for those familiar with defense and cooperative gameplay. Before playing, it’s important to check starting positions and key defense points and clearly divide roles among teammates. Due to the map’s vast and complex structure, using the minimap is crucial, and the ability to quickly read and respond to enemy attack patterns is vital. Overall, it is a strategically deep defense map where teamwork and quick decision-making shine.
맵 선택 가이드
태그는 맵의 핵심 특징을 빠르게 설명하지만 제작 버전마다 규칙이 다를 수 있습니다. 상세 설명에서 권장 인원, 난이도, 플레이 시간과 버전을 함께 확인한 뒤 다운로드하세요.