스타휴지 StarCraft HUZY 스타크래프트 유즈맵 맵 다운로드 커뮤니티
한국어

라운드 전환 스타크래프트 맵 모음

'라운드 전환' 태그가 등록된 맵을 모았습니다. 장르 하나로 찾기 어려운 플레이 방식, 난이도와 특징을 중심으로 인기 맵과 최신 맵을 비교해 보세요.

등록 맵
1
누적 다운로드
0
누적 조회
28

인기 맵

다운로드와 조회 반응이 높은 맵입니다.

전체 보기
라커 D 18웨이 ~=FINAL=~ (Lurker D 18 Way ~=FINAL=~) 맵 미리보기

라커 D 18웨이 ~=FINAL=~ (Lurker D 18 Way ~=FINAL=~)

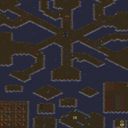
‘라커 D 18웨이 ~=FINAL=~’은 스타크래프트: 브루드워의 유즈맵으로, 프로브를 활용한 자원 채집과 빠른 라운드 전환이라는 독특한 시스템을 강조하는 맵이다. 맵의 이름은 ‘라커(Lurker)’라는 스타크래프트 유닛에서 유래했지만, 실제 게임 플레이에서는 프로브가 추가 채광을 수행하며 30초 단위의 짧은 라운드가 반복되면서Resource Management와 Quick Decision Making 능력을 시험한다. 255까지 업그레이드가 가능하다는 설명은 아마도 자원 관련 또는 유닛 능력의 한도를 의미하는 듯해 맵의 난이도와 전략적 깊이를 높이는 요소로 추정된다. 황무지 타일셋을 사용한 넓은 4096x4096 맵은 넓은 시야와 긴 거리를 활용한 플레이가 요구되며, 특히 프로브를 통한 추가 채광은 자원 확보 전략의 핵심이 된다. 플레이어들은 각 라운드에서 빠르게 자원을 확보하고 다음 라운드 준비를 해야 하며, 짧은 라운드 시간은 타이밍과 효율성을 중시하는 플레이 스타일을 강제한다. 맵의 구조는 대칭형으로 보이며, 중앙과 외곽의 광물 지대가 배치되어 있어 프로브의 이동 경로와 자원 확보 전략이 승패를 좌우할 가능성이 크다. 초보 플레이어는 자원 관리와 라운드 전환 타이밍에서 어려움을 느낄 수 있지만, 숙련된 플레이어는 프로브를 효율적으로 활용해 자원을 극대화할 수 있는 전략을 구사할 수 있을 것이다. 이 맵은 자원 관리와 빠른 판단력을 요구하는 유즈맵을 찾는 플레이어들에게 추천되며, 특히 프로브를 활용한 전략적 플레이를 즐기는 유저들에게 적합하다. 플레이 전에는 프로브의 자원 채집 경로와 라운드 전환 타이밍을 미리 숙지하고, 광물의 위치와 맵 구조를 분석해두는 것이 중요하다. 또한, 업그레이드 시스템이 자원의 최대 한도를 의미한다면, 얼마나 효율적으로 자원을 활용할 수 있는지가 관건이 될 것이다. This StarCraft: Brood War custom map, ‘Lurker D 18 Way ~=FINAL=~’, stands out with its unique focus on probe-driven resource gathering and rapid round transitions. While the name hints at the Lurker unit, the gameplay revolves around Probes mining extra minerals within 30-second rounds, adding a layer of Resource Management and Quick Decision Making to each session. The map, set on a vast 4096x4096 tileset with a barren terrain, encourages strategic planning with its symmetrical layout and strategically placed mineral fields. Players must optimize probe movement and resource allocation while preparing for the next round, making timing and efficiency critical. The potential for upgrades up to 255 suggests a system that challenges players to maximize their resource potential, adding depth to the strategy. Novice players may struggle with the fast-paced rounds and resource management, but experienced players will enjoy the depth of probe utilization and tactical resource control. This map is ideal for those who enjoy custom maps that emphasize resource efficiency and quick decision-making. Before playing, it’s essential to familiarize yourself with the probe’s mining routes, round transitions, and the map’s mineral distribution to gain a competitive edge. Understanding the upgrade system’s implications on resource limits will also be key to mastering this map.

다운로드 0 · 조회 28 · 댓글 0

최근 등록된 맵

새로 추가된 파일과 버전을 확인하세요.

라커 D 18웨이 ~=FINAL=~ (Lurker D 18 Way ~=FINAL=~) 맵 미리보기

라커 D 18웨이 ~=FINAL=~ (Lurker D 18 Way ~=FINAL=~)

‘라커 D 18웨이 ~=FINAL=~’은 스타크래프트: 브루드워의 유즈맵으로, 프로브를 활용한 자원 채집과 빠른 라운드 전환이라는 독특한 시스템을 강조하는 맵이다. 맵의 이름은 ‘라커(Lurker)’라는 스타크래프트 유닛에서 유래했지만, 실제 게임 플레이에서는 프로브가 추가 채광을 수행하며 30초 단위의 짧은 라운드가 반복되면서Resource Management와 Quick Decision Making 능력을 시험한다. 255까지 업그레이드가 가능하다는 설명은 아마도 자원 관련 또는 유닛 능력의 한도를 의미하는 듯해 맵의 난이도와 전략적 깊이를 높이는 요소로 추정된다. 황무지 타일셋을 사용한 넓은 4096x4096 맵은 넓은 시야와 긴 거리를 활용한 플레이가 요구되며, 특히 프로브를 통한 추가 채광은 자원 확보 전략의 핵심이 된다. 플레이어들은 각 라운드에서 빠르게 자원을 확보하고 다음 라운드 준비를 해야 하며, 짧은 라운드 시간은 타이밍과 효율성을 중시하는 플레이 스타일을 강제한다. 맵의 구조는 대칭형으로 보이며, 중앙과 외곽의 광물 지대가 배치되어 있어 프로브의 이동 경로와 자원 확보 전략이 승패를 좌우할 가능성이 크다. 초보 플레이어는 자원 관리와 라운드 전환 타이밍에서 어려움을 느낄 수 있지만, 숙련된 플레이어는 프로브를 효율적으로 활용해 자원을 극대화할 수 있는 전략을 구사할 수 있을 것이다. 이 맵은 자원 관리와 빠른 판단력을 요구하는 유즈맵을 찾는 플레이어들에게 추천되며, 특히 프로브를 활용한 전략적 플레이를 즐기는 유저들에게 적합하다. 플레이 전에는 프로브의 자원 채집 경로와 라운드 전환 타이밍을 미리 숙지하고, 광물의 위치와 맵 구조를 분석해두는 것이 중요하다. 또한, 업그레이드 시스템이 자원의 최대 한도를 의미한다면, 얼마나 효율적으로 자원을 활용할 수 있는지가 관건이 될 것이다. This StarCraft: Brood War custom map, ‘Lurker D 18 Way ~=FINAL=~’, stands out with its unique focus on probe-driven resource gathering and rapid round transitions. While the name hints at the Lurker unit, the gameplay revolves around Probes mining extra minerals within 30-second rounds, adding a layer of Resource Management and Quick Decision Making to each session. The map, set on a vast 4096x4096 tileset with a barren terrain, encourages strategic planning with its symmetrical layout and strategically placed mineral fields. Players must optimize probe movement and resource allocation while preparing for the next round, making timing and efficiency critical. The potential for upgrades up to 255 suggests a system that challenges players to maximize their resource potential, adding depth to the strategy. Novice players may struggle with the fast-paced rounds and resource management, but experienced players will enjoy the depth of probe utilization and tactical resource control. This map is ideal for those who enjoy custom maps that emphasize resource efficiency and quick decision-making. Before playing, it’s essential to familiarize yourself with the probe’s mining routes, round transitions, and the map’s mineral distribution to gain a competitive edge. Understanding the upgrade system’s implications on resource limits will also be key to mastering this map.

다운로드 0 · 조회 28 · 댓글 0
맵 선택 가이드

태그는 맵의 핵심 특징을 빠르게 설명하지만 제작 버전마다 규칙이 다를 수 있습니다. 상세 설명에서 권장 인원, 난이도, 플레이 시간과 버전을 함께 확인한 뒤 다운로드하세요.