
라운드 스타크래프트 맵 모음
'라운드' 태그가 등록된 맵을 모았습니다. 장르 하나로 찾기 어려운 플레이 방식, 난이도와 특징을 중심으로 인기 맵과 최신 맵을 비교해 보세요.
- 등록 맵
- 9개
- 누적 다운로드
- 1
- 누적 조회
- 446
인기 맵
다운로드와 조회 반응이 높은 맵입니다.
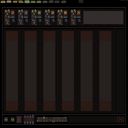
라인 타워 워즈 II (Line Tower Wars II)
스타크래프트 브루드워의 타워 디펜스 장르를 대표하는 명작 중 하나인 <라인 타워 워즈 II (Line Tower Wars II)>는 각 플레이어가 자신만의 독특한 경로를 따라 방어선을 구축하고, 상대방의 경로를 통해 유닛을 보내는 전략형 디펜스 맵이다. 맵의 핵심은 각각의 플레이어가 독립적인 길에서 타워를 건설하고 업그레이드하여 적의 공격을 방어하는 동시에, 자신의 길로 유닛을 보내 상대방의 자원을 빼앗거나 방해하는 데에 있다. 이 과정에서 유닛의 수가 증가할수록 플레이어의 수입이 늘어나며, 전략적인 자원 관리와 타워 배치, 유닛 운용의 균형이 승패를 좌우한다. 맵의 구조는 육각형 형태의 중앙 지역을 중심으로 여섯 명의 플레이어가 각각의 길로 연결된 형태로 구성되어 있으며, 상대방의 길로 유닛을 보내는 ‘라운드’ 시스템이 반복되면서 긴장감이 지속된다. 특히, 각 플레이어의 길은 복잡하게 얽혀 있어 단순하게 방어만 하는 것이 아니라, 상대방의 길로 침투하거나 요새를 공격하는 등 다채로운 플레이가 요구된다. 이 맵은 초보자와 숙련자 모두에게 매력적인데, 초보자는 기본적인 방어 전략과 자원 관리를 익히기에 좋고, 숙련자는 복잡한 길의 패턴과 상대방의 움직임을 예측하는 고도의 전략을 요구한다. 또한, 맵의 그래픽은 정글 타일셋을 활용하여 시각적으로도 흥미를 더하며, 타워와 유닛의 디자인도 스타크래프트의 분위기를 잘 살리고 있다. 플레이 전에는 각 플레이어의 길과 타워 건설 가능 구역을 미리 확인하는 것이 중요하며, 상대방의 유닛이 자신의 길로 들어오기 전에 타워를 배치하거나 요새를 강화하는 것이 핵심 전략이다. 이 맵은 여섯 명이서 플레이할 때 가장 큰 재미를 느낄 수 있으며, 팀플레이보다는 각자의 길에서 경쟁하는 개인전形式이 특징이다. This classic tower defense map in StarCraft: Brood War, <Line Tower Wars II (Line Tower Wars II)>, stands out as a top-tier title in the genre. Each player constructs and upgrades defenses along their own unique path while sending units through opponents' routes to disrupt their economy or attack directly. The core mechanics revolve around strategic tower placement, resource management, and unit coordination—where increased unit production boosts income, creating a dynamic balance between offense and defense. The hexagonal map design features six distinct player paths converging at a central area, with a 'round' system that cycles units through enemy territories, maintaining high tension throughout matches. The complexity of each path demands adaptability; players must not only fortify their defenses but also infiltrate enemy routes or target weak points like fortresses. Suitable for both beginners and veterans, newcomers can grasp fundamental strategies while experienced players enjoy deep tactical challenges involving path prediction and counterplay. The jungle-themed visuals enhance immersion, with tower and unit designs staying true to StarCraft's aesthetic. Before playing, carefully examine your path and buildable zones—prioritizing early tower placement or fortress upgrades to counter incoming enemy units. Best enjoyed in a six-player free-for-all format, this map excels in individual competition rather than team-based play.
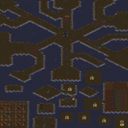
Lurker D 18 Way ~=FINAL=~
Lurker D 18 Way ~=FINAL=~는 4096×4096 타일 크기의 대형 유즈맵으로, 황무지 타일셋을 사용해广阔한 전장을 구현한다. 이 맵은 6인 플레이를 기준으로 설계되며, 팀 플레이보다는 개인 경기 방식을 권장한다. 게임 흐름은 30초마다 라운드가 진행되며, 각 라운드마다 미네랄을 채집하고 업그레이드를 진행한다.players는 각 라운드마다 자원을 모아 유닛을 강화하고, 최종적으로 상대방의 기지를 파괴하거나 생존을 유지해야 한다. map 구조는 여러 개의 섬과 연결된 육로로 구성되어 이동이 자유롭고, 다양한 고지점과 장애물을 활용한 전술적 포지셔닝이 가능하다. 각 섬마다 특화된 자원 채취 지점과 방어 터렛이 배치되어 있어, 플레이어는 지형 활용을 통해 우위를 점할 수 있다. 업그레이드 옵션은 공격력, 방어력, 이동 속도 등 다채롭게 제공되어 전략적 선택이 가능하다. 게임 종료는 30라운드 후 최종 점수가 가장 높은 팀(또는 개인)에게 주어지며, 점수는 채집한 미네랄량과 남은 유닛 수를 종합해 산출된다. 이 map은 빠른 경기 전개와 반복 가능한 라운드 시스템으로 인해 리플레이 가치가 높으며, 커스텀 게임 모드와 호환되어 다양한 변형이 가능하다. 유즈맵 특성상 커스터마이징된 규칙과 트리거가 존재하며, 플레이어의 마이크로 매니지먼트와 매크로 전략이 동시에 요구된다. 난이도는 보통 수준으로, 초보자는 라운드 타이밍과 자원 관리 습관을 익히는 데 어려움을 느낄 수 있지만, 경험이 쌓이면 고난도 전략을 구사하기에 충분한 깊이 제공한다. 이 맵을 즐기기에 적합한 플레이어는 빠른 판단력과 리소스 조율 능력이며, 특히 컴파クト한 전술과 타이밍 조작을 선호하는 유저에게 추천한다. 플레이 전에는 맵 파일을 최신 버전(v4) 확인하고, 6인 플레이 환경에서 테스트해 보는 것이 좋으며, 불필요한 모드나 트리거가 포함되지 않은지 확인해야 한다. Lurker D 18 Way ~=FINAL=~ is a large-scale custom map with a 4096×4096 tile size that utilizes the Wasteland tileset to create a vast battlefield. Designed primarily for 6-player matches, the map is better suited for individual play rather than team play. The gameplay follows a round-based system that progresses every 30 seconds, where players collect minerals and perform upgrades each round. Players must gather resources to strengthen their units, with the ultimate goal of destroying the opponent's base or being the last survivor. The map structure consists of several islands connected by land routes, allowing for free movement and tactical positioning using various high ground and obstacles. Each island features specialized resource gathering points and defensive turrets, allowing players to gain an advantage through terrain utilization. A variety of upgrade options—including attack, defense, and movement speed—allow for diverse strategic choices. The game ends after 30 rounds, and the winner is the team (or individual) with the highest score, calculated based on the total minerals collected and the number of remaining units. Due to its fast-paced progression and repeatable round system, the map offers high replay value and is compatible with custom game modes for various variations. As is typical for custom maps, it features customized rules and triggers, requiring players to master both micro-management and macro-strategy. The difficulty is moderate; while beginners may struggle with round timing and resource management, the map offers enough depth for experienced players to execute high-level strategies. This map is ideal for players with quick decision-making skills and resource management abilities, especially those who prefer compact tactics and precise timing. Before playing, it is recommended to ensure you are using the latest version (v4), test it in a 6-player environment, and verify that no unnecessary mods or triggers are active.
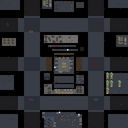
Choose Ur D 17 Choices (17가지 선택지 디펜스)
스타크래프트 브루드워의 유즈맵 장르 중에서도 선택과 집중이 두드러지는 ‘Choose Ur D 17 Choices’는 플레이어가 다양한 유닛을 선택해 전투를 펼치는 독특한 디펜스 형식의 맵이다. 내부 설명에서 확인되는 것처럼 총 17개의 유닛 선택지가 제공되며, 각 유닛은 라운드마다 등장하는 적군을 상대로 전략적 우위를 점할 수 있도록 구성되어 있다. 맵 중앙에는 넓은 평지가 펼쳐져 있으며, 주변으로 방어 시설과 같은 구조물이 배치되어 있어 플레이어의 선택에 따라 전투 양상이 크게 달라진다. 이미지 상에서도 중앙의 넓은 공간과 주변의 건물 배치가 확인되는데, 이는 유닛 선택의 중요성을 강조하는 디자인으로 보인다. 이 맵의 핵심은 바로 ‘선택’에 있다. 17개의 유닛 중에서 매 라운드마다 어떤 조합을 구성할지 고민해야 하며, 각 유닛의 장단점을 숙지하고 적절한 타이밍에 활용해야 한다. 예를 들어, 초기 라운드에는 저렴하고 다수 양산이 가능한 유닛(마린, 저글링 등)을 선택할 수 있지만, 후반부로 갈수록 고화력 유닛(아칸, 탱크, 울트라리스크 등)을 조합해야만 승리를 이끌어낼 수 있다. 또한, 맵 이미지에서 확인되는 여러 개의 건물이 배치된 구조는 방어선을 구축하거나 전략적 우위를 점하는 데 유용한 요소로 활용될 수 있다. 플레이 경험은 상당히 전략적이면서도 긴장감이 넘친다. 매 라운드마다 등장하는 적군은 랜덤한 조합으로 등장하기 때문에, 플레이어는 유닛 선택뿐만 아니라 대처 방법까지 신중히 고려해야 한다. 선택지가 많다는 점은 장점이지만, 반대로 최적의 조합을 찾는 데 시간이 소요될 수 있어 초보자의 경우 어려움을 느낄 수 있다. 또한, 맵의 넓은 공간은 유닛의 기동성을 살릴 수 있는 기회를 제공하지만, 반대로 방심하면 적군의 집중 공격을 받을 위험도 존재한다. 이 맵은 주로 다인 플레이보다는 1인 또는 소수 인원이 플레이하는 방식으로 구성되어 있으며, 팀전보다는 개인의 선택과 판단력이 승패를 좌우하는 구조로 보인다. 따라서 혼자만의 전략을 짜고자 하거나, 다양한 유닛의 조합을 시도해보고 싶은 플레이어에게 추천할 만한 맵이다. 또한, 여러 번 플레이하면서 각 유닛의 특성과 맵의 구조를 익히면 더욱 전략적인 플레이가 가능해질 것이다. 플레이 전에는 유닛별로 어떤 조합이 유효한지 미리 숙지하고, 맵의 지형을 활용한 방어 전략을 세워두는 것이 중요하다. 초보자의 경우 비교적 쉬운 유닛부터 시작해 gradually 난이도를 높이는 것을 권장하며, 숙련자의 경우 최적의 조합을 찾아내어 효율적인 승리를 노려볼 수 있을 것이다. 또한, 맵의 넓은 공간을 활용한 기동전을 연습한다면 더욱 다채로운 플레이가 가능할 것이다. This StarCraft: Brood War custom map, 'Choose Ur D 17 Choices,' stands out in the UMS genre by offering a unique defensive experience centered around strategic unit selection. The map provides 17 distinct unit choices per round, each with unique strengths and weaknesses, forcing players to carefully consider their combinations to counter the randomly generated enemy forces. The central open area, flanked by defensive structures visible in the image, serves as a battleground where unit positioning and timing play crucial roles. The core gameplay revolves around the 'choice' mechanic, where players must balance cost, effectiveness, and synergy between units. Early rounds favor cheaper, mass-produced units like Marines or Zerglings, while later stages demand high-damage combinations such as Tanks, Archons, or Ultralisks to overcome tougher enemy waves. The map's layout encourages both aggressive pushes and defensive setups, with buildings and open spaces allowing for tactical maneuvering. The randomness of enemy compositions adds replayability, as players must adapt their strategies dynamically. The experience is highly strategic, with tension rising as players weigh the risks of their selections against the unpredictable enemy threats. Beginners may find the sheer number of options overwhelming, but the gradual learning curve makes it accessible with practice. The map excels in solo or small-group play, where individual decision-making and adaptability determine success. Veteran players will enjoy experimenting with optimal synergies, while newcomers can start with simpler combinations and progress to more complex strategies. Before diving in, players should familiarize themselves with each unit's strengths and weaknesses, as well as the map's terrain advantages. For beginners, starting with cost-effective units and gradually incorporating advanced ones is advisable. Advanced players can focus on refining optimal combinations for maximum efficiency. The spacious design also rewards players who master unit mobility, allowing for dynamic plays that can turn the tide of battle.
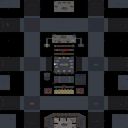
픽 유어 디펜스 (Pick Your Defense)
스타크래프트 브루드워 유즈맵 〈픽 유어 디펜스〉는 플레이어와 컴퓨터가 번갈아 가며 방어와 공격을 펼치는 독특한 디펜스 장르의 맵이다. 맵은 중앙에 위치한 본진과 주변의 방어 건물들, 그리고 적의 공격 루트가 명확히 나뉘어 있어 전략적인 배치와 자원 관리가 무엇보다 중요하다. 플레이어는 각 라운드마다 주어지는 자원을 활용해 방어 건물을 건설하고 업그레이드하며, 컴퓨터는 정해진 패턴으로 공격을 시도한다. 특히 ‘픽’이라는 이름에 걸맞게, 각 라운드마다 제공되는 선택지가 플레이어의 전략을 좌우하는데, 이는 단순한 디펜스 맵을 넘어 선택과 집중의 재미를 더하는 요소다. 맵의 분위기는 우주 타일셋을 기반으로 하여Dark, 차분한 톤으로 조성되어 있으며, 긴장감 있는 전투가 펼쳐지는 동안에도 고요한 공간감이 느껴진다. 중간중간 등장하는 특수 건물이나 아이템 선택지는 플레이어에게 일시적인 우위를 제공하기도 한다. 초보자는 방어 건물의 기본 배치와 자원 관리에 익숙해지는 데 집중해야 하며, 숙련자는 효율적인 자원 분배와 공격 타이밍을 노려야 한다. 맵의 난이도는 라운드가 진행될수록 점차 높아지므로, 꾸준한 전략 수정이 필요하다. 추천 대상은 디펜스 장르를 좋아하는 플레이어와 전략적 사고를 즐기는 유저들로, 특히 ‘선택지와 통제’라는 새로운 재미를 경험하고 싶은 이들에게 적합하다. 플레이 전에는 방어 건물의 종류와 특수 능력, 그리고 컴퓨터의 공격 패턴을 미리 숙지하는 것이 좋다. 또한, 맵의 긴장감을 유지하기 위해 소리와 그래픽 설정을 조절하는 것도 중요한 포인트다. StarCraft: Brood War custom map *Pick Your Defense* is a unique defense genre map where players and the computer take turns defending and attacking. The map is divided into a clearly separated main base in the center, surrounding defensive structures, and enemy attack routes, making strategic placement and resource management crucial. Each round, players use given resources to construct and upgrade defensive buildings, while the computer attempts attacks in predetermined patterns. True to its name, "Pick," the choices provided each round heavily influence the player's strategy, adding layers of selection and focus beyond a typical defense map. The map's atmosphere is built on a space-themed tileset, creating a dark, subdued tone that enhances the sense of calm even during intense battles. Special buildings or item selections appearing at intervals grant temporary advantages. Beginners should focus on mastering basic defensive building placement and resource management, while experienced players must optimize resource allocation and attack timing. The difficulty gradually increases with each round, requiring continuous strategic adjustments. This map is recommended for players who enjoy defense genres and those who appreciate strategic thinking, especially those looking to experience the new fun of "choices and control." Before playing, it's wise to familiarize yourself with defensive building types, special abilities, and the computer's attack patterns. Adjusting sound and graphics settings can also help maintain the map's tension.
Evolves EvX Style viewers
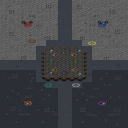
스타크래프트: 브루드워의 유즈맵 «Evolves EvX Style viewers»는 8인용 디펜스 장르의 맵으로, 중앙에 위치한 거대한 둥근 진영 지역과 이를 둘러싼 외부 방어 구역으로 구성되어 있다. 플레이어는 각자 고유한 시작 위치에서 출발해 끊임없이 몰려드는 적 유닛을 막아내야 하며, 중앙의 둥글고 복잡한 구조는 방어선을 구축하거나 중재하는 데 strategic depth를 제공한다. 맵의 특징적인 둥근 형태는 적의 진격을 방해하거나, 다수의 플레이어가 협력하여 방어선을 형성할 수 있도록 유도하며, 특히 외부 구역의 좁은 통로에서 전략적 우위가 발생할 가능성이 크다. 맵의 분위기는 우주 타일셋을 활용하여 광활하고Dark한 느낌을 강조하며, 플레이어는 제한된 자원으로 적의 공격을 방어해야 한다는 긴박감을 느낄 수 있다. 초보자도 쉽게 접근할 수 있지만, 중앙 구역의 복잡한 구조와 다수의 적을 상대해야 하는 난이도로 인해 숙련자도 전략적 깊이를 요구받는 맵으로 평가된다. 플레이 전에는 각 플레이어의 위치와 중앙 방어선의 중요성을 미리 숙지하고, 초반 자원 관리와 방어 건물 배치에 신경 써야 한다. 또한, 맵의 둥근 구조상 시야 확보가 중요하므로, 감시탑이나 오버로드와 같은 시야 확보 유닛을 적극 활용하는 것이 필수적이다. 이 맵은 주로 8인이 동시에 플레이하는 디펜스 장르에 익숙한 유저들에게 추천되며, 팀 플레이를 중시하는 유저에게는 더욱 매력적으로 다가올 수 있다. 특히, 적절한 협력과 커뮤니케이션이 뒷받침된다면, 긴장감 넘치는 방어전을 경험할 수 있을 것이다. Evolves EvX Style viewers is an 8-player defense-style custom map in StarCraft: Brood War, featuring a large circular central area surrounded by outer defensive zones. Players start from unique positions and must defend against waves of incoming enemies, with the central circular layout offering strategic depth for building defenses or coordinating team efforts. The map's distinctive round shape forces players to adapt their strategies, particularly in narrow external passages where positional advantages can make a significant difference. Utilizing the space-themed tileset, the map creates a sense of vastness and darkness, enhancing the intense experience of defending against relentless enemy assaults with limited resources. While accessible to beginners, the map's complexity and the need to fend off multiple enemy waves provide a rewarding challenge for experienced players seeking deeper strategy. Before playing, it's crucial to familiarize yourself with your starting position and the importance of the central defensive area. Efficient early resource management and strategic placement of defensive structures are vital. Given the map's circular design, vision control is key, making units like Overlords or Observer essential for monitoring enemy movements. This map is best suited for players familiar with defense-style games who prefer an 8-player experience, especially those who enjoy team-based coordination. With proper cooperation and communication, players can expect a thrilling and tense defensive battle.
스폰 디펜스 얼티밋 (Spawn Defense Ultimate)
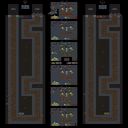
스타크래프트 브루드워의 스페이스 테마 디펜스 유즈맵인 <스폰 디펜스 얼티밋>은 우주 공간을 배경으로 한 방어형 맵으로, 적의 끊임없는 웨이브를 막아내는 재미가 있는 컴까기 형식의 유즈맵이다. 맵의 중앙에 위치한 스폰 지역과, 이를 둘러싼 방어 시설이 특징적이며, 플레이어는 각 라운드마다 등장하는 다양한 적 유닛을 상대로 방어전을 펼치게 된다. 맵의 구조는 비교적 단순하면서도 전략적인 배치로 구성되어 있어, 초보 플레이어는 기본적인 방어 전략을 익힐 수 있고, 숙련자라면 더 효율적인 유닛 배치와 자원 관리, 업그레이드 전략을 통해 높은 점수를 노릴 수 있다. 게임은 여러 라운드로 구성되어 있으며, 각 라운드가 끝날 때마다 보너스 자원이나 특수 아이템을 획득할 수 있는 기회가 주어지기도 한다. 맵의 우주 배경답게 어두운 우주 공간과 빛나는 행성, 우주선들이 맵을 아름답게 꾸미고 있으며, 이는 플레이어에게 긴장감과 몰입감을 동시에 제공한다. 또한, 맵의 중앙에 위치한 스폰 지역은 적의 공격을 집중적으로 받게 되므로, 방어 시설의 강화를 최우선으로 고려해야 한다. 특히, 방어 건물의 배치와 업그레이드 타이밍이 승패를 좌우할 수 있으므로, 플레이어는 신중한 계획을 세우는 것이 중요하다. 이 맵의 가장 큰 장점은 단조로울 수 있는 디펜스 장르에 새로운 재미 요소를 더했다는 점이다. 다양한 적 유닛의 조합과 예기치 못한 웨이브 패턴은 플레이어에게 끊임없는 긴장감을 제공하며, 성공적인 방어 시에는 성취감을 느낄 수 있다. 또한, 맵의 밸런스가 비교적 잘 잡혀 있어 초보부터 숙련자까지 모두 즐길 수 있는 수준으로 설계되어 있다. 마지막으로, 맵의 그래픽과 사운드가 우주 분위기를 잘 살리고 있어, 시각적·청각적으로도 만족스러운 플레이 경험을 제공한다. 이 맵을 즐기기 위해서는 방어 건물의 효율적인 배치와 자원 관리에 중점을 두고, 각 라운드의 특징을 잘 파악하는 것이 중요하다. 또한, 팀 플레이를 고려한 맵이라면 팀원과의 원활한 소통도 필수적일 것이다. StarCraft: Brood War's space-themed defense custom map, *Spawn Defense Ultimate*, is a fun tower-defense-style map set in outer space where players must fend off endless waves of enemies. The map features a central spawn area surrounded by defensive structures, and players engage in round-based battles against a variety of enemy units. Its straightforward yet strategic layout allows beginners to learn basic defense tactics, while experienced players can aim for high scores through optimized unit placement, resource management, and upgrade strategies. The game consists of multiple rounds, with opportunities to earn bonus resources or special items at the end of each. The cosmic aesthetic—dark space, glowing planets, and ships—enhances immersion and tension. Since the central spawn area bears the brunt of attacks, prioritizing defensive upgrades is crucial, as the placement and timing of defensive buildings can determine victory or defeat. Careful planning is essential for success. The map’s biggest strength is revitalizing the defense genre by introducing fresh elements. Unexpected enemy combinations and wave patterns keep players on edge, while successful defenses provide a strong sense of achievement. Balanced for all skill levels, from beginners to experts, it also delivers visually and aurally satisfying space-themed graphics and sound design. To enjoy the map, focus on efficient defensive structures and resource management, and study each round’s unique traits. If played cooperatively, teamwork and clear communication with teammates are also vital.
팀 마이크로 워크 3 (Team Micro Work 3)
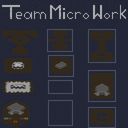
팀 마이크로 워크 3(Team Micro Work 3)는 스타크래프트 브루드워 유즈맵 중에서도 플레이어 간의 협동과 정교한 컨트롤 능력을 집중적으로 시험하는 협동 피하기 및 컨트롤 위주의 유즈맵이다. 전체적인 맵 구조를 살펴보면 플랫폼 타일셋을 기반으로 다양한 형태의 구역들이 분할 배치되어 있으며, 각 구역마다 요구하는 미션이나 생존 방식이 다를 것으로 추정된다. 내부 맵 설명에 따르면 플레이어들은 서로 힘을 합쳐 각 라운드를 완수해야 하며, 만약 실패할 경우 사망했던 라운드의 시작 지점부터 다시 시작하는 독특한 진행 방식을 가지고 있다. 단순한 디펜스나 밀리와는 달리, 끊임없이 주어지는 위협 속에서 실수를 줄이고 팀원 간의 호흡을 맞추는 것이 이 맵의 핵심 재미 요소다. 최대 6명의 플레이어가 참여할 수 있어 여러 명의 친구들과 함께 도전하기에 알맞으며, 개인의 컨트롤 실력뿐만 아니라 팀원 전체의 유기적인 협조가 승패를 가르는 중요한 기준이 된다. 각 라운드를 돌파할 때마다 요구되는 컨트롤의 난이도가 점차 높아질 것으로 보이며, 반복적인 시도를 통해 공략법을 찾아나가는 재미를 느낄 수 있다. 평소 정밀한 컨트롤을 요구하는 유즈맵이나 협동 플레이를 선호하는 유저들에게 적합하며, 혼자보다는 다수가 함께 모여 소통하며 즐길 때 더욱 몰입감 있는 플레이 경험을 선사한다. 플레이하기 전 각 구역의 지형적 특징과 실패 시 부활 지점에 대한 이해를 바탕으로 전략을 세우는 것이 좋다. Team Micro Work 3 is a cooperative Brood War custom map that intensively tests players' teamwork and precise control skills. Based on the platform tileset, the map features various separated zones, and it is presumed that each area requires different missions or survival methods. According to the internal map description, players must work together to complete each round, and if they fail, they restart at the beginning of the round they died at, offering a unique progression system. Unlike standard defense or melee maps, reducing mistakes amidst continuous threats and matching the pace with teammates are the core fun elements of this map. Supporting up to 6 players, it is well-suited for challenging with friends, where both individual control proficiency and organic cooperation among all team members become crucial standards for victory. The control difficulty required to clear each round is expected to gradually increase, allowing players to find strategies through repetitive attempts. It is recommended for users who enjoy custom maps requiring precise control or cooperative gameplay, providing a more immersive experience when played together with communication rather than alone. Before playing, it is advisable to establish strategies based on an understanding of the terrain features of each zone and the respawn points upon failure.
루커 D 18 웨이 FINAL HARD (Lurker D 18 Way FINAL HARD)
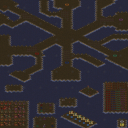
스타크래프트 브루드워의 유즈맵 중 하나로, ‘Lurker D 18 Way FINAL HARD’는 다중 지뢰와 프로브를 활용한Resource Management(자원 관리)형 디펜스 맵으로 주목받고 있다. 맵의 중앙에는 거대한 둥근 성역이 자리하고 있으며, 그 주변을 따라 18개의 지뢰가 배치되어 있는데, 이 지뢰들은 일정 시간마다 자동으로 보급되는 프로브를 통해 추가 자원을 확보할 수 있는 구조로 설계되어 있다. 플레이어는 이 자원을 활용해 업그레이드와 방어 시설을 강화해야 하는데, 특히 30초 단위의 라운드가 지나면서 자원 확보 속도가 빨라지며, 업그레이드 한도가 255까지 허용되어 långvarig(장기적인) 전략 구사가 가능하다. 공격을 받기 전까지는 비교적 안정적인 자원 수급이 가능하지만, 방어선을 구축하지 못하면 순식간에 자원이 고갈되어 게임이 어렵게 전개될 수 있다. 맵의 난이도는 ‘HARD’로 명시되어 있지만, 자원 관리와 타이밍 감각이 뛰어난 플레이어라면 충분히 극복할 수 있는 수준으로 보인다. 또한, 맵의 규모는 4096x4096의 넓은 공간을 자랑하며, 황무지 타일셋을 기반으로 한 황량한 분위기가 전체적인 플레이感(감)을 더해준다. 이 맵은 특히Resource Management(자원 관리)와Defense(방어) 요소가 결합된 하이브리드 스타일의 유즈맵으로, 초보자와 숙련자 모두에게 흥미로운 도전을 제공할 것으로 예상된다. 플레이를 시작하기 전에는 자원 확보 루틴과 방어 시설의 배치 타이밍을 충분히 숙지하는 것이 중요하다. This StarCraft: Brood War custom map, ‘Lurker D 18 Way FINAL HARD’, stands out as a Resource Management defense title where players must strategically handle multiple mines and Probes. The map features a central circular zone surrounded by 18 mines, which can be upgraded and supplied with resources through Probes that appear at regular intervals. Players earn resources that can be invested in upgrades, with the cap set at 255, allowing for long-term strategic planning as rounds progress every 30 seconds. While the map starts with steady income, neglecting defense lines can quickly deplete resources and escalate difficulty. Although labeled ‘HARD’, the challenge is balanced for players with strong resource management and timing skills. The 4096x4096 map size, set in a barren wasteland tile, adds to the immersive experience. This hybrid custom map blends Resource Management and Defense mechanics, offering engaging gameplay for both beginners and veterans. Prior to playing, familiarizing oneself with resource income patterns and optimal defense setups is crucial for success.
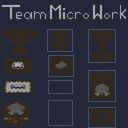
팀 마이크로 워크 4 (Team Micro Work 4)
스타크래프트 브루드워 맵을 즐기는 유저들이라면 컨트롤의 극한을 시험하는 유즈맵에 한 번쯤 관심을 가져보았을 것이다. 이번에 소개할 팀 마이크로 워크 4 (Team Micro Work 4)는 바로 이러한 세밀한 유닛 조작과 협동 플레이의 재미를 극대화한 독특한 형식의 스타크래프트 유즈맵이다. 내부 맵 설명에 따르면 플레이어들은 힘을 합쳐 각 라운드를 돌파해야 하며, 만약 실패하더라도 사망한 라운드의 처음부터 다시 도전할 수 있는 방식으로 진행된다. 이러한 진행 방식은 단순한 일회성 클리어에서 그치지 않고, 반복적인 시도를 통해 공략법을 찾아나가는 재미를 선사한다. 맵 전체의 구조는 여러 개의 독립된 구역으로 나누어져 있는 것으로 보이며, 각 구역마다 요구되는 미세한 컨트롤과 팀원 간의 유기적인 호흡이 승패를 가르는 핵심 요소로 작용할 것으로 추정된다. 혼자서 모든 것을 해결하기보다는 여러 명이 함께 역할을 나누어 각 구간을 헤쳐나가는 협력 플레이가 필수적이다. 특히 세밀한 컨트롤 능력을 키우고 싶은 유저들이나 친구들과 함께 머리를 맞대고 난관을 극복하는 과정을 즐기는 플레이어들에게 알맞은 작품이다. 플레이하기 전에 각 라운드의 특징과 실패 시 재시작되는 규칙을 미리 숙지한다면 더욱 몰입감 넘치는 경험을 할 수 있을 것이다. 세밀한 컨트롤과 팀워크를 바탕으로 구성된 독창적인 라운드를 차근차근 클리어해 나가는 성취감을 느껴보기를 권장한다. For users who enjoy StarCraft Brood War maps, custom maps that test the limits of micro-control have always been a captivating genre. Team Micro Work 4 is a unique StarCraft custom map designed to maximize the fun of precise unit control and cooperative gameplay. According to the internal map description, players must work together to complete each round, and if they fail, they restart at the beginning of the round they died at. This progression system goes beyond a simple one-time clear, offering the enjoyment of finding strategies through repeated attempts. The overall map structure appears to be divided into multiple independent sections, where meticulous control and organic teamwork required in each area are presumed to be key factors determining victory or defeat. Rather than solving everything alone, cooperative play where multiple participants divide roles and navigate each section together is essential. It is a suitable work particularly for users who want to improve their micro-control skills or players who enjoy overcoming obstacles by putting their heads together with friends. Familiarizing oneself with the characteristics of each round and the restart rule upon failure before playing will allow for a more immersive experience. It is recommended to feel the sense of accomplishment of steadily clearing the original rounds constructed based on delicate control and teamwork.
최근 등록된 맵
새로 추가된 파일과 버전을 확인하세요.
팀 마이크로 워크 4 (Team Micro Work 4)
스타크래프트 브루드워 맵을 즐기는 유저들이라면 컨트롤의 극한을 시험하는 유즈맵에 한 번쯤 관심을 가져보았을 것이다. 이번에 소개할 팀 마이크로 워크 4 (Team Micro Work 4)는 바로 이러한 세밀한 유닛 조작과 협동 플레이의 재미를 극대화한 독특한 형식의 스타크래프트 유즈맵이다. 내부 맵 설명에 따르면 플레이어들은 힘을 합쳐 각 라운드를 돌파해야 하며, 만약 실패하더라도 사망한 라운드의 처음부터 다시 도전할 수 있는 방식으로 진행된다. 이러한 진행 방식은 단순한 일회성 클리어에서 그치지 않고, 반복적인 시도를 통해 공략법을 찾아나가는 재미를 선사한다. 맵 전체의 구조는 여러 개의 독립된 구역으로 나누어져 있는 것으로 보이며, 각 구역마다 요구되는 미세한 컨트롤과 팀원 간의 유기적인 호흡이 승패를 가르는 핵심 요소로 작용할 것으로 추정된다. 혼자서 모든 것을 해결하기보다는 여러 명이 함께 역할을 나누어 각 구간을 헤쳐나가는 협력 플레이가 필수적이다. 특히 세밀한 컨트롤 능력을 키우고 싶은 유저들이나 친구들과 함께 머리를 맞대고 난관을 극복하는 과정을 즐기는 플레이어들에게 알맞은 작품이다. 플레이하기 전에 각 라운드의 특징과 실패 시 재시작되는 규칙을 미리 숙지한다면 더욱 몰입감 넘치는 경험을 할 수 있을 것이다. 세밀한 컨트롤과 팀워크를 바탕으로 구성된 독창적인 라운드를 차근차근 클리어해 나가는 성취감을 느껴보기를 권장한다. For users who enjoy StarCraft Brood War maps, custom maps that test the limits of micro-control have always been a captivating genre. Team Micro Work 4 is a unique StarCraft custom map designed to maximize the fun of precise unit control and cooperative gameplay. According to the internal map description, players must work together to complete each round, and if they fail, they restart at the beginning of the round they died at. This progression system goes beyond a simple one-time clear, offering the enjoyment of finding strategies through repeated attempts. The overall map structure appears to be divided into multiple independent sections, where meticulous control and organic teamwork required in each area are presumed to be key factors determining victory or defeat. Rather than solving everything alone, cooperative play where multiple participants divide roles and navigate each section together is essential. It is a suitable work particularly for users who want to improve their micro-control skills or players who enjoy overcoming obstacles by putting their heads together with friends. Familiarizing oneself with the characteristics of each round and the restart rule upon failure before playing will allow for a more immersive experience. It is recommended to feel the sense of accomplishment of steadily clearing the original rounds constructed based on delicate control and teamwork.
팀 마이크로 워크 3 (Team Micro Work 3)
팀 마이크로 워크 3(Team Micro Work 3)는 스타크래프트 브루드워 유즈맵 중에서도 플레이어 간의 협동과 정교한 컨트롤 능력을 집중적으로 시험하는 협동 피하기 및 컨트롤 위주의 유즈맵이다. 전체적인 맵 구조를 살펴보면 플랫폼 타일셋을 기반으로 다양한 형태의 구역들이 분할 배치되어 있으며, 각 구역마다 요구하는 미션이나 생존 방식이 다를 것으로 추정된다. 내부 맵 설명에 따르면 플레이어들은 서로 힘을 합쳐 각 라운드를 완수해야 하며, 만약 실패할 경우 사망했던 라운드의 시작 지점부터 다시 시작하는 독특한 진행 방식을 가지고 있다. 단순한 디펜스나 밀리와는 달리, 끊임없이 주어지는 위협 속에서 실수를 줄이고 팀원 간의 호흡을 맞추는 것이 이 맵의 핵심 재미 요소다. 최대 6명의 플레이어가 참여할 수 있어 여러 명의 친구들과 함께 도전하기에 알맞으며, 개인의 컨트롤 실력뿐만 아니라 팀원 전체의 유기적인 협조가 승패를 가르는 중요한 기준이 된다. 각 라운드를 돌파할 때마다 요구되는 컨트롤의 난이도가 점차 높아질 것으로 보이며, 반복적인 시도를 통해 공략법을 찾아나가는 재미를 느낄 수 있다. 평소 정밀한 컨트롤을 요구하는 유즈맵이나 협동 플레이를 선호하는 유저들에게 적합하며, 혼자보다는 다수가 함께 모여 소통하며 즐길 때 더욱 몰입감 있는 플레이 경험을 선사한다. 플레이하기 전 각 구역의 지형적 특징과 실패 시 부활 지점에 대한 이해를 바탕으로 전략을 세우는 것이 좋다. Team Micro Work 3 is a cooperative Brood War custom map that intensively tests players' teamwork and precise control skills. Based on the platform tileset, the map features various separated zones, and it is presumed that each area requires different missions or survival methods. According to the internal map description, players must work together to complete each round, and if they fail, they restart at the beginning of the round they died at, offering a unique progression system. Unlike standard defense or melee maps, reducing mistakes amidst continuous threats and matching the pace with teammates are the core fun elements of this map. Supporting up to 6 players, it is well-suited for challenging with friends, where both individual control proficiency and organic cooperation among all team members become crucial standards for victory. The control difficulty required to clear each round is expected to gradually increase, allowing players to find strategies through repetitive attempts. It is recommended for users who enjoy custom maps requiring precise control or cooperative gameplay, providing a more immersive experience when played together with communication rather than alone. Before playing, it is advisable to establish strategies based on an understanding of the terrain features of each zone and the respawn points upon failure.
스폰 디펜스 얼티밋 (Spawn Defense Ultimate)
스타크래프트 브루드워의 스페이스 테마 디펜스 유즈맵인 <스폰 디펜스 얼티밋>은 우주 공간을 배경으로 한 방어형 맵으로, 적의 끊임없는 웨이브를 막아내는 재미가 있는 컴까기 형식의 유즈맵이다. 맵의 중앙에 위치한 스폰 지역과, 이를 둘러싼 방어 시설이 특징적이며, 플레이어는 각 라운드마다 등장하는 다양한 적 유닛을 상대로 방어전을 펼치게 된다. 맵의 구조는 비교적 단순하면서도 전략적인 배치로 구성되어 있어, 초보 플레이어는 기본적인 방어 전략을 익힐 수 있고, 숙련자라면 더 효율적인 유닛 배치와 자원 관리, 업그레이드 전략을 통해 높은 점수를 노릴 수 있다. 게임은 여러 라운드로 구성되어 있으며, 각 라운드가 끝날 때마다 보너스 자원이나 특수 아이템을 획득할 수 있는 기회가 주어지기도 한다. 맵의 우주 배경답게 어두운 우주 공간과 빛나는 행성, 우주선들이 맵을 아름답게 꾸미고 있으며, 이는 플레이어에게 긴장감과 몰입감을 동시에 제공한다. 또한, 맵의 중앙에 위치한 스폰 지역은 적의 공격을 집중적으로 받게 되므로, 방어 시설의 강화를 최우선으로 고려해야 한다. 특히, 방어 건물의 배치와 업그레이드 타이밍이 승패를 좌우할 수 있으므로, 플레이어는 신중한 계획을 세우는 것이 중요하다. 이 맵의 가장 큰 장점은 단조로울 수 있는 디펜스 장르에 새로운 재미 요소를 더했다는 점이다. 다양한 적 유닛의 조합과 예기치 못한 웨이브 패턴은 플레이어에게 끊임없는 긴장감을 제공하며, 성공적인 방어 시에는 성취감을 느낄 수 있다. 또한, 맵의 밸런스가 비교적 잘 잡혀 있어 초보부터 숙련자까지 모두 즐길 수 있는 수준으로 설계되어 있다. 마지막으로, 맵의 그래픽과 사운드가 우주 분위기를 잘 살리고 있어, 시각적·청각적으로도 만족스러운 플레이 경험을 제공한다. 이 맵을 즐기기 위해서는 방어 건물의 효율적인 배치와 자원 관리에 중점을 두고, 각 라운드의 특징을 잘 파악하는 것이 중요하다. 또한, 팀 플레이를 고려한 맵이라면 팀원과의 원활한 소통도 필수적일 것이다. StarCraft: Brood War's space-themed defense custom map, *Spawn Defense Ultimate*, is a fun tower-defense-style map set in outer space where players must fend off endless waves of enemies. The map features a central spawn area surrounded by defensive structures, and players engage in round-based battles against a variety of enemy units. Its straightforward yet strategic layout allows beginners to learn basic defense tactics, while experienced players can aim for high scores through optimized unit placement, resource management, and upgrade strategies. The game consists of multiple rounds, with opportunities to earn bonus resources or special items at the end of each. The cosmic aesthetic—dark space, glowing planets, and ships—enhances immersion and tension. Since the central spawn area bears the brunt of attacks, prioritizing defensive upgrades is crucial, as the placement and timing of defensive buildings can determine victory or defeat. Careful planning is essential for success. The map’s biggest strength is revitalizing the defense genre by introducing fresh elements. Unexpected enemy combinations and wave patterns keep players on edge, while successful defenses provide a strong sense of achievement. Balanced for all skill levels, from beginners to experts, it also delivers visually and aurally satisfying space-themed graphics and sound design. To enjoy the map, focus on efficient defensive structures and resource management, and study each round’s unique traits. If played cooperatively, teamwork and clear communication with teammates are also vital.
픽 유어 디펜스 (Pick Your Defense)
스타크래프트 브루드워 유즈맵 〈픽 유어 디펜스〉는 플레이어와 컴퓨터가 번갈아 가며 방어와 공격을 펼치는 독특한 디펜스 장르의 맵이다. 맵은 중앙에 위치한 본진과 주변의 방어 건물들, 그리고 적의 공격 루트가 명확히 나뉘어 있어 전략적인 배치와 자원 관리가 무엇보다 중요하다. 플레이어는 각 라운드마다 주어지는 자원을 활용해 방어 건물을 건설하고 업그레이드하며, 컴퓨터는 정해진 패턴으로 공격을 시도한다. 특히 ‘픽’이라는 이름에 걸맞게, 각 라운드마다 제공되는 선택지가 플레이어의 전략을 좌우하는데, 이는 단순한 디펜스 맵을 넘어 선택과 집중의 재미를 더하는 요소다. 맵의 분위기는 우주 타일셋을 기반으로 하여Dark, 차분한 톤으로 조성되어 있으며, 긴장감 있는 전투가 펼쳐지는 동안에도 고요한 공간감이 느껴진다. 중간중간 등장하는 특수 건물이나 아이템 선택지는 플레이어에게 일시적인 우위를 제공하기도 한다. 초보자는 방어 건물의 기본 배치와 자원 관리에 익숙해지는 데 집중해야 하며, 숙련자는 효율적인 자원 분배와 공격 타이밍을 노려야 한다. 맵의 난이도는 라운드가 진행될수록 점차 높아지므로, 꾸준한 전략 수정이 필요하다. 추천 대상은 디펜스 장르를 좋아하는 플레이어와 전략적 사고를 즐기는 유저들로, 특히 ‘선택지와 통제’라는 새로운 재미를 경험하고 싶은 이들에게 적합하다. 플레이 전에는 방어 건물의 종류와 특수 능력, 그리고 컴퓨터의 공격 패턴을 미리 숙지하는 것이 좋다. 또한, 맵의 긴장감을 유지하기 위해 소리와 그래픽 설정을 조절하는 것도 중요한 포인트다. StarCraft: Brood War custom map *Pick Your Defense* is a unique defense genre map where players and the computer take turns defending and attacking. The map is divided into a clearly separated main base in the center, surrounding defensive structures, and enemy attack routes, making strategic placement and resource management crucial. Each round, players use given resources to construct and upgrade defensive buildings, while the computer attempts attacks in predetermined patterns. True to its name, "Pick," the choices provided each round heavily influence the player's strategy, adding layers of selection and focus beyond a typical defense map. The map's atmosphere is built on a space-themed tileset, creating a dark, subdued tone that enhances the sense of calm even during intense battles. Special buildings or item selections appearing at intervals grant temporary advantages. Beginners should focus on mastering basic defensive building placement and resource management, while experienced players must optimize resource allocation and attack timing. The difficulty gradually increases with each round, requiring continuous strategic adjustments. This map is recommended for players who enjoy defense genres and those who appreciate strategic thinking, especially those looking to experience the new fun of "choices and control." Before playing, it's wise to familiarize yourself with defensive building types, special abilities, and the computer's attack patterns. Adjusting sound and graphics settings can also help maintain the map's tension.
Lurker D 18 Way ~=FINAL=~
Lurker D 18 Way ~=FINAL=~는 4096×4096 타일 크기의 대형 유즈맵으로, 황무지 타일셋을 사용해广阔한 전장을 구현한다. 이 맵은 6인 플레이를 기준으로 설계되며, 팀 플레이보다는 개인 경기 방식을 권장한다. 게임 흐름은 30초마다 라운드가 진행되며, 각 라운드마다 미네랄을 채집하고 업그레이드를 진행한다.players는 각 라운드마다 자원을 모아 유닛을 강화하고, 최종적으로 상대방의 기지를 파괴하거나 생존을 유지해야 한다. map 구조는 여러 개의 섬과 연결된 육로로 구성되어 이동이 자유롭고, 다양한 고지점과 장애물을 활용한 전술적 포지셔닝이 가능하다. 각 섬마다 특화된 자원 채취 지점과 방어 터렛이 배치되어 있어, 플레이어는 지형 활용을 통해 우위를 점할 수 있다. 업그레이드 옵션은 공격력, 방어력, 이동 속도 등 다채롭게 제공되어 전략적 선택이 가능하다. 게임 종료는 30라운드 후 최종 점수가 가장 높은 팀(또는 개인)에게 주어지며, 점수는 채집한 미네랄량과 남은 유닛 수를 종합해 산출된다. 이 map은 빠른 경기 전개와 반복 가능한 라운드 시스템으로 인해 리플레이 가치가 높으며, 커스텀 게임 모드와 호환되어 다양한 변형이 가능하다. 유즈맵 특성상 커스터마이징된 규칙과 트리거가 존재하며, 플레이어의 마이크로 매니지먼트와 매크로 전략이 동시에 요구된다. 난이도는 보통 수준으로, 초보자는 라운드 타이밍과 자원 관리 습관을 익히는 데 어려움을 느낄 수 있지만, 경험이 쌓이면 고난도 전략을 구사하기에 충분한 깊이 제공한다. 이 맵을 즐기기에 적합한 플레이어는 빠른 판단력과 리소스 조율 능력이며, 특히 컴파クト한 전술과 타이밍 조작을 선호하는 유저에게 추천한다. 플레이 전에는 맵 파일을 최신 버전(v4) 확인하고, 6인 플레이 환경에서 테스트해 보는 것이 좋으며, 불필요한 모드나 트리거가 포함되지 않은지 확인해야 한다. Lurker D 18 Way ~=FINAL=~ is a large-scale custom map with a 4096×4096 tile size that utilizes the Wasteland tileset to create a vast battlefield. Designed primarily for 6-player matches, the map is better suited for individual play rather than team play. The gameplay follows a round-based system that progresses every 30 seconds, where players collect minerals and perform upgrades each round. Players must gather resources to strengthen their units, with the ultimate goal of destroying the opponent's base or being the last survivor. The map structure consists of several islands connected by land routes, allowing for free movement and tactical positioning using various high ground and obstacles. Each island features specialized resource gathering points and defensive turrets, allowing players to gain an advantage through terrain utilization. A variety of upgrade options—including attack, defense, and movement speed—allow for diverse strategic choices. The game ends after 30 rounds, and the winner is the team (or individual) with the highest score, calculated based on the total minerals collected and the number of remaining units. Due to its fast-paced progression and repeatable round system, the map offers high replay value and is compatible with custom game modes for various variations. As is typical for custom maps, it features customized rules and triggers, requiring players to master both micro-management and macro-strategy. The difficulty is moderate; while beginners may struggle with round timing and resource management, the map offers enough depth for experienced players to execute high-level strategies. This map is ideal for players with quick decision-making skills and resource management abilities, especially those who prefer compact tactics and precise timing. Before playing, it is recommended to ensure you are using the latest version (v4), test it in a 6-player environment, and verify that no unnecessary mods or triggers are active.
라인 타워 워즈 II (Line Tower Wars II)
스타크래프트 브루드워의 타워 디펜스 장르를 대표하는 명작 중 하나인 <라인 타워 워즈 II (Line Tower Wars II)>는 각 플레이어가 자신만의 독특한 경로를 따라 방어선을 구축하고, 상대방의 경로를 통해 유닛을 보내는 전략형 디펜스 맵이다. 맵의 핵심은 각각의 플레이어가 독립적인 길에서 타워를 건설하고 업그레이드하여 적의 공격을 방어하는 동시에, 자신의 길로 유닛을 보내 상대방의 자원을 빼앗거나 방해하는 데에 있다. 이 과정에서 유닛의 수가 증가할수록 플레이어의 수입이 늘어나며, 전략적인 자원 관리와 타워 배치, 유닛 운용의 균형이 승패를 좌우한다. 맵의 구조는 육각형 형태의 중앙 지역을 중심으로 여섯 명의 플레이어가 각각의 길로 연결된 형태로 구성되어 있으며, 상대방의 길로 유닛을 보내는 ‘라운드’ 시스템이 반복되면서 긴장감이 지속된다. 특히, 각 플레이어의 길은 복잡하게 얽혀 있어 단순하게 방어만 하는 것이 아니라, 상대방의 길로 침투하거나 요새를 공격하는 등 다채로운 플레이가 요구된다. 이 맵은 초보자와 숙련자 모두에게 매력적인데, 초보자는 기본적인 방어 전략과 자원 관리를 익히기에 좋고, 숙련자는 복잡한 길의 패턴과 상대방의 움직임을 예측하는 고도의 전략을 요구한다. 또한, 맵의 그래픽은 정글 타일셋을 활용하여 시각적으로도 흥미를 더하며, 타워와 유닛의 디자인도 스타크래프트의 분위기를 잘 살리고 있다. 플레이 전에는 각 플레이어의 길과 타워 건설 가능 구역을 미리 확인하는 것이 중요하며, 상대방의 유닛이 자신의 길로 들어오기 전에 타워를 배치하거나 요새를 강화하는 것이 핵심 전략이다. 이 맵은 여섯 명이서 플레이할 때 가장 큰 재미를 느낄 수 있으며, 팀플레이보다는 각자의 길에서 경쟁하는 개인전形式이 특징이다. This classic tower defense map in StarCraft: Brood War, <Line Tower Wars II (Line Tower Wars II)>, stands out as a top-tier title in the genre. Each player constructs and upgrades defenses along their own unique path while sending units through opponents' routes to disrupt their economy or attack directly. The core mechanics revolve around strategic tower placement, resource management, and unit coordination—where increased unit production boosts income, creating a dynamic balance between offense and defense. The hexagonal map design features six distinct player paths converging at a central area, with a 'round' system that cycles units through enemy territories, maintaining high tension throughout matches. The complexity of each path demands adaptability; players must not only fortify their defenses but also infiltrate enemy routes or target weak points like fortresses. Suitable for both beginners and veterans, newcomers can grasp fundamental strategies while experienced players enjoy deep tactical challenges involving path prediction and counterplay. The jungle-themed visuals enhance immersion, with tower and unit designs staying true to StarCraft's aesthetic. Before playing, carefully examine your path and buildable zones—prioritizing early tower placement or fortress upgrades to counter incoming enemy units. Best enjoyed in a six-player free-for-all format, this map excels in individual competition rather than team-based play.
Choose Ur D 17 Choices (17가지 선택지 디펜스)
스타크래프트 브루드워의 유즈맵 장르 중에서도 선택과 집중이 두드러지는 ‘Choose Ur D 17 Choices’는 플레이어가 다양한 유닛을 선택해 전투를 펼치는 독특한 디펜스 형식의 맵이다. 내부 설명에서 확인되는 것처럼 총 17개의 유닛 선택지가 제공되며, 각 유닛은 라운드마다 등장하는 적군을 상대로 전략적 우위를 점할 수 있도록 구성되어 있다. 맵 중앙에는 넓은 평지가 펼쳐져 있으며, 주변으로 방어 시설과 같은 구조물이 배치되어 있어 플레이어의 선택에 따라 전투 양상이 크게 달라진다. 이미지 상에서도 중앙의 넓은 공간과 주변의 건물 배치가 확인되는데, 이는 유닛 선택의 중요성을 강조하는 디자인으로 보인다. 이 맵의 핵심은 바로 ‘선택’에 있다. 17개의 유닛 중에서 매 라운드마다 어떤 조합을 구성할지 고민해야 하며, 각 유닛의 장단점을 숙지하고 적절한 타이밍에 활용해야 한다. 예를 들어, 초기 라운드에는 저렴하고 다수 양산이 가능한 유닛(마린, 저글링 등)을 선택할 수 있지만, 후반부로 갈수록 고화력 유닛(아칸, 탱크, 울트라리스크 등)을 조합해야만 승리를 이끌어낼 수 있다. 또한, 맵 이미지에서 확인되는 여러 개의 건물이 배치된 구조는 방어선을 구축하거나 전략적 우위를 점하는 데 유용한 요소로 활용될 수 있다. 플레이 경험은 상당히 전략적이면서도 긴장감이 넘친다. 매 라운드마다 등장하는 적군은 랜덤한 조합으로 등장하기 때문에, 플레이어는 유닛 선택뿐만 아니라 대처 방법까지 신중히 고려해야 한다. 선택지가 많다는 점은 장점이지만, 반대로 최적의 조합을 찾는 데 시간이 소요될 수 있어 초보자의 경우 어려움을 느낄 수 있다. 또한, 맵의 넓은 공간은 유닛의 기동성을 살릴 수 있는 기회를 제공하지만, 반대로 방심하면 적군의 집중 공격을 받을 위험도 존재한다. 이 맵은 주로 다인 플레이보다는 1인 또는 소수 인원이 플레이하는 방식으로 구성되어 있으며, 팀전보다는 개인의 선택과 판단력이 승패를 좌우하는 구조로 보인다. 따라서 혼자만의 전략을 짜고자 하거나, 다양한 유닛의 조합을 시도해보고 싶은 플레이어에게 추천할 만한 맵이다. 또한, 여러 번 플레이하면서 각 유닛의 특성과 맵의 구조를 익히면 더욱 전략적인 플레이가 가능해질 것이다. 플레이 전에는 유닛별로 어떤 조합이 유효한지 미리 숙지하고, 맵의 지형을 활용한 방어 전략을 세워두는 것이 중요하다. 초보자의 경우 비교적 쉬운 유닛부터 시작해 gradually 난이도를 높이는 것을 권장하며, 숙련자의 경우 최적의 조합을 찾아내어 효율적인 승리를 노려볼 수 있을 것이다. 또한, 맵의 넓은 공간을 활용한 기동전을 연습한다면 더욱 다채로운 플레이가 가능할 것이다. This StarCraft: Brood War custom map, 'Choose Ur D 17 Choices,' stands out in the UMS genre by offering a unique defensive experience centered around strategic unit selection. The map provides 17 distinct unit choices per round, each with unique strengths and weaknesses, forcing players to carefully consider their combinations to counter the randomly generated enemy forces. The central open area, flanked by defensive structures visible in the image, serves as a battleground where unit positioning and timing play crucial roles. The core gameplay revolves around the 'choice' mechanic, where players must balance cost, effectiveness, and synergy between units. Early rounds favor cheaper, mass-produced units like Marines or Zerglings, while later stages demand high-damage combinations such as Tanks, Archons, or Ultralisks to overcome tougher enemy waves. The map's layout encourages both aggressive pushes and defensive setups, with buildings and open spaces allowing for tactical maneuvering. The randomness of enemy compositions adds replayability, as players must adapt their strategies dynamically. The experience is highly strategic, with tension rising as players weigh the risks of their selections against the unpredictable enemy threats. Beginners may find the sheer number of options overwhelming, but the gradual learning curve makes it accessible with practice. The map excels in solo or small-group play, where individual decision-making and adaptability determine success. Veteran players will enjoy experimenting with optimal synergies, while newcomers can start with simpler combinations and progress to more complex strategies. Before diving in, players should familiarize themselves with each unit's strengths and weaknesses, as well as the map's terrain advantages. For beginners, starting with cost-effective units and gradually incorporating advanced ones is advisable. Advanced players can focus on refining optimal combinations for maximum efficiency. The spacious design also rewards players who master unit mobility, allowing for dynamic plays that can turn the tide of battle.
Evolves EvX Style viewers
스타크래프트: 브루드워의 유즈맵 «Evolves EvX Style viewers»는 8인용 디펜스 장르의 맵으로, 중앙에 위치한 거대한 둥근 진영 지역과 이를 둘러싼 외부 방어 구역으로 구성되어 있다. 플레이어는 각자 고유한 시작 위치에서 출발해 끊임없이 몰려드는 적 유닛을 막아내야 하며, 중앙의 둥글고 복잡한 구조는 방어선을 구축하거나 중재하는 데 strategic depth를 제공한다. 맵의 특징적인 둥근 형태는 적의 진격을 방해하거나, 다수의 플레이어가 협력하여 방어선을 형성할 수 있도록 유도하며, 특히 외부 구역의 좁은 통로에서 전략적 우위가 발생할 가능성이 크다. 맵의 분위기는 우주 타일셋을 활용하여 광활하고Dark한 느낌을 강조하며, 플레이어는 제한된 자원으로 적의 공격을 방어해야 한다는 긴박감을 느낄 수 있다. 초보자도 쉽게 접근할 수 있지만, 중앙 구역의 복잡한 구조와 다수의 적을 상대해야 하는 난이도로 인해 숙련자도 전략적 깊이를 요구받는 맵으로 평가된다. 플레이 전에는 각 플레이어의 위치와 중앙 방어선의 중요성을 미리 숙지하고, 초반 자원 관리와 방어 건물 배치에 신경 써야 한다. 또한, 맵의 둥근 구조상 시야 확보가 중요하므로, 감시탑이나 오버로드와 같은 시야 확보 유닛을 적극 활용하는 것이 필수적이다. 이 맵은 주로 8인이 동시에 플레이하는 디펜스 장르에 익숙한 유저들에게 추천되며, 팀 플레이를 중시하는 유저에게는 더욱 매력적으로 다가올 수 있다. 특히, 적절한 협력과 커뮤니케이션이 뒷받침된다면, 긴장감 넘치는 방어전을 경험할 수 있을 것이다. Evolves EvX Style viewers is an 8-player defense-style custom map in StarCraft: Brood War, featuring a large circular central area surrounded by outer defensive zones. Players start from unique positions and must defend against waves of incoming enemies, with the central circular layout offering strategic depth for building defenses or coordinating team efforts. The map's distinctive round shape forces players to adapt their strategies, particularly in narrow external passages where positional advantages can make a significant difference. Utilizing the space-themed tileset, the map creates a sense of vastness and darkness, enhancing the intense experience of defending against relentless enemy assaults with limited resources. While accessible to beginners, the map's complexity and the need to fend off multiple enemy waves provide a rewarding challenge for experienced players seeking deeper strategy. Before playing, it's crucial to familiarize yourself with your starting position and the importance of the central defensive area. Efficient early resource management and strategic placement of defensive structures are vital. Given the map's circular design, vision control is key, making units like Overlords or Observer essential for monitoring enemy movements. This map is best suited for players familiar with defense-style games who prefer an 8-player experience, especially those who enjoy team-based coordination. With proper cooperation and communication, players can expect a thrilling and tense defensive battle.
맵 선택 가이드
태그는 맵의 핵심 특징을 빠르게 설명하지만 제작 버전마다 규칙이 다를 수 있습니다. 상세 설명에서 권장 인원, 난이도, 플레이 시간과 버전을 함께 확인한 뒤 다운로드하세요.