
디펜스 전략 스타크래프트 맵 모음
'디펜스 전략' 태그가 등록된 맵을 모았습니다. 장르 하나로 찾기 어려운 플레이 방식, 난이도와 특징을 중심으로 인기 맵과 최신 맵을 비교해 보세요.
- 등록 맵
- 9개
- 누적 다운로드
- 0
- 누적 조회
- 224
인기 맵
다운로드와 조회 반응이 높은 맵입니다.
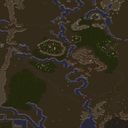
로드 오브 더 링즈: 미르크우드 침략 (Lord of the Rings: Bedim of Mirkwood)
《로드 오브 더 링즈: 미르크우드 침략 (Lord of the Rings: Bedim of Mirkwood)》는 스타크래프트 브루드워의 유즈맵으로, 반지의 제왕 세계관을 배경으로 한 컴까기 스타일의 디펜스 게임이다. 맵은 6인용으로 설계되었으며, 디자인된 시기는 제3시대 반지전쟁 직전으로 설정되어 있어 원작 팬들에게 친숙한 분위기를 제공한다. 맵의 전체 크기는 8192x8192로 넓은 영역을 활용한 구조가 특징이며, 사막 타일셋을 사용하여 건조한 Middle-earth의 분위기를 연출하고 있다. 플레이어는 각각의 진영을 맡아 미르크우드의 어둠이 퍼지는 것을 막기 위해 방어선을 구축하고, 끊임없이 몰려오는 적을 상대로 teritorial을 사수해야 한다. 맵의 진행은 크게 세 단계로 나뉘며, 각 단계마다 새로운 적 유닛과 방어 구조물이 등장하여 전략의 변화를 요구한다. 초반에는 약한 적들이 끊임없이 공격해오지만, 중반부로 접어들수록 강력한 유닛들이 등장해 방어의 난이도가 급격히 상승한다. 방어에 성공하면 새로운 방어 건물을 짓거나 업그레이드할 수 있는 자원을 획득할 수 있으며, 이를 통해 후반부의 강력한 적을 상대할 준비를 할 수 있다. 맵의 특징 중 하나는 맵의 중앙에 위치한 '미르크우드'라는 거대한 숲 지형으로, 이 지역을 중심으로 적의 공격 루트가 집중된다. 플레이어는 이 숲을 보호하면서도, 때로는 숲을 이용해 적의 움직임을 제한하는 전략을 구사할 수 있다. 또한, 맵 곳곳에 숨겨진 자원 지점이 존재해, 이를 확보하면 방어력을 강화하거나 새로운 유닛을 생산할 수 있는 등 다양한 선택지를 제공한다. 이 맵은 원작의 분위기를 잘 살린 그래픽과 함께, 디펜스 게임의 재미를 극대화하기 위해 철저한 밸런스 설계가 이루어졌으며, 특히 6인 동시 플레이가 가능한 구조로 팀워크와 전략적 의사결정이 중요한 요소로 작용한다. 초보 플레이어의 경우 초반 방어에 치중하다가 중반 이후부터는 자원의 확보와 업그레이드에 주력하는 것이 중요하며, 숙련된 플레이어는 방어 라인을 효율적으로 배치하고 자원의 흐름을 최적화하는 데 주력해야 한다. 맵을 플레이하기 전에는 자신의 진영이 맡은 방어 구역을 미리 확인하고, 맵의 주요 자원 지점을 파악하는 것이 좋다. 또한, 맵의 중앙 숲 지형을 어떻게 활용할 것인지에 대한 전략을 미리 세워두면 게임 진행이 훨씬 수월해질 것이다. 이 맵은 반지의 제왕 팬이 아니더라도 디펜스 게임과 전략 게임을 좋아하는 플레이어라면 충분히 즐길 수 있는 작품으로, 특히 팀플레이를 선호하는 유저들에게 추천할 만한佳作이다. 맵의 난이도는 대체로 '보통' 수준으로, 초보자가 처음 플레이하기에도 무리가 없으나, 후반부로 갈수록 전략의 깊이가 깊어지기 때문에 꾸준한 연습이 필요하다. 맵의 디자인과 분위기가 뛰어나며, 원작의 분위기를 잘 살린 점도 이 맵의 큰 장점 중 하나다. 만약 당신이 스타크래프트 유즈맵을 любите하고 디펜스 게임의 묘미를 즐기고 싶다면, 《로드 오브 더 링즈: 미르크우드 침략》을 반드시 한 번 시도해 보길 바란다. 이 맵은 단순한 디펜스가 아니라, 전략과 팀워크가 어우러진 진정한 협동의 묘미를 느낄 수 있는佳品이다. Lord of the Rings: Bedim of Mirkwood is a StarCraft: Brood War custom map that immerses players in a defense-style game within the iconic Lord of the Rings universe. Designed for 6 players, the map recreates the arid and mystical landscapes of Middle-earth using a desert tileset, set in the Third Age just before the Battle of the Five Armies. Players take on the role of guardians tasked with defending the borders of Mirkwood against relentless waves of enemies. The gameplay unfolds in distinct phases, with early waves featuring weaker units that escalate in difficulty as the game progresses. Players must strategically build and upgrade defensive structures, secure hidden resource points scattered across the map, and manage territorial control to maximize efficiency. A standout feature is the central Mirkwood forest, which not only serves as a focal point for enemy attacks but also as a strategic asset players can utilize to restrict enemy movements. The map emphasizes teamwork and tactical decision-making, as success hinges on balancing immediate defense with long-term resource management and upgrades. Beginners are advised to focus on early-game defense and resource gathering, while experienced players will find greater challenge in optimizing upgrade paths and streamlining defensive layouts. It’s crucial to familiarize yourself with the assigned defense zones and resource locations before starting. The map’s difficulty is rated as moderate, making it accessible to newcomers while offering depth for veterans seeking a strategic challenge. Its faithful adaptation of the Lord of the Rings aesthetic and immersive atmosphere make it a standout title, appealing not only to fans of the franchise but also to fans of defense and strategy games. Whether you're coordinating with teammates or refining your solo strategy, Bedim of Mirkwood delivers a rich, collaborative experience that rewards foresight and adaptability. For those who love StarCraft custom maps and the thrill of cooperative defense, this title is a must-play gem in the genre.
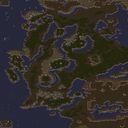
반지의 제왕 - 사우론의 부흥 (LotR - RoS RH)
《LotR - RoS RH》는 스타크래프트 브루드워의 유즈맵으로, 반지의 제왕 세계관을 모티브로 한 디펜스 장르의 맵이다. 맵 곳곳에 배치된 방어 건물과 유닛들이 사우론의 침공을 막아내는 것이 주요 목표로 보이며, 광활한 사막 타일셋 위에 성벽과 요새가 조밀하게 배치되어 있어 전략적 배치와 자원 관리가 중요할 것으로 추정된다. 맵 중앙에는 넓은 평야가 펼쳐져 있으며, 이곳에서 공세와 방어가 교차할 가능성이 높아 보인다. 또한, 맵 외곽의 산맥과 절벽이 자연스러운 방어선을 형성하고 있어, 플레이어는 지형을 활용한 전략적 플레이가 요구될 것으로 보인다. 맵의 규모가 8192x8192로 매우 크고, 7인 플레이가 가능하다는 점에서 대규모 팀플레이가 예상되며, 각 플레이어가 담당하는 구역을 어떻게 방어하고 협력하느냐가 승부를 가를 것으로 보인다. 맵의 디자인과 구조는 디자인된 방어 루트와 공세 경로의 균형이 중요할 것이며, 특히 사막 타일셋의 황량한 분위기가 맵의 긴장감을 더해주고 있다. 이 맵은 디펜스 장르에 익숙한 플레이어들에게는 흥미로운 도전 과제가 될 것이며, 특히 팀원 간의 원활한 소통과 전략적 협력이 필수적일 것으로 보인다. 또한, 맵의 대규모 구조와 복잡한 지형은 초보 플레이어보다는 경험이 있는 플레이어에게 더 적합할 것으로 보인다. 플레이 전에는 방어 건물의 배치 위치와 공세 루트를 미리 숙지하는 것이 중요하며, 자원의 효율적 관리와 유닛의 생산 타이밍을 맞추는 연습이 필요하다. 맵의 긴장감을 높이기 위해 사운드와 이펙트가 충분히 활용되었다면 몰입감 있는 플레이가 가능할 것이다. 이 맵은 디펜스 장르를 좋아하는 플레이어들에게는无疑한 재미를 제공할 것이며, 특히 반지의 제왕 팬들에게는 세계관에 대한 몰입감을 높일 수 있는 장점이 있다. 《LotR - RoS RH》 is a custom defense map in *StarCraft: Brood War*, themed around *The Lord of the Rings* universe. The main objective appears to be defending against Sauron’s invasion using strategically placed defensive structures and units scattered across the map. With dense walls and fortresses built atop vast desert tiles, effective unit placement and resource management will likely be crucial. A wide plain stretches across the map’s center, where clashes between offense and defense will likely unfold. The surrounding mountains and cliffs naturally form defensive lines, demanding players to utilize the terrain for strategic advantage. Given the map’s massive 8192x8192 scale and support for 7 players, large-scale teamwork is expected, with victory hinging on how well players defend their assigned zones and coordinate with teammates. The map’s design emphasizes balanced defensive routes and attack paths, while the desolate desert aesthetic heightens the tension. It offers a compelling challenge for players familiar with defense maps, requiring smooth communication and strategic cooperation among teammates. Due to its vast scale and complex terrain, experienced players will likely find it more suitable than beginners. Before playing, it’s important to memorize defensive structure placements and attack routes, along with mastering efficient resource management and unit production timing. If the map effectively utilizes sound and visual effects, it could further enhance immersion. For fans of defense maps, this is undoubtedly an enjoyable experience, and *Lord of the Rings* enthusiasts will particularly appreciate its immersive world-building.
고지라 VS 미국 (Godzilla attacks U.S.A.)
‘고지라 VS 미국(Godzilla attacks U.S.A.)’은 스타크래프트: 브루드워의 대표적인 컴까기 유즈맵으로, 플레이어는 미국군을 조종해 고지라와 메카고지라, 모스라 등 괴수들의 미국 본토 파괴를 저지해야 하는 디펜스 장르의 재미를 제공한다. 맵은 미국 본토를 배경으로 펼쳐지며, 동부 해안부터 서부 해안까지의 넓은 지역이 구현되어 있어 진행에 따라 괴수들이 끊임없이 침공해 오는 압박감을 느낄 수 있다. 플레이어는 각 지역의 주요 도시와 군사 기지를 방어하면서, 보급로 확보와 자원 관리를 병행해야 한다. 전투는 실시간으로 진행되며, 괴수들은 플레이어의 방어선을 돌파하려 하므로 전략적인 배치와 병력 운용이 중요하다. 특히 고지라와 메카고지라는 강력한 체력과 공격력으로 인해 한 번에 집중된 공격을 받을 가능성이 크므로, 방어 타워나 유닛 강화가 필수적이다. 맵의 특징 중 하나는 다양한 괴수의 등장 패턴으로, 플레이어는 이를 예측하고 대비해야 한다. 예를 들어 메카고지라는 공중 유닛으로 나타나며, 모스라는 대규모 폭격을 가하는 등 각 괴수마다 다른 위협 패턴이 존재해 전략의 다양성을 요구한다. 또한 맵 곳곳에 숨겨진 보급 기지나 추가 자원 지역을 확보하면 장기적인 전투에서 유리한 고지를 점할 수 있다. 이 맵은 초보자보다는 중급 이상의 플레이어에게 적합하며, 전략적 사고와 긴장감 있는 전투를 즐기고자 하는 유저들에게 추천된다. 특히 괴수들의 공격 타이밍과 패턴을 파악하는 것이 핵심으로, 반복 플레이를 통해 점차 숙련도를 높일 수 있다. 맵을 플레이하기 전에는 각 괴수의 공격 패턴과 약점을 미리 숙지하고, 방어 타워나 유닛의 배치 위치를 사전에 계획하는 것이 중요하다. 또한 맵의 넓은 지역을 효율적으로 관리하기 위해 맵 리딩과 자원 관리에 신경 써야 한다. 이 맵은 단순히 괴수를 물리치는 것뿐만 아니라, 미국 본토를 защит하는 전략적 목표를 달성하는 재미가 있는 유즈맵으로, 디펜스와 전략 장르를 좋아하는 유저들에게 강추할 만한 작품이다. 한국산 유즈맵 중에서도 손꼽히는 완성도로, 괴수물의 팬이라면 절대 놓치지 말아야 할 작품이다. 게임을 시작하기 전에는 맵의 주요 지역과 괴수들의 등장 위치를 미리 확인해 두는 것이 좋다. 특히 고지라의 경우 해안가에서 주로 등장하므로, 해안 방어 라인을 강화하는 것이 중요하다. 또한 메카고지라의 경우 공중 유닛이므로 대공 방어가 필수적이다. 맵의 난이도는 괴수의 공격력과 체력이 점차 증가하는 방식으로 구성되어 있어, 초반에는 비교적 쉬운 편이지만 후반으로 갈수록 어려워지는 경향이 있다. 이를 감안해 플레이어는 초반에 충분한 자원을 확보하고 방어선을 구축하는 데 주력해야 한다. 맵의 재미 요소 중 하나는 괴수들과의 전투뿐만 아니라, 미국군의 다양한 유닛을 활용할 수 있다는 점이다. 예를 들어 탱크나 전투기 같은 강력한 유닛을 적시에 투입하면 전투를 훨씬 유리하게 이끌어갈 수 있다. 또한 맵 곳곳에 숨겨진 보급 기지나 추가 자원을 확보하면 장기戦에서 큰 이점을 얻을 수 있다. “Godzilla vs. USA” is a classic *StarCraft: Brood War* custom map where players take control of the U.S. military to defend the homeland against waves of giant monsters like Godzilla, Mechagodzilla, and Mothra. This defense-style map immerses players in the vast terrain of the continental United States, stretching from the East Coast to the West Coast, where relentless enemy invasions create a constant sense of pressure. Players must defend key cities and military bases while managing supply lines and resources in real time. The real-time battles demand strategic unit placement and troop management, as the monsters relentlessly push to break through defensive lines. Godzilla and Mechagodzilla, in particular, pose massive threats due to their high health and attack power, making it essential to fortify defenses with towers and upgraded units. One of the map’s standout features is the variety of enemy patterns—each monster presents unique threats, such as Mechagodzilla’s aerial assaults or Mothra’s devastating bombing runs, forcing players to adapt their strategies accordingly. Hidden supply bases and resource-rich areas scattered across the map can provide long-term advantages, but the map is best suited for intermediate to advanced players. Success hinges on mastering the timing and patterns of enemy attacks, which can be honed through repeated play. Before jumping in, it’s crucial to study each monster’s behavior and weaknesses, plan defensive tower placements, and optimize resource management to efficiently control the expansive battlefield. More than just a test of raw power, the map delivers the satisfaction of protecting the U.S. mainland, blending defense and strategy into a thrilling experience. Its polished design and immersive gameplay make it a must-play among Korean custom maps, especially for fans of kaiju. Before starting, familiarize yourself with key locations and monster spawn points—Godzilla tends to appear near coastlines, so shore defenses are critical, while Mechagodzilla’s aerial nature demands strong anti-air coverage. The difficulty ramps up as monsters grow stronger, so securing early resources and building a solid defense early on is key to surviving the later stages. Beyond the intense monster battles, the map also lets players leverage the U.S. military’s diverse units, such as tanks and fighter jets, for tactical advantages. Uncovering hidden supply bases and additional resources can turn the tide in prolonged engagements, adding depth and replayability to the experience.
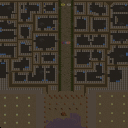
좀비 지옥 (ZOMBIE HELL!!!)
스타크래프트 브루드워의 유즈맵 "ZOMBIE HELL!!!(좀비 지옥)"은 좀비와의 서바이벌 대전을 주제로 한 디펜스 장르의 유즈맵으로, 플레이어는 시작 지점에서부터 끊임없이 몰려오는 좀비 무리를 상대하며 생존을 목표로 한다. 맵은 사막 타일셋으로 구성되어 있으며, 중앙의 시작 지점을 중심으로 사방으로 길이 뻗어 있는 구조로 되어 있다. 플레이어는 제한된 자원과 방어 시설(예: 벽, 바리케이드)을 활용해 좀비의 진격을 저지해야 하며, 일부 구간에서는 좀비의 공격을 버티면서 시간을 벌어 추가 방어선을 구축하는 전략이 필요하다. 맵 곳곳에 배치된 자원(미네랄, 베스핀 가스)을 확보해 방어 시설과 유닛을 보강하는 것이 핵심으로, 특히 초반에는 자원 확보가 생존의 관건이 된다. 좀비는 일정 주기로 특정 지점에서 스폰되며, 플레이어는 이들을 물리치거나 저지해 다음 웨이브까지 버텨야 한다. 맵의 난이도는 웨이브가 진행될수록 급격히 상승하며, 후반으로 갈수록 좀비의 물량과 속도가 증가해 방어선의 중요성이 커진다. 추천하는 플레이 방식은 팀 플레이로, 5인까지 플레이 가능한 이 맵은 팀원 간의 협력이 필수적이며, 각자의 역할(자원 확보, 방어선 구축, 좀비 처치)을 분담하는 것이 중요하다. 초보자가 플레이하기에는 다소 어려운 편이지만, 전략적인 자원 관리와 방어선 구축을 익히면 재미와 긴장감을 동시에 느낄 수 있는 맵이다. 특히 디펜스 장르를 좋아하는 유저들에게는 필수 체험 맵으로 손꼽힌다. 플레이 전에는 맵의 구조와 자원 위치, 좀비 스폰 지점을 미리 숙지하고, 팀원과의 커뮤니케이션을 충분히 하는 것이 좋다. 또한, 방어 시설을 구축할 때 좀비의 진입로를 최대한 좁히는 것이 포인트다. 이 맵은 단순히 좀비를 무찌르는 것이 아니라, 어떻게 하면 좀비를 효율적으로 저지하고 자원을 확보해 장기전을 버틸 수 있는지가 관건이다. StarCraft: Brood War's custom map "ZOMBIE HELL!!!" is a defense-style custom map centered around a survival battle against zombies. Players must fight off endless waves of zombies from the starting point to survive. The map is built with a desert tileset and features a structure with paths extending in all directions from the central starting area. Players must use limited resources and defensive structures (such as walls and barricades) to block the zombies' advance, and in some sections, they need to hold out against attacks while buying time to build additional defenses. Securing resources (minerals and Vespene gas) scattered throughout the map to reinforce defenses and units is key, especially in the early stages where resource collection is vital for survival. Zombies spawn at specific points at regular intervals, and players must defeat or stop them to survive until the next wave. The difficulty escalates sharply as waves progress, with zombies becoming more numerous and faster in later stages, increasing the importance of strong defensive lines. The recommended playstyle is team-based, as this map supports up to five players and requires cooperation among teammates. Dividing roles—such as gathering resources, building defenses, and fighting zombies—is crucial. While it may be challenging for beginners, mastering strategic resource management and defense-building offers both fun and tension. It’s especially recommended for users who enjoy defense-style maps. Before playing, it’s wise to familiarize yourself with the map layout, resource locations, and zombie spawn points, and to communicate thoroughly with teammates. Additionally, when constructing defenses, narrowing zombie entry points is key. The focus isn’t just on defeating zombies but on efficiently blocking them and securing resources to endure a long-term battle.
고양이와 쥐: 윈터 파이널 (Cat N Mice Winter Final)
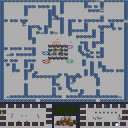
스타크래프트 브루드워의 대표적인 유즈맵 중 하나인 <Cat N Mice Winter Final>은 ‘고양이와 쥐’라는 대결 구도를 바탕으로 한 디펜스 장르의 맵입니다. 맵의 전체적인 구조는 중앙의 넓은 평지 주변을 빙 둘러싼 요새와 방어 시설로 구성되어 있으며, 플레이어는 고양이(고수 진영)와 쥐(컴퓨터 또는 약한 진영)로 나뉘어 대립합니다. 이미지에서 확인되는 것처럼, 중앙에는 각 진영의 본거지가 위치하고 있으며, 그 주변으로mouse(쥐) 진영이 빠져나갈 수 있는 출구와 고양이(고수 진영)가 방어선을 구축할 수 있는 요충지가 배치되어 있습니다. 맵의 이름은 겨울을 테마로 하고 있어, 전체적인 분위기는 흰색과 파란색 계열의 눈 내린 풍경으로 표현되어 있습니다. 플레이어는 고양이 진영에 배치되어 쥐가 출구로 탈출하지 못하도록 efficiently 방어하거나, 반대로 쥐 진영에 배치되어 최대한 많은 쥐가 출구로 탈출할 수 있도록 전략을 세워야 합니다. 맵의 특징은 맵 중앙에 위치한 거대한 얼음 구조물로, 이 구조물이 방어의 핵심 포인트가 되며 맵의 symmetrical한 구조와 함께 전략적 깊이를 더합니다. 또한, 맵 곳곳에 배치된 장애물과 좁은 길은 플레이어가 효율적으로 진형을 짜거나, 상대방을 교란시키는 데 활용할 수 있습니다. 이 맵은 7인까지 플레이가 가능하며, 주로 1:6의 비대칭 구도로 진행됩니다. 초보자의 경우 적절한 자원 관리와 병력 배치 전략을 익히기 어려울 수 있으며, 숙련자의 경우 맵의 symmetrical한 구조를 활용한 효율적인 방어 또는 공격을 계획해야 합니다. 추천하는 플레이 방법은 방어 진영인 고양이 진영의 경우, 중앙 요새를 중심으로 한 방어선을 구축하고, 쥐 진영의 경우 최대한 빠르게 출구로 이동할 수 있는 경로를 확보하는 것입니다. 맵의 난이도는 대체로 ‘보통’ 정도로, 초보자와 숙련자 모두 즐길 수 있지만, 전략의 깊이가 있기 때문에 반복 플레이를 통해 숙련도를 높이는 것이 좋습니다. 이 맵은 특히 디펜스 장르에 익숙한 플레이어들에게 인기가 많으며, symmetrical한 맵 디자인과 겨울 테마가 어우러져 시각적인 즐거움도 제공합니다. 플레이 전에는 맵의 구조와 주요 출구, 요충지 위치를 숙지하는 것이 중요합니다. 또한, 맵의 symmetrical한 구조상, 균형 잡힌 병력 배치가 victory를 좌우할 수 있으므로, 자원과 병력의 효율적인 분배를 신경 써야 합니다. StarCraft: Brood War's classic custom map, *Cat N Mice Winter Final*, is a defense-style map centered around the classic "cat and mouse" dynamic. The map's overall structure consists of fortresses and defensive structures surrounding a wide central plain. Players are divided into two factions—the cats (advanced players or teams) and the mice (computers or weaker players)—who face off against each other. As seen in the image, each faction's base is located at the center, with multiple escape routes for the mice and strategic choke points where the cats can set up defenses. The map's winter theme is reflected in its snowy, white-and-blue aesthetic, immersing players in a frosty landscape. Players assigned to the cat faction must efficiently defend the mice's escape routes, while those in the mouse faction aim to maximize the number of mice that successfully flee through the exits. The map's defining feature is the massive ice structure at its center, which serves as a critical defensive point and enhances the symmetrical layout, adding strategic depth. Scattered obstacles and narrow paths throughout the map allow players to form effective formations or disrupt enemy movements. This map supports up to seven players and is typically played in a 1:6 asymmetrical format. Beginners may struggle with resource management and troop positioning, while experienced players must leverage the symmetrical design to optimize defense or offense. Recommended strategies include establishing a strong defensive line around the central fortress for the cats, while the mice should secure the fastest routes to the exits. The map's difficulty is generally rated as "moderate," making it enjoyable for both beginners and veterans, though its strategic complexity rewards repeated play to refine skills. Particularly popular among defense-oriented players, *Cat N Mice Winter Final* combines its symmetrical design with a winter theme for a visually engaging experience. Before playing, it's crucial to familiarize yourself with the map's layout, key exits, and strategic points. Given the symmetrical structure, balanced troop distribution can often determine victory, so players should carefully manage resources and unit placement.
워 오브 더 로스트 킹덤스 (War of the Lost Kingdoms)
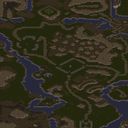
스타크래프트 브루드워의 ‘워 오브 더 로스트 킹덤스’는 8명의 플레이어가 경쟁하며 왕국을 차지하는 디펜스 장르의 유즈맵이다. 맵의 배경은 사막으로 펼쳐진 대륙으로, 거대한 바다에 둘러싸인 지형이 인상적이다. 내부 설명에 따르면 ‘하이 킹’이 선박 사고로 사망하면서 생존한 귀족들이 liferaft를 타고 대륙으로 이동해 각자의 왕국을 차지해야 하는데, 다른 생존자들과 경쟁을 벌이며 모든 적을 제거해야만 승리할 수 있다. 맵 구조는 중앙의 넓은 평지부터 해안가, 산맥, 숲 등 다양한 지형이 배치되어 있어 strategic depth를 제공하며, 특히 해안가에서 시작하는 플레이어는 자원 확보와 초기 진출에 신경을 써야 한다. 맵 곳곳에 scattered되어 있는 자원 지점과 좁은 길목은 초반 전투와 영토 확장 시 유리한 위치를 선점할 기회를 제공한다. 맵의 중심부는 비교적 평탄한 평지이지만, 숲과 산맥이Diamond-shaped territory는 각 플레이어에게 할당되며, 이 구역을 방어하고 확장하는 것이 주요 전략이 된다. 전투는 대부분 근접 전투가 주를 이루며, 각 territoriest에 배치된 건물들이 방어선을 형성하는 역할을 한다. 맵의 전체적인 분위기는 중세 판타지풍으로 보이며, 디자인 상의 특징으로는 해안가의 모래톱과 절벽, 그리고 중앙 평원의 잔디밭이 눈에 띈다. 이 맵은 빠른 판단과 영토 관리 능력이 요구되는 만큼, 초보보다는 경험 있는 플레이어에게 더 어울리며, 특히 ‘생존자’ 컨셉을 살린 경쟁형 디펜스가好き한 유저들에게 추천할 만하다. 플레이 전에는 각 territoriest의 경계와 자원 분포, 그리고 주요 길목을 미리 확인해 두는 것이 좋다. 맵의 배경을 고려했을 때, 해안가에서 시작하는 경우 초기 자원 확보가 중요하며, 중앙 평지로 진출할 때는 다른 플레이어들과의 충돌을 최소화하는 전략이 필요하다. 또한, teritoriy 확장을 위해 필수적인 길목과 방어 거점을 미리 확보하는 것이 승리 확률을 높이는 핵심이다. StarCraft: Brood War’s *War of the Lost Kingdoms* is an 8-player competitive defense-style custom map where players vie for control of a kingdom. The map is set in a desert continent surrounded by vast seas, with a striking coastal terrain. According to the in-game lore, the High King dies in a shipwreck, forcing surviving nobles to flee on lifeboats to the mainland and claim their own territories. To win, players must eliminate all opponents while competing to secure their own kingdom. The map features diverse terrain, from open central plains to coastlines, mountain ranges, and forests, offering deep strategic options. Players starting near the shore must carefully balance early resource gathering and expansion. Scattered resource points and narrow chokepoints provide advantageous positions for early skirmishes and territorial growth. The central area is relatively flat, but each player is assigned a diamond-shaped territory bordered by forests and mountains—defending and expanding these zones is the core strategy. Combat is primarily close-quarters, with buildings placed within each territory forming defensive lines. The map’s overall aesthetic leans into a medieval fantasy vibe, highlighted by coastal sandbars, cliffs, and the grassy plains at the center. Given its fast-paced decision-making and territorial management demands, the map suits experienced players more than beginners. It’s especially recommended for fans of competitive defense maps with a survival theme. Before playing, it’s wise to study the territory boundaries, resource distribution, and key chokepoints. Starting near the coast requires prioritizing early resource acquisition, while advancing toward the central plains demands minimizing clashes with other players. Securing critical pathways and defensive strongholds early is essential to maximizing your chances of victory.
태평양 식민지 (Pacificación en la Colonia Alph)
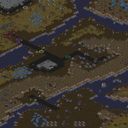
이 맵은 스페인어 제목으로 ‘태평양 식민지Pacificación en la Colonia Alph’라는 이름으로, 초기 스타크래프트 유즈맵 커뮤니티에서 ‘Pc-Manía’ 팀에 의해 제작된 UMS(유즈맵) 장르의 디펜스 맵이다. 맵의 배경은 황무지 타일셋을 기반으로 하며, 전체적으로 넓은 평야와 수풀이 듬성듬성한 지형이 특징이다. 중앙을 가로지르는 큰 강이 맵을 양분하고 있어, 방어 및 공격 루트를 설정하는 데 중요한 요소가 된다. 강둑 사이에는 다리나 얕은 여울이 배치되어 있어 병력의 이동 경로를 제어할 수 있는 구조로 설계된 것으로 추정된다. 플레이어는 단일 플레이어로 진행하며, 적의 끊임없는 웨이브를 상대해야 하는 서바이벌 디펜스 형식을 띤다. 맵의 중앙에 위치한 본진 기지에서는 유닛을 생산하고 방어선을 구축할 수 있으며, 강을 따라 배치된 고지대나 언덕은 시야 확보와 공격 각도 조절에 유리한 위치다. 특히 강을 건너오는 적을 미리 감지하고 방어할 수 있도록, 강 양쪽에 병력을 배치하는 전략이 핵심으로 보인다. 맵 구조상으로는 강을 사이에 두고 대칭형으로 방어 포인트를 세울 수 있어, 일방적인 공격을 막아내기보다는 유연한 대처가 요구된다. 플레이어는 초반에 제한된 자원으로 기지를 보호해야 하며, 시간이 지날수록 점점 강화되는 적의 공격 패턴을 예상해야 한다. 맵의 넓은 공간을 활용한 ‘드랍’이나 ‘기습’ 전술이 가능한지, 또는 중앙을 차지하는 것이 필수인지에 따라 플레이 스타일이 나뉠 수 있다. 또한 맵의 타일셋 특성상 시야 확보가 어려운 지형이 일부 있어, 센서 유닛이나 오버로드 같은 시야 확보 유닛이 유용할 것으로 보인다. 맵의 난이도는 제작자나 커뮤니티의 평가가 없으므로 명확하지 않지만, 넓은 맵과 지속적인 적 공격 패턴을 고려할 때 적어도 ‘보통’ 이상의 난이도로 예상된다. 이 맵은 스페인어권 유즈맵 커뮤니티에서 제작되어 배포되었을 가능성이 높으며, ‘Escuela de Batalla 77’이라는 명칭이 내부 설명에 포함된 점으로 보아 전투 교습을 목적으로 만들어진 맵으로 추정된다. 따라서 실제 게임 플레이보다는 전략적 사고와 방어 전술을 연습하는 데 중점을 둔 맵으로 볼 수 있다. 초보 플레이어는 넓은 맵과 끊임없는 적의 공격을 버겁게 느낄 수 있으므로, 기본적인 방어 전략과 자원 관리 능력을 숙지한 후 도전하는 것이 좋다. 또한 맵의 симметричность(대칭성)을 활용한 방어 라인 구축과, 강을 활용한 ‘물리적 장벽’ 전략을 연습한다면 보다 수월하게 클리어할 수 있을 것이다. This map, originally titled in Spanish as *"Pacificación en la Colonia Alph"* (also known as *"태평양 식민지Pacificación en la Colonia Alph"* in Korean), is a UMS (user-made) defense map created by the *"Pc-Manía"* team for the early StarCraft custom map community. Set in a wasteland tile theme, the map features wide plains interspersed with sparse vegetation, with a major river bisecting the terrain—an element that plays a crucial role in shaping both defensive and offensive routes. Bridges and shallow fords are strategically placed along the riverbanks, allowing for controlled troop movement and tactical positioning. The gameplay is a single-player survival defense mode, where players must withstand endless enemy waves. The central starting base serves as the production hub for units and the foundation of the defense line. Elevated terrain and hills along the river provide advantageous vantage points for sight and firing angles, making them key strategic spots. A core tactic involves positioning forces on both sides of the river to intercept and counter incoming enemies effectively. The symmetrical layout of the map, centered around the river, allows for balanced defensive setups, emphasizing adaptability over rigid one-sided defenses. At the start, players must defend with limited resources, gradually anticipating increasingly intense enemy assaults. The expansive terrain enables tactics like drops or ambushes, while controlling the central area may be essential depending on the strategy employed. Due to the tile design, some areas offer poor visibility, making sensor units or Overlords particularly useful. While exact difficulty ratings are unavailable, the map’s vast scale and relentless enemy patterns suggest a challenge at least on par with "medium" difficulty or higher. Given its Spanish-language origins and the internal reference *"Escuela de Batalla 77"* in its description, this map was likely created for the Spanish-speaking custom map community, possibly as a training tool for combat tactics and defensive strategies rather than pure entertainment. Novice players may find the open terrain and constant threats overwhelming, so mastering basic defense strategies and resource management before attempting it is advisable. Leveraging the map’s symmetry to build layered defenses and using the river as a natural barrier can significantly improve survival chances.
§pêciàl Forçês Extrëmé eXpErTs
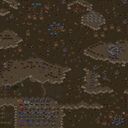
§pêciàl Forçês Extrëmé eXpErTs는 스타크래프트 브루드워의 유즈맵으로, 특수부대와 극한의 적대 세력을 무대로 펼치는 디펜스 장르의 맵이다. 맵 제목부터 보여주듯 난이도가 상당히 높은 편으로, 플레이어는 방어선을 구축하며 끊임없이 몰려오는 적의 공격을 막아내야 한다. 화면 가득 펼쳐진 사막 지형 위에 요새와 방어 건물이 배치되어 있으며, 적들은 지상군과 공중 유닛을 조합해 공격해 온다. 특히 사막이라는 배경은 맵의 분위기를 한층 더 극한적으로 연출하며, 황량한 지형이 주는 긴장감을 상승시킨다. 내부 메타데이터를 살펴보면 제작자와 수정자에 대한 기록이 남아 있어, 꽤 오랜 기간 동안 다양한 제작자들에 의해 개선되고 발전해 왔음을 알 수 있다. 이 맵의 가장 큰 특징은 ‘극한의 전문가’를 위한 난이도로 설계되었다는 점으로, 초보자보다는 경험 많은 플레이어에게 적합하다는 점을 명심해야 한다. 맵 구조는 중앙에 위치한 요새를 중심으로 방어 건물이 배치되어 있으며, 적의 공격 루트는 사방에서 뻗어나오는 형태를 보인다. 이 때문에 방어선을 구축할 때 각 방향의 균형을 carefully 고려해야 하며, 소수의 방어 건물로도 효과적으로 대처할 수 있도록 전략을 세우는 것이 중요하다. 또한, 맵의 해상도와 타일셋을 고려할 때, 세밀한 시야 조절과 빠른 반응이 요구되는 디자인임을 알 수 있다. 플레이 전 반드시 확인해야 할 요소는 방어 건물의 배치와 각 루트의 공격 패턴으로, 이 부분을 숙지하지 않으면 금방 무너질 수 있다. 추천하는 플레이어는 디펜스 장르를 즐기며, 특히 어려운 난이도에서 전략적 깊이를 추구하는 플레이어들이다. 이 맵을 통해 극한의 방어戦略을 경험하고 싶은 유즈맵爱好者들에게 큰 매력을 느낄 수 있을 것이다. Special Forces Extrëmé eXpErTs is a custom map in StarCraft: Brood War, set in a defense genre where elite units face off against extreme hostile forces. As the map's title suggests, the difficulty is quite high, requiring players to build and maintain defensive lines while fending off relentless enemy waves. The map features a vast desert terrain filled with fortresses and defensive structures, while enemies attack with combined ground and air units. The desert setting enhances the map's intense atmosphere, amplifying the tension with its barren landscape. Examining the internal metadata reveals records of creators and modifiers, indicating the map has been refined and improved by various developers over a long period. Its defining feature is its design for "extreme experts," making it suitable for experienced players rather than beginners. The layout centers around a central fortress with defensive structures arranged around it, while enemy attack routes radiate outward in all directions. This demands careful consideration of balance when building defenses, and strategic placement of even a few structures can effectively counter attacks. Given the map's resolution and tileset, it also requires precise vision control and quick reactions. Before playing, it's crucial to study defensive structure placements and enemy attack patterns—neglecting these will lead to quick collapse. Recommended players are those who enjoy defense maps, especially those seeking strategic depth in high difficulty. Fans of custom maps looking to experience intense defensive strategies will find this map highly appealing.
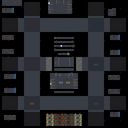
마린 D. 22-웨이 - ver. 3.3 (Marine D. 22-way - ver. 3.3)
스타크래프트 브루드워의 대표적인 컴까기 유즈맵인 《마린 D. 22-웨이 - ver. 3.3》는 플레이어들이 마린(해병) 유닛을 조종하여 끊임없이 쏟아지는 적들을 상대로 생존을 다투는 디펜스 형식의 맵이다. 맵의 중심에는 플레이어 기지가 위치하며, 주변으로 22개의 웨이(길)이 뻗어 있어 각 방향으로 적들이 끊임없이 몰려든다. 맵의 구조는 중앙 기지에서 각 웨이를 따라 적들이 끊임없이 생성되는 방식으로, 플레이어는 각 웨이에 배치된 부대나 구조물을 강화하고 전략적으로 유닛을 배치하여 적의 공격을 방어해야 한다. 맵의 특징은 22개의 웨이 각각에 고유한 지형과 장애물이 배치되어 있어, 단순히 수비만으로는 한계가 있으며 적절한 길막기와 유닛 관리, 그리고 자원 관리가 필수적이라는 점이다. 특히, 각 웨이의 입구와 가운데 지점에 위치한 방어 타워나 보급고가 중요한 역할을 하며, 이를 잘 활용하지 못하면 순식간에 전선이 무너질 수 있다. 플레이어는 제한된 자원으로 유닛을 생산하고, 각 웨이의 특성에 맞는 방어 전략을 세워야 한다. 이 맵은 초보부터 숙련자까지 즐길 수 있는 난이도 조절이 가능하며, 특히 팀플레이 시 각 플레이어 간의 협력이 중요한데, 각 웨이를 분담하여 방어하거나 특정 웨이에 집중 공격을 펼치는 등 전략적 선택이 필요하다. 또한, 맵의 버전 3.3은 이전 버전에서의 개선점이 반영되어 있으며, 특히 18-웨이 버전으로 수정되면서 밸런스가 더욱 정교해졌다. 마린 D. 22-웨이를 플레이하기 전에는 각 웨이의 지형과 입구 위치를 숙지하고, 자원 관리와 유닛 생산 타이밍을 철저히 계획해야 한다. 또한, 팀플레이 시에는 각 플레이어의 역할 분담을 명확히 하고, 중앙 기지의 방어 체계도 함께 관리해야 한다. 맵의 인기는 오랜 시간 지속되어 왔으며, 다양한 커스터마이징 버전과 후속 버전이 존재한다는 점에서도 그 인기를 실감할 수 있다. Marine D. 22-way - ver. 3.3 is a classic Starcraft Brood War custom map in the 'compkagi' (compilation of killing) genre, where players control Marine units to defend against endless waves of enemies. The map features a central player base with 22 distinct paths (or 'ways') extending outward, each serving as an entry point for enemy forces. The core gameplay revolves around reinforcing these paths, strategically placing units, and managing resources to withstand the relentless assaults. Each path has unique terrain and obstacles, requiring players to adapt their defenses rather than relying on a one-size-fits-all strategy. Key elements like defensive towers and supply depots at the entrances and midpoints of each path play crucial roles in survival. Players must balance unit production, resource allocation, and path-specific tactics to prevent collapse. The map supports solo and team play, with teamwork being essential for success—roles can be divided among players, or teams can focus on reinforcing specific paths. Version 3.3 introduces refinements from earlier versions, including adjustments made in the 18-way variant for improved balance. Before playing, familiarizing yourself with each path's layout, resource management, and unit production timing is vital. In team games, clear role distribution and coordination of the central base's defenses are equally important. The map has maintained popularity over time, evidenced by numerous custom versions and sequels that have emerged.
최근 등록된 맵
새로 추가된 파일과 버전을 확인하세요.
태평양 식민지 (Pacificación en la Colonia Alph)
이 맵은 스페인어 제목으로 ‘태평양 식민지Pacificación en la Colonia Alph’라는 이름으로, 초기 스타크래프트 유즈맵 커뮤니티에서 ‘Pc-Manía’ 팀에 의해 제작된 UMS(유즈맵) 장르의 디펜스 맵이다. 맵의 배경은 황무지 타일셋을 기반으로 하며, 전체적으로 넓은 평야와 수풀이 듬성듬성한 지형이 특징이다. 중앙을 가로지르는 큰 강이 맵을 양분하고 있어, 방어 및 공격 루트를 설정하는 데 중요한 요소가 된다. 강둑 사이에는 다리나 얕은 여울이 배치되어 있어 병력의 이동 경로를 제어할 수 있는 구조로 설계된 것으로 추정된다. 플레이어는 단일 플레이어로 진행하며, 적의 끊임없는 웨이브를 상대해야 하는 서바이벌 디펜스 형식을 띤다. 맵의 중앙에 위치한 본진 기지에서는 유닛을 생산하고 방어선을 구축할 수 있으며, 강을 따라 배치된 고지대나 언덕은 시야 확보와 공격 각도 조절에 유리한 위치다. 특히 강을 건너오는 적을 미리 감지하고 방어할 수 있도록, 강 양쪽에 병력을 배치하는 전략이 핵심으로 보인다. 맵 구조상으로는 강을 사이에 두고 대칭형으로 방어 포인트를 세울 수 있어, 일방적인 공격을 막아내기보다는 유연한 대처가 요구된다. 플레이어는 초반에 제한된 자원으로 기지를 보호해야 하며, 시간이 지날수록 점점 강화되는 적의 공격 패턴을 예상해야 한다. 맵의 넓은 공간을 활용한 ‘드랍’이나 ‘기습’ 전술이 가능한지, 또는 중앙을 차지하는 것이 필수인지에 따라 플레이 스타일이 나뉠 수 있다. 또한 맵의 타일셋 특성상 시야 확보가 어려운 지형이 일부 있어, 센서 유닛이나 오버로드 같은 시야 확보 유닛이 유용할 것으로 보인다. 맵의 난이도는 제작자나 커뮤니티의 평가가 없으므로 명확하지 않지만, 넓은 맵과 지속적인 적 공격 패턴을 고려할 때 적어도 ‘보통’ 이상의 난이도로 예상된다. 이 맵은 스페인어권 유즈맵 커뮤니티에서 제작되어 배포되었을 가능성이 높으며, ‘Escuela de Batalla 77’이라는 명칭이 내부 설명에 포함된 점으로 보아 전투 교습을 목적으로 만들어진 맵으로 추정된다. 따라서 실제 게임 플레이보다는 전략적 사고와 방어 전술을 연습하는 데 중점을 둔 맵으로 볼 수 있다. 초보 플레이어는 넓은 맵과 끊임없는 적의 공격을 버겁게 느낄 수 있으므로, 기본적인 방어 전략과 자원 관리 능력을 숙지한 후 도전하는 것이 좋다. 또한 맵의 симметричность(대칭성)을 활용한 방어 라인 구축과, 강을 활용한 ‘물리적 장벽’ 전략을 연습한다면 보다 수월하게 클리어할 수 있을 것이다. This map, originally titled in Spanish as *"Pacificación en la Colonia Alph"* (also known as *"태평양 식민지Pacificación en la Colonia Alph"* in Korean), is a UMS (user-made) defense map created by the *"Pc-Manía"* team for the early StarCraft custom map community. Set in a wasteland tile theme, the map features wide plains interspersed with sparse vegetation, with a major river bisecting the terrain—an element that plays a crucial role in shaping both defensive and offensive routes. Bridges and shallow fords are strategically placed along the riverbanks, allowing for controlled troop movement and tactical positioning. The gameplay is a single-player survival defense mode, where players must withstand endless enemy waves. The central starting base serves as the production hub for units and the foundation of the defense line. Elevated terrain and hills along the river provide advantageous vantage points for sight and firing angles, making them key strategic spots. A core tactic involves positioning forces on both sides of the river to intercept and counter incoming enemies effectively. The symmetrical layout of the map, centered around the river, allows for balanced defensive setups, emphasizing adaptability over rigid one-sided defenses. At the start, players must defend with limited resources, gradually anticipating increasingly intense enemy assaults. The expansive terrain enables tactics like drops or ambushes, while controlling the central area may be essential depending on the strategy employed. Due to the tile design, some areas offer poor visibility, making sensor units or Overlords particularly useful. While exact difficulty ratings are unavailable, the map’s vast scale and relentless enemy patterns suggest a challenge at least on par with "medium" difficulty or higher. Given its Spanish-language origins and the internal reference *"Escuela de Batalla 77"* in its description, this map was likely created for the Spanish-speaking custom map community, possibly as a training tool for combat tactics and defensive strategies rather than pure entertainment. Novice players may find the open terrain and constant threats overwhelming, so mastering basic defense strategies and resource management before attempting it is advisable. Leveraging the map’s symmetry to build layered defenses and using the river as a natural barrier can significantly improve survival chances.
§pêciàl Forçês Extrëmé eXpErTs
§pêciàl Forçês Extrëmé eXpErTs는 스타크래프트 브루드워의 유즈맵으로, 특수부대와 극한의 적대 세력을 무대로 펼치는 디펜스 장르의 맵이다. 맵 제목부터 보여주듯 난이도가 상당히 높은 편으로, 플레이어는 방어선을 구축하며 끊임없이 몰려오는 적의 공격을 막아내야 한다. 화면 가득 펼쳐진 사막 지형 위에 요새와 방어 건물이 배치되어 있으며, 적들은 지상군과 공중 유닛을 조합해 공격해 온다. 특히 사막이라는 배경은 맵의 분위기를 한층 더 극한적으로 연출하며, 황량한 지형이 주는 긴장감을 상승시킨다. 내부 메타데이터를 살펴보면 제작자와 수정자에 대한 기록이 남아 있어, 꽤 오랜 기간 동안 다양한 제작자들에 의해 개선되고 발전해 왔음을 알 수 있다. 이 맵의 가장 큰 특징은 ‘극한의 전문가’를 위한 난이도로 설계되었다는 점으로, 초보자보다는 경험 많은 플레이어에게 적합하다는 점을 명심해야 한다. 맵 구조는 중앙에 위치한 요새를 중심으로 방어 건물이 배치되어 있으며, 적의 공격 루트는 사방에서 뻗어나오는 형태를 보인다. 이 때문에 방어선을 구축할 때 각 방향의 균형을 carefully 고려해야 하며, 소수의 방어 건물로도 효과적으로 대처할 수 있도록 전략을 세우는 것이 중요하다. 또한, 맵의 해상도와 타일셋을 고려할 때, 세밀한 시야 조절과 빠른 반응이 요구되는 디자인임을 알 수 있다. 플레이 전 반드시 확인해야 할 요소는 방어 건물의 배치와 각 루트의 공격 패턴으로, 이 부분을 숙지하지 않으면 금방 무너질 수 있다. 추천하는 플레이어는 디펜스 장르를 즐기며, 특히 어려운 난이도에서 전략적 깊이를 추구하는 플레이어들이다. 이 맵을 통해 극한의 방어戦略을 경험하고 싶은 유즈맵爱好者들에게 큰 매력을 느낄 수 있을 것이다. Special Forces Extrëmé eXpErTs is a custom map in StarCraft: Brood War, set in a defense genre where elite units face off against extreme hostile forces. As the map's title suggests, the difficulty is quite high, requiring players to build and maintain defensive lines while fending off relentless enemy waves. The map features a vast desert terrain filled with fortresses and defensive structures, while enemies attack with combined ground and air units. The desert setting enhances the map's intense atmosphere, amplifying the tension with its barren landscape. Examining the internal metadata reveals records of creators and modifiers, indicating the map has been refined and improved by various developers over a long period. Its defining feature is its design for "extreme experts," making it suitable for experienced players rather than beginners. The layout centers around a central fortress with defensive structures arranged around it, while enemy attack routes radiate outward in all directions. This demands careful consideration of balance when building defenses, and strategic placement of even a few structures can effectively counter attacks. Given the map's resolution and tileset, it also requires precise vision control and quick reactions. Before playing, it's crucial to study defensive structure placements and enemy attack patterns—neglecting these will lead to quick collapse. Recommended players are those who enjoy defense maps, especially those seeking strategic depth in high difficulty. Fans of custom maps looking to experience intense defensive strategies will find this map highly appealing.
마린 D. 22-웨이 - ver. 3.3 (Marine D. 22-way - ver. 3.3)
스타크래프트 브루드워의 대표적인 컴까기 유즈맵인 《마린 D. 22-웨이 - ver. 3.3》는 플레이어들이 마린(해병) 유닛을 조종하여 끊임없이 쏟아지는 적들을 상대로 생존을 다투는 디펜스 형식의 맵이다. 맵의 중심에는 플레이어 기지가 위치하며, 주변으로 22개의 웨이(길)이 뻗어 있어 각 방향으로 적들이 끊임없이 몰려든다. 맵의 구조는 중앙 기지에서 각 웨이를 따라 적들이 끊임없이 생성되는 방식으로, 플레이어는 각 웨이에 배치된 부대나 구조물을 강화하고 전략적으로 유닛을 배치하여 적의 공격을 방어해야 한다. 맵의 특징은 22개의 웨이 각각에 고유한 지형과 장애물이 배치되어 있어, 단순히 수비만으로는 한계가 있으며 적절한 길막기와 유닛 관리, 그리고 자원 관리가 필수적이라는 점이다. 특히, 각 웨이의 입구와 가운데 지점에 위치한 방어 타워나 보급고가 중요한 역할을 하며, 이를 잘 활용하지 못하면 순식간에 전선이 무너질 수 있다. 플레이어는 제한된 자원으로 유닛을 생산하고, 각 웨이의 특성에 맞는 방어 전략을 세워야 한다. 이 맵은 초보부터 숙련자까지 즐길 수 있는 난이도 조절이 가능하며, 특히 팀플레이 시 각 플레이어 간의 협력이 중요한데, 각 웨이를 분담하여 방어하거나 특정 웨이에 집중 공격을 펼치는 등 전략적 선택이 필요하다. 또한, 맵의 버전 3.3은 이전 버전에서의 개선점이 반영되어 있으며, 특히 18-웨이 버전으로 수정되면서 밸런스가 더욱 정교해졌다. 마린 D. 22-웨이를 플레이하기 전에는 각 웨이의 지형과 입구 위치를 숙지하고, 자원 관리와 유닛 생산 타이밍을 철저히 계획해야 한다. 또한, 팀플레이 시에는 각 플레이어의 역할 분담을 명확히 하고, 중앙 기지의 방어 체계도 함께 관리해야 한다. 맵의 인기는 오랜 시간 지속되어 왔으며, 다양한 커스터마이징 버전과 후속 버전이 존재한다는 점에서도 그 인기를 실감할 수 있다. Marine D. 22-way - ver. 3.3 is a classic Starcraft Brood War custom map in the 'compkagi' (compilation of killing) genre, where players control Marine units to defend against endless waves of enemies. The map features a central player base with 22 distinct paths (or 'ways') extending outward, each serving as an entry point for enemy forces. The core gameplay revolves around reinforcing these paths, strategically placing units, and managing resources to withstand the relentless assaults. Each path has unique terrain and obstacles, requiring players to adapt their defenses rather than relying on a one-size-fits-all strategy. Key elements like defensive towers and supply depots at the entrances and midpoints of each path play crucial roles in survival. Players must balance unit production, resource allocation, and path-specific tactics to prevent collapse. The map supports solo and team play, with teamwork being essential for success—roles can be divided among players, or teams can focus on reinforcing specific paths. Version 3.3 introduces refinements from earlier versions, including adjustments made in the 18-way variant for improved balance. Before playing, familiarizing yourself with each path's layout, resource management, and unit production timing is vital. In team games, clear role distribution and coordination of the central base's defenses are equally important. The map has maintained popularity over time, evidenced by numerous custom versions and sequels that have emerged.
워 오브 더 로스트 킹덤스 (War of the Lost Kingdoms)
스타크래프트 브루드워의 ‘워 오브 더 로스트 킹덤스’는 8명의 플레이어가 경쟁하며 왕국을 차지하는 디펜스 장르의 유즈맵이다. 맵의 배경은 사막으로 펼쳐진 대륙으로, 거대한 바다에 둘러싸인 지형이 인상적이다. 내부 설명에 따르면 ‘하이 킹’이 선박 사고로 사망하면서 생존한 귀족들이 liferaft를 타고 대륙으로 이동해 각자의 왕국을 차지해야 하는데, 다른 생존자들과 경쟁을 벌이며 모든 적을 제거해야만 승리할 수 있다. 맵 구조는 중앙의 넓은 평지부터 해안가, 산맥, 숲 등 다양한 지형이 배치되어 있어 strategic depth를 제공하며, 특히 해안가에서 시작하는 플레이어는 자원 확보와 초기 진출에 신경을 써야 한다. 맵 곳곳에 scattered되어 있는 자원 지점과 좁은 길목은 초반 전투와 영토 확장 시 유리한 위치를 선점할 기회를 제공한다. 맵의 중심부는 비교적 평탄한 평지이지만, 숲과 산맥이Diamond-shaped territory는 각 플레이어에게 할당되며, 이 구역을 방어하고 확장하는 것이 주요 전략이 된다. 전투는 대부분 근접 전투가 주를 이루며, 각 territoriest에 배치된 건물들이 방어선을 형성하는 역할을 한다. 맵의 전체적인 분위기는 중세 판타지풍으로 보이며, 디자인 상의 특징으로는 해안가의 모래톱과 절벽, 그리고 중앙 평원의 잔디밭이 눈에 띈다. 이 맵은 빠른 판단과 영토 관리 능력이 요구되는 만큼, 초보보다는 경험 있는 플레이어에게 더 어울리며, 특히 ‘생존자’ 컨셉을 살린 경쟁형 디펜스가好き한 유저들에게 추천할 만하다. 플레이 전에는 각 territoriest의 경계와 자원 분포, 그리고 주요 길목을 미리 확인해 두는 것이 좋다. 맵의 배경을 고려했을 때, 해안가에서 시작하는 경우 초기 자원 확보가 중요하며, 중앙 평지로 진출할 때는 다른 플레이어들과의 충돌을 최소화하는 전략이 필요하다. 또한, teritoriy 확장을 위해 필수적인 길목과 방어 거점을 미리 확보하는 것이 승리 확률을 높이는 핵심이다. StarCraft: Brood War’s *War of the Lost Kingdoms* is an 8-player competitive defense-style custom map where players vie for control of a kingdom. The map is set in a desert continent surrounded by vast seas, with a striking coastal terrain. According to the in-game lore, the High King dies in a shipwreck, forcing surviving nobles to flee on lifeboats to the mainland and claim their own territories. To win, players must eliminate all opponents while competing to secure their own kingdom. The map features diverse terrain, from open central plains to coastlines, mountain ranges, and forests, offering deep strategic options. Players starting near the shore must carefully balance early resource gathering and expansion. Scattered resource points and narrow chokepoints provide advantageous positions for early skirmishes and territorial growth. The central area is relatively flat, but each player is assigned a diamond-shaped territory bordered by forests and mountains—defending and expanding these zones is the core strategy. Combat is primarily close-quarters, with buildings placed within each territory forming defensive lines. The map’s overall aesthetic leans into a medieval fantasy vibe, highlighted by coastal sandbars, cliffs, and the grassy plains at the center. Given its fast-paced decision-making and territorial management demands, the map suits experienced players more than beginners. It’s especially recommended for fans of competitive defense maps with a survival theme. Before playing, it’s wise to study the territory boundaries, resource distribution, and key chokepoints. Starting near the coast requires prioritizing early resource acquisition, while advancing toward the central plains demands minimizing clashes with other players. Securing critical pathways and defensive strongholds early is essential to maximizing your chances of victory.
반지의 제왕 - 사우론의 부흥 (LotR - RoS RH)
《LotR - RoS RH》는 스타크래프트 브루드워의 유즈맵으로, 반지의 제왕 세계관을 모티브로 한 디펜스 장르의 맵이다. 맵 곳곳에 배치된 방어 건물과 유닛들이 사우론의 침공을 막아내는 것이 주요 목표로 보이며, 광활한 사막 타일셋 위에 성벽과 요새가 조밀하게 배치되어 있어 전략적 배치와 자원 관리가 중요할 것으로 추정된다. 맵 중앙에는 넓은 평야가 펼쳐져 있으며, 이곳에서 공세와 방어가 교차할 가능성이 높아 보인다. 또한, 맵 외곽의 산맥과 절벽이 자연스러운 방어선을 형성하고 있어, 플레이어는 지형을 활용한 전략적 플레이가 요구될 것으로 보인다. 맵의 규모가 8192x8192로 매우 크고, 7인 플레이가 가능하다는 점에서 대규모 팀플레이가 예상되며, 각 플레이어가 담당하는 구역을 어떻게 방어하고 협력하느냐가 승부를 가를 것으로 보인다. 맵의 디자인과 구조는 디자인된 방어 루트와 공세 경로의 균형이 중요할 것이며, 특히 사막 타일셋의 황량한 분위기가 맵의 긴장감을 더해주고 있다. 이 맵은 디펜스 장르에 익숙한 플레이어들에게는 흥미로운 도전 과제가 될 것이며, 특히 팀원 간의 원활한 소통과 전략적 협력이 필수적일 것으로 보인다. 또한, 맵의 대규모 구조와 복잡한 지형은 초보 플레이어보다는 경험이 있는 플레이어에게 더 적합할 것으로 보인다. 플레이 전에는 방어 건물의 배치 위치와 공세 루트를 미리 숙지하는 것이 중요하며, 자원의 효율적 관리와 유닛의 생산 타이밍을 맞추는 연습이 필요하다. 맵의 긴장감을 높이기 위해 사운드와 이펙트가 충분히 활용되었다면 몰입감 있는 플레이가 가능할 것이다. 이 맵은 디펜스 장르를 좋아하는 플레이어들에게는无疑한 재미를 제공할 것이며, 특히 반지의 제왕 팬들에게는 세계관에 대한 몰입감을 높일 수 있는 장점이 있다. 《LotR - RoS RH》 is a custom defense map in *StarCraft: Brood War*, themed around *The Lord of the Rings* universe. The main objective appears to be defending against Sauron’s invasion using strategically placed defensive structures and units scattered across the map. With dense walls and fortresses built atop vast desert tiles, effective unit placement and resource management will likely be crucial. A wide plain stretches across the map’s center, where clashes between offense and defense will likely unfold. The surrounding mountains and cliffs naturally form defensive lines, demanding players to utilize the terrain for strategic advantage. Given the map’s massive 8192x8192 scale and support for 7 players, large-scale teamwork is expected, with victory hinging on how well players defend their assigned zones and coordinate with teammates. The map’s design emphasizes balanced defensive routes and attack paths, while the desolate desert aesthetic heightens the tension. It offers a compelling challenge for players familiar with defense maps, requiring smooth communication and strategic cooperation among teammates. Due to its vast scale and complex terrain, experienced players will likely find it more suitable than beginners. Before playing, it’s important to memorize defensive structure placements and attack routes, along with mastering efficient resource management and unit production timing. If the map effectively utilizes sound and visual effects, it could further enhance immersion. For fans of defense maps, this is undoubtedly an enjoyable experience, and *Lord of the Rings* enthusiasts will particularly appreciate its immersive world-building.
로드 오브 더 링즈: 미르크우드 침략 (Lord of the Rings: Bedim of Mirkwood)
《로드 오브 더 링즈: 미르크우드 침략 (Lord of the Rings: Bedim of Mirkwood)》는 스타크래프트 브루드워의 유즈맵으로, 반지의 제왕 세계관을 배경으로 한 컴까기 스타일의 디펜스 게임이다. 맵은 6인용으로 설계되었으며, 디자인된 시기는 제3시대 반지전쟁 직전으로 설정되어 있어 원작 팬들에게 친숙한 분위기를 제공한다. 맵의 전체 크기는 8192x8192로 넓은 영역을 활용한 구조가 특징이며, 사막 타일셋을 사용하여 건조한 Middle-earth의 분위기를 연출하고 있다. 플레이어는 각각의 진영을 맡아 미르크우드의 어둠이 퍼지는 것을 막기 위해 방어선을 구축하고, 끊임없이 몰려오는 적을 상대로 teritorial을 사수해야 한다. 맵의 진행은 크게 세 단계로 나뉘며, 각 단계마다 새로운 적 유닛과 방어 구조물이 등장하여 전략의 변화를 요구한다. 초반에는 약한 적들이 끊임없이 공격해오지만, 중반부로 접어들수록 강력한 유닛들이 등장해 방어의 난이도가 급격히 상승한다. 방어에 성공하면 새로운 방어 건물을 짓거나 업그레이드할 수 있는 자원을 획득할 수 있으며, 이를 통해 후반부의 강력한 적을 상대할 준비를 할 수 있다. 맵의 특징 중 하나는 맵의 중앙에 위치한 '미르크우드'라는 거대한 숲 지형으로, 이 지역을 중심으로 적의 공격 루트가 집중된다. 플레이어는 이 숲을 보호하면서도, 때로는 숲을 이용해 적의 움직임을 제한하는 전략을 구사할 수 있다. 또한, 맵 곳곳에 숨겨진 자원 지점이 존재해, 이를 확보하면 방어력을 강화하거나 새로운 유닛을 생산할 수 있는 등 다양한 선택지를 제공한다. 이 맵은 원작의 분위기를 잘 살린 그래픽과 함께, 디펜스 게임의 재미를 극대화하기 위해 철저한 밸런스 설계가 이루어졌으며, 특히 6인 동시 플레이가 가능한 구조로 팀워크와 전략적 의사결정이 중요한 요소로 작용한다. 초보 플레이어의 경우 초반 방어에 치중하다가 중반 이후부터는 자원의 확보와 업그레이드에 주력하는 것이 중요하며, 숙련된 플레이어는 방어 라인을 효율적으로 배치하고 자원의 흐름을 최적화하는 데 주력해야 한다. 맵을 플레이하기 전에는 자신의 진영이 맡은 방어 구역을 미리 확인하고, 맵의 주요 자원 지점을 파악하는 것이 좋다. 또한, 맵의 중앙 숲 지형을 어떻게 활용할 것인지에 대한 전략을 미리 세워두면 게임 진행이 훨씬 수월해질 것이다. 이 맵은 반지의 제왕 팬이 아니더라도 디펜스 게임과 전략 게임을 좋아하는 플레이어라면 충분히 즐길 수 있는 작품으로, 특히 팀플레이를 선호하는 유저들에게 추천할 만한佳作이다. 맵의 난이도는 대체로 '보통' 수준으로, 초보자가 처음 플레이하기에도 무리가 없으나, 후반부로 갈수록 전략의 깊이가 깊어지기 때문에 꾸준한 연습이 필요하다. 맵의 디자인과 분위기가 뛰어나며, 원작의 분위기를 잘 살린 점도 이 맵의 큰 장점 중 하나다. 만약 당신이 스타크래프트 유즈맵을 любите하고 디펜스 게임의 묘미를 즐기고 싶다면, 《로드 오브 더 링즈: 미르크우드 침략》을 반드시 한 번 시도해 보길 바란다. 이 맵은 단순한 디펜스가 아니라, 전략과 팀워크가 어우러진 진정한 협동의 묘미를 느낄 수 있는佳品이다. Lord of the Rings: Bedim of Mirkwood is a StarCraft: Brood War custom map that immerses players in a defense-style game within the iconic Lord of the Rings universe. Designed for 6 players, the map recreates the arid and mystical landscapes of Middle-earth using a desert tileset, set in the Third Age just before the Battle of the Five Armies. Players take on the role of guardians tasked with defending the borders of Mirkwood against relentless waves of enemies. The gameplay unfolds in distinct phases, with early waves featuring weaker units that escalate in difficulty as the game progresses. Players must strategically build and upgrade defensive structures, secure hidden resource points scattered across the map, and manage territorial control to maximize efficiency. A standout feature is the central Mirkwood forest, which not only serves as a focal point for enemy attacks but also as a strategic asset players can utilize to restrict enemy movements. The map emphasizes teamwork and tactical decision-making, as success hinges on balancing immediate defense with long-term resource management and upgrades. Beginners are advised to focus on early-game defense and resource gathering, while experienced players will find greater challenge in optimizing upgrade paths and streamlining defensive layouts. It’s crucial to familiarize yourself with the assigned defense zones and resource locations before starting. The map’s difficulty is rated as moderate, making it accessible to newcomers while offering depth for veterans seeking a strategic challenge. Its faithful adaptation of the Lord of the Rings aesthetic and immersive atmosphere make it a standout title, appealing not only to fans of the franchise but also to fans of defense and strategy games. Whether you're coordinating with teammates or refining your solo strategy, Bedim of Mirkwood delivers a rich, collaborative experience that rewards foresight and adaptability. For those who love StarCraft custom maps and the thrill of cooperative defense, this title is a must-play gem in the genre.
고지라 VS 미국 (Godzilla attacks U.S.A.)
‘고지라 VS 미국(Godzilla attacks U.S.A.)’은 스타크래프트: 브루드워의 대표적인 컴까기 유즈맵으로, 플레이어는 미국군을 조종해 고지라와 메카고지라, 모스라 등 괴수들의 미국 본토 파괴를 저지해야 하는 디펜스 장르의 재미를 제공한다. 맵은 미국 본토를 배경으로 펼쳐지며, 동부 해안부터 서부 해안까지의 넓은 지역이 구현되어 있어 진행에 따라 괴수들이 끊임없이 침공해 오는 압박감을 느낄 수 있다. 플레이어는 각 지역의 주요 도시와 군사 기지를 방어하면서, 보급로 확보와 자원 관리를 병행해야 한다. 전투는 실시간으로 진행되며, 괴수들은 플레이어의 방어선을 돌파하려 하므로 전략적인 배치와 병력 운용이 중요하다. 특히 고지라와 메카고지라는 강력한 체력과 공격력으로 인해 한 번에 집중된 공격을 받을 가능성이 크므로, 방어 타워나 유닛 강화가 필수적이다. 맵의 특징 중 하나는 다양한 괴수의 등장 패턴으로, 플레이어는 이를 예측하고 대비해야 한다. 예를 들어 메카고지라는 공중 유닛으로 나타나며, 모스라는 대규모 폭격을 가하는 등 각 괴수마다 다른 위협 패턴이 존재해 전략의 다양성을 요구한다. 또한 맵 곳곳에 숨겨진 보급 기지나 추가 자원 지역을 확보하면 장기적인 전투에서 유리한 고지를 점할 수 있다. 이 맵은 초보자보다는 중급 이상의 플레이어에게 적합하며, 전략적 사고와 긴장감 있는 전투를 즐기고자 하는 유저들에게 추천된다. 특히 괴수들의 공격 타이밍과 패턴을 파악하는 것이 핵심으로, 반복 플레이를 통해 점차 숙련도를 높일 수 있다. 맵을 플레이하기 전에는 각 괴수의 공격 패턴과 약점을 미리 숙지하고, 방어 타워나 유닛의 배치 위치를 사전에 계획하는 것이 중요하다. 또한 맵의 넓은 지역을 효율적으로 관리하기 위해 맵 리딩과 자원 관리에 신경 써야 한다. 이 맵은 단순히 괴수를 물리치는 것뿐만 아니라, 미국 본토를 защит하는 전략적 목표를 달성하는 재미가 있는 유즈맵으로, 디펜스와 전략 장르를 좋아하는 유저들에게 강추할 만한 작품이다. 한국산 유즈맵 중에서도 손꼽히는 완성도로, 괴수물의 팬이라면 절대 놓치지 말아야 할 작품이다. 게임을 시작하기 전에는 맵의 주요 지역과 괴수들의 등장 위치를 미리 확인해 두는 것이 좋다. 특히 고지라의 경우 해안가에서 주로 등장하므로, 해안 방어 라인을 강화하는 것이 중요하다. 또한 메카고지라의 경우 공중 유닛이므로 대공 방어가 필수적이다. 맵의 난이도는 괴수의 공격력과 체력이 점차 증가하는 방식으로 구성되어 있어, 초반에는 비교적 쉬운 편이지만 후반으로 갈수록 어려워지는 경향이 있다. 이를 감안해 플레이어는 초반에 충분한 자원을 확보하고 방어선을 구축하는 데 주력해야 한다. 맵의 재미 요소 중 하나는 괴수들과의 전투뿐만 아니라, 미국군의 다양한 유닛을 활용할 수 있다는 점이다. 예를 들어 탱크나 전투기 같은 강력한 유닛을 적시에 투입하면 전투를 훨씬 유리하게 이끌어갈 수 있다. 또한 맵 곳곳에 숨겨진 보급 기지나 추가 자원을 확보하면 장기戦에서 큰 이점을 얻을 수 있다. “Godzilla vs. USA” is a classic *StarCraft: Brood War* custom map where players take control of the U.S. military to defend the homeland against waves of giant monsters like Godzilla, Mechagodzilla, and Mothra. This defense-style map immerses players in the vast terrain of the continental United States, stretching from the East Coast to the West Coast, where relentless enemy invasions create a constant sense of pressure. Players must defend key cities and military bases while managing supply lines and resources in real time. The real-time battles demand strategic unit placement and troop management, as the monsters relentlessly push to break through defensive lines. Godzilla and Mechagodzilla, in particular, pose massive threats due to their high health and attack power, making it essential to fortify defenses with towers and upgraded units. One of the map’s standout features is the variety of enemy patterns—each monster presents unique threats, such as Mechagodzilla’s aerial assaults or Mothra’s devastating bombing runs, forcing players to adapt their strategies accordingly. Hidden supply bases and resource-rich areas scattered across the map can provide long-term advantages, but the map is best suited for intermediate to advanced players. Success hinges on mastering the timing and patterns of enemy attacks, which can be honed through repeated play. Before jumping in, it’s crucial to study each monster’s behavior and weaknesses, plan defensive tower placements, and optimize resource management to efficiently control the expansive battlefield. More than just a test of raw power, the map delivers the satisfaction of protecting the U.S. mainland, blending defense and strategy into a thrilling experience. Its polished design and immersive gameplay make it a must-play among Korean custom maps, especially for fans of kaiju. Before starting, familiarize yourself with key locations and monster spawn points—Godzilla tends to appear near coastlines, so shore defenses are critical, while Mechagodzilla’s aerial nature demands strong anti-air coverage. The difficulty ramps up as monsters grow stronger, so securing early resources and building a solid defense early on is key to surviving the later stages. Beyond the intense monster battles, the map also lets players leverage the U.S. military’s diverse units, such as tanks and fighter jets, for tactical advantages. Uncovering hidden supply bases and additional resources can turn the tide in prolonged engagements, adding depth and replayability to the experience.
좀비 지옥 (ZOMBIE HELL!!!)
스타크래프트 브루드워의 유즈맵 "ZOMBIE HELL!!!(좀비 지옥)"은 좀비와의 서바이벌 대전을 주제로 한 디펜스 장르의 유즈맵으로, 플레이어는 시작 지점에서부터 끊임없이 몰려오는 좀비 무리를 상대하며 생존을 목표로 한다. 맵은 사막 타일셋으로 구성되어 있으며, 중앙의 시작 지점을 중심으로 사방으로 길이 뻗어 있는 구조로 되어 있다. 플레이어는 제한된 자원과 방어 시설(예: 벽, 바리케이드)을 활용해 좀비의 진격을 저지해야 하며, 일부 구간에서는 좀비의 공격을 버티면서 시간을 벌어 추가 방어선을 구축하는 전략이 필요하다. 맵 곳곳에 배치된 자원(미네랄, 베스핀 가스)을 확보해 방어 시설과 유닛을 보강하는 것이 핵심으로, 특히 초반에는 자원 확보가 생존의 관건이 된다. 좀비는 일정 주기로 특정 지점에서 스폰되며, 플레이어는 이들을 물리치거나 저지해 다음 웨이브까지 버텨야 한다. 맵의 난이도는 웨이브가 진행될수록 급격히 상승하며, 후반으로 갈수록 좀비의 물량과 속도가 증가해 방어선의 중요성이 커진다. 추천하는 플레이 방식은 팀 플레이로, 5인까지 플레이 가능한 이 맵은 팀원 간의 협력이 필수적이며, 각자의 역할(자원 확보, 방어선 구축, 좀비 처치)을 분담하는 것이 중요하다. 초보자가 플레이하기에는 다소 어려운 편이지만, 전략적인 자원 관리와 방어선 구축을 익히면 재미와 긴장감을 동시에 느낄 수 있는 맵이다. 특히 디펜스 장르를 좋아하는 유저들에게는 필수 체험 맵으로 손꼽힌다. 플레이 전에는 맵의 구조와 자원 위치, 좀비 스폰 지점을 미리 숙지하고, 팀원과의 커뮤니케이션을 충분히 하는 것이 좋다. 또한, 방어 시설을 구축할 때 좀비의 진입로를 최대한 좁히는 것이 포인트다. 이 맵은 단순히 좀비를 무찌르는 것이 아니라, 어떻게 하면 좀비를 효율적으로 저지하고 자원을 확보해 장기전을 버틸 수 있는지가 관건이다. StarCraft: Brood War's custom map "ZOMBIE HELL!!!" is a defense-style custom map centered around a survival battle against zombies. Players must fight off endless waves of zombies from the starting point to survive. The map is built with a desert tileset and features a structure with paths extending in all directions from the central starting area. Players must use limited resources and defensive structures (such as walls and barricades) to block the zombies' advance, and in some sections, they need to hold out against attacks while buying time to build additional defenses. Securing resources (minerals and Vespene gas) scattered throughout the map to reinforce defenses and units is key, especially in the early stages where resource collection is vital for survival. Zombies spawn at specific points at regular intervals, and players must defeat or stop them to survive until the next wave. The difficulty escalates sharply as waves progress, with zombies becoming more numerous and faster in later stages, increasing the importance of strong defensive lines. The recommended playstyle is team-based, as this map supports up to five players and requires cooperation among teammates. Dividing roles—such as gathering resources, building defenses, and fighting zombies—is crucial. While it may be challenging for beginners, mastering strategic resource management and defense-building offers both fun and tension. It’s especially recommended for users who enjoy defense-style maps. Before playing, it’s wise to familiarize yourself with the map layout, resource locations, and zombie spawn points, and to communicate thoroughly with teammates. Additionally, when constructing defenses, narrowing zombie entry points is key. The focus isn’t just on defeating zombies but on efficiently blocking them and securing resources to endure a long-term battle.
맵 선택 가이드
태그는 맵의 핵심 특징을 빠르게 설명하지만 제작 버전마다 규칙이 다를 수 있습니다. 상세 설명에서 권장 인원, 난이도, 플레이 시간과 버전을 함께 확인한 뒤 다운로드하세요.