
디펜스 유즈맵 스타크래프트 맵 모음
'디펜스 유즈맵' 태그가 등록된 맵을 모았습니다. 장르 하나로 찾기 어려운 플레이 방식, 난이도와 특징을 중심으로 인기 맵과 최신 맵을 비교해 보세요.
- 등록 맵
- 11개
- 누적 다운로드
- 0
- 누적 조회
- 479
인기 맵
다운로드와 조회 반응이 높은 맵입니다.
리커 디펜스 솔로 하드 3.2b (Lurker Defense Solo HARD 3.2b)
스타크래프트: 브루드워의 숨은 명작 디펜스 유즈맵인 <리커 디펜스 솔로 하드 3.2b>는 이름 그대로 리커(Lurker)라는 지상형 유닛을 중심으로 한 고전적인 디펜스 장르의 정수를 보여준다. 이 맵은 플레이어가 맵 하단에 배치된 방어 건물과 유닛을 활용해 끊임없이 몰려오는 적군 웨이브를 막아내야 하는 구조로, 30단계에 걸쳐 점점 강해지는 적군을 상대해야 한다. 각 웨이브는 다양한 조합의 저글링, 히드라리스크, 뮤탈리스크 등으로 구성되어 있으며, 리커의 특성상 지상 공격만 가능한 특수 능력을 적극 활용해야 효율적인 방어가 가능하다. 맵의 특징은 하드 난이도로, 초보자에게는 상당히 어려운 난이도를 자랑하지만 숙련된 플레이어라면 전략적으로 리커를 배치하고 자원을 효율적으로 관리하는 재미를 느낄 수 있다. 특히 리커의 땅굴 발사 능력은 하단에서 공격해오는 적군을 미리 차단할 수 있어 전략의 핵심으로 작용한다. 맵의 진행 방식은 웨이브가 시작될 때마다 맵 상단에서 적군이 하단으로 진격하는 방식이며, 플레이어는 각 웨이브를 통과할 때마다 일정량의 미네랄과 가스를 획득할 수 있어 자원 관리가 중요하다. 또한, 맵의 배경은 황혼 테마의 황량한 분위기로 구성되어 있어 플레이어에게 긴장감을 더해준다. 이 맵은 혼자서 플레이하는 솔로 디펜스라는 점에서 concentration과 patience가 요구되며, 실수를 допу할 경우 다음 웨이브에서 치명적인 타격을 입을 수 있어 신중한 플레이가 필요하다. 추천 대상은 디펜스 장르를 좋아하는 플레이어, 리커 유닛의 전략적 활용을 즐기는 유저, 그리고 혼자서 긴장감 넘치는 플레이를 원하는 게이머들에게 적합하다. 플레이 전에는 리커의 특성과 각 웨이브 별 적군 조합을 숙지하고, 방어 건물의 위치와 리소스 관리 계획을 미리 세워두는 것이 중요하다. 또한, 하드 난이도 특성상 실수 허용도가 낮기 때문에 충분한 연습을 거친 후에 도전하는 것이 바람직하다. Lurker Defense Solo HARD 3.2b is a classic defense-style custom map in StarCraft: Brood War that focuses on the Lurker unit, offering a challenging experience for solo players. The gameplay revolves around defending the bottom of the map against relentless enemy waves that escalate in difficulty over 30 levels. Each wave consists of ground-based units like Zerglings, Hydralisks, and Mutalisks, requiring players to strategically place Lurkers to maximize their ground attack capabilities. The "Hard" difficulty ensures a tough challenge, where even a single mistake can lead to devastating consequences. Players earn minerals and vespene gas with each cleared wave, enabling resource management for upgrades and unit production. The map's eerie Twilight-themed atmosphere enhances the tension, making every wave feel like a high-stakes battle. Solo play demands concentration and patience, as the absence of team support means all defensive strategies must be executed flawlessly. This map is ideal for players who enjoy defense genres, appreciate the strategic depth of Lurkers, and seek a solo experience filled with excitement. Before playing, it's crucial to understand Lurker mechanics, study enemy wave compositions, and plan resource distribution carefully. Given the Hard difficulty, ample practice is recommended to avoid costly mistakes during the later stages.
7vs1 테란 대량 공격 (7vs1 Terran with Mass Attack)
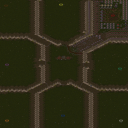
스타크래프트 브루드워의 ‘7vs1 Terran with Mass Attack’은 7명의 플레이어가 한 명의 강력한 컴퓨터를 상대하는 디펜스 장르의 유즈맵입니다. 맵은 사막 타일셋을 배경으로 넓게 펼쳐져 있으며, 중앙에 플레이어의 본진이 배치되어 있습니다. 컴퓨터는 테란 종족을 사용해 대규모 공세를 펼치며, 플레이어는 빠르게 방어 시설을 구축하고 자원을 관리해야 합니다. 내부 설명에 따르면 ‘컴퓨터가 러시를 해서 방어가 늦으면 바로 게임이 끝난다’는 설명이 있어, 긴장감과 긴급한 대처가 요구됩니다. 이 맵의 핵심은 빠른 판단력과 방어 건물의 효율적인 배치입니다. 플레이어는 초반에 자원을 확보해 방어 건물을 건설하고, 중반에는 병력을 조합해 반격하는 전략을 세워야 합니다. 컴퓨터는 테란의 장갑 유닛과 다수의 러쉬를 동반하기 때문에, 가스 자원과 방어 건물의 조합이 승패를 좌우합니다. 또한, 맵의 크기가 넓어 시야 확보와 자원 채취 위치 선택이 중요합니다. 초보 플레이어에게는 다소 어려울 수 있지만, 방어 건물의 종류와 배치에 익숙해지면 안정적인 플레이가 가능해집니다. 이 맵은 팀 플레이보다는 개인 플레이가 주를 이루며, 특히 컴퓨터의 러쉬 타이밍을 예측하고 대비하는 것이 중요합니다. 또한, 자원 관리와 건물 업그레이드는 필수적이며, 병력 조합은 테란의 장갑 유닛을 상대할 수 있는 바이오닉이나 메카닉 병력으로 맞추는 것이 좋습니다. 맵의 난이도는 ‘하드’로 설정되어 있어, 초보자보다는 경험이 있는 플레이어에게 적합합니다. 한 판당 플레이 시간은 약 20~30분 정도로 예상되지만, 컴퓨터의 공격 타이밍과 플레이어의 전략에 따라 크게 달라질 수 있습니다. 이 맵을 추천하는 대상은 디펜스 장르에 익숙한 플레이어이거나, 팀플레이보다는 개인 전투를 선호하는 유저입니다. 또한, 테란 종족의 특성과 방어 건물의 활용법을 숙지하고 있는 플레이어에게 더 재미있게 느껴질 것입니다. 맵의 긴장감과 전략적 깊이가 매력적인 이 맵은, 스타크래프트 유즈맵 among the best 중 하나로 꼽힐 만합니다. 7vs1 Terran with Mass Attack is a defense-style custom map in StarCraft: Brood War where seven players face off against a single, overwhelmingly powerful computer opponent. Set against a desert tileset, the map features a sprawling battlefield with the players' starting bases positioned centrally. The computer, controlling the Terran faction, launches relentless mass attacks, forcing players to quickly establish defenses and manage resources to survive. The core challenge lies in rapid decision-making and efficient placement of defensive structures. Players must secure resources early to construct defenses, then shift focus to mid-game counterattacks by combining units effectively. The computer’s strategy revolves around armored Terran units and waves of attacks, making gas management and defensive building placement critical to success. The map’s large scale demands careful resource node selection and strategic vision control to anticipate threats. This map is designed for individual play rather than team coordination, emphasizing personal strategy and adaptability to the AI’s aggressive timing. Resource management and building upgrades are essential, with recommended unit compositions focusing on bio or mechanical forces to counter the Terran’s armored units. Due to its high difficulty, the map is better suited for experienced players familiar with Terran mechanics and defensive tactics. A typical match lasts around 20 to 30 minutes, though the duration can vary significantly based on the AI’s aggression and player strategy. Ideal for players who enjoy defense-focused gameplay or prefer solo challenges over team-based scenarios, this map offers a thrilling blend of tension and strategic depth. It’s particularly recommended for those well-versed in Terran faction mechanics and defensive building utilization, standing out as a top-tier custom map in the StarCraft community.
뉴 선켄 디펜스 (New Sunken Defence)
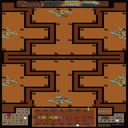
뉴 선켄 디펜스 (New Sunken Defence)는 스타크래프트 브루드워에서 즐길 수 있는 독특한 구조의 디펜스 장르 유즈맵입니다. 이번에 살펴볼 뉴 선켄 디펜스 (0.4x3) 버전은 맵 제목과 내부 설명에 나타난 바와 같이 몰려오는 적들을 막아내며 특정 조건을 달성하는 방식으로 진행되는 것이 특징입니다. 내부 설명에서는 킬 수에 따른 가스 획득이나 스테이지 진행 구조를 암시하는 요소들이 포함되어 있어, 플레이어들이 협력하여 몰려오는 적을 상대하는 전통적인 디펜스 유즈맵의 재미를 느낄 수 있도록 구성된 것으로 보입니다. 맵의 전반적인 지형 구조를 살펴보면, 유닛들이 이동하는 복잡한 경로와 플레이어들이 거점을 구축할 수 있는 공간들이 배치되어 있어 방어선 구축과 자원 관리가 중요한 승부처가 됩니다. 특히 적들의 진격 경로를 효율적으로 차단하고, 킬 수를 늘려 자원을 확보하는 과정에서 플레이어 간의 호흡과 전략적인 판단이 요구됩니다. 스타크래프트 유즈맵을 즐겨 찾는 유저들이나 독특한 방어 규칙을 가진 디펜스 맵을 선호하는 플레이어들에게 추천할 만한 작품입니다. 대규모 공중 및 지상 유닛들이 얽히는 전장에서 최적의 방어 진지를 완성하고 스테이지를 돌파하는 성취감을 맛볼 수 있습니다. 다만, 본격적으로 게임을 시작하기 앞서 내부 설명에 적힌 킬 수 조건이나 자원 획득 규칙을 미리 숙지하는 것이 원활한 플레이를 위해 큰 도움이 됩니다. New Sunken Defence is a unique defense-genre Use Map Settings map available in StarCraft: Brood War. As indicated by the map title and internal description, this particular version, New Sunken Defence (0.4x3), centers around holding off waves of incoming enemies while achieving specific objectives to progress. The internal description hints at mechanics such as gas acquisition based on kill counts and stage progression, offering the classic cooperative defense experience where players must work together to fend off enemies. Examining the overall terrain layout reveals carefully designed movement paths and designated areas for players to establish their bases, making defensive positioning and resource management crucial to success. Efficiently blocking enemy routes and securing resources through higher kill counts requires strong teamwork and strategic decision-making among participants. This map is recommended for users who enjoy StarCraft custom maps and prefer defense scenarios with distinct rules. Players can experience a strong sense of achievement by building optimal defense lines and clearing stages on a battlefield crowded with various units. However, before diving into the game, reviewing the kill requirements and resource mechanics mentioned in the internal description is helpful for a smooth gameplay experience.
도트 보지 않기 (Dont Look At The Dot!)
‘Dont Look At The Dot!’은 스타크래프트 브루드워의 유즈맵으로, 시야를 가리고 핵심 요소를 확인하지 못하는 상태에서 진행되는 독특한 디펜스 장르의 유즈맵이다. 맵의 중심에는 시선을 끌어당기는 붉은색 또는 초록색의 깜빡이는 점(‘도트’)이 존재하며, 플레이어는 이 점을 절대로 쳐다보아서는 안 된다. 시선을 돌리거나 화면을 가린 채 맵을 분석하고, 적절한 타이밍에 유닛을 생산하고 배치해야만 살아남을 수 있는 구조로 설계되어 있다. 맵의 배경은 설원 타일셋으로 꾸며져 있으며, 전체적으로 어두운 색조와 조명이 상대적으로 сла한 편이라 시야가 제한되는 환경에서 도트의 유무를 확인하는 것이 핵심 과제가 된다. 플레이 방식은 기본적으로 디펜스 장르의 특징을 따르지만, 시야를 제한하는 특이한 조건이 추가되어 전략적 깊이를 더한다. 플레이어는 도트를 쳐다보지 않으면서도 맵의 상황을 파악해야 하며, 이 과정에서 자연스럽게 맵 리딩 능력이 요구된다. 유닛 생산과 자원 관리도 중요하지만, 도트의 유무를 감지하지 못한 채로 플레이하면 순식간에 패배할 수 있는 위험이 상존한다. 또한, 맵의 타일셋과 조명 설정 때문에 일부 플레이어는 도트의 색상이나 깜빡임 주기를 제대로 인식하지 못할 수 있어, 사전 테스트가 필요하다는 점도 특징이다. 이 맵은 초보자보다는 어느 정도의 전략적 감각과 집중력이 요구되는 유즈맵으로, 특히 디펜스 장르에 익숙한 플레이어에게 추천할 만하다. 또한, 팀 플레이보다는 개인전 또는 팀 디펜스 형태로 구성되어 있으며, 플레이어의 시야를 제한하는 특이한 조건 때문에 기존 디펜스 맵과는 완전히 다른 경험을 제공한다. 맵을 플레이하기 전에는 반드시 도트의 색상과 깜빡임 주기를 숙지하고, 시야를 제한하는 조건하에서도 맵의 구조를 파악할 수 있는 연습을 하는 것이 중요하다. 이 맵의 진정한 재미는 시야를 제한받은 상태에서 어떻게든 승리를 쟁취하는 순간에 있기 때문에, 도전을 즐기는 플레이어에게는 더할 나위 없이 매력적인 경험이 될 것이다. This StarCraft: Brood War custom map, ‘Dont Look At The Dot!’, offers a unique twist on the defense genre by forcing players to navigate the map without looking directly at a blinking dot at the center. The map, set against a snowy tileset with dim lighting, challenges players to rely on peripheral vision and strategic planning, as direct visual contact with the dot—either red or green—leads to failure. Players must produce and position units while avoiding the temptation to glance at the dot, testing both their ability to manage resources and their map awareness under restricted visibility. The gameplay revolves around the core mechanic of avoiding the dot while still reacting to enemy waves, making it a test of reflexes, concentration, and adaptability. Unlike traditional defense maps, the restricted vision forces players to develop alternative methods for tracking enemy movements and base status, adding a layer of unpredictability. The snowy environment and lighting further obscure visibility, which may pose additional challenges for some players, necessitating familiarity with the map’s visual cues before attempting a playthrough. Ideal for players who enjoy strategic depth and unconventional mechanics, ‘Dont Look At The Dot!’ is best suited for those with prior experience in defense-style custom maps. The map can be played solo or in team-based defense modes, emphasizing individual skill and team coordination. Prospective players should practice recognizing the dot’s blinking pattern and map layout without direct visual confirmation to fully appreciate the challenge. The true appeal of this map lies in the thrill of overcoming its unique constraints and achieving victory against the odds, making it a standout experience for fans of creative and demanding custom maps.
시타델 바운드 (Citadel Bound)
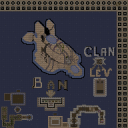
스타크래프트 브루드워 유즈맵 '시타델 바운드(Citadel Bound)'는 6144x6144 크기의 거대한 사막 타일셋 맵으로, 방어와 생존에 중점을 둔 디펜스 장르의 유즈맵이다. 맵 중앙에는 거대한 요새가 자리 잡고 있으며, 플레이어는 요새를 중심으로 배치된 방어 건물과 유닛을 활용해 끊임없이 몰려오는 적의 공격을 막아내야 한다. 맵 구조는 크게 세 구역으로 나뉘며, 요새 주변의 좁은 통로와 외곽의 넓은 평야가 특징적이다. 외곽 평야는 적이 접근하기 전에 미리 감지하고 요격할 수 있는 전략적 장소로 활용할 수 있으며, 좁은 통로는 방어 병력의 효율적인 배치와 보호막 역할을 한다. 맵 곳곳에는 자원과 보급 건물이 배치되어 있어 장기전을 대비한 보충이 가능하며, 요새 내부의 핵심 건물은 최대한 보호해야 한다. 적의 공격 패턴은 일정 주기로 변화하며, 후반으로 갈수록 강도가 높아지는 구조로 설계되어 있다. 초보자도 쉽게 접근할 수 있는 기본 방어 루틴부터, 숙련자라면 전략적 요충지 점령과 유닛 컨트롤을 통해 난이도를 높일 수 있는 다층적 플레이가 가능하다. 특히 요새 주변의 좁은 길목을 활용한 입구막기 전략이 핵심 포인트로, 적의 접근로를 제한하고 효율적으로 방어할 수 있는지가 승부의 관건이다. 맵의 몰입감을 높이기 위해 사막 타일셋의 황량한 분위기와 요새의 웅장한 디자인이 어우러져 atmosferic한 플레이 경험을 제공한다. 이 맵은 방어와 생존에 중점을 둔 유저들에게 적합하며, 팀 플레이보다는 개인의 판단과 컨트롤이 중요한 1인용 디펜스 맵으로 분류된다. 플레이 전에는 맵의 입구와 요새 주변의 방어 건물 배치를 꼼꼼히 확인하고, 초반 자원 확보와 유닛 생산 타이밍을 철저히 관리하는 것이 중요하다. 또한, 맵의 넓은 공간을 활용한 시야 관리와 적의 공격 루트를 예측하는 연습이 필요할 것이다. Citadel Bound is a StarCraft: Brood War custom map set in a massive 6144x6144 desert tile set, designed as a defense-focused UMS that emphasizes survival and strategic fortification. The map centers around a large citadel, with players tasked to defend it using strategically placed defensive structures and units against waves of enemy attacks. The layout is divided into three main zones: the central citadel area, narrow pathways surrounding it, and outer plains. The outer plains serve as early detection and interception zones, while the narrow pathways act as choke points for efficient defense and unit protection. Scattered throughout the map are resource points and supply buildings, enabling long-term sustainability. The core structure requires players to protect key buildings within the citadel while adapting to increasingly intense enemy attack patterns as the game progresses. Beginners can focus on basic defensive routines, while advanced players can employ strategic outpost control and precise unit micro-management to enhance difficulty. The narrow pathways around the citadel are critical for implementing choke point defense strategies, limiting enemy access and maximizing defensive efficiency. The map's atmospheric desert tile set and imposing citadel design enhance immersion, providing a tense and engaging defensive experience ideal for solo players rather than team-based play. Before starting, players should thoroughly inspect the map's entry points and defensive structure placements, ensuring efficient resource gathering and unit production timing. Effective vision management across the vast open spaces and anticipating enemy attack routes are essential skills for success in this map.
관측자 미치기 퀵2 (Observer Madness Quick 2)
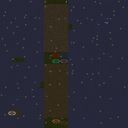
스타크래프트 브루드워의Observer Madness Quick 2는 관측자(Observer)를 중심으로 펼쳐지는 흥미로운 디펜스 유즈맵으로, 플레이어는 끊임없이 밀려드는 적군으로부터 관측자를 보호해야 한다. 맵 중앙에 위치한 관측자 건물을 중심으로 방어선이 배치되어 있으며, 주변 지형은 사막 타일셋으로 구성되어 있어 건조한 환경의 긴장감을 더한다. 맵 곳곳에 흩어져 있는 방어 건물과 자원 분포는 전략적인 배치와 자원 관리의 중요성을 강조하며, 맵의 구조상 좌우 대칭을 이루고 있어 균형 잡힌 플레이가 요구된다. 관측자의 보호는 단순히 방어 건물에만 의존하지 않는다. 맵 상단과 하단에는 각 팀의 기지 역할을 하는 구역이 있으며, 이곳에서 생산된 유닛을 효율적으로 배치하여 관측자 주변을 방어해야 한다. 적군은 끊임없이 밀어붙이기 때문에, 빠른 판단과 유닛 관리 능력이 필수적이다. 특히 관측자 주변의 좁은 길목은 방어의 핵심 지점으로, 이곳에 방어 건물을 집중시키면 상대의 공격을 효과적으로 차단할 수 있다. 이 맵의 가장 큰 특징은 관측자라는 독특한 목표물에 있다. 관측자를 잃으면 게임이 즉시 종료되므로, 플레이어는 관측자의 안전을 최우선으로 고려해야 한다. 또한 맵 곳곳에 배치된 보너스 자원과 업그레이드 포인트는 플레이어의 전략을 다양하게 만들어주며, 특히 관측자 주변의Resource Depots는 자원 확보와 방어선 확장에 중요한 역할을 한다. 맵의 진행은 비교적 빠른 속도로 전개되기 때문에, 초보자보다는 어느 정도의 경험이 있는 플레이어에게 더 적합하다. 추천 대상으로는 스타크래프트의 디펜스 유즈맵을 즐기는 플레이어, 특히 관측자라는 독특한 목표물에 도전하고 싶어 하는 분들에게 강력히 권장한다. 또한 팀 플레이가 중요한 맵이기 때문에, 팀원과의 원활한 소통과 협력이 필수적이다. 맵을 플레이하기 전에는 관측자의 위치를 정확히 파악하고, 방어 건물의 배치와 자원 관리에 대한 계획을 세우는 것이 중요하다. 관측자 주변의 좁은 길목을 어떻게 방어할 것인지, 어떤 유닛을 우선적으로 생산할 것인지에 따라 게임의 승패가 좌우될 수 있으므로, 신중한 플레이가 요구된다. StarCraft: Brood War’s *Observer Madness Quick 2* is a thrilling defense custom map centered around the Observer, where players must protect the Observer from relentless enemy waves. The Observer structure is positioned at the center of the map, surrounded by defensive lines, while the surrounding terrain features a desert tile set that heightens the tense, arid atmosphere. Scattered defensive buildings and resource distribution emphasize the importance of strategic placement and resource management, and the map’s balanced, symmetrical design demands well-rounded play. Protecting the Observer isn’t just about relying on defensive structures alone. The top and bottom sections of the map serve as each team’s base zones, where produced units must be efficiently deployed to reinforce the Observer’s perimeter. Since enemies continuously push forward, quick decision-making and unit management skills are essential. The narrow chokepoints near the Observer are critical defensive points—concentrating defensive buildings here can effectively block enemy advances. The map’s standout feature is its unique objective: the Observer. Losing the Observer results in an immediate game over, forcing players to prioritize its safety above all else. Additionally, scattered bonus resources and upgrade points add strategic depth, with Resource Depots near the Observer playing a key role in securing resources and expanding defensive lines. The game progresses at a relatively fast pace, making it better suited for players with some experience rather than complete beginners. This map is highly recommended for players who enjoy StarCraft defense custom maps, especially those eager to tackle the challenge of protecting the Observer. Teamwork is crucial, so smooth communication and coordination with teammates are a must. Before playing, it’s important to familiarize yourself with the Observer’s location, plan defensive building placements, and manage resources wisely. The outcome of the match can hinge on how well you defend the narrow chokepoints and which units you prioritize producing, so careful, deliberate play is key.
마진 Shenron (DBAF-Majin Shenron)
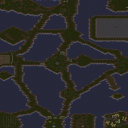
DBAF-Majin Shenron은 스타크래프트: 브루드워의 유즈맵으로, 사막 테마의 거대한 맵에서 펼쳐지는 흥미로운 전투를 경험할 수 있는 디펜스 장르의 맵입니다. 맵의 중앙에는 넓은 평원이 펼쳐져 있으며, 주변으로는 바위와 언덕 지형이 펼쳐져 있어 방어 거점을 확보하기에 적합한 구조를 가지고 있습니다. 맵의 외곽으로는 높은 언덕과 협곡이 자리 잡고 있어 적의 접근을 차단하거나 요새를 구축하기에 이상적인 환경을 제공합니다. 이 맵은 플레이어가 적의 공격을 방어하면서 주요 건물을 보호하는 동시에, 일정 시간마다 등장하는 보스급 유닛을 처치하는 것이 주요 목표로 보입니다. 맵의 구조상 중앙 평원은 넓은 시야를 확보할 수 있어 적의 움직임을 미리 포착할 수 있지만, 반대로 적의 기습 공격에 취약할 수 있는 구조이기도 합니다. 맵의 가장자리에 위치한 협곡과 언덕은 방어 시설을 구축하거나 요새를 건설하기에 적합한 장소로, 플레이어는 이곳을 활용해 전략적인 방어를 펼칠 수 있습니다. 플레이어는 7명의 인원으로 구성되며, 각 플레이어는 고유한 시작 지점에서 게임을 시작합니다. 맵의 중앙에 위치한 보스는 게임의 난이도를 높이는 요소로, 플레이어들은 협력하여 보스를 처치해야 합니다. 맵의 지형은 사막 특유의 황량한 분위기를 자아내며, 넓은 시야와 험준한 지형이 어우러져 전략적인 플레이가 요구됩니다. 맵의 구조상 중앙 평원은 개방되어 있지만, 외곽의 협곡과 언덕은 방어에 유리한 지형을 제공합니다. 이 맵은 디펜스 장르의 유즈맵으로써, 방어 시설을 구축하고 적의 공격을 막아내는 전략적인 요소가 강합니다. 또한, 보스급 유닛의 처치가 게임의 주요 목표 중 하나로, 플레이어 간의 협력이 요구되는 요소도 포함되어 있습니다. 맵의 크기와 지형은 넓은 시야와 험준한 지형을 제공하여 전략적인 플레이를 이끌어내며, 사막 테마의 분위기는 게임의 몰입감을 높이는 요소로 작용합니다. 이 맵은 방어와 협력이 주된 전략을 요구하는 맵으로, 디펜스 장르를 좋아하는 플레이어들에게 추천할 만한 작품입니다. 플레이 전에는 맵의 지형과 주요 방어 거점을 미리 파악하여 전략을 세우는 것이 중요합니다. DBAF-Majin Shenron is a user-made defense map in StarCraft: Brood War, set in a vast desert-themed battlefield where players must strategically defend against waves of enemies while targeting powerful boss units that appear periodically. The map features a central open plain surrounded by rocky hills and valleys, providing both expansive visibility and natural choke points for defensive positioning. The central area allows players to monitor enemy movements early, but its openness also makes it vulnerable to sudden rushes. The surrounding valleys and elevated terrain offer ideal spots for constructing defensive structures or towers, enabling players to control the battlefield more effectively. With a player count of seven, each participant starts from distinct positions, forcing coordination to protect shared objectives while tackling the recurring boss challenges. The desert aesthetic enhances immersion, while the terrain's mix of open fields and rugged high ground creates a dynamic environment that rewards strategic foresight. As a defense-focused UMS map, it emphasizes base-building, resource management, and teamwork to withstand enemy assaults. Players should familiarize themselves with high-ground positions and potential flanking routes to optimize their defensive setup before the first wave arrives. This map is ideal for those who enjoy tactical defense mechanics and cooperative boss hunts in a visually striking desert landscape.
어너더 디펜스 스택 (Another Defense Stack)
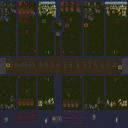
어너더 디펜스 스택(Another Defense Stack)은 스타크래프트 브루드워에서 즐길 수 있는 독특한 구조의 디펜스 장르 유즈맵입니다. 사막 타일셋을 바탕으로 설계된 이 맵은 플레이어들이 각자의 구역에서 유닛을 배치하고 적의 공세를 막아내는 전통적인 디펜스 방식에 집중하고 있습니다. 맵의 내부 설명에 따르면 적들이 반대편으로 도달하지 못하도록 막는 것이 핵심 목표로 보이며, 다수의 플레이어가 협력하여 각 라인을 방어하는 형태를 띱니다. 공개된 맵 구조를 살펴보면 중앙의 이동 통로를 중심으로 여러 개의 독립된 진영 구역이 배치되어 있으며, 각 진영마다 다양한 종족의 유닛과 방어 시설들이 정렬된 모습을 확인할 수 있습니다. 이는 플레이어들이 개별 구역을 맡아 책임을 다하면서도 전체적인 전선의 균형을 유지해야 하는 협동 플레이의 재미를 강조합니다. 전형적인 스타크래프트 브루드워 디펜스 유즈맵을 선호하는 유저들이나 친구들과 함께 호흡을 맞춰 몰려오는 적을 저지하는 방식을 즐기는 이들에게 알맞은 플레이 경험을 제공합니다. 특히 각 진영별로 배치된 유닛의 조합과 포지셔닝이 승패를 가르는 중요한 요소로 작용할 가능성이 높아, 반복 플레이를 통해 최적의 방어 전략을 찾아나가는 재미를 느낄 수 있습니다. 본격적으로 게임을 시작하기 전에는 각 구역의 지형적 특징과 배치된 유닛의 특성을 미리 파악하고, 아군과의 소통을 통해 방어 공백이 생기지 않도록 준비하는 것이 유리합니다. 스타크래프트 브루드워 커스텀 맵 중에서 깔끔하게 정돈된 라인 방어 형태의 유즈맵을 찾는 플레이어라면 한 번쯤 도전해 볼 만한 가치가 있는 맵입니다. Another Defense Stack is a custom defense genre map with a unique structure that can be enjoyed in StarCraft: Brood War. Designed around a desert tileset, this map focuses on the traditional defense style where players deploy units in their respective zones and fend off incoming enemy waves. According to the internal map description, the core objective appears to be preventing enemies from reaching the opposite side, taking the form of multiple players cooperating to defend individual lines. Examining the revealed map layout, several independent faction areas are arranged around a central passage, with various race units and defensive structures neatly aligned in each zone. This emphasizes the fun of cooperative play, where players must take responsibility for their individual sectors while maintaining overall front-line balance. It delivers a fitting gameplay experience for users who prefer classic StarCraft: Brood War defense UMS maps or those who enjoy halting swarms of enemies in coordination with friends. In particular, the combination and positioning of units deployed in each faction likely serve as critical factors determining victory or defeat, allowing players to find optimal defense strategies through repeated play. Before truly diving into the game, it is advantageous to grasp the topographical features of each zone and the characteristics of the assigned units in advance, preparing through communication with allies to prevent defensive gaps. For players searching for a well-organized line-defense UMS map among StarCraft: Brood War custom maps, this is a map well worth giving a try.
데저트 스트라이크 트위 v6 (Desert Strike Twi v6)
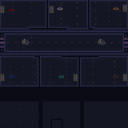
《Desert Strike Twi v6》는 화산 타일셋을 배경으로 한 6인용 아케이드 스타일 디펜스 유즈맵으로, Sand Castle Wars의 간소화된 버전으로 기획되었다. 맵 곳곳에 배치된 방어 건물을 활용해 끊임없이 몰려오는 적의 웨이브를 막아내야 하는 구조로, 플레이어는 중앙의 넥서스를 보호하면서 동시에 공격과 수비를 조율해야 한다. 맵 하단과 상단에 위치한 각 플레이어의 시작 지점은 좁은 길목을 통해 연결되며, 이 길목에서 적이 주로 진군하기 때문에 입구막기 전략이 중요하다. 화산 지형이 주는 지형적 특징은 공격로의 복잡성을 더해주며, 플레이어는 높은 곳을 선점해 수비적 우위를 점하거나, 반대로 좁은 통로를 활용한 함정 전략을 구사할 수 있다. 맵 우측 하단에 위치한 좁은 틈을 통한 일꾼 생산과 자원 관리도 게임의 핵심 요소로, 자원을 확보하지 못하면 방어 건물의 업그레이드와 유지보수가 어려워진다. 버전 2.1에서 발견된 밸런스 이슈는 이번 리메이크에서 대부분 개선되었으며, 아케이드 스타일답게 속도감 있는 진행이 특징이다. 6명의 플레이어가 각자 독자적인 전술을 펼치며 경쟁하는 만큼, 팀웍과 순간적인 판단력이 승패를 가르는 중요한 요소로 작용할 것이다. 맵을 처음 플레이하는 입문자라면 각 플레이어의 시작 지점과 주요 공격로, 그리고 자원 채취 위치를 숙지하는 것이 좋다. 또한, 적의 웨이브가 몰려오는 타이밍을 예측하고, 방어 건물의 배치와 업그레이드 우선순위를 신중히 결정해야 한다. 맵의 난이도는 방어 건물의 배치와 자원 관리에 따라 초보자도 충분히 즐길 수 있지만, 숙련된 플레이어는 더 전략적인 플레이를 요구할 수 있다. 특히, 중앙의 넥서스를 보호하는 동시에 적의 주요 공격로를 차단하는 것이 관건이다. 전체적으로 《Desert Strike Twi v6》는 간결하면서도 깊이를 더하는 디펜스 유즈맵으로, Sand Castle Wars의 팬이라면 물론, 아케이드 스타일의 디펜스 게임을 좋아하는 플레이어에게도 strong 추천할 만한 작품이다. 게임의 재미는 개인의 전략과 팀웍에 달려 있으므로, 다양한 전략을 시도해 보는 것이 좋다. 또한, 맵의 밸런스가 개선된 만큼, 이전 버전보다 더 안정적인 플레이 경험을 제공할 것으로 예상된다. 최종적으로, 이 맵은 디펜스와 전략의 조화를 추구하는 플레이어들에게 훌륭한 선택지가 될 것이다. 특히, 6인용 맵이기 때문에 친구들과의 협동이나 경쟁 플레이가 가능한 점이 큰 장점으로 작용할 것이다. 《Desert Strike Twi v6》 is a six-player arcade-style defense custom map set against a volcanic tileset, designed as a simplified version of *Sand Castle Wars*. Players must use the defensive structures scattered throughout the map to fend off endless enemy waves while protecting the central Nexus and balancing offense and defense. Each player's starting position, located at the top and bottom of the map, is connected by narrow paths—the primary routes enemies take—making entrance-blocking strategies crucial. The volcanic terrain adds complexity to the attack paths, allowing players to secure high ground for defensive advantages or set traps in tight corridors. Producing workers and managing resources through the narrow gap in the bottom-right corner is also key, as insufficient resources hinder upgrades and maintenance of defensive buildings. Most balance issues identified in version 2.1 have been addressed in this remake, retaining the arcade-style's fast-paced gameplay. With six players each employing unique tactics, teamwork and quick decision-making are vital to victory. New players should familiarize themselves with starting positions, main attack routes, and resource locations. Predicting enemy wave timings and carefully planning defensive building placements and upgrades are essential. While the difficulty can be adjusted through building placement and resource management, beginners can still enjoy the game, though experienced players may demand more strategic depth. The core challenge lies in protecting the central Nexus while blocking enemy advance routes. Overall, *Desert Strike Twi v6* is a concise yet deep defense custom map that comes highly recommended for fans of *Sand Castle Wars* and arcade-style defense games. Its fun hinges on personal strategy and teamwork, so experimenting with different approaches is encouraged. With improved balance, it offers a more stable experience than previous versions. Ultimately, this map is an excellent choice for players seeking harmony between defense and strategy, especially with its six-player format enabling cooperative or competitive play with friends.
추즈 유어 D 17 초이스 (Choose Ur D 17 Choices)
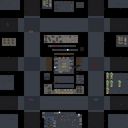
를 통해 살펴볼 'Choose Ur D 17 Choices'는 다양한 선택지를 바탕으로 유저 간의 전략적 선택과 방어 플레이를 즐길 수 있도록 제작된 독특한 UMS 유즈맵이다. 내부 설명에 따르면 이 맵은 A[S]KidBuu가 제작하고 Agentsix1이 수정을 거쳐 완성되었으며, 우주 타일셋 기반의 독특한 구조 위에서 진행된다. 플레이어는 럴커, 골리앗, 아콘, 캐논, 마린, 드라군, 울트라리스크, 선켄 커니건, 탱크, 고스트, 뮤타리스크, 가드 등 무려 17가지에 달하는 다채로운 방어 유닛과 선택지 중에서 자신의 전략에 맞는 대상을 고를 수 있다. 각 유닛의 특성과 조합에 따라 방어선 구축 양상이 완전히 달라지기 때문에, 매 판마다 새로운 조합을 시도하는 재미가 쏠쏠하다. 전체적인 맵 구조는 중앙과 사방으로 나뉜 공간에 다양한 유닛 배치 구역과 방어 거점이 마련되어 있는 형태를 띤다. 유저는 주어진 자원과 선택 가능한 옵션을 활용하여 몰려오는 적의 공세를 막아내야 하며, 팀원들과의 협력이나 개별적인 유닛 조합 능력이 승패를 가르는 중요한 요인으로 작용한다. 초보 유저부터 색다른 디펜스 장르의 유즈맵을 선호하는 이들까지 폭넓게 즐길 수 있는 구조를 갖추고 있으며, 특히 다양한 유닛을 직접 골라 배치하는 재미를 찾는 플레이어에게 추천할 만하다. 플레이를 시작하기 전에는 17가지 선택지의 특성을 가볍게 파악하고, 아군과의 유닛 중복 여부나 조합 시너지를 미리 고려하는 것이 유리하다. 방어선이 무너지기 쉬운 타이밍을 대비해 초반 유닛 배치와 자원 관리에 집중하면서 자신만의 최적화된 빌드를 찾아 나가는 과정이 이 맵의 핵심적인 즐거움이라 할 수 있다. Choose Ur D 17 Choices is a unique StarCraft Brood War UMS custom map designed to let players enjoy strategic choices and defensive gameplay based on a wide variety of options. According to the internal map description, this map was originally created by A[S]KidBuu and later edited by Agentsix1, featuring a distinct layout set against a space tileset. Players are given an impressive selection of 17 different defense units and choices, including Lurkers, Goliaths, Archons, Cannons, Marines, Dragoons, Ultralisks, Sunkens, Kerrigans, Tanks, Ghosts, Mutalisks, and Guards, allowing them to tailor their defense to their preferred strategy. Because the pattern of the defensive line shifts dramatically depending on the characteristics and combinations of each unit, trying out new combinations in every match provides continuous replay value. The overall map structure consists of central and scattered areas equipped with various unit placement zones and defensive strongholds. Users must utilize their given resources and available options to fend off incoming enemy waves, making cooperation with teammates and individual unit synergy crucial factors in determining victory or defeat. The map offers a structure that appeals broadly to everyone from novice users to fans of distinct defense-genre custom maps, and it is especially recommended for players who enjoy directly choosing and positioning diverse units. Before starting the game, it is advantageous to briefly understand the traits of the 17 choices and consider potential unit overlaps or combinatorial synergies with allies. Focusing on early unit placement and resource management to prepare for vulnerable moments when the defensive line is prone to collapsing is the core enjoyment of this map.
데저트 스트라이크 울티마-X (Desert Strike Ultima-X)
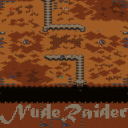
《데저트 스트라이크 울티마-X》는 사막을 배경으로 한 아케이드 스타일의 디펜스 유즈맵으로,Sand Castle Wars와 유사한 구조를 가지고 있지만 훨씬 간소화된 플레이 방식을 제공합니다. 맵의 전체적인 색감은 오렌지빛 황량한 사막과 검은색 암석 지형이 어우러져 전쟁터의 분위기를 강렬하게 전달하며, 플레이어는 중앙에 위치한 요새를 지키며 끊임없이 몰려드는 적들을 상대해야 합니다. 맵 중앙의 넓은 평야와 주변의 산악 지형이 시야를 가리며, 적의 진격로를 차단하거나 요새를 보호하는 전략적인 포지셔닝이 핵심입니다. 6인용으로 설계된 이 맵은 팀 대전이 아닌 개인 또는 협동 플레이에 중점을 두고 있으며, 아케이드 스타일답게 빠른 진행과 단순한 조작성으로 초보자도 쉽게 접근할 수 있습니다. 맵 곳곳에 배치된 자원 채취 지점과 요새 주변의 방어 시설은 게임의 균형을 맞추는 데 중요한 역할을 합니다. 또한, 맵의 후반부로 갈수록 적의 공격 강도가 높아지며, 일부 지형은 파괴 가능한 벽으로 구성되어 있어 유동적인 전술을 요구합니다. 맵 제목에 'Ultima-X'라는 접미사가 붙어 있지만, Sand Castle Wars의 단순화된 리메이크라는 설명이 있어 복잡한 시스템보다는 재미와 속도를 우선시한 디자인임을 짐작할 수 있습니다. 추천 대상으로는 스타크래프트의 디펜스 유즈맵을 즐기는 플레이어, 특히 아케이드 스타일의 빠른 진행을 선호하는 게이머에게 적합합니다. 맵의 구조상 요새 Verteidgung(방어)과 자원 관리가 중요한 만큼, 초보자는 난이도를 낮춰 연습해 보는 것이 좋습니다. 또한, 맵의 해상도와 타일셋이 스타크래프트의 황혼 테마를 활용하고 있어 시각적인 완성도도 뛰어난 편입니다. 플레이 전에는 맵의 중앙 요새 위치와 자원 분포를 미리 확인하고, 방어 시설의 배치 여부를 점검하는 것이 중요합니다. Desert Strike Ultima-X는 its orange-hued desert landscape and rocky terrain evoke the intensity of a warzone, offering players a simplified yet engaging defense experience inspired by Sand Castle Wars. Designed for six players, the map emphasizes individual or cooperative play, with central forts that must be defended against waves of enemies. The vast central plains and surrounding mountains create natural choke points, while scattered resource points and destructible walls encourage dynamic tactical decisions. The arcade-style gameplay ensures accessibility for beginners, with straightforward controls and a focus on quick decision-making. As the game progresses, enemy attacks intensify, testing the player's ability to adapt their strategies. The 'Ultima-X' suffix suggests this is a refined version of the original concept, streamlining mechanics for faster-paced, more enjoyable sessions. The Twilight tileset and 3072x3072 resolution enhance visual immersion, making it a standout choice for fans of defense-themed custom maps. Ideal for players who enjoy StarCraft's UMS defense maps, Desert Strike Ultima-X is particularly suited to those who prefer arcade-style, high-speed gameplay. Beginners should start on lower difficulties to master fort defense and resource management. Before diving in, players should scout the central fort locations and resource distribution to optimize their strategies.
최근 등록된 맵
새로 추가된 파일과 버전을 확인하세요.
관측자 미치기 퀵2 (Observer Madness Quick 2)
스타크래프트 브루드워의Observer Madness Quick 2는 관측자(Observer)를 중심으로 펼쳐지는 흥미로운 디펜스 유즈맵으로, 플레이어는 끊임없이 밀려드는 적군으로부터 관측자를 보호해야 한다. 맵 중앙에 위치한 관측자 건물을 중심으로 방어선이 배치되어 있으며, 주변 지형은 사막 타일셋으로 구성되어 있어 건조한 환경의 긴장감을 더한다. 맵 곳곳에 흩어져 있는 방어 건물과 자원 분포는 전략적인 배치와 자원 관리의 중요성을 강조하며, 맵의 구조상 좌우 대칭을 이루고 있어 균형 잡힌 플레이가 요구된다. 관측자의 보호는 단순히 방어 건물에만 의존하지 않는다. 맵 상단과 하단에는 각 팀의 기지 역할을 하는 구역이 있으며, 이곳에서 생산된 유닛을 효율적으로 배치하여 관측자 주변을 방어해야 한다. 적군은 끊임없이 밀어붙이기 때문에, 빠른 판단과 유닛 관리 능력이 필수적이다. 특히 관측자 주변의 좁은 길목은 방어의 핵심 지점으로, 이곳에 방어 건물을 집중시키면 상대의 공격을 효과적으로 차단할 수 있다. 이 맵의 가장 큰 특징은 관측자라는 독특한 목표물에 있다. 관측자를 잃으면 게임이 즉시 종료되므로, 플레이어는 관측자의 안전을 최우선으로 고려해야 한다. 또한 맵 곳곳에 배치된 보너스 자원과 업그레이드 포인트는 플레이어의 전략을 다양하게 만들어주며, 특히 관측자 주변의Resource Depots는 자원 확보와 방어선 확장에 중요한 역할을 한다. 맵의 진행은 비교적 빠른 속도로 전개되기 때문에, 초보자보다는 어느 정도의 경험이 있는 플레이어에게 더 적합하다. 추천 대상으로는 스타크래프트의 디펜스 유즈맵을 즐기는 플레이어, 특히 관측자라는 독특한 목표물에 도전하고 싶어 하는 분들에게 강력히 권장한다. 또한 팀 플레이가 중요한 맵이기 때문에, 팀원과의 원활한 소통과 협력이 필수적이다. 맵을 플레이하기 전에는 관측자의 위치를 정확히 파악하고, 방어 건물의 배치와 자원 관리에 대한 계획을 세우는 것이 중요하다. 관측자 주변의 좁은 길목을 어떻게 방어할 것인지, 어떤 유닛을 우선적으로 생산할 것인지에 따라 게임의 승패가 좌우될 수 있으므로, 신중한 플레이가 요구된다. StarCraft: Brood War’s *Observer Madness Quick 2* is a thrilling defense custom map centered around the Observer, where players must protect the Observer from relentless enemy waves. The Observer structure is positioned at the center of the map, surrounded by defensive lines, while the surrounding terrain features a desert tile set that heightens the tense, arid atmosphere. Scattered defensive buildings and resource distribution emphasize the importance of strategic placement and resource management, and the map’s balanced, symmetrical design demands well-rounded play. Protecting the Observer isn’t just about relying on defensive structures alone. The top and bottom sections of the map serve as each team’s base zones, where produced units must be efficiently deployed to reinforce the Observer’s perimeter. Since enemies continuously push forward, quick decision-making and unit management skills are essential. The narrow chokepoints near the Observer are critical defensive points—concentrating defensive buildings here can effectively block enemy advances. The map’s standout feature is its unique objective: the Observer. Losing the Observer results in an immediate game over, forcing players to prioritize its safety above all else. Additionally, scattered bonus resources and upgrade points add strategic depth, with Resource Depots near the Observer playing a key role in securing resources and expanding defensive lines. The game progresses at a relatively fast pace, making it better suited for players with some experience rather than complete beginners. This map is highly recommended for players who enjoy StarCraft defense custom maps, especially those eager to tackle the challenge of protecting the Observer. Teamwork is crucial, so smooth communication and coordination with teammates are a must. Before playing, it’s important to familiarize yourself with the Observer’s location, plan defensive building placements, and manage resources wisely. The outcome of the match can hinge on how well you defend the narrow chokepoints and which units you prioritize producing, so careful, deliberate play is key.
뉴 선켄 디펜스 (New Sunken Defence)
뉴 선켄 디펜스 (New Sunken Defence)는 스타크래프트 브루드워에서 즐길 수 있는 독특한 구조의 디펜스 장르 유즈맵입니다. 이번에 살펴볼 뉴 선켄 디펜스 (0.4x3) 버전은 맵 제목과 내부 설명에 나타난 바와 같이 몰려오는 적들을 막아내며 특정 조건을 달성하는 방식으로 진행되는 것이 특징입니다. 내부 설명에서는 킬 수에 따른 가스 획득이나 스테이지 진행 구조를 암시하는 요소들이 포함되어 있어, 플레이어들이 협력하여 몰려오는 적을 상대하는 전통적인 디펜스 유즈맵의 재미를 느낄 수 있도록 구성된 것으로 보입니다. 맵의 전반적인 지형 구조를 살펴보면, 유닛들이 이동하는 복잡한 경로와 플레이어들이 거점을 구축할 수 있는 공간들이 배치되어 있어 방어선 구축과 자원 관리가 중요한 승부처가 됩니다. 특히 적들의 진격 경로를 효율적으로 차단하고, 킬 수를 늘려 자원을 확보하는 과정에서 플레이어 간의 호흡과 전략적인 판단이 요구됩니다. 스타크래프트 유즈맵을 즐겨 찾는 유저들이나 독특한 방어 규칙을 가진 디펜스 맵을 선호하는 플레이어들에게 추천할 만한 작품입니다. 대규모 공중 및 지상 유닛들이 얽히는 전장에서 최적의 방어 진지를 완성하고 스테이지를 돌파하는 성취감을 맛볼 수 있습니다. 다만, 본격적으로 게임을 시작하기 앞서 내부 설명에 적힌 킬 수 조건이나 자원 획득 규칙을 미리 숙지하는 것이 원활한 플레이를 위해 큰 도움이 됩니다. New Sunken Defence is a unique defense-genre Use Map Settings map available in StarCraft: Brood War. As indicated by the map title and internal description, this particular version, New Sunken Defence (0.4x3), centers around holding off waves of incoming enemies while achieving specific objectives to progress. The internal description hints at mechanics such as gas acquisition based on kill counts and stage progression, offering the classic cooperative defense experience where players must work together to fend off enemies. Examining the overall terrain layout reveals carefully designed movement paths and designated areas for players to establish their bases, making defensive positioning and resource management crucial to success. Efficiently blocking enemy routes and securing resources through higher kill counts requires strong teamwork and strategic decision-making among participants. This map is recommended for users who enjoy StarCraft custom maps and prefer defense scenarios with distinct rules. Players can experience a strong sense of achievement by building optimal defense lines and clearing stages on a battlefield crowded with various units. However, before diving into the game, reviewing the kill requirements and resource mechanics mentioned in the internal description is helpful for a smooth gameplay experience.
추즈 유어 D 17 초이스 (Choose Ur D 17 Choices)
를 통해 살펴볼 'Choose Ur D 17 Choices'는 다양한 선택지를 바탕으로 유저 간의 전략적 선택과 방어 플레이를 즐길 수 있도록 제작된 독특한 UMS 유즈맵이다. 내부 설명에 따르면 이 맵은 A[S]KidBuu가 제작하고 Agentsix1이 수정을 거쳐 완성되었으며, 우주 타일셋 기반의 독특한 구조 위에서 진행된다. 플레이어는 럴커, 골리앗, 아콘, 캐논, 마린, 드라군, 울트라리스크, 선켄 커니건, 탱크, 고스트, 뮤타리스크, 가드 등 무려 17가지에 달하는 다채로운 방어 유닛과 선택지 중에서 자신의 전략에 맞는 대상을 고를 수 있다. 각 유닛의 특성과 조합에 따라 방어선 구축 양상이 완전히 달라지기 때문에, 매 판마다 새로운 조합을 시도하는 재미가 쏠쏠하다. 전체적인 맵 구조는 중앙과 사방으로 나뉜 공간에 다양한 유닛 배치 구역과 방어 거점이 마련되어 있는 형태를 띤다. 유저는 주어진 자원과 선택 가능한 옵션을 활용하여 몰려오는 적의 공세를 막아내야 하며, 팀원들과의 협력이나 개별적인 유닛 조합 능력이 승패를 가르는 중요한 요인으로 작용한다. 초보 유저부터 색다른 디펜스 장르의 유즈맵을 선호하는 이들까지 폭넓게 즐길 수 있는 구조를 갖추고 있으며, 특히 다양한 유닛을 직접 골라 배치하는 재미를 찾는 플레이어에게 추천할 만하다. 플레이를 시작하기 전에는 17가지 선택지의 특성을 가볍게 파악하고, 아군과의 유닛 중복 여부나 조합 시너지를 미리 고려하는 것이 유리하다. 방어선이 무너지기 쉬운 타이밍을 대비해 초반 유닛 배치와 자원 관리에 집중하면서 자신만의 최적화된 빌드를 찾아 나가는 과정이 이 맵의 핵심적인 즐거움이라 할 수 있다. Choose Ur D 17 Choices is a unique StarCraft Brood War UMS custom map designed to let players enjoy strategic choices and defensive gameplay based on a wide variety of options. According to the internal map description, this map was originally created by A[S]KidBuu and later edited by Agentsix1, featuring a distinct layout set against a space tileset. Players are given an impressive selection of 17 different defense units and choices, including Lurkers, Goliaths, Archons, Cannons, Marines, Dragoons, Ultralisks, Sunkens, Kerrigans, Tanks, Ghosts, Mutalisks, and Guards, allowing them to tailor their defense to their preferred strategy. Because the pattern of the defensive line shifts dramatically depending on the characteristics and combinations of each unit, trying out new combinations in every match provides continuous replay value. The overall map structure consists of central and scattered areas equipped with various unit placement zones and defensive strongholds. Users must utilize their given resources and available options to fend off incoming enemy waves, making cooperation with teammates and individual unit synergy crucial factors in determining victory or defeat. The map offers a structure that appeals broadly to everyone from novice users to fans of distinct defense-genre custom maps, and it is especially recommended for players who enjoy directly choosing and positioning diverse units. Before starting the game, it is advantageous to briefly understand the traits of the 17 choices and consider potential unit overlaps or combinatorial synergies with allies. Focusing on early unit placement and resource management to prepare for vulnerable moments when the defensive line is prone to collapsing is the core enjoyment of this map.
도트 보지 않기 (Dont Look At The Dot!)
‘Dont Look At The Dot!’은 스타크래프트 브루드워의 유즈맵으로, 시야를 가리고 핵심 요소를 확인하지 못하는 상태에서 진행되는 독특한 디펜스 장르의 유즈맵이다. 맵의 중심에는 시선을 끌어당기는 붉은색 또는 초록색의 깜빡이는 점(‘도트’)이 존재하며, 플레이어는 이 점을 절대로 쳐다보아서는 안 된다. 시선을 돌리거나 화면을 가린 채 맵을 분석하고, 적절한 타이밍에 유닛을 생산하고 배치해야만 살아남을 수 있는 구조로 설계되어 있다. 맵의 배경은 설원 타일셋으로 꾸며져 있으며, 전체적으로 어두운 색조와 조명이 상대적으로 сла한 편이라 시야가 제한되는 환경에서 도트의 유무를 확인하는 것이 핵심 과제가 된다. 플레이 방식은 기본적으로 디펜스 장르의 특징을 따르지만, 시야를 제한하는 특이한 조건이 추가되어 전략적 깊이를 더한다. 플레이어는 도트를 쳐다보지 않으면서도 맵의 상황을 파악해야 하며, 이 과정에서 자연스럽게 맵 리딩 능력이 요구된다. 유닛 생산과 자원 관리도 중요하지만, 도트의 유무를 감지하지 못한 채로 플레이하면 순식간에 패배할 수 있는 위험이 상존한다. 또한, 맵의 타일셋과 조명 설정 때문에 일부 플레이어는 도트의 색상이나 깜빡임 주기를 제대로 인식하지 못할 수 있어, 사전 테스트가 필요하다는 점도 특징이다. 이 맵은 초보자보다는 어느 정도의 전략적 감각과 집중력이 요구되는 유즈맵으로, 특히 디펜스 장르에 익숙한 플레이어에게 추천할 만하다. 또한, 팀 플레이보다는 개인전 또는 팀 디펜스 형태로 구성되어 있으며, 플레이어의 시야를 제한하는 특이한 조건 때문에 기존 디펜스 맵과는 완전히 다른 경험을 제공한다. 맵을 플레이하기 전에는 반드시 도트의 색상과 깜빡임 주기를 숙지하고, 시야를 제한하는 조건하에서도 맵의 구조를 파악할 수 있는 연습을 하는 것이 중요하다. 이 맵의 진정한 재미는 시야를 제한받은 상태에서 어떻게든 승리를 쟁취하는 순간에 있기 때문에, 도전을 즐기는 플레이어에게는 더할 나위 없이 매력적인 경험이 될 것이다. This StarCraft: Brood War custom map, ‘Dont Look At The Dot!’, offers a unique twist on the defense genre by forcing players to navigate the map without looking directly at a blinking dot at the center. The map, set against a snowy tileset with dim lighting, challenges players to rely on peripheral vision and strategic planning, as direct visual contact with the dot—either red or green—leads to failure. Players must produce and position units while avoiding the temptation to glance at the dot, testing both their ability to manage resources and their map awareness under restricted visibility. The gameplay revolves around the core mechanic of avoiding the dot while still reacting to enemy waves, making it a test of reflexes, concentration, and adaptability. Unlike traditional defense maps, the restricted vision forces players to develop alternative methods for tracking enemy movements and base status, adding a layer of unpredictability. The snowy environment and lighting further obscure visibility, which may pose additional challenges for some players, necessitating familiarity with the map’s visual cues before attempting a playthrough. Ideal for players who enjoy strategic depth and unconventional mechanics, ‘Dont Look At The Dot!’ is best suited for those with prior experience in defense-style custom maps. The map can be played solo or in team-based defense modes, emphasizing individual skill and team coordination. Prospective players should practice recognizing the dot’s blinking pattern and map layout without direct visual confirmation to fully appreciate the challenge. The true appeal of this map lies in the thrill of overcoming its unique constraints and achieving victory against the odds, making it a standout experience for fans of creative and demanding custom maps.
데저트 스트라이크 울티마-X (Desert Strike Ultima-X)
《데저트 스트라이크 울티마-X》는 사막을 배경으로 한 아케이드 스타일의 디펜스 유즈맵으로,Sand Castle Wars와 유사한 구조를 가지고 있지만 훨씬 간소화된 플레이 방식을 제공합니다. 맵의 전체적인 색감은 오렌지빛 황량한 사막과 검은색 암석 지형이 어우러져 전쟁터의 분위기를 강렬하게 전달하며, 플레이어는 중앙에 위치한 요새를 지키며 끊임없이 몰려드는 적들을 상대해야 합니다. 맵 중앙의 넓은 평야와 주변의 산악 지형이 시야를 가리며, 적의 진격로를 차단하거나 요새를 보호하는 전략적인 포지셔닝이 핵심입니다. 6인용으로 설계된 이 맵은 팀 대전이 아닌 개인 또는 협동 플레이에 중점을 두고 있으며, 아케이드 스타일답게 빠른 진행과 단순한 조작성으로 초보자도 쉽게 접근할 수 있습니다. 맵 곳곳에 배치된 자원 채취 지점과 요새 주변의 방어 시설은 게임의 균형을 맞추는 데 중요한 역할을 합니다. 또한, 맵의 후반부로 갈수록 적의 공격 강도가 높아지며, 일부 지형은 파괴 가능한 벽으로 구성되어 있어 유동적인 전술을 요구합니다. 맵 제목에 'Ultima-X'라는 접미사가 붙어 있지만, Sand Castle Wars의 단순화된 리메이크라는 설명이 있어 복잡한 시스템보다는 재미와 속도를 우선시한 디자인임을 짐작할 수 있습니다. 추천 대상으로는 스타크래프트의 디펜스 유즈맵을 즐기는 플레이어, 특히 아케이드 스타일의 빠른 진행을 선호하는 게이머에게 적합합니다. 맵의 구조상 요새 Verteidgung(방어)과 자원 관리가 중요한 만큼, 초보자는 난이도를 낮춰 연습해 보는 것이 좋습니다. 또한, 맵의 해상도와 타일셋이 스타크래프트의 황혼 테마를 활용하고 있어 시각적인 완성도도 뛰어난 편입니다. 플레이 전에는 맵의 중앙 요새 위치와 자원 분포를 미리 확인하고, 방어 시설의 배치 여부를 점검하는 것이 중요합니다. Desert Strike Ultima-X는 its orange-hued desert landscape and rocky terrain evoke the intensity of a warzone, offering players a simplified yet engaging defense experience inspired by Sand Castle Wars. Designed for six players, the map emphasizes individual or cooperative play, with central forts that must be defended against waves of enemies. The vast central plains and surrounding mountains create natural choke points, while scattered resource points and destructible walls encourage dynamic tactical decisions. The arcade-style gameplay ensures accessibility for beginners, with straightforward controls and a focus on quick decision-making. As the game progresses, enemy attacks intensify, testing the player's ability to adapt their strategies. The 'Ultima-X' suffix suggests this is a refined version of the original concept, streamlining mechanics for faster-paced, more enjoyable sessions. The Twilight tileset and 3072x3072 resolution enhance visual immersion, making it a standout choice for fans of defense-themed custom maps. Ideal for players who enjoy StarCraft's UMS defense maps, Desert Strike Ultima-X is particularly suited to those who prefer arcade-style, high-speed gameplay. Beginners should start on lower difficulties to master fort defense and resource management. Before diving in, players should scout the central fort locations and resource distribution to optimize their strategies.
데저트 스트라이크 트위 v6 (Desert Strike Twi v6)
《Desert Strike Twi v6》는 화산 타일셋을 배경으로 한 6인용 아케이드 스타일 디펜스 유즈맵으로, Sand Castle Wars의 간소화된 버전으로 기획되었다. 맵 곳곳에 배치된 방어 건물을 활용해 끊임없이 몰려오는 적의 웨이브를 막아내야 하는 구조로, 플레이어는 중앙의 넥서스를 보호하면서 동시에 공격과 수비를 조율해야 한다. 맵 하단과 상단에 위치한 각 플레이어의 시작 지점은 좁은 길목을 통해 연결되며, 이 길목에서 적이 주로 진군하기 때문에 입구막기 전략이 중요하다. 화산 지형이 주는 지형적 특징은 공격로의 복잡성을 더해주며, 플레이어는 높은 곳을 선점해 수비적 우위를 점하거나, 반대로 좁은 통로를 활용한 함정 전략을 구사할 수 있다. 맵 우측 하단에 위치한 좁은 틈을 통한 일꾼 생산과 자원 관리도 게임의 핵심 요소로, 자원을 확보하지 못하면 방어 건물의 업그레이드와 유지보수가 어려워진다. 버전 2.1에서 발견된 밸런스 이슈는 이번 리메이크에서 대부분 개선되었으며, 아케이드 스타일답게 속도감 있는 진행이 특징이다. 6명의 플레이어가 각자 독자적인 전술을 펼치며 경쟁하는 만큼, 팀웍과 순간적인 판단력이 승패를 가르는 중요한 요소로 작용할 것이다. 맵을 처음 플레이하는 입문자라면 각 플레이어의 시작 지점과 주요 공격로, 그리고 자원 채취 위치를 숙지하는 것이 좋다. 또한, 적의 웨이브가 몰려오는 타이밍을 예측하고, 방어 건물의 배치와 업그레이드 우선순위를 신중히 결정해야 한다. 맵의 난이도는 방어 건물의 배치와 자원 관리에 따라 초보자도 충분히 즐길 수 있지만, 숙련된 플레이어는 더 전략적인 플레이를 요구할 수 있다. 특히, 중앙의 넥서스를 보호하는 동시에 적의 주요 공격로를 차단하는 것이 관건이다. 전체적으로 《Desert Strike Twi v6》는 간결하면서도 깊이를 더하는 디펜스 유즈맵으로, Sand Castle Wars의 팬이라면 물론, 아케이드 스타일의 디펜스 게임을 좋아하는 플레이어에게도 strong 추천할 만한 작품이다. 게임의 재미는 개인의 전략과 팀웍에 달려 있으므로, 다양한 전략을 시도해 보는 것이 좋다. 또한, 맵의 밸런스가 개선된 만큼, 이전 버전보다 더 안정적인 플레이 경험을 제공할 것으로 예상된다. 최종적으로, 이 맵은 디펜스와 전략의 조화를 추구하는 플레이어들에게 훌륭한 선택지가 될 것이다. 특히, 6인용 맵이기 때문에 친구들과의 협동이나 경쟁 플레이가 가능한 점이 큰 장점으로 작용할 것이다. 《Desert Strike Twi v6》 is a six-player arcade-style defense custom map set against a volcanic tileset, designed as a simplified version of *Sand Castle Wars*. Players must use the defensive structures scattered throughout the map to fend off endless enemy waves while protecting the central Nexus and balancing offense and defense. Each player's starting position, located at the top and bottom of the map, is connected by narrow paths—the primary routes enemies take—making entrance-blocking strategies crucial. The volcanic terrain adds complexity to the attack paths, allowing players to secure high ground for defensive advantages or set traps in tight corridors. Producing workers and managing resources through the narrow gap in the bottom-right corner is also key, as insufficient resources hinder upgrades and maintenance of defensive buildings. Most balance issues identified in version 2.1 have been addressed in this remake, retaining the arcade-style's fast-paced gameplay. With six players each employing unique tactics, teamwork and quick decision-making are vital to victory. New players should familiarize themselves with starting positions, main attack routes, and resource locations. Predicting enemy wave timings and carefully planning defensive building placements and upgrades are essential. While the difficulty can be adjusted through building placement and resource management, beginners can still enjoy the game, though experienced players may demand more strategic depth. The core challenge lies in protecting the central Nexus while blocking enemy advance routes. Overall, *Desert Strike Twi v6* is a concise yet deep defense custom map that comes highly recommended for fans of *Sand Castle Wars* and arcade-style defense games. Its fun hinges on personal strategy and teamwork, so experimenting with different approaches is encouraged. With improved balance, it offers a more stable experience than previous versions. Ultimately, this map is an excellent choice for players seeking harmony between defense and strategy, especially with its six-player format enabling cooperative or competitive play with friends.
마진 Shenron (DBAF-Majin Shenron)
DBAF-Majin Shenron은 스타크래프트: 브루드워의 유즈맵으로, 사막 테마의 거대한 맵에서 펼쳐지는 흥미로운 전투를 경험할 수 있는 디펜스 장르의 맵입니다. 맵의 중앙에는 넓은 평원이 펼쳐져 있으며, 주변으로는 바위와 언덕 지형이 펼쳐져 있어 방어 거점을 확보하기에 적합한 구조를 가지고 있습니다. 맵의 외곽으로는 높은 언덕과 협곡이 자리 잡고 있어 적의 접근을 차단하거나 요새를 구축하기에 이상적인 환경을 제공합니다. 이 맵은 플레이어가 적의 공격을 방어하면서 주요 건물을 보호하는 동시에, 일정 시간마다 등장하는 보스급 유닛을 처치하는 것이 주요 목표로 보입니다. 맵의 구조상 중앙 평원은 넓은 시야를 확보할 수 있어 적의 움직임을 미리 포착할 수 있지만, 반대로 적의 기습 공격에 취약할 수 있는 구조이기도 합니다. 맵의 가장자리에 위치한 협곡과 언덕은 방어 시설을 구축하거나 요새를 건설하기에 적합한 장소로, 플레이어는 이곳을 활용해 전략적인 방어를 펼칠 수 있습니다. 플레이어는 7명의 인원으로 구성되며, 각 플레이어는 고유한 시작 지점에서 게임을 시작합니다. 맵의 중앙에 위치한 보스는 게임의 난이도를 높이는 요소로, 플레이어들은 협력하여 보스를 처치해야 합니다. 맵의 지형은 사막 특유의 황량한 분위기를 자아내며, 넓은 시야와 험준한 지형이 어우러져 전략적인 플레이가 요구됩니다. 맵의 구조상 중앙 평원은 개방되어 있지만, 외곽의 협곡과 언덕은 방어에 유리한 지형을 제공합니다. 이 맵은 디펜스 장르의 유즈맵으로써, 방어 시설을 구축하고 적의 공격을 막아내는 전략적인 요소가 강합니다. 또한, 보스급 유닛의 처치가 게임의 주요 목표 중 하나로, 플레이어 간의 협력이 요구되는 요소도 포함되어 있습니다. 맵의 크기와 지형은 넓은 시야와 험준한 지형을 제공하여 전략적인 플레이를 이끌어내며, 사막 테마의 분위기는 게임의 몰입감을 높이는 요소로 작용합니다. 이 맵은 방어와 협력이 주된 전략을 요구하는 맵으로, 디펜스 장르를 좋아하는 플레이어들에게 추천할 만한 작품입니다. 플레이 전에는 맵의 지형과 주요 방어 거점을 미리 파악하여 전략을 세우는 것이 중요합니다. DBAF-Majin Shenron is a user-made defense map in StarCraft: Brood War, set in a vast desert-themed battlefield where players must strategically defend against waves of enemies while targeting powerful boss units that appear periodically. The map features a central open plain surrounded by rocky hills and valleys, providing both expansive visibility and natural choke points for defensive positioning. The central area allows players to monitor enemy movements early, but its openness also makes it vulnerable to sudden rushes. The surrounding valleys and elevated terrain offer ideal spots for constructing defensive structures or towers, enabling players to control the battlefield more effectively. With a player count of seven, each participant starts from distinct positions, forcing coordination to protect shared objectives while tackling the recurring boss challenges. The desert aesthetic enhances immersion, while the terrain's mix of open fields and rugged high ground creates a dynamic environment that rewards strategic foresight. As a defense-focused UMS map, it emphasizes base-building, resource management, and teamwork to withstand enemy assaults. Players should familiarize themselves with high-ground positions and potential flanking routes to optimize their defensive setup before the first wave arrives. This map is ideal for those who enjoy tactical defense mechanics and cooperative boss hunts in a visually striking desert landscape.
시타델 바운드 (Citadel Bound)
스타크래프트 브루드워 유즈맵 '시타델 바운드(Citadel Bound)'는 6144x6144 크기의 거대한 사막 타일셋 맵으로, 방어와 생존에 중점을 둔 디펜스 장르의 유즈맵이다. 맵 중앙에는 거대한 요새가 자리 잡고 있으며, 플레이어는 요새를 중심으로 배치된 방어 건물과 유닛을 활용해 끊임없이 몰려오는 적의 공격을 막아내야 한다. 맵 구조는 크게 세 구역으로 나뉘며, 요새 주변의 좁은 통로와 외곽의 넓은 평야가 특징적이다. 외곽 평야는 적이 접근하기 전에 미리 감지하고 요격할 수 있는 전략적 장소로 활용할 수 있으며, 좁은 통로는 방어 병력의 효율적인 배치와 보호막 역할을 한다. 맵 곳곳에는 자원과 보급 건물이 배치되어 있어 장기전을 대비한 보충이 가능하며, 요새 내부의 핵심 건물은 최대한 보호해야 한다. 적의 공격 패턴은 일정 주기로 변화하며, 후반으로 갈수록 강도가 높아지는 구조로 설계되어 있다. 초보자도 쉽게 접근할 수 있는 기본 방어 루틴부터, 숙련자라면 전략적 요충지 점령과 유닛 컨트롤을 통해 난이도를 높일 수 있는 다층적 플레이가 가능하다. 특히 요새 주변의 좁은 길목을 활용한 입구막기 전략이 핵심 포인트로, 적의 접근로를 제한하고 효율적으로 방어할 수 있는지가 승부의 관건이다. 맵의 몰입감을 높이기 위해 사막 타일셋의 황량한 분위기와 요새의 웅장한 디자인이 어우러져 atmosferic한 플레이 경험을 제공한다. 이 맵은 방어와 생존에 중점을 둔 유저들에게 적합하며, 팀 플레이보다는 개인의 판단과 컨트롤이 중요한 1인용 디펜스 맵으로 분류된다. 플레이 전에는 맵의 입구와 요새 주변의 방어 건물 배치를 꼼꼼히 확인하고, 초반 자원 확보와 유닛 생산 타이밍을 철저히 관리하는 것이 중요하다. 또한, 맵의 넓은 공간을 활용한 시야 관리와 적의 공격 루트를 예측하는 연습이 필요할 것이다. Citadel Bound is a StarCraft: Brood War custom map set in a massive 6144x6144 desert tile set, designed as a defense-focused UMS that emphasizes survival and strategic fortification. The map centers around a large citadel, with players tasked to defend it using strategically placed defensive structures and units against waves of enemy attacks. The layout is divided into three main zones: the central citadel area, narrow pathways surrounding it, and outer plains. The outer plains serve as early detection and interception zones, while the narrow pathways act as choke points for efficient defense and unit protection. Scattered throughout the map are resource points and supply buildings, enabling long-term sustainability. The core structure requires players to protect key buildings within the citadel while adapting to increasingly intense enemy attack patterns as the game progresses. Beginners can focus on basic defensive routines, while advanced players can employ strategic outpost control and precise unit micro-management to enhance difficulty. The narrow pathways around the citadel are critical for implementing choke point defense strategies, limiting enemy access and maximizing defensive efficiency. The map's atmospheric desert tile set and imposing citadel design enhance immersion, providing a tense and engaging defensive experience ideal for solo players rather than team-based play. Before starting, players should thoroughly inspect the map's entry points and defensive structure placements, ensuring efficient resource gathering and unit production timing. Effective vision management across the vast open spaces and anticipating enemy attack routes are essential skills for success in this map.
맵 선택 가이드
태그는 맵의 핵심 특징을 빠르게 설명하지만 제작 버전마다 규칙이 다를 수 있습니다. 상세 설명에서 권장 인원, 난이도, 플레이 시간과 버전을 함께 확인한 뒤 다운로드하세요.